搭建zabbix
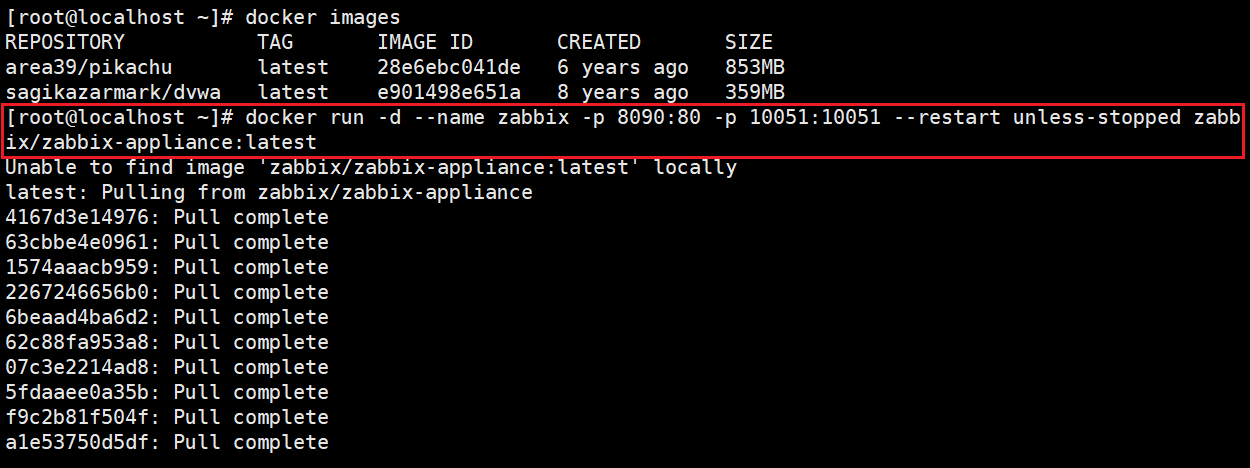
拉取镜像并运行容器,根据拉取的容器名字不同,监控版本不同
docker run -d --name zabbix -p 8090:80 -p 10051:10051 --restart unless-stopped zabbix/zabbix-appliance:latest
如果拉取不下来,去修改镜像加速****/etc/docker/daemon.json****
{
"registry-mirrors": "https://docker.1panel.live",
"https://hub.rat.dev",
"https://docker.actima.top",
"https://atomhub.openatom.cn",
"https://docker.m.daocloud.io",
"https://docker.nastool.de",
"https://dockerpull.org",
"https://registry.dockermirror.com",
"https://docker.m.daocloud.io",
"https://docker.1ms.run",
"https://docker.aityp.com",
"https://dockerhub.xisoul.cn",
"https://docker.imgdb.de",
"https://hub.littlediary.cn",
"https://docker.unsee.tech",
"https://hub.crdz.gq",
"https://hub.firefly.store",
"https://docker.kejilion.pro",
"https://dhub.kubesre.xyz",
"https://hub.xdark.top",
"https://docker.udayun.com"
}

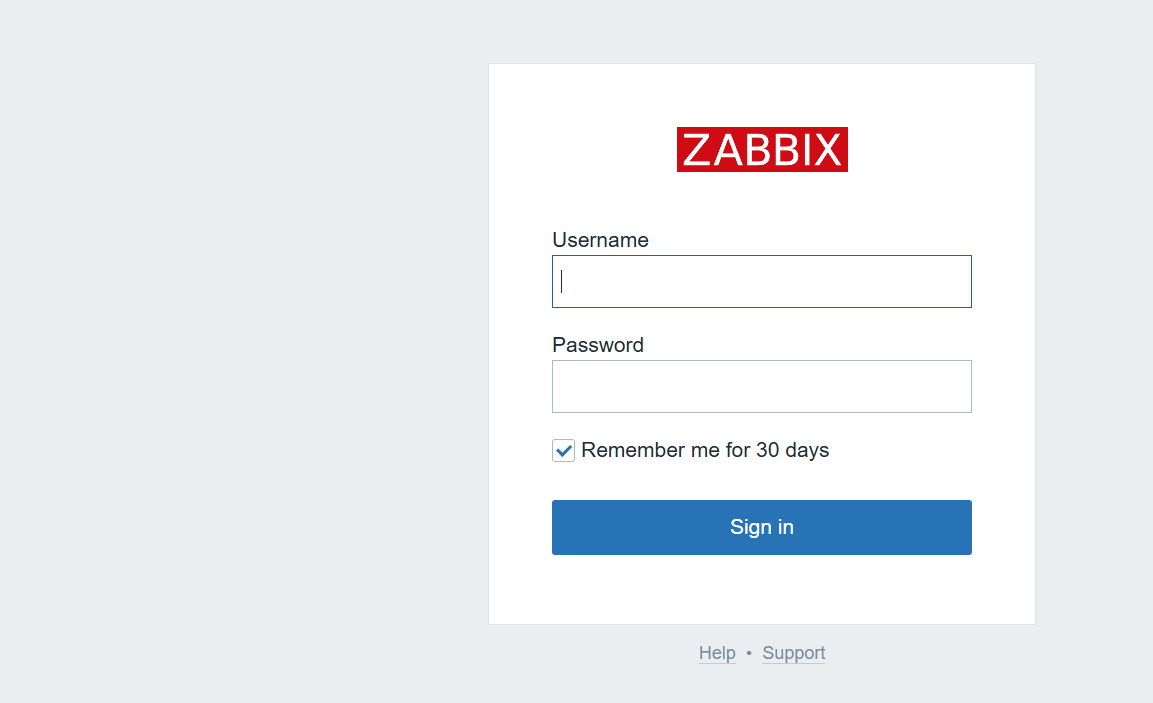
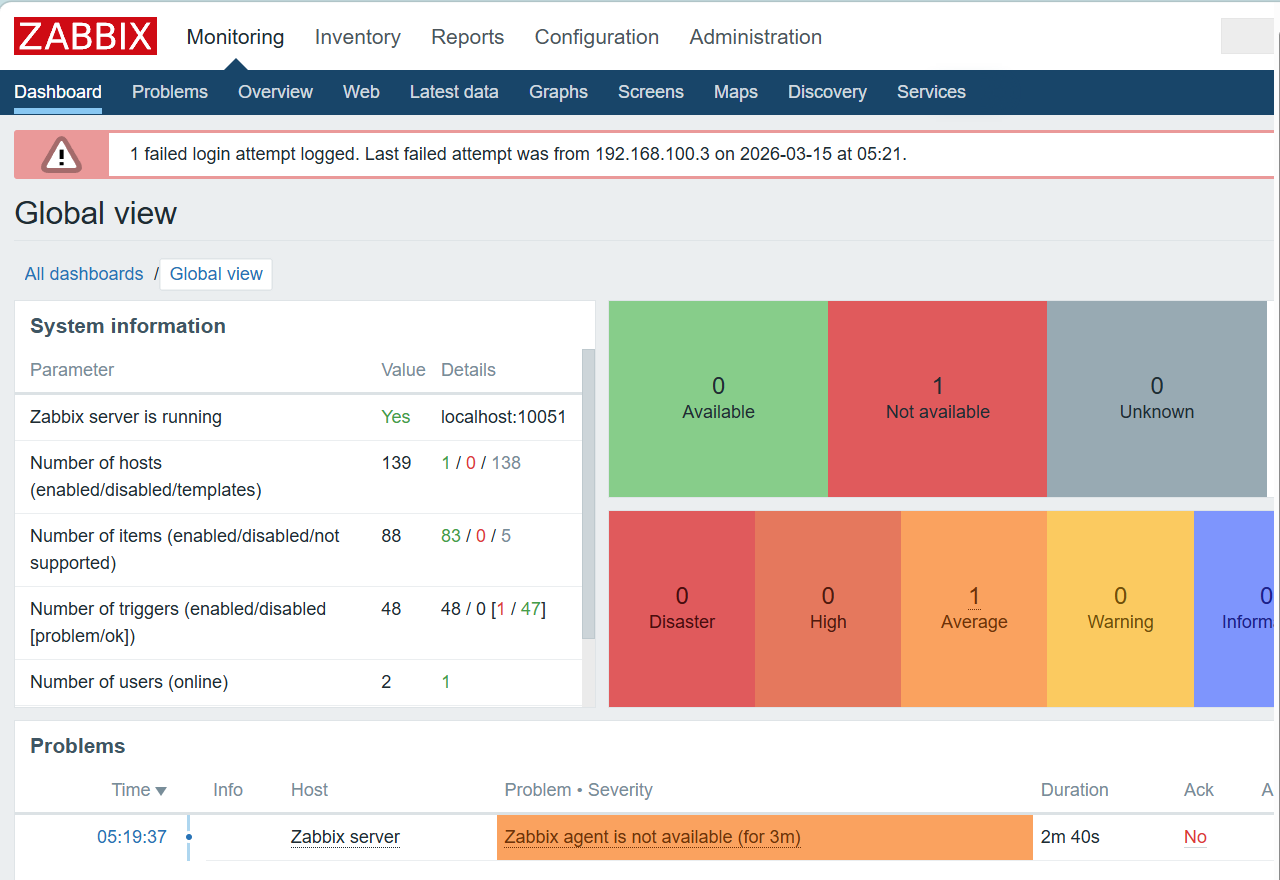
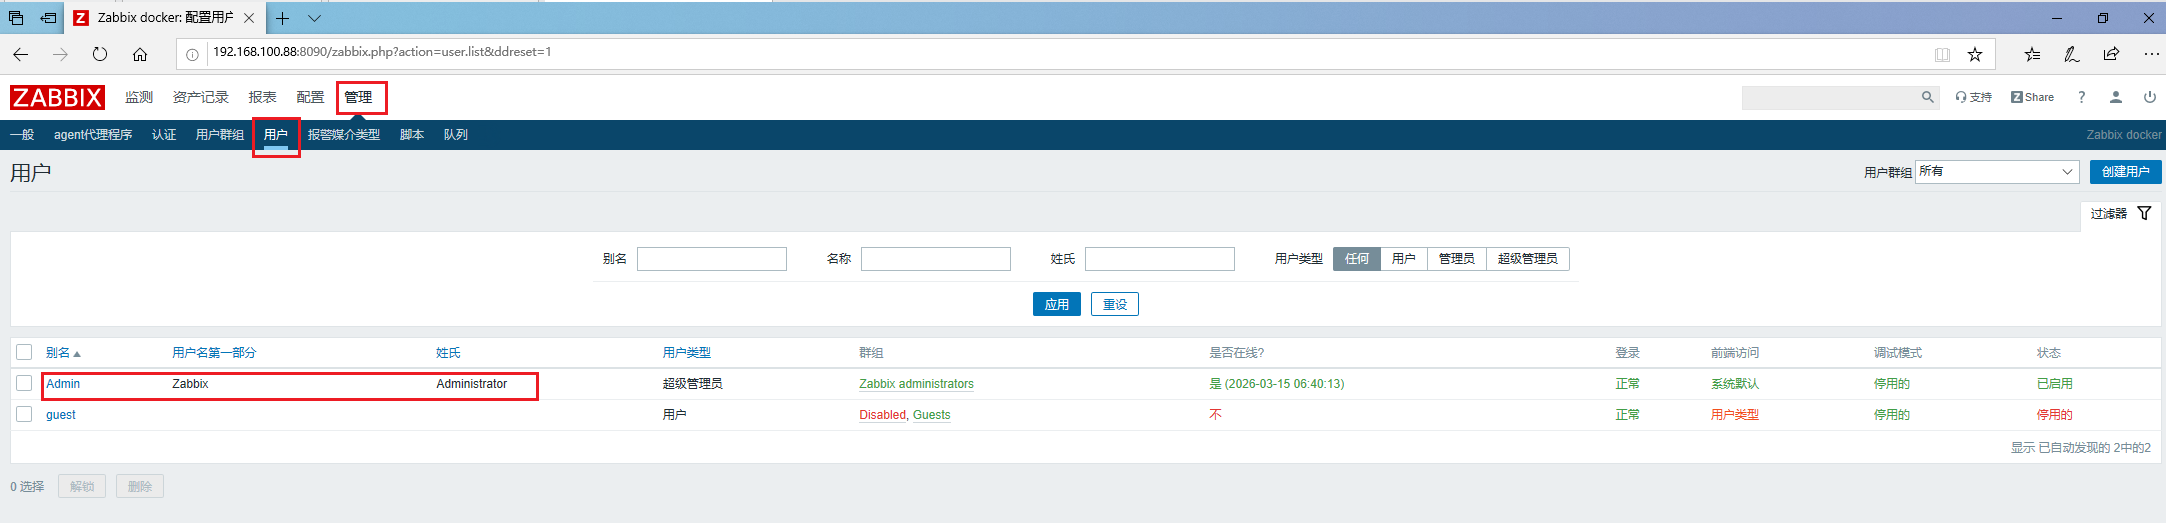
登录zabbix
访问地址: http://hostname:port" 0.0.0.0:8090
用户名: Admin (区分大小写)
密码: zabbix
Centos 客户端
root@localhost \~# ping www.baidu.com ping通网络
rpm -ivh https://repo.zabbix.com/zabbix/4.2/rhel/7/x86_64/zabbix-release-4.2-1.el7.noarch.rpm //zabbix的yum源
wget -O /etc/yum.repos.d/CentOS-Base.repo http://mirrors.aliyun.com/repo/Centos-7.repo
wget -O /etc/yum.repos.d/epel.repo http://mirrors.aliyun.com/repo/epel-7.repo
/ /阿里的网络yum源 这些网络yum源都是用来解决依赖关系的
yum -y install epel-release / /安装epel源 ,软件仓库
yum -y install zabbix-agent zabbix-sender
cd /etc/zabbix/
cp zabbix_agentd.conf zabbix_agentd.conf.bak // 备份
vim zabbix_agentd.conf
98 Server=192.168. 1 00. 88(改为自己虚拟机的ip)
106 ListenPort=10050
114 ListenIP=0.0.0.0
123 StartAgents=3
139 ServerActive=192.168. 1 00. 88
150 Hostname= node 1
hostnamectl set-hostname node1 / / 设置主机名为node 1
systemctl start zabbix-agent
netstat -anput | grep 10050

ubuntu 客户端(192.168.1 00 .202)
1)更新系统
root@ubuntu:~#sudo apt update && sudo apt upgrade -y
2)添加zabbix仓库
sudo dpkg -i zabbix-release_7.0-2+ubuntu22.04_all.deb
sudo apt update
3)安装zabbix agent2
root@ubuntu:~# sudo apt install -y zabbix-agent2
4)编辑agent配置文件,企业环境记得提前备份
root@ubuntu:~# sudo vim /etc/zabbix/zabbix_agent2.conf
98 Server=192.168. 1 00. 202
106 ListenPort=10050
114 ListenIP=0.0.0.0
123 StartAgents=3
139 ServerActive=192.168. 1 00. 202
150 Hostname= node 1
5)启动并验证服务
root@ubuntu:~# sudo systemctl start zabbix-agent2
root@ubuntu:~#sudo systemctl status zabbix-agent2
6)设置开机自启动
root@ubuntu:~# sudo systemctl enable zabbix-agent2
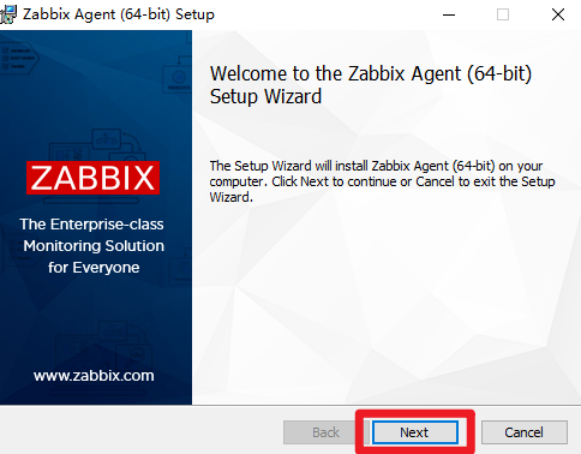
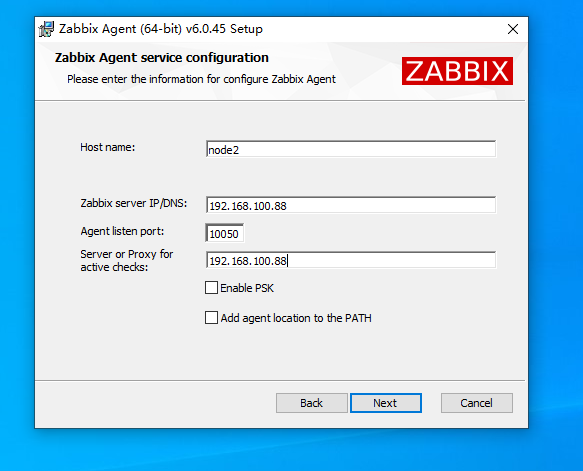
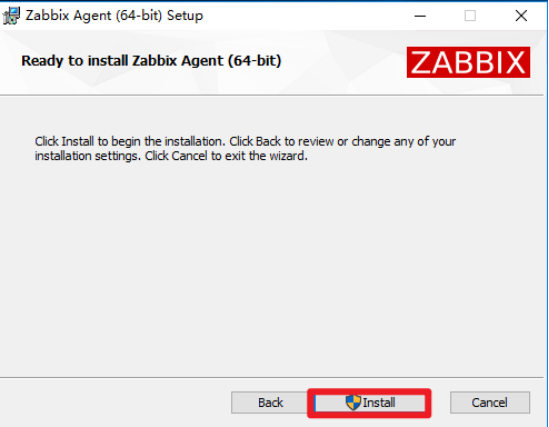
Windows 客户端(192.168.1 00 .102)
Download Zabbix agents 官网下载windows安装插件
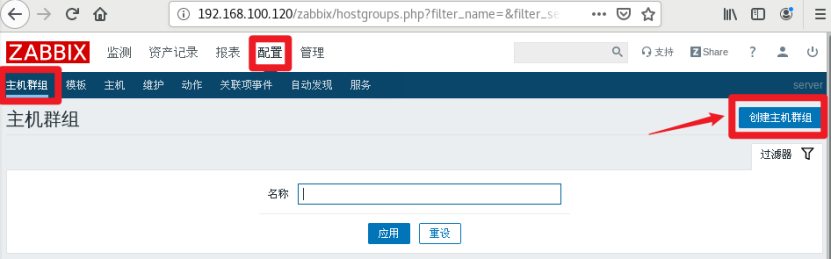
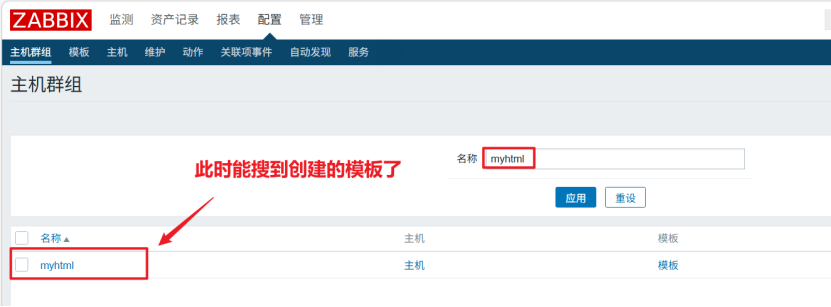
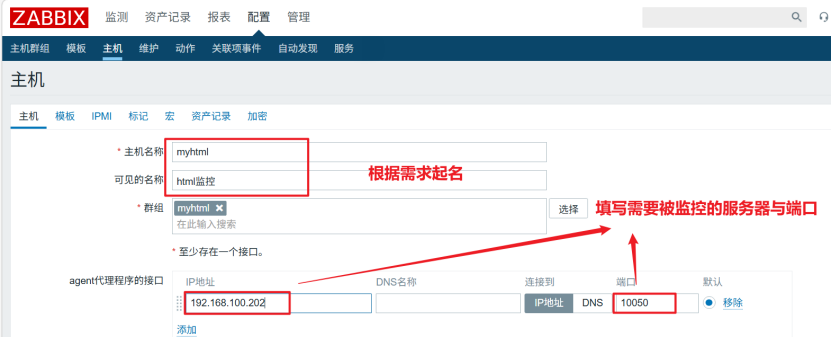
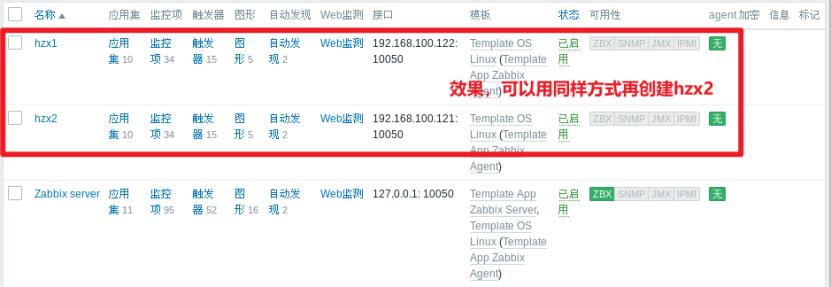
创建主机组

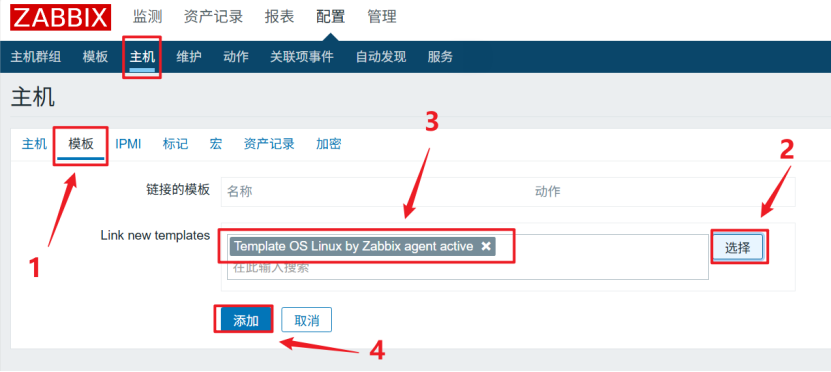
点击模板选择os linux
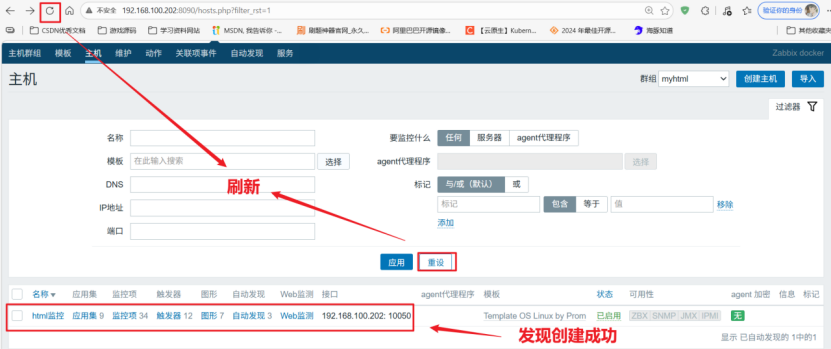
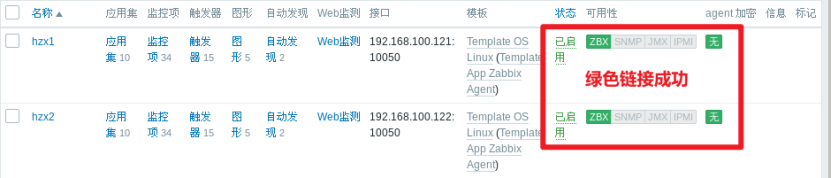
打开图形的预览:
