最近一直在鼓捣 Cesium 相关的内容,有对这个方面感兴趣的兄弟可以多多关注我一下。
今天实现一下 Cesium 中比较常用到的电子围栏效果,这个效果本身其实比较简单。
但是在三维GIS可视化、智慧园区、安防监控、厂区管控等场景中,电子围栏是核心功能之一。。
尤其是针对特定地点,特定人员的自动化安防措施方面。
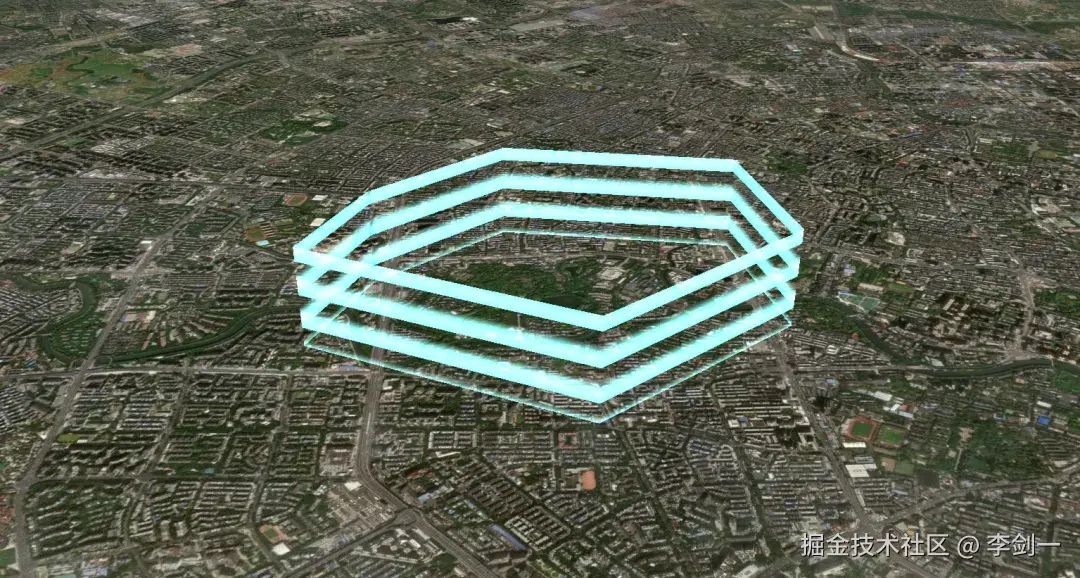
动态发光渐变电子围栏
使用自定义GLSL Shader材质,实现三条循环向上的蓝色流光带。
这种方案支持自定义围栏坐标、高度、颜色、流动速度,并且基于Primitive渲染,性能优于普通Entity。
完整代码
javascript
const loadFence = () => {
    // 电子围栏坐标点(根据实际园区范围修改经纬度)
    const fencePositions = [
        {lon:117.106447, lat:36.436758},
        {lon:117.106590, lat:36.437983},
        {lon:117.104106, lat:36.438014},
        {lon:117.103922, lat:36.437467},
    ];

    // 围栏高度(单位:米)
    const fenceHeight = 6.0;

    // 【核心】自定义Shader发光材质(实现循环流光效果)
    const createGlowMaterial = () => {
        return new Cesium.Material({
            fabric: {
                type: 'MyFenceGlow',
                source: `
                    czm_material czm_getMaterial(czm_materialInput materialInput)
                    {
                        czm_material material = czm_getDefaultMaterial(materialInput);
                        vec2 st = materialInput.st;

                        // 流光动画速度(数值越大越快)
                        float t = czm_frameNumber * 0.008;

                        // 垂直位置 0=底部 1=顶部
                        float v = st.t;

                        // 三条流光带循环位置
                        float band1Center = fract(0.15 + t);
                        float band2Center = fract(0.50 + t);
                        float band3Center = fract(0.85 + t);

                        // 计算流光带边缘渐变
                        float dist1 = abs(v - band1Center);
                        float dist2 = abs(v - band2Center);
                        float dist3 = abs(v - band3Center);

                        dist1 = min(dist1, 1.0 - dist1);
                        dist2 = min(dist2, 1.0 - dist2);
                        dist3 = min(dist3, 1.0 - dist3);

                        // 流光带宽度
                        float bandWidth = 0.08;
                        float fadeWidth = 0.08;

                        float intensity1 = smoothstep(bandWidth + fadeWidth, bandWidth, dist1);
                        float intensity2 = smoothstep(bandWidth + fadeWidth, bandWidth, dist2);
                        float intensity3 = smoothstep(bandWidth + fadeWidth, bandWidth, dist3);

                        // 底部亮、顶部透明渐变
                        float gradient1 = 1.0 - smoothstep(0.0, 1.0, band1Center);
                        float gradient2 = 1.0 - smoothstep(0.0, 1.0, band2Center);
                        float gradient3 = 1.0 - smoothstep(0.0, 1.0, band3Center);

                        intensity1 *= mix(0.3, 1.0, gradient1);
                        intensity2 *= mix(0.3, 1.0, gradient2);
                        intensity3 *= mix(0.3, 1.0, gradient3);

                        float totalIntensity = max(intensity1, max(intensity2, intensity3));

                        // 科技蓝颜色(可修改RGB值换颜色)
                        vec3 techBlueColor = vec3(0.0, 0.8, 1.0);

                        material.diffuse = techBlueColor;
                        material.alpha = totalIntensity * 0.9;
                        material.emission = techBlueColor * totalIntensity * 2.5;

                        return material;
                    }
                `
            },
            translucent: true
        });
    };

    // 创建围栏墙体
    for (let i = 0; i < fencePositions.length; i++) {
        const start = fencePositions[i];
        const end = fencePositions[(i + 1) % fencePositions.length];

        const wallGeometry = new Cesium.WallGeometry({
            positions: Cesium.Cartesian3.fromDegreesArray([
                start.lon, start.lat,
                end.lon, end.lat
            ]),
            maximumHeights: [fenceHeight, fenceHeight],
            minimumHeights: [0, 0],
            vertexFormat: Cesium.VertexFormat.POSITION_AND_ST
        });

        const wallInstance = new Cesium.GeometryInstance({
            geometry: wallGeometry
        });

        const wallPrimitive = new Cesium.Primitive({
            geometryInstances: wallInstance,
            appearance: new Cesium.MaterialAppearance({
                material: createGlowMaterial(),
                closed: false,
                flat: false,
                renderState: {
                    blending: Cesium.BlendingState.ALPHA_BLEND,
                    depthTest: { enabled: true },
                    depthMask: false
                }
            })
        });

        cesiumViewer.value.scene.primitives.add(wallPrimitive);
    }

    // 底部发光轮廓线(可省略)
    const bottomLinePositions = [];
    fencePositions.forEach(pos => {
        bottomLinePositions.push(pos.lon, pos.lat, 0.1);
    });
    bottomLinePositions.push(fencePositions[0].lon, fencePositions[0].lat, 0.1);

    cesiumViewer.value.entities.add({
        polyline: {
            positions: Cesium.Cartesian3.fromDegreesArrayHeights(bottomLinePositions),
            width: 4,
            material: new Cesium.PolylineGlowMaterialProperty({
                glowPower: 0.5,
                color: Cesium.Color.fromCssColorString('#00ccff'),
            }),
        },
    });

    // 顶部发光轮廓线(可省略)
    const topLinePositions = [];
    fencePositions.forEach(pos => {
        topLinePositions.push(pos.lon, pos.lat, fenceHeight);
    });
    topLinePositions.push(fencePositions[0].lon, fencePositions[0].lat, fenceHeight);

    cesiumViewer.value.entities.add({
        polyline: {
            positions: Cesium.Cartesian3.fromDegreesArrayHeights(topLinePositions),
            width: 4,
            material: new Cesium.PolylineGlowMaterialProperty({
                glowPower: 0.4,
                color: Cesium.Color.fromCssColorString('#00ccff'),
            }),
        },
    });

    // 中间层发光轮廓线(可省略)
    const midLinePositions = [];
    fencePositions.forEach(pos => {
        midLinePositions.push(pos.lon, pos.lat, fenceHeight / 2);
    });
    midLinePositions.push(fencePositions[0].lon, fencePositions[0].lat, fenceHeight / 2);

    cesiumViewer.value.entities.add({
        polyline: {
            positions: Cesium.Cartesian3.fromDegreesArrayHeights(midLinePositions),
            width: 3,
            material: new Cesium.PolylineGlowMaterialProperty({
                glowPower: 0.3,
                color: Cesium.Color.fromCssColorString('#0099ff').withAlpha(0.7),
            }),
        },
    });

    console.log('电子围栏加载完成!');
};
动态贴图电子围栏
这是我无意间发现的一个方案,这个方案要比上面的方法简单得多。
仅需要10多行核心代码就能实现动态围栏,而且基于图片贴图+自定义流动材质,性能消耗极低。
最关键的是想要换效果直接换个贴图就行。
完整代码
javascript
// 动态贴图电子围栏
function loadWall() {
  // 1. 围栏坐标(经纬度数组,首尾坐标需闭合)
  let data = [
    [104.0185546875, 30.66235300961486],
    [104.01589393615723, 30.65652022496456],
    [104.029541015625, 30.65053940942565],
    [104.0185546875, 30.66235300961486],
  ];

  // 坐标扁平化处理
  let coor = Array.prototype.concat.apply([], data);

  // 创建数据源
  let datasouce = map_common_addDatasouce("动态围栏");

  // 添加墙体实体
  datasouce.entities.add({
    wall: {
      positions: Cesium.Cartesian3.fromDegreesArray(coor),
      // 围栏高度
      maximumHeights: new Array(data.length).fill(500),
      minimumHeights: new Array(data.length).fill(0),

      // 动态流动材质(核心)
      material: new DynamicWallMaterialProperty({
        trailImage: "/images/wall.png", // 围栏贴图路径
        color: Cesium.Color.CYAN,       // 围栏颜色
        duration: 1500,                 // 流动周期(毫秒)
      }),
    },
  });
}

// 工具函数:添加数据源
function map_common_addDatasouce(name) {
  let dataSource = new Cesium.CustomDataSource(name);
  viewer.dataSources.add(dataSource);
  return dataSource;
}注意:需要提前引入DynamicWallMaterialProperty动态墙体材质类,另外准备一张透明的围栏条纹PNG图片,放入项目public目录中。
五、总结
电子围栏是Gis里面比较基础的功能了,结合空间分析(点是否在面内) 还能实现越界告警、人员管控、车辆监控等业务功能!
如果你想要比较简单的实现直接第二种绝对能满足需求,如果你想效果精细化一点可以考虑第一种。