目录
[(3)ASCII 顺序](#(3)ASCII 顺序)
一、Ansible介绍
Ansible 是由 Red Hat 维护的开源自动化引擎,用于:
- 配置管理:统一多台服务器的系统设置、文件、服务状态
- 应用部署:一键发布 / 更新软件包、容器、服务
- 任务编排:执行批量命令、滚动更新、零停机发布
- 云 / 基础设施即代码:管理虚拟机、容器、网络设备Ansible
1、核心特点
- 无代理:无需在目标机器安装客户端,仅通过 SSH(Linux)/ WinRM(Windows) 连接,轻量、安全、易维护,且部署ji。
- YAML 语法:用人类可读的 YAML 写自动化脚本,类似文档,学习成本低。
- 幂等性:同一脚本执行多次,结果一致;系统已达目标状态时不做重复操作。
- 模块化:内置数千个模块(文件、包、服务、云、数据库等),也可自定义模块。
- 跨平台:支持 Linux、Windows、macOS、网络设备、云厂商(AWS/Azure/ 阿里云等)。
2、核心组件
- 控制节点:运行 Ansible 的机器(Linux/macOS)
- 被管理节点:远程服务器 / 设备
- Inventory(主机清单):定义要管理的机器列表(静态文件或动态脚本)
- Playbook(剧本):YAML 编写的自动化任务集合
- Module(模块):最小执行单元(如
copy、yum、service) - Role(角色):按功能封装的 Playbook 集合(复用性强)
3、工作流程
- 在控制节点编写 Inventory 和 Playbook
- Ansible 读取配置,通过 SSH 连接目标节点
- 推送并临时执行对应模块,将系统调整到目标状态
- 执行完成后自动清理模块,不残留进程
4、典型使用场景
- 批量安装 / 升级软件(Nginx、MySQL、Java 等)
- 统一配置文件、用户、权限、防火墙
- 批量执行命令、日志收集、系统巡检
- 容器 / Kubernetes 部署与编排
- 云资源创建与销毁(EC2、虚拟机、负载均衡)Ansible
Ansible是一款用于Python开发的开源自动化工具,主要用于配置管理、应用部署、任务自动化和持续交付,采用的是无代理架构,也就是无需在目标主机上安装客户端,通过SSH进行通信,简化了大规模系统的管理。
5、执行过程
1、用户发出ansible命令
2、Ansible主程序加载自己的配置文件**(/etc/ansible/hosts)**
3、读取主机清单中的设备IP或域名及变量
4、调用Ansible命令中指定的模块,通过Ansible将模块参数生成对应的临时Python脚本,传输给目标服务器
5、对应目标主机的执行用户的家目录出现.ansible/tmp/xxx/xxx.py文件,给文件赋予可执行权限,执行该脚本并返回脚本
二、Ansible环境准备
1、安装ansible
yum install ansible-core -y是安装 Ansible 运行的基础,必须执行;
ansible-galaxy collection install community.general补充了绝大多数日常运维所需的模块,建议安装;
cpp
# 准备好一个主机(172.25.254.100),之后安装ansible
[root@Ansible ~]# yum install ansible -y

# 如果下载失败,无法找到,我们就可以通过search进行查找我们需要下载的ansible软件包
[root@Ansible ~]# yum search ansible
正在更新 Subscription Management 软件仓库。
无法读取客户身份

本系统尚未在权利服务器中注册。可使用 "rhc" 或 "subscription-manager" 进行注册。

上次元数据过期检查:0:00:30 前,执行于 2026年03月12日 星期四 20时48分53秒。
============================================ 名称 和 概况 匹配:ansible ============================================
ansible-collection-microsoft-sql.noarch : The Ansible collection for Microsoft SQL Server management
ansible-collection-redhat-rhel_mgmt.noarch : Ansible Collection of general system management and utility modules and
                                           : other plugins
ansible-freeipa-collection.noarch : freeipa.ansible_freeipa collection
ansible-freeipa-tests.noarch : ansible-freeipa tests
ansible-pcp.noarch : Ansible Metric collection for Performance Co-Pilot
ansible-test.x86_64 : Tool for testing ansible plugin and module code
================================================ 名称 匹配:ansible ================================================
ansible-core.x86_64 : SSH-based configuration management, deployment, and task execution system
ansible-freeipa.noarch : Roles and playbooks to deploy FreeIPA servers, replicas and clients
================================================ 概况 匹配:ansible ================================================
rhc-worker-playbook.x86_64 : Python worker for Red Hat connector that launches Ansible Runner


# 必须执行
[root@Ansible ~]# yum install ansible-core.x86_64 -y

# 可选扩展,这里朱波下载了,等待时间大概3分钟,请耐心等待
[root@Ansible ~]# ansible-galaxy collection install community.general

# 之后我们再查看以下ansible的版本,顺便确认一下是否安装成功
[root@Ansible ~]# ansible --version
ansible [core 2.14.18]
  config file = /etc/ansible/ansible.cfg
  configured module search path = ['/root/.ansible/plugins/modules', '/usr/share/ansible/plugins/modules']
  ansible python module location = /usr/lib/python3.9/site-packages/ansible
  ansible collection location = /root/.ansible/collections:/usr/share/ansible/collections
  executable location = /usr/bin/ansible
  python version = 3.9.21 (main, Feb 10 2025, 00:00:00) [GCC 11.5.0 20240719 (Red Hat 11.5.0-5)] (/usr/bin/python3)   # ansible依赖于python,所以肯定是会有python的版本
  jinja version = 3.1.2
  libyaml = True

# 目前安装的是 Ansible Core 2.14.18,这是 Ansible 的核心运行引擎,具备完整的自动化基础能力。
2、配置Ansible主配置文件
从 2.12 版本开始,默认的
/etc/ansible/ansible.cfg被精简成了说明文档,不再包含完整的配置项,只保留了生成配置文件的提示:
- 所有默认配置都被内置到 Ansible 代码中,不再写在配置文件里
- 这个文件的作用是告诉你:如何生成完整的配置模板,而不是直接存放配置
所以我们为了更加直观的看到代码和一些操作,就需要使用命令来生成最基础的配置文件
cpp
# 生成一个包含所有默认配置项(已注释)的 ansible.cfg:
[root@Ansible ~]# ansible-config init --disabled > /etc/ansible/ansible.cfg

# 主配置文件
[root@Ansible ~]# vim /etc/ansible/ansible.cfg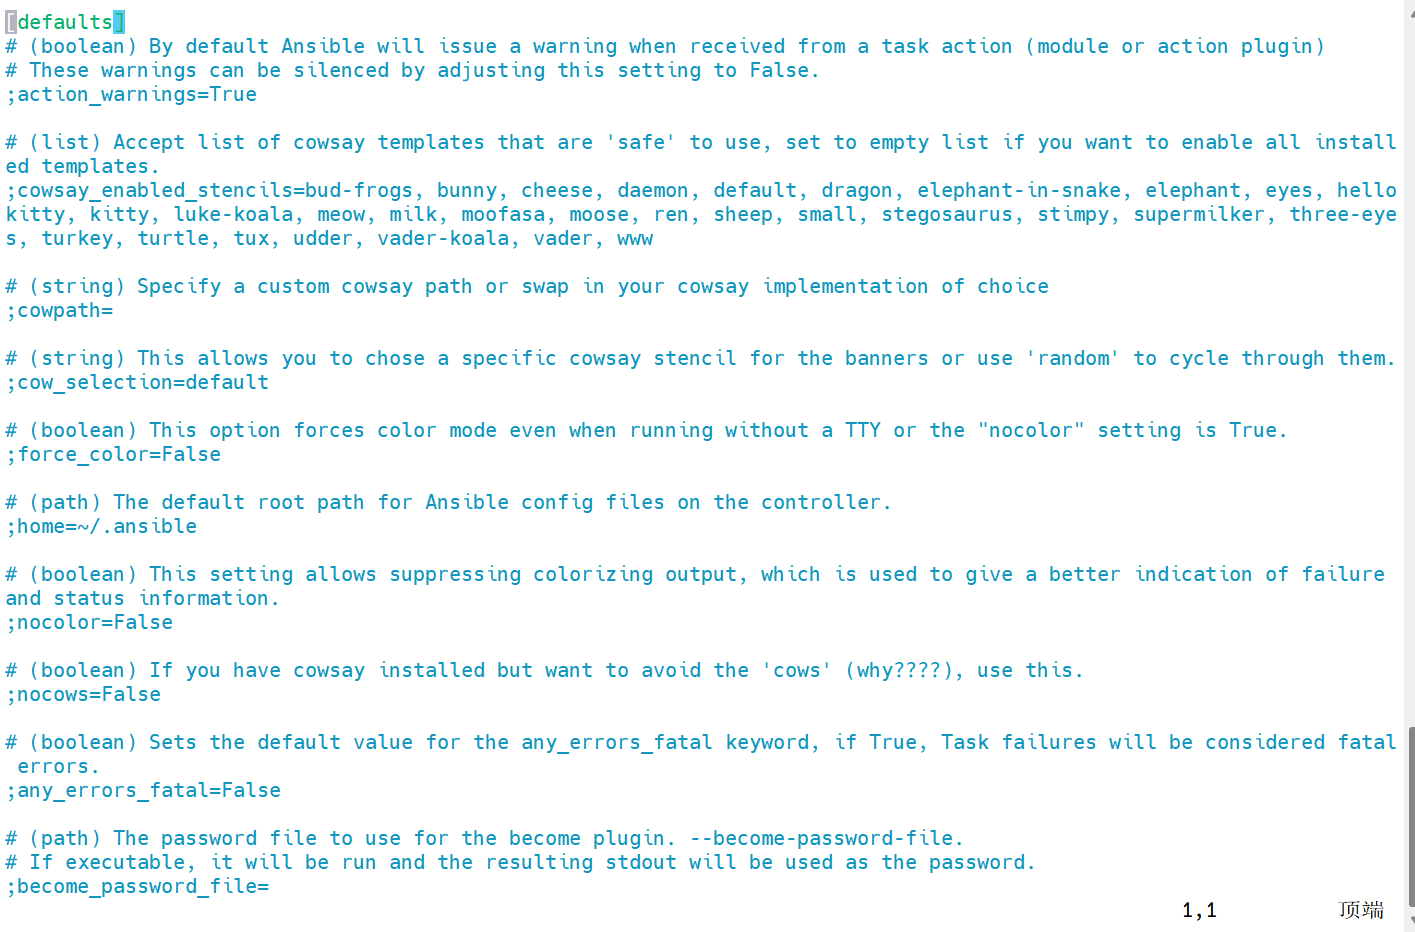
为什么主配置文件里面的内容都被注释了?
- ansible的所有配置参数都有内置的默认值
- 用户只需要删除注释并修改为自定义的配置即可
- 该设计避免了配置文件的冗余,用户只需要关注覆盖的配置
3、理解主配置文件
cs
[defaults]
# ========== 最常用核心配置 ==========
# 1. 关闭SSH主机密钥检查(首次连接不弹确认提示)
host_key_checking = False
# 2. 工作进程数(批量操作提速,默认5,改成20足够用)
forks = 20
# 3. 指定默认主机清单路径(不用每次-i指定)
inventory = /etc/ansible/hosts
# 4. 关闭奶牛图标(简化输出)
nocows = True
# 5. 模块默认路径(不用改,保留默认)
library = /usr/share/ansible
# 6. 模块执行超时时间(SSH连接超时,单位秒)
timeout = 30
# 7、远程连接用户(默认当前用户)
remote_user = root
# 8、是否提示SSH密码(默认是False,建议使用密钥认证)
ack_pass = False
[privilege_escalation]
# ========== 提权相关(sudo) ==========
# 允许提权(普通用户执行root操作)
become = True
# 提权方式(默认sudo)
become_method = sudo
# 提权用户(默认root)
become_user = root
# 不用每次输sudo密码(如果配置了免密sudo)
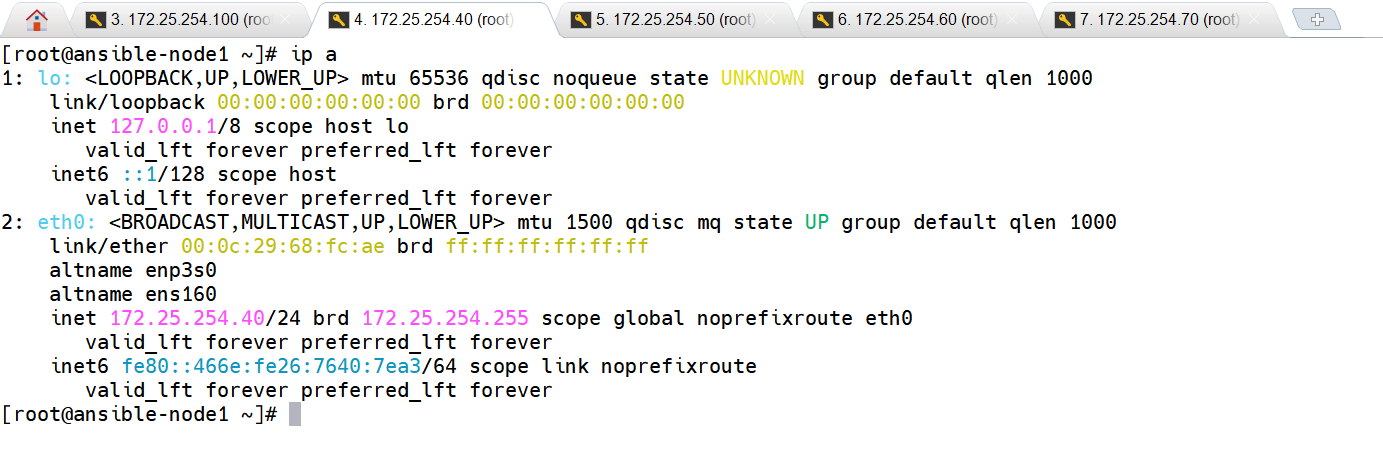
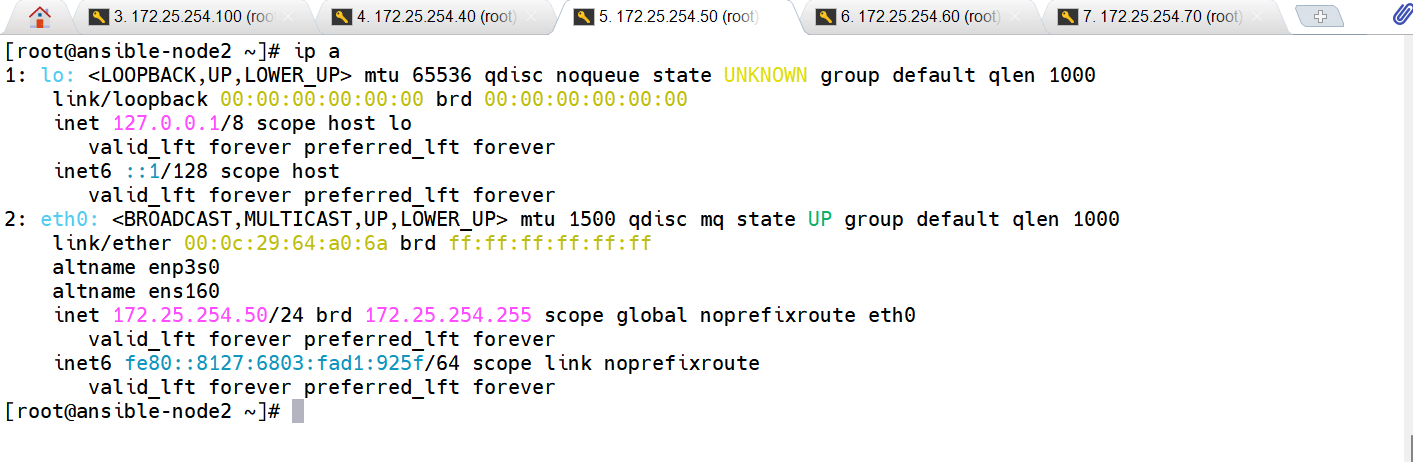
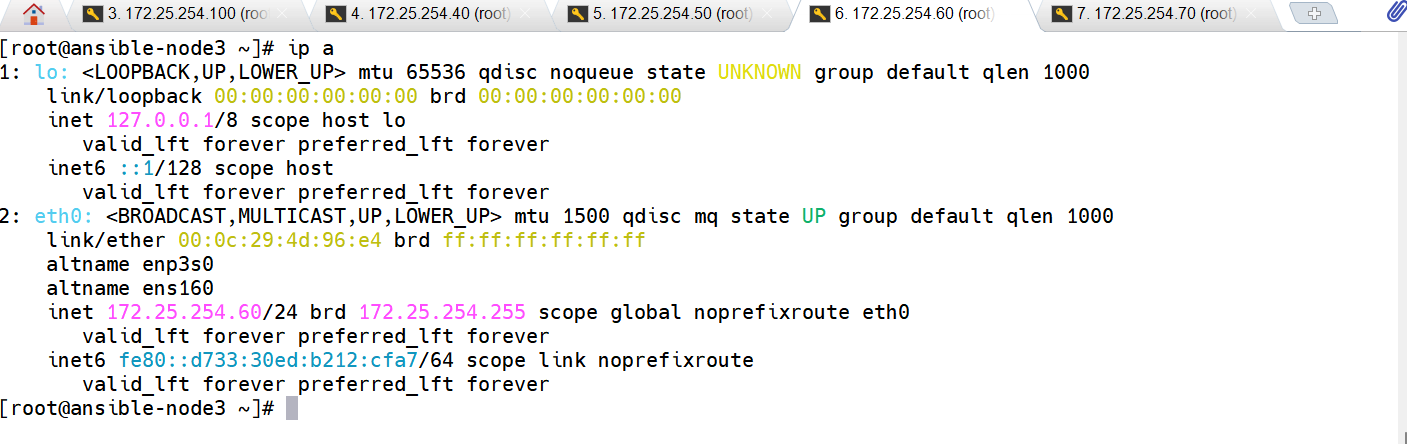
become_ask_pass = False4、准备四台主机
172.25.254.40、172.25.254.50、172.25.254.60、172.25.254.70
cpp
[root@ansible-node1 ~]# vmset.sh eth0 172.25.254.40 ansible-node1
[root@ansible-node2 ~]# vmset.sh eth0 172.25.254.50 ansible-node2
[root@ansible-node3 ~]# vmset.sh eth0 172.25.254.60 ansible-node3
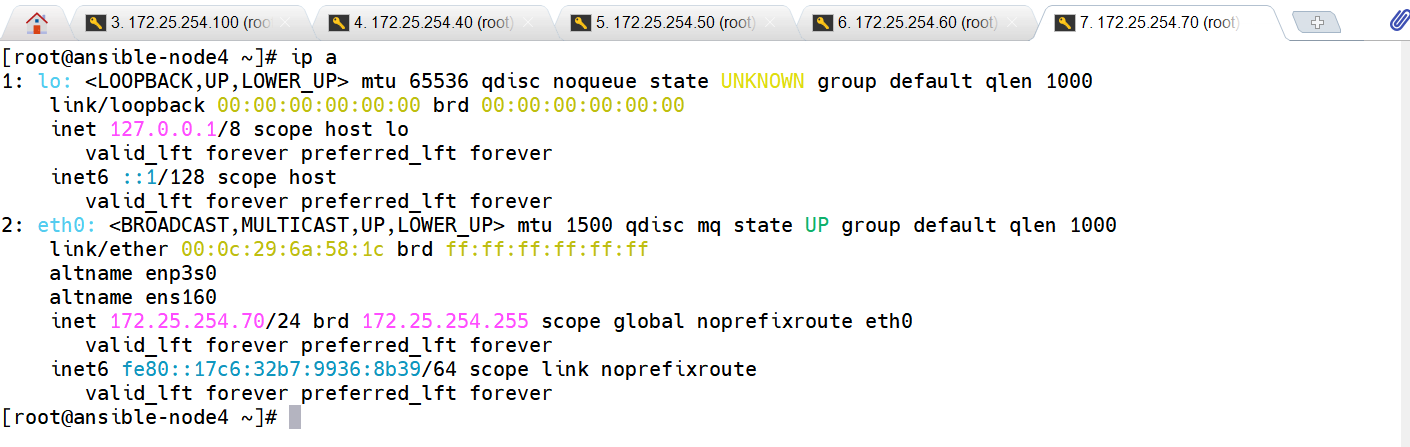
[root@ansible-node4 ~]# vmset.sh eth0 172.25.254.70 ansible-node4(1)ansible-node1
(2)ansible-node2
(3)ansible-node3
(4)ansible-node4
三、了解Ad-Hoc
Ad-Hoc(临时命令)是 Ansible 最常用的快速批量操作方式,无需编写 Playbook,直接在终端输入一行命令就能完成多台服务器的临时任务,适合简单、一次性的运维操作(比如批量查状态、改配置、执行脚本)。
cs
# 基本语法
ansible <目标主机/分组> -i <主机清单> -m <模块名> -a <模块参数> [可选参数]| 参数 | 全称(可选) | 核心作用 | 基础示例 |
|---|---|---|---|
-i |
--inventory |
指定主机清单(Inventory) 路径(默认 /etc/ansible/hosts) |
ansible all -i ./hosts.txt -a "hostname" ansible-playbook -i ./inventory.yml nginx.yml |
-u |
--user |
指定远程执行用户(默认用当前本地用户) | ansible web -u root -a "whoami" ansible-playbook -u ops nginx.yml |
-k |
--ask-pass |
交互输入远程用户的密码(适合未配置 SSH 免密的场景) | ansible all -k -a "hostname" |
-K |
--ask-become-pass |
交互输入提权密码(比如 sudo 密码) | ansible web -K -a "yum install nginx -y" |
-b |
--become |
提权执行(默认 sudo,相当于 sudo) |
ansible all -b -a "systemctl restart nginx" |
-f |
--forks |
指定并发数(默认 5,批量操作时调大提速) | ansible all -f 20 -a "df -h" |
-m |
--module-name |
指定要使用的模块(Ad-Hoc 专用,默认 command 模块) | `ansible all -m shell -a "ps aux |
-a |
--args |
指定模块参数(Ad-Hoc 专用) | ansible all -m copy -a "src=/tmp/test.txt dest=/tmp/" |
-v |
--verbose |
输出详细信息(-vvv 是最详细,排错用),还有-v,-vv,-vvv | ansible all -v -a "hostname" |
-l |
--limit |
限制执行范围(精准筛选主机) | ansible all -l 192.168.1.10 -a "hostname" ansible all -l web:!db -a "free -m"(web 组排除 db 组) |
注意:如果没有使用-u,则默认是root用户
四、Ansible主机清单(静态)
主机清单是Ansible的核心配置文件,用于定义管理哪些主机以及如何分组。一个主机隶属于多个不同的组
默认主机清单文件路径:/etc/ansible/ansible.cfg(或通过-i来指定自定义文件)
基本规则
- 主机组以header开头,这是主机组的名称
- 可以使用主机名/域名或IP地址识别目标主机
- 没有分组的主机需要在所有主机组之前定义
cpp
# 查看主机组的命令
[root@Ansible ~]# vim /etc/ansible/hosts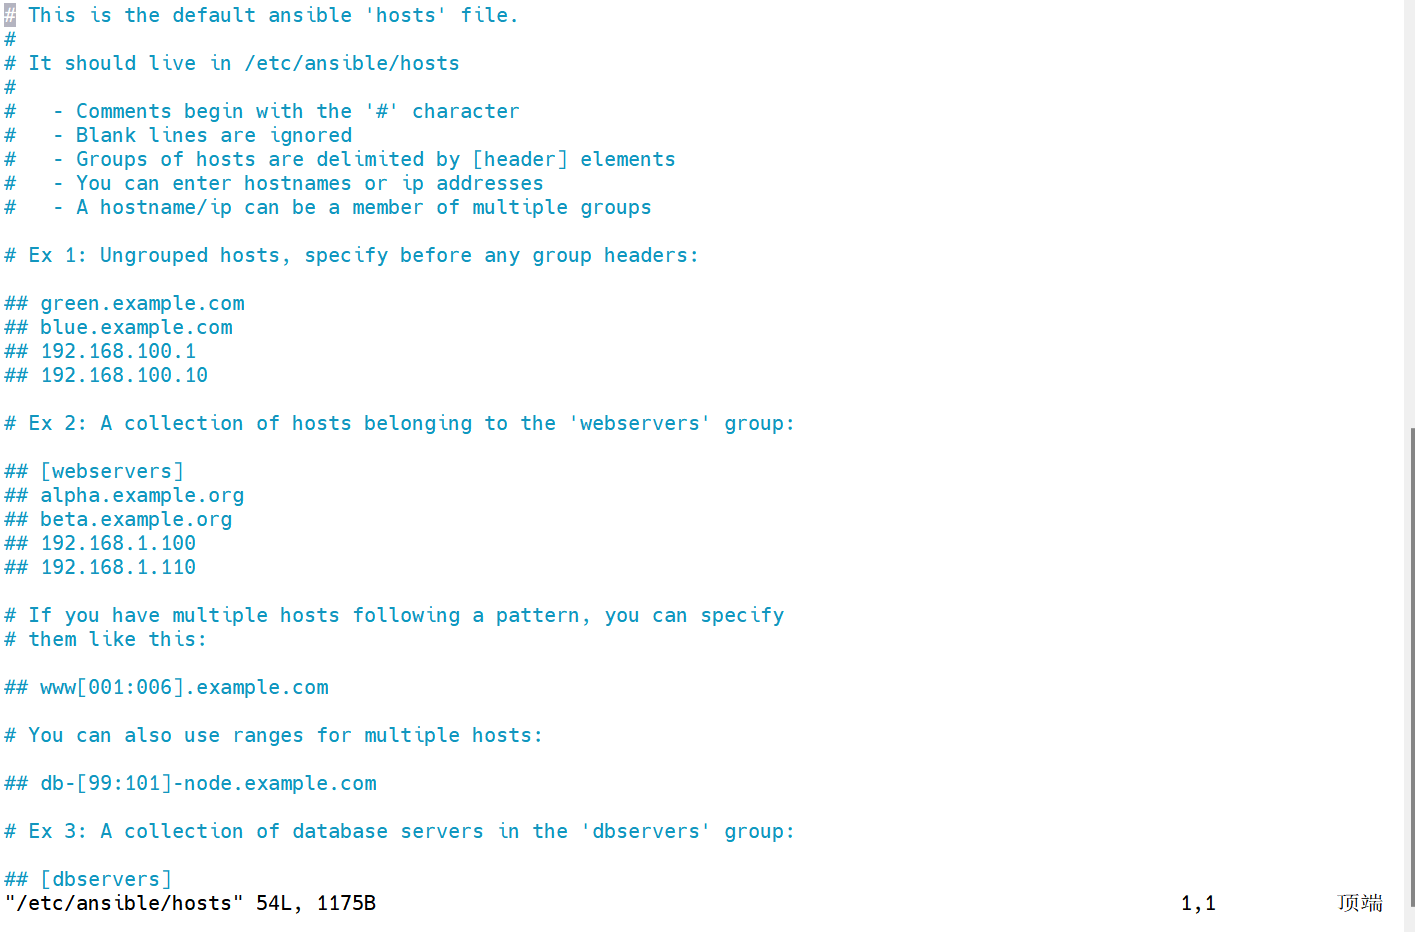
默认组(无需手动定义,会自动匹配对应主机,是日常使用中高频且实用的功能):
- all
- ungrouped
| 默认组名 | 作用 | 实用示例 |
|---|---|---|
all |
匹配所有在清单中的主机(静态 + 动态),是最常用的默认组 | ansible all -m ping(测试所有主机连通性) |
ungrouped |
匹配没有被分到任何自定义组的主机(仅在清单中单独列示、无分组的主机) | ansible ungrouped -a "hostname"(查看无分组主机) |
1、命名规则
| 规则类型 | 具体要求 |
|---|---|
| 允许字符 | 字母 / 数字 / 下划线 / 短横线 / 点 |
| 禁止字符 | 空格 / 特殊符号 / 中文 |
| 大小写 | 不敏感(统一识别为小写) |
| 长度 | 无强制限制,建议≤30 字符 |
2、配置主机清单
零散的的主机:172.25.254.40、172.25.254.50(未被分配到任何自定义分组的主机)
app_servers:172.25.254.60、172.25.254.70
cpp
# 配置主机清单
[root@Ansible ~]# vim /etc/ansible/hosts
## db-[99:101]-node.example.com
172.25.254.40
172.25.254.50
[app_servers]
172.25.254.60
172.25.254.70
(1)测试(ping)主机
【注意】:下面的测试直接显示结果,但是没有指纹,是因为新版本的Ansible默认关闭了交互式指纹认证,所以如果你还想像旧版本一样有指纹,就可以去/etc/ansible/ansible.cfg修改host_key_checking = False,把这样False改成Ture,就可以直接开启指纹
cpp
# 记住测试时需要把40、50、60、70的虚拟机给打开

# 1、ping我们设置的app_servers的主机组(60、70)
[root@Ansible ~]# ansible app_servers -m ping
172.25.254.70 | SUCCESS => {
    "ansible_facts": {
        "discovered_interpreter_python": "/usr/bin/python3"
    },
    "changed": false,
    "ping": "pong"
}
172.25.254.60 | SUCCESS => {
    "ansible_facts": {
        "discovered_interpreter_python": "/usr/bin/python3"
    },
    "changed": false,
    "ping": "pong"
}

# 2、ping未被分组到我们自定义设置的组中(40、50)
[root@Ansible ~]# ansible ungrouped -m ping
172.25.254.50 | SUCCESS => {
    "ansible_facts": {
        "discovered_interpreter_python": "/usr/bin/python3"
    },
    "changed": false,
    "ping": "pong"
}
172.25.254.40 | SUCCESS => {
    "ansible_facts": {
        "discovered_interpreter_python": "/usr/bin/python3"
    },
    "changed": false,
    "ping": "pong"
}

# 3、ping所有的主机(40、50、60、70)
[root@Ansible ~]# ansible all -m ping
172.25.254.60 | SUCCESS => {
    "ansible_facts": {
        "discovered_interpreter_python": "/usr/bin/python3"
    },
    "changed": false,
    "ping": "pong"
}
172.25.254.70 | SUCCESS => {
    "ansible_facts": {
        "discovered_interpreter_python": "/usr/bin/python3"
    },
    "changed": false,
    "ping": "pong"
}
172.25.254.40 | SUCCESS => {
    "ansible_facts": {
        "discovered_interpreter_python": "/usr/bin/python3"
    },
    "changed": false,
    "ping": "pong"
}
172.25.254.50 | SUCCESS => {
    "ansible_facts": {
        "discovered_interpreter_python": "/usr/bin/python3"
    },
    "changed": false,
    "ping": "pong"
}

# 这就是全部ping成功了
(2)配置web_servers组
将172.25.254.40、172.25.254.50设置为web_servers组
【注意】:这里不需要使用systemctl去启动或者关闭,因为ansible是一个工具,他的文件修改了之后,他会实时的去调度主机清单等等,和apahe等是不一样的
cpp
[root@Ansible ~]# vim /etc/ansible/hosts
## db-[99:101]-node.example.com
[web_servers]
172.25.254.40
172.25.254.50
[app_servers]
172.25.254.60
172.25.254.70
(3)查看详细日志
-v:看「任务结果」,新手日常排错首选;-vv:看「连接 + 模块」,排查 SSH / 模块调用问题;-vvv:看「全量细节」,解决复杂底层异常(输出量最大)。
cpp
[root@Ansible ~]# ansible 172.25.254.40 -m ping -v
Using /etc/ansible/ansible.cfg as config file
172.25.254.40 | SUCCESS => {
    "ansible_facts": {
        "discovered_interpreter_python": "/usr/bin/python3"
    },
    "changed": false,
    "ping": "pong"
}

[root@Ansible ~]# ansible 172.25.254.40 -m ping -vv
ansible [core 2.14.18]
  config file = /etc/ansible/ansible.cfg
  configured module search path = ['/root/.ansible/plugins/modules', '/usr/share/ansible/plugins/modules']
  ansible python module location = /usr/lib/python3.9/site-packages/ansible
  ansible collection location = /root/.ansible/collections:/usr/share/ansible/collections
  executable location = /usr/bin/ansible
  python version = 3.9.21 (main, Feb 10 2025, 00:00:00) [GCC 11.5.0 20240719 (Red Hat 11.5.0-5)] (/usr/bin/python3)
  jinja version = 3.1.2
  libyaml = True
Using /etc/ansible/ansible.cfg as config file
Skipping callback 'default', as we already have a stdout callback.
Skipping callback 'minimal', as we already have a stdout callback.
Skipping callback 'oneline', as we already have a stdout callback.
172.25.254.40 | SUCCESS => {
    "ansible_facts": {
        "discovered_interpreter_python": "/usr/bin/python3"
    },
    "changed": false,
    "ping": "pong"
}

# 这个当然是最详细的(由于太多,这里就没有放出来了)
[root@Ansible ~]# ansible 172.25.254.40 -m ping -vvv
3、嵌套组(父子组)
是将多个子分组归到一个父分组 下,通过
:children标识父组,实现分组的层级管理,简化批量操作。
- 嵌套组通过
:children实现分组层级管理,父组聚合多个子组;- 操作父组即可批量管控所有子组主机,减少重复命令。
(1)配置
cpp
# 配置嵌套组
[root@Ansible ~]# vim /etc/ansible/hosts
[web_servers]
172.25.254.40
172.25.254.50
[app_servers]
172.25.254.60
172.25.254.70
[all_app_web:children]
web_servers
app_servers
(2)测试
我们调用all_app_web就会直接调用里面的所有子组,所以这里直接将app_servers和web_servers中的主机全部进行ping测试,这就是嵌套的作用,更简单高效的完成了对大量主机的ping测试。
cpp
# 测试
[root@Ansible ~]# ansible all_app_web -m ping
172.25.254.50 | SUCCESS => {
    "ansible_facts": {
        "discovered_interpreter_python": "/usr/bin/python3"
    },
    "changed": false,
    "ping": "pong"
}
172.25.254.60 | SUCCESS => {
    "ansible_facts": {
        "discovered_interpreter_python": "/usr/bin/python3"
    },
    "changed": false,
    "ping": "pong"
}
172.25.254.70 | SUCCESS => {
    "ansible_facts": {
        "discovered_interpreter_python": "/usr/bin/python3"
    },
    "changed": false,
    "ping": "pong"
}
172.25.254.40 | SUCCESS => {
    "ansible_facts": {
        "discovered_interpreter_python": "/usr/bin/python3"
    },
    "changed": false,
    "ping": "pong"
}
(3)查看当前嵌套关系
cpp
[root@Ansible ~]# ansible-inventory --graph
@all:
  |--@ungrouped:
  |--@all_app_web:
  |  |--@web_servers:
  |  |  |--172.25.254.40
  |  |  |--172.25.254.50
  |  |--@app_servers:
  |  |  |--172.25.254.60
  |  |  |--172.25.254.70
4、设置主机范围
用于指定 "对哪些主机 / 组执行任务" 的核心语法,也常被称为 "模式匹配" 或 "主机匹配模式"
(1)数字或字母范围
| 语法类型 | 核心语法格式 | 适用场景 | 示例 | 匹配结果 |
|---|---|---|---|---|
| 基础连续范围 | [n-m] |
单个数字位的连续值 | web[01-03] |
web01、web02、web03 |
| 基础离散范围 | [n,m,k] |
单个数字位的离散值 | web[1,3,5] |
web1、web3、web5 |
| 步长 | [n,m,步长] |
步长可以省略,默认1 | web[10,30,10] |
web10、web20、web30 |
(2)通配符匹配
| 语法类型 | 核心格式 | 作用说明 | 示例 | 匹配结果(参考常见清单) |
|---|---|---|---|---|
| 通配符匹配 | */? |
模糊匹配任意字符 / 单个字符 | web*、web0? |
web01/web02/web-server / web01/web02 |
五、管理主机清单
统一管理所有机器把所有服务器 IP、账号、端口集中存起来,不用到处记、到处找。
方便分组批量操作按业务、环境分组(web、db、测试、生产),想控哪批就控哪批。
避免输错 IP、误操作有了清单和分组,执行命令只写组名,不用手动敲一长串 IP,更安全。
统一配置,少写重复代码在清单里设变量,playbook 里直接用,不用每个任务都重复写连接信息。
扩展性强机器变多、架构变复杂时,只要改清单,不用改剧本逻辑。
【一句话】:主机清单就是 Ansible 的 "通讯录",管理好它,批量运维才稳、准、快。
1、创建主机清单
这里我们假设如果我们不想通过/etc/ansible/hosts里面去调度主机,想通过自己建立的主机清单去调用,我们就可以将它相反
app_servers:172.25.254.40、172.25.254.50
web_servers:172.25.254.60、172.25.254.70
cpp
# 创建
[root@Ansible ~]# vim app_servers
[app_servers]
172.25.254.40
172.25.254.50

[root@Ansible ~]# vim web_servers
[web_servers]
172.25.254.60
172.25.254.70

# 查看我们创建的主机清单
[root@Ansible ~]# ll
总用量 12
-rw-------. 1 root root 1000  1月 14 19:39 anaconda-ks.cfg
-rw-r--r--  1 root root   42  3月 13 14:27 app_servers
-rw-r--r--  1 root root   42  3月 13 14:27 web_servers
[root@Ansible ~]# cat web_servers
[web_servers]
172.25.254.50
172.25.254.60
[root@Ansible ~]# cat app_servers
[app_servers]
172.25.254.60
172.25.254.70
2、测试
ansible后面接的是目标主机(也就是我们建立的web_servers),而后面由参数-i指定的是自定义建立的主机清单
cpp
# 这里是指定我们自己建立的web_servers(60、70)
[root@Ansible ~]# ansible web_servers -m ping -i app_servers -i web_servers
172.25.254.60 | SUCCESS => {
    "ansible_facts": {
        "discovered_interpreter_python": "/usr/bin/python3"
    },
    "changed": false,
    "ping": "pong"
}
172.25.254.70 | SUCCESS => {
    "ansible_facts": {
        "discovered_interpreter_python": "/usr/bin/python3"
    },
    "changed": false,
    "ping": "pong"
}

# 这里是all
[root@Ansible ~]# ansible all -m ping -i app_servers -i web_servers
172.25.254.60 | SUCCESS => {
    "ansible_facts": {
        "discovered_interpreter_python": "/usr/bin/python3"
    },
    "changed": false,
    "ping": "pong"
}
172.25.254.70 | SUCCESS => {
    "ansible_facts": {
        "discovered_interpreter_python": "/usr/bin/python3"
    },
    "changed": false,
    "ping": "pong"
}
172.25.254.40 | SUCCESS => {
    "ansible_facts": {
        "discovered_interpreter_python": "/usr/bin/python3"
    },
    "changed": false,
    "ping": "pong"
}
172.25.254.50 | SUCCESS => {
    "ansible_facts": {
        "discovered_interpreter_python": "/usr/bin/python3"
    },
    "changed": false,
    "ping": "pong"
}
3、完善自定义主机清单
将我们自定义的主机清单放在我们设定的目录
优点:
- 结构清晰:按环境 / 业务分文件 / 子目录(如 prod/、test/、web/),清单不杂乱,找主机更高效;
- 灵活复用 :不同场景调用不同子目录清单(如
-i ./inventory/prod/),不用改主清单;- 权限可控:按目录 / 文件分配权限,避免误改核心环境(如生产)的主机配置;
- 扩展方便:新增业务 / 环境时,仅需加新子目录,不影响现有清单,适配架构迭代。
cpp
# 建立存放主机清单的目录
[root@Ansible ~]# mkdir /ansible/test -p
[root@Ansible ~]# mv web_servers /ansible/test/
[root@Ansible ~]# mv app_servers /ansible/test/
[root@Ansible ~]# cd /ansible/test/
[root@Ansible test]# ll
总用量 8
-rw-r--r-- 1 root root 42  3月 13 14:30 app_servers
-rw-r--r-- 1 root root 42  3月 13 14:30 web_servers

# 之后我们在运行ping操作时,就不再要写两个-i,直接就可以调用存放主机清单的目录即可
[root@Ansible ~]# ansible all -m ping -i /ansible/test/
172.25.254.60 | SUCCESS => {
    "ansible_facts": {
        "discovered_interpreter_python": "/usr/bin/python3"
    },
    "changed": false,
    "ping": "pong"
}
172.25.254.40 | SUCCESS => {
    "ansible_facts": {
        "discovered_interpreter_python": "/usr/bin/python3"
    },
    "changed": false,
    "ping": "pong"
}
172.25.254.70 | SUCCESS => {
    "ansible_facts": {
        "discovered_interpreter_python": "/usr/bin/python3"
    },
    "changed": false,
    "ping": "pong"
}
172.25.254.50 | SUCCESS => {
    "ansible_facts": {
        "discovered_interpreter_python": "/usr/bin/python3"
    },
    "changed": false,
    "ping": "pong"
}
4、主机清单的管理
首先,假设我们把app作为web的主机清单,如果先识别的是app,则此时还不知道web主机清单的内容,那此时就会报错,我们来试验一下
(1)配置app_service
cpp
[root@ansible-node1 test]# vim app_services
[app_servers:children]
web_servers
(2)测试
此时这里我们可以看到只有60与70出来了,而上面的报错就是告诉我们,他们没有找到web_servers主机清单,所以无法成功,那我们要如何解决这个问题呢?
这里就需要看下一个知识点:【主机清单加载顺序】,就能够解决这个问题
cpp
# 测试:
[root@ansible-node1 test]# ansible all -m ping -i /ansible/test/
[WARNING]:  * Failed to parse /ansible/test/app_services with yaml plugin: We
were unable to read either as JSON nor YAML, these are the errors we got from
each: JSON: Expecting value: line 1 column 2 (char 1)  Syntax Error while loading
YAML.   did not find expected <document start>  The error appears to be in
'/ansible/test/app_services': line 2, column 1, but may be elsewhere in the file
depending on the exact syntax problem.  The offending line appears to be:
[app_servers:children] web_servers ^ here
[WARNING]:  * Failed to parse /ansible/test/app_services with ini plugin:
/ansible/test/app_services:2: Section [app_servers:children] includes undefined
group: web_servers
[WARNING]: Unable to parse /ansible/test/app_services as an inventory source
172.25.254.60 | SUCCESS => {
    "ansible_facts": {
        "discovered_interpreter_python": "/usr/bin/python3"
    },
    "changed": false,
    "ping": "pong"
}
172.25.254.70 | SUCCESS => {
    "ansible_facts": {
        "discovered_interpreter_python": "/usr/bin/python3"
    },
    "changed": false,
    "ping": "pong"
}
5、主机清单加载顺序
在 Ansible 中,主机清单(Inventory)是定义被管理节点的核心配置,其加载顺序直接决定了最终生效的清单内容。
【注意】:后加载的会覆盖先加载的同名配置
(1)内置默认清单(最低优先级)
Ansible 安装后会自带一个默认清单文件,路径固定为:
cpp
/etc/ansible/hosts这是最基础的清单,若未指定其他清单,Ansible 会默认读取这个文件。
(2)配置文件(ansible.cfg)指定的清单
如果在 Ansible 配置文件(
ansible.cfg)中通过inventory参数指定了清单路径 / 目录,该清单的优先级会高于默认清单。ansible.cfg的加载顺序本身也有优先级(同样后加载的覆盖先加载的):
- 命令行环境变量
ANSIBLE_CONFIG指定的配置文件- 当前工作目录下的
./ansible.cfg- 用户家目录下的
~/.ansible.cfg- 系统级配置
/etc/ansible/ansible.cfg在配置文件中指定清单的示例:
[defaults]
# 可以是单个文件、目录(会加载目录下所有清单文件)、甚至动态清单脚本
inventory = /opt/ansible/inventory/hosts,/opt/ansible/inventory/dynamic_inventory.sh
(3)ASCII 顺序
图片里提到的是 Ansible 主机清单(Inventory)最核心的加载优先级规则 ,特别是针对父子组依赖的场景。
Ansible 加载清单目录中的多个文件时,严格按照文件名的 ASCII 码顺序(字母 / 数字升序)进行加载。
- 规则 :
0-9优先于A-Z,字母a优先于b。- 示例 :加载顺序为
01-hosts→02-webservers→a_vars→b_vars。
(4)使用ASCLL顺序测试
此时因为我们需要先运行子组web_servers,再运行父组app_servers,才能够解决上述我们的报错。
所以如果父子组,最好先识别子组,再识别父组。
cpp
# 修改文件名
[root@ansible-node1 test]# mv app_servers  02app_servers
[root@ansible-node1 test]# mv web_servers  01web_services
[root@ansible-node1 test]# ls
01web_services  02app_servers

# 测试:
[root@ansible-node1 test]# ansible all -m ping -i /ansible/test/
172.25.254.60 | SUCCESS => {
    "ansible_facts": {
        "discovered_interpreter_python": "/usr/bin/python3"
    },
    "changed": false,
    "ping": "pong"
}
172.25.254.70 | SUCCESS => {
    "ansible_facts": {
        "discovered_interpreter_python": "/usr/bin/python3"
    },
    "changed": false,
    "ping": "pong"
}
六、变量
Ansible 中的变量是实现自动化配置灵活性的核心,不同类型的变量有明确的定义场景和优先级规则。
1、核心变量分类
(1)基础连接变量
基础设施变量主要围绕「服务器 / 设备的核心属性」和「运维配置」展开
| 典型变量名 | 用途说明 | 示例值 |
|---|---|---|
| ansible_host | 被管理主机的 IP / 域名(核心) | 192.168.1.101 |
| ansible_user | 远程登录用户名 | root / ansible |
| ansible_port | SSH / 管理端口 | 22 / 2222 |
| ansible_ssh_private_key_file | 登录私钥路径 | ~/.ssh/id_rsa |
| ansible_python_interpreter | 远程 Python 解释器路径 | /usr/bin/python3 |
(2)测试ansible_port
把172.25.254.70的端口改为6666,之后在尝试连接,肯定是会显示失败,所以我们需要去主机清单配置文件中添加ansible_port=6666,去指引修改后的端口号位置,就可以成功连接了。
cpp
# 再172.25.254.70修改端口为6666
[root@ansible-node4 ~]# vim /etc/ssh/sshd_config
Port 6666

# 关闭防火墙
[root@ansible-node4 ~]# setenforce 0
setenforce: SELinux is disabled
[root@ansible-node4 ~]# systemctl stop firewalld

# 之后在重启一下shhd
[root@ansible-node4 ~]# systemctl restart sshd

# 再回到172.25.254.40尝试连接,发现70连接不上
[root@ansible-node1 test]# ansible all -m ping -i /ansible/test/
172.25.254.70 | UNREACHABLE! => {
    "changed": false,
    "msg": "Failed to connect to the host via ssh: ssh: connect to host 172.25.254.70 port 22: Connection refused",
    "unreachable": true
}
172.25.254.60 | SUCCESS => {
    "ansible_facts": {
        "discovered_interpreter_python": "/usr/bin/python3"
    },
    "changed": false,
    "ping": "pong"
}

# 那我们就要去修改一下配置文件,为70添加修改后的端口信息
[root@ansible-node1 test]# vim /etc/ansible/hosts
## db-[99:101]-node.example.com
[web_servers]
172.25.254.40
172.25.254.50
[app_servers]
172.25.254.60
172.25.254.70 ansible_port=6666
[all_app_web:children]
web_servers
app_servers

# 测试,此时就全部成功了:
[root@ansible-node1 test]# ansible all -m ping
172.25.254.70 | SUCCESS => {
    "ansible_facts": {
        "discovered_interpreter_python": "/usr/bin/python3"
    },
    "changed": false,
    "ping": "pong"
}
172.25.254.50 | SUCCESS => {
    "ansible_facts": {
        "discovered_interpreter_python": "/usr/bin/python3"
    },
    "changed": false,
    "ping": "pong"
}
172.25.254.60 | SUCCESS => {
    "ansible_facts": {
        "discovered_interpreter_python": "/usr/bin/python3"
    },
    "changed": false,
    "ping": "pong"
}
172.25.254.40 | SUCCESS => {
    "ansible_facts": {
        "discovered_interpreter_python": "/usr/bin/python3"
    },
    "changed": false,
    "ping": "pong"
}
(3)组变量
当我们的主机变量与主机组有相同的变量,但是发生冲突的时候,此时听主机的;
当父组与子组有相同的变量时,但是发生冲突,此时听子组的,虽然会继承父组的变量,但是他们发生冲突时,以子组的变量为主
【总结】:当定义了不同级别的变量时,但是发生了冲突,此时,主机变量优先级最高,其次是主机组变量,最后是父组变量。
cpp
# 修改172.25.254.70的密码为123
[root@ansible-node4 ~]# passwd
更改用户 root 的密码 。
新的密码:
无效的密码: 密码少于 8 个字符
重新输入新的密码:
passwd:所有的身份验证令牌已经成功更新。

# 之后再同样修改172.25.254.40的配置文件,设置变量
# 123是我们刚刚修改的密码,666是原先所有主机的密码
[root@ansible-node1 test]# vim /etc/ansible/hosts
[web_servers]
172.25.254.40
172.25.254.50
[app_servers]
172.25.254.60
172.25.254.70 ansible_port=6666 ansible_password=123
[all_app_web:children]
web_servers
app_servers
[app_servers:vars]
ansible_password=666
[all_app_web:vars]
ansible_password=1234

# 测试,都成功了:
[root@ansible-node1 test]# ansible all -m ping
172.25.254.50 | SUCCESS => {
    "ansible_facts": {
        "discovered_interpreter_python": "/usr/bin/python3"
    },
    "changed": false,
    "ping": "pong"
}
172.25.254.60 | SUCCESS => {
    "ansible_facts": {
        "discovered_interpreter_python": "/usr/bin/python3"
    },
    "changed": false,
    "ping": "pong"
}
172.25.254.70 | SUCCESS => {
    "ansible_facts": {
        "discovered_interpreter_python": "/usr/bin/python3"
    },
    "changed": false,
    "ping": "pong"
}
172.25.254.40 | SUCCESS => {
    "ansible_facts": {
        "discovered_interpreter_python": "/usr/bin/python3"
    },
    "changed": false,
    "ping": "pong"
}
七、Ansible常用模块
1、file模块
Ansible 的
file模块是管理文件、目录、链接的核心模块,几乎所有自动化场景(如部署配置、创建目录、修改权限)都会用到它。它支持创建、删除、修改权限 / 属主、创建软链接等操作,且幂等性极佳(重复执行不会导致异常)。
(1)核心参数
| 参数 | 作用 | 必选 | 常用值 |
|---|---|---|---|
path/dest |
目标文件 / 目录 / 链接的路径(dest 多用于链接) |
是 | /etc/nginx/nginx.conf、/opt/app |
state |
定义操作类型(核心参数) | 是 | 👇 重点说明 |
mode |
设置文件 / 目录权限(八进制 / 符号) | 否 | 0644、0755、u=rwx,g=rx,o=rx |
owner |
设置属主 | 否 | root、nginx |
group |
设置属组 | 否 | root、nginx |
src |
软链接 / 硬链接的源文件路径(仅state=link/hard时用) |
是(链接场景) | /etc/nginx/conf.d/default.conf |
recurse |
递归修改目录下所有文件(仅state=directory时生效) |
否 | yes/no |
force |
强制操作(如覆盖已存在的链接、创建父目录) | 否 | yes/no |
(2)state=touch
这里有个地方要注意:就是第一次创建时是黄色的,代表成功,但是你再尝试一次,发现还是黄色的,是因为
state=touch每次都会更新文件时间戳,这是模块的正常行为。
state=touch的设计逻辑就是:
- 如果文件不存在 → 创建文件(返回
CHANGED,黄色)- 如果文件已存在 → 更新文件的 atime/mtime 时间戳 (同样返回
CHANGED,黄色)
cpp
# 测试建立一个文件(这里黄色代表创建成功了,并且改变了目标主机的状态)
# 在shell里是黄色的
[root@ansible-node1 ~]# ansible all -m file -a "path=/opt/file1.txt state=touch"  172.25.254.40 | CHANGED => {
    "ansible_facts": {
        "discovered_interpreter_python": "/usr/bin/python3"
    },
    "changed": true,
    "dest": "/opt/file1.txt",
    "gid": 0,
    "group": "root",
    "mode": "0644",
    "owner": "root",
    "size": 0,
    "state": "file",
    "uid": 0
}
172.25.254.60 | CHANGED => {
    "ansible_facts": {
        "discovered_interpreter_python": "/usr/bin/python3"
    },
    "changed": true,
    "dest": "/opt/file1.txt",
    "gid": 0,
    "group": "root",
    "mode": "0644",
    "owner": "root",
    "size": 0,
    "state": "file",
    "uid": 0
}
172.25.254.70 | CHANGED => {
    "ansible_facts": {
        "discovered_interpreter_python": "/usr/bin/python3"
    },
    "changed": true,
    "dest": "/opt/file1.txt",
    "gid": 0,
    "group": "root",
    "mode": "0644",
    "owner": "root",
    "size": 0,
    "state": "file",
    "uid": 0
}
172.25.254.50 | CHANGED => {
    "ansible_facts": {
        "discovered_interpreter_python": "/usr/bin/python3"
    },
    "changed": true,
    "dest": "/opt/file1.txt",
    "gid": 0,
    "group": "root",
    "mode": "0644",
    "owner": "root",
    "size": 0,
    "state": "file",
    "uid": 0
}
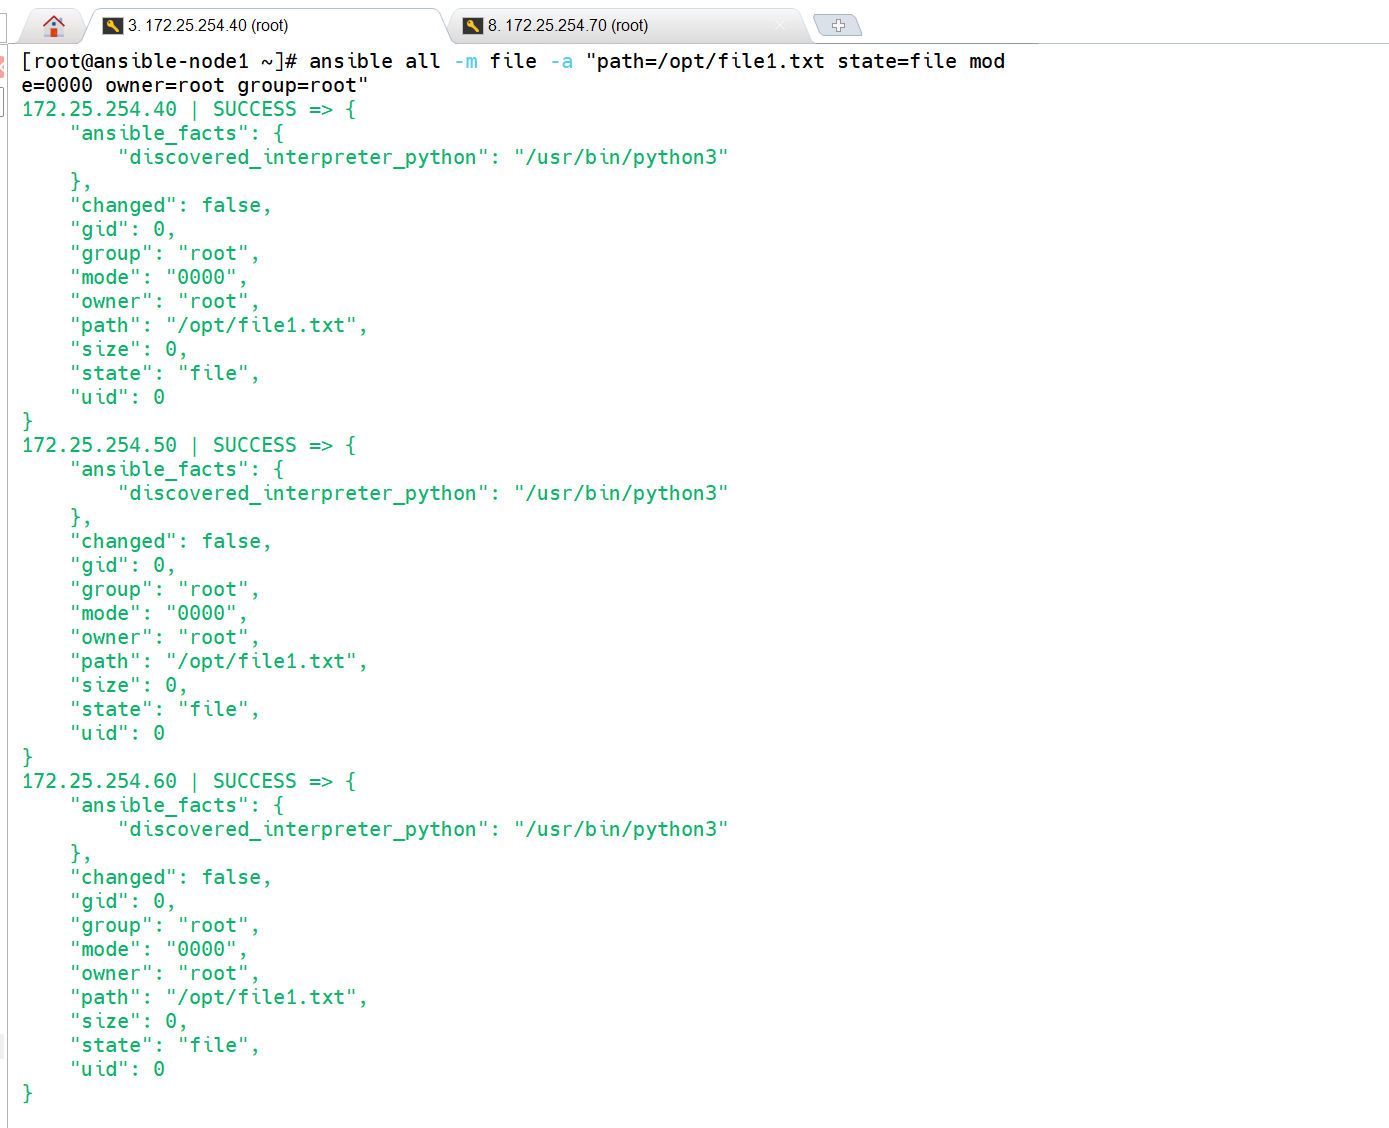
(3)state=file
state=file最核心的特性 ------仅在首次修正属性时标黄,后续无变更则标绿 ,和state=touch每次都标黄的逻辑完全不同。
- 首次执行 :Ansible 会修正权限为
0000、属主 / 属组为 root → 返回CHANGED(黄色);- 第二次执行 :文件属性已完全匹配(权限 0000、root/root)→ 返回
SUCCESS(绿色);- 核心:仅首次修正属性标黄,后续永久标绿(无任何操作,不碰时间戳)。
cpp
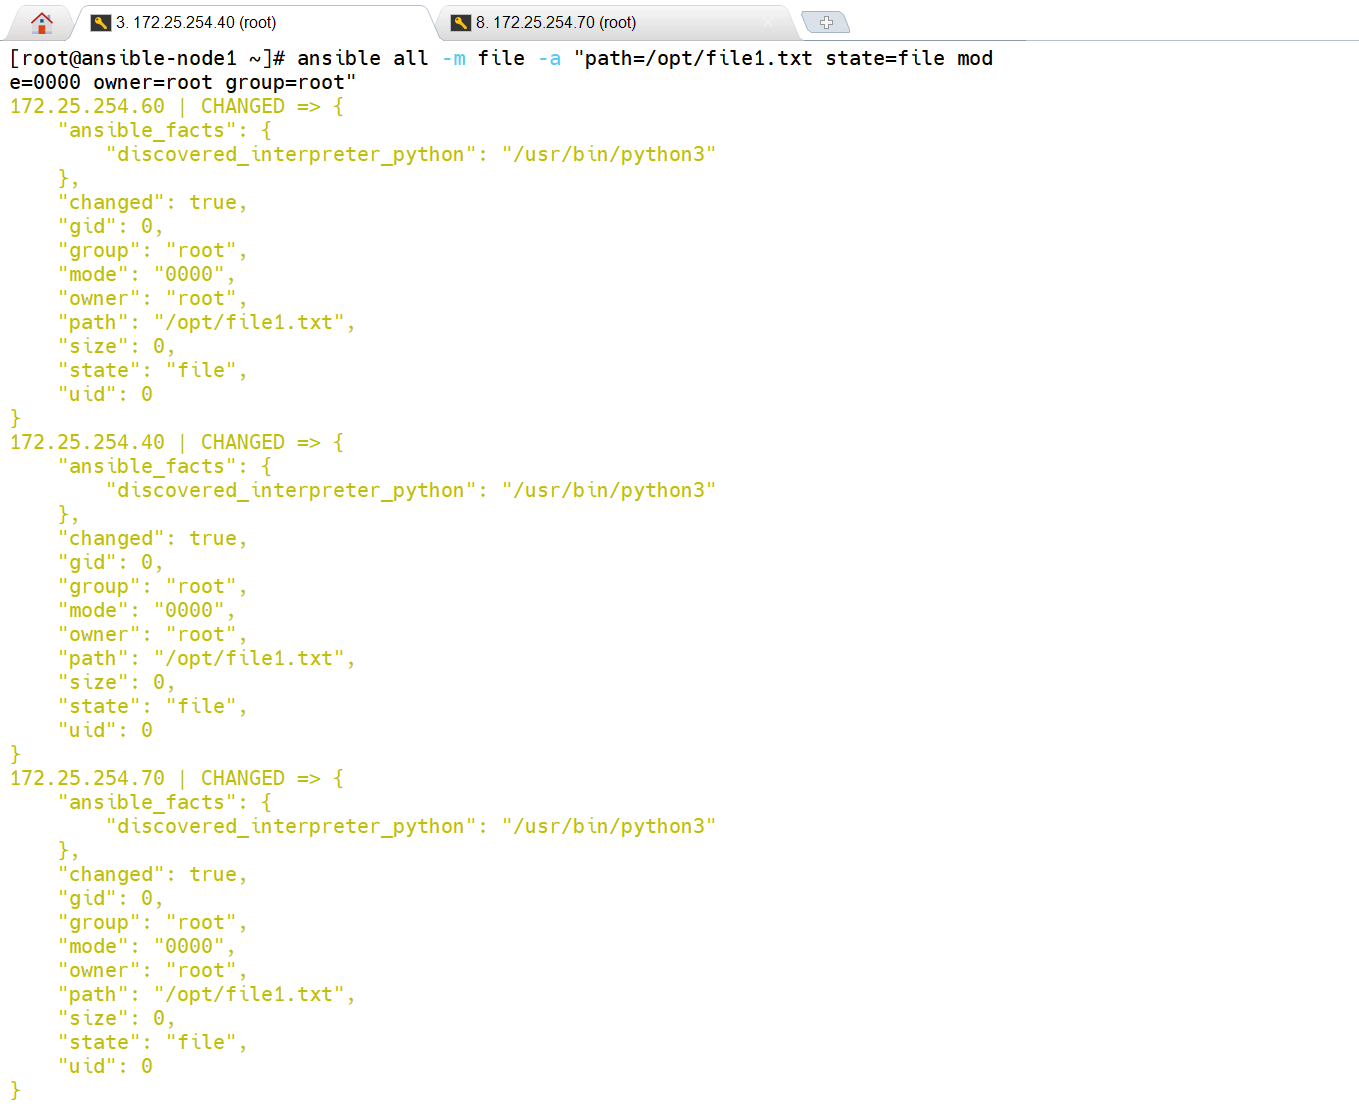
# 修改权限
[root@ansible-node1 ~]# ansible all -m file -a "path=/opt/file1.txt state=file mode=0000 owner=root group=root"
172.25.254.60 | CHANGED => {
    "ansible_facts": {
        "discovered_interpreter_python": "/usr/bin/python3"
    },
    "changed": true,
    "gid": 0,
    "group": "root",
    "mode": "0000",
    "owner": "root",
    "path": "/opt/file1.txt",
    "size": 0,
    "state": "file",
    "uid": 0
}
172.25.254.40 | CHANGED => {
    "ansible_facts": {
        "discovered_interpreter_python": "/usr/bin/python3"
    },
    "changed": true,
    "gid": 0,
    "group": "root",
    "mode": "0000",
    "owner": "root",
    "path": "/opt/file1.txt",
    "size": 0,
    "state": "file",
    "uid": 0
}
172.25.254.70 | CHANGED => {
    "ansible_facts": {
        "discovered_interpreter_python": "/usr/bin/python3"
    },
    "changed": true,
    "gid": 0,
    "group": "root",
    "mode": "0000",
    "owner": "root",
    "path": "/opt/file1.txt",
    "size": 0,
    "state": "file",
    "uid": 0
}
172.25.254.50 | CHANGED => {
    "ansible_facts": {
        "discovered_interpreter_python": "/usr/bin/python3"
    },
    "changed": true,
    "gid": 0,
    "group": "root",
    "mode": "0000",
    "owner": "root",
    "path": "/opt/file1.txt",
    "size": 0,
    "state": "file",
    "uid": 0
}

# 随机开一台主机(172.25.254.70)测试:
[root@ansible-node4 ~]# ll /opt
总用量 0
---------- 1 root root 0  3月 16 15:29 file1.txt

# 最重要的地方就是这,我们确认好其他主机已经修改好权限,此时我们在172.25.254.40中在重新输入修改权限的命令,此时在shell里的命令是绿色的,这就是与touch的不同
[root@ansible-node1 ~]# ansible all -m file -a "path=/opt/file1.txt state=file mode=0000 owner=root group=root"
172.25.254.40 | SUCCESS => {
    "ansible_facts": {
        "discovered_interpreter_python": "/usr/bin/python3"
    },
    "changed": false,
    "gid": 0,
    "group": "root",
    "mode": "0000",
    "owner": "root",
    "path": "/opt/file1.txt",
    "size": 0,
    "state": "file",
    "uid": 0
}
172.25.254.50 | SUCCESS => {
    "ansible_facts": {
        "discovered_interpreter_python": "/usr/bin/python3"
    },
    "changed": false,
    "gid": 0,
    "group": "root",
    "mode": "0000",
    "owner": "root",
    "path": "/opt/file1.txt",
    "size": 0,
    "state": "file",
    "uid": 0
}
172.25.254.60 | SUCCESS => {
    "ansible_facts": {
        "discovered_interpreter_python": "/usr/bin/python3"
    },
    "changed": false,
    "gid": 0,
    "group": "root",
    "mode": "0000",
    "owner": "root",
    "path": "/opt/file1.txt",
    "size": 0,
    "state": "file",
    "uid": 0
}
172.25.254.70 | SUCCESS => {
    "ansible_facts": {
        "discovered_interpreter_python": "/usr/bin/python3"
    },
    "changed": false,
    "gid": 0,
    "group": "root",
    "mode": "0000",
    "owner": "root",
    "path": "/opt/file1.txt",
    "size": 0,
    "state": "file",
    "uid": 0
}
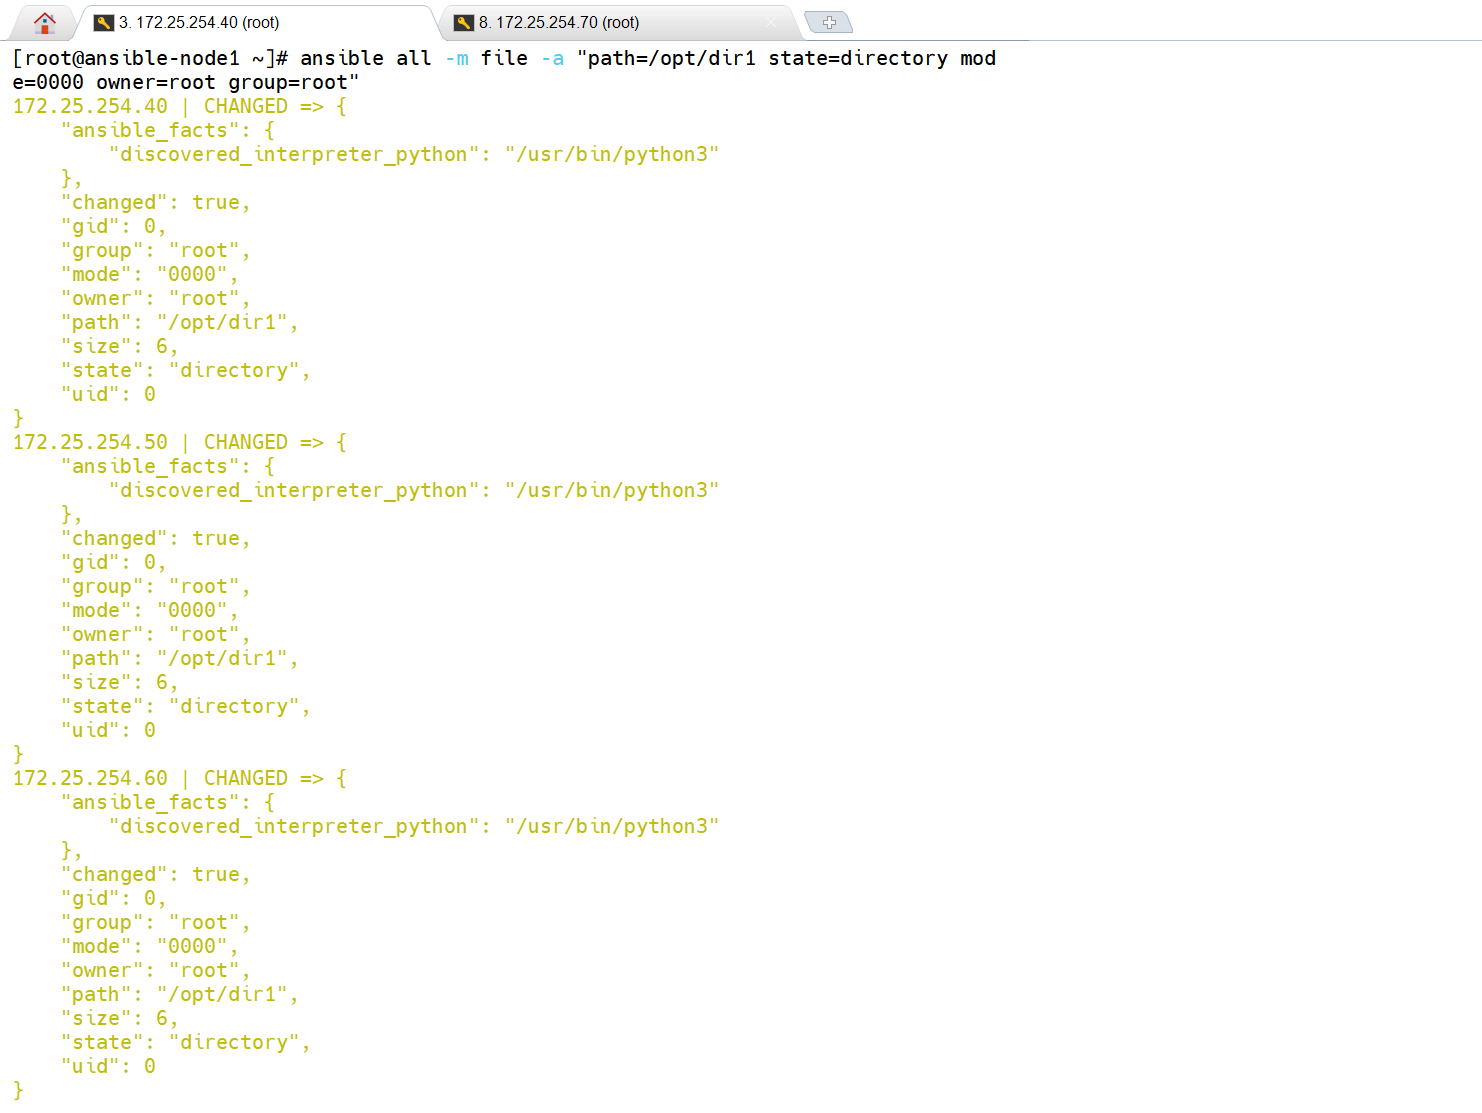
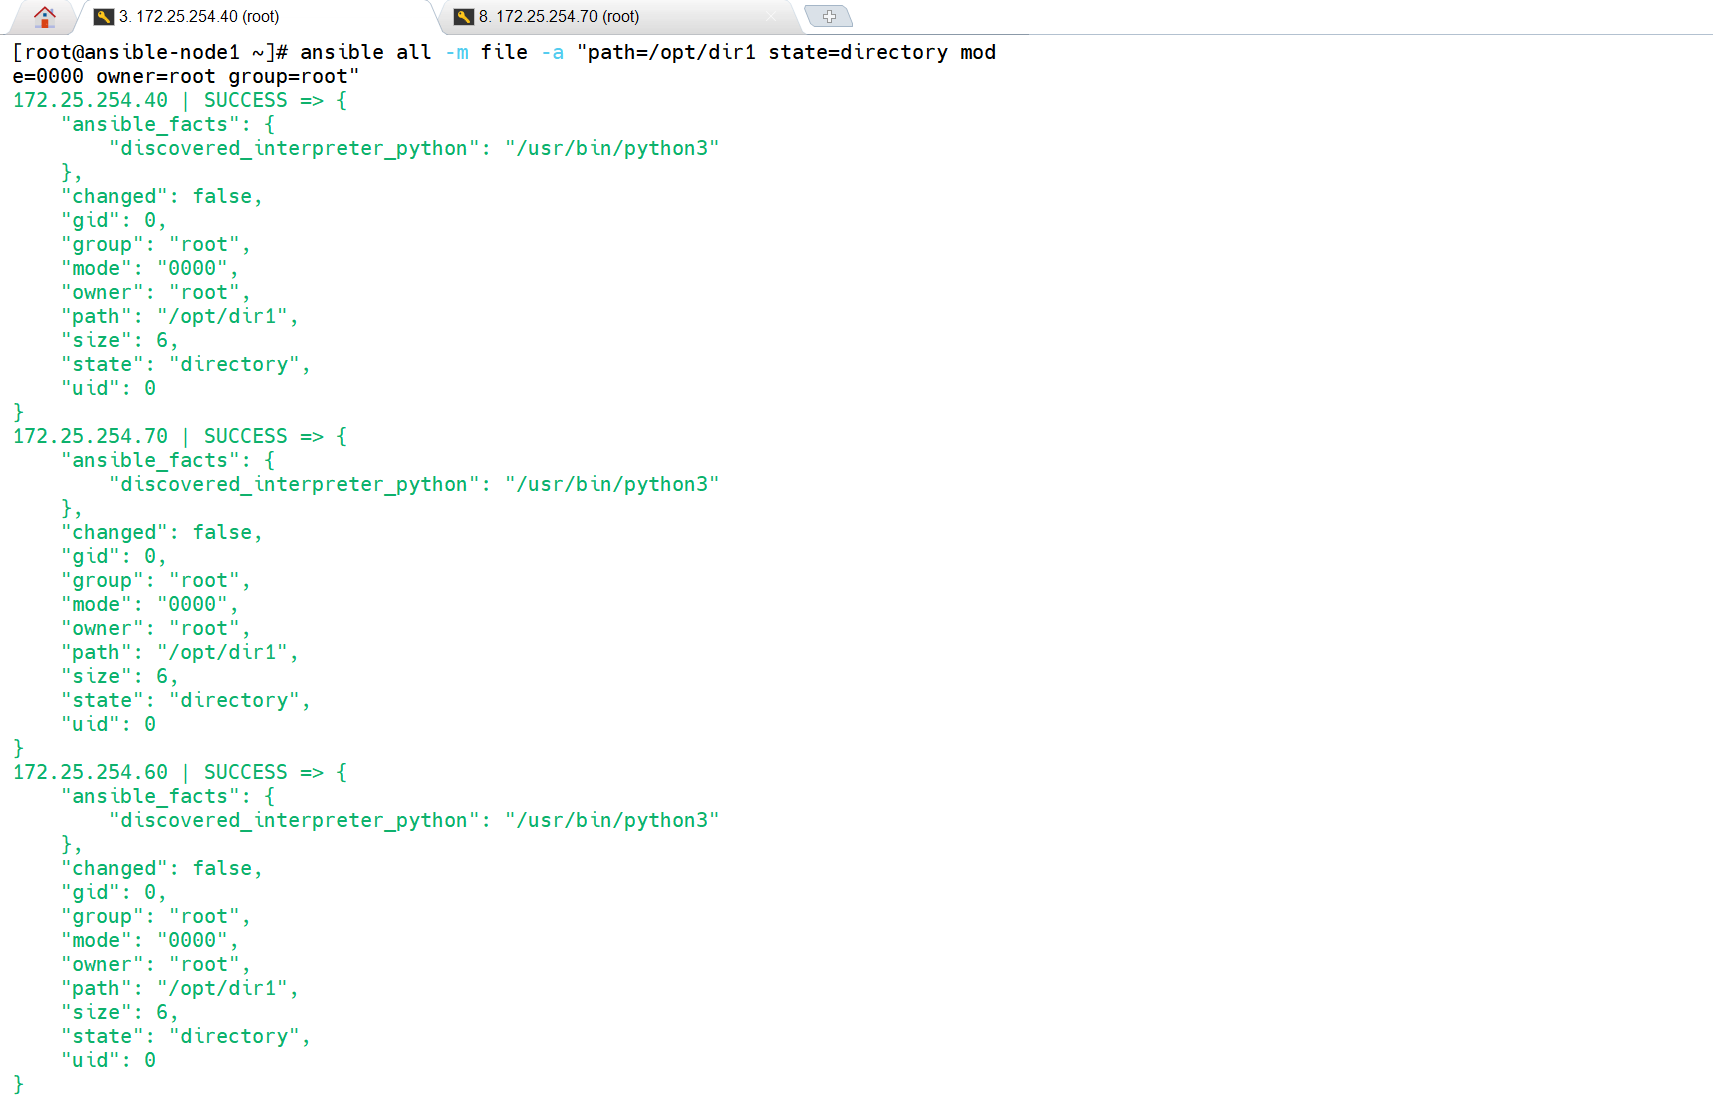
(4)state=directory
该命令(创建目录)对目录的行为:不存在则创建(标黄),属性不匹配则修正(标黄),匹配则标绿(无操作);
- 首次执行 :自动创建目录 + 设置权限
0000/ 属主 root → 返回CHANGED(黄色);- 第二次执行 :目录已存在且属性完全匹配 → 返回
SUCCESS(绿色);- 核心:仅首次创建 / 修正属性标黄,后续永久标绿(无任何操作,不碰时间戳)。
cpp
# 建立目录
[root@ansible-node1 ~]# ansible all -m file -a "path=/opt/dir1 state=directory mode=0000 owner=root group=root"
172.25.254.40 | CHANGED => {
    "ansible_facts": {
        "discovered_interpreter_python": "/usr/bin/python3"
    },
    "changed": true,
    "gid": 0,
    "group": "root",
    "mode": "0000",
    "owner": "root",
    "path": "/opt/dir1",
    "size": 6,
    "state": "directory",
    "uid": 0
}
172.25.254.50 | CHANGED => {
    "ansible_facts": {
        "discovered_interpreter_python": "/usr/bin/python3"
    },
    "changed": true,
    "gid": 0,
    "group": "root",
    "mode": "0000",
    "owner": "root",
    "path": "/opt/dir1",
    "size": 6,
    "state": "directory",
    "uid": 0
}
172.25.254.60 | CHANGED => {
    "ansible_facts": {
        "discovered_interpreter_python": "/usr/bin/python3"
    },
    "changed": true,
    "gid": 0,
    "group": "root",
    "mode": "0000",
    "owner": "root",
    "path": "/opt/dir1",
    "size": 6,
    "state": "directory",
    "uid": 0
}
172.25.254.70 | CHANGED => {
    "ansible_facts": {
        "discovered_interpreter_python": "/usr/bin/python3"
    },
    "changed": true,
    "gid": 0,
    "group": "root",
    "mode": "0000",
    "owner": "root",
    "path": "/opt/dir1",
    "size": 6,
    "state": "directory",
    "uid": 0
}

# 查看
[root@ansible-node4 ~]# ll /opt
总用量 0
d--------- 2 root root 6  3月 16 16:03 dir1
---------- 1 root root 0  3月 16 15:29 file1.txt

# 再执行一次
[root@ansible-node1 ~]# ansible all -m file -a "path=/opt/dir1 state=directory mode=0000 owner=root group=root"
172.25.254.40 | SUCCESS => {
    "ansible_facts": {
        "discovered_interpreter_python": "/usr/bin/python3"
    },
    "changed": false,
    "gid": 0,
    "group": "root",
    "mode": "0000",
    "owner": "root",
    "path": "/opt/dir1",
    "size": 6,
    "state": "directory",
    "uid": 0
}
172.25.254.70 | SUCCESS => {
    "ansible_facts": {
        "discovered_interpreter_python": "/usr/bin/python3"
    },
    "changed": false,
    "gid": 0,
    "group": "root",
    "mode": "0000",
    "owner": "root",
    "path": "/opt/dir1",
    "size": 6,
    "state": "directory",
    "uid": 0
}
172.25.254.60 | SUCCESS => {
    "ansible_facts": {
        "discovered_interpreter_python": "/usr/bin/python3"
    },
    "changed": false,
    "gid": 0,
    "group": "root",
    "mode": "0000",
    "owner": "root",
    "path": "/opt/dir1",
    "size": 6,
    "state": "directory",
    "uid": 0
}
172.25.254.50 | SUCCESS => {
    "ansible_facts": {
        "discovered_interpreter_python": "/usr/bin/python3"
    },
    "changed": false,
    "gid": 0,
    "group": "root",
    "mode": "0000",
    "owner": "root",
    "path": "/opt/dir1",
    "size": 6,
    "state": "directory",
    "uid": 0
}
(5)删除文件与目录
cpp
# 删除文件file1.txt,此时是黄色的
[root@ansible-node1 ~]# ansible all -m file -a "path=/opt/file1.txt state=absent"
172.25.254.40 | CHANGED => {
"ansible_facts": {
"discovered_interpreter_python": "/usr/bin/python3"
},
"changed": true,
"path": "/opt/file1.txt",
"state": "absent"
}
172.25.254.50 | CHANGED => {
"ansible_facts": {
"discovered_interpreter_python": "/usr/bin/python3"
},
"changed": true,
"path": "/opt/file1.txt",
"state": "absent"
}
172.25.254.60 | CHANGED => {
"ansible_facts": {
"discovered_interpreter_python": "/usr/bin/python3"
},
"changed": true,
"path": "/opt/file1.txt",
"state": "absent"
}
172.25.254.70 | CHANGED => {
"ansible_facts": {
"discovered_interpreter_python": "/usr/bin/python3"
},
"changed": true,
"path": "/opt/file1.txt",
"state": "absent"
}
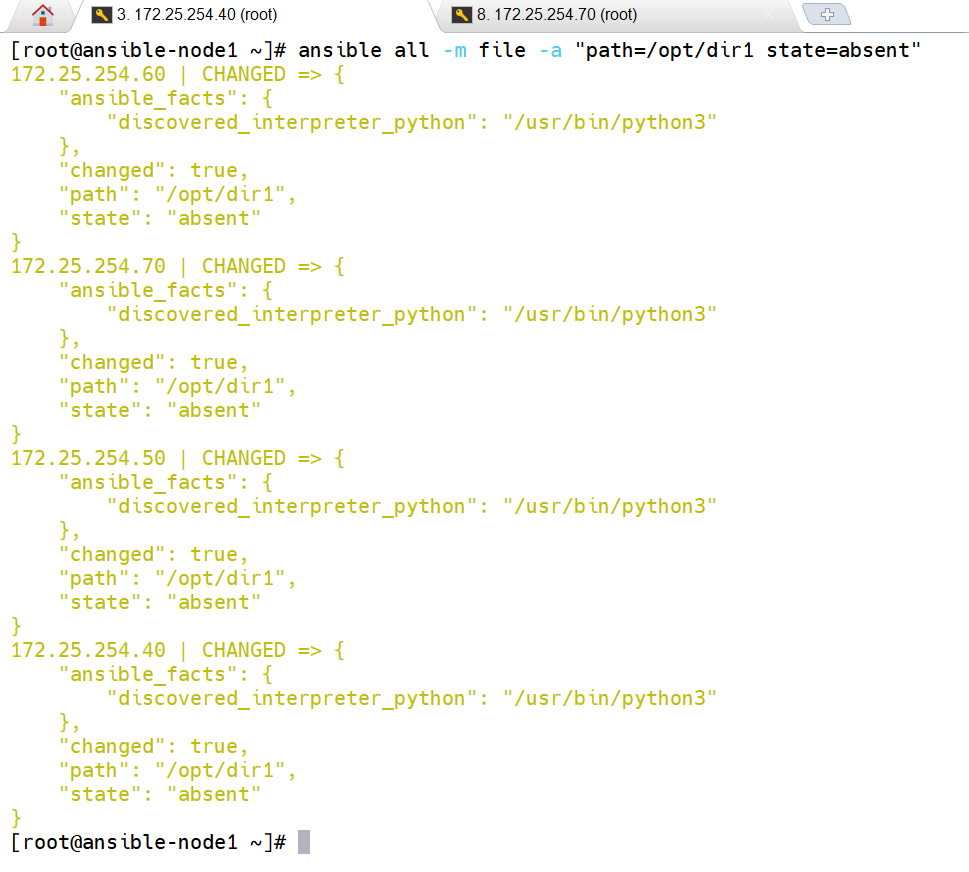
# 删除目录
[root@ansible-node1 ~]# ansible all -m file -a "path=/opt/dir1 state=absent"
172.25.254.60 | CHANGED => {
"ansible_facts": {
"discovered_interpreter_python": "/usr/bin/python3"
},
"changed": true,
"path": "/opt/dir1",
"state": "absent"
}
172.25.254.70 | CHANGED => {
"ansible_facts": {
"discovered_interpreter_python": "/usr/bin/python3"
},
"changed": true,
"path": "/opt/dir1",
"state": "absent"
}
172.25.254.50 | CHANGED => {
"ansible_facts": {
"discovered_interpreter_python": "/usr/bin/python3"
},
"changed": true,
"path": "/opt/dir1",
"state": "absent"
}
172.25.254.40 | CHANGED => {
"ansible_facts": {
"discovered_interpreter_python": "/usr/bin/python3"
},
"changed": true,
"path": "/opt/dir1",
"state": "absent"
}
# 检测是否删除成功:
[root@ansible-node4 ~]# ll /opt
总用量 0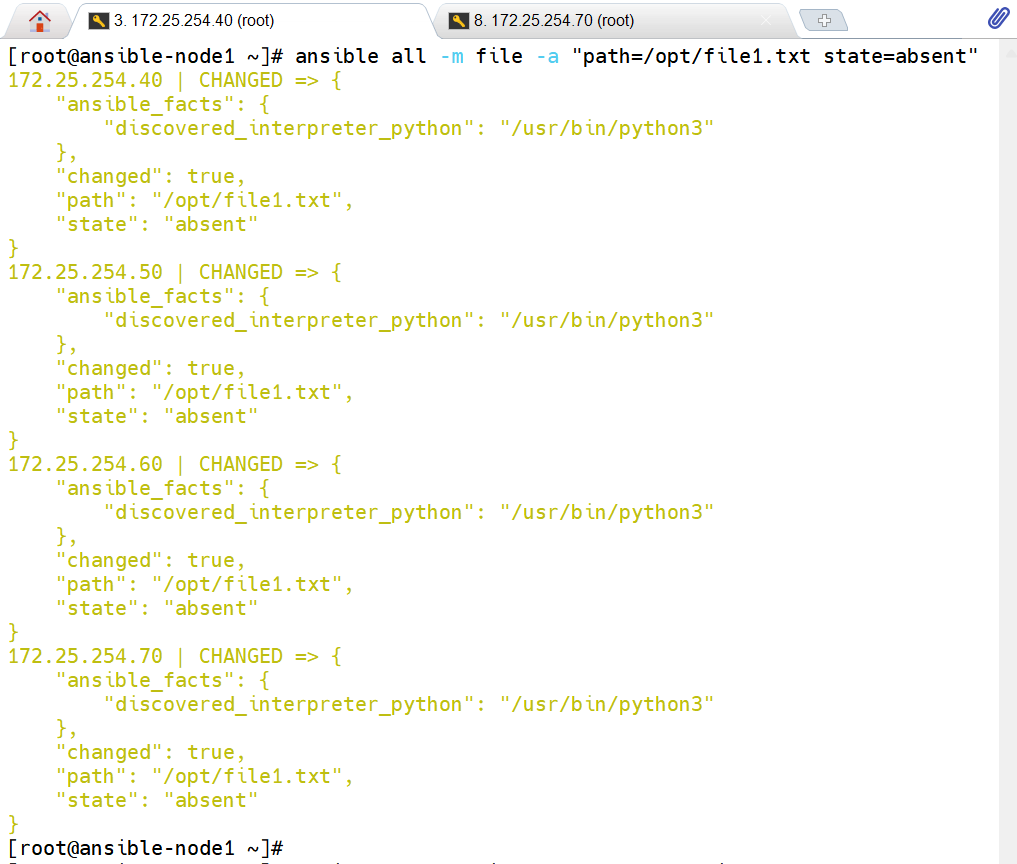
(6)递归修改整个目录权限
Ansible 黄色 = 有实际变更,绿色 = 无变更。
- 第一次执行:
/opt/dir1或其子项的权限 / 属主不匹配,Ansible 修正 → 黄色;- 第二次执行:所有属性已完全匹配,无任何修改 → 绿色。
recurse=yes 作用 :递归处理目录下所有已有子目录 / 文件 ,不仅修改
/opt/dir1本身,还会把目录内所有子项的权限 / 属主统一改成0600/root;仅对执行时已存在的子项生效,新增文件 / 目录不会自动同步。【注意】recurse是默认不启动状态的,所以如果需要进行递归操作,则需要手动进行recurse=yes
cpp
# 准备好目录
[root@ansible-node1 ~]# ansible all -m file -a "path=/opt/dir1 state=directory"
172.25.254.40 | CHANGED => {
"ansible_facts": {
"discovered_interpreter_python": "/usr/bin/python3"
},
"changed": true,
"gid": 0,
"group": "root",
"mode": "0755",
"owner": "root",
"path": "/opt/dir1",
"size": 6,
"state": "directory",
"uid": 0
}
172.25.254.70 | CHANGED => {
"ansible_facts": {
"discovered_interpreter_python": "/usr/bin/python3"
},
"changed": true,
"gid": 0,
"group": "root",
"mode": "0755",
"owner": "root",
"path": "/opt/dir1",
"size": 6,
"state": "directory",
"uid": 0
}
172.25.254.60 | CHANGED => {
"ansible_facts": {
"discovered_interpreter_python": "/usr/bin/python3"
},
"changed": true,
"gid": 0,
"group": "root",
"mode": "0755",
"owner": "root",
"path": "/opt/dir1",
"size": 6,
"state": "directory",
"uid": 0
}
172.25.254.50 | CHANGED => {
"ansible_facts": {
"discovered_interpreter_python": "/usr/bin/python3"
},
"changed": true,
"gid": 0,
"group": "root",
"mode": "0755",
"owner": "root",
"path": "/opt/dir1",
"size": 6,
"state": "directory",
"uid": 0
}
# 准备好文件,注意和之前的命令是不一样的,文件建立在/opt/dir1/下
[root@ansible-node1 ~]# ansible all -m file -a "path=/opt/dir1/file1.txt state=touch"
172.25.254.60 | CHANGED => {
"ansible_facts": {
"discovered_interpreter_python": "/usr/bin/python3"
},
"changed": true,
"dest": "/opt/dir1/file1.txt",
"gid": 0,
"group": "root",
"mode": "0644",
"owner": "root",
"size": 0,
"state": "file",
"uid": 0
}
172.25.254.50 | CHANGED => {
"ansible_facts": {
"discovered_interpreter_python": "/usr/bin/python3"
},
"changed": true,
"dest": "/opt/dir1/file1.txt",
"gid": 0,
"group": "root",
"mode": "0644",
"owner": "root",
"size": 0,
"state": "file",
"uid": 0
}
172.25.254.70 | CHANGED => {
"ansible_facts": {
"discovered_interpreter_python": "/usr/bin/python3"
},
"changed": true,
"dest": "/opt/dir1/file1.txt",
"gid": 0,
"group": "root",
"mode": "0644",
"owner": "root",
"size": 0,
"state": "file",
"uid": 0
}
172.25.254.40 | CHANGED => {
"ansible_facts": {
"discovered_interpreter_python": "/usr/bin/python3"
},
"changed": true,
"dest": "/opt/dir1/file1.txt",
"gid": 0,
"group": "root",
"mode": "0644",
"owner": "root",
"size": 0,
"state": "file",
"uid": 0
}
# 查看初始权限
[root@ansible-node4 ~]# ll /opt/dir1/
总用量 0
-rw-r--r-- 1 root root 0 3月 16 16:18 file1.txt
# 递归修改整个目录权限(recurse属性,默认关闭状态,前面需要开启)
# 第一次同样是黄色的
[root@ansible-node1 ~]# ansible all -m file -a "path=/opt/dir1 mode=0600 owner=root group=root recurse=yes"
172.25.254.40 | CHANGED => {
"ansible_facts": {
"discovered_interpreter_python": "/usr/bin/python3"
},
"changed": true,
"gid": 0,
"group": "root",
"mode": "0600",
"owner": "root",
"path": "/opt/dir1",
"size": 23,
"state": "directory",
"uid": 0
}
172.25.254.70 | CHANGED => {
"ansible_facts": {
"discovered_interpreter_python": "/usr/bin/python3"
},
"changed": true,
"gid": 0,
"group": "root",
"mode": "0600",
"owner": "root",
"path": "/opt/dir1",
"size": 23,
"state": "directory",
"uid": 0
}
172.25.254.50 | CHANGED => {
"ansible_facts": {
"discovered_interpreter_python": "/usr/bin/python3"
},
"changed": true,
"gid": 0,
"group": "root",
"mode": "0600",
"owner": "root",
"path": "/opt/dir1",
"size": 23,
"state": "directory",
"uid": 0
}
172.25.254.60 | CHANGED => {
"ansible_facts": {
"discovered_interpreter_python": "/usr/bin/python3"
},
"changed": true,
"gid": 0,
"group": "root",
"mode": "0600",
"owner": "root",
"path": "/opt/dir1",
"size": 23,
"state": "directory",
"uid": 0
}
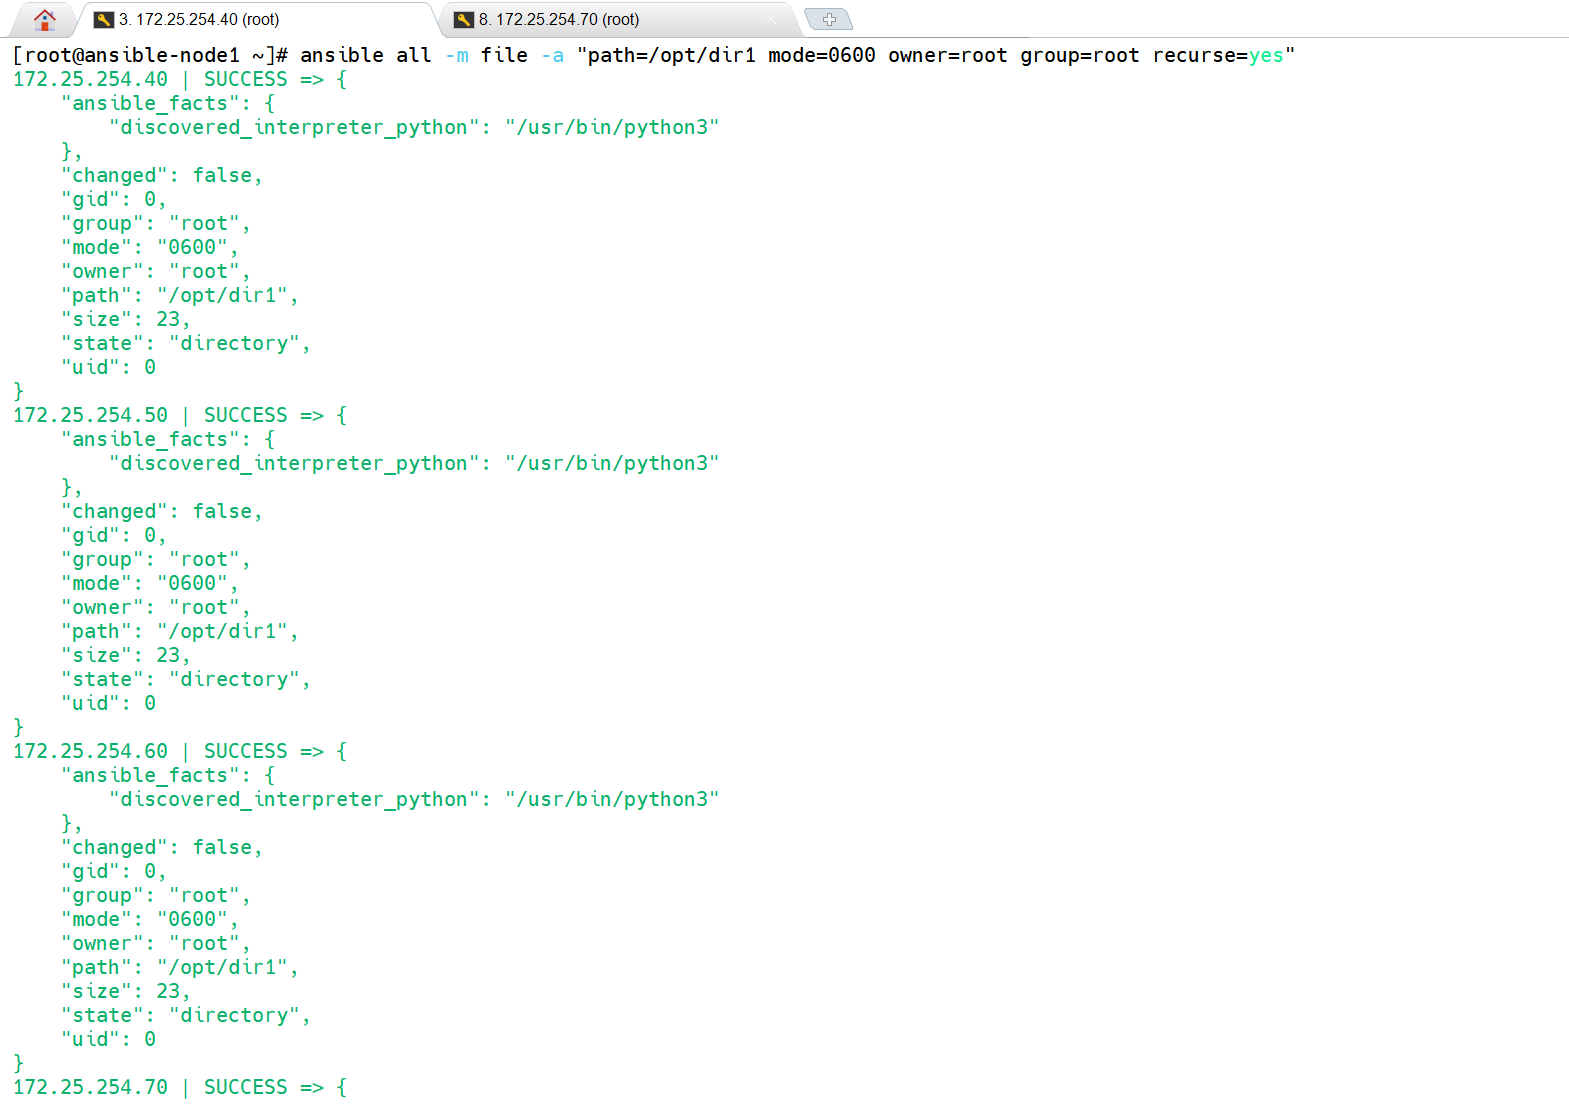
# 如果我们需要去验证他是否成功,我们就可以再次执行一次,如果是绿色的,就是大致成功的
[root@ansible-node1 ~]# ansible all -m file -a "path=/opt/dir1 mode=0600 owner=root group=root recurse=yes"
172.25.254.40 | SUCCESS => {
"ansible_facts": {
"discovered_interpreter_python": "/usr/bin/python3"
},
"changed": false,
"gid": 0,
"group": "root",
"mode": "0600",
"owner": "root",
"path": "/opt/dir1",
"size": 23,
"state": "directory",
"uid": 0
}
172.25.254.50 | SUCCESS => {
"ansible_facts": {
"discovered_interpreter_python": "/usr/bin/python3"
},
"changed": false,
"gid": 0,
"group": "root",
"mode": "0600",
"owner": "root",
"path": "/opt/dir1",
"size": 23,
"state": "directory",
"uid": 0
}
172.25.254.60 | SUCCESS => {
"ansible_facts": {
"discovered_interpreter_python": "/usr/bin/python3"
},
"changed": false,
"gid": 0,
"group": "root",
"mode": "0600",
"owner": "root",
"path": "/opt/dir1",
"size": 23,
"state": "directory",
"uid": 0
}
172.25.254.70 | SUCCESS => {
"ansible_facts": {
"discovered_interpreter_python": "/usr/bin/python3"
},
"changed": false,
"gid": 0,
"group": "root",
"mode": "0600",
"owner": "root",
"path": "/opt/dir1",
"size": 23,
"state": "directory",
"uid": 0
}
# 之后我们可以去172.25.254.70中去查看(修改成功了)
[root@ansible-node4 ~]# ll /opt/
总用量 0
drw------- 2 root root 23 3月 16 16:18 dir1
[root@ansible-node4 ~]# ll /opt/dir1/
总用量 0
-rw------- 1 root root 0 3月 16 16:18 file1.txt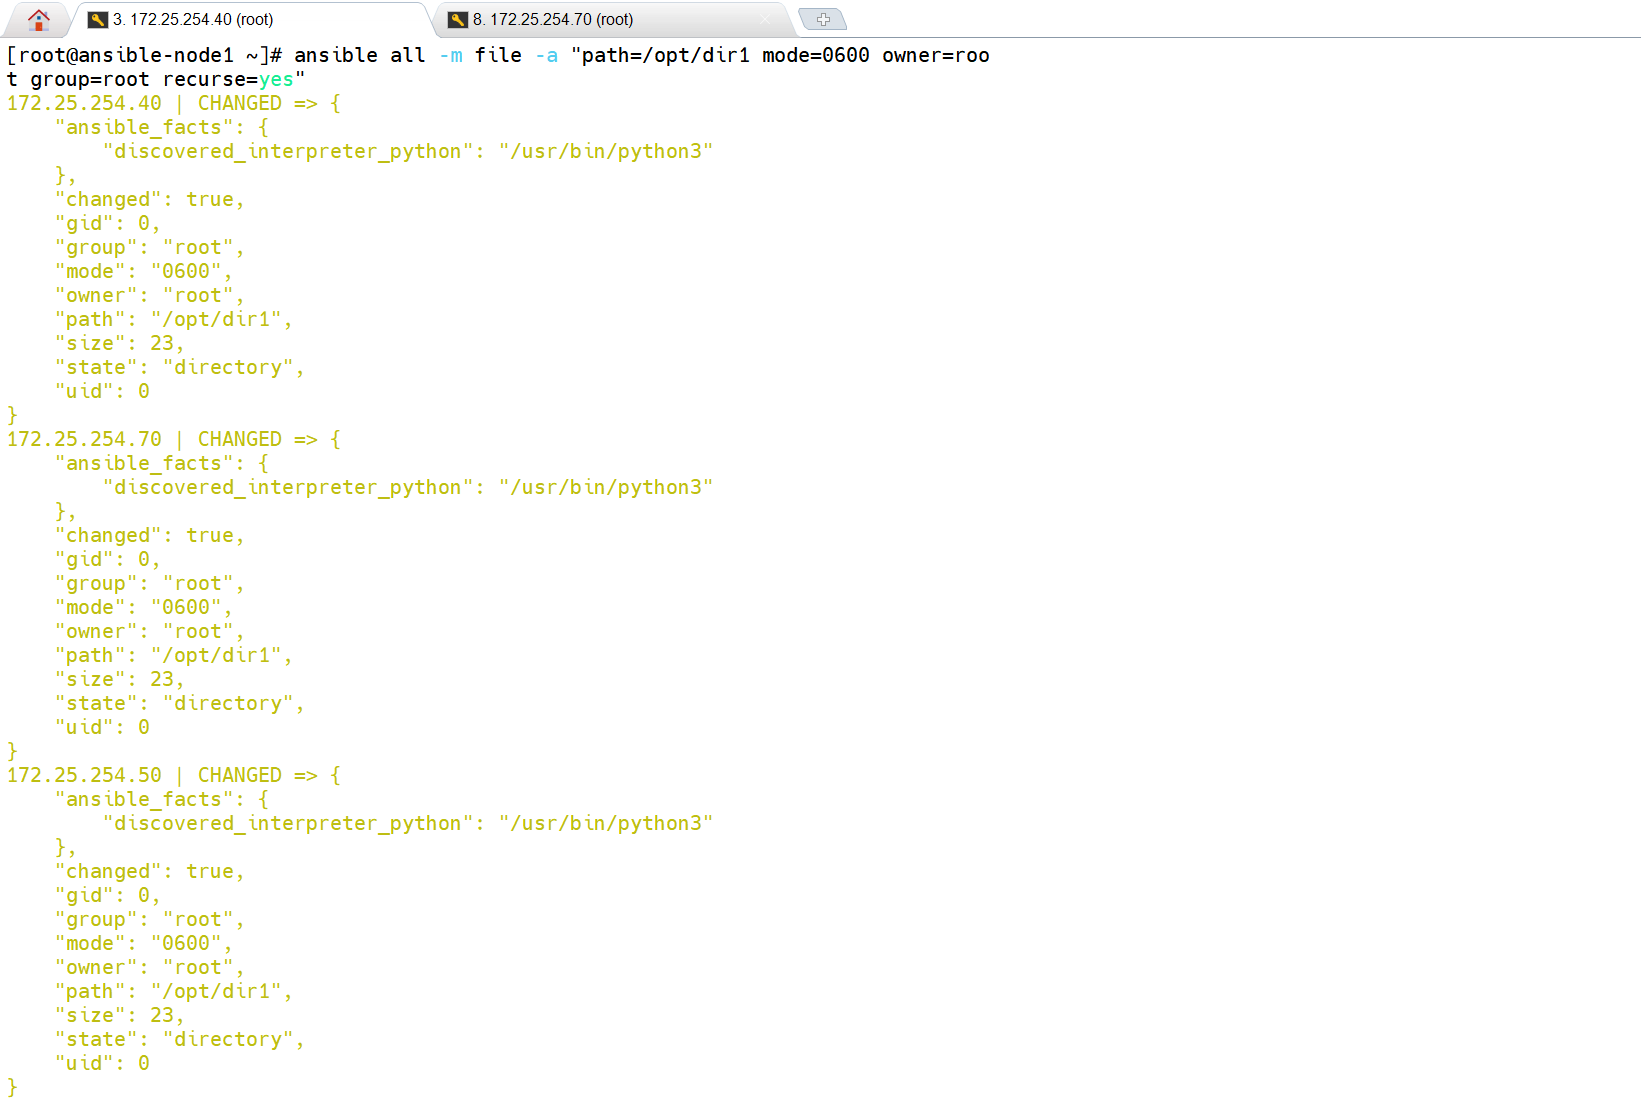
2、user模块
Ansible 的
user模块是管理远程主机系统用户 / 用户组的核心模块,支持创建 / 删除用户、设置密码、指定家目录 / 登录 Shell、管理用户组等操作,完全遵循幂等性(重复执行无变更则标绿)。
(1)核心参数
| 参数 | 作用 | 常用值 |
|---|---|---|
name(必选) |
用户名 | nginx、appuser |
state |
操作类型 | present(创建 / 修改,默认)、absent(删除) |
uid |
指定用户 UID | 1001、2000 |
gid |
指定用户主组 GID / 组名 | 1001、nginx |
groups |
指定用户附加组(逗号分隔) | root,nginx |
home |
指定用户家目录 | /home/appuser |
shell |
指定登录 Shell | /bin/bash、/sbin/nologin(禁止登录) |
password |
设置用户密码(需加密) | 加密后的密码字符串 |
create_home |
是否创建家目录 | yes(默认)、no |
remove |
删除用户时是否删家目录(仅state=absent生效) |
yes、no(默认) |
(2)创建用户
user模块默认state=present(创建 / 更新用户):
- 首次执行:远程主机上不存在 test01 用户 → Ansible 自动创建该用户(包含默认属性:默认 UID、主组、家目录
/home/test01、Shell/bin/bash)→ 产生实际变更 → 黄色;- 若二次执行仍黄:说明用户虽存在,但某属性和默认值不匹配(比如手动改了 test01 的 Shell/UID,Ansible 会修正回默认)。
cpp
# 创建用户test01,此处是代码黄色
[root@ansible-node1 ~]# ansible all -m user -a "name=test01"
172.25.254.40 | CHANGED => {
    "ansible_facts": {
        "discovered_interpreter_python": "/usr/bin/python3"
    },
    "changed": true,
    "comment": "",
    "create_home": true,
    "group": 1000,
    "home": "/home/test01",
    "name": "test01",
    "shell": "/bin/bash",
    "state": "present",
    "system": false,
    "uid": 1000
}
172.25.254.60 | CHANGED => {
    "ansible_facts": {
        "discovered_interpreter_python": "/usr/bin/python3"
    },
    "changed": true,
    "comment": "",
    "create_home": true,
    "group": 1000,
    "home": "/home/test01",
    "name": "test01",
    "shell": "/bin/bash",
    "state": "present",
    "system": false,
    "uid": 1000
}
172.25.254.70 | CHANGED => {
    "ansible_facts": {
        "discovered_interpreter_python": "/usr/bin/python3"
    },
    "changed": true,
    "comment": "",
    "create_home": true,
    "group": 1000,
    "home": "/home/test01",
    "name": "test01",
    "shell": "/bin/bash",
    "state": "present",
    "system": false,
    "uid": 1000
}
172.25.254.50 | CHANGED => {
    "ansible_facts": {
        "discovered_interpreter_python": "/usr/bin/python3"
    },
    "changed": true,
    "comment": "",
    "create_home": true,
    "group": 1000,
    "home": "/home/test01",
    "name": "test01",
    "shell": "/bin/bash",
    "state": "present",
    "system": false,
    "uid": 1000
}

# 查看用户
[root@ansible-node4 ~]# cat /etc/passwd
root:x:0:0:root:/root:/bin/bash
bin:x:1:1:bin:/bin:/sbin/nologin
daemon:x:2:2:daemon:/sbin:/sbin/nologin
adm:x:3:4:adm:/var/adm:/sbin/nologin
lp:x:4:7:lp:/var/spool/lpd:/sbin/nologin
sync:x:5:0:sync:/sbin:/bin/sync
shutdown:x:6:0:shutdown:/sbin:/sbin/shutdown
halt:x:7:0:halt:/sbin:/sbin/halt
mail:x:8:12:mail:/var/spool/mail:/sbin/nologin
operator:x:11:0:operator:/root:/sbin/nologin
games:x:12:100:games:/usr/games:/sbin/nologin
ftp:x:14:50:FTP User:/var/ftp:/sbin/nologin
nobody:x:65534:65534:Kernel Overflow User:/:/sbin/nologin
systemd-coredump:x:999:999:systemd Core Dumper:/:/sbin/nologin
dbus:x:81:81:System message bus:/:/sbin/nologin
polkitd:x:998:998:User for polkitd:/:/sbin/nologin
sssd:x:997:996:User for sssd:/:/sbin/nologin
tss:x:59:59:Account used for TPM access:/:/usr/sbin/nologin
clevis:x:996:995:Clevis Decryption Framework unprivileged user:/var/cache/clevis:/usr/sbin/nologin
libstoragemgmt:x:994:994:daemon account for libstoragemgmt:/:/usr/sbin/nologin
setroubleshoot:x:993:993:SELinux troubleshoot server:/var/lib/setroubleshoot:/usr/sbin/nologin
sshd:x:74:74:Privilege-separated SSH:/usr/share/empty.sshd:/usr/sbin/nologin
chrony:x:992:992:chrony system user:/var/lib/chrony:/sbin/nologin
tcpdump:x:72:72::/:/sbin/nologin
apache:x:48:48:Apache:/usr/share/httpd:/sbin/nologin
test01:x:1000:1000::/home/test01:/bin/bash     # 已创建成功
(3)修改属性
修改 test01 用户,指定家目录为
/opt/test01、登录 Shell 为/sbin/nologin(禁止登录)创建与修改属性是一个状态
cpp
[root@ansible-node1 ~]# ansible all -m user -a "name=test01 home=/opt/test01 shell=/sbin/nologin"
172.25.254.40 | CHANGED => {
    "ansible_facts": {
        "discovered_interpreter_python": "/usr/bin/python3"
    },
    "append": false,
    "changed": true,
    "comment": "",
    "group": 1000,
    "home": "/opt/test01",
    "move_home": false,
    "name": "test01",
    "shell": "/sbin/nologin",
    "state": "present",
    "uid": 1000
}
172.25.254.50 | CHANGED => {
    "ansible_facts": {
        "discovered_interpreter_python": "/usr/bin/python3"
    },
    "append": false,
    "changed": true,
    "comment": "",
    "group": 1000,
    "home": "/opt/test01",
    "move_home": false,
    "name": "test01",
    "shell": "/sbin/nologin",
    "state": "present",
    "uid": 1000
}
172.25.254.70 | CHANGED => {
    "ansible_facts": {
        "discovered_interpreter_python": "/usr/bin/python3"
    },
    "append": false,
    "changed": true,
    "comment": "",
    "group": 1000,
    "home": "/opt/test01",
    "move_home": false,
    "name": "test01",
    "shell": "/sbin/nologin",
    "state": "present",
    "uid": 1000
}
172.25.254.60 | CHANGED => {
    "ansible_facts": {
        "discovered_interpreter_python": "/usr/bin/python3"
    },
    "append": false,
    "changed": true,
    "comment": "",
    "group": 1000,
    "home": "/opt/test01",
    "move_home": false,
    "name": "test01",
    "shell": "/sbin/nologin",
    "state": "present",
    "uid": 1000
}

# 查看:
[root@ansible-node4 ~]# cat /etc/passwd
root:x:0:0:root:/root:/bin/bash
bin:x:1:1:bin:/bin:/sbin/nologin
daemon:x:2:2:daemon:/sbin:/sbin/nologin
adm:x:3:4:adm:/var/adm:/sbin/nologin
lp:x:4:7:lp:/var/spool/lpd:/sbin/nologin
sync:x:5:0:sync:/sbin:/bin/sync
shutdown:x:6:0:shutdown:/sbin:/sbin/shutdown
halt:x:7:0:halt:/sbin:/sbin/halt
mail:x:8:12:mail:/var/spool/mail:/sbin/nologin
operator:x:11:0:operator:/root:/sbin/nologin
games:x:12:100:games:/usr/games:/sbin/nologin
ftp:x:14:50:FTP User:/var/ftp:/sbin/nologin
nobody:x:65534:65534:Kernel Overflow User:/:/sbin/nologin
systemd-coredump:x:999:999:systemd Core Dumper:/:/sbin/nologin
dbus:x:81:81:System message bus:/:/sbin/nologin
polkitd:x:998:998:User for polkitd:/:/sbin/nologin
sssd:x:997:996:User for sssd:/:/sbin/nologin
tss:x:59:59:Account used for TPM access:/:/usr/sbin/nologin
clevis:x:996:995:Clevis Decryption Framework unprivileged user:/var/cache/clevis:/usr/sbin/nologin
libstoragemgmt:x:994:994:daemon account for libstoragemgmt:/:/usr/sbin/nologin
setroubleshoot:x:993:993:SELinux troubleshoot server:/var/lib/setroubleshoot:/usr/sbin/nologin
sshd:x:74:74:Privilege-separated SSH:/usr/share/empty.sshd:/usr/sbin/nologin
chrony:x:992:992:chrony system user:/var/lib/chrony:/sbin/nologin
tcpdump:x:72:72::/:/sbin/nologin
apache:x:48:48:Apache:/usr/share/httpd:/sbin/nologin
test01:x:1000:1000::/opt/test01:/sbin/nologin
(4)不创建家目录
ansible all -m user -a "name=test02 create_home=no"
- 执行后
/home/test02不会被创建;
cpp
# 取消生成家目录
[root@ansible-node1 ~]# ansible all -m user -a "name=test02 create_home=no"       172.25.254.40 | CHANGED => {
    "ansible_facts": {
        "discovered_interpreter_python": "/usr/bin/python3"
    },
    "changed": true,
    "comment": "",
    "create_home": false,
    "group": 1001,
    "home": "/home/test02",
    "name": "test02",
    "shell": "/bin/bash",
    "state": "present",
    "system": false,
    "uid": 1001
}
172.25.254.60 | CHANGED => {
    "ansible_facts": {
        "discovered_interpreter_python": "/usr/bin/python3"
    },
    "changed": true,
    "comment": "",
    "create_home": false,
    "group": 1001,
    "home": "/home/test02",
    "name": "test02",
    "shell": "/bin/bash",
    "state": "present",
    "system": false,
    "uid": 1001
}
172.25.254.50 | CHANGED => {
    "ansible_facts": {
        "discovered_interpreter_python": "/usr/bin/python3"
    },
    "changed": true,
    "comment": "",
    "create_home": false,
    "group": 1001,
    "home": "/home/test02",
    "name": "test02",
    "shell": "/bin/bash",
    "state": "present",
    "system": false,
    "uid": 1001
}
172.25.254.70 | CHANGED => {
    "ansible_facts": {
        "discovered_interpreter_python": "/usr/bin/python3"
    },
    "changed": true,
    "comment": "",
    "create_home": false,
    "group": 1001,
    "home": "/home/test02",
    "name": "test02",
    "shell": "/bin/bash",
    "state": "present",
    "system": false,
    "uid": 1001
}

# 查看是否创建test02成功
[root@ansible-node4 ~]# cat /etc/passwd
root:x:0:0:root:/root:/bin/bash
bin:x:1:1:bin:/bin:/sbin/nologin
daemon:x:2:2:daemon:/sbin:/sbin/nologin
adm:x:3:4:adm:/var/adm:/sbin/nologin
lp:x:4:7:lp:/var/spool/lpd:/sbin/nologin
sync:x:5:0:sync:/sbin:/bin/sync
shutdown:x:6:0:shutdown:/sbin:/sbin/shutdown
halt:x:7:0:halt:/sbin:/sbin/halt
mail:x:8:12:mail:/var/spool/mail:/sbin/nologin
operator:x:11:0:operator:/root:/sbin/nologin
games:x:12:100:games:/usr/games:/sbin/nologin
ftp:x:14:50:FTP User:/var/ftp:/sbin/nologin
nobody:x:65534:65534:Kernel Overflow User:/:/sbin/nologin
systemd-coredump:x:999:999:systemd Core Dumper:/:/sbin/nologin
dbus:x:81:81:System message bus:/:/sbin/nologin
polkitd:x:998:998:User for polkitd:/:/sbin/nologin
sssd:x:997:996:User for sssd:/:/sbin/nologin
tss:x:59:59:Account used for TPM access:/:/usr/sbin/nologin
clevis:x:996:995:Clevis Decryption Framework unprivileged user:/var/cache/clevis:/usr/sbin/nologin
libstoragemgmt:x:994:994:daemon account for libstoragemgmt:/:/usr/sbin/nologin
setroubleshoot:x:993:993:SELinux troubleshoot server:/var/lib/setroubleshoot:/usr/sbin/nologin
sshd:x:74:74:Privilege-separated SSH:/usr/share/empty.sshd:/usr/sbin/nologin
chrony:x:992:992:chrony system user:/var/lib/chrony:/sbin/nologin
tcpdump:x:72:72::/:/sbin/nologin
apache:x:48:48:Apache:/usr/share/httpd:/sbin/nologin
test01:x:1000:1000::/opt/test01:/sbin/nologin
test02:x:1001:1001::/home/test02:/bin/bash

# 再看是否生成了test02家目录,这里只有test01家目录
[root@ansible-node4 ~]# ll /home/
总用量 0
drwx------ 3 test01 test01 74  3月 16 19:55 test01
(5)删除用户
不带remove=yes,执行后:
/etc/passwd//etc/group中 test01 条目被删除(用户注销);/home/test01目录、/var/spool/mail/test01文件完全保留;- 适合 "暂时删除用户,但需保留数据" 的场景。
带remove=yes,执行后:
- 除注销用户外,会递归删除
/home/test01(含所有子文件 / 目录)、/var/spool/mail/test01;- 适合 "彻底清理用户,无需保留任何数据" 的场景(如废弃测试用户);
- ⚠️ 注意:此操作不可逆,删除前确认数据无需保留!
cpp
# 删除用户test01
[root@ansible-node1 ~]# ansible all -m user -a "name=test01 state=absent remove=yes"
172.25.254.60 | CHANGED => {
    "ansible_facts": {
        "discovered_interpreter_python": "/usr/bin/python3"
    },
    "changed": true,
    "force": false,
    "name": "test01",
    "remove": true,
    "state": "absent"
}
172.25.254.50 | CHANGED => {
    "ansible_facts": {
        "discovered_interpreter_python": "/usr/bin/python3"
    },
    "changed": true,
    "force": false,
    "name": "test01",
    "remove": true,
    "state": "absent"
}
172.25.254.70 | CHANGED => {
    "ansible_facts": {
        "discovered_interpreter_python": "/usr/bin/python3"
    },
    "changed": true,
    "force": false,
    "name": "test01",
    "remove": true,
    "state": "absent"
}
172.25.254.40 | CHANGED => {
    "ansible_facts": {
        "discovered_interpreter_python": "/usr/bin/python3"
    },
    "changed": true,
    "force": false,
    "name": "test01",
    "remove": true,
    "state": "absent"
}

# 查看
[root@ansible-node4 ~]# cat /etc/passwd
root:x:0:0:root:/root:/bin/bash
bin:x:1:1:bin:/bin:/sbin/nologin
daemon:x:2:2:daemon:/sbin:/sbin/nologin
adm:x:3:4:adm:/var/adm:/sbin/nologin
lp:x:4:7:lp:/var/spool/lpd:/sbin/nologin
sync:x:5:0:sync:/sbin:/bin/sync
shutdown:x:6:0:shutdown:/sbin:/sbin/shutdown
halt:x:7:0:halt:/sbin:/sbin/halt
mail:x:8:12:mail:/var/spool/mail:/sbin/nologin
operator:x:11:0:operator:/root:/sbin/nologin
games:x:12:100:games:/usr/games:/sbin/nologin
ftp:x:14:50:FTP User:/var/ftp:/sbin/nologin
nobody:x:65534:65534:Kernel Overflow User:/:/sbin/nologin
systemd-coredump:x:999:999:systemd Core Dumper:/:/sbin/nologin
dbus:x:81:81:System message bus:/:/sbin/nologin
polkitd:x:998:998:User for polkitd:/:/sbin/nologin
sssd:x:997:996:User for sssd:/:/sbin/nologin
tss:x:59:59:Account used for TPM access:/:/usr/sbin/nologin
clevis:x:996:995:Clevis Decryption Framework unprivileged user:/var/cache/clevis:/usr/sbin/nologin
libstoragemgmt:x:994:994:daemon account for libstoragemgmt:/:/usr/sbin/nologin
setroubleshoot:x:993:993:SELinux troubleshoot server:/var/lib/setroubleshoot:/usr/sbin/nologin
sshd:x:74:74:Privilege-separated SSH:/usr/share/empty.sshd:/usr/sbin/nologin
chrony:x:992:992:chrony system user:/var/lib/chrony:/sbin/nologin
tcpdump:x:72:72::/:/sbin/nologin
apache:x:48:48:Apache:/usr/share/httpd:/sbin/nologin
test02:x:1001:1001::/home/test02:/bin/bash

# 测试test01的家目录就不存在了
[root@ansible-node4 ~]# ll /home/
总用量 0
3、group模块
Ansible 的
group模块是管理远程主机系统用户组的核心模块,功能和user模块对应,支持创建 / 删除组、修改组 ID(GID)、管理组的状态,同样遵循幂等性(无变更则标绿)。
(1)核心参数
| 参数 | 作用 | 常用值 |
|---|---|---|
name(必选) |
组名 | testgrp、nginx |
state |
操作类型 | present(创建 / 修改,默认)、absent(删除) |
gid |
指定组的 GID(数字) | 1005、2000 |
system |
是否创建为系统组(GID 通常 < 1000) | yes、no(默认) |
(2)创建普通组
创建group01组(默认自动分配GID),此时下面自动分配GID为1002
- 首次执行:组不存在 → 创建组 → 黄色(CHANGED);
- 二次执行:组已存在 → 绿色(SUCCESS)。
cpp
# 建立group01组
[root@ansible-node1 ~]# ansible all -m group -a "name=group01 state=present"
172.25.254.40 | CHANGED => {
    "ansible_facts": {
        "discovered_interpreter_python": "/usr/bin/python3"
    },
    "changed": true,
    "gid": 1002,
    "name": "group01",
    "state": "present",
    "system": false
}
172.25.254.50 | CHANGED => {
    "ansible_facts": {
        "discovered_interpreter_python": "/usr/bin/python3"
    },
    "changed": true,
    "gid": 1002,
    "name": "group01",
    "state": "present",
    "system": false
}
172.25.254.60 | CHANGED => {
    "ansible_facts": {
        "discovered_interpreter_python": "/usr/bin/python3"
    },
    "changed": true,
    "gid": 1002,
    "name": "group01",
    "state": "present",
    "system": false
}
172.25.254.70 | CHANGED => {
    "ansible_facts": {
        "discovered_interpreter_python": "/usr/bin/python3"
    },
    "changed": true,
    "gid": 1002,
    "name": "group01",
    "state": "present",
    "system": false
}

# 查看
[root@ansible-node4 ~]# cat /etc/group
root:x:0:
bin:x:1:
daemon:x:2:
sys:x:3:
adm:x:4:
tty:x:5:
disk:x:6:
lp:x:7:
mem:x:8:
kmem:x:9:
wheel:x:10:
cdrom:x:11:
mail:x:12:
man:x:15:
dialout:x:18:
floppy:x:19:
games:x:20:
tape:x:33:
video:x:39:
ftp:x:50:
lock:x:54:
audio:x:63:
users:x:100:
nobody:x:65534:
utmp:x:22:
utempter:x:35:
input:x:104:
kvm:x:36:
render:x:105:
sgx:x:106:
systemd-journal:x:190:
systemd-coredump:x:999:
dbus:x:81:
polkitd:x:998:
printadmin:x:997:
ssh_keys:x:101:
sssd:x:996:
tss:x:59:clevis
clevis:x:995:
libstoragemgmt:x:994:
setroubleshoot:x:993:
sshd:x:74:
chrony:x:992:
slocate:x:21:
tcpdump:x:72:
apache:x:48:
test02:x:1001:
group01:x:1002:
(3)创建组并指定GID
使用原先的group01,指定GID=2222
- 若 GID 已被占用 → 执行报错(需换未使用的 GID);
- 若组已存在但 GID 不匹配 → 修正 GID → 黄色(CHANGED)。
cpp
# 指定GID为2222
[root@ansible-node1 ~]# ansible all -m group -a "name=group01 state=present gid=2222"
172.25.254.40 | CHANGED => {
    "ansible_facts": {
        "discovered_interpreter_python": "/usr/bin/python3"
    },
    "changed": true,
    "gid": 2222,
    "name": "group01",
    "state": "present",
    "system": false
}
172.25.254.70 | CHANGED => {
    "ansible_facts": {
        "discovered_interpreter_python": "/usr/bin/python3"
    },
    "changed": true,
    "gid": 2222,
    "name": "group01",
    "state": "present",
    "system": false
}
172.25.254.60 | CHANGED => {
    "ansible_facts": {
        "discovered_interpreter_python": "/usr/bin/python3"
    },
    "changed": true,
    "gid": 2222,
    "name": "group01",
    "state": "present",
    "system": false
}
172.25.254.50 | CHANGED => {
    "ansible_facts": {
        "discovered_interpreter_python": "/usr/bin/python3"
    },
    "changed": true,
    "gid": 2222,
    "name": "group01",
    "state": "present",
    "system": false
}

# 查看是否更改成功
[root@ansible-node4 ~]# cat /etc/group
root:x:0:
bin:x:1:
daemon:x:2:
sys:x:3:
adm:x:4:
tty:x:5:
disk:x:6:
lp:x:7:
mem:x:8:
kmem:x:9:
wheel:x:10:
cdrom:x:11:
mail:x:12:
man:x:15:
dialout:x:18:
floppy:x:19:
games:x:20:
tape:x:33:
video:x:39:
ftp:x:50:
lock:x:54:
audio:x:63:
users:x:100:
nobody:x:65534:
utmp:x:22:
utempter:x:35:
input:x:104:
kvm:x:36:
render:x:105:
sgx:x:106:
systemd-journal:x:190:
systemd-coredump:x:999:
dbus:x:81:
polkitd:x:998:
printadmin:x:997:
ssh_keys:x:101:
sssd:x:996:
tss:x:59:clevis
clevis:x:995:
libstoragemgmt:x:994:
setroubleshoot:x:993:
sshd:x:74:
chrony:x:992:
slocate:x:21:
tcpdump:x:72:
apache:x:48:
test02:x:1001:
group01:x:2222:
(4)创建系统组
【注意事项】
- GID 范围规范(必须遵守),系统组 / 用户的 ID 通常 < 1000
- 避免 GID 冲突(最易踩坑)
- 依赖关系:先建组,后建用户
- 不可删除被依赖的系统组
cpp
# 创建nginx系统组(GID<1000)
ansible all -m group -a "name=nginx system=yes state=present"
(5)删除组
删除group01组(仅删组,不影响组内用户)
⚠️ 注意:若组是某个用户的主组,删除会报错(需先修改用户主组)。
【注意】下面的操作是我们创建一个用户user01,此时创建了他之后,他会有一个自动创建的主组
user01(GID 默认和 UID 一致 = 3000),之后我们的操作就是将之前建立好的group01加入到user01组中但是,当我们再创建一个group02时,加入到user01中,此时group01会被group02给覆盖掉
原因:
- 核心原因是:Ansible
user模块的groups参数默认是「覆盖模式」,而非「追加模式」------ 每次指定groups=xxx,都会清空用户原有所有附加组,只保留你本次指定的组。但是如果你想要同时有两个组的话,就需要加入append=yes。
append=yes的核心作用
- 默认(无 append) :
groups=xxx→ 「覆盖」模式,清空用户所有原有附加组,只保留本次指定的组;- 加
append=yes:groups=xxx append=yes→ 「追加」模式,保留原有附加组,仅新增本次指定的组。
cpp
# 创建用户user01,uid为3000
[root@ansible-node1 ~]# ansible all -m user -a "name=user01 uid=3000"
172.25.254.60 | CHANGED => {
    "ansible_facts": {
        "discovered_interpreter_python": "/usr/bin/python3"
    },
    "changed": true,
    "comment": "",
    "create_home": true,
    "group": 3000,
    "home": "/home/user01",
    "name": "user01",
    "shell": "/bin/bash",
    "state": "present",
    "system": false,
    "uid": 3000
}
172.25.254.70 | CHANGED => {
    "ansible_facts": {
        "discovered_interpreter_python": "/usr/bin/python3"
    },
    "changed": true,
    "comment": "",
    "create_home": true,
    "group": 3000,
    "home": "/home/user01",
    "name": "user01",
    "shell": "/bin/bash",
    "state": "present",
    "system": false,
    "uid": 3000
}
172.25.254.40 | CHANGED => {
    "ansible_facts": {
        "discovered_interpreter_python": "/usr/bin/python3"
    },
    "changed": true,
    "comment": "",
    "create_home": true,
    "group": 3000,
    "home": "/home/user01",
    "name": "user01",
    "shell": "/bin/bash",
    "state": "present",
    "system": false,
    "uid": 3000
}
172.25.254.50 | CHANGED => {
    "ansible_facts": {
        "discovered_interpreter_python": "/usr/bin/python3"
    },
    "changed": true,
    "comment": "",
    "create_home": true,
    "group": 3000,
    "home": "/home/user01",
    "name": "user01",
    "shell": "/bin/bash",
    "state": "present",
    "system": false,
    "uid": 3000
}

# 查看
[root@ansible-node4 ~]# id user01
用户id=3000(user01) 组id=3000(user01) 组=3000(user01)


# 之后我们希望给user01加一个附加组group01
[root@ansible-node1 ~]# ansible all -m user -a "name=user01 groups=group01"
172.25.254.60 | CHANGED => {
    "ansible_facts": {
        "discovered_interpreter_python": "/usr/bin/python3"
    },
    "append": false,
    "changed": true,
    "comment": "",
    "group": 3000,
    "groups": "group01",
    "home": "/home/user01",
    "move_home": false,
    "name": "user01",
    "shell": "/bin/bash",
    "state": "present",
    "uid": 3000
}
172.25.254.40 | CHANGED => {
    "ansible_facts": {
        "discovered_interpreter_python": "/usr/bin/python3"
    },
    "append": false,
    "changed": true,
    "comment": "",
    "group": 3000,
    "groups": "group01",
    "home": "/home/user01",
    "move_home": false,
    "name": "user01",
    "shell": "/bin/bash",
    "state": "present",
    "uid": 3000
}
172.25.254.70 | CHANGED => {
    "ansible_facts": {
        "discovered_interpreter_python": "/usr/bin/python3"
    },
    "append": false,
    "changed": true,
    "comment": "",
    "group": 3000,
    "groups": "group01",
    "home": "/home/user01",
    "move_home": false,
    "name": "user01",
    "shell": "/bin/bash",
    "state": "present",
    "uid": 3000
}
172.25.254.50 | CHANGED => {
    "ansible_facts": {
        "discovered_interpreter_python": "/usr/bin/python3"
    },
    "append": false,
    "changed": true,
    "comment": "",
    "group": 3000,
    "groups": "group01",
    "home": "/home/user01",
    "move_home": false,
    "name": "user01",
    "shell": "/bin/bash",
    "state": "present",
    "uid": 3000
}

# 查看是否添加成功
[root@ansible-node4 ~]# id user01
用户id=3000(user01) 组id=3000(user01) 组=3000(user01),2222(group01)

# 那我们在添加一个组group02
[root@ansible-node1 ~]# ansible all -m group -a "name=group02"                    172.25.254.40 | CHANGED => {
    "ansible_facts": {
        "discovered_interpreter_python": "/usr/bin/python3"
    },
    "changed": true,
    "gid": 3001,
    "name": "group02",
    "state": "present",
    "system": false
}
172.25.254.50 | CHANGED => {
    "ansible_facts": {
        "discovered_interpreter_python": "/usr/bin/python3"
    },
    "changed": true,
    "gid": 3001,
    "name": "group02",
    "state": "present",
    "system": false
}
172.25.254.70 | CHANGED => {
    "ansible_facts": {
        "discovered_interpreter_python": "/usr/bin/python3"
    },
    "changed": true,
    "gid": 3001,
    "name": "group02",
    "state": "present",
    "system": false
}
172.25.254.60 | CHANGED => {
    "ansible_facts": {
        "discovered_interpreter_python": "/usr/bin/python3"
    },
    "changed": true,
    "gid": 3001,
    "name": "group02",
    "state": "present",
    "system": false
}

# 再把group02添加到user01组中
[root@ansible-node1 ~]# ansible all -m user -a "name=user01 groups=group02"
172.25.254.50 | CHANGED => {
    "ansible_facts": {
        "discovered_interpreter_python": "/usr/bin/python3"
    },
    "append": false,
    "changed": true,
    "comment": "",
    "group": 3000,
    "groups": "group02",
    "home": "/home/user01",
    "move_home": false,
    "name": "user01",
    "shell": "/bin/bash",
    "state": "present",
    "uid": 3000
}
172.25.254.70 | CHANGED => {
    "ansible_facts": {
        "discovered_interpreter_python": "/usr/bin/python3"
    },
    "append": false,
    "changed": true,
    "comment": "",
    "group": 3000,
    "groups": "group02",
    "home": "/home/user01",
    "move_home": false,
    "name": "user01",
    "shell": "/bin/bash",
    "state": "present",
    "uid": 3000
}
172.25.254.60 | CHANGED => {
    "ansible_facts": {
        "discovered_interpreter_python": "/usr/bin/python3"
    },
    "append": false,
    "changed": true,
    "comment": "",
    "group": 3000,
    "groups": "group02",
    "home": "/home/user01",
    "move_home": false,
    "name": "user01",
    "shell": "/bin/bash",
    "state": "present",
    "uid": 3000
}
172.25.254.40 | CHANGED => {
    "ansible_facts": {
        "discovered_interpreter_python": "/usr/bin/python3"
    },
    "append": false,
    "changed": true,
    "comment": "",
    "group": 3000,
    "groups": "group02",
    "home": "/home/user01",
    "move_home": false,
    "name": "user01",
    "shell": "/bin/bash",
    "state": "present",
    "uid": 3000
}

#查看验证,此时发现group01被group02覆盖了
[root@ansible-node4 ~]# id user01
用户id=3000(user01) 组id=3000(user01) 组=3000(user01),3001(group02)

# 但是如果你想要同时有两个组的话,就需要加入append=yes
# 此时已经知道有group02,那我们再把group01加进去
[root@ansible-node1 ~]# ansible all -m user -a "name=user01 groups=group01 append=yes"
172.25.254.50 | CHANGED => {
    "ansible_facts": {
        "discovered_interpreter_python": "/usr/bin/python3"
    },
    "append": true,
    "changed": true,
    "comment": "",
    "group": 3000,
    "groups": "group01",
    "home": "/home/user01",
    "move_home": false,
    "name": "user01",
    "shell": "/bin/bash",
    "state": "present",
    "uid": 3000
}
172.25.254.70 | CHANGED => {
    "ansible_facts": {
        "discovered_interpreter_python": "/usr/bin/python3"
    },
    "append": true,
    "changed": true,
    "comment": "",
    "group": 3000,
    "groups": "group01",
    "home": "/home/user01",
    "move_home": false,
    "name": "user01",
    "shell": "/bin/bash",
    "state": "present",
    "uid": 3000
}
172.25.254.40 | CHANGED => {
    "ansible_facts": {
        "discovered_interpreter_python": "/usr/bin/python3"
    },
    "append": true,
    "changed": true,
    "comment": "",
    "group": 3000,
    "groups": "group01",
    "home": "/home/user01",
    "move_home": false,
    "name": "user01",
    "shell": "/bin/bash",
    "state": "present",
    "uid": 3000
}
172.25.254.60 | CHANGED => {
    "ansible_facts": {
        "discovered_interpreter_python": "/usr/bin/python3"
    },
    "append": true,
    "changed": true,
    "comment": "",
    "group": 3000,
    "groups": "group01",
    "home": "/home/user01",
    "move_home": false,
    "name": "user01",
    "shell": "/bin/bash",
    "state": "present",
    "uid": 3000
}

# 之后我们就可以看到此时user01就会同时拥有两个组
[root@ansible-node4 ~]# id user01
用户id=3000(user01) 组id=3000(user01) 组=3000(user01),2222(group01),3001(group02)
4、yum模块
Ansible 的
yum模块是管理 RHEL/CentOS/Rocky Linux 等 RPM 系系统软件包的核心模块,支持安装、卸载、更新软件包,以及管理 yum 仓库(需结合yum_repository模块),完全遵循幂等性
(1)核心参数
| 参数 | 作用 | 常用值 |
|---|---|---|
name(必选) |
指定软件包名(支持版本号) | nginx、mysql-server-8.0.36、*(所有包) |
state |
操作类型 | present(安装 / 确保存在,默认)、absent(卸载)、latest(更新到最新版) |
update_cache |
执行前刷新 yum 缓存 | yes/no(默认) |
disable_gpg_check |
禁用 GPG 校验(应急用) | yes/no(默认) |
enablerepo/disablerepo |
临时启用 / 禁用指定 yum 仓库 | epel、nginx-stable |
(2)安装软件包
- 首次执行:包未安装 → 安装 → 黄色(CHANGED);
- 二次执行:包已安装 → 绿色(SUCCESS);
- 若指定版本:
name=httpd state=present(仅安装该版本,无则报错)。
cpp
# 下载httpd
[root@ansible-node1 ~]# ansible all -m yum -a "name=httpd state=present"          172.25.254.50 | SUCCESS => {
    "ansible_facts": {
        "discovered_interpreter_python": "/usr/bin/python3"
    },
    "changed": false,
    "msg": "Nothing to do",
    "rc": 0,
    "results": []
}
172.25.254.60 | SUCCESS => {
    "ansible_facts": {
        "discovered_interpreter_python": "/usr/bin/python3"
    },
    "changed": false,
    "msg": "Nothing to do",
    "rc": 0,
    "results": []
}
172.25.254.70 | SUCCESS => {
    "ansible_facts": {
        "discovered_interpreter_python": "/usr/bin/python3"
    },
    "changed": false,
    "msg": "Nothing to do",
    "rc": 0,
    "results": []
}
172.25.254.40 | SUCCESS => {
    "ansible_facts": {
        "discovered_interpreter_python": "/usr/bin/python3"
    },
    "changed": false,
    "msg": "Nothing to do",
    "rc": 0,
    "results": []
}

# 你如果我们想要看到运行命令,则通过shell命令查看
[root@ansible-node1 ~]# ansible all -m shell -a "httpd -v"
172.25.254.60 | CHANGED | rc=0 >>
Server version: Apache/2.4.62 (Red Hat Enterprise Linux)
Server built:   Jan 29 2025 00:00:00
172.25.254.70 | CHANGED | rc=0 >>
Server version: Apache/2.4.62 (Red Hat Enterprise Linux)
Server built:   Jan 29 2025 00:00:00
172.25.254.40 | CHANGED | rc=0 >>
Server version: Apache/2.4.62 (Red Hat Enterprise Linux)
Server built:   Jan 29 2025 00:00:00
172.25.254.50 | CHANGED | rc=0 >>
Server version: Apache/2.4.62 (Red Hat Enterprise Linux)
Server built:   Jan 29 2025 00:00:00
(3)安装多个软件包
同时安装httpd、wget
cpp
[root@ansible-node1 ~]# ansible all -m yum -a "name=httpd,wget state=present"
172.25.254.60 | SUCCESS => {
    "ansible_facts": {
        "discovered_interpreter_python": "/usr/bin/python3"
    },
    "changed": false,
    "msg": "Nothing to do",
    "rc": 0,
    "results": []
}
172.25.254.50 | SUCCESS => {
    "ansible_facts": {
        "discovered_interpreter_python": "/usr/bin/python3"
    },
    "changed": false,
    "msg": "Nothing to do",
    "rc": 0,
    "results": []
}
172.25.254.70 | SUCCESS => {
    "ansible_facts": {
        "discovered_interpreter_python": "/usr/bin/python3"
    },
    "changed": false,
    "msg": "Nothing to do",
    "rc": 0,
    "results": []
}
172.25.254.40 | SUCCESS => {
    "ansible_facts": {
        "discovered_interpreter_python": "/usr/bin/python3"
    },
    "changed": false,
    "msg": "Nothing to do",
    "rc": 0,
    "results": []
}
(4)更新软件包到最新版
将httpd更新到最新版(已安装则更,未装则安装)
【注意】:若想更新所有 已安装包:
name=* state=latest(谨慎使用,可能引发依赖问题)。
cpp
[root@ansible-node1 ~]# ansible all -m yum -a "name=httpd state=latest"
172.25.254.40 | SUCCESS => {
    "ansible_facts": {
        "discovered_interpreter_python": "/usr/bin/python3"
    },
    "changed": false,
    "msg": "Nothing to do",
    "rc": 0,
    "results": []
}
172.25.254.60 | SUCCESS => {
    "ansible_facts": {
        "discovered_interpreter_python": "/usr/bin/python3"
    },
    "changed": false,
    "msg": "Nothing to do",
    "rc": 0,
    "results": []
}
172.25.254.70 | SUCCESS => {
    "ansible_facts": {
        "discovered_interpreter_python": "/usr/bin/python3"
    },
    "changed": false,
    "msg": "Nothing to do",
    "rc": 0,
    "results": []
}
172.25.254.50 | SUCCESS => {
    "ansible_facts": {
        "discovered_interpreter_python": "/usr/bin/python3"
    },
    "changed": false,
    "msg": "Nothing to do",
    "rc": 0,
    "results": []
}
(5)卸载安装包
卸载httpd(保留配置文件,仅删包)
cpp
# 卸载软件包
[root@ansible-node1 ~]# ansible all -m yum -a "name=httpd state=absent"
172.25.254.60 | CHANGED => {
    "ansible_facts": {
        "discovered_interpreter_python": "/usr/bin/python3"
    },
    "changed": true,
    "msg": "",
    "rc": 0,
    "results": [
        "Removed: httpd-2.4.62-4.el9.x86_64",
        "Removed: mod_http2-2.0.26-4.el9.x86_64"
    ]
}
172.25.254.70 | CHANGED => {
    "ansible_facts": {
        "discovered_interpreter_python": "/usr/bin/python3"
    },
    "changed": true,
    "msg": "",
    "rc": 0,
    "results": [
        "Removed: httpd-2.4.62-4.el9.x86_64",
        "Removed: mod_http2-2.0.26-4.el9.x86_64"
    ]
}
172.25.254.50 | CHANGED => {
    "ansible_facts": {
        "discovered_interpreter_python": "/usr/bin/python3"
    },
    "changed": true,
    "msg": "",
    "rc": 0,
    "results": [
        "Removed: httpd-2.4.62-4.el9.x86_64",
        "Removed: mod_http2-2.0.26-4.el9.x86_64"
    ]
}
172.25.254.40 | CHANGED => {
    "ansible_facts": {
        "discovered_interpreter_python": "/usr/bin/python3"
    },
    "changed": true,
    "msg": "",
    "rc": 0,
    "results": [
        "Removed: httpd-2.4.62-4.el9.x86_64",
        "Removed: mod_http2-2.0.26-4.el9.x86_64"
    ]
}
(6)刷新缓存后安装
update_cache=yes是yum模块的参数,作用是在执行 yum 操作(安装 / 更新等)前,强制刷新远程主机的 yum 缓存 ,等价于在远程主机手动执行yum clean all && yum makecache。此处,刷新yum缓存,再安装httpd
- 可以解决仓库缓存过期
cpp
[root@ansible-node1 ~]# ansible all -m yum -a "name=httpd state=absent update_cache=yes"
172.25.254.60 | SUCCESS => {
    "ansible_facts": {
        "discovered_interpreter_python": "/usr/bin/python3"
    },
    "changed": false,
    "msg": "Nothing to do",
    "rc": 0,
    "results": []
}
172.25.254.70 | SUCCESS => {
    "ansible_facts": {
        "discovered_interpreter_python": "/usr/bin/python3"
    },
    "changed": false,
    "msg": "Nothing to do",
    "rc": 0,
    "results": []
}
172.25.254.50 | SUCCESS => {
    "ansible_facts": {
        "discovered_interpreter_python": "/usr/bin/python3"
    },
    "changed": false,
    "msg": "Nothing to do",
    "rc": 0,
    "results": []
}
172.25.254.40 | SUCCESS => {
    "ansible_facts": {
        "discovered_interpreter_python": "/usr/bin/python3"
    },
    "changed": false,
    "msg": "Nothing to do",
    "rc": 0,
    "results": []
}
5、copy模块
Ansible 的
copy模块是管理「本地文件复制到远程主机」的核心模块,支持文件复制、权限设置、内容替换、目录递归复制等,是日常运维中最常用的模块之一,完全遵循幂等性(文件无变更则标绿)。
(1)核心参数
| 参数 | 作用 | 常用值 |
|---|---|---|
src(必选) |
本地源文件 / 目录路径 | /tmp/test.txt、/opt/local_dir |
dest(必选) |
远程主机目标路径 | /opt/test.txt、/opt/remote_dir |
mode |
设置目标文件 / 目录权限 | 0644、0755(建议加引号) |
owner/group |
设置目标文件属主 / 属组 | root、nginx |
backup |
覆盖远程文件前先备份(后缀加时间戳) | yes/no(默认) |
directory_mode |
递归复制目录时,设置目录的权限(仅目录生效) | 0755 |
content |
直接写入内容到远程文件(替代 src,适合小文本) |
hello ansible |
(2)复制本地文件到远程
1、安装软件包(所有的主机都是需要安装的)
2、复制(第一次一定是黄色的,就是执行成功)
cpp
# 安装软件包,保证环境运行成功
[root@ansible-node1 ~]# yum install libselinux-python*
[root@ansible-node2 ~]# yum install libselinux-python*
[root@ansible-node3 ~]# yum install libselinux-python*
[root@ansible-node4 ~]# yum install libselinux-python*

# 之后进行复制
[root@ansible-node1 ~]# ansible all -m copy -a "src=/etc/passwd dest=/root/passwd01.txt"
172.25.254.40 | CHANGED => {
    "ansible_facts": {
        "discovered_interpreter_python": "/usr/bin/python3"
    },
    "changed": true,
    "checksum": "73cbf36f046fe05c5e259c13001195bd4d95fcde",
    "dest": "/root/passwd01.txt",
    "gid": 0,
    "group": "root",
    "md5sum": "7ce008d92bd6fed52228def60772c29c",
    "mode": "0644",
    "owner": "root",
    "size": 1388,
    "src": "/root/.ansible/tmp/ansible-tmp-1773727606.5971029-123541-182429354178700/source",
    "state": "file",
    "uid": 0
}
172.25.254.70 | CHANGED => {
    "ansible_facts": {
        "discovered_interpreter_python": "/usr/bin/python3"
    },
    "changed": true,
    "checksum": "73cbf36f046fe05c5e259c13001195bd4d95fcde",
    "dest": "/root/passwd01.txt",
    "gid": 0,
    "group": "root",
    "md5sum": "7ce008d92bd6fed52228def60772c29c",
    "mode": "0644",
    "owner": "root",
    "size": 1388,
    "src": "/root/.ansible/tmp/ansible-tmp-1773727606.6288288-123545-23244009118721/source",
    "state": "file",
    "uid": 0
}
172.25.254.60 | CHANGED => {
    "ansible_facts": {
        "discovered_interpreter_python": "/usr/bin/python3"
    },
    "changed": true,
    "checksum": "73cbf36f046fe05c5e259c13001195bd4d95fcde",
    "dest": "/root/passwd01.txt",
    "gid": 0,
    "group": "root",
    "md5sum": "7ce008d92bd6fed52228def60772c29c",
    "mode": "0644",
    "owner": "root",
    "size": 1388,
    "src": "/root/.ansible/tmp/ansible-tmp-1773727606.6460736-123543-70362185452309/source",
    "state": "file",
    "uid": 0
}
172.25.254.50 | CHANGED => {
    "ansible_facts": {
        "discovered_interpreter_python": "/usr/bin/python3"
    },
    "changed": true,
    "checksum": "73cbf36f046fe05c5e259c13001195bd4d95fcde",
    "dest": "/root/passwd01.txt",
    "gid": 0,
    "group": "root",
    "md5sum": "7ce008d92bd6fed52228def60772c29c",
    "mode": "0644",
    "owner": "root",
    "size": 1388,
    "src": "/root/.ansible/tmp/ansible-tmp-1773727606.6742706-123542-235107014812178/source",
    "state": "file",
    "uid": 0
}

# 查看是否复制成功
[root@ansible-node4 ~]# ll /root/
总用量 8
-rw-------. 1 root root 1000  1月 14 19:39 anaconda-ks.cfg
-rw-r--r--  1 root root 1388  3月 17 14:06 passwd01.txt
(3)设置文件权限和所有者
cpp
# 当然也可以进行权限(用户、组等等)设置
[root@ansible-node1 ~]# ansible all -m copy -a "src=/etc/passwd dest=/root/passwd01.txt mode=0777 owner=user01 group=user01"
172.25.254.50 | CHANGED => {
    "ansible_facts": {
        "discovered_interpreter_python": "/usr/bin/python3"
    },
    "changed": true,
    "checksum": "73cbf36f046fe05c5e259c13001195bd4d95fcde",
    "dest": "/root/passwd01.txt",
    "gid": 3000,
    "group": "user01",
    "mode": "0777",
    "owner": "user01",
    "path": "/root/passwd01.txt",
    "size": 1388,
    "state": "file",
    "uid": 3000
}
172.25.254.40 | CHANGED => {
    "ansible_facts": {
        "discovered_interpreter_python": "/usr/bin/python3"
    },
    "changed": true,
    "checksum": "73cbf36f046fe05c5e259c13001195bd4d95fcde",
    "dest": "/root/passwd01.txt",
    "gid": 3000,
    "group": "user01",
    "mode": "0777",
    "owner": "user01",
    "path": "/root/passwd01.txt",
    "size": 1388,
    "state": "file",
    "uid": 3000
}
172.25.254.70 | CHANGED => {
    "ansible_facts": {
        "discovered_interpreter_python": "/usr/bin/python3"
    },
    "changed": true,
    "checksum": "73cbf36f046fe05c5e259c13001195bd4d95fcde",
    "dest": "/root/passwd01.txt",
    "gid": 3000,
    "group": "user01",
    "mode": "0777",
    "owner": "user01",
    "path": "/root/passwd01.txt",
    "size": 1388,
    "state": "file",
    "uid": 3000
}
172.25.254.60 | CHANGED => {
    "ansible_facts": {
        "discovered_interpreter_python": "/usr/bin/python3"
    },
    "changed": true,
    "checksum": "73cbf36f046fe05c5e259c13001195bd4d95fcde",
    "dest": "/root/passwd01.txt",
    "gid": 3000,
    "group": "user01",
    "mode": "0777",
    "owner": "user01",
    "path": "/root/passwd01.txt",
    "size": 1388,
    "state": "file",
    "uid": 3000
}

# 查看
[root@ansible-node4 ~]# ll /root/
总用量 8
-rw-------. 1 root   root   1000  1月 14 19:39 anaconda-ks.cfg
-rwxrwxrwx  1 user01 user01 1388  3月 17 14:06 passwd01.txt
(4)直接创建文件内容
cpp
[root@ansible-node1 ~]# ansible all -m copy -a "content='APP_HOST=127.0.0.1' dest=/root/app.conf"
172.25.254.40 | CHANGED => {
    "ansible_facts": {
        "discovered_interpreter_python": "/usr/bin/python3"
    },
    "changed": true,
    "checksum": "335fdce0531aa3630d1ed89763eceff8e6ebc0ff",
    "dest": "/root/app.conf",
    "gid": 0,
    "group": "root",
    "md5sum": "89ddf92c2802fa21a45318becca6e894",
    "mode": "0644",
    "owner": "root",
    "size": 18,
    "src": "/root/.ansible/tmp/ansible-tmp-1773727957.4965496-125378-88715494069430/source",
    "state": "file",
    "uid": 0
}
172.25.254.60 | CHANGED => {
    "ansible_facts": {
        "discovered_interpreter_python": "/usr/bin/python3"
    },
    "changed": true,
    "checksum": "335fdce0531aa3630d1ed89763eceff8e6ebc0ff",
    "dest": "/root/app.conf",
    "gid": 0,
    "group": "root",
    "md5sum": "89ddf92c2802fa21a45318becca6e894",
    "mode": "0644",
    "owner": "root",
    "size": 18,
    "src": "/root/.ansible/tmp/ansible-tmp-1773727957.5140765-125380-120056811524828/source",
    "state": "file",
    "uid": 0
}
172.25.254.70 | CHANGED => {
    "ansible_facts": {
        "discovered_interpreter_python": "/usr/bin/python3"
    },
    "changed": true,
    "checksum": "335fdce0531aa3630d1ed89763eceff8e6ebc0ff",
    "dest": "/root/app.conf",
    "gid": 0,
    "group": "root",
    "md5sum": "89ddf92c2802fa21a45318becca6e894",
    "mode": "0644",
    "owner": "root",
    "size": 18,
    "src": "/root/.ansible/tmp/ansible-tmp-1773727957.5442429-125381-136773539495080/source",
    "state": "file",
    "uid": 0
}
172.25.254.50 | CHANGED => {
    "ansible_facts": {
        "discovered_interpreter_python": "/usr/bin/python3"
    },
    "changed": true,
    "checksum": "335fdce0531aa3630d1ed89763eceff8e6ebc0ff",
    "dest": "/root/app.conf",
    "gid": 0,
    "group": "root",
    "md5sum": "89ddf92c2802fa21a45318becca6e894",
    "mode": "0644",
    "owner": "root",
    "size": 18,
    "src": "/root/.ansible/tmp/ansible-tmp-1773727957.500018-125379-132811081992249/source",
    "state": "file",
    "uid": 0
}

# 查看内容
[root@ansible-node4 ~]# cat /root/app.conf
APP_HOST=127.0.0.1

# 还有一种,如果你想要加备份的话
[root@ansible-node1 ~]# ansible all -m copy -a "content='APP_HOST=127.0.0.1' dest=/root/app.conf backup=yes"
172.25.254.60 | SUCCESS => {
    "ansible_facts": {
        "discovered_interpreter_python": "/usr/bin/python3"
    },
    "changed": false,
    "checksum": "335fdce0531aa3630d1ed89763eceff8e6ebc0ff",
    "dest": "/root/app.conf",
    "gid": 0,
    "group": "root",
    "mode": "0644",
    "owner": "root",
    "path": "/root/app.conf",
    "size": 18,
    "state": "file",
    "uid": 0
}
172.25.254.70 | SUCCESS => {
    "ansible_facts": {
        "discovered_interpreter_python": "/usr/bin/python3"
    },
    "changed": false,
    "checksum": "335fdce0531aa3630d1ed89763eceff8e6ebc0ff",
    "dest": "/root/app.conf",
    "gid": 0,
    "group": "root",
    "mode": "0644",
    "owner": "root",
    "path": "/root/app.conf",
    "size": 18,
    "state": "file",
    "uid": 0
}
172.25.254.50 | SUCCESS => {
    "ansible_facts": {
        "discovered_interpreter_python": "/usr/bin/python3"
    },
    "changed": false,
    "checksum": "335fdce0531aa3630d1ed89763eceff8e6ebc0ff",
    "dest": "/root/app.conf",
    "gid": 0,
    "group": "root",
    "mode": "0644",
    "owner": "root",
    "path": "/root/app.conf",
    "size": 18,
    "state": "file",
    "uid": 0
}
172.25.254.40 | SUCCESS => {
    "ansible_facts": {
        "discovered_interpreter_python": "/usr/bin/python3"
    },
    "changed": false,
    "checksum": "335fdce0531aa3630d1ed89763eceff8e6ebc0ff",
    "dest": "/root/app.conf",
    "gid": 0,
    "group": "root",
    "mode": "0644",
    "owner": "root",
    "path": "/root/app.conf",
    "size": 18,
    "state": "file",
    "uid": 0
}

# 在本机查看
[root@ansible-node1 ~]# ll /etc/passwd-
-rw-r--r--. 1 root root 1345  3月 16 20:06 /etc/passwd-

# 查看内容
[root@ansible-node1 ~]# cat /etc/passwd-
root:x:0:0:root:/root:/bin/bash
bin:x:1:1:bin:/bin:/sbin/nologin
daemon:x:2:2:daemon:/sbin:/sbin/nologin
adm:x:3:4:adm:/var/adm:/sbin/nologin
lp:x:4:7:lp:/var/spool/lpd:/sbin/nologin
sync:x:5:0:sync:/sbin:/bin/sync
shutdown:x:6:0:shutdown:/sbin:/sbin/shutdown
halt:x:7:0:halt:/sbin:/sbin/halt
mail:x:8:12:mail:/var/spool/mail:/sbin/nologin
operator:x:11:0:operator:/root:/sbin/nologin
games:x:12:100:games:/usr/games:/sbin/nologin
ftp:x:14:50:FTP User:/var/ftp:/sbin/nologin
nobody:x:65534:65534:Kernel Overflow User:/:/sbin/nologin
systemd-coredump:x:999:999:systemd Core Dumper:/:/sbin/nologin
dbus:x:81:81:System message bus:/:/sbin/nologin
polkitd:x:998:998:User for polkitd:/:/sbin/nologin
sssd:x:997:996:User for sssd:/:/sbin/nologin
tss:x:59:59:Account used for TPM access:/:/usr/sbin/nologin
clevis:x:996:995:Clevis Decryption Framework unprivileged user:/var/cache/clevis:/usr/sbin/nologin
libstoragemgmt:x:994:994:daemon account for libstoragemgmt:/:/usr/sbin/nologin
setroubleshoot:x:993:993:SELinux troubleshoot server:/var/lib/setroubleshoot:/usr/sbin/nologin
sshd:x:74:74:Privilege-separated SSH:/usr/share/empty.sshd:/usr/sbin/nologin
chrony:x:992:992:chrony system user:/var/lib/chrony:/sbin/nologin
tcpdump:x:72:72::/:/sbin/nologin
apache:x:48:48:Apache:/usr/share/httpd:/sbin/nologin
test02:x:1001:1001::/home/test02:/bin/bash
(5)单个主机复制本地文件
「从远程主机自身的
/opt/dir1复制到同一远程主机的/root目录下」(而非从 Ansible 控制节点复制)
cpp
[root@ansible-node1 ~]# ansible all -m copy -a "src=/opt/dir1 dest=/root remote_src=yes"
172.25.254.40 | CHANGED => {
    "ansible_facts": {
        "discovered_interpreter_python": "/usr/bin/python3"
    },
    "changed": true,
    "checksum": null,
    "dest": "/root/dir1",
    "gid": 0,
    "group": "root",
    "md5sum": null,
    "mode": "0600",
    "owner": "root",
    "size": 23,
    "src": "/opt/dir1",
    "state": "directory",
    "uid": 0
}
172.25.254.60 | CHANGED => {
    "ansible_facts": {
        "discovered_interpreter_python": "/usr/bin/python3"
    },
    "changed": true,
    "checksum": null,
    "dest": "/root/dir1",
    "gid": 0,
    "group": "root",
    "md5sum": null,
    "mode": "0600",
    "owner": "root",
    "size": 23,
    "src": "/opt/dir1",
    "state": "directory",
    "uid": 0
}
172.25.254.50 | CHANGED => {
    "ansible_facts": {
        "discovered_interpreter_python": "/usr/bin/python3"
    },
    "changed": true,
    "checksum": null,
    "dest": "/root/dir1",
    "gid": 0,
    "group": "root",
    "md5sum": null,
    "mode": "0600",
    "owner": "root",
    "size": 23,
    "src": "/opt/dir1",
    "state": "directory",
    "uid": 0
}
172.25.254.70 | CHANGED => {
    "ansible_facts": {
        "discovered_interpreter_python": "/usr/bin/python3"
    },
    "changed": true,
    "checksum": null,
    "dest": "/root/dir1",
    "gid": 0,
    "group": "root",
    "md5sum": null,
    "mode": "0600",
    "owner": "root",
    "size": 23,
    "src": "/opt/dir1",
    "state": "directory",
    "uid": 0
}

# 查看
[root@ansible-node4 ~]# ll /opt/
总用量 0
drw------- 2 root root 23  3月 16 16:18 dir1
[root@ansible-node4 ~]# ll /root/
总用量 12
-rw-------. 1 root   root   1000  1月 14 19:39 anaconda-ks.cfg
-rw-r--r--  1 root   root     18  3月 17 14:12 app.conf
drw-------  2 root   root     23  3月 16 16:18 dir1
-rwxrwxrwx  1 user01 user01 1388  3月 17 14:06 passwd01.txt