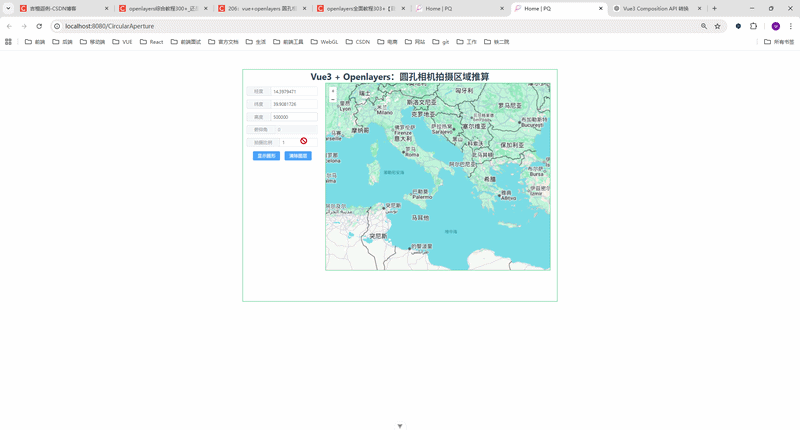
🎯 一、效果展示
实现功能:
-
输入经纬度、飞行高度
-
设置拍摄比例
-
一键绘制地面覆盖区域(圆形)
-
支持清除图层
👉 本质:根据高度推算一个地面半径
📌 二、前言
在做无人机巡检系统 / 卫星遥感 / 地图可视化项目时,经常会遇到一个问题:
👉 已知相机(或卫星)的经纬度、高度,如何推算它在地面的拍摄范围?
这篇文章,我将带你用:
-
✅ Vue3(Composition API)
-
✅ OpenLayers
-
✅ 圆孔相机简化模型
实现一个拍摄区域可视化 Demo(画圆)
🧠 三、核心原理(非常重要)
这里用的是一个简化版圆孔相机模型
📍 计算逻辑:
半径 = 高度 / 拍摄比例
即:
javascript
const r = alt / proportion📐 为什么这样算?
可以这样理解:
-
相机在高空(alt)
-
向地面拍摄
-
拍摄范围随着高度变大而扩大
👉 proportion 相当于一个"缩放系数":
| 参数 | 含义 |
|---|---|
| alt | 相机高度(米) |
| proportion | 拍摄缩放比例 |
| r | 地面覆盖半径 |
⚠️ 注意:
这个公式是工程简化模型,并不是真实物理模型(后面会讲)
🗺️ 四、核心实现思路
1️⃣ 经纬度 → 地图坐标
OpenLayers 使用的是:
EPSG:3857(墨卡托投影)
所以必须转换:
javascript
fromLonLat([lon, lat])2️⃣ 使用 Circle 绘制区域
javascript
new Circle(center, radius)3️⃣ 加入地图图层
javascript
dataSource.addFeature(feature)💻 五、完整核心代码
javascript
<!--
 * @Author: 彭麒
 * @Date: 2026/3/20
 * @Email: 1062470959@qq.com
 * @Description: 此源码版权归吉檀迦俐所有,可供学习和借鉴或商用。
 -->
<template>
  <div class="container">
    <div class="w-full flex justify-center flex-wrap">
      <div class="font-bold text-[24px]">
        Vue3 + Openlayers:圆孔相机拍摄区域推算
      </div>
    </div>
    <div class="nav">
      <el-input v-model="lon" size="small">
        <template #prepend>经度</template>
      </el-input>

      <el-input v-model="lat" size="small">
        <template #prepend>纬度</template>
      </el-input>

      <el-input v-model="alt" size="small">
        <template #prepend>高度</template>
      </el-input>

      <el-input v-model="pitch" size="small" disabled>
        <template #prepend>俯仰角</template>
      </el-input>

      <el-input v-model="proportion" size="small">
        <template #prepend>拍摄比例</template>
      </el-input>

      <el-button type="primary" size="small" @click="showCircle">
        显示圆形
      </el-button>

      <el-button type="primary" size="small" @click="clearLayer">
        清除图层
      </el-button>
    </div>

    <div id="vue-openlayers"></div>
  </div>
</template>

<script setup>
import { ref, onMounted } from 'vue'
import 'ol/ol.css'

import { Map, View } from 'ol'
import TileLayer from 'ol/layer/Tile'
import VectorLayer from 'ol/layer/Vector'
import VectorSource from 'ol/source/Vector'
import XYZ from 'ol/source/XYZ'
import Feature from 'ol/Feature'
import { Circle } from 'ol/geom'
import Style from 'ol/style/Style'
import Fill from 'ol/style/Fill'
import Stroke from 'ol/style/Stroke'
import CircleStyle from 'ol/style/Circle'
import { fromLonLat } from 'ol/proj'

const map = ref(null)

const dataSource = new VectorSource({
  wrapX: false
})

const lon = ref(16.3979471)
const lat = ref(39.9081726)
const alt = ref(500000)
const pitch = ref(0)
const proportion = ref(2)

const featureStyle = () => {
  return new Style({
    fill: new Fill({
      color: 'rgba(0,0,0,0.1)'
    }),
    stroke: new Stroke({
      width: 2,
      color: '#f00'
    }),
    image: new CircleStyle({
      radius: 3,
      fill: new Fill({
        color: '#0000ff'
      })
    })
  })
}

// 清空图层
const clearLayer = () => {
  dataSource.clear()
}

// 画圆
const showCircle = () => {
  const r = alt.value / proportion.value
  const center = fromLonLat([lon.value, lat.value])

  const circleFeature = new Feature({
    geometry: new Circle(center, r)
  })

  dataSource.addFeature(circleFeature)
}

// 初始化地图
const initMap = () => {
  const baseLayer = new TileLayer({
    source: new XYZ({
      url:
          'https://www.google.com/maps/vt?lyrs=m&gl=en&x={x}&y={y}&z={z}',
      crossOrigin: 'anonymous'
    })
  })

  const vectorLayer = new VectorLayer({
    source: dataSource,
    style: featureStyle()
  })

  map.value = new Map({
    target: 'vue-openlayers',
    layers: [baseLayer, vectorLayer],
    view: new View({
      projection: 'EPSG:3857',
      center: fromLonLat([16.5, 39.7]),
      zoom: 5
    })
  })
}

onMounted(() => {
  initMap()
})
</script>

<style scoped>
.container {
  width: 840px;
  height: 620px;
  margin: 50px auto;
  border: 1px solid #42B983;
}

#vue-openlayers {
  width: 600px;
  height: 500px;
  border: 1px solid #42B983;
  float: left;
}

.nav {
  float: left;
  width: 210px;
  height: 500px;
  margin-right: 10px;
  padding-top: 10px;
}

.nav :deep(.el-input-group) {
  width: 200px;
  padding: 0 5px;
  margin-bottom: 10px;
}
</style>
⚠️ 六、这个方案的局限性(面试加分点🔥)
很多人写到这里就结束了,但其实这是不严谨的!
❌ 问题:
这个"圆形区域"并不真实,因为:
-
没有考虑相机视场角(FOV)
-
没有考虑俯仰角(pitch)
-
忽略了地球曲率
-
忽略了投影畸变
-
实际拍摄区域是矩形而不是圆
🧠 七、真实工程中应该怎么做?
如果你是做:
👉 无人机巡检系统 / 航测 / GIS系统
建议使用:
✅ 更真实模型:
1️⃣ 相机模型(针孔相机)
2️⃣ 关键参数:
-
高度(alt)
-
视场角(FOV)
-
俯仰角(pitch)
📐 真实计算公式(核心思想)
地面宽度 ≈ 2 * alt * tan(FOV / 2)
👉 进一步:
-
pitch ≠ 0 → 区域会偏移
-
最终是一个 倾斜矩形
🚀 八、可以怎么优化升级?
你这个 Demo 可以升级成项目级能力:
🔥 升级方向:
-
✅ 圆 → 矩形(真实拍摄范围)
-
✅ 加入 pitch(倾斜摄影)
-
✅ 动态轨迹绘制(航线覆盖)
-
✅ 多点连续覆盖分析
-
✅ 热力图分析覆盖率
-
✅ WebGL 加速大数据渲染
🧩 九、总结
本文实现了:
✔ Vue3 + OpenLayers 地图搭建
✔ 经纬度转投影坐标
✔ 基于高度推算拍摄范围
✔ 使用 Circle 绘制覆盖区域
👉 核心一句话总结:
利用"高度 / 比例"简化模型,在地图上快速模拟相机拍摄范围。
💬 十、适用场景
这个方案适用于:
-
无人机巡检系统(快速预览)
-
卫星可视化
-
GIS演示系统
-
教学 Demo
🎁 十一、结语
如果你正在做:
👉 无人机 / WebGIS / 三维地图 / 数字孪生
这个思路可以作为一个基础能力模块