WPF的启动过程
因为在前面的文章中,我还没有介绍到WPF程序的启动过程,所以这里简单介绍一下WPF的启动过程
一个正常的WPF启动流程如下:
 1 public partial class App : Application
 2 {
 3     [STAThread]
 4     public static void Main()
 5     {
 6         App app = new App();
 7         app.InitializeComponent();
 8         app.Run();
 9     }
10
11     public void InitializeComponent()
12     {
13         this.StartupUri = new Uri("MainWindow.xaml",UriKind.Relative);
14     }
15 }通过设置Application.StartupUri属性来设置启动的窗口。
上述的代码是手动创建窗口时的逻辑,正常情况下,WPF已经帮我们创建好了App.xaml
并且在App.xaml中指定了StartupUri
1 <Application x:Class="WpfApp23.App"
2              xmlns="http://schemas.microsoft.com/winfx/2006/xaml/presentation"
3              xmlns:x="http://schemas.microsoft.com/winfx/2006/xaml"
4              xmlns:local="clr-namespace:WpfApp23"
5              StartupUri="MainWindow.xaml">
6     <Application.Resources>
7
8     </Application.Resources>
9 </Application>
我们可以理解为在App类完成WPF的初始化工作。
后续我会详细介绍Application类,这里仅做简单讲解,有疑问的小伙伴,可以访问下面的链接进行学习:
https://learn.microsoft.com/zh-cn/dotnet/desktop/wpf/app-development/application-management-overview
什么是Bootstrapper
在Prism中,我们会引入一个新的概念,Bootstrapper。我们也可以称之为启动器。
目前我们可以不用具体掌握它的全部职责,后面会详细介绍到。
现阶段只要了解,在使用Prism框架后,我们需要调整原来Application类的启动逻辑,以便完成一些Prism的初始化工作。
Bootstrapper的职责如下
初始化容器(Container)
Prism 基于依赖注入(DI)设计,Bootstrapper 首先会创建并配置 DI 容器(默认是 Unity/Autofac 等),这是 Prism 实现松耦合、模块化的核心。
它会自动注册 Prism 框架的核心服务(如IRegionManager、IEventAggregator),也支持你注册自定义服务。
配置模块(Module)
负责发现、加载和初始化应用的模块化组件(Module)。你可以通过 Bootstrapper 指定模块的加载方式(按需加载 / 启动时加载)、模块所在程序集等,实现模块化开发的核心逻辑。
创建并配置 Shell(主窗口)
Shell 是 WPF Prism 应用的主窗口,Bootstrapper 会从 DI 容器中解析 Shell 实例,设置为应用的主窗口,并完成窗口的初始化(如关联 RegionManager、绑定视图模型等)。
自动初始化 Prism 的关键服务
IRegionManager:管理视图区域(Region),实现视图的动态加载 / 切换;
IEventAggregator:实现模块间的无耦合通信;
IDialogService:统一管理对话框;
IModuleManager:管理模块的发现、加载、初始化。
这里的初始化是指创建对应的实例,并注入到DI容器中,这个过程是在内部进行的,不需要我们进行干预。
可以参考下面的代码
Prism-8.1.97\src\Wpf\Prism.Wpf\PrismInitializationExtensions.cs
 1 containerRegistry.RegisterSingleton<IDialogService, DialogService>();
 2 containerRegistry.RegisterSingleton<IModuleInitializer, ModuleInitializer>();
 3 containerRegistry.RegisterSingleton<IModuleManager, ModuleManager>();
 4 containerRegistry.RegisterSingleton<RegionAdapterMappings>();
 5 containerRegistry.RegisterSingleton<IRegionManager, RegionManager>();
 6 containerRegistry.RegisterSingleton<IRegionNavigationContentLoader, RegionNavigationContentLoader>();
 7 containerRegistry.RegisterSingleton<IEventAggregator, EventAggregator>();
 8 containerRegistry.RegisterSingleton<IRegionViewRegistry, RegionViewRegistry>();
 9 containerRegistry.RegisterSingleton<IRegionBehaviorFactory, RegionBehaviorFactory>();
10 containerRegistry.Register<IRegionNavigationJournalEntry, RegionNavigationJournalEntry>();
11 containerRegistry.Register<IRegionNavigationJournal, RegionNavigationJournal>();
12 containerRegistry.Register<IRegionNavigationService, RegionNavigationService>();
13 containerRegistry.Register<IDialogWindow, DialogWindow>();
启动应用
完成所有初始化后,Bootstrapper 会显示 Shell 主窗口,正式启动应用程序。
创建Bootstrapper的两种方式
方式1、代码创建Bootstrapper类
创建步骤如下:
1、创建一个Bootstrapper类
 1    public class Bootstrapper : PrismBootstrapper
 2    {
 3        protected override DependencyObject CreateShell()
 4        {
 5            return Container.Resolve<MainWindow>();
 6        }
 7
 8        protected override void RegisterTypes(IContainerRegistry containerRegistry)
 9        {
10
11        }
12 }可以看到Bootstrapper类的构成:
在Bootstrapper里重写了CreateShell和RegisterTypes两个函数
CreateShell函数的作用是创建程序外壳(主界面)
RegisterTypes的作用是注册类型到容器中(这个后面会详细介绍)
2、移除App.xaml中的StartupUri
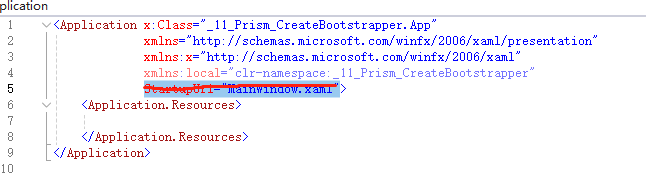
3、在App.cs中重写Startup函数,并运行Bootstrapper
 1  public partial class App : Application
 2  {
 3      protected override void OnStartup(StartupEventArgs e)
 4      {
 5          base.OnStartup(e);
 6
 7          var bootstrapper = new Bootstrapper();
 8          bootstrapper.Run();
 9      }
10  }
方式2、XAML创建PrismApplication类
创建步骤如下:
1、在App.xaml中引入命名空间前缀
1 xmlns:prism="http://prismlibrary.com/"2、将App.xaml的根节点由Application替换为prism:PrismApplication
 1 <prism:PrismApplication x:Class="Prism_CreateBootstrapper_XAML.App"
 2              xmlns="http://schemas.microsoft.com/winfx/2006/xaml/presentation"
 3              xmlns:x="http://schemas.microsoft.com/winfx/2006/xaml"
 4              xmlns:local="clr-namespace:Prism_CreateBootstrapper_XAML"
 5              xmlns:prism="http://prismlibrary.com/">
 7     <Application.Resources>
 8
 9     </Application.Resources>
10 </prism:PrismApplication>
注意:这里依旧需要移除StartupUri
3、将App类修改为继承自PrismApplication并重写函数
 1 public partial class App : PrismApplication
 2 {
 3     protected override Window CreateShell()
 4     {
 5         return Container.Resolve<MainWindow>();
 6     }
 7
 8     protected override void RegisterTypes(IContainerRegistry containerRegistry)
 9     {
10
11     }
12 }App类中的逻辑和前面创建Bootstrapper类是一样的。
在文章的开头部分我介绍了App类的内部逻辑,这种方式就是借助了原来的流程。
这样我们就拥有了一个Prism的启动器。
这两种方式根据个人需求选择其中一种即可。
下一篇文章中,我将会详细介绍Bootstrapper的职责。
示例代码
https://github.com/zhaotianff/WPF-MVVM-Beginner/tree/main/11_Prism_CreateBootstrapper