0、前言
技术栈:Nginx + 纯 HTML/CSS
1. 极低资源占用
2. 极致性能
-
直接返回静态文件,没有 PHP/数据库等中间层
-
单机轻松支撑每天几万访问量
-
响应时间通常在 10ms 以内
3. 安全性最高
-
攻击面最小(无动态脚本、无数据库)
-
几乎不需要安全更新和维护
1、部署
系统:Ubuntu 22.04.1 LTS
1.1 安装依赖
root@yyvnjarl:~# apt update
root@yyvnjarl:~# apt install -y make gcc g++
root@yyvnjarl:~# apt install -y libpcre3-dev zlib1g-dev libssl-dev
2.2 解压编译nginx
root@yyvnjarl:~# tar -xzvf nginx-1.28.2.tar.gz -C /opt/
root@yyvnjarl:/opt/nginx-1.28.2# useradd -r -s /sbin/nologin nginx
root@yyvnjarl:/opt# cd /opt/nginx-1.28.2/
编译
./configure --prefix=/usr/local/nginx \ --user=nginx \ --group=nginx \ --with-http_ssl_module \ --with-http_realip_module \ --with-http_gzip_static_module \ --with-http_stub_status_module \ --with-pcre
参数解释
- 安装路径
--prefix=/usr/local/nginxnginx 最终安装到这里,日志、配置、二进制文件都在这。
- 运行用户(必须加,安全)
--user=nginx --group=nginx让 nginx 以专用用户运行,不使用 root,更安全。
- HTTPS 支持(网站必开)
--with-http_ssl_module支持 https、证书、SSL。
- 获取真实客户端 IP(反向代理必开)
--with-http_realip_module用在 CDN / 负载均衡后面,能拿到用户真实 IP。
- 静态文件压缩优化
--with-http_gzip_static_module提前压缩好文件,nginx 直接返回,性能更高。
- 状态监控页面
--with-http_stub_status_module提供 nginx 状态页,用于监控连接数、请求数。
- 正则表达式库(必开)
--with-pcre支持 rewrite 重写规则,nginx 几乎离不开。
编译安装
root@yyvnjarl:/opt/nginx-1.28.2# make && make install
root@yyvnjarl:/usr/local# chown -R nginx:nginx /usr/local/nginx
启动
root@yyvnjarl:~# /usr/local/nginx/sbin/nginx
root@yyvnjarl:~# ss -anplt | grep nginx
LISTEN 0 511 0.0.0.0:80 0.0.0.0:* users:(("nginx",pid=58963,fd=6),("nginx",pid=58962,fd=6))
root@yyvnjarl:~# /usr/local/nginx/sbin/nginx -s stop
root@yyvnjarl:~# vi /lib/systemd/system/nginx.service
加入以下配置
Unit
Description=nginx - high performance web server
Documentation=http://nginx.org/en/docs/
After=network.target remote-fs.target nss-lookup.target
Service
Type=forking
Nginx 启动程序路径
ExecStart=/usr/local/nginx/sbin/nginx
重启命令
ExecReload=/usr/local/nginx/sbin/nginx -s reload
停止命令
ExecStop=/usr/local/nginx/sbin/nginx -s quit
重启策略
PrivateTmp=true
Install
WantedBy=multi-user.target
root@yyvnjarl:~# systemctl daemon-reloadroot@yyvnjarl:~# systemctl enable nginx
2.3 安装wordpress
root@yyvnjarl:~# apt install php8.1-fpm php8.1-mysql php8.1-xml php8.1-curl \
php8.1-mbstring php8.1-zip php8.1-gd php8.1-intl \
php8.1-imagick -y
root@yyvnjarl:~# apt install mariadb-server wget unzip curl -y
配置数据库
root@yyvnjarl:~# mysql_secure_installation
按提示操作:
- Enter current password: 回车(无密码)
- Set root password? Y/n Y
- 输入你的数据库 root 密码
- Remove anonymous users? Y/n Y
- Disallow root login remotely? Y/n Y
- Remove test database and access to it? Y/n Y
- Reload privilege tables now? Y/n Y
创建 WordPress 数据库和用户
root@yyvnjarl:~# mysql -u root
Welcome to the MariaDB monitor. Commands end with ; or \g.
Your MariaDB connection id is 42
Server version: 10.6.23-MariaDB-0ubuntu0.22.04.1 Ubuntu 22.04
Copyright (c) 2000, 2018, Oracle, MariaDB Corporation Ab and others.
Type 'help;' or '\h' for help. Type '\c' to clear the current input statement.
MariaDB (none)> CREATE DATABASE wordpress CHARACTER SET utf8mb4 COLLATE utf8mb4_unicode_ci;
Query OK, 1 row affected (0.003 sec)
MariaDB (none)> CREATE USER 'wpuser'@'localhost' IDENTIFIED BY '你的密码';
Query OK, 0 rows affected (0.002 sec)
MariaDB (none)> GRANT ALL PRIVILEGES ON wordpress.* TO 'wpuser'@'localhost';
Query OK, 0 rows affected (0.002 sec)
MariaDB (none)> FLUSH PRIVILEGES;
Query OK, 0 rows affected (0.001 sec)
MariaDB (none)> exit
Bye
root@yyvnjarl:~# cd /var/www/
root@yyvnjarl:/var/www# wget https://wordpress.org/latest.tar.gz
root@yyvnjarl:/var/www# tar -xzf latest.tar.gzroot@yyvnjarl:/var/www# chown -R www-data:www-data /var/www/wordpress
root@yyvnjarl:/var/www# chmod -R 755 /var/www/wordpress
root@yyvnjarl:/var/www# cp /usr/local/nginx/conf/nginx.conf /usr/local/nginx/conf/nginx.conf.bak
root@yyvnjarl:/var/www# vi /usr/local/nginx/conf/nginx.conf
user  www-data;
worker_processes  1;

events {
    worker_connections  1024;
}

http {
    include       mime.types;
    default_type  application/octet-stream;

    log_format  main  '$remote_addr - $remote_user [$time_local] "$request" '
                      '$status $body_bytes_sent "$http_referer" '
                      '"$http_user_agent" "$http_x_forwarded_for"';

    access_log  logs/access.log  main;
    error_log   logs/error.log;

    sendfile        on;
    keepalive_timeout  65;

    # Gzip 压缩
    gzip  on;
    gzip_vary on;
    gzip_min_length 1024;
    gzip_types text/plain text/css text/xml text/javascript
               application/javascript application/xml+rss
               application/json image/x-icon;

    # WordPress 站点配置
    server {
        listen       80;
        server_name  www.xxx.com;  # 改成你的域名
        root   /var/www/wordpress;
        index  index.php index.html index.htm;

        access_log  logs/wordpress.access.log;
        error_log   logs/wordpress.error.log;

        # WordPress 固定链接支持
        location / {
            try_files $uri $uri/ /index.php?$args;
        }

        # PHP 处理
        location ~ \.php$ {
            fastcgi_pass unix:/var/run/php/php8.1-fpm.sock;
            fastcgi_index index.php;
            fastcgi_param SCRIPT_FILENAME $document_root$fastcgi_script_name;
            fastcgi_param PATH_INFO $fastcgi_path_info;
            include fastcgi_params;
        }

        # 静态文件缓存
        location ~* \.(js|css|png|jpg|jpeg|gif|ico|svg|woff|woff2|ttf)$ {
            expires 1y;
            add_header Cache-Control "public, immutable";
            access_log off;
        }

        # 禁止访问敏感文件
        location ~ /\. {
            deny all;
        }

        location = /wp-config.php {
            deny all;
        }

        location ~ /wp-content/uploads/.*\.php$ {
            deny all;
        }
    }
}
root@yyvnjarl:/var/www# systemctl start php8.1-fpm
root@yyvnjarl:/var/www# systemctl enable php8.1-fpm
检查nginx.conf配置文件
root@yyvnjarl:/var/www# nginx -t
nginx: the configuration file /usr/local/nginx/conf/nginx.conf syntax is ok
nginx: configuration file /usr/local/nginx/conf/nginx.conf test is successful
加载配置
root@yyvnjarl:/var/www# nginx -s reload
检查服务状态
root@yyvnjarl:/var/www# systemctl status mariadb
root@yyvnjarl:/var/www# systemctl status php8.1-fpm
root@yyvnjarl:/var/www# ps aux | grep nginx
2.4 配置wordpress
访问你的ip+端口
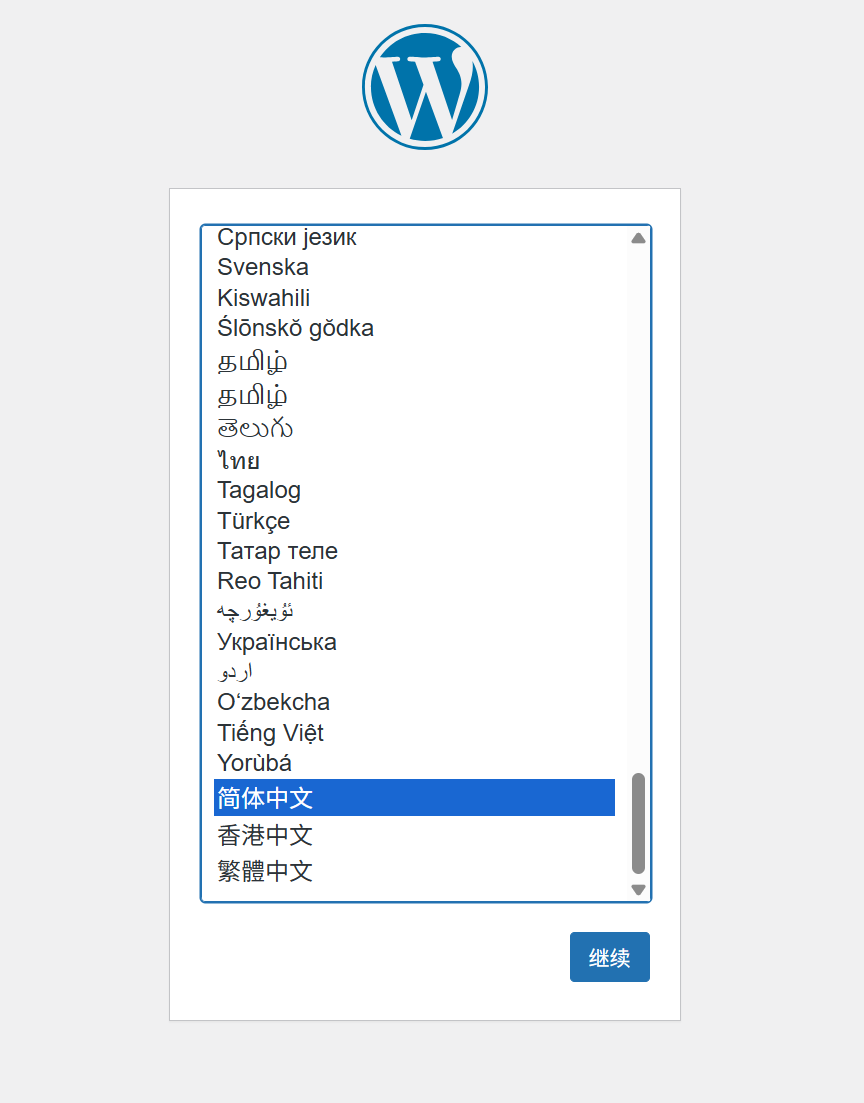
浏览器访问
http://你的ip选择语言 - 选择简体中文
填写数据库信息:
数据库名:
wordpress用户名:
wpuser密码:你设置的密码
数据库主机:
localhost表前缀:
wp_(保持默认)运行安装程序
设置站点信息:
站点标题:你的博客名称
用户名:管理员用户名
密码:设置强密码
电子邮件:你的邮箱
登录 WordPress 后台,安装以下插件:
WP Super Cache 或 W3 Total Cache - 静态缓存,大幅降低资源占用
Autoptimize - 优化 CSS/JS