上节内容是嵌套路由与路由传参。路由的传参有两方式,一是query,一是params。这节主要内容:
- 路由的props
- 路由的replace属性
- 路由编程式导航
- 路由的重定向
1、 什么是路由的props
前几节详细讲解组件的props,父组件给子组件传递参数,就是通过props。如下例:父组件将变量fish、price传递给子组件fish
<Fish :name="fish" :price="price"/>子组件通过defineProps接收参数,可在模版中直接使用
<template>
  <h2>我是子组件</h2>
  <h3>{{ name }}</h3>
  <h3>{{ price }}</h3>
</template>
<script setup lang="ts">
defineProps(['name', 'price']);
</script>
1.1路由的props
路由传参有两种方式,一是通过query,一是通过params,props就是第三种方式。用户通过点击router-link标签时,会跳转到对应的路由,此时组件被创建。是路由创建的组件。以下是路由的props的含义:
路由在创建组件时,可把路由参数通过组件的props传递给组件。
路由传递参数给组件的props,有两种方式:
- 默认传参params
- 通过函数传递自定义数据
1.2props默认传参
props默认传参是params。以父组件Fish点击路由,跳转到Fishdetail组件为例。
-
创建Fish组件传递params参数
-
创建路由,路由配置props参数为true
-
创建FishDetail组件,通过defineProps接收props参数
Fish组件代码-
{{ item.name }}
-
FishDetail组件代码
<template>
  <div>
    <h3>鱼类:{{ name }}</h3>
    <h3>id:{{ id }}</h3>
    <h3>价格:{{ price }}</h3>
  </div>
</template>
<script setup lang="ts">
defineProps(['name', 'id', 'price']);
</script>
路由代码
import { createRouter, createWebHistory } from 'vue-router'
import Fish from '@/view/Fish.vue'
import Cat from '@/view/Cat.vue'
import Bird from '@/view/Bird.vue'
import FishDetial from '@/view/FishDetial.vue'
const routes = [
  {
    name: 'fish',
    path: '/fish',
    component: Fish,
    children: [
      {
        name: 'fishdetail',
        path: 'detail/:id/:name/:price?',
        component: FishDetial,
        props:true
      }
    ]
  },
  { path: '/cat', component: Cat },
  { path: '/bird', component: Bird }, // 动态路由
]
const router = createRouter({
  history: createWebHistory(),
  routes: routes,
})
export default router
运行查看效果
对比路由params传参与props默认传参的区别
- props默认传参,在子组件中不需要通过useRoute()接收路由参数
- props默认传参,通过defineProps接收数据,可直接在模版中使用
- props默认传参,在路由中设置props为true即可
1.3路由props通过函数传递自定义数据
自定义数据可以根据需要来定义,以传递query数据为例。
路由配置:
  import { createRouter, createWebHistory } from 'vue-router'
  import Fish from '@/view/Fish.vue'
  import Cat from '@/view/Cat.vue'
  import Bird from '@/view/Bird.vue'
  import FishDetial from '@/view/FishDetial.vue'
  console.log(createRouter)
  const routes = [
    {
      name: 'fish',
      path: '/fish',
      component: Fish,
      children: [
        {
          name: 'fishdetail',
          path: 'detail',
          component: FishDetial,
          props(route: any) {
            return route.query;
          }
        }
      ]
    },
    { path: '/cat', component: Cat },
    { path: '/bird', component: Bird }, // 动态路由
  ]
  const router = createRouter({
    history: createWebHistory(),
    routes: routes,
  })
  export default router
Fish代码
<template>
  <div>
    <ul>
      <li v-for="item in fishs" :key="item.id">
        <router-link
         :to="{name:'fishdetail',query:{id:item.id,name:item.name,price:item.price}}">{{ item.name }}</router-link>
      </li>
    </ul>
    <RouterView/>
  </div>
</template>
<script setup lang="ts">
import { reactive } from 'vue';
let fishs = reactive([
  {id:'01',name:'鲫鱼',price:100},
  {id:'02',name:'草鱼',price:150},
  {id:'03',name:'鲈鱼',price:200},
])
</script>
FishDetail代码
<template>
  <div>
    <h3>鱼类:{{ name }}</h3>
    <h3>id:{{ id }}</h3>
    <h3>价格:{{ price }}</h3>
  </div>
</template>
<script setup lang="ts">
defineProps(['name', 'id', 'price']);
</script>
注意核心代码分两处,一是路由的配置,一是route-link跳转
 children: [
        {
          name: 'fishdetail',
          path: 'detail',
          component: FishDetial,
          props(route: any) {
            return route.query;
          }
        }
      ]

 <router-link
      :to="{name:'fishdetail',query:{id:item.id,name:item.name,price:item.price}}">
         {{ item.name }}
 </router-link>
2、路由的replace属性
与push相对,当点击路由进入页面时。默认是push模式,push是一个一个页面堆叠在一起,点击浏览器返回键,可返回到上一页面。replace属性则不是,它只有一个页面,当点击路由时,它替换当前页面。如下:如需要给标签加上replace即可
    <router-link replace :to="{name:'fish'}">跳转到鱼</router-link>
	<router-link replace to="/cat">跳转到猫</router-link>
    <router-link replace to="/bird">跳转到鸟</router-link>
如图,点击路由跳转时,无法后退
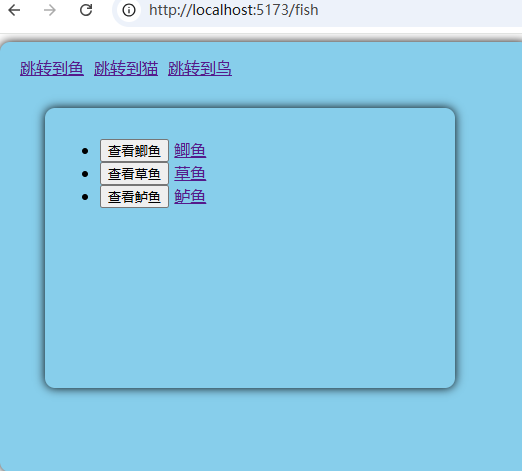
3、编程式路由导航
编程式路由导航是在开发中使用最常见的一种方式,而前边使用的router-link,实则就是a标签。
<a href="/cat" class="">跳转到鱼</a>
<router-link replace to="/cat">跳转到猫</router-link>
这两种写法等效。编程式导航是使用api跳转路由,如打开页面三秒跳转到cat页面,再如用户登录成功后跳转到个人页面。这些都需要编程式导航。
-
创建Fish组件、FishDetail
-
在Fish组件引入useRouter函数,创建路由器
router,注意与route区别 -
router使用push或者replace跳转到对应路由 -
push或者replace函数的参数与router-link中的to参数使用方法是一样的
Fish组件
FishDetail组件源码
<template>
  <div>
    <h3>鱼类:{{ name }}</h3>
    <h3>id:{{ id }}</h3>
    <h3>价格:{{ price }}</h3>
  </div>
</template>
<script setup lang="ts">
import { useRoute } from 'vue-router';
// let route = useRoute();
defineProps(['name', 'id', 'price']);
</script>
路由源码
  import { createRouter, createWebHistory } from 'vue-router'
  import Fish from '@/view/Fish.vue'
  import Cat from '@/view/Cat.vue'
  import Bird from '@/view/Bird.vue'
  import FishDetial from '@/view/FishDetial.vue'
  console.log(createRouter)
  const routes = [
    {
      name: 'fish',
      path: '/fish',
      component: Fish,
      children: [
        {
          name: 'fishdetail',
          path: 'detail',
          component: FishDetial,
          props(route: any) {
            return route.query;
          }
        }
      ]
    },
    { path: '/cat', component: Cat },
    { path: '/bird', component: Bird }, // 动态路由
  ]
  const router = createRouter({
    history: createWebHistory(),
    routes: routes,
  })
  export default router
运行查看效果:
注意对比一下router.push的参数与router-link的to参数。两者参数用法是一致的,不管路由如何配置,是使用query还是params传参还是props传参。
如下例:
 <router-link
         :to="{name:'fishdetail',query:{id:item.id,name:item.name,price:item.price}}">
         {{ item.name }}</router-link>

function goDetail(fish: any) {
  router.push({
    name: 'fishdetail',
    query:fish
  });
}
router-link的to用法与 router.push用法一致。
4、路由的重定向
路由的重定向,就是访问a路由,自动跳转到b路由。如打开主页,默认访问http://localhost:5173/,访问的路径是/,能否一打开就跳转到/fish。就用重定向来解决。
 {
    path: '/',
    redirect: '/fish'

  },
路由具体代码:
  import { createRouter, createWebHistory } from 'vue-router'
  import Fish from '@/view/Fish.vue'
  import Cat from '@/view/Cat.vue'
  import Bird from '@/view/Bird.vue'
  import FishDetial from '@/view/FishDetial.vue'
  console.log(createRouter)
const routes = [
  {
    path: '/',
    redirect: '/fish'

  },
  {
    name: 'fish',
    path: '/fish',
    component: Fish,
    children: [
      {
        name: 'fishdetail',
        path: 'detail',
        component: FishDetial,
        props(route: any) {
          return route.query;
        }
      }
    ]
  },
  { path: '/cat', component: Cat },
  { path: '/bird', component: Bird }, // 动态路由
]
  const router = createRouter({
    history: createWebHistory(),
    routes: routes,
  })
  export default router
效果是一打开页面,就重定向到fish页面