分享一个THREE.JS中无限滚动的技巧
最近在学习three.js发现了一个无限滚动的效果感觉还挺好看的故此来分享一下
本篇代码使用了
@react-three/fiber
1. 如何布局
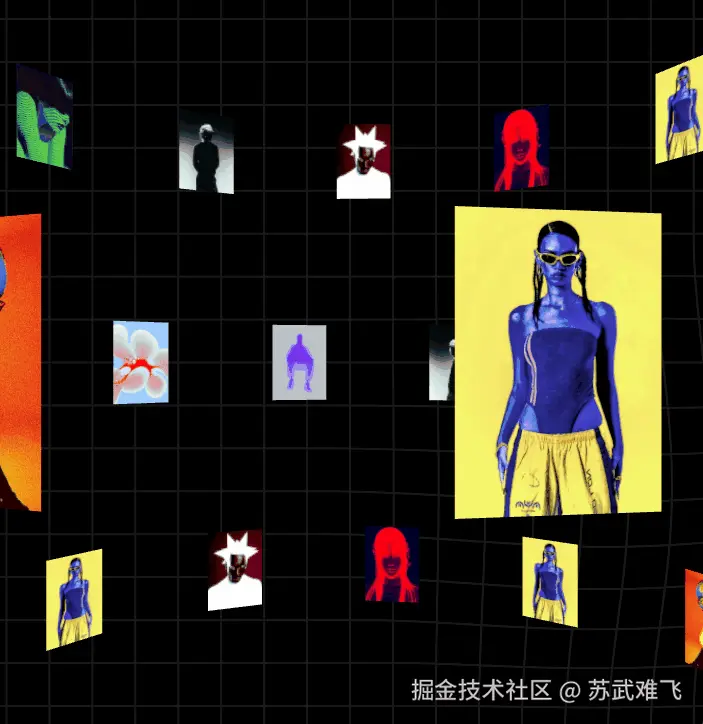
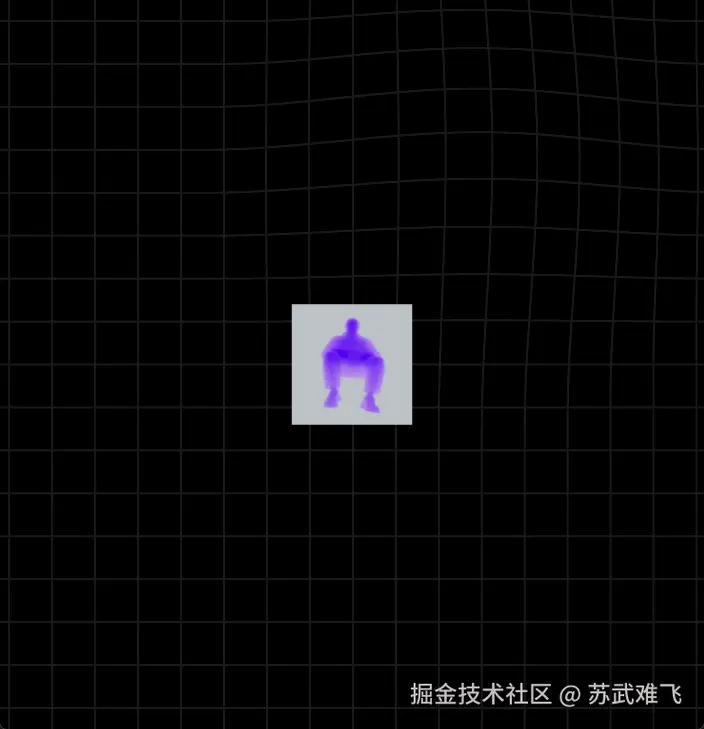
首先我们准备好我们需要的图片资源,然后直接加载到页面中心
JavaScript
function ImageTube() {

    const imageUrls = useMemo(() => [
        "/tube/im1.jpg",
        "/tube/im3.jpg",
        "/tube/im2.jpg",
        "/tube/im4.jpg",
        "/tube/im5.jpg",
        "/tube/im6.jpg",
        "/tube/im7.jpg",
        "/tube/im8.jpg",
        "/tube/im9.jpg",
    ], []);

    const textures = useTexture(imageUrls);


    return Array.from({length: imageUrls.length}).map((_, index) => {

        return (
            <mesh key={index}>
                <planeGeometry args={[1, 1]}/>
                <meshBasicMaterial map={textures[index]} toneMapped={false} side={DoubleSide}/>
            </mesh>
        );

    })
}
PlaneGeometry 参数定义表
| 参数索引 | 参数名 | 类型 | 默认值 | 功能描述 |
|---|---|---|---|---|
args[0] |
width | float |
1.0 |
平面宽度:沿 X 轴的长度。 |
args[1] |
height | float |
1.0 |
平面高度:沿 Y 轴的长度。 |
args[2] |
widthSegments | int |
1 |
水平分段:沿宽度方向将平面切分成多少个面片。 |
args[3] |
heightSegments | int |
1 |
垂直分段:沿高度方向将平面切分成多少个面片。 |
1.1 上下分开排列布局!
目前我们已经把我们所有的图片信息都加载到画面中了,下一步我们让这些图片依次从上到下排列!
核心是利用mesh的position属性来改变定位,举个例子🌰
JavaScript
return Array.from({length: imageUrls.length}).map((_, index) => {

        const tileW = 0.8;
        const tileH = 1.0;

        // 定义对角线的边界
        const startX = -width / 2 + tileW / 2;     // 屏幕左侧
        const startY = height / 2 - tileH / 2;    // 屏幕上方
        const endX = width / 2 - tileW / 2;      // 屏幕右侧
        const endY = -height / 2 + tileH / 2;   // 屏幕下方

        const count = imageUrls.length;
        const t = index / (count - 1);

        const x = startX + (endX - startX) * t;
        const y = startY + (endY - startY) * t;
        const z = 0;


        return (
            <mesh key={index} position={[x,y,z]}>
                <planeGeometry args={[tileW, tileH]}/>
                <meshBasicMaterial map={textures[index]} toneMapped={false} side={DoubleSide}/>
            </mesh>
        );

    })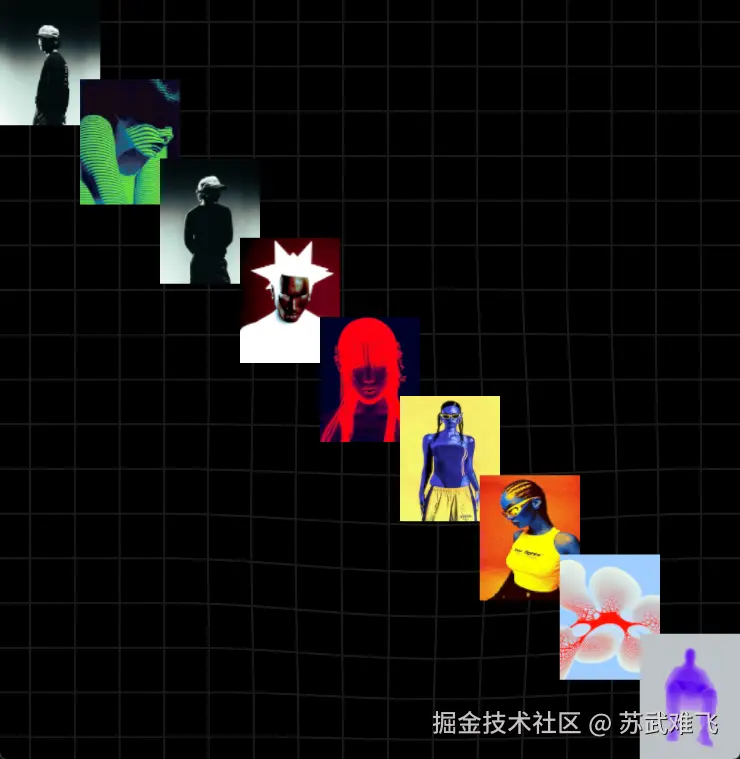
可以很直观的看到我们已经完成了一个对角线排列的图片布局!
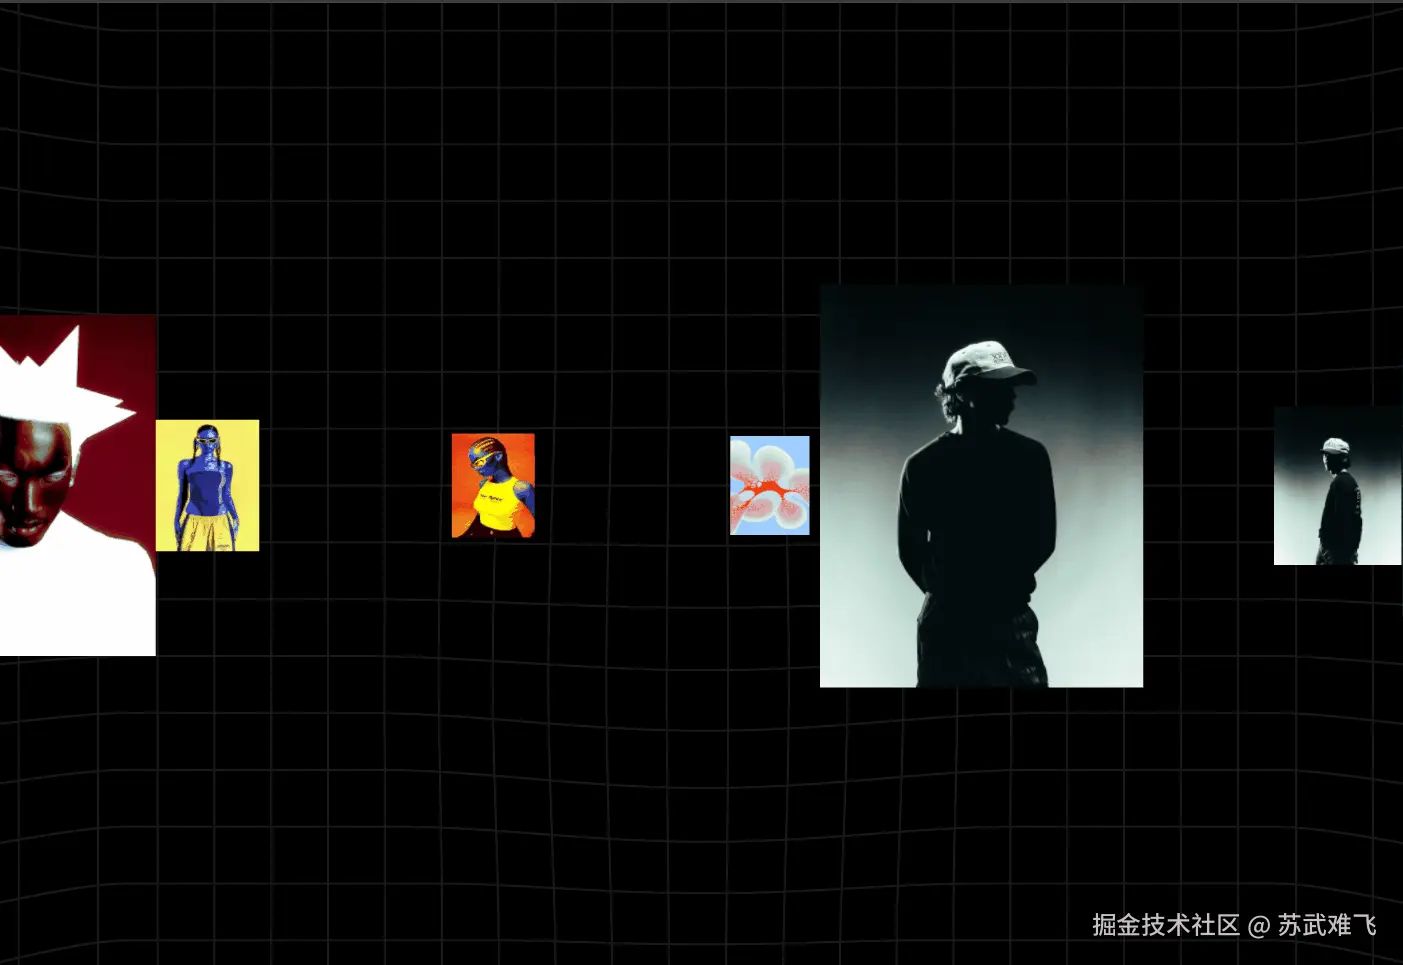
1.2 水平球形排列
经过上面的练习我们已经知道了可以通过position来排列,那么接下来我们把图片按照效果图那样排列一下!主要是用到了球坐标公式
⎩ ⎨ ⎧x=radius×cos(θ)z=radius×sin(θ)y=height
| 变量 | 名称 | 含义 | 作用 |
|---|---|---|---|
theta ( θ) |
弧度 (Radians) | 物体在圆周上的角度位置。 | 决定物体在圆圈的"几点钟方向"。 |
radius ( r) |
半径 | 物体距离圆心的距离。 | 决定圆阵的大小(圆柱体的粗细)。 |
x |
X 坐标 | 水平轴位置。 | 决定物体的左右分布。 |
z |
Z 坐标 | 深度轴位置。 | 决定物体的远近分布(产生 3D 深度感)。 |
JavaScript
 return Array.from({length: imageUrls.length}).map((_, index) => {

        const count = imageUrls.length;
        // const y = (index - (count - 1) / 2) * ySpacing;

        const radius = 4;
        const theta = (index / count - 1) * Math.PI * 2;
        const x = Math.cos(theta) * radius;
        const z = Math.sin(theta) * radius;


        return (
            <mesh key={index} position={[x, 0, z]}>
                <planeGeometry args={[tileW, tileH]}/>
                <meshBasicMaterial map={textures[index]} toneMapped={false} side={DoubleSide}/>
            </mesh>
        );

    })
1.3 引入Group上下排列
上面我们已经成功的实现了一个水平球形排列,接下来我们要把这九张图重复上下排列!这时候就有一个问题了,目前我们的x和z的计算很简单就是代入公式直接求答案,如果要上下排列那么就不再是一个单纯的圆形而是一个圆柱体形的排列,复杂度上了一个档次所以我介绍一个新的组件Group!也就是组的概念,在这个组下的所有元素都受到这个Group的影响!也就是position属性也是先根据Group再计算自身的
JavaScript
    const radius = 4;
    const tileW = 0.8;
    const tileH = 1.0;
    const ySpacing = 2.7;

    const rows = 5;
    const cols = 12;

    const rowPositions = useMemo(() => {
        const out: Array<{ rowIndex: number; y: number; baseRow: number;  }> = [];
        for (let rowIndex = 0; rowIndex < rows; rowIndex++) {
            const y = (rowIndex - (rows - 1) / 2) * ySpacing;
            const baseRow = rowIndex % rows;
            out.push({rowIndex, y, baseRow});
        }
        return out;
    }, [rows, ySpacing]);


return (
        <group>
            {rowPositions.map(({rowIndex, y, baseRow}) => (
                <group key={rowIndex} position={[0, y, 0]}>

                    {Array.from({length: cols}).map((_, col) => {
                        const theta = (col / cols) * Math.PI * 2;
                        const x = Math.cos(theta) * radius;
                        const z = Math.sin(theta) * radius;
                        const ry = -(theta + Math.PI / 2);
                        const texIndex = (baseRow * cols + col) % imageUrls.length;

                        return (
                            <mesh
                                key={col}
                                position={[x, 0, z]}
                                rotation={[0, ry, 0]}
                            >
                                <planeGeometry args={[tileW, tileH]}/>
                                <meshBasicMaterial map={textures[texIndex]} toneMapped={false} side={DoubleSide}/>
                            </mesh>
                        );
                    })}

                </group>
            ))}
        </group>
    )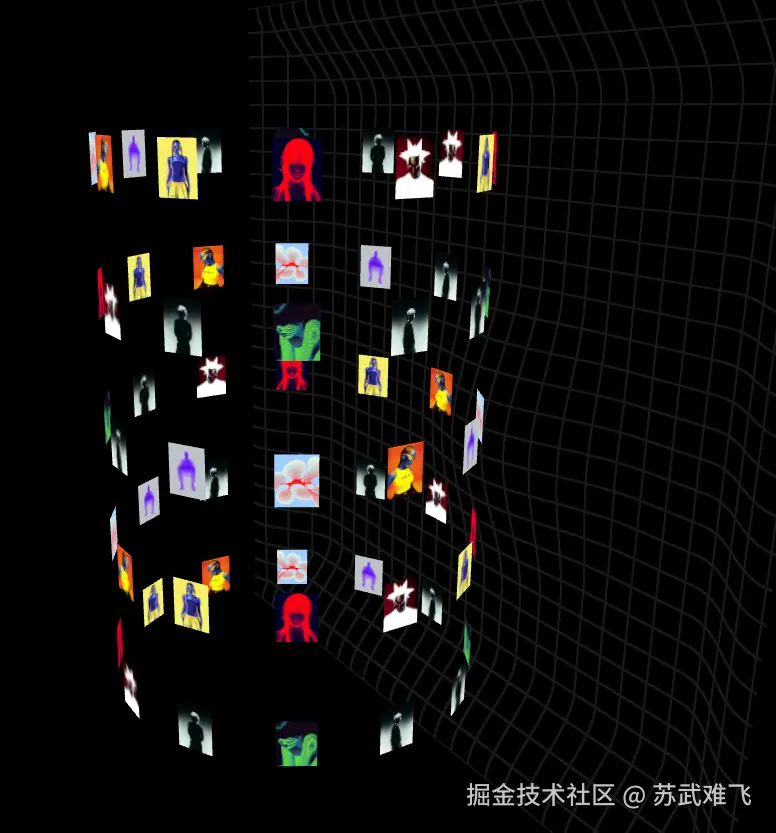
成功完成五行十二列的布局!
2. 自滚动
目前的布局我们基本上实现了,接下来添加一个自旋转效果,说到自动的视图变化那肯定就要用到useFrame了
useFrame是 R3F 中最重要的 Hook,它允许你在每一帧(通常是每秒 60 次)执行代码。它是实现 动画 、物理模拟 和 实时交互 的核心入口。
JavaScript
    useFrame((_state, dt) => {
        ...
        ...
        👆每一帧自动运行
});举个例子!我们直接在useFrame中控制group的rotation.y
JavaScript
 const rowGroupRefs = useRef<Array<Object3D | null>>([]);

 useFrame((_state, dt) => {
        for (let rowIndex = 0; rowIndex < rows; rowIndex++) {
            const rowObj = rowGroupRefs.current[rowIndex];
            if (!rowObj) continue;
            // const baseRow = rowIndex % rows;
            rowObj.rotation.y  += 0.0065;
        }
 })

{rowPositions.map(({rowIndex, y, baseRow}) => (
                <group
                    ...
                    ...
                    ref={(obj) => {
                        rowGroupRefs.current[rowIndex] = obj;
  }}>
...
...
... 
这样已经实现了一个基本的自滚动效果!
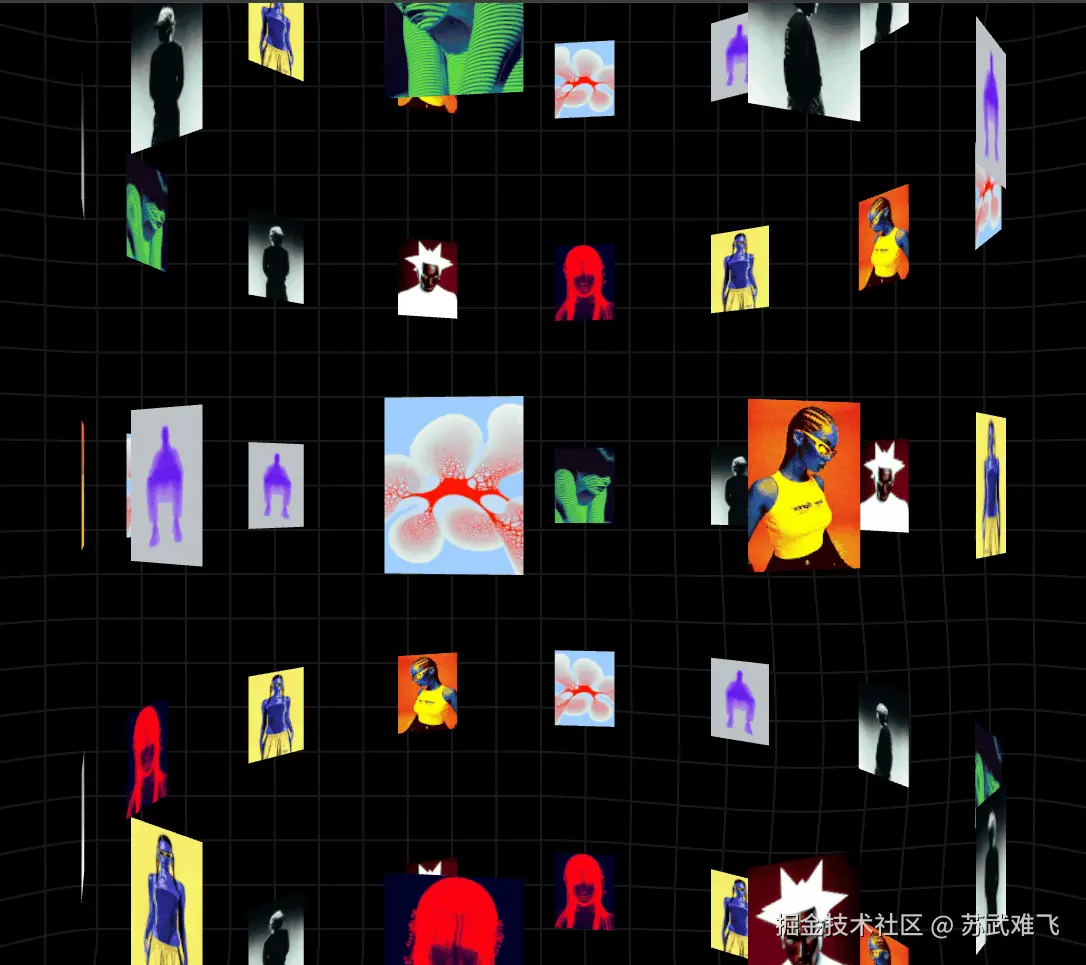
2.1 交错排列
现在的滚动效果可以发现每一行每一列都是对齐的有点过去生硬了,我们加一个偏移量
JavaScript
 const rowPositions = useMemo(() => {
        const out: Array<{ rowIndex: number; y: number; baseRow: number; rowOffset: number }> = [];
        for (let rowIndex = 0; rowIndex < rows; rowIndex++) {
            ...
            ...
            + const rowOffset = baseRow % 2 === 0 ? 0 : 0.5;
            out.push({rowIndex, y, baseRow, rowOffset});
        }
        return out;
}, [rows, ySpacing]);


{Array.from({length: cols}).map((_, col) => {
                        const theta = ((col + rowOffset) / cols) * Math.PI * 2;
                        const x = Math.cos(theta) * radius;
                        const z = Math.sin(theta) * radius;
                        const ry = -(theta + Math.PI / 2);
                        const texIndex = (baseRow * cols + col) % imageUrls.length;

                        return (
                            <mesh
                                key={col}
                                position={[x, 0, z]}
                                rotation={[0, ry, 0]}
                            >
                                <planeGeometry args={[tileW, tileH]}/>
                                <meshBasicMaterial map={textures[texIndex]} toneMapped={false} side={DoubleSide}/>
                            </mesh>
                        );
})}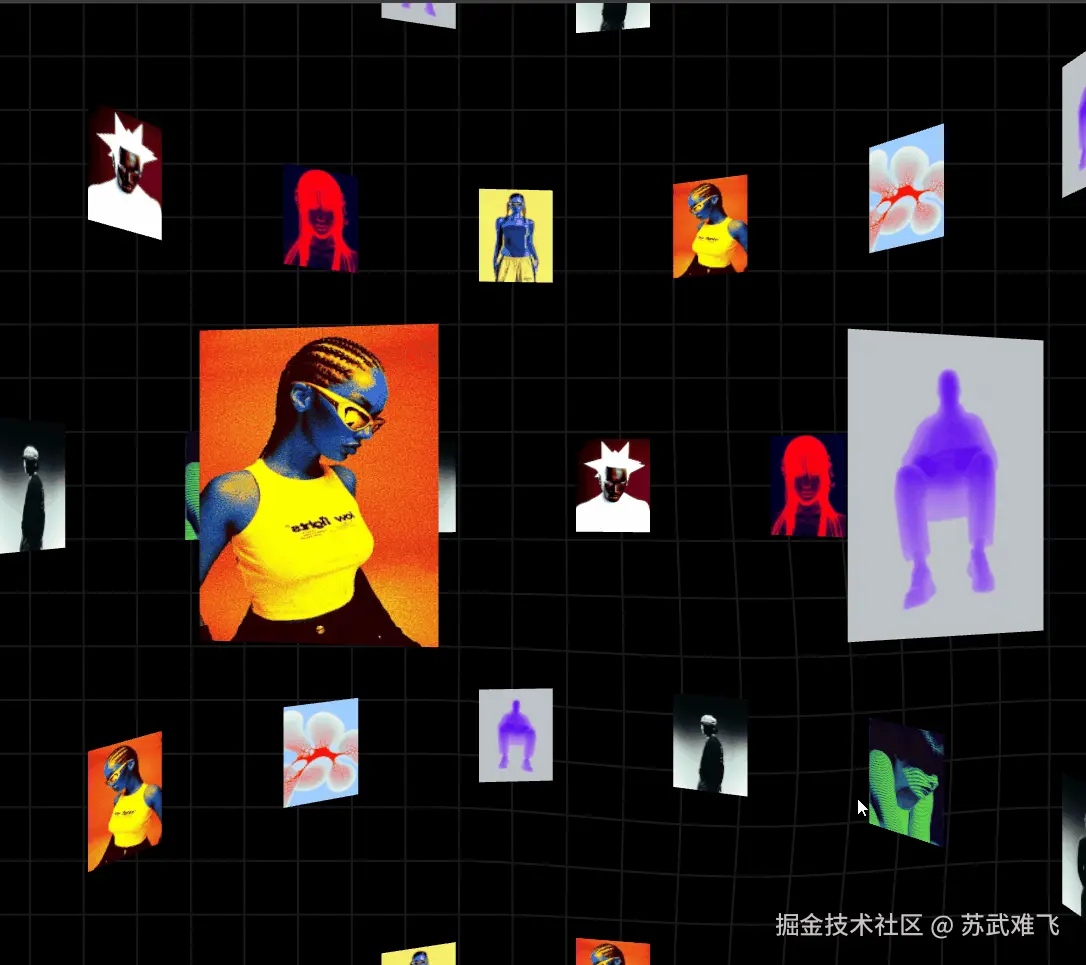
2.2 和鼠标滚轮结合
现在基本的自转已经实现了,但是我们的目标是和鼠标滚轮结合还要有一个上下的滚动效果!
首先我们来实现一个上下滚动的效果,根据我们 1.3 学到的经验我们应该在这些外层再使用一个Group,并且控制这个Group的position.y
JavaScript
  const rowGroupRefs = useRef<Array<Object3D | null>>([]);
  + const groupRef = useRef<Object3D>(null);
  + const scrollCurrent = useRef(0);


    useFrame((_state, dt) => {

        scrollCurrent.current += (scrollTargetRef.current - scrollCurrent.current) * 0.12;

        const group = groupRef.current;
        if (!group) return;
        group.position.y = -scrollCurrent.current;

        for (let rowIndex = 0; rowIndex < rows; rowIndex++) {
            const rowObj = rowGroupRefs.current[rowIndex];
            if (!rowObj) continue;
            // const baseRow = rowIndex % rows;
            rowObj.rotation.y += 0.0065;
        }


    })


  <group ref={groupRef}>
            {rowPositions.map(({rowIndex, y, baseRow,rowOffset}) => (
                <group>
                    ...
                    ...
                <group>
</group>scrollTargetRef为外部组件传递进来
JavaScript
function App() {

    const tubeScrollTarget = useRef(0);

    const onWheel = useCallback((event: React.WheelEvent<HTMLDivElement>) => {
        tubeScrollTarget.current += event.deltaY * 0.002;
    }, []);

    return (
        <div className="sceneRoot" onWheel={onWheel}>

            <Canvas
                camera={{position: [0, 0, 6.5], fov: 50}}
                onCreated={({camera}) => {
                    camera.lookAt(0, 0, 0);
                }}
            >

                {/*<OrbitControls enableDamping dampingFactor={0.05}/>*/}
                <ambientLight intensity={0.5}/>
                <directionalLight position={[5, 5, 5]} intensity={1}/>

                <Environment preset="studio" blur={10.5}/>
                <GridPlane targetCenterUv={targetCenterUv}/>

                <ImageTube2 scrollTargetRef={tubeScrollTarget}/>

            </Canvas>
        </div>
    )
}
okkk,现在和鼠标滚轮事件结合可以上下滚动我们的列表了,但是现在还有点呆板的是我们绕y轴旋转的列表还没有和滚轮事件结合,我们的目标是在鼠标滚动的时候我们的旋转列表应该进行一个加速滚动!
这个时候我们需要用到另一个公式
📈 动态旋转位移叠加公式
该公式负责在 useFrame 中更新全局旋转角度,结合了自动巡航与用户交互。
-
公式定义
Total_Angle_Increment = (Base_Auto_Speed + User_Input_Velocity) * Delta_Time -
参数拆解
baseSpeed: 静态常量,控制背景自动旋转的快慢。spinVelocityRef: 动态变量,承载用户交互产生的动能(惯性)。scaledDt: 时间缩放因子,确保跨设备速度一致性。
- 运行逻辑
- 每一帧读取当前的"自转力"和"手动推力"。
- 将两者求和,得到当前的总瞬时速度。
- 根据这一帧经过的时间计算出应该转过的弧度增量。
- 累加到
angle.current,从而驱动所有mesh的rotation.y。
首先我们得速率spinVelocityRef依然要和鼠标滚轮事件绑定,同时区分一下鼠标滚动得方向tubeNaturalDir
JavaScript
    const onWheel = useCallback((event: React.WheelEvent<HTMLDivElement>) => {
        tubeScrollTarget.current += event.deltaY * 0.002;
      + tubeSpinVelocity.current += event.deltaY * 0.004;

        if (event.deltaY < 0) tubeNaturalDir.current = -1;
        else if (event.deltaY > 0) tubeNaturalDir.current = 1;
    }, []);


 <ImageTube
    scrollTargetRef={tubeScrollTarget}
  + spinVelocityRef={tubeSpinVelocity}
    naturalDirRef={tubeNaturalDir}
    ...
... />然后在我们得ImageTube中接收这个速率并且做一个递增处理
JavaScript
 useFrame((_state, dt) => {

        scrollCurrent.current += (scrollTargetRef.current - scrollCurrent.current) * 0.12;

        const damping = 0.92;
        spinVelocityRef.current *= Math.pow(damping, dt * 60);
        spinVelocityRef.current = Math.max(-2.0, Math.min(2.0, spinVelocityRef.current));

        ...
        ...

})接下来我们算一个旋转速度比例系数
JavaScript
 useFrame((_state, dt) => {

        scrollCurrent.current += (scrollTargetRef.current - scrollCurrent.current) * 0.12;

        const damping = 0.92;
        spinVelocityRef.current *= Math.pow(damping, dt * 60);
        spinVelocityRef.current = Math.max(-2.0, Math.min(2.0, spinVelocityRef.current));

      + rotationSpeedScale.current +=
            (1.0 - rotationSpeedScale.current) *
            0.12;
      // 根据方向不同产生不同方向得力
      + const scaledDt = dt * rotationSpeedScale.current;
        ...
        ...

    })
有了速率和速度比例系数之后我们就可以套进公式算出来我们应该滚动得距离了
JavaScript
useFrame((_state, dt) => {

        scrollCurrent.current += (scrollTargetRef.current - scrollCurrent.current) * 0.12;

        const damping = 0.92;
        spinVelocityRef.current *= Math.pow(damping, dt * 60);
        spinVelocityRef.current = Math.max(-2.0, Math.min(2.0, spinVelocityRef.current));

        rotationSpeedScale.current +=
            (1.0 - rotationSpeedScale.current) *
            rotationSpeedScaleLerpRef.current;

        const scaledDt = dt * rotationSpeedScale.current;

        const baseSpeed = naturalDirRef.current * baseSpeedRef.current;
        angle.current += (baseSpeed + spinVelocityRef.current) * scaledDt;

        tubeAngleRef.current = angle.current;

        const group = groupRef.current;
        if (!group) return;
        group.position.y = -scrollCurrent.current;

        for (let rowIndex = 0; rowIndex < rows; rowIndex++) {
            const rowObj = rowGroupRefs.current[rowIndex];
            if (!rowObj) continue;
            rowObj.rotation.y = angle.current;
        }


    })
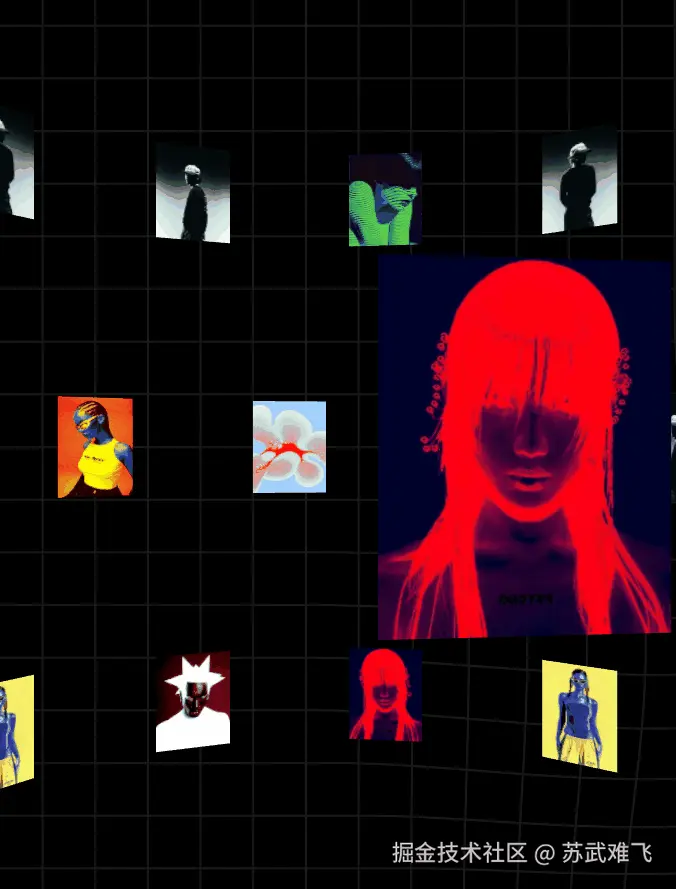
3. 无限滚动!
拖拖拉拉才进入本章得主题,那就是实现一个无限滚动得效果,如果大家之前用css做过类似得效果得话其实是能了解到所谓得无限滚动都是障眼法,是通过瞬时改变值来实现得,也就是把滚动了一定距离得值直接改到起始位置!
在我们这个上下滚动得例子中很明显我们得滚动距离最大是rows * ySpacing / 2 ,同样由于我们支持上下自由滚动所以我们最起码需要
JavaScript
const repeatCount = 3;
const totalRows = rows * repeatCount;okok来实际看下代码,之前所有关于rows得地方都需要改变成totalRows
JavaScript
function ImageTube({
                        baseSpeedRef,
                        tubeAngleRef,
                        naturalDirRef,
                        scrollTargetRef,
                        spinVelocityRef,
                        rotationSpeedScaleLerpRef,
                        rotationSpeedScaleTargetRef,
                    }: {
    baseSpeedRef: React.MutableRefObject<number>;
    tubeAngleRef: React.MutableRefObject<number>;
    naturalDirRef: React.MutableRefObject<number>;
    scrollTargetRef: React.MutableRefObject<number>;
    spinVelocityRef: React.MutableRefObject<number>;
    rotationSpeedScaleTargetRef: React.MutableRefObject<number>;
    rotationSpeedScaleLerpRef: React.MutableRefObject<number>;
}) {

    const groupRef = useRef<Object3D>(null);
    const rowGroupRefs = useRef<Array<Object3D | null>>([]);
    const scrollCurrent = useRef(0);
    const rotationSpeedScale = useRef(1);
    const angle = useRef(0);

    const imageUrls = useMemo(() => [
        "/tube/im1.jpg",
        "/tube/im3.jpg",
        "/tube/im2.jpg",
        "/tube/im4.jpg",
        "/tube/im5.jpg",
        "/tube/im6.jpg",
        "/tube/im7.jpg",
        "/tube/im8.jpg",
        "/tube/im9.jpg",
    ], []);


    const textures = useTexture(imageUrls);

    const radius = 4;
    const tileW = 0.8;
    const tileH = 1.0;
    const ySpacing = 2.7;

    const rows = 5;
    const cols = 12;

    const loopHeight = rows * ySpacing;
    const repeatCount = 3;
    const totalRows = rows * repeatCount;

    const rowPositions = useMemo(() => {
        const out: Array<{ rowIndex: number; y: number; baseRow: number; rowOffset: number }> = [];
        for (let rowIndex = 0; rowIndex < totalRows; rowIndex++) {
            const y = (rowIndex - (totalRows - 1) / 2) * ySpacing;
            const baseRow = rowIndex % rows;
            const rowOffset = baseRow % 2 === 0 ? 0 : 0.5;
            out.push({rowIndex, y, baseRow, rowOffset});
        }
        return out;
    }, [totalRows, ySpacing]);


    useFrame((_state, dt) => {

        scrollCurrent.current += (scrollTargetRef.current - scrollCurrent.current) * 0.12;

        const damping = 0.92;
        spinVelocityRef.current *= Math.pow(damping, dt * 60);
        spinVelocityRef.current = Math.max(-2.0, Math.min(2.0, spinVelocityRef.current));

        rotationSpeedScale.current +=
            (1.0 - rotationSpeedScale.current) *
            rotationSpeedScaleLerpRef.current;

        const scaledDt = dt * rotationSpeedScale.current;

        const baseSpeed = naturalDirRef.current * baseSpeedRef.current;
        angle.current += (baseSpeed + spinVelocityRef.current) * scaledDt;

        tubeAngleRef.current = angle.current;

        const group = groupRef.current;
        if (!group) return;
        group.position.y = -scrollCurrent.current;

        for (let rowIndex = 0; rowIndex < totalRows; rowIndex++) {
            const rowObj = rowGroupRefs.current[rowIndex];
            if (!rowObj) continue;
            rowObj.rotation.y = angle.current;
        }


    })

    return (
        <group ref={groupRef}>
            {rowPositions.map(({rowIndex, y, baseRow, rowOffset}) => (
                <group
                    key={rowIndex}
                    position={[0, y, 0]}
                    ref={(obj) => {
                        rowGroupRefs.current[rowIndex] = obj;
                    }}>

                    {Array.from({length: cols}).map((_, col) => {
                        const theta = ((col + rowOffset) / cols) * Math.PI * 2;
                        const x = Math.cos(theta) * radius;
                        const z = Math.sin(theta) * radius;
                        const ry = -(theta + Math.PI / 2);
                        const texIndex = (baseRow * cols + col) % imageUrls.length;

                        return (
                            <mesh
                                key={col}
                                position={[x, 0, z]}
                                rotation={[0, ry, 0]}
                            >
                                <planeGeometry args={[tileW, tileH]}/>
                                <meshBasicMaterial map={textures[texIndex]} toneMapped={false} side={DoubleSide}/>
                            </mesh>
                        );
                    })}

                </group>
            ))}
        </group>
    )

}然后我们依然在useFrame中处理我们得瞬时逻辑!
JavaScript
useFrame((_state, dt) => {

        scrollCurrent.current += (scrollTargetRef.current - scrollCurrent.current) * 0.12;
        // 当超过最大滚动距离得时候,我们瞬间改变滚动得高度
        if (scrollCurrent.current > loopHeight / 2) {
            scrollCurrent.current -= loopHeight;
            scrollTargetRef.current -= loopHeight;
        } else if (scrollCurrent.current < -loopHeight / 2) {
            scrollCurrent.current += loopHeight;
            scrollTargetRef.current += loopHeight;
        }

        const damping = 0.92;
        spinVelocityRef.current *= Math.pow(damping, dt * 60);
        spinVelocityRef.current = Math.max(-2.0, Math.min(2.0, spinVelocityRef.current));

        rotationSpeedScale.current +=
            (1.0 - rotationSpeedScale.current) *
            rotationSpeedScaleLerpRef.current;

        const scaledDt = dt * rotationSpeedScale.current;

        const baseSpeed = naturalDirRef.current * baseSpeedRef.current;
        angle.current += (baseSpeed + spinVelocityRef.current) * scaledDt;

        tubeAngleRef.current = angle.current;

        const group = groupRef.current;
        if (!group) return;
        group.position.y = -scrollCurrent.current;

        for (let rowIndex = 0; rowIndex < totalRows; rowIndex++) {
            const rowObj = rowGroupRefs.current[rowIndex];
            if (!rowObj) continue;
            rowObj.rotation.y = angle.current;
        }


    })
4. 结语
为什么总觉得成功只差一步!
参考资料
Reactive Depth: Building a Scroll-Driven 3D Image Tube with React Three Fiber