一、前言
说起记账这件事,大多数人都有过三分钟热度的经历------下载了好几个记账 App,记了几天就没了动力。我自己也是这样,后来索性想:干脆用 HarmonyOS 5.0 自己写一个,功能轻一点,用起来顺手就好。
这篇文章就是记录整个开发过程,从项目结构的规划,到数据持久化的实现,再到界面的搭建。用到的技术主要是 ArkUI 声明式框架和 HarmonyOS 提供的 Preferences 接口,没有引入任何第三方库,也没有依赖云端服务,所有数据都存在本地。
整体功能聚焦在三个页面:首页展示账单列表和收支总览、添加账单页面、以及一个简单的分类统计页。代码量控制在一个人可以几小时内读完的范围,适合正在学习鸿蒙开发的朋友作为上手练习项目。
二、工程准备
2.1 开发环境
开始之前,确保以下环境已就绪:
- DevEco Studio NEXT(Build Version 5.0.5.200 或以上)
- HarmonyOS SDK:API Level 12(对应 HarmonyOS 5.0.0)
- 运行设备:Phone 类型模拟器或真机
在 DevEco Studio 的 SDK Manager 中确认已安装对应版本的 SDK,API Level 12 是 HarmonyOS 5.0.0 正式版对应的接口版本,本文所有代码均基于此版本验证。
2.2 新建工程
打开 DevEco Studio,选择「Create Project」→「Application」→「Empty Ability」,配置如下:
Project name:BillBook
Bundle name:com.yourname.billbook
Compatible SDK:5.0.0(12)
Module type:Phone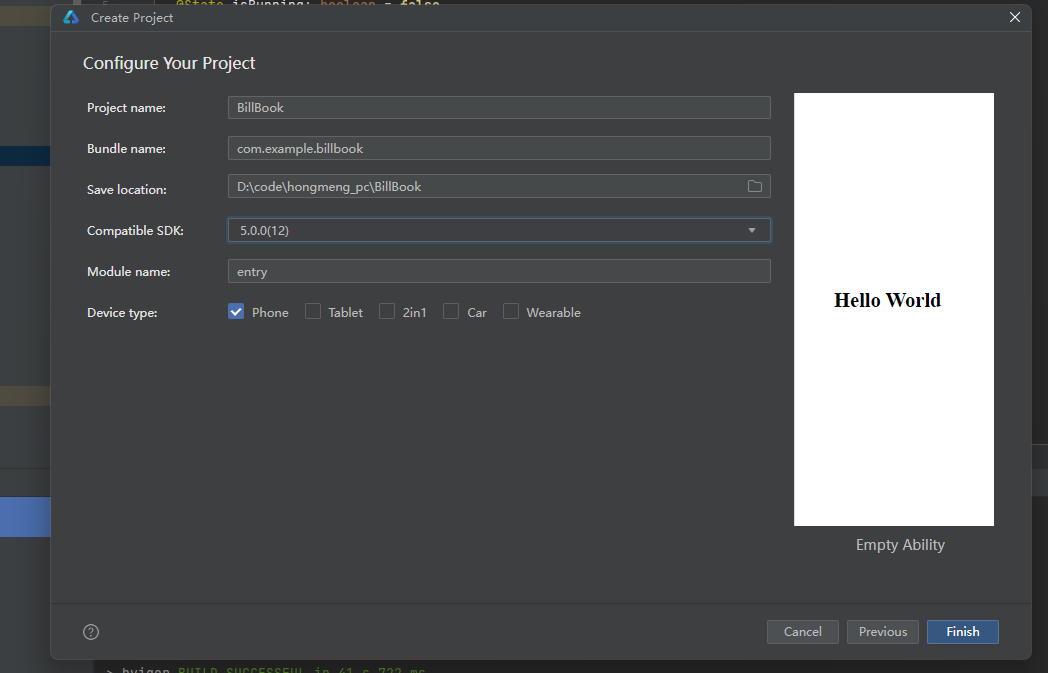
工程创建完成后,默认会生成一个 EntryAbility 和一个 Index 页面,这是我们后续开发的起点。
2.3 工程目录结构
按照功能划分,整个项目的 ets 源码目录组织如下:
entry/src/main/ets/
├── entryability/
│   └── EntryAbility.ets
├── model/
│   ├── BillItem.ets        // 账单数据模型
│   └── BillStorage.ets     // Preferences 存储封装
├── pages/
│   ├── Index.ets           // 首页(账单列表)
│   ├── AddBill.ets         // 添加账单
│   └── Statistics.ets      // 统计页面
└── components/
    ├── BillCard.ets        // 账单卡片组件
    └── CategoryTag.ets     // 分类标签组件
这样划分的好处是,model 层只管数据逻辑,pages 层只管页面展示,components 里放可复用的小组件。后期维护起来思路比较清晰,各层职责边界也很明确。

三、数据模型与持久化
3.1 账单数据结构
先定义账单的数据结构。一条账单记录包含:唯一 id、类型(收入/支出)、金额、分类、备注和时间戳。
这里有一个细节值得注意:金额统一用「分」作为存储单位(整数),而不是「元」(浮点数)。这样可以避免 JavaScript 浮点数运算带来的精度问题,比如 0.1 + 0.2 !== 0.3 这类经典问题在记账场景里是不能接受的。
// model/BillItem.ets
export interface BillItem {
  id: string;
  type: "income" | "expense";   // 收入或支出
  amount: number;               // 金额(分为单位)
  category: string;             // 分类
  note: string;                 // 备注
  date: number;                 // 时间戳
}

// 支出分类
export const EXPENSE_CATEGORIES = [
  "餐饮", "交通", "购物", "娱乐",
  "医疗", "住房", "教育", "其他"
];

// 收入分类
export const INCOME_CATEGORIES = [
  "工资", "兼职", "投资", "礼金", "其他"
];
3.2 Preferences 存储封装
HarmonyOS 提供的 @ohos.data.preferences 是一个轻量的键值对本地存储方案,非常适合存储这类结构化程度不高、数据量不太大的数据。我们把所有账单序列化为 JSON 字符串,存在一个 key 下面。
封装一个 BillStorage 工具类,对外提供 init、loadAll、saveAll、addBill、deleteBill 几个静态方法:
// model/BillStorage.ets
import dataPreferences from "@ohos.data.preferences";
import { BillItem } from "./BillItem";

const PREF_NAME = "bill_data";
const BILLS_KEY  = "bills";

export class BillStorage {
  private static prefs: dataPreferences.Preferences | null = null;

  // 初始化 Preferences 实例
  static async init(context: Context): Promise<void> {
    BillStorage.prefs = await dataPreferences.getPreferences(context, PREF_NAME);
  }

  // 读取所有账单
  static async loadAll(): Promise<BillItem[]> {
    if (!BillStorage.prefs) return [];
    const raw = await BillStorage.prefs.get(BILLS_KEY, "[]") as string;
    return JSON.parse(raw) as BillItem[];
  }

  // 保存账单列表
  static async saveAll(bills: BillItem[]): Promise<void> {
    if (!BillStorage.prefs) return;
    await BillStorage.prefs.put(BILLS_KEY, JSON.stringify(bills));
    await BillStorage.prefs.flush();
  }

  // 新增一条账单
  static async addBill(item: BillItem): Promise<void> {
    const bills = await BillStorage.loadAll();
    bills.unshift(item);        // 最新的放在最前面
    await BillStorage.saveAll(bills);
  }

  // 删除指定 id 的账单
  static async deleteBill(id: string): Promise<void> {
    let bills = await BillStorage.loadAll();
    bills = bills.filter(b => b.id !== id);
    await BillStorage.saveAll(bills);
  }
}
需要特别说明的是 flush() 这个调用------preferences.put() 只是把数据写入内存,flush() 才会真正持久化到磁盘。如果应用意外崩溃而没有 flush,数据就会丢失,这是初学者很容易忽略的地方。
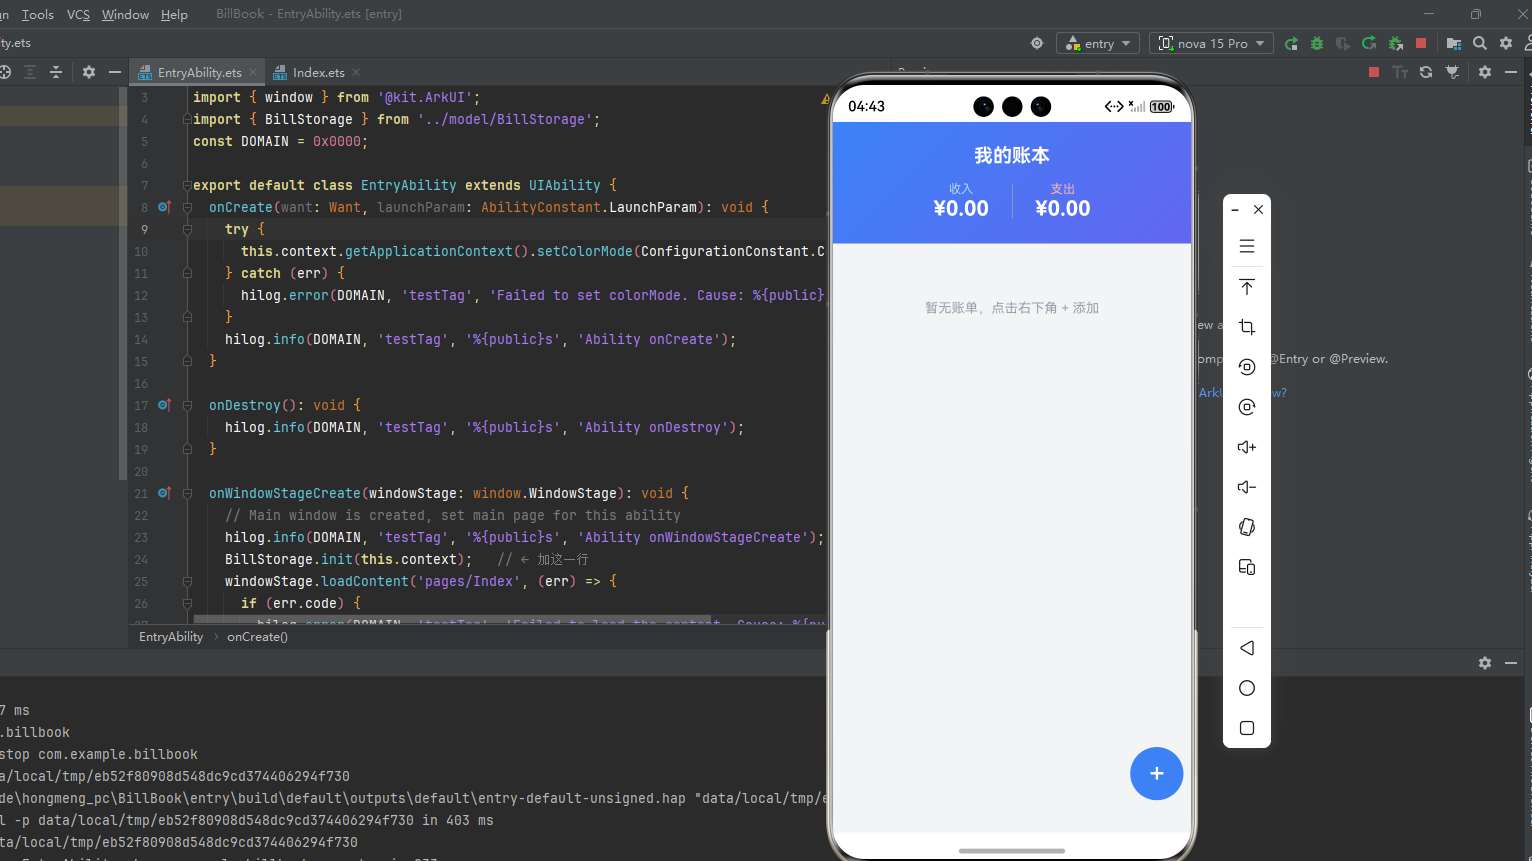
BillStorage.init() 需要在 EntryAbility 的 onWindowStageCreate 中调用,把 context 传进去:
// EntryAbility.ets
onWindowStageCreate(windowStage: window.WindowStage) {
  BillStorage.init(this.context);
  windowStage.loadContent("pages/Index");
}
这样能确保整个应用生命周期中只初始化一次,且在任何页面加载之前就已经完成。
四、页面实现
4.1 首页:账单列表与总览
首页分为上下两个区域:顶部是一个带渐变背景的总览卡片,展示当前的总收入和总支出;下方是账单列表,用 List + ForEach 渲染每一条记录。
页面每次进入时(onPageShow)都会重新从 Preferences 读取数据,这样添加完账单返回后能立即看到最新结果,不需要手动管理刷新状态。
// pages/Index.ets
import router from "@ohos.router";
import { BillItem } from "../model/BillItem";
import { BillStorage } from "../model/BillStorage";
import { BillCard } from "../components/BillCard";

@Entry
@Component
struct Index {
  @State bills: BillItem[] = [];
  @State totalIncome: number = 0;
  @State totalExpense: number = 0;

  // 页面每次出现时刷新数据
  async onPageShow() {
    this.bills = await BillStorage.loadAll();
    this.calcSummary();
  }

  calcSummary() {
    this.totalIncome  = this.bills
      .filter(b => b.type === "income")
      .reduce((s, b) => s + b.amount, 0);
    this.totalExpense = this.bills
      .filter(b => b.type === "expense")
      .reduce((s, b) => s + b.amount, 0);
  }

  build() {
    Column() {
      // ---- 顶部总览卡片 ----
      Column() {
        Text("我的账本").fontSize(20).fontWeight(FontWeight.Bold).fontColor(Color.White)
        Row() {
          Column() {
            Text("收入").fontColor("#b3d8ff").fontSize(13)
            Text(`¥${(this.totalIncome / 100).toFixed(2)}`)
              .fontColor(Color.White).fontSize(22).fontWeight(FontWeight.Bold)
          }
          Divider().vertical(true).height(36).color("#ffffff44").margin({ left: 24, right: 24 })
          Column() {
            Text("支出").fontColor("#ffb3b3").fontSize(13)
            Text(`¥${(this.totalExpense / 100).toFixed(2)}`)
              .fontColor(Color.White).fontSize(22).fontWeight(FontWeight.Bold)
          }
        }
        .margin({ top: 16 })
      }
      .width("100%")
      .padding(24)
      .linearGradient({ angle: 135, colors: [["#3b82f6", 0], ["#6366f1", 1]] })

      // ---- 账单列表 ----
      if (this.bills.length === 0) {
        Text("暂无账单,点击右下角 + 添加")
          .fontSize(14).fontColor("#9ca3af").margin({ top: 60 })
      } else {
        List({ space: 8 }) {
          ForEach(this.bills, (item: BillItem) => {
            ListItem() {
              BillCard({ item: item, onDelete: async () => {
                await BillStorage.deleteBill(item.id);
                this.bills = await BillStorage.loadAll();
                this.calcSummary();
              }})
            }
          }, (item: BillItem) => item.id)
        }
        .width("100%")
        .layoutWeight(1)
        .padding({ left: 16, right: 16, top: 8 })
      }

      // ---- 悬浮添加按钮 ----
      Button("+").fontSize(28).fontColor(Color.White)
        .width(56).height(56).borderRadius(28)
        .backgroundColor("#3b82f6")
        .position({ x: "83%", y: "88%" })
        .onClick(() => {
          router.pushUrl({ url: "pages/AddBill" });
        })
    }
    .height("100%").backgroundColor("#f3f4f6")
  }
}
4.2 账单卡片组件
BillCard 是一个可复用的自定义组件,负责渲染单条账单。通过长按手势触发删除确认弹窗,这比添加一个单独的删除按钮更节省空间,交互也更自然。
分类和对应 Emoji 图标的映射用一个简单的 Record 来维护,比写一大堆 if-else 要干净很多:
// components/BillCard.ets
import { BillItem } from "../model/BillItem";

@Component
export struct BillCard {
  item: BillItem = {} as BillItem;
  onDelete: () => void = () => {};

  build() {
    Row() {
      // 分类图标
      Text(this.getCategoryIcon())
        .fontSize(24).width(44).height(44)
        .textAlign(TextAlign.Center)
        .backgroundColor("#eff6ff")
        .borderRadius(22)

      Column() {
        Text(this.item.category).fontSize(15).fontWeight(FontWeight.Medium)
        Text(this.item.note || "无备注").fontSize(12).fontColor("#9ca3af")
        Text(this.formatDate()).fontSize(11).fontColor("#d1d5db")
      }
      .alignItems(HorizontalAlign.Start)
      .layoutWeight(1)
      .margin({ left: 12 })

      // 金额,收入绿色支出红色
      Text(`${this.item.type === "income" ? "+" : "-"}¥${(this.item.amount / 100).toFixed(2)}`)
        .fontSize(16).fontWeight(FontWeight.Bold)
        .fontColor(this.item.type === "income" ? "#22c55e" : "#ef4444")
    }
    .width("100%").padding(14)
    .backgroundColor(Color.White)
    .borderRadius(12)
    .gesture(LongPressGesture({ duration: 600 }).onAction(() => {
      AlertDialog.show({
        title: "删除账单",
        message: "确定要删除这条账单吗?",
        confirm: { value: "删除", action: () => this.onDelete() }
      });
    }))
  }

  getCategoryIcon(): string {
    const map: Record<string, string> = {
      "餐饮": "🍜", "交通": "🚇", "购物": "🛍️", "娱乐": "🎬",
      "医疗": "💊", "住房": "🏠", "教育": "📚", "工资": "💰",
      "兼职": "💼", "投资": "📈", "礼金": "🎁"
    };
    return map[this.item.category] ?? "📝";
  }

  formatDate(): string {
    const d = new Date(this.item.date);
    return `${d.getMonth()+1}月${d.getDate()}日`;
  }
}
4.3 添加账单页
这个页面承担了主要的数据录入工作:选择收入/支出类型、输入金额、选择分类,以及填写备注。
类型切换通过 @State billType 控制,切换后 categories 的 getter 会自动返回对应的分类列表,ForEach 也跟着重新渲染,不需要任何额外操作------这就是声明式 UI 的优雅之处。
// pages/AddBill.ets
import router from "@ohos.router";
import promptAction from "@ohos.promptAction";
import { BillItem, EXPENSE_CATEGORIES, INCOME_CATEGORIES } from "../model/BillItem";
import { BillStorage } from "../model/BillStorage";

@Entry
@Component
struct AddBill {
  @State billType: "income" | "expense" = "expense";
  @State amountText: string = "";
  @State selectedCategory: string = "餐饮";
  @State note: string = "";

  get categories() {
    return this.billType === "expense" ? EXPENSE_CATEGORIES : INCOME_CATEGORIES;
  }

  async save() {
    // 金额格式校验
    const valid = /^\d+(\.\d{0,2})?$/.test(this.amountText);
    if (!valid || this.amountText === "") {
      promptAction.showToast({ message: "请输入正确金额" });
      return;
    }
    const amount = Math.round(parseFloat(this.amountText) * 100);
    if (amount <= 0) {
      promptAction.showToast({ message: "金额必须大于 0" });
      return;
    }
    const item: BillItem = {
      id: Date.now().toString(),
      type: this.billType,
      amount,
      category: this.selectedCategory,
      note: this.note,
      date: Date.now()
    };
    await BillStorage.addBill(item);
    router.back();
  }

  build() {
    Column() {
      // 页面标题
      Text("记一笔").fontSize(20).fontWeight(FontWeight.Bold).margin({ top: 24, bottom: 24 })

      // 收入/支出切换
      Row() {
        ForEach(["expense", "income"] as ("expense" | "income")[], (t: "expense" | "income") => {
          Text(t === "expense" ? "支出" : "收入")
            .fontSize(15)
            .fontColor(this.billType === t ? Color.White : "#6b7280")
            .backgroundColor(this.billType === t
              ? (t === "expense" ? "#ef4444" : "#22c55e")
              : Color.Transparent)
            .padding({ left: 28, right: 28, top: 8, bottom: 8 })
            .borderRadius(20)
            .onClick(() => {
              this.billType = t;
              this.selectedCategory = this.categories[0];
            })
        })
      }
      .backgroundColor(Color.White)
      .borderRadius(24)
      .padding(4)

      // 金额输入
      Row() {
        Text("¥").fontSize(28).fontColor("#374151").margin({ right: 4 })
        TextInput({ placeholder: "0.00", text: this.amountText })
          .type(InputType.Number)
          .fontSize(36).textAlign(TextAlign.Start)
          .backgroundColor(Color.Transparent)
          .border({ width: 0 })
          .layoutWeight(1)
          .onChange(v => this.amountText = v)
      }
      .width("100%")
      .padding({ left: 16, right: 16, top: 12, bottom: 12 })
      .backgroundColor(Color.White)
      .borderRadius(12)
      .margin({ top: 20 })

      // 分类选择
      Text("选择分类").fontSize(13).fontColor("#9ca3af")
        .alignSelf(ItemAlign.Start).margin({ top: 20, bottom: 8 })
      Flex({ wrap: FlexWrap.Wrap }) {
        ForEach(this.categories, (cat: string) => {
          Text(cat)
            .padding({ left: 16, right: 16, top: 6, bottom: 6 })
            .borderRadius(16)
            .fontSize(14)
            .margin(4)
            .backgroundColor(this.selectedCategory === cat ? "#dbeafe" : "#f3f4f6")
            .fontColor(this.selectedCategory === cat ? "#2563eb" : "#374151")
            .onClick(() => this.selectedCategory = cat)
        })
      }
      .width("100%")

      // 备注输入
      Text("备注").fontSize(13).fontColor("#9ca3af")
        .alignSelf(ItemAlign.Start).margin({ top: 20, bottom: 8 })
      TextInput({ placeholder: "添加备注(选填)" })
        .onChange(v => this.note = v)
        .backgroundColor(Color.White)
        .borderRadius(12)
        .width("100%")

      // 保存按钮
      Button("保存").width("100%").height(48)
        .backgroundColor("#3b82f6").fontColor(Color.White)
        .borderRadius(12).margin({ top: 32 })
        .onClick(() => this.save())
    }
    .padding(24).height("100%").backgroundColor("#f3f4f6")
    .alignItems(HorizontalAlign.Center)
  }
}
五、统计功能:Canvas 绘制柱状图
统计页面把支出按分类汇总,用横向柱状图展示每个分类的消费占比。HarmonyOS 的 Canvas 组件提供了一套接近 Web Canvas API 的绘图接口,用起来对前端开发者来说很容易上手。
先写一个统计计算方法,按分类汇总金额并降序排列:
// Statistics.ets - 数据汇总方法
calcExpenseByCategory(): { category: string; total: number }[] {
  const map = new Map<string, number>();
  this.bills
    .filter(b => b.type === "expense")
    .forEach(b => {
      map.set(b.category, (map.get(b.category) ?? 0) + b.amount);
    });
  return Array.from(map.entries())
    .map(([category, total]) => ({ category, total }))
    .sort((a, b) => b.total - a.total);
}
Canvas 的绘制逻辑如下,需要注意的是绘图代码必须放在 onReady 回调里,否则此时 Canvas 的宽高还没有确定,绘制会异常:
// Statistics.ets - Canvas 绘制部分
@State private settings: RenderingContextSettings = new RenderingContextSettings(true);
@State private ctx: CanvasRenderingContext2D = new CanvasRenderingContext2D(this.settings);

// 在 build() 中
Canvas(this.ctx)
  .width("100%").height(280)
  .backgroundColor(Color.White)
  .borderRadius(12)
  .onReady(() => {
    this.drawBarChart(this.ctx, this.calcExpenseByCategory());
  })

// 绘图函数
drawBarChart(ctx: CanvasRenderingContext2D, data: { category: string; total: number }[]) {
  const maxVal = Math.max(...data.map(d => d.total));
  const barH = 28;
  const gap = 16;
  const labelW = 56;
  const chartW = ctx.width - labelW - 24;
  ctx.clearRect(0, 0, ctx.width, ctx.height);

  data.slice(0, 6).forEach((d, i) => {
    const y = i * (barH + gap) + 16;
    const barLen = maxVal > 0 ? (d.total / maxVal) * chartW : 0;

    // 分类标签
    ctx.fillStyle = "#374151";
    ctx.font = "13px sans-serif";
    ctx.fillText(d.category, 0, y + barH - 6);

    // 背景条
    ctx.fillStyle = "#f3f4f6";
    ctx.beginPath();
    ctx.roundRect(labelW, y, chartW, barH, 4);
    ctx.fill();

    // 数值条
    ctx.fillStyle = "#6366f1";
    ctx.beginPath();
    ctx.roundRect(labelW, y, barLen, barH, 4);
    ctx.fill();

    // 金额文字
    ctx.fillStyle = "#ffffff";
    ctx.font = "12px sans-serif";
    if (barLen > 50) {
      ctx.fillText(`¥${(d.total / 100).toFixed(0)}`, labelW + barLen - 48, y + barH - 8);
    }
  });
}
完整的 Statistics 页面还需要在 onPageShow 里加载账单数据,和首页保持一致,这里不再重复。
六、开发过程中踩的几个坑
6.1 Preferences 必须在页面加载前初始化
最开始我把 BillStorage.init() 放在 Index 页面的 aboutToAppear 里,结果 onPageShow 比 init 更早触发,第一次进入页面时 prefs 还是 null,数据读不出来,页面显示空列表。
正确做法是在 EntryAbility 的 onWindowStageCreate 里调用 init,确保整个应用生命周期中只初始化一次,且在任何页面加载之前就完成。这个时序问题不注意很容易踩。
6.2 ForEach 的 key 函数不能省
在账单列表的 ForEach 里,第三个参数 key 函数 (item: BillItem) => item.id 一定要写。如果省略,删除某一条记录后,框架可能无法准确判断哪个 ListItem 发生了变化,出现列表渲染错乱或者动画异常的问题。
// 正确写法:提供唯一 key
ForEach(this.bills, (item: BillItem) => {
  ListItem() { BillCard({ item }) }
}, (item: BillItem) => item.id)   // ← 这个不能省
6.3 数字输入的边界处理
TextInput 设置了 InputType.Number,但某些输入法仍然可以绕过限制输入 "1.2.3" 这样不合法的字符串。建议在保存前统一用正则做一次校验,而不是只依赖 parseFloat 的结果:
const valid = /^\d+(\.\d{0,2})?$/.test(this.amountText);
if (!valid || this.amountText === "") {
  promptAction.showToast({ message: "请输入正确金额" });
  return;
}
另外 Number("") 在 JavaScript 里返回 0 而不是 NaN,所以不能用它来判断用户是否没有输入,需要额外检查空字符串。
6.4 长按手势与滚动手势的冲突
列表项上同时有 LongPressGesture 和 List 的滚动手势,快速滑动时偶尔会意外触发长按删除弹窗。解决方案是给 LongPressGesture 设置一个合理的触发时长阈值:
// 600ms 才触发,正常滑动不会误触
LongPressGesture({ duration: 600 }).onAction(() => {
  // 弹出删除确认
})
600ms 是一个比较合适的阈值,用户有明确的长按意图才会触发,普通滑动和短按都不会误触。
6.5 Canvas 内容刷新的时机
统计页的柱状图数据是动态的,每次进入页面都可能不同。但 Canvas 不像普通组件那样跟着 @State 自动刷新,需要在数据更新后手动重新调用绘制方法:
async onPageShow() {
  this.bills = await BillStorage.loadAll();
  // 数据更新后重新绘制
  this.drawBarChart(this.ctx, this.calcExpenseByCategory());
}
七、整体运行效果
在 DevEco Studio 中连接 Phone 模拟器(API Level 12),点击运行按钮,首次编译需要等待约一分钟。应用启动后可以走完如下完整流程:
- 首次打开:列表区域显示「暂无账单,点击右下角 + 添加」的引导文字,顶部收支均为 ¥0.00
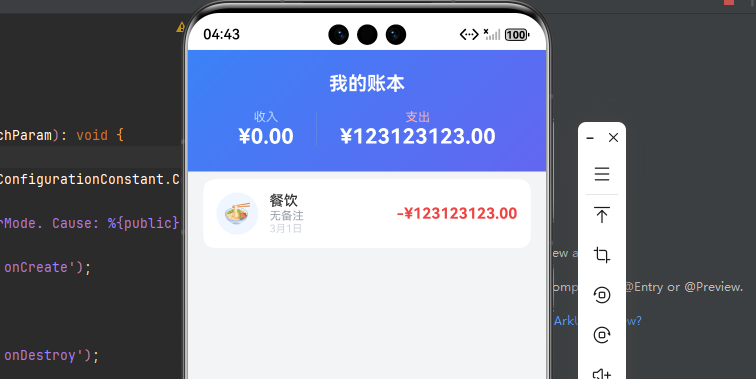
- 添加支出:点击右下角 + 按钮,进入添加页,默认为支出模式,选择「餐饮」,输入 38.5,保存返回
- 列表更新:回到首页,账单卡片出现,顶部支出金额更新为 ¥38.50
- 切换收入:再添加一条「工资」收入,首页顶部收入金额同步显示
- 删除操作:长按某条账单超过 600ms,弹出确认弹窗,确认后账单消失,总额更新
- 统计页面:切换到统计标签,柱状图按支出金额降序展示各分类
整个交互流程比较流畅,Preferences 的读写速度在数据量不大的情况下基本感知不到延迟。
八、总结
做完这个小项目,最直观的感受是 HarmonyOS 5.0 的 ArkUI 框架已经很成熟。声明式 UI 的模式让界面逻辑变得清晰,@State 驱动刷新这套机制用顺手之后效率确实比传统命令式写法高不少,很多地方可以少写很多手动更新视图的代码。
Preferences 接口对于这种轻量的本地存储需求来说已经够用,API 简洁,异步操作规范。如果后续数据量增大,或者需要支持按日期范围查询、多条件过滤等复杂场景,可以考虑换用 relationalStore(关系型数据库)接口,鸿蒙的 API 设计风格保持一致,迁移成本不高。
整个项目的代码量大约在 400 行左右,涵盖了多页面跳转、自定义组件封装、状态管理、数据持久化、Canvas 绘图这几个常用的技术点。如果你正在学习 HarmonyOS 应用开发,这个项目可以作为一个不错的练手起点,在此基础上扩展月度统计、数据导出、多账本等功能也不会太复杂。
欢迎有问题在评论区交流,踩过的坑能少踩一个是一个。