基于Python 的cv2和ultraytics库,直接调用yolov8n.pt(yolov8n.pt 是 Ultralytics YOLOv8 目标检测系列中最小、最轻量的官方预训练模型)
1、安装依赖
pip install ultralytics -i https://pypi.tuna.tsinghua.edu.cn/simple
pip install opencv-python
2、加载模型
from ultralytics import YOLO

# 加载模型(自动下载,只需要这一行)
model = YOLO("yolov8n.pt")
3、开始识别(单张图和监控识别)
from ultralytics import YOLO
import cv2

# 1. 加载模型
model = YOLO("yolov8n.pt")

# 2. 识别(只检测人,置信度 0.4)
results = model("你的图片.jpg", classes=[0], conf=0.4)

# 3. 读取图片画框
img = cv2.imread("你的图片.jpg")

for r in results:
    for box in r.boxes:
        x1, y1, x2, y2 = map(int, box.xyxy[0])
        cv2.rectangle(img, (x1, y1), (x2, y2), (0,255,0), 2)
        cv2.putText(img, "PERSON", (x1,y1-10), cv2.FONT_HERSHEY_SIMPLEX, 1, (0,255,0), 2)

# 保存
cv2.imwrite("result.jpg", img)classes=[0]→ 只检测人conf=0.4→ 置信度 40% 就识别model()→ AI 推理核心- box = 一个人在图片里的 "位置方框"
监控头识别
from ultralytics import YOLO

model = YOLO("yolov8n.pt")
model.predict(source=0, show=True)  # 0=摄像头

def local_inference(img_path):
    model = YOLO("yolov8n.pt")
    results = model(img_path, classes=[0], conf=0.4)

    persons = []
    for r in results:
        for box in r.boxes:
            x1, y1, x2, y2 = map(int, box.xyxy[0])
            persons.append({
                "Box": {
                    "X": x1,
                    "Y": y1,
                    "Width": x2-x1,
                    "Height": y2-y1
                },
                "label": "person",
                "Score": float(box.conf)
            })
    return {"result": persons}
下面是一段测试的照片识别项目
import os
import cv2
from ultralytics import YOLO
# ===================== 你的路径(完全按你要求) =====================
BASE_DIR = r"C:\AI_project\person_detect"
PicPath = os.path.join(BASE_DIR, "pic") # 原图在这里
DetectPicPath = os.path.join(BASE_DIR, "detect_pic") # 打框图输出到这里
os.makedirs(DetectPicPath, exist_ok=True)
# ===================== 加载YOLO模型 =====================
model = YOLO("yolov8n.pt")
# ===================== 要检测的图片(你那张图) =====================
img_name = "safe.jpg" # <--- 改成你图片真实名字!!!
img_path = os.path.join(PicPath, img_name)
# ===================== 开始检测(只检测人) =====================
results = model(img_path, conf=0.2, classes=[0]) # conf=0.2 超低门槛,必检出!
# ===================== 读取图片 + 画框 =====================
img = cv2.imread(img_path)
for r in results:
for box in r.boxes:
# 获取坐标
x1, y1, x2, y2 = map(int, box.xyxy[0])
# 画绿色框
cv2.rectangle(img, (x1, y1), (x2, y2), (0, 255, 0), 3)
# 写文字
cv2.putText(img, "PERSON", (x1, y1-10), cv2.FONT_HERSHEY_SIMPLEX, 1, (0,255,0), 2)
#cv2.putText(img, "illegal", (x1+10, y1 + 10), cv2.FONT_HERSHEY_SIMPLEX, 1, (0, 255, 0), 2)
# ===================== 保存到 detect_pic =====================
save_path = os.path.join(DetectPicPath, f"detected_{img_name}")
cv2.imwrite(save_path, img)
print(f"✅ 检测完成!已保存到:{save_path}")
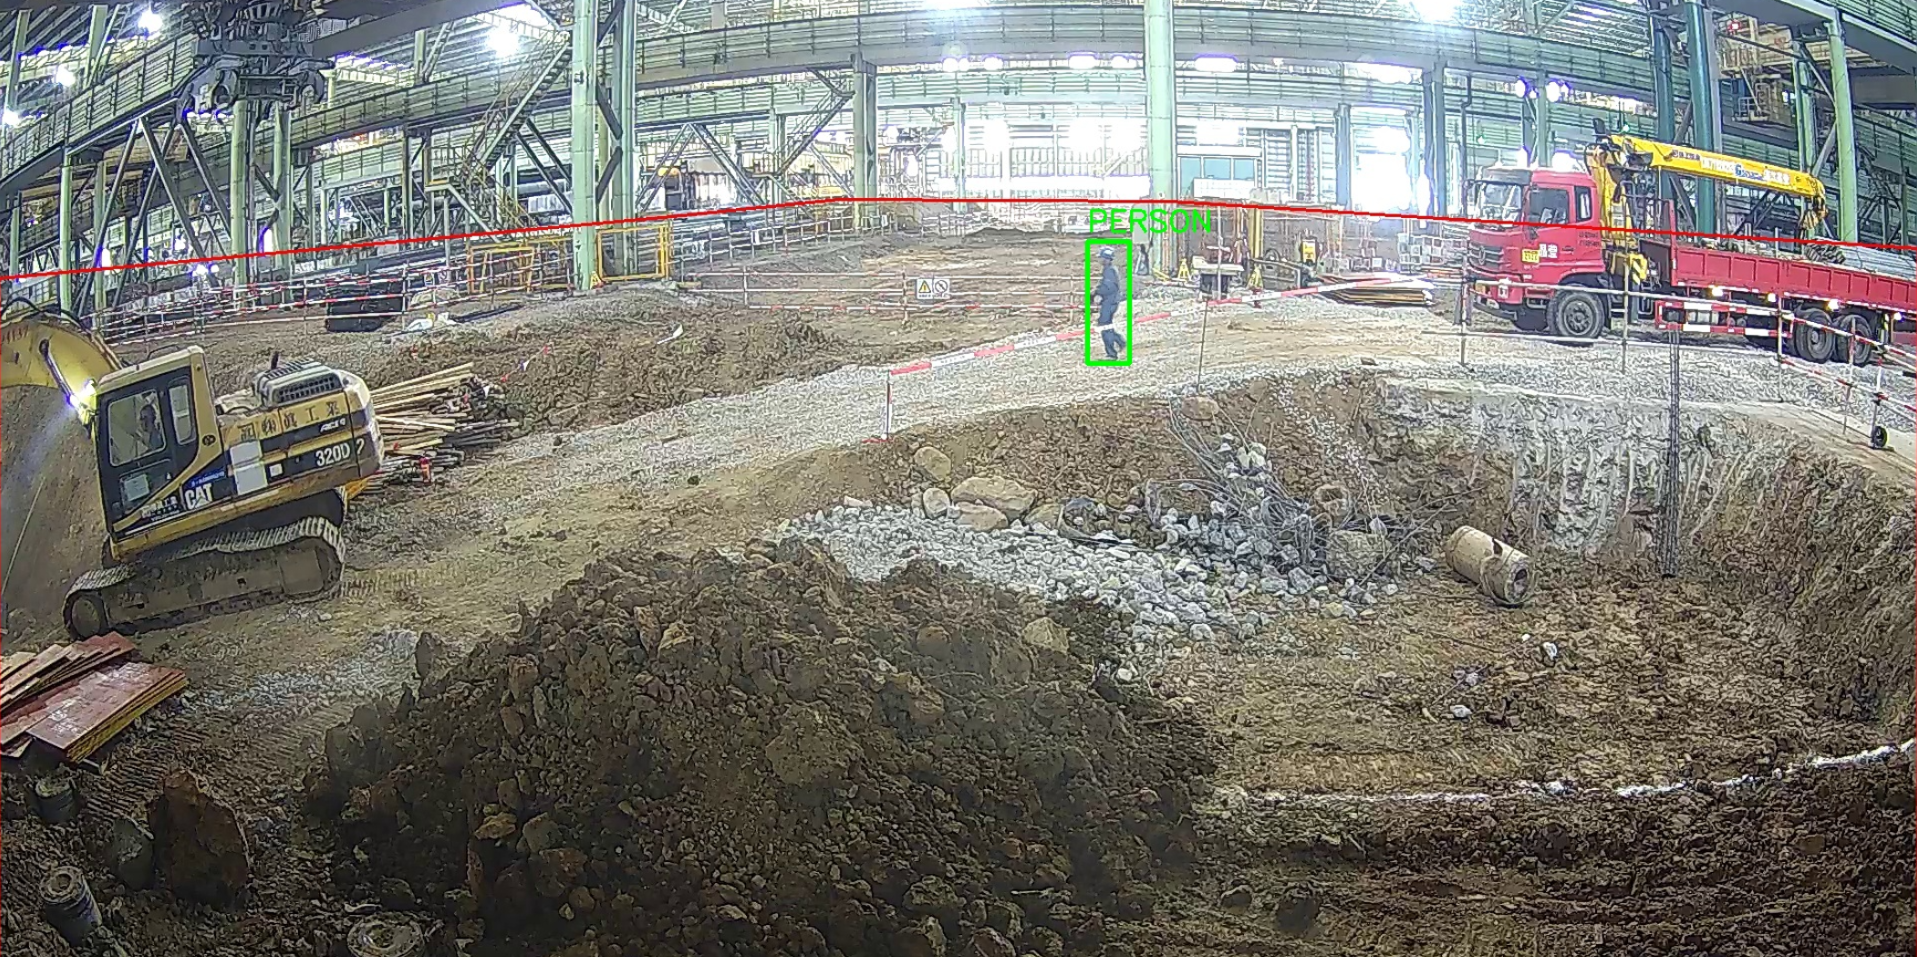
print(f"✅ 一共检测到 {len(results[0].boxes)} 个人!")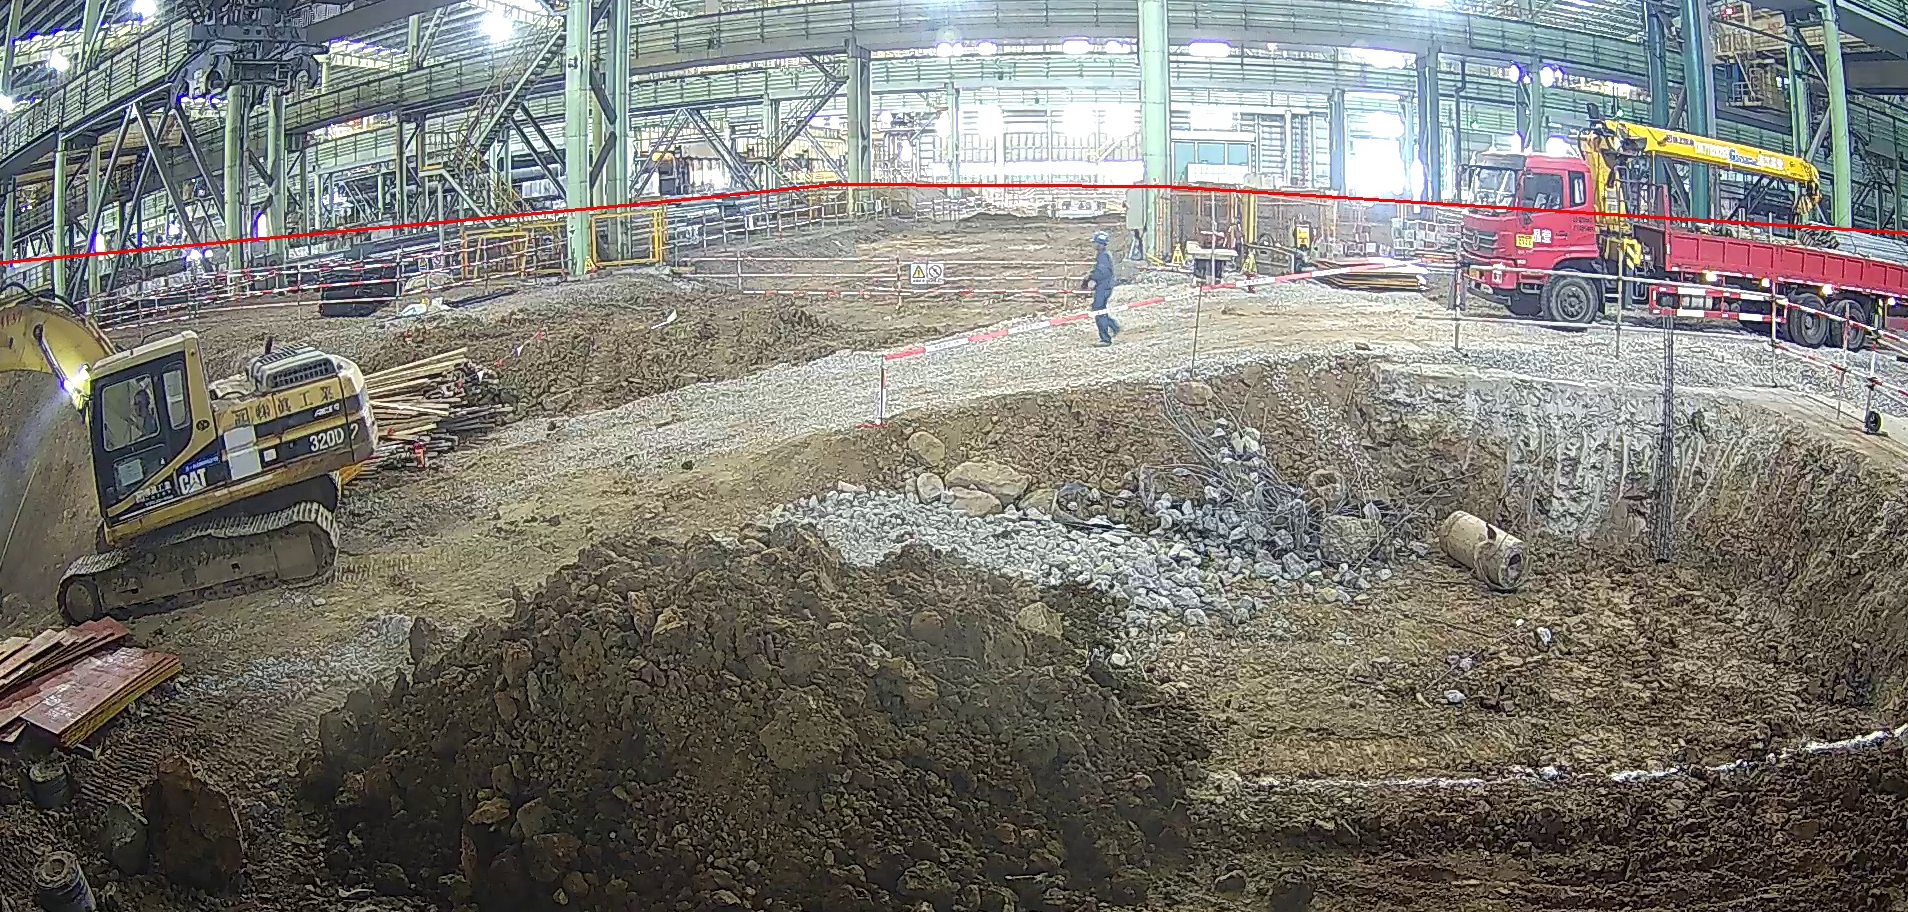 在pic目录下保存safe.jpg运行后生成图如下