使用 tianai-captcha
官方文档地址: https://doc.captcha.tianai.cloud/
一: 后端:
1:maven 引入
<dependency>
<groupId>cloud.tianai.captcha</groupId>
<artifactId>tianai-captcha-springboot-starter</artifactId>
<version>${tianai-captcha}</version>
</dependency>
2: application.yml 配置:
行为验证码配置, 详细请看 cloud.tianai.captcha.autoconfiguration.ImageCaptchaProperties 类
captcha:
如果项目中使用到了redis,滑块验证码会自动把验证码数据存到redis中, 这里配置redis的key的前缀,默认是captcha:slider
prefix: captcha:slider
验证码过期时间,默认是2分钟,单位毫秒, 可以根据自身业务进行调整
expire:
默认缓存时间 2分钟
default: 10000
针对 点选验证码 过期时间设置为 2分钟, 因为点选验证码验证比较慢,把过期时间调整大一些
WORD_IMAGE_CLICK: 20000
使用加载系统自带的资源, 默认是 false(这里系统的默认资源包含 滑动验证码模板/旋转验证码模板,如果想使用系统的模板,这里设置为true)
init-default-resource: true
缓存控制, 默认为false不开启
local-cache-enabled: false
缓存开启后,验证码会提前缓存一些生成好的验证数据, 默认是20
local-cache-size: 20
缓存开启后,缓存拉取失败后等待时间 默认是 5秒钟
local-cache-wait-time: 5000
缓存开启后,缓存检查间隔 默认是2秒钟
local-cache-period: 2000
缓存开启后,忽略的字段,默认是 ""(不忽略任何字段)
local-cache-ignored-cache-fields: ""
配置字体包,供文字点选验证码使用,可以配置多个,不配置使用默认的字体
font-path:
- classpath:font/SimHei.ttf
secondary:
二次验证, 默认false 不开启
enabled: true
二次验证key过期时间, 默认 2分钟
expire: 120000
二次验证缓存key前缀,默认是 captcha:secondary
keyPrefix: "captcha:secondary"
3: 自定义配置背景图片, 放在resource/image下, 图片是 600 * 360
@Slf4j
@Configuration
@RequiredArgsConstructor
public class CaptchaResourceConfiguration {

    @Bean
    public ResourceStore resourceStore() {

        // 使用本地内存存储器
        LocalMemoryResourceStore resourceStore = new LocalMemoryResourceStore();

        // 批量加载背景图片
        loadResourcesFromDir(resourceStore, "image/", CaptchaTypeConstant.SLIDER, "default");


        return resourceStore;
    }

    /**
     * 批量加载资源文件(背景图)
     */
    private void loadResourcesFromDir(LocalMemoryResourceStore store, String dirPath, String type, String tag) {
        try {
            ResourcePatternResolver resolver = new PathMatchingResourcePatternResolver();
            org.springframework.core.io.Resource[] resources =
                    resolver.getResources("classpath:" + dirPath + "*.{png,jpg,jpeg}");

            for (org.springframework.core.io.Resource resource : resources) {
                String filename = resource.getFilename();
                if (filename != null) {
                    String path = dirPath + filename;
                    Resource res = new Resource("classpath", path, tag);
                    store.addResource(type, res);
                }
            }
        } catch (IOException e) {
            log.error("加载背景图失败: {}", dirPath, e);
        }
    }


}
背景图片转换大小: 600 * 360
import javax.imageio.ImageIO;
import java.awt.image.BufferedImage;
import java.io.File;

public class ImageResizer {
    public static void main(String[] args) throws Exception {
        String dir = "D:/images";  // 修改为你的目录
        File[] files = new File(dir).listFiles((d, n) -> n.endsWith(".jpg") || n.endsWith(".png"));

        for (File f : files) {
            BufferedImage img = ImageIO.read(f);
            BufferedImage resized = new BufferedImage(600, 360, BufferedImage.TYPE_INT_RGB);
            resized.getGraphics().drawImage(img, 0, 0, 600, 360, null);
            ImageIO.write(resized, "jpg", new File(dir + "/resized_" + f.getName()));
        }
    }
}
4: controller 我这里默认是使用滑块, 可以根据前端传递参数设置
@RestController
@RequiredArgsConstructor
public class CaptchaController {
    private final ImageCaptchaApplication application;

    /**
     * 生成验证码
     * @return 验证码数据
     */
    @PostMapping("/action/get/image")
    @LimitAnnotation(key = CommonConstant.IMAGEKEY)
    public ApiResponse<ImageCaptchaVO> genCaptcha() {
        GenerateParam generateParam = new GenerateParam();
        // 要生成的验证码类型
        generateParam.setType(CaptchaTypeConstant.SLIDER);
        // 自定义容错值
        generateParam.addParam(ParamKeyEnum.TOLERANT, 0.05);
        return application.generateCaptcha(generateParam);
    }

    /**
     * 校验验证码
     * @param data 验证码数据
     * @return 校验结果
     */
    @PostMapping("/action/check/image")
    public ApiResponse<?> checkCaptcha(@RequestBody Data data) {
        ApiResponse<?> response = application.matching(data.getId(), data.getData());
        if (response.isSuccess()) {
            return ApiResponse.ofSuccess(Collections.singletonMap("id", data.getId()));
        }
        return response;
    }

    @lombok.Data
    public static class Data {
        // 验证码id,前端回传的验证码ID
        private String  id;
        // 验证码数据,前端回传的验证码轨迹数据
        private ImageCaptchaTrack data;
    }
}
二: vue3 前端
1: captcha.vue 验证码组件
源代码打包的文件放在 public/static下
<template>
    <!-- 验证码挂载点 -->
    <div id="captcha-box"></div>
</template>

<script setup>
import { ref, onMounted, onUnmounted, watch, nextTick } from 'vue'
import { useI18n } from 'vue-i18n'
const { t } = useI18n()

// --- Props 定义 ---
// 接收父组件传来的验证码类型 (ROTATE, CONCAT, WORD_IMAGE_CLICK, SLIDER)
const props = defineProps({
    captchaType: {
        type: String,
        default: 'SLIDER' // 默认滑块
    },
    // 控制验证码弹窗的显示与隐藏(用于重新初始化)
    visible: {
        type: Boolean,
        default: false
    }
})

// --- Emits 定义 ---
// 验证成功时向父组件传递 Token
// 验证失败时通知父组件
const emit = defineEmits(['verify-success', 'verify-fail', 'loaded'])

// --- 核心逻辑 ---

// 1. 管理当前的验证码实例
let currentCaptcha = null

// 2. 动态加载外部资源 (CSS & JS)
const loadResources = () => {
    // 加载 CSS
    if (!document.querySelector('link[href="/static/tac/css/tac.css"]')) {
        const link = document.createElement('link')
        link.rel = 'stylesheet'
        link.href = '/static/tac/css/tac.css'
        document.head.appendChild(link)
    }

    // 加载 JS
    if (!document.querySelector('script[src="/static/tac/js/tac.js"]')) {
        const script = document.createElement('script')
        script.src = '/static/tac/js/tac.js'
        script.defer = true
        document.head.appendChild(script)
    }
}

// 3. 初始化验证码
const initCaptcha = () => {
    // 防止重复初始化
    if (currentCaptcha) {
        currentCaptcha.destroyWindow?.()
    }

    // 等待 TAC 全局对象加载完成
    const tryInit = () => {
        if (typeof TAC === 'undefined') {
            setTimeout(tryInit, 200)
            return
        }

        const style = {
            i18n: {
                // 通用提示   i18n 国际化
                tips_success: t('captcha.tips_success'),
                tips_error: t('captcha.tips_error'),
                tips_network_error: t('captcha.tips_network_error'),
                tips_4001: t('captcha.tips_4001'),

                // // 滑块验证码
                slider_title: t('captcha.slider_title'),
                slider_title_size: "15px",


                // 禁用状态
                disable_title: t('captcha.disable_title'),
                disable_title_size: "14px",


                // 错误消息
                error_config_bindEl: t('captcha.error_config_bindEl'),
                error_config_requestUrl: t('captcha.error_config_requestUrl'),
                error_config_validUrl: t('captcha.error_config_validUrl'),
                error_data_invalid: t('captcha.error_data_invalid'),
                error_type_unknown: t('captcha.error_type_unknown'),
                error_blackhole: t('captcha.error_blackhole'),

                // 按钮文字
                btn_confirm: "t('common.ok')"


            }
        }

        // TAC 加载完成,创建配置
        const config = {
            // 获取验证码数据接口
            requestCaptchaDataUrl: `${location.protocol}//${location.host}/action/get/image`,
            // 验证验证码接口
            validCaptchaUrl: `${location.protocol}//${location.host}/action/ck/image`,

            // 绑定到 template 中的 div
            bindEl: "#captcha-box",

            timeToTimestamp: true,
            i18n: style.i18n,

            // 验证成功回调
            validSuccess: (res, _, tac) => {

                tac.destroyWindow()
                // 触发父组件事件,传递 Token
                emit('verify-success', res.data?.id)
            },

            // 验证失败回调
            validFail: (res, _, tac) => {
                tac.reloadCaptcha()
                emit('verify-fail')
            },

            // 加载完成回调
            loaded: () => {
                emit('loaded')
            }
        }

        // 创建实例并初始化
        currentCaptcha = new TAC(config, style)
        currentCaptcha.init()
    }

    tryInit()
}

// 4. 组件挂载时:加载资源
onMounted(() => {
    loadResources()
    // 如果父组件要求显示,则初始化
    if (props.visible) {
        // 使用 nextTick 确保 DOM 渲染完成
        nextTick(() => {
            initCaptcha()
        })
    }
})

// 5. 监听 visible 变化:控制显示/隐藏
watch(() => props.visible, (newVal) => {

    if (newVal) {
        if (currentCaptcha) {
            currentCaptcha.destroyWindow?.()
            currentCaptcha = null
        }

        // 延迟一点点执行,确保 DOM 已经清理干净
        nextTick(() => {
            initCaptcha()
        })
    } else {
        // 隐藏时也彻底销毁
        if (currentCaptcha) {
            currentCaptcha.destroyWindow?.()
            currentCaptcha = null
        }
    }
}, { immediate: false })

// 6. 组件卸载时:清理资源
onUnmounted(() => {
    if (currentCaptcha) {
        currentCaptcha.destroyWindow?.()
    }
})


defineExpose({
    refreshCaptcha() {
        if (currentCaptcha) {
            currentCaptcha.reloadCaptcha?.()
        }
    },
    destroy() {
        if (currentCaptcha) {
            currentCaptcha.destroyWindow?.()
            currentCaptcha = null
        }
    },
    init() {
        initCaptcha()
    }
})
</script>

<style scoped>
/* 确保挂载点有正确的定位 */
#captcha-box {
    position: fixed;
    top: 50%;
    left: 50%;
    transform: translate(-50%, -50%);
    z-index: 9999;
}


</style>
2: 登录组件使用
<Captcha
ref="captchaRef"
:visible="captchaVisible"
@verify-success="handleCaptchaSuccess"
@verify-fail="handleCaptchaFail"
/>
// --- 核心逻辑:分步登录流程 ---
/**
* 第一步:点击登录按钮
* 1. 验证表单数据
* 2. 如果通过,打开验证码弹窗
*/
const handleLogin = async () => {
if (!loginFormRef.value) return
// 重置验证码状态
loginCaptchaVerified.value = false
// 1. 验证账号密码输入
const valid = await loginFormRef.value.validate().catch(() => false)
if (valid) {
// 2. 验证通过后,保存当前表单数据,并弹出验证码
pendingLoginData = { ...loginForm }
captchaVisible.value = true
nextTick(() => {
// 如果子组件有暴露的方法,直接调用
if (captchaRef.value) {
captchaRef.value.init()
}
})
}
}
/**
* 第二步:验证码验证成功回调
* 1. 接收 Token
* 2. 结合之前保存的账号密码调用登录接口
*/
const handleCaptchaSuccess = async (token) => {
// 标记验证通过(虽然马上就会关闭弹窗,但为了逻辑完整性)
loginCaptchaVerified.value = true
captchaVisible.value = false
pendingLoginData.captchaId = token
if (pendingLoginData) {
loading.value = true
try {
await login(pendingLoginData).then((res) => {
console.log(res, '登录返回')
FormUtils.msg(Type.SUCCESS, t('login.loginSuccess'))
// 登录成功后清理临时数据
pendingLoginData = null
captchaVisible.value = false
})
} catch (error) {
loginCaptchaVerified.value = false
FormUtils.msg(Type.WARNING, t('login.loginFailed'))
captchaRef.value?.refreshCaptcha()
} finally {
loading.value = false
}
}
}
const handleCaptchaFail = () => {
loginCaptchaVerified.value = false
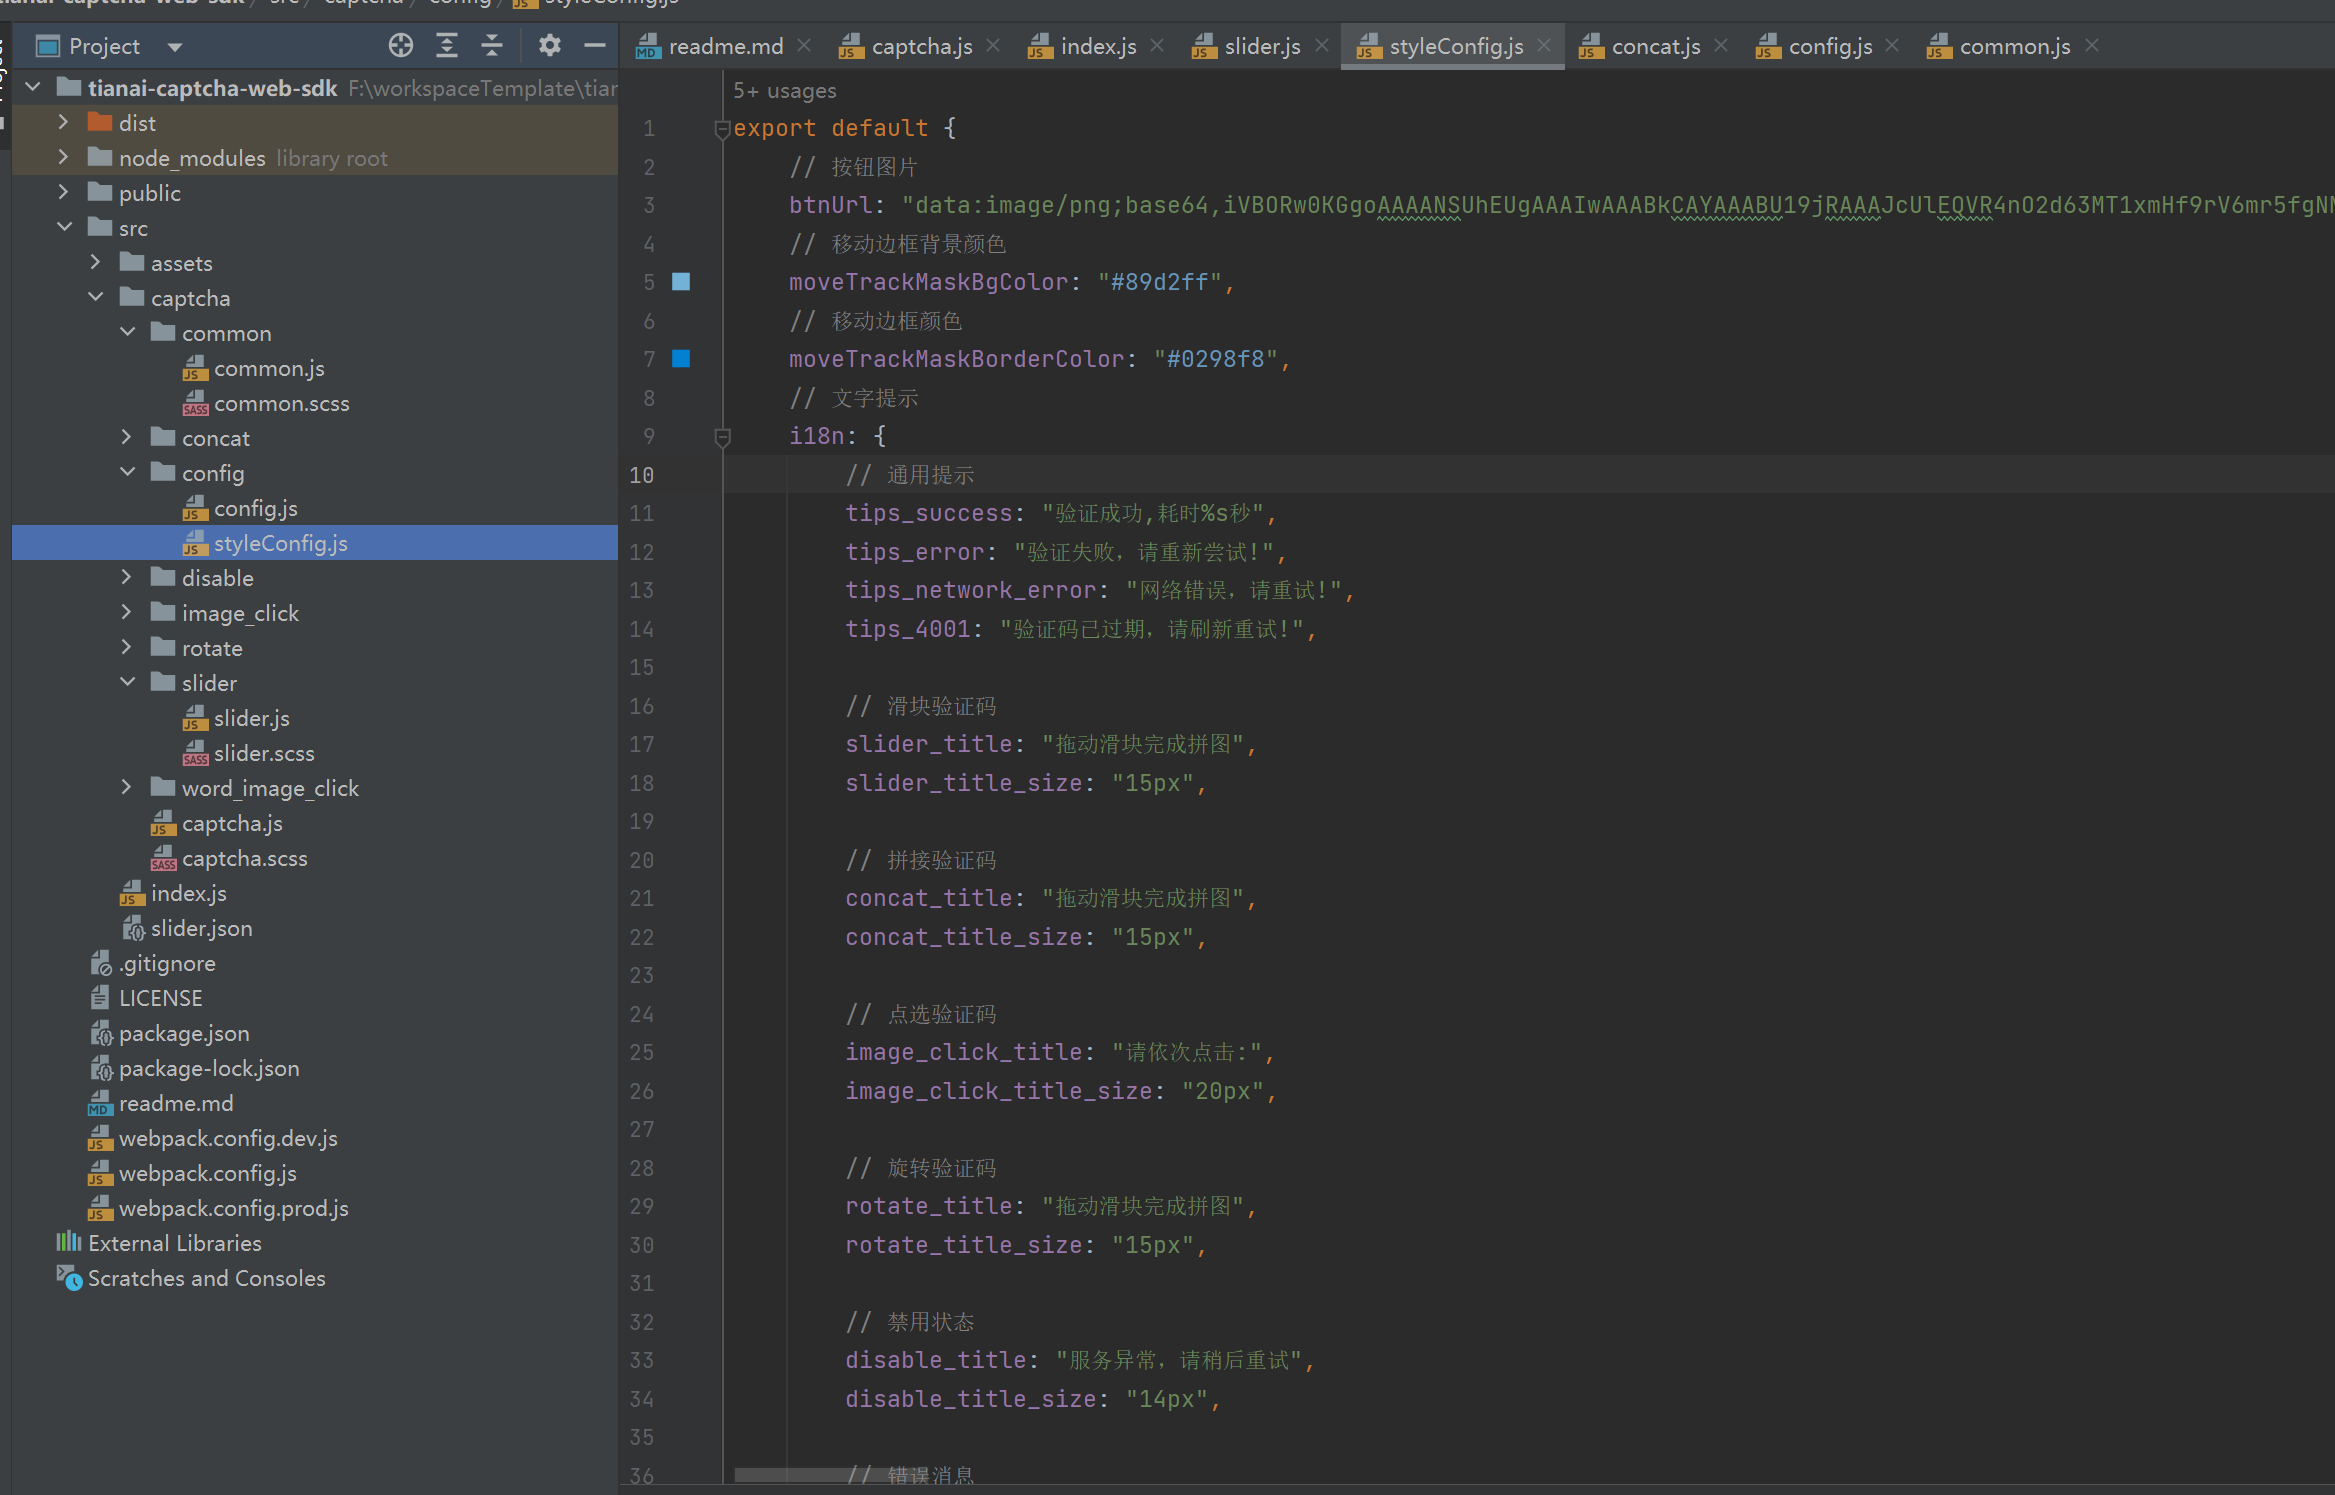
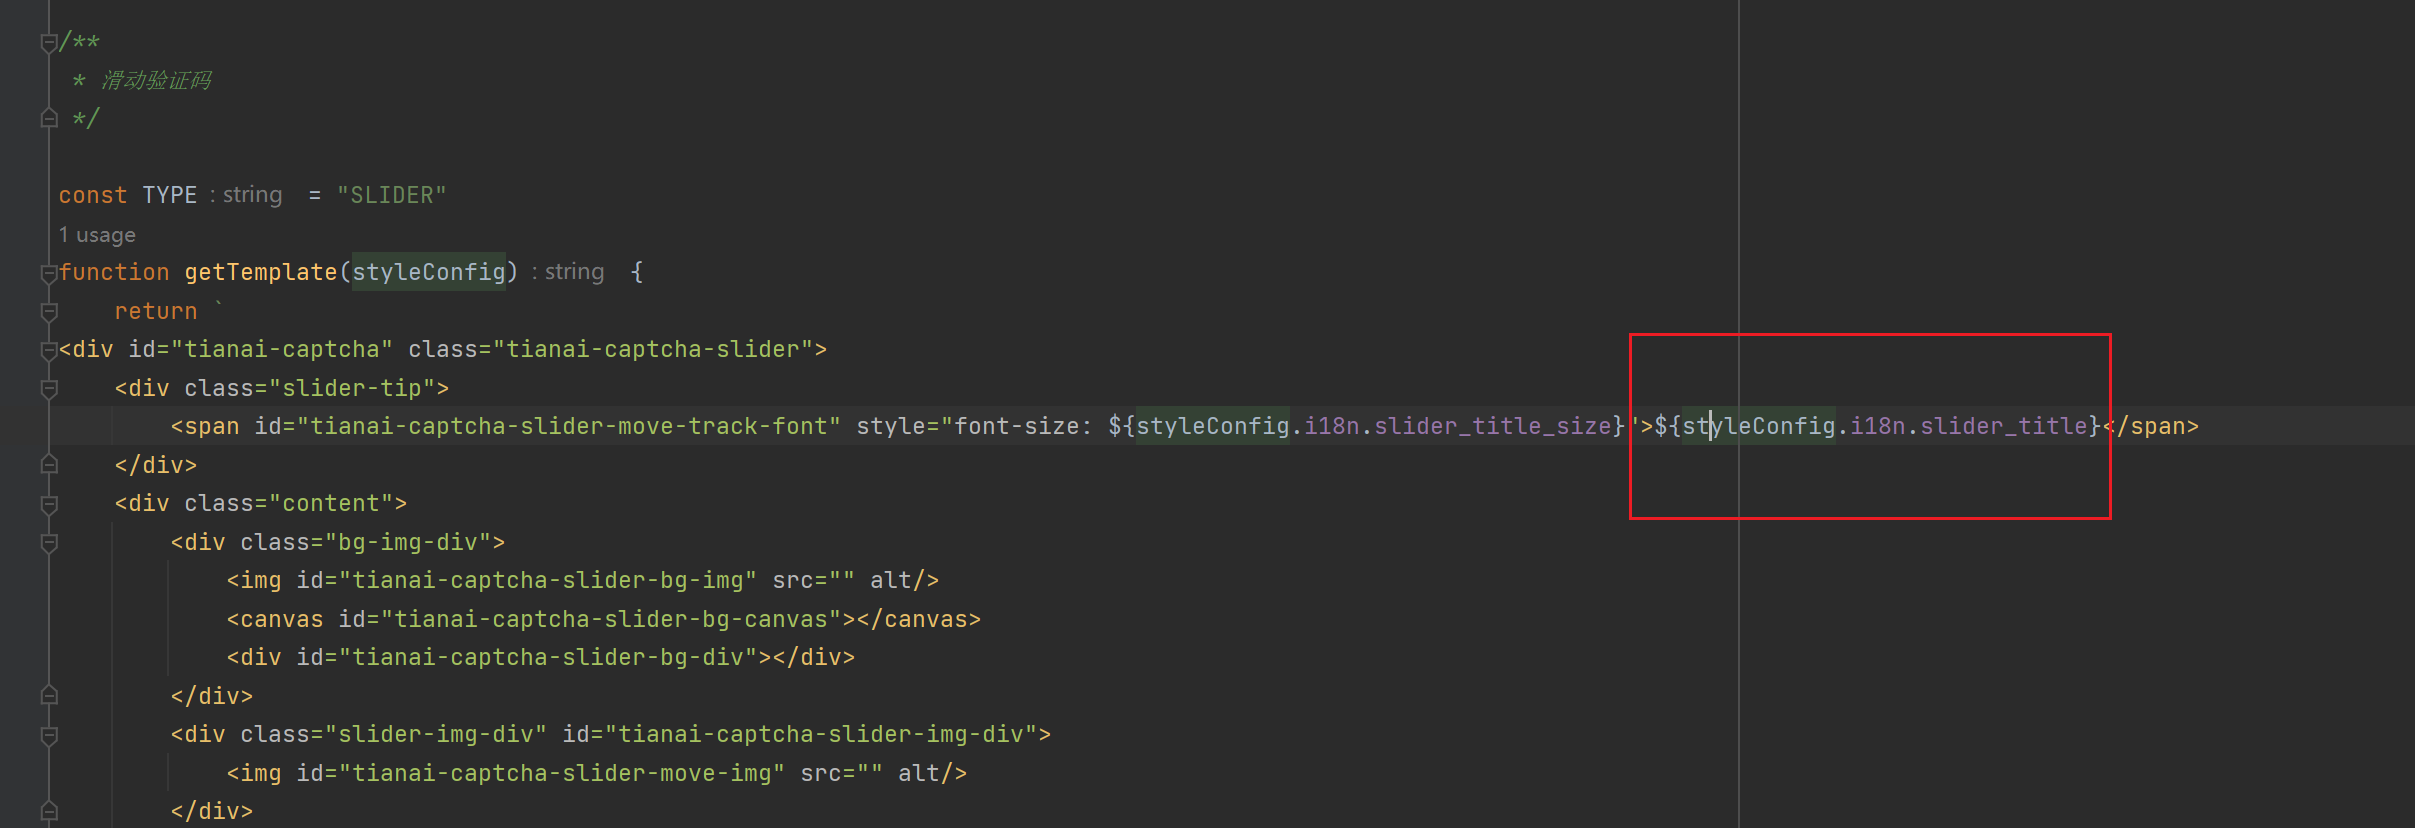
}3: 源代码
地址:https://gitee.com/dromara/tianai-captcha/tree/master/tianai-captcha-web-sdk
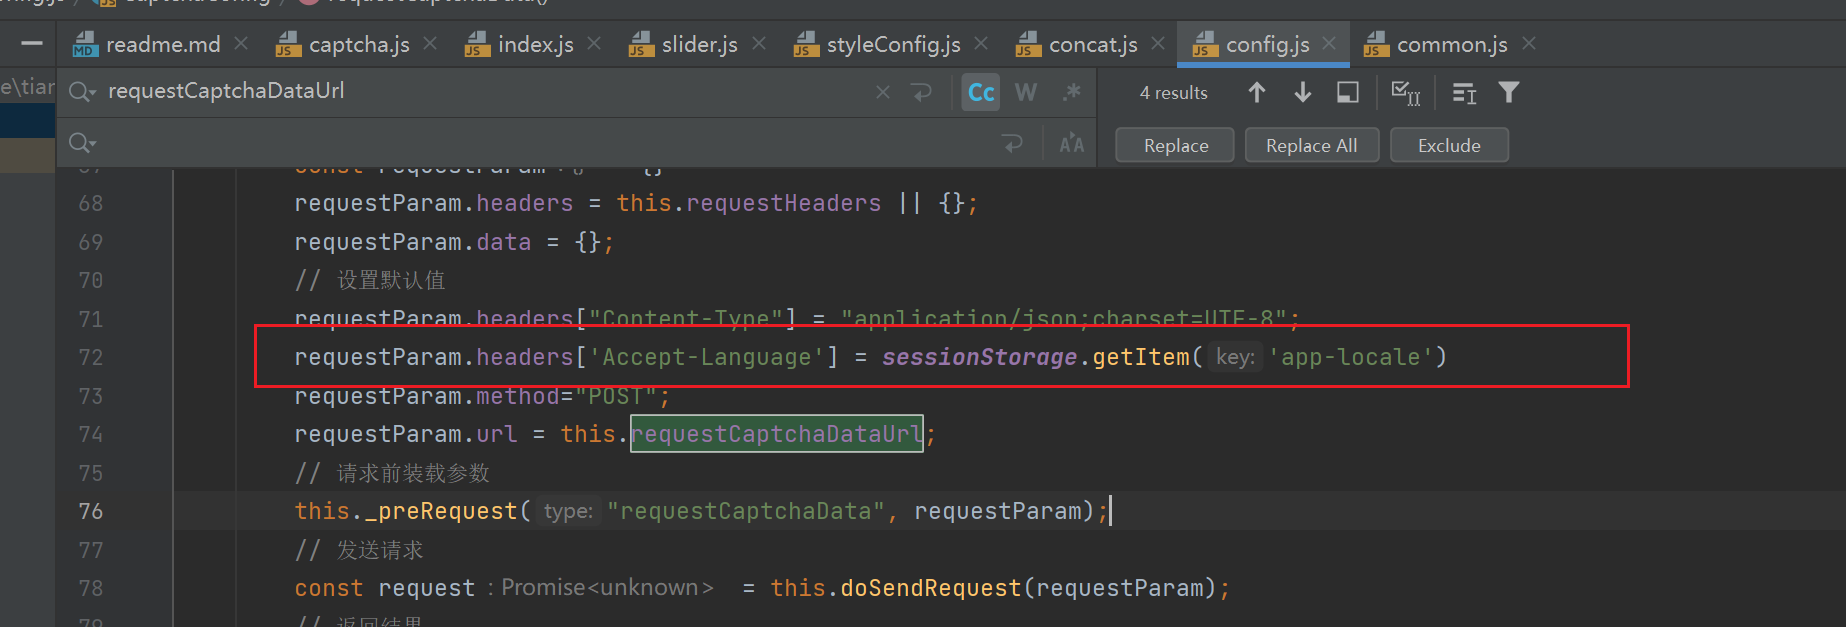
要支持 i18n 修改如下图中的文件。以及全文搜索中文配置为使用多语言
请求头加上本地存储的语言参数
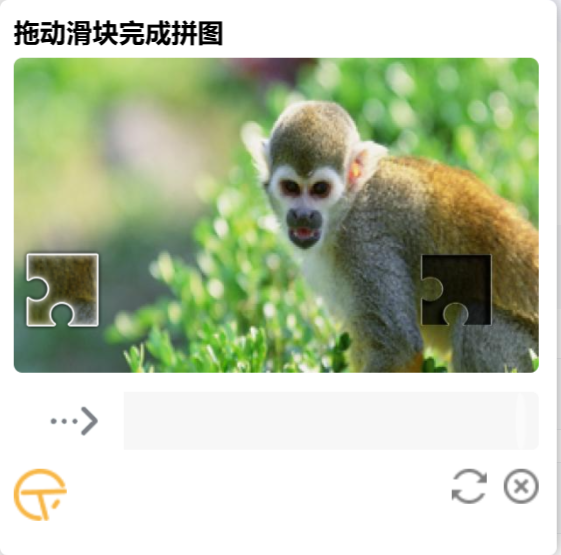
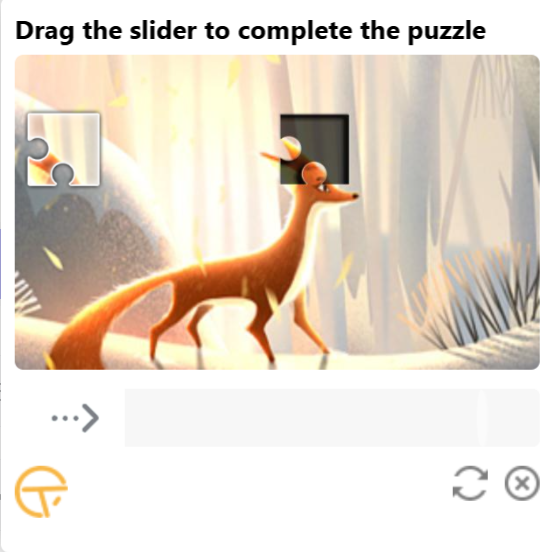
三: 效果: