文章目录
-
- oAuth2.0介绍
-
- **核心概念**
- [**授权流程(Grant Types)**](#授权流程(Grant Types))
- **关键特点**
- **安全注意事项**
- **常见应用场景**
- [**与OAuth 1.0的区别**](#与OAuth 1.0的区别)
- **示例流程(授权码模式)**
- [Spring Cloud Security OAuth2](#Spring Cloud Security OAuth2)
- 环境搭建
- 授权服务器配置
oAuth2.0介绍
OAuth 2.0 是一种广泛使用的授权框架,允许第三方应用在用户授权的前提下访问其受保护的资源(如API、数据等),而无需共享用户凭证(如用户名和密码)。它通过**令牌(Token)**机制实现安全授权,是现代互联网应用中实现单点登录(SSO)、开放平台、API安全访问的核心协议。
核心概念
-
角色(Roles):
- 资源所有者(Resource Owner):用户(如社交媒体账号持有者)。
- 客户端(Client):需要访问用户资源的应用(如移动App、网站)。
- 授权服务器(Authorization Server):验证用户身份并颁发令牌的服务器(如Google OAuth服务)。
- 资源服务器(Resource Server):存储用户资源的服务器(如Google Drive API)。
-
令牌类型:
- 访问令牌(Access Token):短期有效,用于访问资源(如读取用户邮箱)。
- 刷新令牌(Refresh Token):长期有效,用于获取新的访问令牌(避免用户频繁授权)。
授权流程(Grant Types)
OAuth 2.0 定义了多种授权模式,适用于不同场景:
-
授权码模式(Authorization Code Grant)
- 适用场景:服务器端应用(如Web应用)。
- 流程 :
- 用户访问客户端,客户端重定向到授权服务器。
- 用户登录并授权,授权服务器返回授权码。
- 客户端用授权码换取访问令牌 和刷新令牌。
- 优点:安全性高(令牌不经过浏览器,避免泄露)。
-
隐式模式(Implicit Grant)
- 适用场景:纯前端应用(如SPA)。
- 流程 :
- 用户授权后,授权服务器直接返回访问令牌(无授权码步骤)。
- 缺点:安全性较低(令牌可能暴露在浏览器历史记录中)。
-
密码模式(Resource Owner Password Credentials Grant)
- 适用场景:高信任度的客户端(如官方移动App)。
- 流程 :
- 用户直接输入用户名和密码给客户端。
- 客户端用凭证换取令牌。
- 缺点:需用户信任客户端(不推荐公开使用)。
-
客户端凭证模式(Client Credentials Grant)
- 适用场景:机器对机器通信(如后台服务访问API)。
- 流程 :
- 客户端用自身凭证(Client ID/Secret)直接获取令牌。
关键特点
- 去中心化:用户、客户端、授权服务器可属于不同域。
- 灵活性:支持多种授权模式,适应不同安全需求。
- 令牌短生命周期:访问令牌通常有效期短(如1小时),减少泄露风险。
- 可扩展性 :通过
scope参数限制客户端权限(如只读访问)。
安全注意事项
- HTTPS:所有通信必须加密。
- 令牌存储:避免在客户端存储刷新令牌(如前端应用)。
- CSRF防护 :授权码模式需验证
state参数。 - 令牌撤销:提供机制废除已颁发的令牌(如用户注销)。
常见应用场景
- 第三方登录:用Google/Facebook账号登录其他网站。
- 开放平台:允许开发者调用API(如Twitter API)。
- 微服务架构:服务间安全通信(如Kubernetes API)。
- IoT设备:设备通过云端授权访问用户数据。
与OAuth 1.0的区别
- 简化流程:OAuth 2.0 移除了签名验证,改用TLS加密。
- 更灵活:支持多种授权模式,而OAuth 1.0仅支持单一模式。
- 不兼容:OAuth 2.0 令牌与OAuth 1.0 不互通。
示例流程(授权码模式)
ResourceServer AuthServer Client User ResourceServer AuthServer Client User 访问应用 重定向到授权页面 登录并授权 返回授权码 用授权码换取令牌 返回访问令牌+刷新令牌 用访问令牌请求资源 返回资源数据
OAuth 2.0 是现代应用安全授权的标准,理解其流程和模式对开发安全系统至关重要。实际实现时,建议使用成熟库(如Spring Security OAuth、Passport.js)避免安全漏洞。
Spring Cloud Security OAuth2
环境介绍
Spring-Security-OAuth2是对OAuth2的一种实现,并且跟我们之前学习的Spring Security相辅相成,与Spring Cloud体系的集成也非常便利,接下来,我们需要对它进行学习,最终使用它来实现我们设计的分布式认证授权解决方案。
OAuth2.0的服务提供方涵盖两个服务,即授权服务(Authorization Server,也叫认证服务)和资源服务(Resource Server),使用Spring Security OAuth2的时候你可以选择把它们在同一个应用程序中实现,也可以选择建立使用同一个授权服务的多个资源服务。
授权服务(Authorization Server) 应包含对接入端以及登入用户的合法性进行验证并颁发token等功能,对令牌的请求端点由Spring MVC控制器进行实现,下面是配置一个认证服务必须要实现的endpoints:
- AuthorizationEndpoint 服务于认证请求。默认URL:
/oauth/authorize。 - TokenEndpoint 服务于访问令牌的请求。默认URL:
/oauth/token。
资源服务(Resource Server),应包含对资源的保护功能,对非法请求进行拦截,对请求中token进行解析鉴权等,下面的过滤器用于实现OAuth 2.0资源服务:
- OAuth2AuthenticationProcessingFilter用来对请求给出的身份令牌解析鉴权。
本教程分别创建uaa授权服务(也可叫认证服务)和order订单资源服务。
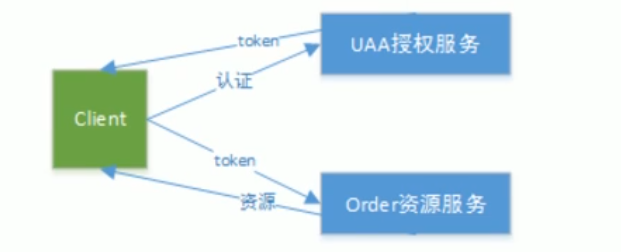
认证流程如下:
- 客户端请求UAA授权服务进行认证。
- 认证通过后由UAA颁发令牌。
- 客户端携带令牌Token请求资源服务。
环境搭建
创建父工程
- 首先创建maven 父工程
xml
<?xml version="1.0" encoding="UTF-8"?>
<project xmlns="http://maven.apache.org/POM/4.0.0"
         xmlns:xsi="http://www.w3.org/2001/XMLSchema-instance"
         xsi:schemaLocation="http://maven.apache.org/POM/4.0.0 http://maven.apache.org/xsd/maven-4.0.0.xsd">
    <modelVersion>4.0.0</modelVersion>

    <groupId>com.it2.security</groupId>
    <artifactId>distributed-security</artifactId>
    <version>1.0-SNAPSHOT</version>
    <modules>
        <module>distributed-security-uaa</module>
    </modules>
    <packaging>pom</packaging>

    <parent>
        <groupId>org.springframework.boot</groupId>
        <artifactId>spring-boot-starter-parent</artifactId>
        <version>2.1.3.RELEASE</version>
    </parent>
    <properties>
        <project.build.sourceEncoding>UTF-8</project.build.sourceEncoding>
        <project.reporting.outputEncoding>UTF-8</project.reporting.outputEncoding>
        <java.version>1.8</java.version>
    </properties>

    <dependencyManagement>
        <dependencies>
            <dependency>
                <groupId>org.springframework.cloud</groupId>
                <artifactId>spring-cloud-dependencies</artifactId>
                <version>Greenwich.RELEASE</version>
                <type>pom</type>
                <scope>import</scope>
            </dependency>
            <dependency>
                <groupId>javax.servlet</groupId>
                <artifactId>javax.servlet-api</artifactId>
                <version>3.1.0</version>
                <scope>provided</scope>
            </dependency>
            <dependency>
                <groupId>javax.interceptor</groupId>
                <artifactId>javax.interceptor-api</artifactId>
                <version>1.2</version>
            </dependency>
            <dependency>
                <groupId>com.alibaba</groupId>
                <artifactId>fastjson</artifactId>
                <version>1.2.47</version>
            </dependency>
            <dependency>
                <groupId>org.projectlombok</groupId>
                <artifactId>lombok</artifactId>
                <version>1.18.0</version>
            </dependency>
            <dependency>
                <groupId>mysql</groupId>
                <artifactId>mysql-connector-java</artifactId>
                <version>5.1.47</version>
            </dependency>
            <dependency>
                <groupId>org.springframework.security</groupId>
                <artifactId>spring-security-jwt</artifactId>
                <version>1.0.1.RELEASE</version>
            </dependency>
            <dependency>
                <groupId>org.springframework.security.oauth.boot</groupId>
                <artifactId>spring-security-oauth2-autoconfigure</artifactId>
                <version>2.1.3.RELEASE</version>
            </dependency>
        </dependencies>
    </dependencyManagement>
    <build>
        <finalName>${project.name}</finalName>
        <resources>
            <resource>
                <directory>src/main/resource</directory>
                <filtering>true</filtering>
                <includes>
                    <include>**/*</include>
                </includes>
            </resource>
        </resources>
        <plugins>
            <plugin>
                <groupId>org.apache.maven.plugins</groupId>
                <artifactId>maven-compiler-plugin</artifactId>
                <configuration>
                    <source>1.8</source>
                    <target>1.8</target>
                </configuration>
            </plugin>
            <plugin>
                <artifactId>maven-resources-plugin</artifactId>
                <configuration>
                    <encoding>utf-8</encoding>
                    <useDefaultDelimiters>true</useDefaultDelimiters>
                </configuration>
            </plugin>
        </plugins>
    </build>


</project>
创建UAA授权服务器
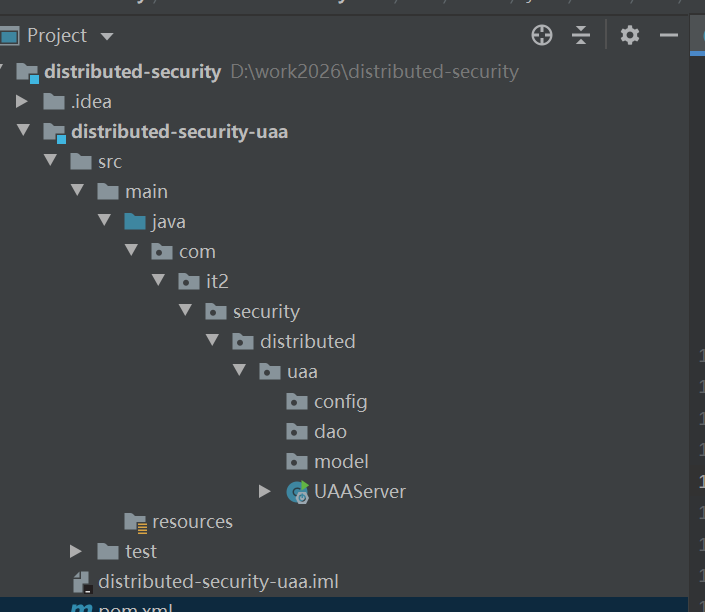
- 创建distributed-security-uaa
创建distributed-security-uaa作为授权服务工程,依赖如下:
xml
<?xml version="1.0" encoding="UTF-8"?>
<project xmlns="http://maven.apache.org/POM/4.0.0"
         xmlns:xsi="http://www.w3.org/2001/XMLSchema-instance"
         xsi:schemaLocation="http://maven.apache.org/POM/4.0.0 http://maven.apache.org/xsd/maven-4.0.0.xsd">
    <parent>
        <artifactId>distributed-security</artifactId>
        <groupId>com.it2.security</groupId>
        <version>1.0-SNAPSHOT</version>
    </parent>
    <modelVersion>4.0.0</modelVersion>

    <artifactId>distributed-security-uaa</artifactId>


    <dependencies>

        <dependency>
            <groupId>org.springframework.boot</groupId>
            <artifactId>spring-boot-starter-test</artifactId>
        </dependency>

        <dependency>
            <groupId>org.springframework.cloud</groupId>
            <artifactId>spring-cloud-starter-netflix-hystrix</artifactId>
        </dependency>
        <dependency>
            <groupId>org.springframework.cloud</groupId>
            <artifactId>spring-cloud-starter-netflix-ribbon</artifactId>
        </dependency>
        <dependency>
            <groupId>org.springframework.cloud</groupId>
            <artifactId>spring-cloud-starter-openfeign</artifactId>
        </dependency>
        <dependency>
            <groupId>com.netflix.hystrix</groupId>
            <artifactId>hystrix-javanica</artifactId>
        </dependency>
        <dependency>
            <groupId>org.springframework.retry</groupId>
            <artifactId>spring-retry</artifactId>
        </dependency>
        <dependency>
            <groupId>org.springframework.boot</groupId>
            <artifactId>spring-boot-starter-actuator</artifactId>
        </dependency>
        <dependency>
            <groupId>org.springframework.boot</groupId>
            <artifactId>spring-boot-starter-web</artifactId>
        </dependency>
        <dependency>
            <groupId>org.springframework.boot</groupId>
            <artifactId>spring-boot-starter-freemarker</artifactId>
        </dependency>
        <dependency>
            <groupId>org.springframework.data</groupId>
            <artifactId>spring-data-commons</artifactId>
        </dependency>
        <dependency>
            <groupId>org.springframework.cloud</groupId>
            <artifactId>spring-cloud-starter-security</artifactId>
        </dependency>
        <dependency>
            <groupId>org.springframework.cloud</groupId>
            <artifactId>spring-cloud-starter-oauth2</artifactId>
            <!--<exclusions>-->
            <!--<exclusion>-->
            <!--<groupId>org.springframework.security.oauth.boot</groupId>-->
            <!--<artifactId>spring-security-oauth2-autoconfigure</artifactId>-->
            <!--</exclusion>-->
            <!--</exclusions>-->
        </dependency>

        <dependency>
            <groupId>javax.interceptor</groupId>
            <artifactId>javax.interceptor-api</artifactId>
        </dependency>
        <dependency>
            <groupId>org.springframework.security</groupId>
            <artifactId>spring-security-jwt</artifactId>
        </dependency>
        <dependency>
            <groupId>mysql</groupId>
            <artifactId>mysql-connector-java</artifactId>
        </dependency>
        <dependency>
            <groupId>org.springframework.boot</groupId>
            <artifactId>spring-boot-starter-jdbc</artifactId>
        </dependency>
        <dependency>
            <groupId>org.projectlombok</groupId>
            <artifactId>lombok</artifactId>
        </dependency>
    </dependencies>


</project>
2 创建项目结构和启动类
java
package com.it2.security.distributed.uaa;

import org.springframework.boot.SpringApplication;
import org.springframework.boot.autoconfigure.SpringBootApplication;
import org.springframework.cloud.client.discovery.EnableDiscoveryClient;
import org.springframework.cloud.netflix.hystrix.EnableHystrix;
import org.springframework.cloud.openfeign.EnableFeignClients;

@SpringBootApplication
@EnableDiscoveryClient
@EnableHystrix
@EnableFeignClients(basePackages={"com.it2.security.distributed.uaa"})
public class UAAServer {

    public static void main(String[] args){
        SpringApplication.run(UAAServer.class,args);
    }
}
3 配置文件 application.properties
properties
spring.application.name=uaa-service
server.port=53020
spring.main.allow-bean-definition-overriding=true

#logging.level.root = debug
#logging.level.org.springframework.web = info

spring.http.encoding.enabled=true
spring.http.encoding.charset=utf-8
spring.http.encoding.force=true

server.tomcat.remote-ip-header=x-forwarded-for
server.tomcat.protocol-header=x-forwarded-proto
server.tomcat.max-http-post-size=5MB
server.use-forward-headers=true
server.servlet.context-path=/uaa

spring.freemarker.enabled=true
spring.freemarker.suffix=.html
spring.freemarker.request-context-attribute=rc
spring.freemarker.content-type=text/html
spring.freemarker.charset=UTF-8
spring.mvc.throw-exception-if-no-handler-found=true
spring.resources.add-mappings=false

spring.datasource.url=jdbc:mysql://localhost:3306/db1?useUnicode=true
spring.datasource.username=root
spring.datasource.password=123456
spring.datasource.driver-class-name=com.mysql.jdbc.Driver


management.endpoints.web.exposure.exclude=refresh,health,info,env

feign.hystrix.enabled=true
feign.compression.request.enabled=true
feign.compression.request.mime-types[0]=text/xml
feign.compression.request.mime-types[1]=application/xml
feign.compression.request.mime-types[2]=application/json
feign.compression.request.min-request-size=2048
feign.compression.response.enabled=true
创建Order资源服务
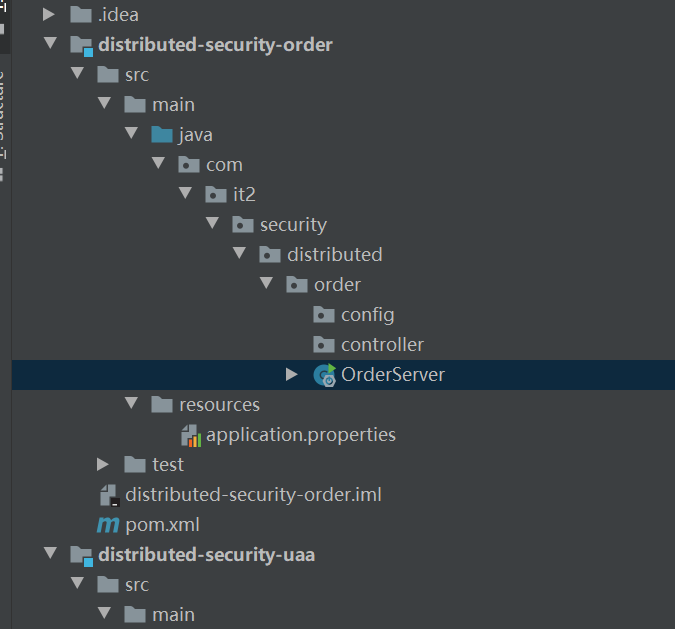
1 创建模块 distributed-security-order
导入依赖
xml
<?xml version="1.0" encoding="UTF-8"?>
<project xmlns="http://maven.apache.org/POM/4.0.0"
         xmlns:xsi="http://www.w3.org/2001/XMLSchema-instance"
         xsi:schemaLocation="http://maven.apache.org/POM/4.0.0 http://maven.apache.org/xsd/maven-4.0.0.xsd">
    <parent>
        <artifactId>distributed-security</artifactId>
        <groupId>com.it2.security</groupId>
        <version>1.0-SNAPSHOT</version>
    </parent>
    <modelVersion>4.0.0</modelVersion>

    <artifactId>distributed-security-order</artifactId>

    <dependencies>
        <dependency>
            <groupId>org.springframework.boot</groupId>
            <artifactId>spring-boot-starter-actuator</artifactId>
        </dependency>
        <dependency>
            <groupId>org.springframework.boot</groupId>
            <artifactId>spring-boot-starter-web</artifactId>
        </dependency>
        <dependency>
            <groupId>org.springframework.cloud</groupId>
            <artifactId>spring-cloud-starter-security</artifactId>
        </dependency>
        <dependency>
            <groupId>org.springframework.cloud</groupId>
            <artifactId>spring-cloud-starter-oauth2</artifactId>
        </dependency>
        <dependency>
            <groupId>javax.interceptor</groupId>
            <artifactId>javax.interceptor-api</artifactId>
        </dependency>
        <dependency>
            <groupId>com.alibaba</groupId>
            <artifactId>fastjson</artifactId>
        </dependency>
        <dependency>
            <groupId>org.projectlombok</groupId>
            <artifactId>lombok</artifactId>
        </dependency>
    </dependencies>
</project>
2 . 创建项目结构和启动类
java
package com.it2.security.distributed.order;


import org.springframework.boot.SpringApplication;
import org.springframework.boot.autoconfigure.SpringBootApplication;
import org.springframework.cloud.client.discovery.EnableDiscoveryClient;

@SpringBootApplication
@EnableDiscoveryClient
public class OrderServer {

    public static void main(String[] args) {
        SpringApplication.run(OrderServer.class,args);
    }

}- 创建配置文件 application.properties
properties
spring.application.name=order-service
server.port=53022
spring.main.allow-bean-definition-overriding=true

logging.level.root=debug
logging.level.org.springframework.web=info
spring.http.encoding.enabled=true
spring.http.encoding.charset=utf-8
spring.http.encoding.force=true
server.tomcat.remote-ip-header=x-forwarded-for
server.tomcat.protocol-header=x-forwarded-proto
server.use-forward-headers=true
server.servlet.context-path=/order


spring.freemarker.enabled=true
spring.freemarker.suffix=.html
spring.freemarker.request-context-attribute=rc
spring.freemarker.content-type=text/html
spring.freemarker.charset=utf-8
spring.mvc.throw-exception-if-no-handler-found=true
spring.resources.add-mappings=false
授权服务器配置
EnableAuthorizationServer
可以用@EnableAuthorizationServer注解并继承AuthorizationServerConfigurerAdapter来配置OAuth2.0授权服务器。
在config包下创建AuthorizationServer
java
@Configuration
@EnableAuthorizationServer
public class AuthorizationServer extends AuthorizationServerConfigurerAdapter {

}
AuthorizationServerConfigurerAdapter 要求配置一下几个类,这几个类是由Spring创建的独立的配置对象,它们会被Spring传入AuthorizationServerConfigurer中进行配置。
java
public class AuthorizationServerConfigurerAdapter implements AuthorizationServerConfigurer {
    public AuthorizationServerConfigurerAdapter() {
    }

    public void configure(AuthorizationServerSecurityConfigurer security) throws Exception {
    }

    public void configure(ClientDetailsServiceConfigurer clients) throws Exception {
    }

    public void configure(AuthorizationServerEndpointsConfigurer endpoints) throws Exception {
    }
}- ClientDetailsServiceConfigurer :用于配置客户端详情服务(ClientDetailsService),客户端详情信息在这里进行初始化,你能够把客户端详情信息写死在这里或者是通过数据库来存储调取详情信息。
- AuthorizationServerEndpointsConfigurer :用来配置令牌(token)的访问端点和令牌服务(tokenservices)。
- AuthorizationServerSecurityConfigurer :用来配置令牌端点的安全约束。
配置客户端详情信息
ClientDetailServiceConfigurer能够使用内存或者JDBC来实现客户端详情服务(ClientDetailsService),ClientDetailsService负责查找ClientDetails,而 ClientDetails有几个重要的树形如下列表:
- clientId :(必须的)用来标识客户的Id
- secret: (需要值得信任的客户端)客户端安全码,如果有的话。
- scope:用来限制客户端的访问访问,如果为空(默认)的话,那么客户端拥有全部的访问访问。
- authorizedGrantTypes:此客户端可以使用的授权类型,默认为空。
- authorities: 此客户端可以使用的权限(基于Spring Security authorities)。
客户端详情 (Client Details)能够在应用程序运行的时候进行更新,可以通过访问底层的存储服务(例如将客户端详情存储在一个关系数据库的表中,就可以使用JdbcClientDetailsService)或者通过自己实现ClietntRegistrationService接口 (同时你也可以实现ClientDetailsService接口)来进行管理。
我们暂时使用内存方式存储客户端详情信息,配置如下:
java
  @Override
    public void configure(ClientDetailsServiceConfigurer clients) throws Exception {
//        clients.withClientDetails(clientDetailsService)
        clients.inMemory()  //使用内存方式
        .withClient("c1") //client_id
        .secret(new BCryptPasswordEncoder().encode("secret")) //客户端密钥
        .resourceIds("res1")
                .authorizedGrantTypes("authorization_code","password","client_credentials","implicit","refresh_token")
    //该client允许的授权类型"authorization_code","password","client_credentials","implicit","refresh_token"
        .scopes("all") //允许的授权范围
        .autoApprove(false)  //授权码模式的话,跳到授权码页面
                .redirectUris("http://www.baidu.com");
    }
管理令牌
AuthorizationServerTokenServices接口定义了一些操作使得你可以对令牌进行一些必要的管理,令牌可以被用来加载身份信息,里面包含了这个令牌的相关权限。
自己可以创建AuthorizationServerTokenServices这个接口的实现,则需要继承DefaultTokenServices这个类,里面包含了一些有用实现,你可以使用它来修改令牌的格式和令牌的存储。默认的,当它尝试创建一个令牌的时候,是使用随机值来进行填充的,除了持久化令牌是委托一个TokenStore接口来实现意外,这个类几乎帮你做了所有的事情,并且TokenStore这个接口有一个默认的实现,它就是InMemoryTokenStore,如其命名,所有的令牌是被保存在了内存中。除了使用这个类之外,你还可以使用一些其他的预定义实现,下面有几个版本,它们都实现了TokenStore接口
- InMemoryTokenStore: 这个版本的实现是被默认采用的,它可以完美的工作在单服务器上(即访问并发量压力不大的情况下,并且它在失败的时候不会进行备份),大多数的项目都可以使用这个版本的实现来进行尝试,你可以在开发的时候使用它来进行管理,因为不会被保存到磁盘中,所以更易于调试。
- JdbcTokenStore: 这是一个基于JDBC的实现版本,令牌会被保存进关系型数据库。使用这个版本的实现时,你可以在不同的服务器之间共享令牌信息,使用这个版本的时候注意把"spring-jdbc"这个依赖加入到你的classpath之中。
- JwtTokenStore:这个版本的全程是JSON Web Token(JWT),它可以把令牌相关的数据进行编码(因此对于后端服务器来说,它不需要进行存储,这就是一个重大优势),但是它有一个缺点,那就是撤销你一个已经授权的令牌将会非常困难,所以通常用来处理一个生命周期较短的令牌以及撤销刷新令牌(refresh_token)。另外一个缺点就是这个令牌占用的空间会比较大,如果你加入了比较多用户凭证信息。JwtTokenStore不会保存任何数据,但是它在转化令牌值以及授权信息方面与DefaultTokenServices所扮演的角色是一样的。
- 定义TokenConfig
在config包下定义TokenConfig ,这里暂时使用InMemoryTokenStore ,生成一个普通的令牌。
java
@Configuration
public class TokenConfig {

    @Bean
    public TokenStore tokenStore(){
        return new InMemoryTokenStore();
    }
}- 定义AuthorizationServerTokenServices
在AuthorizationServer中定义AuthorizationServerTokenServices
java
@Autowired
    private TokenStore tokenStore;

    @Autowired
    private ClientDetailsService clientDetailsService;


    @Bean
    public AuthorizationServerTokenServices tokenService(){
        DefaultTokenServices service = new DefaultTokenServices();
        service.setClientDetailsService(clientDetailsService);//客户端信息服务
        service.setSupportRefreshToken(true);//是否产生刷新令牌
        service.setTokenStore(tokenStore);//令牌存储策略
        service.setAccessTokenValiditySeconds(7200);//令牌默认的有效期2小时
        service.setRefreshTokenValiditySeconds(259200);//刷新令牌的默认有效期3天
        return service;
    }
令牌访问端点配置
AuthorizationServerEndpointsConfiguer 这个对象的实例可以完成令牌服务以及令牌endpoint配置。
配置授权类型(Grant Types)
AuthorizationServerEndpointsConfigurer通过设定以下属性决定支持的授权类型(Grant Types):
-
authenticationManager:认证管理器,当你选择了资源所有者密码(password)授权类型的时候,请设置这个属性注入一个 AuthenticationManager 对象。
-
userDetailsService:如果你设置了这个属性的话,那说明你有一个自己的 UserDetailsService 接口的实现,或者你可以把这个东西设置到全局域上面去(例如 GlobalAuthenticationManagerConfigurer 这个配置对象),当你设置了这个之后,那么 "refresh_token" 即刷新令牌授权类型模式的流程中就会包含一个检查,用来确保这个账号是否仍然有效,假如说你禁用了这个账户的话。
-
authorizationCodeServices:这个属性是用来设置授权码服务的(即 AuthorizationCodeServices 的实例对象),主要用于 "authorization_code" 授权码类型模式。
-
implicitGrantService:这个属性用于设置隐式授权模式,用来管理隐式授权模式的状态。
-
tokenGranter:当你设置了这个东西(即 TokenGranter 接口实现),那么授权将会交由你来完全掌控,并且会忽略掉上面的这几个属性,这个属性一般是用作拓展用途的,即标准的四种授权模式已经满足不了你的需求的时候,才会考虑使用这个。
配置授权端点的URL(Endpoint URLs):
AuthorizationServerEndpointsConfigurer 这个配置对象有一个叫做 pathMapping() 的方法用来配置端点URL链接,它有两个参数:
- 第一个参数:String 类型的,这个端点URL的默认链接。
- 第二个参数:String 类型的,你要进行替代的URL链接。
以上的参数都将以"/"字符为开始的字符串,框架的默认URL链接如下列表,可以作为这个pathMapping()方法的第一个参数:
- /oauth/authorize:授权端点。
- /oauth/token:令牌端点。
- /oauth/confirm_access:用户确认授权提交端点。
- /oauth/error:授权服务错误信息端点。
- /oauth/check_token:用于资源服务访问的令牌解析端点。
- /oauth/token_key:提供公有密匙的端点,如果你使用JWT令牌的话。
需要注意的是授权端点这个URL应该被Spring Security保护起来只供授权用户访问.
在AuthorizationServer配置令牌访问端点
java
 @Autowired
    private AuthorizationCodeServices authorizationCodeServices;

    @Autowired
    private AuthenticationManager authenticationManager;

    @Override
    public void configure(AuthorizationServerEndpointsConfigurer endpoints) throws Exception {
        endpoints
                .authenticationManager(authenticationManager) //密码模式
                .authorizationCodeServices(authorizationCodeServices) //授权码模式
                .tokenServices(tokenService()) //令牌管理服务
                .allowedTokenEndpointRequestMethods(HttpMethod.POST);  //允许post提交
    }
令牌端点的安全约束
AuthorizationServerSecurityConfigurer:用来配置令牌端点(Token Endpoint) 的安全约束,在AuthorizationServer中配置如下,
java
 @Override
    public void configure(AuthorizationServerSecurityConfigurer security) throws Exception {
      security.tokenKeyAccess("permitAll()")  //(1)
              .checkTokenAccess("permitAll()")  //(2)
              .allowFormAuthenticationForClients(); //(3)
    }
(1) tokenKey这个endpoint 当使用JwtToken且使用非对称解密,资源服务用于获取公钥而开放的,这里指这个endpoint完全公开。
(2) checkToken这个endpoint完全公开
(3) 允许表单认证。
授权服务配置总结:授权服务配置分成三大块,可以关联记忆。
既然要完成认证,它首先得知道信息从哪里读取,因此要进行客户端详情配置。
既然要颁发token ,那必须得定义token的相关endpoint,以及token如何存取,以及客户端支持哪些类型的token。
既然暴露了一些endpoint,那对这些endpoint可以定义一些安全上的约束等。
web安全配置
将springboot工程中的WebSecurityConfig复制到UAA工程中。
java
package com.it2.security.distributed.order.config;

import org.springframework.context.annotation.Bean;
import org.springframework.context.annotation.Configuration;
import org.springframework.security.config.annotation.method.configuration.EnableGlobalMethodSecurity;
import org.springframework.security.config.annotation.web.builders.HttpSecurity;
import org.springframework.security.config.annotation.web.configuration.WebSecurityConfigurerAdapter;
import org.springframework.security.config.http.SessionCreationPolicy;
import org.springframework.security.crypto.bcrypt.BCryptPasswordEncoder;
import org.springframework.security.crypto.password.PasswordEncoder;

@Configuration
@EnableGlobalMethodSecurity(securedEnabled = true,prePostEnabled = true) //开启不同的方法权限注解
public class WebSecurityConfig extends WebSecurityConfigurerAdapter {


    //使用BCryptPasswordEncoder密码编码器
    @Bean
    public PasswordEncoder passwordEncoder() {
        return new BCryptPasswordEncoder();
    }


    //配置安全拦截机制
    protected void configure(HttpSecurity security) throws Exception {
        security.csrf().disable().authorizeRequests()
//                .antMatchers("/r/r1").hasAnyAuthority("p1")
                .antMatchers("/r/r2").hasAnyAuthority("p2")
                .antMatchers("/r/**").authenticated() //所有/r/**的请求都必须认证通过
                .anyRequest().permitAll() //除此之外的请求,都可以访问
                .and()
                .formLogin() //允许表单登录
                .loginPage("/login-view") //登录页面
                .loginProcessingUrl("/login")  //指定登录处理的url
                .successForwardUrl("/login-success") //自定义登录成功后的页面地址
        .and().sessionManagement().sessionCreationPolicy(SessionCreationPolicy.IF_REQUIRED)
                .and().logout().logoutUrl("/logout").logoutSuccessUrl("/login-view?logout"); //自定义退出


    }

    //配置安全拦截机制
//    protected void configure2(HttpSecurity security) throws Exception {
//        security.authorizeRequests()
//                .antMatchers("/admin/**").hasRole("ADMIN")
//                .antMatchers("/admin/login").permitAll()
//                .antMatchers("/r/r1").hasAnyAuthority("p1")
//                .antMatchers("/r/r2").hasAnyAuthority("p2")
//                .antMatchers("/r/r3").access("hasAuthority('p1') and hasAuthority('p2')")
//                .antMatchers("/r/**").authenticated() //所有/r/**的请求都必须认证通过
//                .anyRequest().permitAll() //除此之外的请求,都可以访问
//                .and()
//                .formLogin(); //允许表单登录
//    }

}