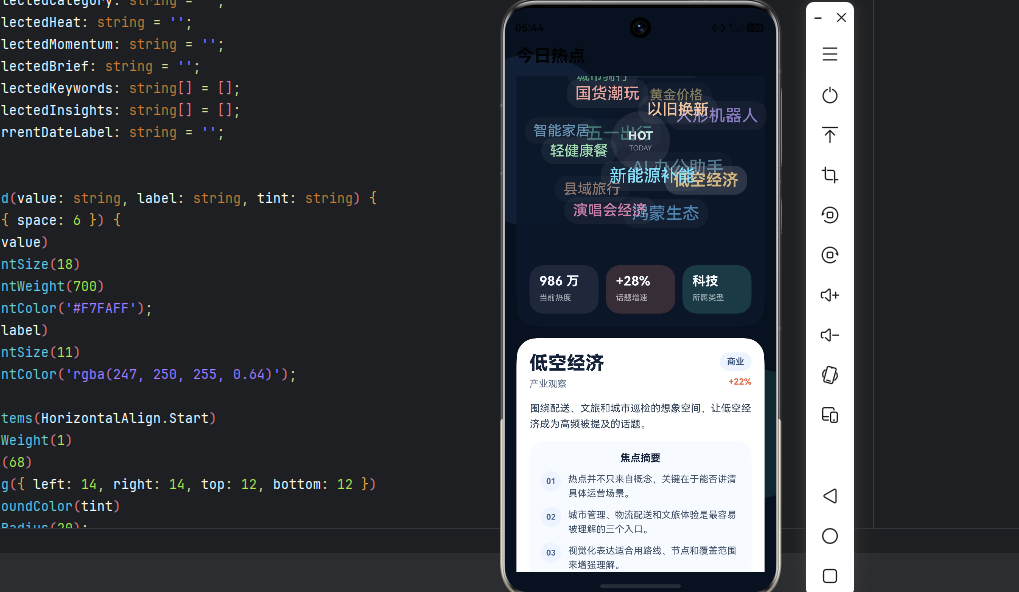
HarmonyOS 数据可视化实战:封装一个可复用的 3D 热点词球卡片组件
-
- 为什么要把词球做成组件,而不是直接写在页面里
- 先把数据模型定清楚:业务字段和空间字段放在一起
- [词球的核心其实不在 UI,而在球面排布和双轴旋转](#词球的核心其实不在 UI,而在球面排布和双轴旋转)
-
- [1. 先做球面初始化](#1. 先做球面初始化)
- [2. 再做绕 X、Y 轴旋转](#2. 再做绕 X、Y 轴旋转)
- 交互体验怎么做顺:自动旋转、拖拽控制、惯性减速都要收进组件内部
- [组件实现:封装一个真正可复用的 `TopicSphereCard`](#组件实现:封装一个真正可复用的
TopicSphereCard) - 补一个实战细节:词球看起来不居中,通常不是球心错了,而是定位方式错了
- 页面接入、封装收益和后续扩展
做内容型页面时,常见的诉求有两类:一类是信息要足够直观,另一类是交互要有记忆点。普通标签列表虽然稳定,但很难做出停留感;纯视觉动效虽然吸睛,却经常难以复用。
最近我用 ArkUI 封装了一个可复用的 TopicSphereCard 组件,目标很明确:
- 词条不是平铺,而是以 3D 球面的形式动态分布
- 组件支持自动旋转、手势拖拽和惯性减速
- 点击任意词条后,卡片详情区同步切换
- 结构上可直接复用到热点页、兴趣推荐页、活动会场页
如何把一个看起来偏效果型的词球交互,真正封装成可复用的鸿蒙卡片组件。
如果你正在做 HarmonyOS 的资讯页、标签页、热点页,或者希望给首页增加一块更有表现力的内容入口,这个方案会比较合适。
为什么要把词球做成组件,而不是直接写在页面里
很多交互在第一版实现时都能跑,但真正进入业务以后,很快就会暴露出几个问题:
- 页面代码同时承载数据、动画、样式和点击联动,职责过重。
- 换一个业务场景,比如从"热点词条"切到"兴趣标签",几乎只能复制整页。
- 后续如果要接接口、改皮肤、加埋点、调交互,维护成本会迅速上升。
这也是我这次封装 TopicSphereCard 的出发点。
组件应该只关心这些事情:
- 把词条排布到球面上
- 维护旋转动画与手势交互
- 提供统一的卡片容器和详情联动
而这些事情不应该由组件决定:
- 词条数据来自哪里
- 页面如何布局
- 详情区是否要换成别的业务内容
也就是说,我们封装的不是一个"页面",而是一块可以独立生长的交互能力。
在进入代码之前,先看一下这个组件最终应具备的能力边界:
- 输入一组词条数据
- 组件内部自动完成球面初始化
- 组件内部维护旋转状态与选中状态
- 外部页面只负责传数据和摆放位置
这个边界一旦清楚,后面的实现就会非常顺。
先把数据模型定清楚:业务字段和空间字段放在一起
词球看起来像一个视觉组件,但本质上它是"数据驱动动画"的结果。
对于单个词条,我们至少需要两类信息:
- 业务信息:标题、分类、热度、摘要、标签
- 空间信息:
x、y、z、alpha
建议把这两部分直接放在同一个对象里,而不是拆成两份。这样做的好处是:一个对象既能参与旋转计算,也能直接渲染 UI,避免中间再做映射。
ts
@ObservedV2
export class SphereTopic {
  @Trace x: number = 0;
  @Trace y: number = 0;
  @Trace z: number = 0;
  @Trace alpha: number = 0.5;

  id: string = '';
  title: string = '';
  summary: string = '';
  category: string = '';
  heat: string = '';
  momentum: string = '';
  color: string = '#FFFFFF';
  fontSize: number = 18;
  tags: string[] = [];
  insights: string[] = [];

  constructor(options: {
    id: string;
    title: string;
    summary: string;
    category: string;
    heat: string;
    momentum: string;
    color?: string;
    fontSize?: number;
    tags?: string[];
    insights?: string[];
  }) {
    this.id = options.id;
    this.title = options.title;
    this.summary = options.summary;
    this.category = options.category;
    this.heat = options.heat;
    this.momentum = options.momentum;
    this.color = options.color ?? '#FFFFFF';
    this.fontSize = options.fontSize ?? 18;
    this.tags = options.tags ?? [];
    this.insights = options.insights ?? [];
  }
}
这里有两个细节值得强调。
第一,@ObservedV2 和 @Trace 不是装饰性的写法,它们决定了坐标变化能否及时驱动视图刷新。
第二,alpha 最好也放到模型里,因为它和 z 深度是强关联的,后面可以直接拿来控制透明度和字号层次。
如果你后面想把这个组件做成完全通用的词球,只要保持这个数据模型不变,业务字段继续加就行,旋转逻辑不需要动。
词球的核心其实不在 UI,而在球面排布和双轴旋转
很多人第一次做词球时,会把注意力放在渐变、玻璃拟态、卡片圆角这些"看得见"的部分。但真正决定这个组件是不是词球的,是下面两段能力:
- 初始时,词条能不能均匀分布到球面上
- 运行时,词条能不能在 X/Y 两个轴上稳定旋转
1. 先做球面初始化
核心思路是通过球面均匀采样,为每个词条生成一组三维坐标:
ts
private initSphere() {
  this.topics.forEach((item, index) => {
    const ratio = -1 + (2 * (index + 1) - 1) / this.topics.length;
    const polar = Math.acos(ratio);
    const azimuth = polar * Math.sqrt(this.topics.length * Math.PI);

    item.x = this.radius * Math.sin(polar) * Math.cos(azimuth) + this.centerX;
    item.y = this.radius * Math.sin(polar) * Math.sin(azimuth) + this.centerY;
    item.z = this.radius * Math.cos(polar);
    item.alpha = (item.z + this.radius) / (2 * this.radius);
  });
}
这段代码的价值在于,它不是"随机撒点",而是真正让标签围绕球面均匀展开。
其中:
polar对应极角azimuth对应方位角x / y / z是词条在球面上的空间坐标alpha用来表达远近层次
如果省掉这一步,词球很容易做成"乱飞的标签堆";而只要这一步稳了,后面的旋转基本就顺了。
2. 再做绕 X、Y 轴旋转
绕 X 轴旋转:
ts
private rotateX() {
  const cos = Math.cos(this.angleX);
  const sin = Math.sin(this.angleX);

  this.topics.forEach((item) => {
    const nextY = (item.y - this.centerY) * cos - item.z * sin + this.centerY;
    const nextZ = item.z * cos + (item.y - this.centerY) * sin;

    item.y = nextY;
    item.z = nextZ;
    item.alpha = (item.z + this.radius) / (2 * this.radius);
  });
}
绕 Y 轴旋转:
ts
private rotateY() {
  const cos = Math.cos(this.angleY);
  const sin = Math.sin(this.angleY);

  this.topics.forEach((item) => {
    const nextX = (item.x - this.centerX) * cos - item.z * sin + this.centerX;
    const nextZ = item.z * cos + (item.x - this.centerX) * sin;

    item.x = nextX;
    item.z = nextZ;
    item.alpha = (item.z + this.radius) / (2 * this.radius);
  });
}
这两段看起来是数学公式,实际上决定的是整个组件的"质感"。
因为在词球场景里,视觉层次并不是来自复杂特效,而是来自这几个值的联动:
z越靠前,透明度越高z越靠前,字号可以适当更大- 前景词条和背景词条自然形成层级
所以后面渲染时,我会直接这样处理:
ts
.fontSize(item.fontSize + item.alpha * 4)
.opacity(0.38 + item.alpha * 0.62)
这不是重特效,但性价比非常高。对词球这种组件来说,轻量级联动往往比花哨动画更有效。
交互体验怎么做顺:自动旋转、拖拽控制、惯性减速都要收进组件内部
如果词球只是静态旋转,它更像一个观赏组件;只有当用户能接管它,它才真的有"交互价值"。
我在封装时,把交互拆成了三层:
- 自动旋转,保证组件默认有生命力
- 拖拽旋转,让用户直接干预词球方向
- 惯性减速,让手势结束后的过渡更自然
自动旋转
自动旋转本身很简单,关键是谁来管理它 。
如果你希望组件可复用,那定时器的启动和销毁必须内聚在组件内部。
ts
private startAutoRotate() {
  this.stopAutoRotate();
  this.rotateTimer = setInterval(() => {
    this.rotateX();
    this.rotateY();
  }, 17);
}

private stopAutoRotate() {
  if (this.rotateTimer >= 0) {
    clearInterval(this.rotateTimer);
    this.rotateTimer = -1;
  }
}
17ms 基本就是 60fps 左右的节奏,表现和性能比较平衡。
拖拽旋转
用户拖动时,我不会直接把位移映射成坐标,而是先映射成角速度:
ts
private onPanUpdate(event: GestureEvent) {
  const offsetX = -event.offsetX;
  const offsetY = -event.offsetY;

  const nextAngleY = offsetX > 0
    ? Math.min(this.radius * 0.0024, offsetX * 0.001)
    : Math.max(-this.radius * 0.0024, offsetX * 0.001);

  const nextAngleX = offsetY > 0
    ? Math.min(this.radius * 0.0024, offsetY * 0.001)
    : Math.max(-this.radius * 0.0024, offsetY * 0.001);

  if (nextAngleX !== 0 && nextAngleY !== 0) {
    this.angleX = nextAngleX;
    this.angleY = nextAngleY;
  }

  this.rotateX();
  this.rotateY();
}
这么做有两个目的:
- 拖拽越快,旋转反馈越明显
- 通过
Math.min / Math.max给角速度设上限,防止出现过度甩动
如果不做上限控制,词球会非常容易"发疯"。
惯性减速
只靠自动旋转和手势更新,用户松手后的体验会很硬,所以我又加了一层惯性:
ts
private startInertia() {
  this.stopInertia();
  this.inertiaTimer = setInterval(() => {
    const nextAngleX = this.angleX * 0.82;
    const nextAngleY = this.angleY * 0.82;

    if (Math.abs(nextAngleX) <= this.minAngle && Math.abs(nextAngleY) <= this.minAngle) {
      this.stopInertia();
      return;
    }

    this.angleX = nextAngleX;
    this.angleY = nextAngleY;
  }, 120);
}
衰减系数 0.82 不一定是唯一答案,但这个量级已经足够让交互显得顺滑,不会有明显的断档感。
手势接管时的正确时机
真正影响手感的,往往不是旋转公式,而是状态切换是否自然。我的处理方式是:
- 手指按下时,暂停自动旋转
- 开始拖拽时,停止惯性动画
- 拖拽更新时,实时根据位移调整角速度
- 手势结束后,先进入惯性减速,再恢复自动旋转
这一步建议一定放在组件内部,否则外部页面会被迫知道太多实现细节。
组件实现:封装一个真正可复用的 TopicSphereCard
上面的算法和交互都准备好之后,组件封装就比较自然了。
我把它整理成这样一个结构:
ts
@ComponentV2
export struct TopicSphereCard {
@Param title: string = '今日热点';
@Param subtitle: string = '拖拽旋转,点击词条查看详情';
@Param topics: SphereTopic[] = [];
// 根据设备进行动态计算,这里是示意
radius: number = 112;
centerX: number = 156;
centerY: number = 152;
angleX: number = Math.PI / 360;
angleY: number = Math.PI / 420;
minAngle: number = Math.PI / 900;
rotateTimer: number = -1;
inertiaTimer: number = -1;
@Local currentTopic: SphereTopic | null = null;
aboutToAppear(): void {
this.initSphere();
if (this.topics.length > 0) {
this.currentTopic = this.topics[0];
}
this.startAutoRotate();
}
aboutToDisappear(): void {
this.stopAutoRotate();
this.stopInertia();
}
private initSphere() {
this.topics.forEach((item, index) => {
const ratio = -1 + (2 * (index + 1) - 1) / this.topics.length;
const polar = Math.acos(ratio);
const azimuth = polar * Math.sqrt(this.topics.length * Math.PI);
item.x = this.radius * Math.sin(polar) * Math.cos(azimuth) + this.centerX;
item.y = this.radius * Math.sin(polar) * Math.sin(azimuth) + this.centerY;
item.z = this.radius * Math.cos(polar);
item.alpha = (item.z + this.radius) / (2 * this.radius);
});
}
private rotateX() {
const cos = Math.cos(this.angleX);
const sin = Math.sin(this.angleX);
this.topics.forEach((item) => {
const nextY = (item.y - this.centerY) * cos - item.z * sin + this.centerY;
const nextZ = item.z * cos + (item.y - this.centerY) * sin;
item.y = nextY;
item.z = nextZ;
item.alpha = (item.z + this.radius) / (2 * this.radius);
});
}
private rotateY() {
const cos = Math.cos(this.angleY);
const sin = Math.sin(this.angleY);
this.topics.forEach((item) => {
const nextX = (item.x - this.centerX) * cos - item.z * sin + this.centerX;
const nextZ = item.z * cos + (item.x - this.centerX) * sin;
item.x = nextX;
item.z = nextZ;
item.alpha = (item.z + this.radius) / (2 * this.radius);
});
}
private onPanUpdate(event: GestureEvent) {
const offsetX = -event.offsetX;
const offsetY = -event.offsetY;
const nextAngleY = offsetX > 0
? Math.min(this.radius * 0.0024, offsetX * 0.001)
: Math.max(-this.radius * 0.0024, offsetX * 0.001);
const nextAngleX = offsetY > 0
? Math.min(this.radius * 0.0024, offsetY * 0.001)
: Math.max(-this.radius * 0.0024, offsetY * 0.001);
if (nextAngleX !== 0 && nextAngleY !== 0) {
this.angleX = nextAngleX;
this.angleY = nextAngleY;
}
this.rotateX();
this.rotateY();
}
private startAutoRotate() {
this.stopAutoRotate();
this.rotateTimer = setInterval(() => {
this.rotateX();
this.rotateY();
}, 17);
}
private stopAutoRotate() {
if (this.rotateTimer >= 0) {
clearInterval(this.rotateTimer);
this.rotateTimer = -1;
}
}
private startInertia() {
this.stopInertia();
this.inertiaTimer = setInterval(() => {
const nextAngleX = this.angleX * 0.82;
const nextAngleY = this.angleY * 0.82;
if (Math.abs(nextAngleX) <= this.minAngle && Math.abs(nextAngleY) <= this.minAngle) {
this.stopInertia();
return;
}
this.angleX = nextAngleX;
this.angleY = nextAngleY;
}, 120);
}
private stopInertia() {
if (this.inertiaTimer >= 0) {
clearInterval(this.inertiaTimer);
this.inertiaTimer = -1;
}
}
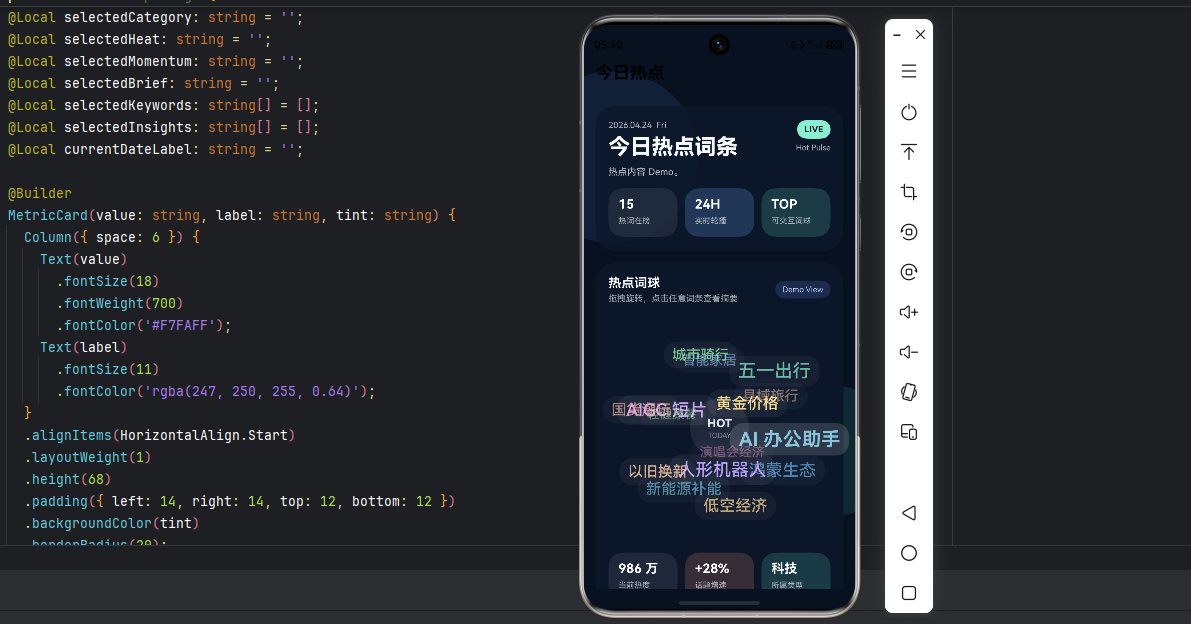
build() {
Column({ space: 14 }) {
Row() {
Column({ space: 4 }) {
Text(this.title)
.fontSize(18)
.fontWeight(700)
.fontColor('#F7FAFF');
Text(this.subtitle)
.fontSize(12)
.fontColor('rgba(247, 250, 255, 0.64)');
}
.alignItems(HorizontalAlign.Start)
.layoutWeight(1);
Text('Demo View')
.fontSize(11)
.fontColor('#AFC7FF')
.padding({ left: 10, right: 10, top: 6, bottom: 6 })
.backgroundColor('rgba(116, 154, 255, 0.16)')
.borderRadius(14);
}
.width('100%')
.justifyContent(FlexAlign.SpaceBetween);
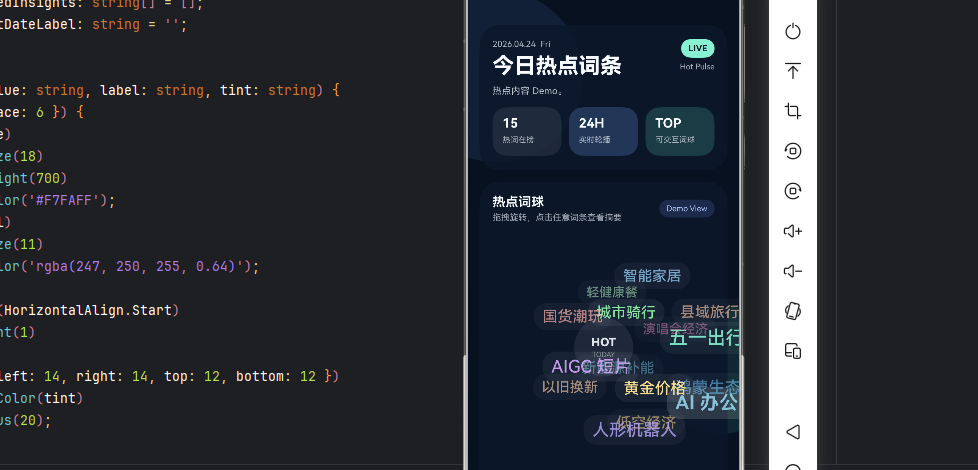
Stack() {
ForEach(this.topics, (item: SphereTopic) => {
Text(item.title)
.fontSize(item.fontSize + item.alpha * 4)
.fontWeight(this.currentTopic?.id === item.id ? 700 : 500)
.fontColor(item.color)
.padding({ left: 12, right: 12, top: 7, bottom: 7 })
.backgroundColor(
this.currentTopic?.id === item.id ? 'rgba(255, 255, 255, 0.18)' : 'rgba(255, 255, 255, 0.06)'
)
.borderRadius(18)
.opacity(0.38 + item.alpha * 0.62)
.position({ x: item.x, y: item.y })
.onClick(() => {
this.currentTopic = item;
});
}, (item: SphereTopic) => item.id);
}
.height(320)
.width('100%')
.onTouch((event?: TouchEvent) => {
if (!event) {
return;
}
if (event.type === TouchType.Down) {
this.stopAutoRotate();
}
if (event.type === TouchType.Up || event.type === TouchType.Cancel) {
this.startAutoRotate();
}
})
.gesture(
PanGesture()
.onActionStart(() => {
this.stopInertia();
})
.onActionUpdate((event) => {
this.onPanUpdate(event);
})
.onActionEnd(() => {
this.startInertia();
this.startAutoRotate();
})
);
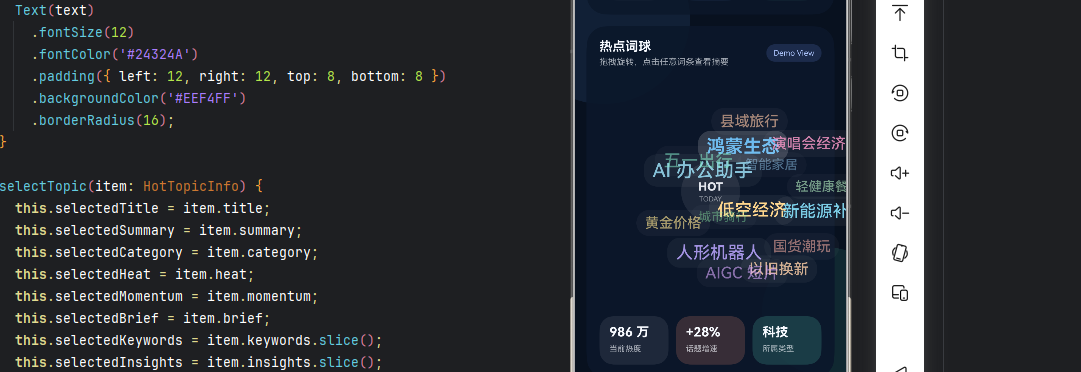
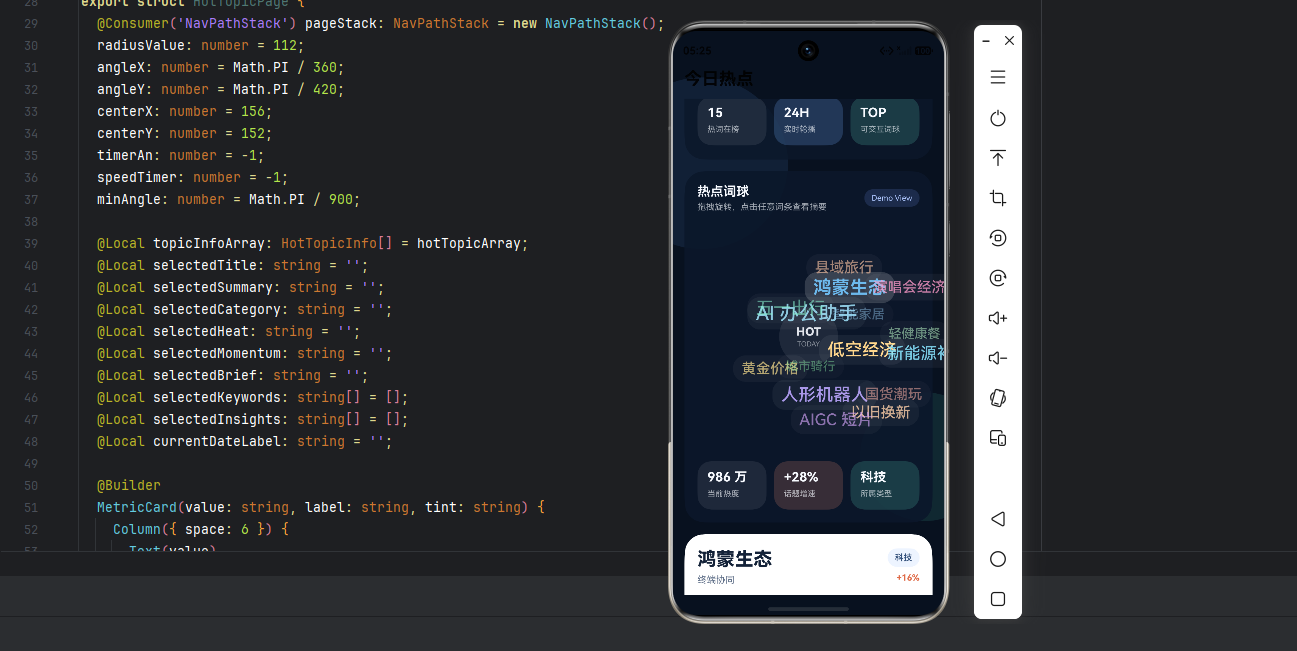
if (this.currentTopic) {
Column({ space: 10 }) {
Text(this.currentTopic.title)
.fontSize(22)
.fontWeight(800)
.fontColor('#132238');
Text(this.currentTopic.summary)
.fontSize(13)
.fontColor('#607089');
Text(this.currentTopic.heat + ' · ' + this.currentTopic.momentum)
.fontSize(12)
.fontColor('#E06B48');
}
.width('100%')
.alignItems(HorizontalAlign.Start)
.padding(16)
.backgroundColor('#FFFFFF')
.borderRadius(22);
}
}
.width('100%')
.padding(18)
.backgroundColor('rgba(12, 23, 42, 0.92)')
.borderRadius(28);
}
}这版组件里,我刻意保留了三类对外参数:
titlesubtitletopics
这样外部页面在使用时只需要关心"展示什么",不需要知道词球内部到底怎么转。
而像这些实现细节,则全部收进了组件内部:
- 球面初始化
- 双轴旋转
- 自动旋转的启动与清理
- 惯性减速
- 当前词条选中态
这一步做完以后,整个组件就从"效果代码"变成了"业务可复用资产"。
补一个实战细节:词球看起来不居中,通常不是球心错了,而是定位方式错了

这次在 demo 调整里,我还额外处理了一个很典型的问题:球体数学中心是对的,但视觉中心看起来还是偏了。
这个问题一般有两个来源:
- 球心坐标写死了,比如直接固定
centerX = 156、centerY = 152 - 词条用
.position({ x, y })时,传入的是词条中心点,但组件实际按左上角落位
第一种情况会导致词球在不同屏宽下整体偏移;第二种情况会让一圈标签整体"往右下坠",看起来就像球没摆正。
更稳妥的处理方式是:球心跟着容器尺寸动态计算,词条位置再减去自身一半宽高,让视觉中心和数学中心对齐。
ts
private syncSphereCenter(width: number, height: number) {
  if (width <= 0 || height <= 0) {
    return;
  }

  const nextCenterX = width / 2;
  const nextCenterY = height / 2;
  const deltaX = nextCenterX - this.centerX;
  const deltaY = nextCenterY - this.centerY;

  if (deltaX === 0 && deltaY === 0) {
    return;
  }

  this.centerX = nextCenterX;
  this.centerY = nextCenterY;
  this.topics.forEach((item) => {
    item.x += deltaX;
    item.y += deltaY;
  });
}

private getTopicPositionX(item: SphereTopic): number {
  return item.x - this.getTopicWidth(item) / 2;
}

private getTopicPositionY(item: SphereTopic): number {
  return item.y - this.getTopicHeight(item) / 2;
}
在视图层里,可以结合 onAreaChange 一起使用:
ts
Stack() {
  ForEach(this.topics, (item: SphereTopic) => {
    Text(item.title)
      .position({
        x: this.getTopicPositionX(item),
        y: this.getTopicPositionY(item)
      });
  }, (item: SphereTopic) => item.id);
}
.height(320)
.width('100%')
.onAreaChange((_: Area, value: Area) => {
  this.syncSphereCenter(Number(value.width), Number(value.height));
})
这一层优化看起来不大,但很关键。因为词球这种组件只要中心点稍微发偏,用户第一眼就会觉得"这个球没放正";把容器中心和词条视觉中心同时校准之后,整个组件的稳定感会明显提升。
页面接入、封装收益和后续扩展
页面接入方式非常简单:
ts
@Entry
@ComponentV2
struct MainPage {
  @Local topics: SphereTopic[] = mockTopics;

  build() {
    Column() {
      TopicSphereCard({
        title: '今日热点词条',
        subtitle: '拖拽旋转,点击任意词条查看摘要',
        topics: this.topics
      })
    }
    .width('100%')
    .height('100%')
    .padding(16)
    .backgroundColor('#08111F');
  }
}
页面层现在只承担三件事:
- 准备数据
- 传入文案
- 决定卡片放在哪里
而这恰恰就是组件封装之后最理想的状态。
这次封装带来的直接收益
- 同一套旋转逻辑可以复用到热搜词、兴趣标签、品牌词云等多个场景。
- 页面样式可以自由换,但词球核心不用反复重写。
- 动画、交互和详情联动全部收口,后面接接口或者加埋点都更顺。
- 组件边界清晰后,团队协作也会轻松很多,谁负责业务层、谁负责组件层一眼就能分开。
封装这类组件时最容易踩的坑
- 把业务数据和空间数据拆成两份,导致状态同步很绕
- 忘记在
aboutToDisappear清理定时器 - 用户拖拽时没有暂停自动旋转,导致手感很乱
- 只做透明度变化,不做字号层次,视觉会显得偏平
我建议继续扩展的方向
- 支持
@Param onTopicClick,把点击事件抛给外部 - 支持纯词球模式和"词球 + 详情卡片"双模式
- 支持自定义主题色,适配深浅两套视觉风格
- 支持外部数据更新后重新初始化球面
- 支持自定义半径和高度,适配首页卡片、全屏模块、弹层容器
如果这些都补上,TopicSphereCard 基本就能成为一块长期可复用的内容组件了。
最后回看这次封装,真正重要的不是"做出了一个会转的球",而是把它拆成了清晰的结构:
- 数据模型负责描述词条
- 数学逻辑负责维护球面排布和旋转
- 组件负责承接交互、样式和详情联动
- 页面只负责组织业务内容
这也是我现在做鸿蒙交互组件时最看重的一点:先把边界切清楚,再去追求效果。
因为只有这样,组件才能真的复用起来,而不是停留在一次性的页面实现里。