1. 前言
在没有使用 enableEdgeToEdge() 之前,开发者如果想实现顶部沉浸式效果,同时兼顾底部导航栏的兼容,往往需要编写大量适配代码,不仅繁琐,而且容易出错。而现在,这一切变得简单了许多。
enableEdgeToEdge 是 AndroidX Activity 中的 Kotlin 扩展函数,简单来说就是:让你的界面内容可以画到状态栏、导航栏下面,实现全屏沉浸效果。
2. 🔍具体效果
默认情况下:
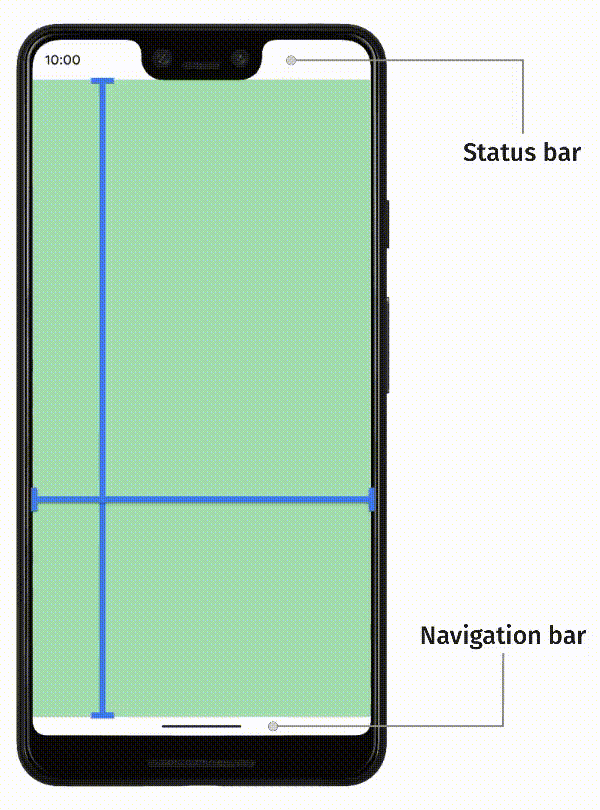
- 内容会避开状态栏(顶部时间、电量)
- 底部避开导航栏(Back、Home、Task 三按键)/手势条
开启 enableEdgeToEdge() 后,UI 更现代(类似 iPhone 的沉浸式体验):
- 内容可以延伸到整个屏幕
- 状态栏变成透明
- 导航栏变成透明(手势条)或半透明(三按键)
Back、Home、Task 三按键导航栏导航栏会呈现半透明效果,默认不透明度为 80%,系统图标颜色会根据浅色或深色主题自动调整
3. 🧠如何开启 enableEdgeToEdge
3.1 最低系统版本
不是 Android 15 才开始支持 edge-to-edge,Android 15会默认启用此功能,minSdk = 21完全没问题(源码做了分级适配)
| Android版本 | 行为 |
|---|---|
| API 21~28 | ❗ 不是完全透明(用 scrim 模拟) |
| API 29+ | ✅ 支持真正透明 |
| API 30+ | ✅ 手势导航适配更好 |
| API 35(Android 15) | ✅ 新一代 edge-to-edge(ProtectionLayout) |
Kotlin
//源码解读
(if (Build.VERSION.SDK_INT >= 35) {
    EdgeToEdgeApi35()
} else if (Build.VERSION.SDK_INT >= 30) {
    EdgeToEdgeApi30()
} else if (Build.VERSION.SDK_INT >= 29) {
    EdgeToEdgeApi29()
} else if (Build.VERSION.SDK_INT >= 28) {
    EdgeToEdgeApi28()
} else if (Build.VERSION.SDK_INT >= 26) {
    EdgeToEdgeApi26()
} else {
    EdgeToEdgeApi23()
})
.also { Impl = it }
enableEdgeToEdge() 最低支持 Android 5.0(API 21),但不同版本系统表现存在差异:
- Android 5.0--9.0:通过半透明遮罩(scrim)实现近似效果,系统不支持真正透明的导航栏
Kotlin
//源码解读
WindowCompat.setDecorFitsSystemWindows(window, false)
window.statusBarColor = statusBarStyle.getScrim(statusBarIsDark)
window.navigationBarColor = navigationBarStyle.getScrim(navigationBarIsDark)
WindowInsetsControllerCompat(window, view).run {
     isAppearanceLightStatusBars = !statusBarIsDark
     isAppearanceLightNavigationBars = !navigationBarIsDark
}- Android 10+:支持真正的透明系统栏
- Android 11+:手势导航适配更完善
- Android 15+:进一步增强 edge-to-edge 支持(如 ProtectionLayout)
Kotlin
//源码解读
window.statusBarColor = Color.TRANSPARENT
window.navigationBarColor = Color.TRANSPARENT
val statusBarColor = statusBarStyle.getScrimWithEnforcedContrast(statusBarIsDark)
val navBarColor = navigationBarStyle.getScrimWithEnforcedContrast(navigationBarIsDark)
(view as ViewGroup).addView(
                ProtectionLayout(
                    view.context,
                    listOf(
                        ColorProtection(WindowInsetsCompat.Side.TOP, statusBarColor),
                        ColorProtection(WindowInsetsCompat.Side.LEFT, navBarColor),
                        ColorProtection(WindowInsetsCompat.Side.RIGHT, navBarColor),
                        ColorProtection(WindowInsetsCompat.Side.BOTTOM, navBarColor),
                    ),
                )
            )
3.2 依赖配置与版本要求
| activity-ktx版本 | 推荐 compileSdk | 最低可编译 | 说明 |
|---|---|---|---|
| 1.6.x | 31 | 30 | 较老版本 |
| 1.7.x | 32 | 31 | 开始完善 WindowInsets |
| 1.8.x | 33 | 31 | 👉 enableEdgeToEdge() 初始版本 |
| 1.9.0 | 34 / 35(推荐) | 33 | 👉 当前主流 |
| 1.10.x | 35+ | 34 | 面向 Android 15 |
只用 KTX(非 Compose), 建议 1.8.0+,推荐 1.9.0,enableEdgeToEdge() 其实来自 AndroidX ComponentActivity:
Groovy
implementation "androidx.activity:activity-ktx:1.9.0"Compose 项目,则添加(已经包含 ktx,目前最新版本1.12.1)
Groovy
implementation "androidx.activity:activity-compose:1.9.0"Kotlin版本要和Compose Compiler匹配,需要1.8+,例如 kotlinVersion = '1.8.10':
3.3 开启方式
必须在 Activity 的 onCreate 方法中调用,且需遵循以下顺序:
- Jetpack Compose:在
setContent之前调用。 - Java传统项目:在
setContentView之前调用。 - 示例代码:
Kotlin
/**
 * Jetpack Compose
 */
class MainActivity : ComponentActivity() {
    override fun onCreate(savedInstanceState: Bundle?) {
        super.onCreate(savedInstanceState)
        enableEdgeToEdge() //开启
        setContent {
            ...
        }
    }
}

/**
 * java传统项目
 */

public class MainActivity extends AppCompatActivity {
    @Override
    protected void onCreate(@Nullable Bundle savedInstanceState) {
        super.onCreate(savedInstanceState);
        EdgeToEdge.enable(this); //开启
        setContentView(R.layout.activity_main.xml);
    }
}
4. 内容避让与适配要点
4.1 内边距处理
启用后系统栏会覆盖应用内容,需为布局添加适当内边距避免遮挡,类似于harmony/vue/react native的做法
Kotlin
//harmony(鸿蒙)
const win = windowStage.getMainWindowSync();
const systemAvoidArea = win.getWindowAvoidArea(window.AvoidAreaType.TYPE_SYSTEM);
const topHeightPx = systemAvoidArea.topRect.height;
const avoidArea = win.getWindowAvoidArea(window.AvoidAreaType.TYPE_NAVIGATION_INDICATOR);
const bottomHeightPx = avoidArea.bottomRect.height
AppStorage.setOrCreate('topHeight', px2vp(topHeightPx));
AppStorage.setOrCreate('bottomHeight', px2vp(bottomHeightPx));

@StorageProp('bottomHeight') bottomHeight: number = 0
Column().backgroundColor('#fff').padding({bottom:this.bottomHeight}).width('100%')

//vue
<View style="padding-bottom: env(safe-area-inset-bottom);">
  底部按钮
</View>

//React native
const insets = useSafeAreaInsets();
<View style={{padding-bottom: insets.bottom}}>
  底部按钮
</View>
4.1.1 Jetpack Compose 中使用
Kotlin
Box(modifier = Modifier.fillMaxSize()
.padding(WindowInsets.statusBars.asPaddingValues())) {
// 应用内容
}
Box(modifier = Modifier.fillMaxWidth()
.padding(WindowInsets.navigationBars.asPaddingValues())) {
// 应用内容
}
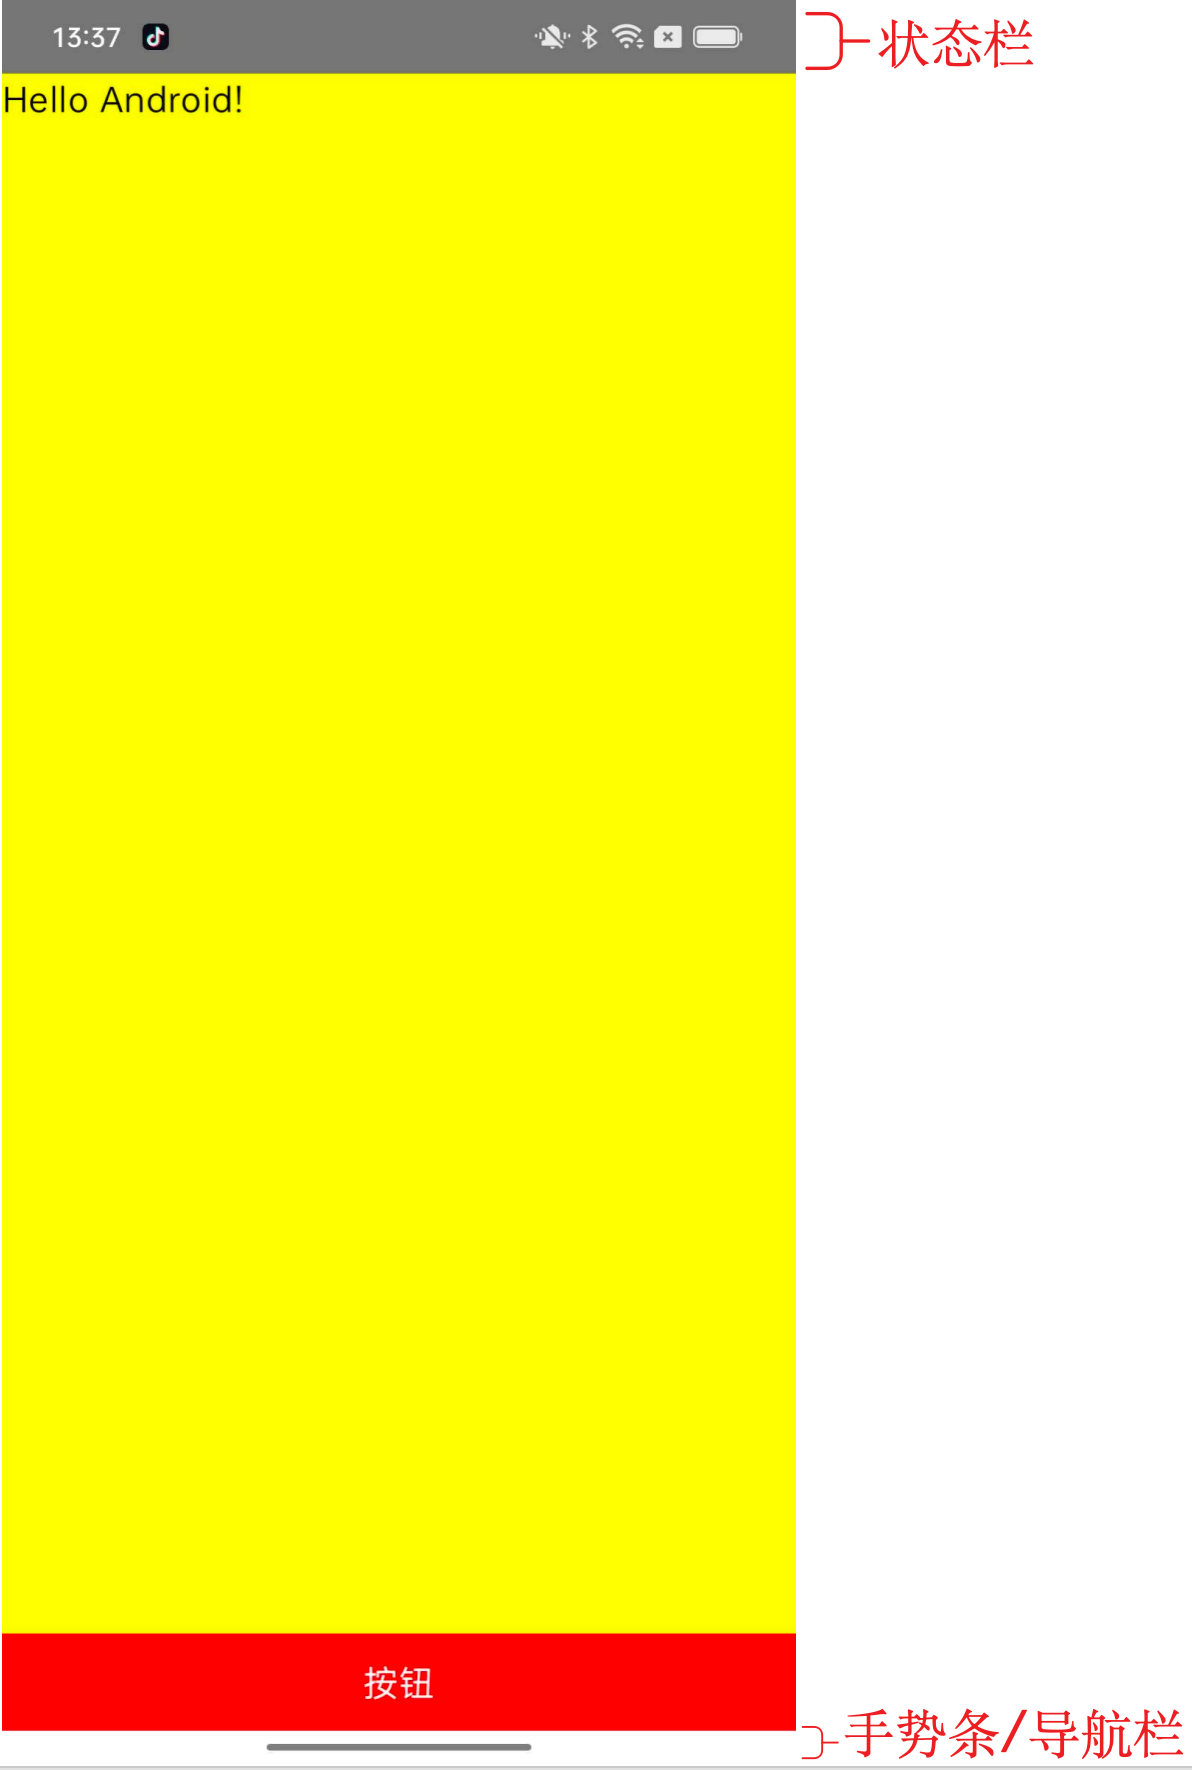
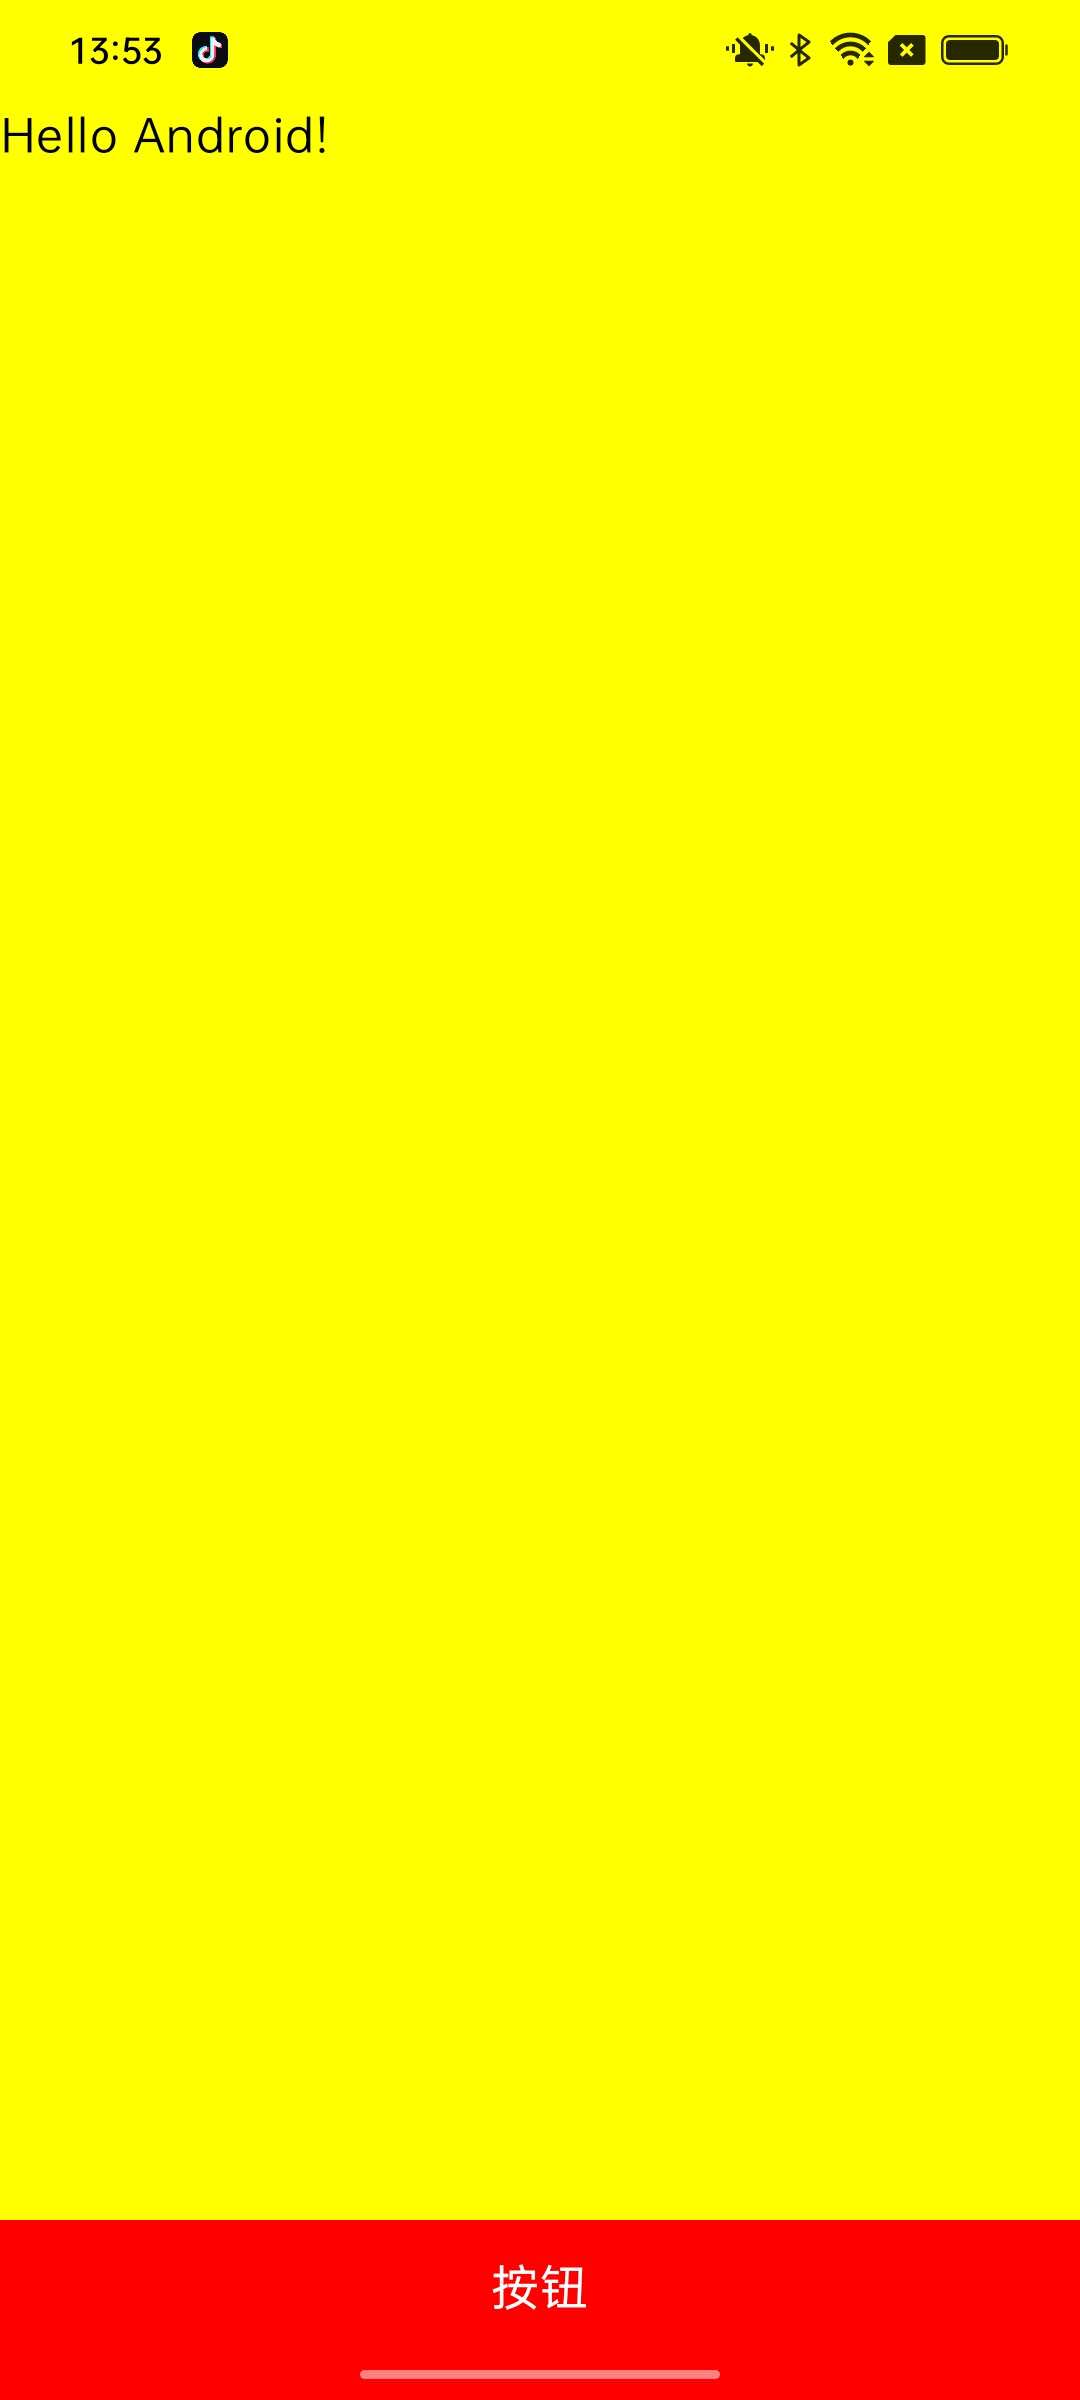
Scaffold(modifier = Modifier.fillMaxSize(),containerColor = Color.Yellow)
{ innerPadding -> //避开顶部状态栏
Greeting(
name = "Android",
modifier = Modifier.padding(innerPadding).fillMaxSize()
)
}4.1.2 传统 View 系统适配
Kotlin
@Override
protected void onCreate(Bundle savedInstanceState) {
    super.onCreate(savedInstanceState);
    EdgeToEdge.enable(this); //开启
    setContentView(R.layout.activity_main);
    View rootView = findViewById(android.R.id.content);
    // 设置 inset 监听
    ViewCompat.setOnApplyWindowInsetsListener(rootView, (v, insets) -> {
        Insets bars = insets.getInsets(WindowInsetsCompat.Type.systemBars());
        v.setPadding(0, bars.top, 0, bars.bottom);
        return insets;
    });
}
4.1.3 主题适配
如果使用自定义状态栏主题,需要手动设置状态栏文字颜色。例如:白色背景的状态栏通常需要使用 深色(dark)文字 ,而蓝色等深色背景则一般使用 浅色(light)文字,以保证对比度和可读性。
为了简化适配,也可以采用一种"懒人方案":根据状态栏背景颜色的亮度自动判断使用 dark 还是 light 模式,自动设置系统状态栏字体颜色。
Kotlin
fun isLightColor(color: Int): Boolean {
    val r = android.graphics.Color.red(color)
    val g = android.graphics.Color.green(color)
    val b = android.graphics.Color.blue(color)
    // 亮度计算公式(标准权重)
    val luminance = (0.299 * r + 0.587 * g + 0.114 * b)
    return luminance > 180
}
fun setStatusBarStyle(activity: Activity, bgColor: Int) {
    val window = activity.window
    val decorView = window.decorView
    val isLight = isLightColor(bgColor)
    WindowInsetsControllerCompat(window, decorView).isAppearanceLightStatusBars =
        isLight
}
4.1.4 用户交互(系统栏动态变化适配)
由于 Android 设备形态较为复杂,用户可以设置通过手势(如下拉、上滑)动态呼出或隐藏系统栏(状态栏 / 导航栏)。
这意味着系统栏的可见性和尺寸是实时变化的,如果处理不当,很容易出现 UI 被遮挡或跳动的问题。
👉 因此,要实现良好的沉浸式体验,应用必须动态响应 Insets 变化,而不是一次性计算。
🟢 传统 View 方案(推荐封装)
在 View 体系中,需要通过监听 WindowInsets 的变化来手动更新布局,👉 建议统一封装成工具方法:
Kotlin
public static void applyEdgeToEdge(View root) {

    ViewCompat.setOnApplyWindowInsetsListener(root, (v, insets) -> {
        Insets bars = insets.getInsets(WindowInsetsCompat.Type.systemBars());
        v.setPadding(
            v.getPaddingLeft(),
            bars.top,
            v.getPaddingRight(),
            bars.bottom
        );
        return insets;
    });

    ViewCompat.requestApplyInsets(root);
}
🟣 Compose 方案(声明式自动适配)
✨ 原理:WindowInsets.navigationBars 并不是普通对象,而是基于 SnapshotState 的可观察数据
系统栏变化 → Insets 更新 → 触发 recomposition → UI 自动刷新,因此无需手动监听或更新 padding,Compose 会自动完
Kotlin
Modifier.padding(WindowInsets.navigationBars.asPaddingValues())⚠️ 不推荐写法
Kotlin
val padding = WindowInsets.navigationBars.asPaddingValues()
Modifier.padding(padding)
这种写法会将 Insets 提前计算并缓存,可能失去响应性,导致系统栏变化时 UI 无法及时更新。