1. 环境准备与依赖安装
1.1 系统更新
首先确保系统处于最新状态:
bash
sudo yum update -y1.2 安装必要依赖
安装Certbot所需的依赖包:
bash
sudo yum install -y epel-release2. Certbot工具安装
2.1 安装Certbot
根据您的Web服务器类型选择相应的安装命令:
使用Nginx服务器:
bash
sudo yum install -y certbot python3-certbot-nginx使用Apache服务器:
bash
sudo yum install -y certbot python3-certbot-apache2.2 验证安装
检查Certbot版本以确认安装成功:
bash
certbot --version3. SSL证书申请
3.1 基于Web服务器的自动配置
使用Nginx服务器:
bash
sudo certbot --nginx使用Apache服务器:
bash
sudo certbot --apache3.2 手动申请证书
3.2.1 standalone方式
使用内置服务器验证域名:
bash
sudo certbot certonly --standalone -d example.com -d www.example.com -m your@email.com3.2.2 webroot方式
使用Web服务器的根目录验证域名(不需要停止Web服务器):
bash
sudo certbot certonly --webroot -w /path/to/webroot -d example.com -d www.example.com -m your@email.com3.3 命令参数说明
certonly:仅获取证书,不自动配置--standalone:使用内置服务器验证域名--webroot:使用Web服务器根目录验证域名-w:指定Web服务器根目录路径-d:指定域名,可多次使用添加多个域名-m:指定邮箱地址,用于证书到期通知
3.4 其他常用命令
检查证书:
bash
sudo certbot certificates删除证书:
bash
sudo certbot delete --cert-name example.com证书验证:
bash
openssl s_client -connect example.com:443 -servername example.com < /dev/null4. 证书自动续期配置
4.1 创建自动续期脚本
bash
sudo crontab -e添加以下内容(每隔10天的凌晨3点运行续期):
bash
0 3 */10 * * /usr/bin/certbot renew --quiet4.2 测试续期功能
bash
# 测试续期(使用standalone方式时需要关闭Web服务器)
sudo certbot renew --dry-run
4.3 手动续期
bash
# 手动续期(使用standalone方式时需要关闭Web服务器)
sudo certbot renew --quit
5. 常见问题排查与解决方案
5.1 端口80被占用
问题:申请证书时提示端口80被占用
解决方案:
- 临时停止占用端口80的服务
- 使用
--http-01-port参数指定其他端口
5.2 域名解析问题
问题:无法验证域名所有权
解决方案:
- 确保域名A记录正确指向服务器IP
- 等待DNS解析生效(通常需要10-15分钟)
5.3 权限问题
问题:证书文件权限不足
解决方案:
- 确保Web服务器用户有读取证书目录的权限
- 使用
sudo执行Certbot命令
6. 证书配置示例
6.1 Nginx配置示例
nginx
server {
    listen 443 ssl;
    server_name example.com www.example.com;

    ssl_certificate /etc/letsencrypt/live/example.com/fullchain.pem;
    ssl_certificate_key /etc/letsencrypt/live/example.com/privkey.pem;

    # 其他配置...
}
6.2 Apache配置示例
apache
<VirtualHost *:443>
    ServerName example.com
    ServerAlias www.example.com

    SSLEngine on
    SSLCertificateFile /etc/letsencrypt/live/example.com/fullchain.pem
    SSLCertificateKeyFile /etc/letsencrypt/live/example.com/privkey.pem

    # 其他配置...
</VirtualHost>
7. 操作截图
7.1 安装Certbot截图
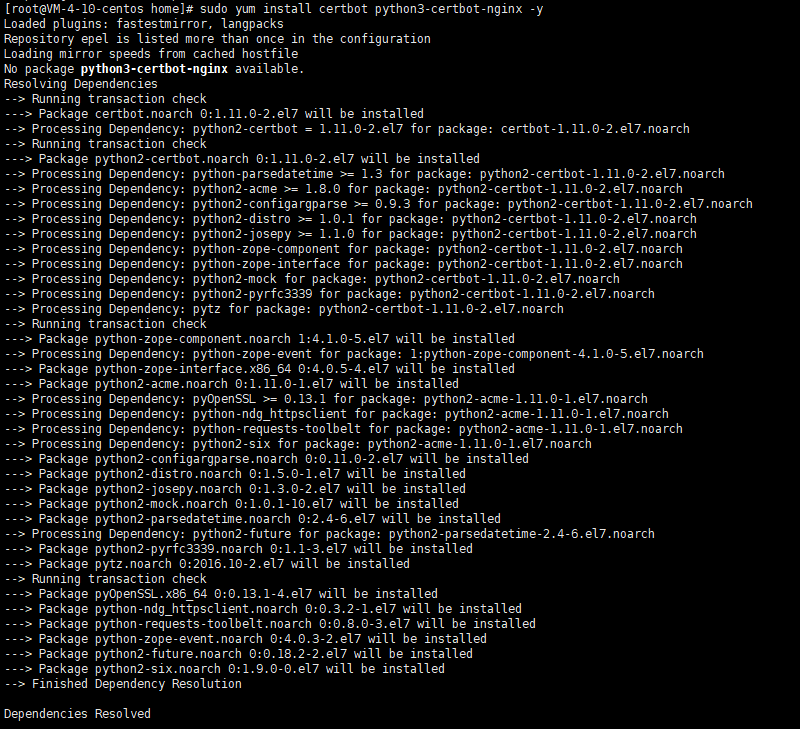
7.2 申请证书截图
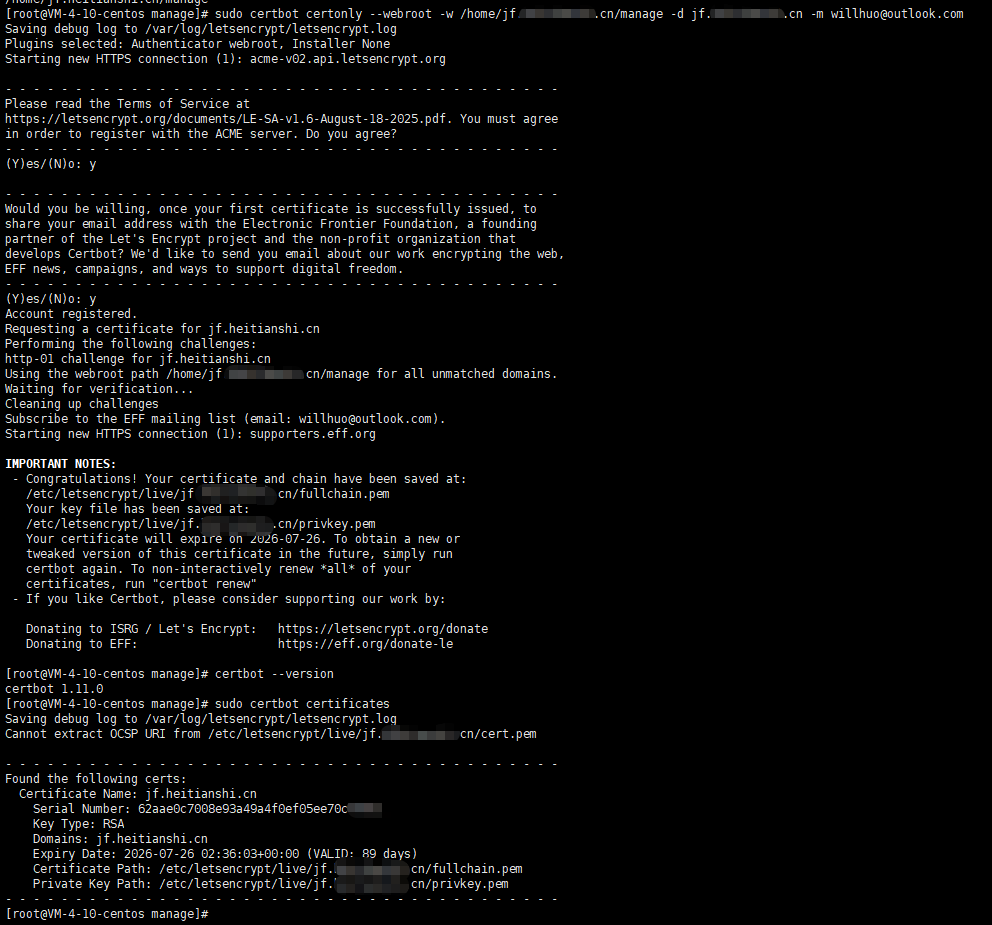
8. 总结
本教程详细介绍了在CentOS 7.9服务器上使用Certbot工具申请和配置SSL证书的完整流程,包括环境准备、工具安装、证书申请、自动续期配置以及常见问题排查。按照本教程操作,您可以为您的网站轻松配置免费的SSL证书,提升网站安全性和用户信任度。
注意:Let's Encrypt证书有效期为90天,务必配置自动续期以避免证书过期。