MQTT的服务有很多家,这里选择EMQX Cloud 免费版,简单上手快,适合新手玩家。
注册之后部署一个Serverless
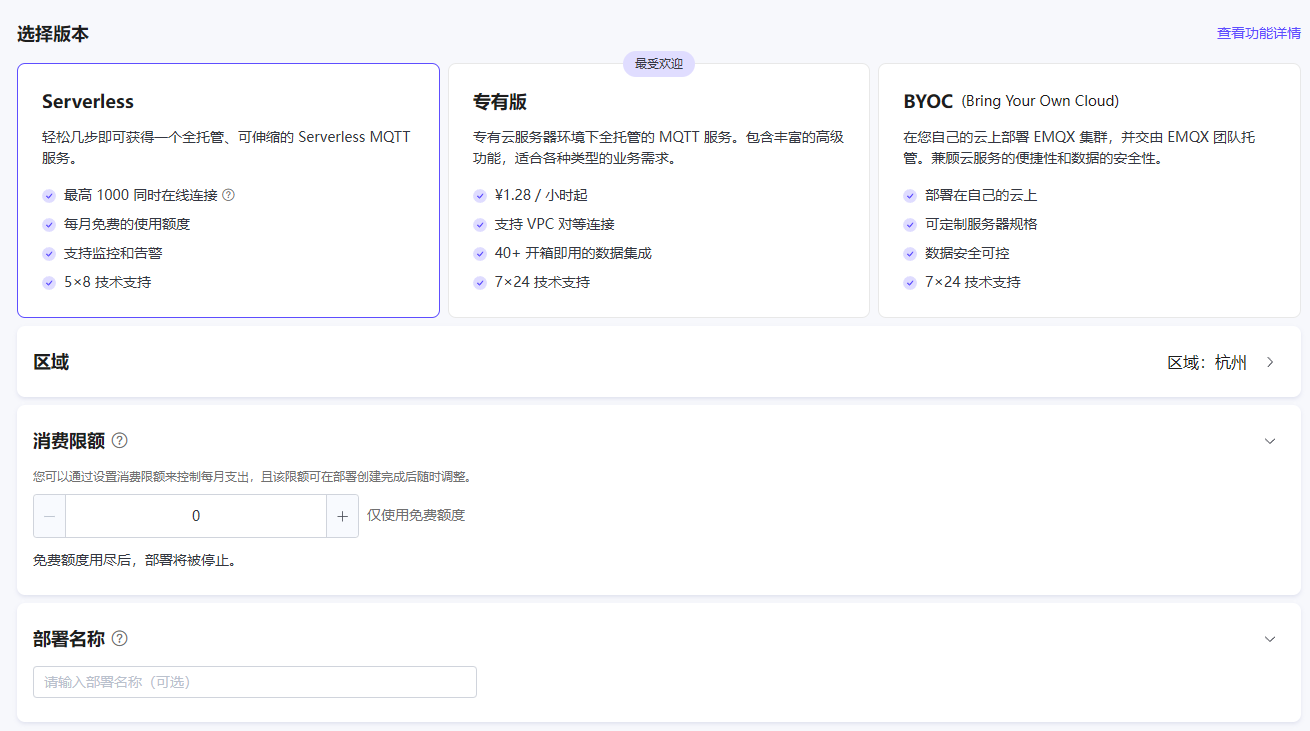
同时我们的单片机环境安装 PubSub client 库,并配置一些基本信息,由于我们选择免费版本,所以只能走TLS,走不了TCP。
cpp
// WiFi credentials
const char *ssid = "WIFI_SSID";             // Replace with your WiFi name
const char *password = "WIFI_PASSWORD";   // Replace with your WiFi password

// MQTT Broker settings
const int mqtt_port = 8883;  // MQTT port (TLS)
const char *mqtt_broker = "broker.emqx.io";  // EMQX broker endpoint
const char *mqtt_topic = "emqx/esp8266";     // MQTT topic
const char *mqtt_username = "emqx";  // MQTT username for authentication
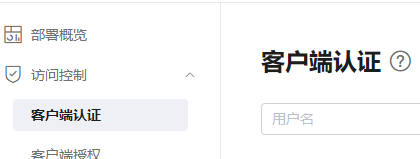
const char *mqtt_password = "public"; // MQTT password for authenticationWiFi账号密码正常填写,然后mqtt_port固定8883,broker写MQTT连接信息中连接地址。topic可以随便写,然后需要在客户端认证中添加一个单元,保证认证的和ESP32上的账号密码一致即可。
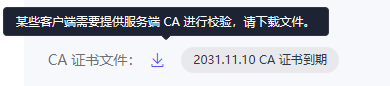
之后我们下载CA证书并用记事本打开,复制到模板区域
在官方的例程中,BearSSL 是 ESP8266 专属 的 SSL/TLS 库,ESP32 不用这个。我们需要进行替换。
-
头文件替换
// ESP8266 原版(删掉)
#include <ESP8266WiFi.h>
#include <BearSSL.h> // 如果有这个// ESP32 改成:
#include <WiFi.h>
#include <WiFiClientSecure.h> // ESP32 的 TLS -
客户端对象替换
// ESP8266 原版(删掉)
BearSSL::WiFiClientSecure espClient;// ESP32 改成:
WiFiClientSecure espClient; -
证书加载方式(关键区别)
ESP32 的 WiFiClientSecure 没有 setTrustAnchors() 方法,用 setCACert():
// ESP8266 原版(删掉)
BearSSL::X509List serverTrustedCA(ca_cert);
espClient.setTrustAnchors(&serverTrustedCA);

// ESP32 改成:
espClient.setCACert(ca_cert); // 直接传字符串-
获取 SSL 错误的方式不同
// ESP8266 原版(删掉)
char err_buf[128];
espClient.getLastSSLError(err_buf, sizeof(err_buf));
Serial.print("SSL error: ");
Serial.println(err_buf);// ESP32 改成:没有直接获取 SSL 错误字符串的 API
// 只能看 mqtt_client.state() 返回的错误码
最后附上完整代码
cpp
#include <WiFi.h>
#include <PubSubClient.h>
#include <WiFiClientSecure.h>

// WiFi credentials
const char *ssid = "WIFI_SSID";             // Replace with your WiFi name
const char *password = "WIFI_PASSWORD";   // Replace with your WiFi password

// MQTT Broker settings
const int mqtt_port = 8883;  // MQTT port (TLS)
const char *mqtt_broker = "broker.emqx.io";  // EMQX broker endpoint
const char *mqtt_topic = "emqx/esp8266";     // MQTT topic
const char *mqtt_username = "emqx";  // MQTT username for authentication
const char *mqtt_password = "public";  // MQTT password for authentication

// NTP Server settings
const char *ntp_server = "pool.ntp.org";     // Default NTP server
// const char* ntp_server = "cn.pool.ntp.org"; // Recommended NTP server for users in China
const long gmt_offset_sec = 0;            // GMT offset in seconds (adjust for your time zone)
const int daylight_offset_sec = 0;        // Daylight saving time offset in seconds

// WiFi and MQTT client initialization
WiFiClientSecure espClient;
PubSubClient mqtt_client(espClient);

// ========== 证书(DigiCert Global Root G2)==========
const char* ca_cert = R"EOF(
-----BEGIN CERTIFICATE-----

-----END CERTIFICATE-----
)EOF";

// Function declarations
void connectToWiFi();

void connectToMQTT();

void syncTime();

void mqttCallback(char *topic, byte *payload, unsigned int length);


void setup() {
    Serial.begin(115200);
    connectToWiFi();
    syncTime();  // X.509 validation requires synchronization time
    mqtt_client.setServer(mqtt_broker, mqtt_port);
    mqtt_client.setCallback(mqttCallback);
    connectToMQTT();
}

void connectToWiFi() {
    WiFi.begin(ssid, password);
    while (WiFi.status() != WL_CONNECTED) {
        delay(1000);
        Serial.println("Connecting to WiFi...");
    }
    Serial.println("Connected to WiFi");
}

void syncTime() {
    configTime(gmt_offset_sec, daylight_offset_sec, ntp_server);
    Serial.print("Waiting for NTP time sync: ");
    while (time(nullptr) < 8 * 3600 * 2) {
        delay(1000);
        Serial.print(".");
    }
    Serial.println("Time synchronized");
    struct tm timeinfo;
    if (getLocalTime(&timeinfo)) {
        Serial.print("Current time: ");
        Serial.println(asctime(&timeinfo));
    } else {
        Serial.println("Failed to obtain local time");
    }
}

void connectToMQTT() {
    espClient.setCACert(ca_cert);
    while (!mqtt_client.connected()) {
        String client_id = "esp8266-client-" + String(WiFi.macAddress());
        Serial.printf("Connecting to MQTT Broker as %s.....\n", client_id.c_str());
        if (mqtt_client.connect(client_id.c_str(), mqtt_username, mqtt_password)) {
            Serial.println("Connected to MQTT broker");
            mqtt_client.subscribe(mqtt_topic);
            // Publish message upon successful connection
            mqtt_client.publish(mqtt_topic, "Hi EMQX I'm ESP8266 ^^");
        } else {

            Serial.print("Failed to connect to MQTT broker, rc=");
            Serial.println(mqtt_client.state());
            delay(5000);
        }
    }
}

void mqttCallback(char *topic, byte *payload, unsigned int length) {
    Serial.print("Message received on topic: ");
    Serial.print(topic);
    Serial.print("]: ");
    for (int i = 0; i < length; i++) {
        Serial.print((char) payload[i]);
    }
    Serial.println();
}

void loop() {
    if (!mqtt_client.connected()) {
        connectToMQTT();
    }
    mqtt_client.loop();
}
接着快速调试一下,随机生成一个账号并连接,订阅ESP32上面的topic,然后就可以正常收发了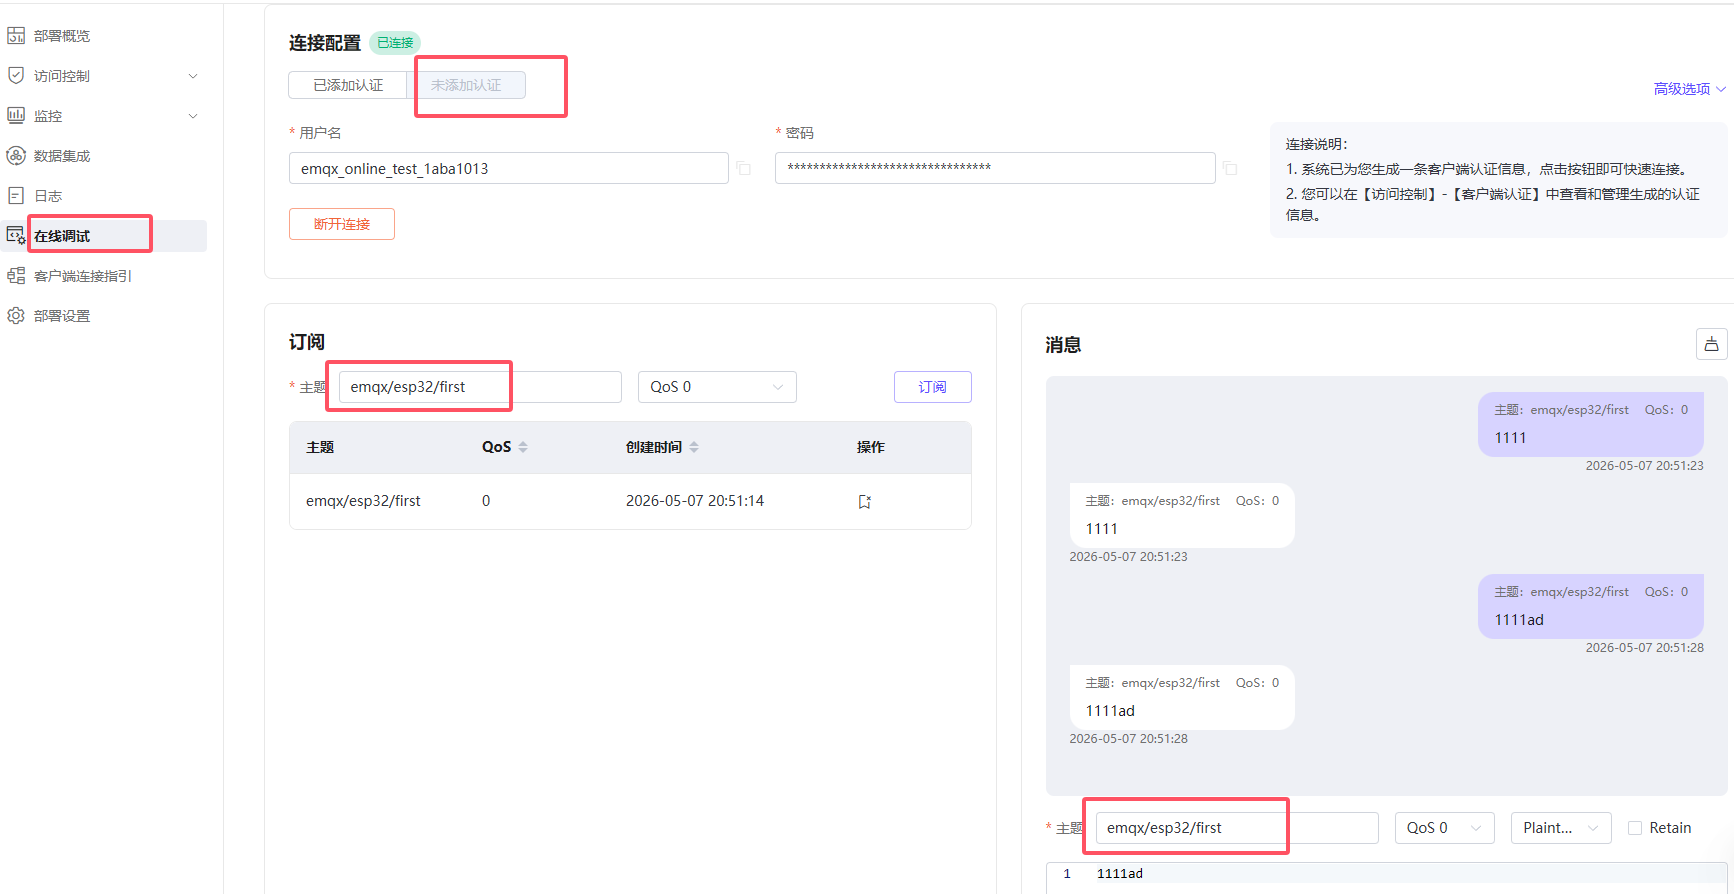

这里尝试了一下MQTT连接微信小程序
利用EMQX的demoMQTT-Client-Examples/mqtt-client-wechat-miniprogram at master · emqx/MQTT-Client-Examples
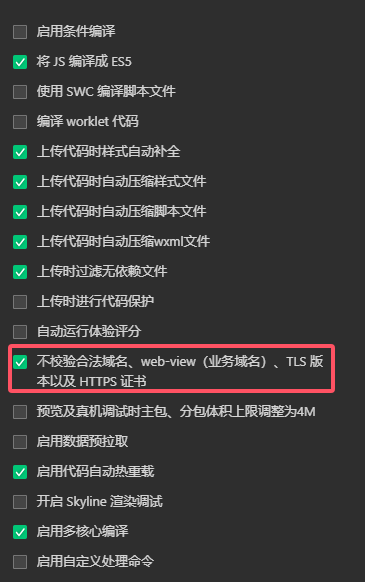
并在设置-项目设置关闭域名合法校验
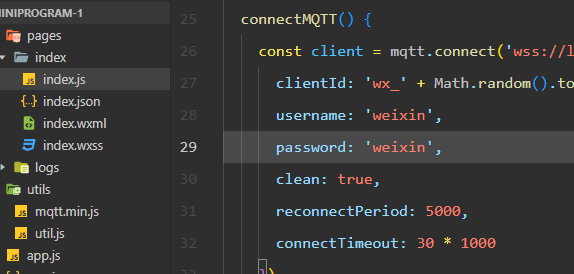
并修改index.js中的name和密码
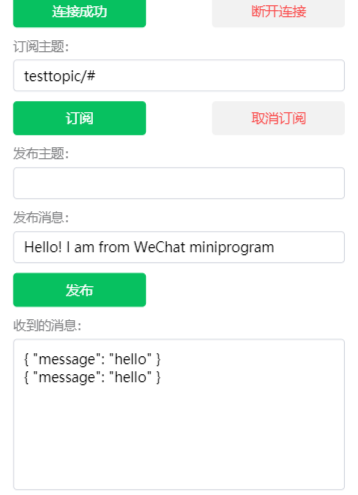
然后就可以正常连接了
不过真机调试会出现bug不能用,查了一下这个错误通常出现在 UniApp 开发微信小程序时,代码中使用了 Node.js 的文件系统(fs)模块,但微信小程序环境不支持 Node.js API
参考文章: