一、实验要求

- 搭建主站:www.openlab.com 显示 welcome to openlab!!!
- 搭建三个子页面:
学生信息:www.openlab.com/student
教学资料:www.openlab.com/data
缴费网站:www.openlab.com/money - 访问控制:仅用户 song、tian 可访问学生信息页面
- 安全要求:缴费网站使用 HTTPS 加密访问
二、实验步骤
1、系统环境初始化与安全策略关闭
bash
[root@localhost ~]# hostnamectl set-hostname luoxuan #修改主机名
[root@localhost ~]# bash
[root@luoxuan ~]# systemctl disable --now firewalld #关闭防火墙
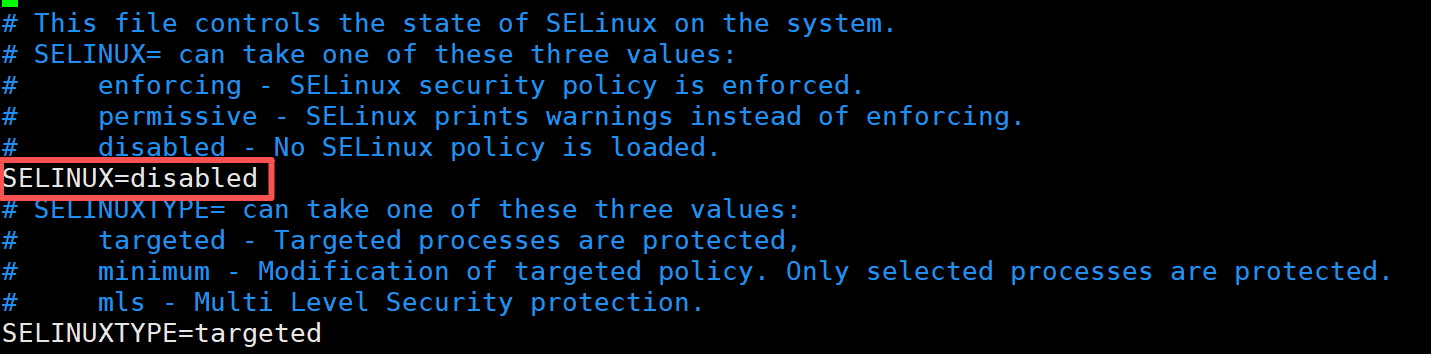
[root@luoxuan ~]# vim /etc/selinux/config #关闭SeLinux
SELINX=disabled
[root@luoxuan ~]# yum install nginx mod_ssl httpd-tools -y #下载实验所需的工具
[root@luoxuan ~]# systemctl start nginx
[root@luoxuan ~]# systemctl enable --now nginx #设置nginx开机自启
Created symlink /etc/systemd/system/multi-user.target.wants/nginx.service → /usr/lib/systemd/system/nginx.service.注:vim /etc/selinux/config 配置文件
2、创建网站根目录与测试页面
bash
[root@luoxuan ~]# mkdir -p /www/openlab
[root@luoxuan ~]# mkdir /www/openlab/student /www/openlab/data /www/openlab/money

[root@luoxuan ~]# echo "www.openlab.com" > /www/openlab/index.html    #输入网站数据
[root@luoxuan ~]# echo "student" > /www/openlab/student/index.html
[root@luoxuan ~]# echo "money" > /www/openlab/money/index.html
[root@luoxuan ~]# echo "data" > /www/openlab/data/index.html

[root@luoxuan ~]# tree /www
/www
`-- openlab
    |-- data
    |   `-- index.html
    |-- index.html
    |-- money
    |   `-- index.html
    `-- student
        `-- index.html

4 directories, 4 files
3、配置本地域名映射
bash
[root@luoxuan ~]# vim /etc/hosts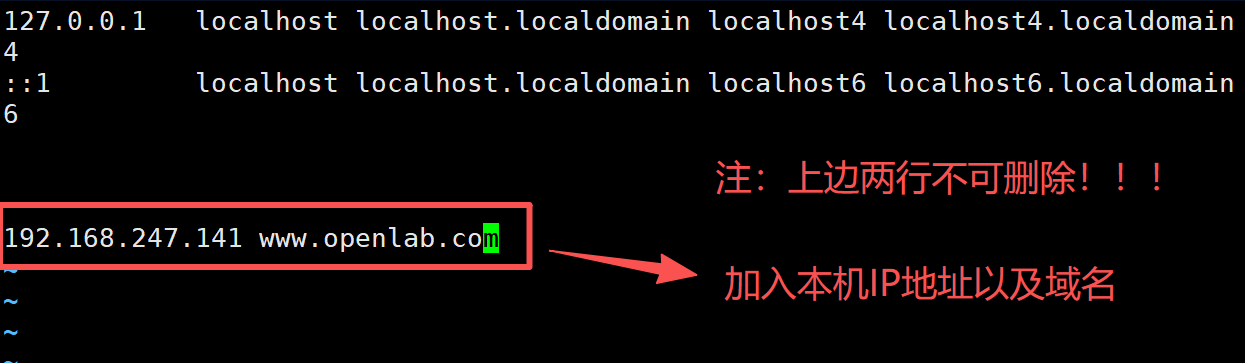
4、修改Nginx主配置文件(主网站:www.openlab.com)
bash
[root@luoxuan ~]# vim /etc/nginx/nginx.conf

server {
        listen       80;
        server_name  www.openlab.com;
        root         /www/openlab;
    }
5、修改Nginx主配置文件(子网站:www.openlab.com/data)
bash
server {
        listen       80;
        server_name  www.openlab.com;
        root         /www/openlab;
        location /data   {
                                alias /www/openlab/data;
                                index index.html index.htm;

                }
    }
6、新建账户并改密码
bash
[root@luoxuan ~]# useradd song
[root@luoxuan ~]# passwd song
Changing password for user song.
New password:
BAD PASSWORD: The password is shorter than 8 characters
Retype new password:
passwd: all authentication tokens updated successfully.

[root@luoxuan ~]# useradd tian
[root@luoxuan ~]# passwd tian
Changing password for user tian.
New password:
BAD PASSWORD: The password is shorter than 8 characters
Retype new password:
passwd: all authentication tokens updated successfully.
[root@luoxuan ~]#
7、增加密码访问控制
bash
[root@luoxuan ~]# htpasswd -c /www/openlab/student/passwd song
New password:
Re-type new password:
Adding password for user song

[root@luoxuan ~]# htpasswd  /www/openlab/student/passwd tian
New password:
Re-type new password:
Adding password for user tian8、修改Nginx主配置文件(子网站:www.openlab.com/student)
bash
server {
        listen       80;
        server_name  www.openlab.com;
        root         /www/openlab;
        location /data   {
                                alias /www/openlab/data;
                                index index.html index.htm;
        location /student   {
                                alias /www/openlab/student;
                                index index.html index.htm;
                                auth_basic               "Please input password";
                                auth_basic_user_file     /www/openlab/student/passwd;
                }
    }
9、生成 SSL 证书(HTTPS 必需)
使用 openssl 生成加密私钥、自签名证书,并去除私钥密码(避免 Nginx 启动报错)。
bash
#制作私钥
[root@luoxuan ~]# openssl  genrsa  -aes128  2048 > /www/openlab/money/money.key
Enter PEM pass phrase:
Verifying - Enter PEM pass phrase:

#制作证书
[root@luoxuan ~]# openssl  req  -utf8  -new  -key  /www/openlab/money/money.key  -x509  -days  365  -out  /www/openlab/money/money.crt
Enter pass phrase for /www/openlab/money/money.key:
You are about to be asked to enter information that will be incorporated
into your certificate request.
What you are about to enter is what is called a Distinguished Name or a DN.
There are quite a few fields but you can leave some blank
For some fields there will be a default value,
If you enter '.', the field will be left blank.
-----
Country Name (2 letter code) [XX]:86
State or Province Name (full name) []:shan'xi
Locality Name (eg, city) [Default City]:bao'ji
Organization Name (eg, company) [Default Company Ltd]:openlab
Organizational Unit Name (eg, section) []:test
Common Name (eg, your name or your server's hostname) []:master
Email Address []:123456789@qq.com


# 在加载SSL支持的Nginx并使用上述私钥时除去必须的口令
[root@luoxuan ~]# cp /www/openlab/money/money.key /www/openlab/money/money.key.org
[root@luoxuan ~]# openssl rsa -in /www/openlab/money/money.key.org -out /www/openlab/money/money.key
Enter pass phrase for /www/openlab/money/money.key.org:
writing RSA key
[root@luoxuan ~]# 10、修改Nginx主配置文件(子网站:www.openlab.com/money)
bash
#重新起一个server

server {
        listen       443 ssl http2;
        server_name  www.openlab.com;
        location     /money {
                                alias /www/openlab/money;
                                index index.html index.htm;
                }

        ssl_certificate         "/www/openlab/money/money.crt";
        ssl_certificate_key     "/www/openlab/money/money.key";
        }
11、检查配置并重启 Nginx 服务
bash
# 检查Nginx配置语法(整改新增,提前排查错误)
[root@luoxuan nginx]# nginx -t
nginx: the configuration file /etc/nginx/nginx.conf syntax is ok
nginx: configuration file /etc/nginx/nginx.conf test is successful

# 重启Nginx使配置生效
[root@luoxuan nginx]# systemctl restart nginx
注:出现以下提示,说明配置文件没有问题
nginx: the configuration file /etc/nginx/nginx.conf syntax is ok
nginx: configuration file /etc/nginx/nginx.conf test is successful
三、实验结果
1、访问主网站 www.openlab.com

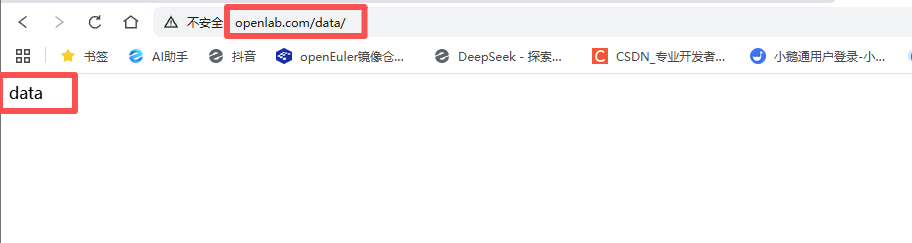
2、访问子网站 www.openlab.com/data
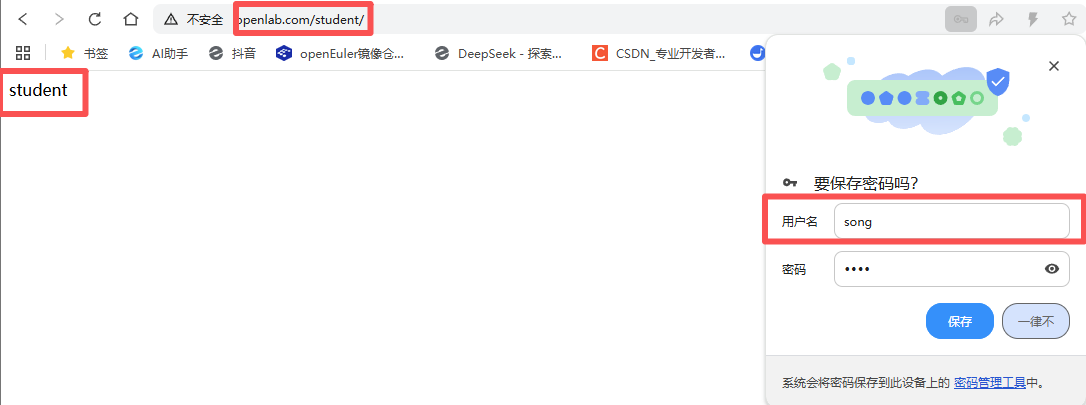
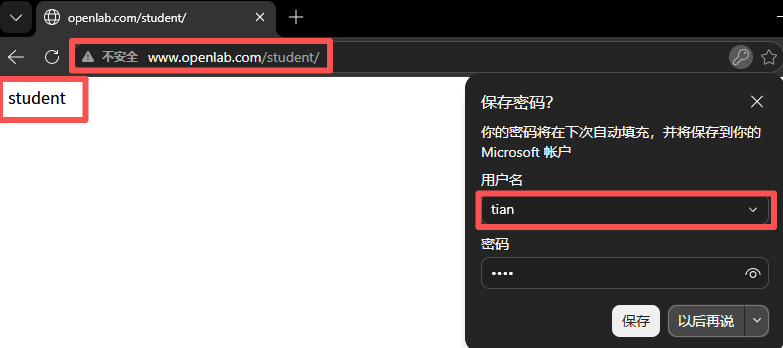
3、访问子网站 www.openlab.com/student

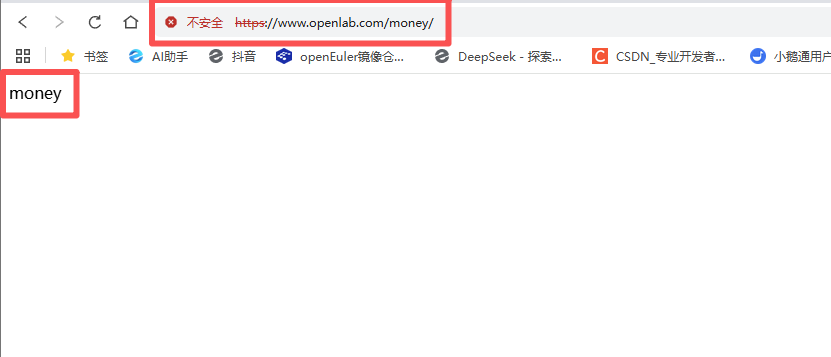
4、访问子网站 www.openlab.com/money(点击高级->接受风险并继续)
若访问超时,或不能访问,可在真机上配置本地域名映射,具体方法可查看过往CSDN Nginx 子目录多站点配置实验(HTTP/HTTPS 分离部署)![]() https://blog.csdn.net/2502_90206768/article/details/160957287?spm=1001.2014.3001.5501
https://blog.csdn.net/2502_90206768/article/details/160957287?spm=1001.2014.3001.5501
四、实验总结
本次实验完成 Nginx 多站点部署、基于 htpasswd 的用户访问控制、HTTPS 证书配置,实现企业级 Web 服务的多路径分发、权限隔离、数据加密,符合 RHCE 企业 Web 服务部署标准。