YOLO26 检测系统使用教程
文章目录
- [YOLO26 检测系统使用教程](#YOLO26 检测系统使用教程)
-
- 一、环境准备
- 二、服务端代码
-
- [2.1 文件结构](#2.1 文件结构)
- [2.2 完整代码](#2.2 完整代码)
- [2.3 启动服务端](#2.3 启动服务端)
- 三、获取访问地址
- 四、方式一:网页版(推荐)
- [五、方式二:Python 命令行客户端](#五、方式二:Python 命令行客户端)
-
- [5.1 安装依赖](#5.1 安装依赖)
- [5.2 客户端代码](#5.2 客户端代码)
- [5.3 运行](#5.3 运行)
- 六、服务端接口说明
-
- [/detect 返回示例](#/detect 返回示例)
https://docs.ultralytics.com/zh/models/yolo26
一、环境准备
在 AutoDL 实例中执行:
bash
pip install flask flask-cors ultralytics pillow requests验证模型能正常加载:
bash
python -c "from ultralytics import YOLO; m=YOLO('yolo26n.pt'); print('模型加载成功')"
二、服务端代码
2.1 文件结构
文件路径:/root/ultralytics-YOLO26/server.py
2.2 完整代码
python
from flask import Flask, request, jsonify, send_file, render_template_string
from flask_cors import CORS
from ultralytics import YOLO
from PIL import Image
import io, os, uuid
app = Flask(__name__)
CORS(app)
model = YOLO("yolo26n.pt")
SAVE_DIR = "results"
os.makedirs(SAVE_DIR, exist_ok=True)
HTML_PAGE = '''
<!DOCTYPE html>
<html lang="zh-CN">
<head>
<meta charset="UTF-8">
<title>YOLO26 在线检测系统</title>
<style>
body { font-family: "Microsoft YaHei", sans-serif; max-width: 900px; margin: 40px auto; padding: 20px; background: #f5f5f5; }
h1 { text-align: center; color: #333; }
.upload-box { background: #fff; padding: 30px; border-radius: 10px; box-shadow: 0 2px 8px rgba(0,0,0,0.1); text-align: center; }
input[type="file"] { margin: 20px 0; }
button { padding: 10px 30px; font-size: 16px; background: #1890ff; color: #fff; border: none; border-radius: 5px; cursor: pointer; }
button:hover { background: #40a9ff; }
.result { margin-top: 30px; background: #fff; padding: 20px; border-radius: 10px; display: none; }
.imgs { display: flex; gap: 20px; justify-content: center; flex-wrap: wrap; margin-top: 15px; }
.imgs img { max-width: 100%; width: 400px; border: 1px solid #ddd; border-radius: 5px; }
pre { background: #f6f8fa; padding: 15px; border-radius: 5px; text-align: left; overflow-x: auto; }
.loading { color: #888; margin-top: 10px; }
</style>
</head>
<body>
<h1>YOLO26 目标检测系统</h1>
<div class="upload-box">
<h3>上传图片进行检测</h3>
<input type="file" id="fileInput" accept="image/*"><br>
<button onclick="upload()">开始检测</button>
<div class="loading" id="loading"></div>
</div>
<div class="result" id="result">
<h3>检测结果</h3>
<pre id="jsonBox"></pre>
<div class="imgs">
<div><p>原图</p><img id="srcImg" src=""></div>
<div><p>检测图</p><img id="dstImg" src=""></div>
</div>
</div>
<script>
function upload() {
const file = document.getElementById("fileInput").files[0];
if (!file) { alert("请先选择图片"); return; }
document.getElementById("loading").innerText = "检测中,请稍候...";
const form = new FormData();
form.append("image", file);
fetch("/detect", { method: "POST", body: form })
.then(r => r.json())
.then(data => {
document.getElementById("loading").innerText = "";
document.getElementById("result").style.display = "block";
document.getElementById("jsonBox").innerText = JSON.stringify(data.boxes, null, 2);
const srcUrl = URL.createObjectURL(file);
document.getElementById("srcImg").src = srcUrl;
document.getElementById("dstImg").src = "/result/" + data.result_image;
})
.catch(err => {
document.getElementById("loading").innerText = "";
alert("请求失败: " + err);
});
}
</script>
</body>
</html>
'''
@app.route("/")
def index():
return render_template_string(HTML_PAGE)
@app.route("/detect", methods=["POST"])
def detect():
if "image" not in request.files:
return jsonify({"error": "no image"}), 400
file = request.files["image"]
img = Image.open(file.stream).convert("RGB")
results = model.predict(img, conf=0.25)
r = results[0]
out_name = f"{uuid.uuid4().hex}.jpg"
out_path = os.path.join(SAVE_DIR, out_name)
r.save(filename=out_path)
boxes = []
for b in r.boxes:
boxes.append({
"cls": model.names[int(b.cls)],
"conf": float(b.conf),
"xyxy": b.xyxy[0].tolist()
})
return jsonify({"boxes": boxes, "result_image": out_name})
@app.route("/result/<name>")
def result(name):
return send_file(os.path.join(SAVE_DIR, name), mimetype="image/jpeg")
if __name__ == "__main__":
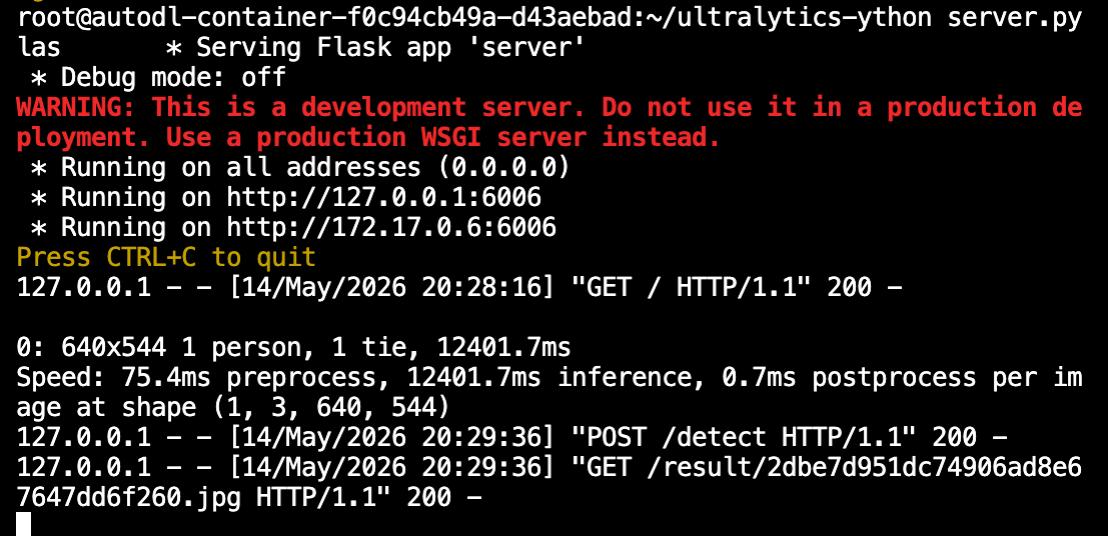
app.run(host="0.0.0.0", port=6006)2.3 启动服务端
bash
cd /root/ultralytics-YOLO26
python server.py
保持终端运行,不要关闭。
三、获取访问地址
登录 AutoDL 控制台,找到当前实例,点击「自定义服务」,复制外网链接,格式类似:
https://u37150-b49a-d43aebad.westc.seetacloud.com:8443以下两种调用方式均使用该地址。
四、方式一:网页版(推荐)
直接将上述链接(https://u37150-b49a-d43aebad.westc.seetacloud.com:8443/)发给任何人,浏览器打开即可。
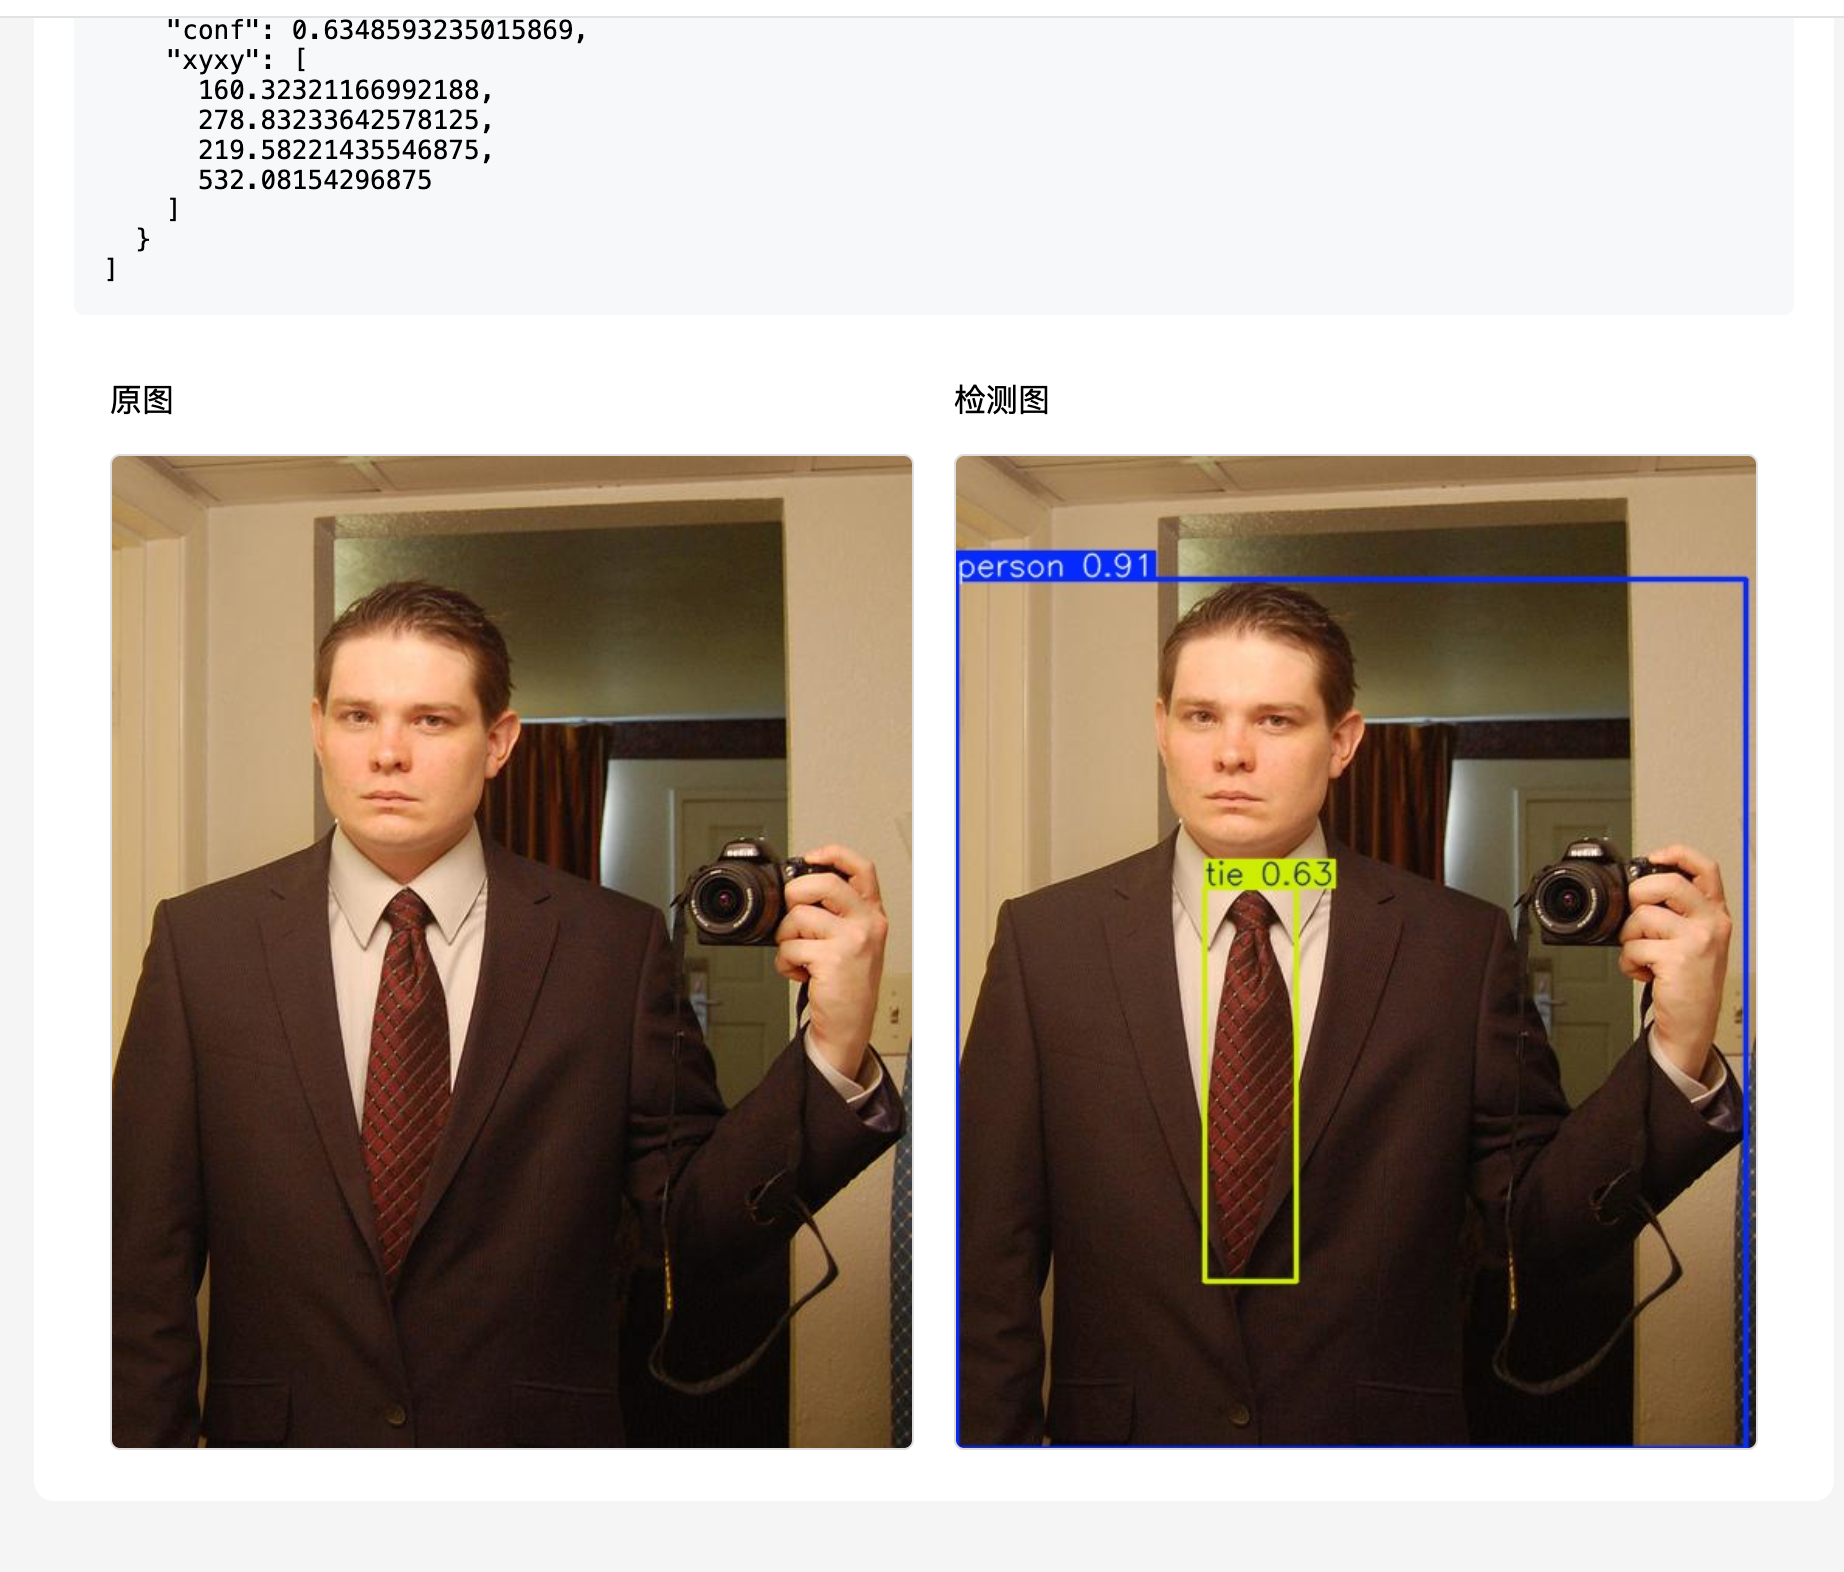
页面功能:
- 点击「选择文件」上传图片
- 点击「开始检测」
- 页面下方显示原图、检测图、以及 JSON 格式的检测框信息(类别、置信度、坐标)
无需安装任何环境,手机、电脑均可使用。

五、方式二:Python 命令行客户端
适用于本地有 Python 环境的情况。
5.1 安装依赖
bash
pip install requests pillow5.2 客户端代码
创建 client.py,内容如下:
python
import requests, sys
from PIL import Image
import io

# 替换为你的 AutoDL 自定义服务地址
SERVER = "https://u37150-b49a-d43aebad.westc.seetacloud.com:8443"

def main(img_path):
    with open(img_path, "rb") as f:
        r = requests.post(f"{SERVER}/detect", files={"image": f})
    data = r.json()
    print("检测结果:", data["boxes"])

    # 下载结果图
    img_r = requests.get(f"{SERVER}/result/{data['result_image']}")
    Image.open(io.BytesIO(img_r.content)).show()

if __name__ == "__main__":
    main(sys.argv[1])
5.3 运行
bash
python client.py test.jpg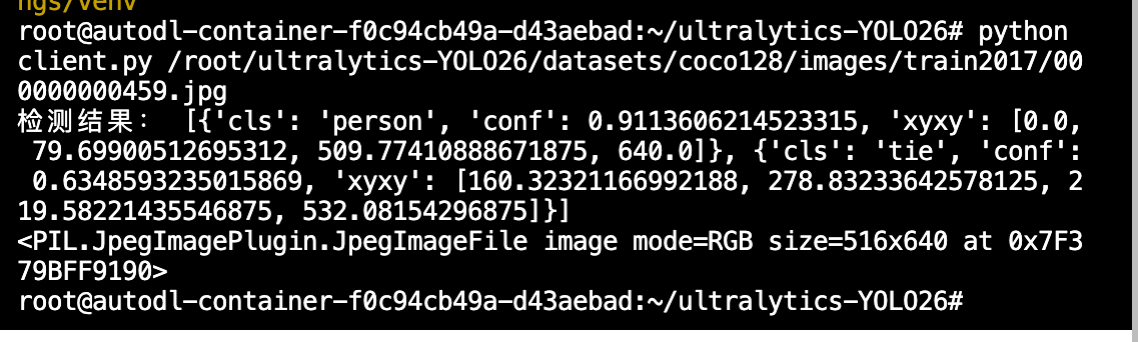
六、服务端接口说明
| 接口 | 方法 | 说明 |
|---|---|---|
/ |
GET | 网页版首页 |
/detect |
POST | 上传图片,返回检测框信息和结果图文件名 |
/result/<name> |
GET | 根据文件名获取结果图片 |
/detect 返回示例
json
{
  "boxes": [
    {
      "cls": "person",
      "conf": 0.92,
      "xyxy": [100.0, 200.0, 300.0, 500.0]
    }
  ],
  "result_image": "a1b2c3d4.jpg"
}