目录
[1 基本配置](#1 基本配置)
[2.1 安装svn服务器](#2.1 安装svn服务器)
[2.2 创建svn仓库文件夹](#2.2 创建svn仓库文件夹)
[2.3 创建版本库](#2.3 创建版本库)
[2.4 配置](#2.4 配置)
[2.4.1 svnserve.conf文件](#2.4.1 svnserve.conf文件)
[2.4.2 authz文件](#2.4.2 authz文件)
[2.4.3 passwd文件](#2.4.3 passwd文件)
[2.5 启动服务器](#2.5 启动服务器)
[2.6 查看连接状态](#2.6 查看连接状态)
[2.8 使用rc.local设置开机自启动](#2.8 使用rc.local设置开机自启动)
[3 访问svn](#3 访问svn)
[3.1 查看端口](#3.1 查看端口)
[3.2 开放svn服务器端口](#3.2 开放svn服务器端口)
[3.3 访问svn库](#3.3 访问svn库)
[3.4 愉快的玩耍吧](#3.4 愉快的玩耍吧)
魔息大帝
**诗号1:**由忧惧起爱憎,由忿痴忘心根,旦天大法地,魔轮转死生。
**诗号2:**八翼魔劫开,万魔归一帝,暗轮转乾坤,人间灾符应。
**诗号3:**青山一发,英雄相埋,山河几多颜色改。数朝代,叹成败,征尘古今只余哀。战,也兵灾。和,也兵灾。
**诗号4:**人身百年,魔身千年。转眼一见,人魔何别。
魔息大帝,是九轮天中魔息国度的帝王,本名魔息珥图。 他曾以强烈手段侵略九轮天各国,欲成为九轮唯一领导,后归降九轮共主。为侵略苦境,魔息大帝与幽魂、创罪者达成协议,进入苦境寻找开启九轮天与苦境通道的方法。 在与侠菩提的灵识一战后受到重创,因而隐遁于怪贩妖市的魔息山许久。之后将寄体目标转向龙戩,以此来进行自我霸业。龙戩死后,九轮天降世,魔息大帝与魔息国度的一切再度有了交会,最终退场于《霹雳狼烟之古原争霸》第4章。

1 基本配置
硬件:Dell R730
系统:CentOS Stream 10
架构信息:Linux r730 6.12.0-224.el10.x86_64 #1 SMP PREEMPT_DYNAMIC Tue Apr 21 19:40:37 UTC 2026 x86_64 GNU/Linux
注: 可用uname -a 查看具体架构信息。
2.安装svnserver
2.1 安装svn服务器
bash
zero@r730:~$ sudo yum install subversion
[sudo] zero 的密码:
上次元数据过期检查:3:08:40 前,执行于 2026年05月23日 星期六 03时33分46秒。
依赖关系解决。
=====================================================================================================================
 软件包                          架构                  版本                           仓库                      大小
=====================================================================================================================
安装:
 subversion                      x86_64                1.14.5-3.el10                  appstream                1.0 M
安装依赖关系:
 apr                             x86_64                1.7.5-3.el10                   appstream                127 k
 apr-util                        x86_64                1.6.3-23.el10                  appstream                 97 k
 libserf                         x86_64                1.3.10-7.el10                  appstream                 61 k
 subversion-libs                 x86_64                1.14.5-3.el10                  appstream                1.3 M
 utf8proc                        x86_64                2.7.0-9.el10                   appstream                 81 k
安装弱的依赖:
 apr-util-lmdb                   x86_64                1.6.3-23.el10                  appstream                 13 k
 apr-util-openssl                x86_64                1.6.3-23.el10                  appstream                 15 k

事务概要
=====================================================================================================================
安装  8 软件包

总下载:2.7 M
安装大小:10 M
确定吗?[y/N]: y
下载软件包:
(1/8): apr-util-lmdb-1.6.3-23.el10.x86_64.rpm                                        4.1 kB/s |  13 kB     00:03
(2/8): apr-util-openssl-1.6.3-23.el10.x86_64.rpm                                     227 kB/s |  15 kB     00:00
(3/8): apr-util-1.6.3-23.el10.x86_64.rpm                                              29 kB/s |  97 kB     00:03
(4/8): apr-1.7.5-3.el10.x86_64.rpm                                                    38 kB/s | 127 kB     00:03
(5/8): libserf-1.3.10-7.el10.x86_64.rpm                                              485 kB/s |  61 kB     00:00
(6/8): utf8proc-2.7.0-9.el10.x86_64.rpm                                              833 kB/s |  81 kB     00:00
(7/8): subversion-1.14.5-3.el10.x86_64.rpm                                           3.9 MB/s | 1.0 MB     00:00
(8/8): subversion-libs-1.14.5-3.el10.x86_64.rpm                                      5.0 MB/s | 1.3 MB     00:00
---------------------------------------------------------------------------------------------------------------------
总计                                                                                 318 kB/s | 2.7 MB     00:08
运行事务检查
事务检查成功。
运行事务测试
事务测试成功。
运行事务
  准备中  :                                                                                                      1/1
  安装    : apr-1.7.5-3.el10.x86_64                                                                              1/8
  安装    : apr-util-lmdb-1.6.3-23.el10.x86_64                                                                   2/8
  安装    : apr-util-openssl-1.6.3-23.el10.x86_64                                                                3/8
  安装    : apr-util-1.6.3-23.el10.x86_64                                                                        4/8
  安装    : libserf-1.3.10-7.el10.x86_64                                                                         5/8
  安装    : utf8proc-2.7.0-9.el10.x86_64                                                                         6/8
  安装    : subversion-libs-1.14.5-3.el10.x86_64                                                                 7/8
  安装    : subversion-1.14.5-3.el10.x86_64                                                                      8/8
  运行脚本: subversion-1.14.5-3.el10.x86_64                                                                      8/8

已安装:
  apr-1.7.5-3.el10.x86_64                   apr-util-1.6.3-23.el10.x86_64     apr-util-lmdb-1.6.3-23.el10.x86_64
  apr-util-openssl-1.6.3-23.el10.x86_64     libserf-1.3.10-7.el10.x86_64      subversion-1.14.5-3.el10.x86_64
  subversion-libs-1.14.5-3.el10.x86_64      utf8proc-2.7.0-9.el10.x86_64

完毕!
zero@r730:~$
查看下版本,确认下安装成功没:
bash
zero@r730:~$ svnadmin --version
svnadmin,版本 1.14.5 (r1922182)
   编译于 Jul 24 2025,00:00:00 在 x86_64-redhat-linux-gnu

Copyright (C) 2024 The Apache Software Foundation.
This software consists of contributions made by many people;
see the NOTICE file for more information.
Subversion is open source software, see http://subversion.apache.org/

下列版本库后端(FS) 模块可用:

* fs_fs : 模块与文本文件(FSFS)版本库一起工作。
* fs_x : Module for working with an experimental (FSX) repository.
正常打印出来信息就安装成功了。
2.2 创建svn仓库文件夹
在数据目录/var/lib下创建一个svn仓库文件夹,用来做svn仓库文件夹。
bash
zero@r730:/var/lib$ sudo mkdir /var/lib/svn
[sudo] zero 的密码:
zero@r730:/var/lib$
2.3 创建版本库
bash
zero@r730:~$ sudo svnadmin create /var/lib/svn/test
zero@r730:~$ cd /var/lib/svn
zero@r730:/var/lib/svn$ ll
总计 0
drwxr-xr-x. 6 root root 114  5月23日 06:51 test    # 创建成功
2.4 配置
通过修改conf文件夹下的文件配置权限。
注意,修改配置文件svnserve.conf、authz、passwd文件时,所有行头不能有空格,末尾也不能添加空空格,下文配置#号说明的信息主要用于备注,实际修改时不能添加,否则会报"authorization failed"错误。
2.4.1 svnserve.conf文件
python
[general]
### The anon-access and auth-access options control access to the
### repository for unauthenticated (a.k.a. anonymous) users and
### authenticated users, respectively.
### Valid values are "write", "read", and "none".
### Setting the value to "none" prohibits both reading and writing;
### "read" allows read-only access, and "write" allows complete
### read/write access to the repository.
### The sample settings below are the defaults and specify that anonymous
### users have read-only access to the repository, while authenticated
### users have read and write access to the repository.
anon-access = none      # 设置匿名用户不可读
auth-access = write     # 权限用户可写
### The password-db option controls the location of the password
### database file.  Unless you specify a path starting with a /,
### the file's location is relative to the directory containing
### this configuration file.
### If SASL is enabled (see below), this file will NOT be used.
### Uncomment the line below to use the default password file.
password-db = passwd    # 使用用密码文件
### The authz-db option controls the location of the authorization
### rules for path-based access control.  Unless you specify a path
### starting with a /, the file's location is relative to the
### directory containing this file.  The specified path may be a
### repository relative URL (^/) or an absolute file:// URL to a text
### file in a Subversion repository.  If you don't specify an authz-db,
### no path-based access control is done.
### Uncomment the line below to use the default authorization file.
authz-db = authz        # 使用权限文件
注:如果要全局配置权限,可以将用户和权限的库文件authz和passwd文件存储到一个特定位置,然后文件配置中,采用相对路径或者绝对路径指向到存储的位置,如下示例,以相对路径指向:
bash
password-db = ../../conf/passwd
authz-db = ../../conf/authz
2.4.2 authz文件
python
[groups]
# harry_and_sally = harry,sally
# harry_sally_and_joe = harry,sally,&joe

# [/foo/bar]
# harry = rw
# &joe = r
# * =

# [repository:/baz/fuz]
# @harry_and_sally = rw
# * = r
# 在末尾添加信息
admin = admin   # 管理员用户admin分组属于admin组
[/]             # 从仓库开始设置权限
@admin = rw     # 管理员组的权限是读写
注:/路径是启动svn服务器时设置的根目录,如果库目录不是在根目录下,而是在根目录下的其他文件夹下,则指定库是需要加上子目录,示例如下:
bash
[forder/repos:/...]2.4.3 passwd文件
python
[users]
# harry = harryssecret
# sally = sallyssecret
admin = 123456    # 在末尾添加用户和密码,明文输入
2.5 启动服务器
python
zero@r730:/var/lib/svn/test$ sudo svnserve -d -r /var/lib/svn- -d:标识以守护模式启动
- -r:设置svn存储库根目录,这样访问的时候不要输入完整路径
- 其他:暂时还没研究。
2.6 查看连接状态
python
zero@r730:/var/lib/svn/test$ ps -aux | grep svnserve
root       83033  0.0  0.0 240880  2184 ?        Ss   06:55   0:00 svnserve -d -r /var/lib/svn
zero       83037  0.0  0.0 227720  2388 pts/0    S+   06:55   0:00 grep --color=auto svnserve
有看到服务表示服务器启动成功。
2.7停止服务器
python
killall svnserve2.8 使用rc.local设置开机自启动
切到etc目录下
bash
zero@r730:/var/lib/svn/test$ cd /etc编辑rc.local,注有的系统没有这个文件,直接新建即可:
bash
zero@r730:/etc$ sudo vim rc.local输入启动内容:
bash
sudo svnserve -d -r /var/lib/svn 然后esc,按:wq保存退出。
修改rc.local文件权限:
python
zero@r730:/etc$ sudo chmod +x rc.local然后重启服务器。完事
3 访问svn
3.1 查看端口
python
zero@r730:/etc$ sudo netstat -anp | grep svnserve
tcp        0      0 0.0.0.0:3690            0.0.0.0:*               LISTEN      83033/svnserve
通过sudo netstat -anp 查看svn服务的端口号,这边我们可以看到svn服务器的默认端口为3690。
3.2 开放svn服务器端口
python
zero@r730:/var/lib/svn/test$ sudo firewall-cmd --zone=public --add-port=3690/tcp --permanent
Warning: ALREADY_ENABLED: 3690:tcp
success
重新加载防火墙:
python
zero@r730:/etc$ sudo firewall-cmd --reload
success
查看端口状态:
python
zero@r730:/var/lib/svn/test$ sudo firewall-cmd --zone=public --list-all
public (default, active)
  target: default
  ingress-priority: 0
  egress-priority: 0
  icmp-block-inversion: no
  interfaces: eno1 wlp4s0
  sources:
  services: cockpit dhcpv6-client https ssh
  ports: 80/tcp 443/tcp 8000/tcp 8000/udp 3000/udp 3000/tcp 3069/tcp 3069/udp 3690/tcp
  protocols:
  forward: yes
  masquerade: no
  forward-ports:
  source-ports:
  icmp-blocks:
  rich rules:
端口打开后就可以通过外部访问。
3.3 访问svn库
我是以window环境的svn客户端访问的 :
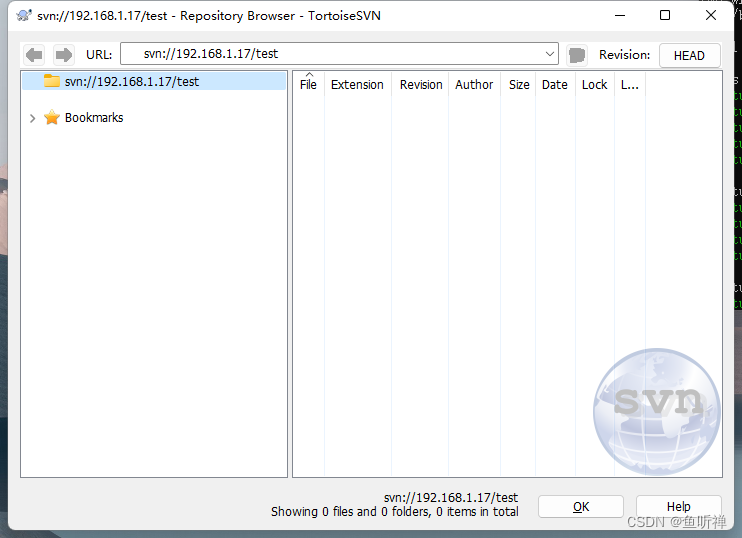
试着创建个文件夹:
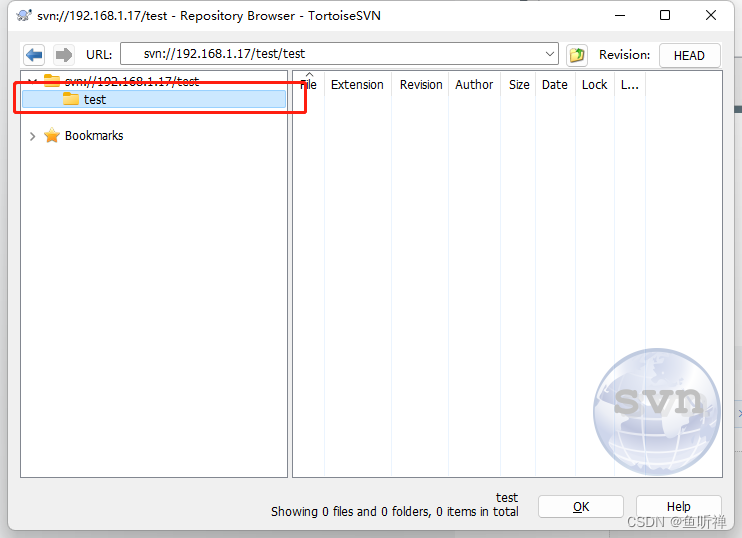
3.4 愉快的玩耍吧
网上资料看着一看就觉得自己会,实际还是需要动手去实践才能发现问题,只有自己动手配置过了才能有所收获。