为什么需要Service Mesh(服务网格)?
简单来说,当你的架构从"单体"演进到"微服务"后,原本简单的进程内调用变成了错综复杂的网络调用。Service Mesh(服务网格)的出现,是为了把"业务逻辑"与"网络基础设施"彻底解耦。
一、启动k8s集群
sql
$ kind create cluster --config kind-config.yaml --name go
lang-per-day
Creating cluster "golang-per-day" ...
 • Ensuring node image (kindest/node:v1.35.0) 🖼  ...
 ✓ Ensuring node image (kindest/node:v1.35.0) 🖼
 • Preparing nodes 📦  📦  📦    ...
 ✓ Preparing nodes 📦  📦  📦
 • Writing configuration 📜   ...
 ✓ Writing configuration 📜
 • Starting control-plane 🕹️  ...
 ✓ Starting control-plane 🕹️
 • Installing CNI 🔌   ...
 ✓ Installing CNI 🔌
 • Installing StorageClass 💾   ...
 ✓ Installing StorageClass 💾
 • Joining worker nodes 🚜   ...
 ✓ Joining worker nodes 🚜
Set kubectl context to "kind-golang-per-day"
You can now use your cluster with:

kubectl cluster-info --context kind-golang-per-day
二、安装 istioctl命令工具
- 下载 压缩包:
https://github.com/istio/istio/releases/download/1.28.2/istioctl-1.28.2-win-amd64.zip
- 解压到 ~/go/bin/istioctl.exe,或者添加到系统的PATH里。
三、在K8s中安装 Istio
markdown
$ istioctl.exe install --set profile=demo -y
        |\
        | \
        |  \
        |   \
      /||    \
     / ||     \
    /  ||      \
   /   ||       \
  /    ||        \
 /     ||         \
/______||__________\
____________________
  \__       _____/
     \_____/

✔ Istio core installed ⛵️
✔ Istiod installed 🧠
✔ Egress gateways installed 🛫
✔ Ingress gateways installed 🛬
✔ Installation complete
四、验证状态
sql
$ kubectl get pods -n istio-system
NAME                                    READY   STATUS    RESTARTS   AGE
istio-egressgateway-67cf7cbcdd-6jfrg    1/1     Running   0          28s
istio-ingressgateway-6bcdbb9678-4jgk5   1/1     Running   0          28s
istiod-666f895d5d-fgqbr                 1/1     Running   0          51s
五、配置Ingress网关端口
由于 Kind 无法像云厂商那样自动分配 LoadBalancer 的 External IP,我们需要手动将 Istio 的入站服务改为 NodePort,并匹配我们在 Kind 配置中映射的端口(30000 和 30001)。
执行以下补丁命令:
makefile
kubectl patch svc istio-ingressgateway -n istio-system --type='json' -p='[
  {"op": "replace", "path": "/spec/type", "value": "NodePort"},
  {"op": "replace", "path": "/spec/ports/1/nodePort", "value": 30000}
]'
六、在Istio中发布应用
- 创建命名空间
cpp
//创建命名空间
$ kubectl create namespace codee-jun
namespace/codee-jun created - 开启Sidercar自动注入
Istio 的强大功能(流量管理、安全、监控)是依靠在你的应用容器旁运行的一个"边车"代理(Envoy)实现的。你需要告诉 Istio 在你部署应用时自动把这个代理"塞"进去。
cpp
//给命名空间打标签
$ kubectl label namespace codee-jun istio-injection=enabled --overwrite
namespace/codee-jun labeled- 部署应用
sql
$ kubectl apply -f configmap.yaml
configmap/golang-per-day-68-configmap created
$ kubectl.exe apply -f app.yaml
service/golang-per-day-68 unchanged
deployment.apps/golang-per-day-68 created
sql
$ kubectl get pods -n codee-jun
NAME                                 READY   STATUS    RESTARTS   AGE
golang-per-day-68-667956b8d7-dddbh   2/2     Running   0          56s
golang-per-day-68-667956b8d7-kj5cw   2/2     Running   0          56s
golang-per-day-68-667956b8d7-lxdwd   2/2     Running   0          56s
sql
$ kubectl logs -f golang-per-day-68-667956b8d7-dddbh -n codee-jun
Hello, Codee君 !
[GIN-debug] [WARNING] Creating an Engine instance with the Logger and Recovery middleware already attached.

[GIN-debug] [WARNING] Running in "debug" mode. Switch to "release" mode in production.
 - using env:   export GIN_MODE=release
 - using code:  gin.SetMode(gin.ReleaseMode)

[GIN-debug] GET    /ping                     --> main.main.func1 (3 handlers)
[GIN-debug] [WARNING] You trusted all proxies, this is NOT safe. We recommend you to set a value.
Please check https://github.com/gin-gonic/gin/blob/master/docs/doc.md#dont-trust-all-proxies for details.
[GIN-debug] Listening and serving HTTP on :8080 - 配置网关与路由(Istio核心资源)
为了让外部用户能访问你的应用,你需要创建两个 Istio 专属资源:Gateway 和 VirtualService。
4.1 定义入口网关
makefile
apiVersion: networking.istio.io/v1beta1
kind: Gateway
metadata:
  name: golang-per-day-68-gateway
  namespace: codee-jun
spec:
  selector:
    istio: ingressgateway # 使用 Istio 默认的网关控制器
  servers:
  - port:
      number: 80
      name: http
      protocol: HTTP
    hosts:
    - "*" # 或者填写你的具体域名,如 myapp.example.com
sql
$ kubectl apply -f istio-ingress.yaml
gateway.networking.istio.io/golang-per-day-68-gateway created
4.2 定义虚拟服务
makefile
apiVersion: networking.istio.io/v1beta1
kind: VirtualService
metadata:
  name: golang-per-day-68-route
  namespace: codee-jun
spec:
  hosts:
  - "*"
  gateways:
  - golang-per-day-68-gateway # 绑定上面定义的网关
  http:
  - match:
    - uri:
        prefix: / # 匹配路径,这里是匹配所有
    route:
    - destination:
        host: golang-per-day-68 # 你的 K8s Service 名称
        port:
          number: 8080 # Service 暴露的端口
sql
$ kubectl apply -f istio-route.yaml
virtualservice.networking.istio.io/golang-per-day-68-route created
浏览器访问
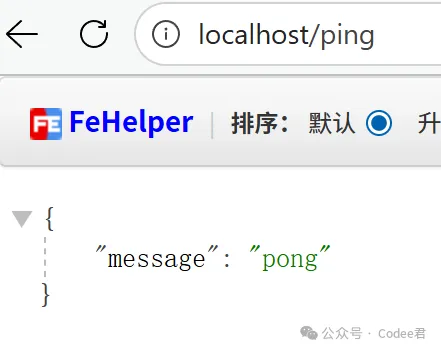
看见以上信息,恭喜你:部署成功了!
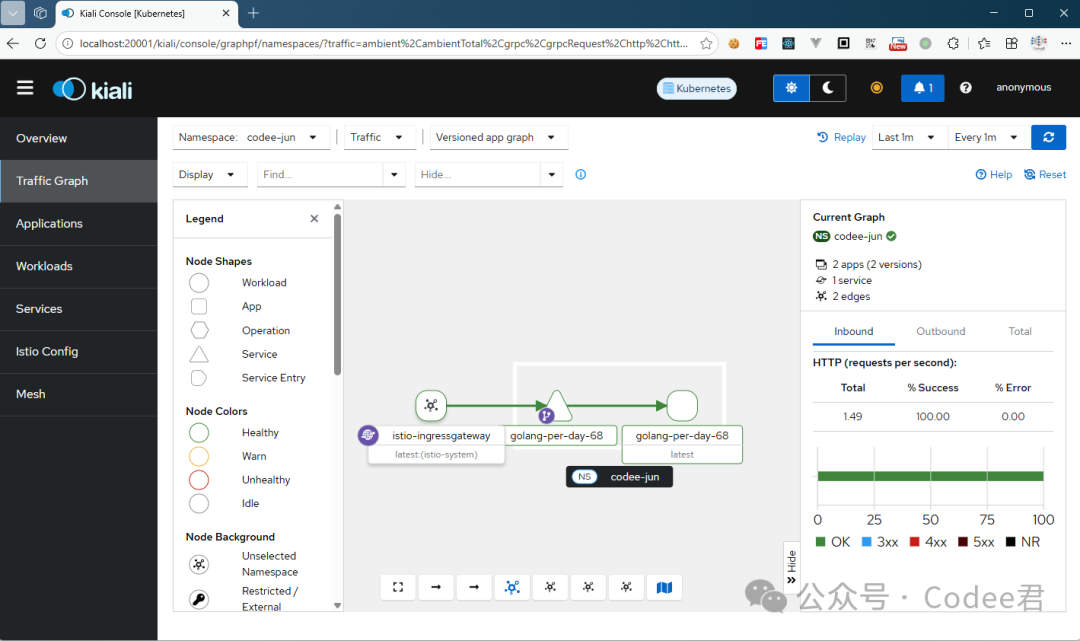
流量的路径是完整的:Windows 浏览器/Curl -> Kind 端口转发 (80:30000) -> Istio Ingress Gateway -> Istio VirtualService 路由 -> golang-per-day-68 服务 (Pod)。
七、安装流量监控 (Kiali)
apache
kubectl apply -f https://raw.githubusercontent.com/istio/istio/release-1.24/samples/addons/prometheus.yaml
kubectl apply -f https://raw.githubusercontent.com/istio/istio/release-1.24/samples/addons/kiali.yaml
八、查看流量图
bash
$ istioctl dashboard kiali
http://localhost:20001/kiali 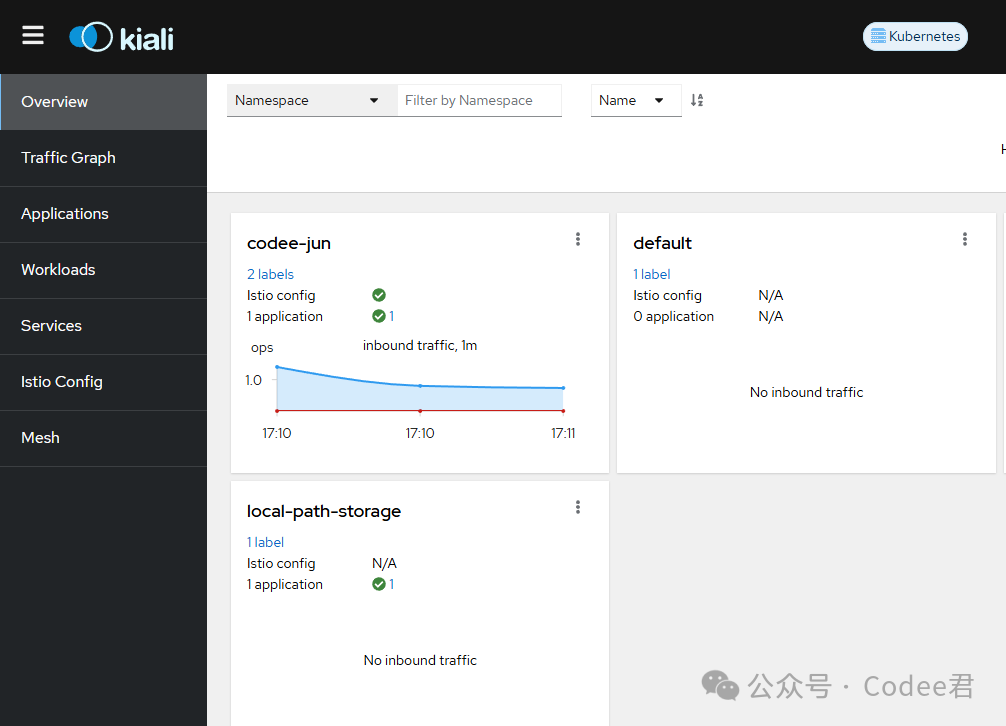

友情链接:加班费计算器(vx小程序搜索"加班计")
*源码地址*
评论区留言要
如果您喜欢这篇文章,请您(点赞、分享、亮爱心),万分感谢!