OpenClaw一个起到"承上启下"桥梁作用的组件就是它的gateway进程。前面我们已经看到过gateway启动后,我们能打开对应的网关配置页面。gateway进程的主要主要是用于接收来自手机客户端例如飞书,企业微信,钉钉等应用发过来的命令,然后将对应的命令转发给agent模块进行处理,然后再把处理结果返还给手机客户端。本节我们看看openclaw是如何在不同系统上加载gateway进程,并且将其作为系统常驻服务进程的。
openclaw主要运行在三个主流操作系统上,分别为macos, linux和windows,它先为三个系统的服务进程启动设置了接口定义,在 src/daemon/service.ts 文件中为服务进程的启动,停止等操作提供了统一的抽象接口,对应代码如下:
js
export type GatewayService = {
  label: string;
  loadedText: string;
  notLoadedText: string;
  stage: (args: GatewayServiceStageArgs) => Promise<void>;
  install: (args: GatewayServiceInstallArgs) => Promise<void>;
  uninstall: (args: GatewayServiceManageArgs) => Promise<void>;
  stop: (args: GatewayServiceControlArgs) => Promise<void>;
  restart: (args: GatewayServiceControlArgs) => Promise<GatewayServiceRestartResult>;
  isLoaded: (args: GatewayServiceEnvArgs) => Promise<boolean>;
  readCommand: (env: GatewayServiceEnv) => Promise<GatewayServiceCommandConfig | null>;
  readRuntime: (env: GatewayServiceEnv) => Promise<GatewayServiceRuntime>;
};
上面接口定义中,install对应在给定操作系统上安装gateway进程,uninstall对应卸载gateway进程,restart对应重启gateway进程,我们看看针对不同操作系统,openclaw如何初始化上面接口对应的实例,在同一个代码文件,也就是service.ts里有一个关键的常量定义GATEWAY_SERVICE_REGISTRY,它的内容如下:
js
const GATEWAY_SERVICE_REGISTRY: Record<SupportedGatewayServicePlatform, GatewayService> = {
  darwin: {
    label: "LaunchAgent",
    loadedText: "loaded",
    notLoadedText: "not loaded",
    stage: ignoreServiceWriteResult(stageLaunchAgent),
    install: ignoreServiceWriteResult(installLaunchAgent),
    uninstall: uninstallLaunchAgent,
    stop: stopLaunchAgent,
    restart: restartLaunchAgent,
    isLoaded: isLaunchAgentLoaded,
    readCommand: readLaunchAgentProgramArguments,
    readRuntime: readLaunchAgentRuntime,
  },
  linux: {
    label: "systemd",
    loadedText: "enabled",
    notLoadedText: "disabled",
    stage: ignoreServiceWriteResult(stageSystemdService),
    install: ignoreServiceWriteResult(installSystemdService),
    uninstall: uninstallSystemdService,
    stop: stopSystemdService,
    restart: restartSystemdService,
    isLoaded: isSystemdServiceEnabled,
    readCommand: readSystemdServiceExecStart,
    readRuntime: readSystemdServiceRuntime,
  },
  win32: {
    label: "Scheduled Task",
    loadedText: "registered",
    notLoadedText: "missing",
    stage: ignoreServiceWriteResult(stageScheduledTask),
    install: ignoreServiceWriteResult(installScheduledTask),
    uninstall: uninstallScheduledTask,
    stop: stopScheduledTask,
    restart: restartScheduledTask,
    isLoaded: isScheduledTaskInstalled,
    readCommand: readScheduledTaskCommand,
    readRuntime: readScheduledTaskRuntime,
  },
};
由于openclaw是通过nodejs开发的,因此openclaw的代码需要通过Nodejs的进程进行加载执行。当nodejs在对应的操作系统上运行时,它首先获取当前操作系统的信息,如果当前操作系统是macos,那么它使用"darwin"来获取GatewayService实例,如果是linux,那么通过"linux"来获取对应实例,如果是windows,你妈使用"win32"来获取对应实例。由于不同操作系统设置常驻服务进程的逻辑和步骤完全不同,因此openclaw在抽象出服务进程的对应接口后,需要针对不同操作系统执行不同的服务进程设置流程。
尽管不同系统设置常驻服务进程的流程不同,但是他们都遵循相同的模式:创建常驻服务进程配置文件->通知操作系统每次启动时读取配置文件->根据配置文件的设置启动nodejs进程->读取并运行openclaw编译好的dist目录下的entry.js文件代码->执行gateway模块代码。根据这个模式,openclaw如果运行在macos上,它就会创建一个xml文件,里面配置好如何启动nodejs进程的设置。如果运行在Linux上,就会创建unit文件,然后通知systemd模块在系统启动时读取unit文件然后启动nodejs去执行openclaw对应的gateway模块代码;如果运行在windows上,那么创建cmd脚本文件,然后使用schtasks服务运行对应的cmd脚步,cmd脚步将启动nodejs进程,并让nodejs进程执行openclaw对应的dist/entry.js,然后执行对应的gateway服务进程模块
由于我使用windows系统,因此我们着重看在windows上openclaw启动gateway服务进程的具体流程。从前面给出针对windows平台的GatewayService接口实例看到,在执行install接口时,针对windows平台,install接口实际对应函数installScheduledTask,同时可以看到所有关于windows平台对应的GatewayService接口函数实现都来自schtasks.js,所以我们进入到这个文件。
从schtasks.js中对应的installScheduledTask函数实现如下:
js
export async function installScheduledTask(
  args: GatewayServiceInstallArgs,
): Promise<{ scriptPath: string }> {
  const staged = await writeScheduledTaskScript(args);
  await activateScheduledTask({
    env: args.env,
    stdout: args.stdout,
    scriptPath: staged.scriptPath,
    description: staged.taskDescription,
  });
  return { scriptPath: staged.scriptPath };
}

async function writeScheduledTaskScript({
  env,
  programArguments,
  workingDirectory,
  environment,
  description,
}: Omit<GatewayServiceInstallArgs, "stdout">): Promise<{
  scriptPath: string;
  taskDescription: string;
}> {
  await assertSchtasksAvailable();
  const scriptPath = resolveTaskScriptPath(env);
  await fs.mkdir(path.dirname(scriptPath), { recursive: true });
  const taskDescription = resolveGatewayServiceDescription({ env, environment, description });
  const script = buildTaskScript({
    description: taskDescription,
    programArguments,
    workingDirectory,
    environment,
  });
  await fs.writeFile(scriptPath, script, "utf8");
  return { scriptPath, taskDescription };
}
它首先调用writeScheduledTaskScript,该函数首先使用resolveTaskScriptPath获取cmd脚本文件应该存放的路径,通常情况下是openclaw的安装路径,然后使用buildTastScript创建cmd脚本的内容,最后使用fs.writeFile写下cmd脚本,我们修改上面代码做个调试,我们打印出scriptPath和script对应内容,在执行完writeFile后直接退出程序而不是继续往下走:
js
async function writeScheduledTaskScript({
  env,
  programArguments,
  workingDirectory,
  environment,
  description,
}: Omit<GatewayServiceInstallArgs, "stdout">): Promise<{
  scriptPath: string;
  taskDescription: string;
}> {
 ....
  console.log("scriptPath:", scriptPath);
  console.log("taskLaunchPath:", taskLaunchPath);
  console.log("taskDescription:", taskDescription);
  process.exit(0);
 return { scriptPath, taskLaunchPath, taskDescription };
}
然后执行如下命令:
js
pnpm openclaw onboard --install-daemon上面命令启动openclaw命令后,进入gateway进程的启动流程,然后会执行到writeScheduledTaskScript函数,等执行完三条console.log输出信息后退出,此时在console上看到类似下面的输出:
taskLaunchPath: C:\Users\OseasyVM\.openclaw\gateway.cmd
taskDescription: OpenClaw Gateway (v2026.5.20)
根据taskLaunchPath的路径,我们打开对应的gateway.cmd查看其内容:
js
@echo off
rem OpenClaw Gateway (v2026.5.20)
set "HOME=C:\Users\OseasyVM"
set "TMPDIR=C:\Users\OseasyVM\AppData\Local\Temp"
set "OPENCLAW_GATEWAY_PORT=18789"
set "OPENCLAW_SYSTEMD_UNIT=openclaw-gateway.service"
set "OPENCLAW_WINDOWS_TASK_NAME=OpenClaw Gateway"
set "OPENCLAW_SERVICE_MARKER=openclaw"
set "OPENCLAW_SERVICE_KIND=gateway"
set "OPENCLAW_SERVICE_VERSION=2026.5.20"
"C:\Program Files\nodejs\node.exe" C:\Users\OseasyVM\Documents\openclaw\dist\index.js gateway --port 18789
从上面脚本看到,他运行时会先设定一系列环境变量,然后启动node程序,让他执行我们编译后的dist\index.js,这是openclaw的入口文件,gateway表示执行gateway进程部分的代码,并绑定端口18789.现在我们去掉上面的调试输出代码,然后重新启动gateway:
js
openclaw onboard --install-daemon相应的设置能"skip"就"skip",先启动gateway进程再说。接下来的一系列配置可以根据自己的需要配置,我是选择了飞书,搜索选择了kimi,另外说一句,我在设置飞书为通讯app的时候,需要在飞书开发者后台创建一个应用,这个应用设置为机器人功能,因为我们需要通过gateway发送消息给飞书。要想实现网关与飞书的通讯,我们首先需要安装飞书差距,使用如下命令:
js
openclaw plugins install clawhub:@openclaw-cn/feishu但是上面的插件存在问题,那就是它自己缺失了一个关键组件叫zod,首先我们先通过全局方式对其进行安装:
"""
npm install -g zod
"""
完成上面安装后,我们需要针对飞书机器人应用进行相应配置,要想与openclaw网关应用通讯,我们需要确保机器人在事件配置上使用长连接来接收事件:
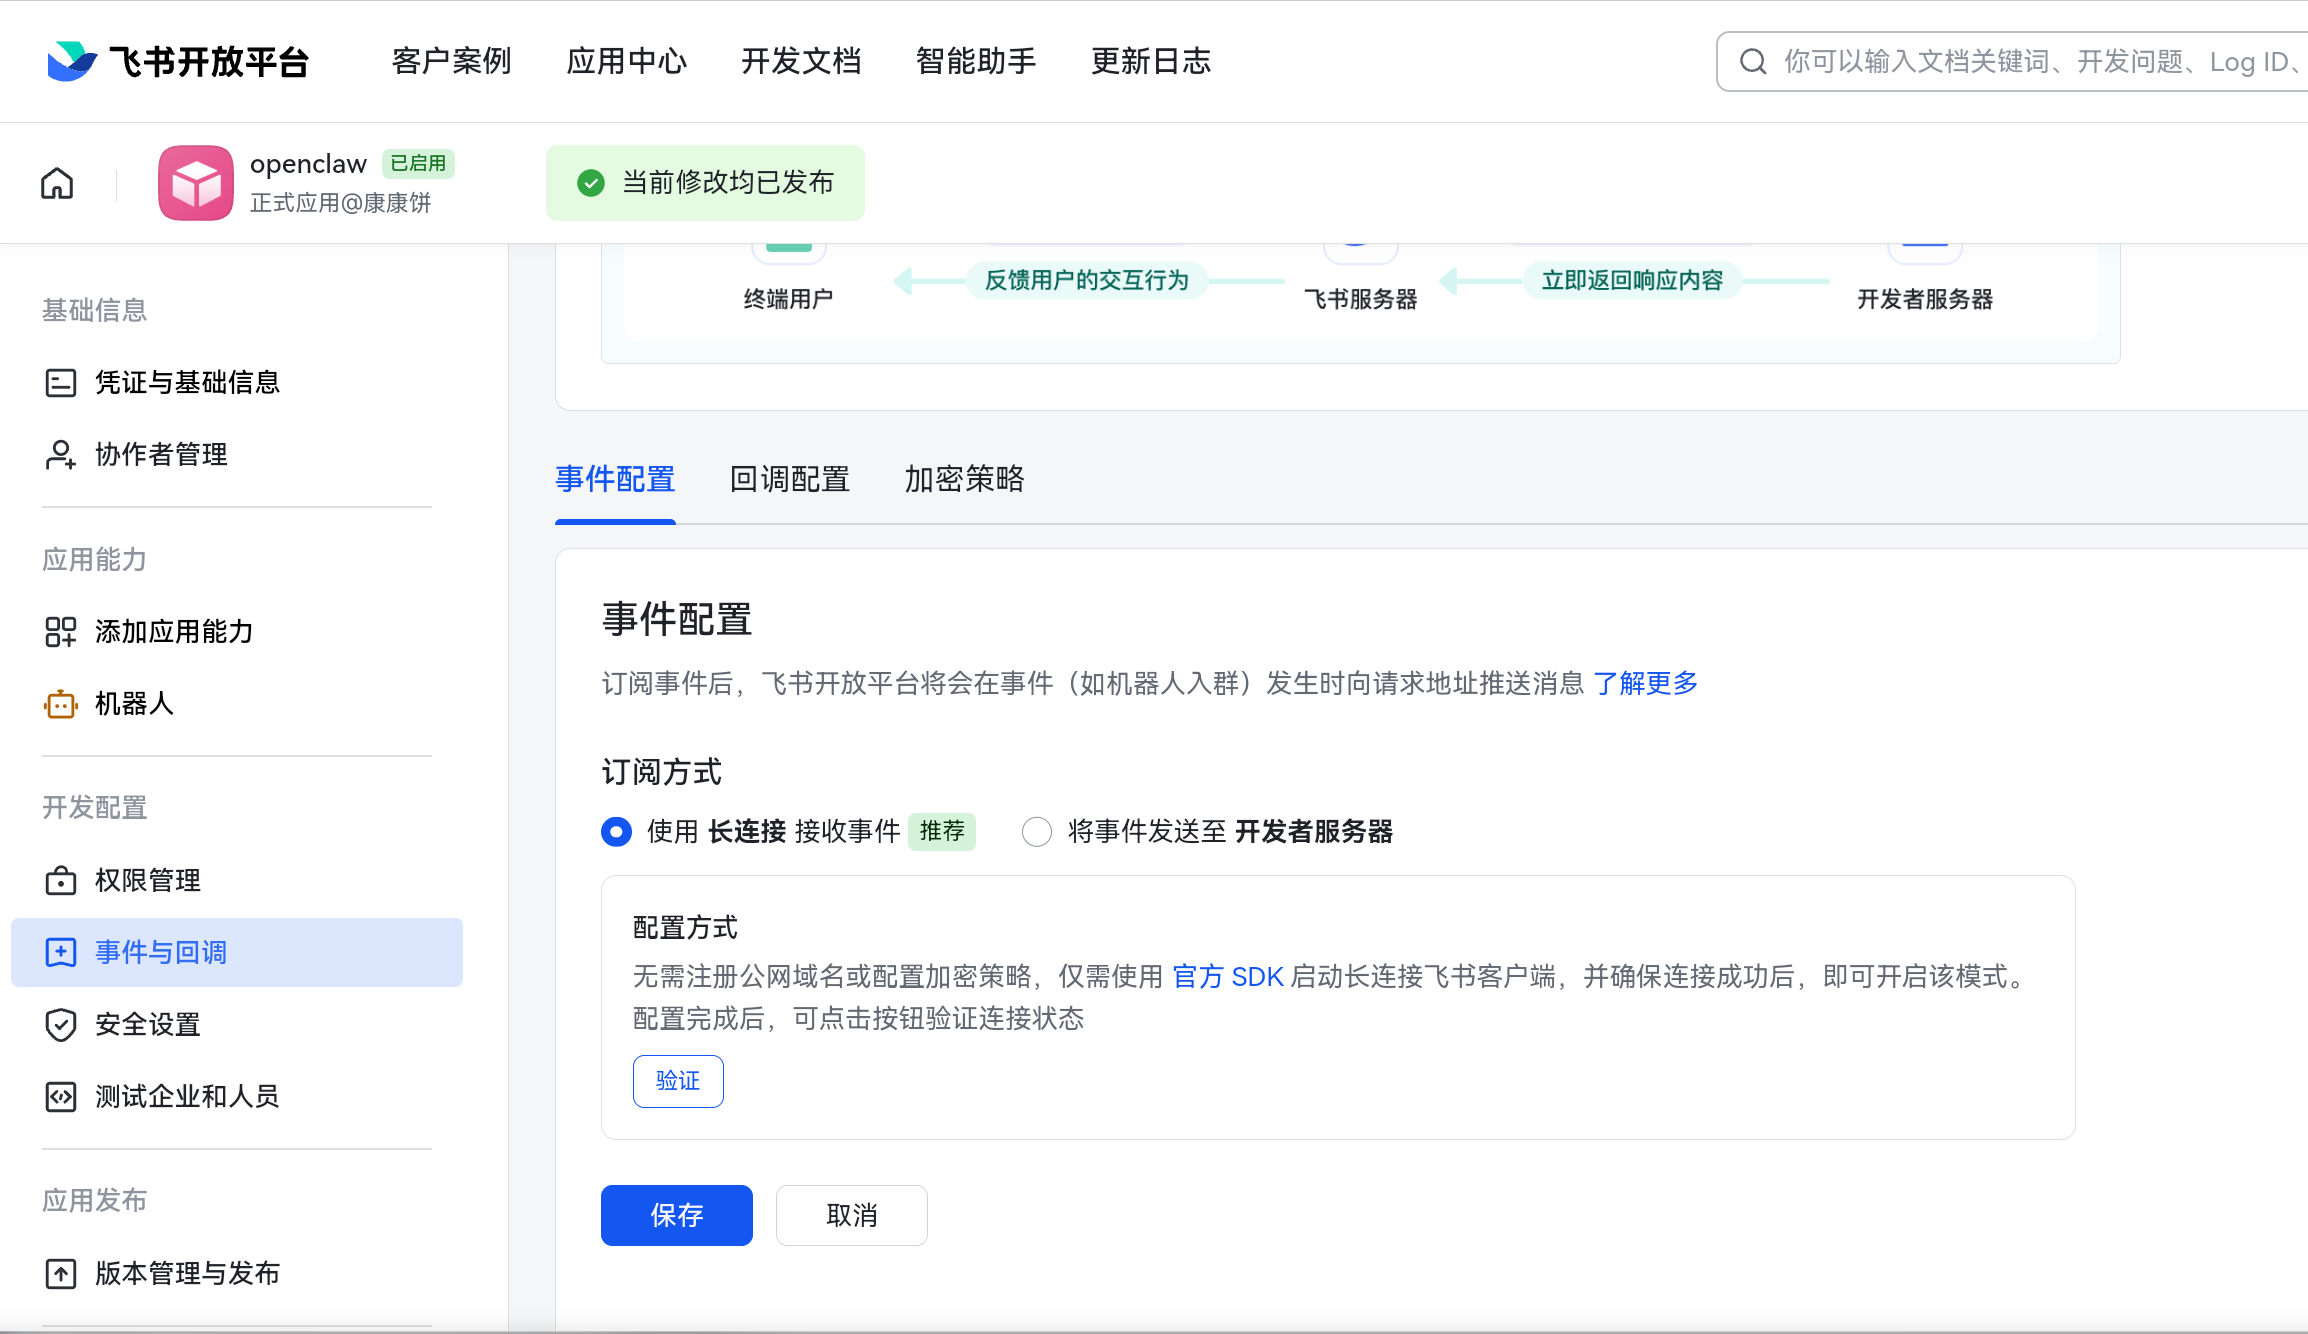
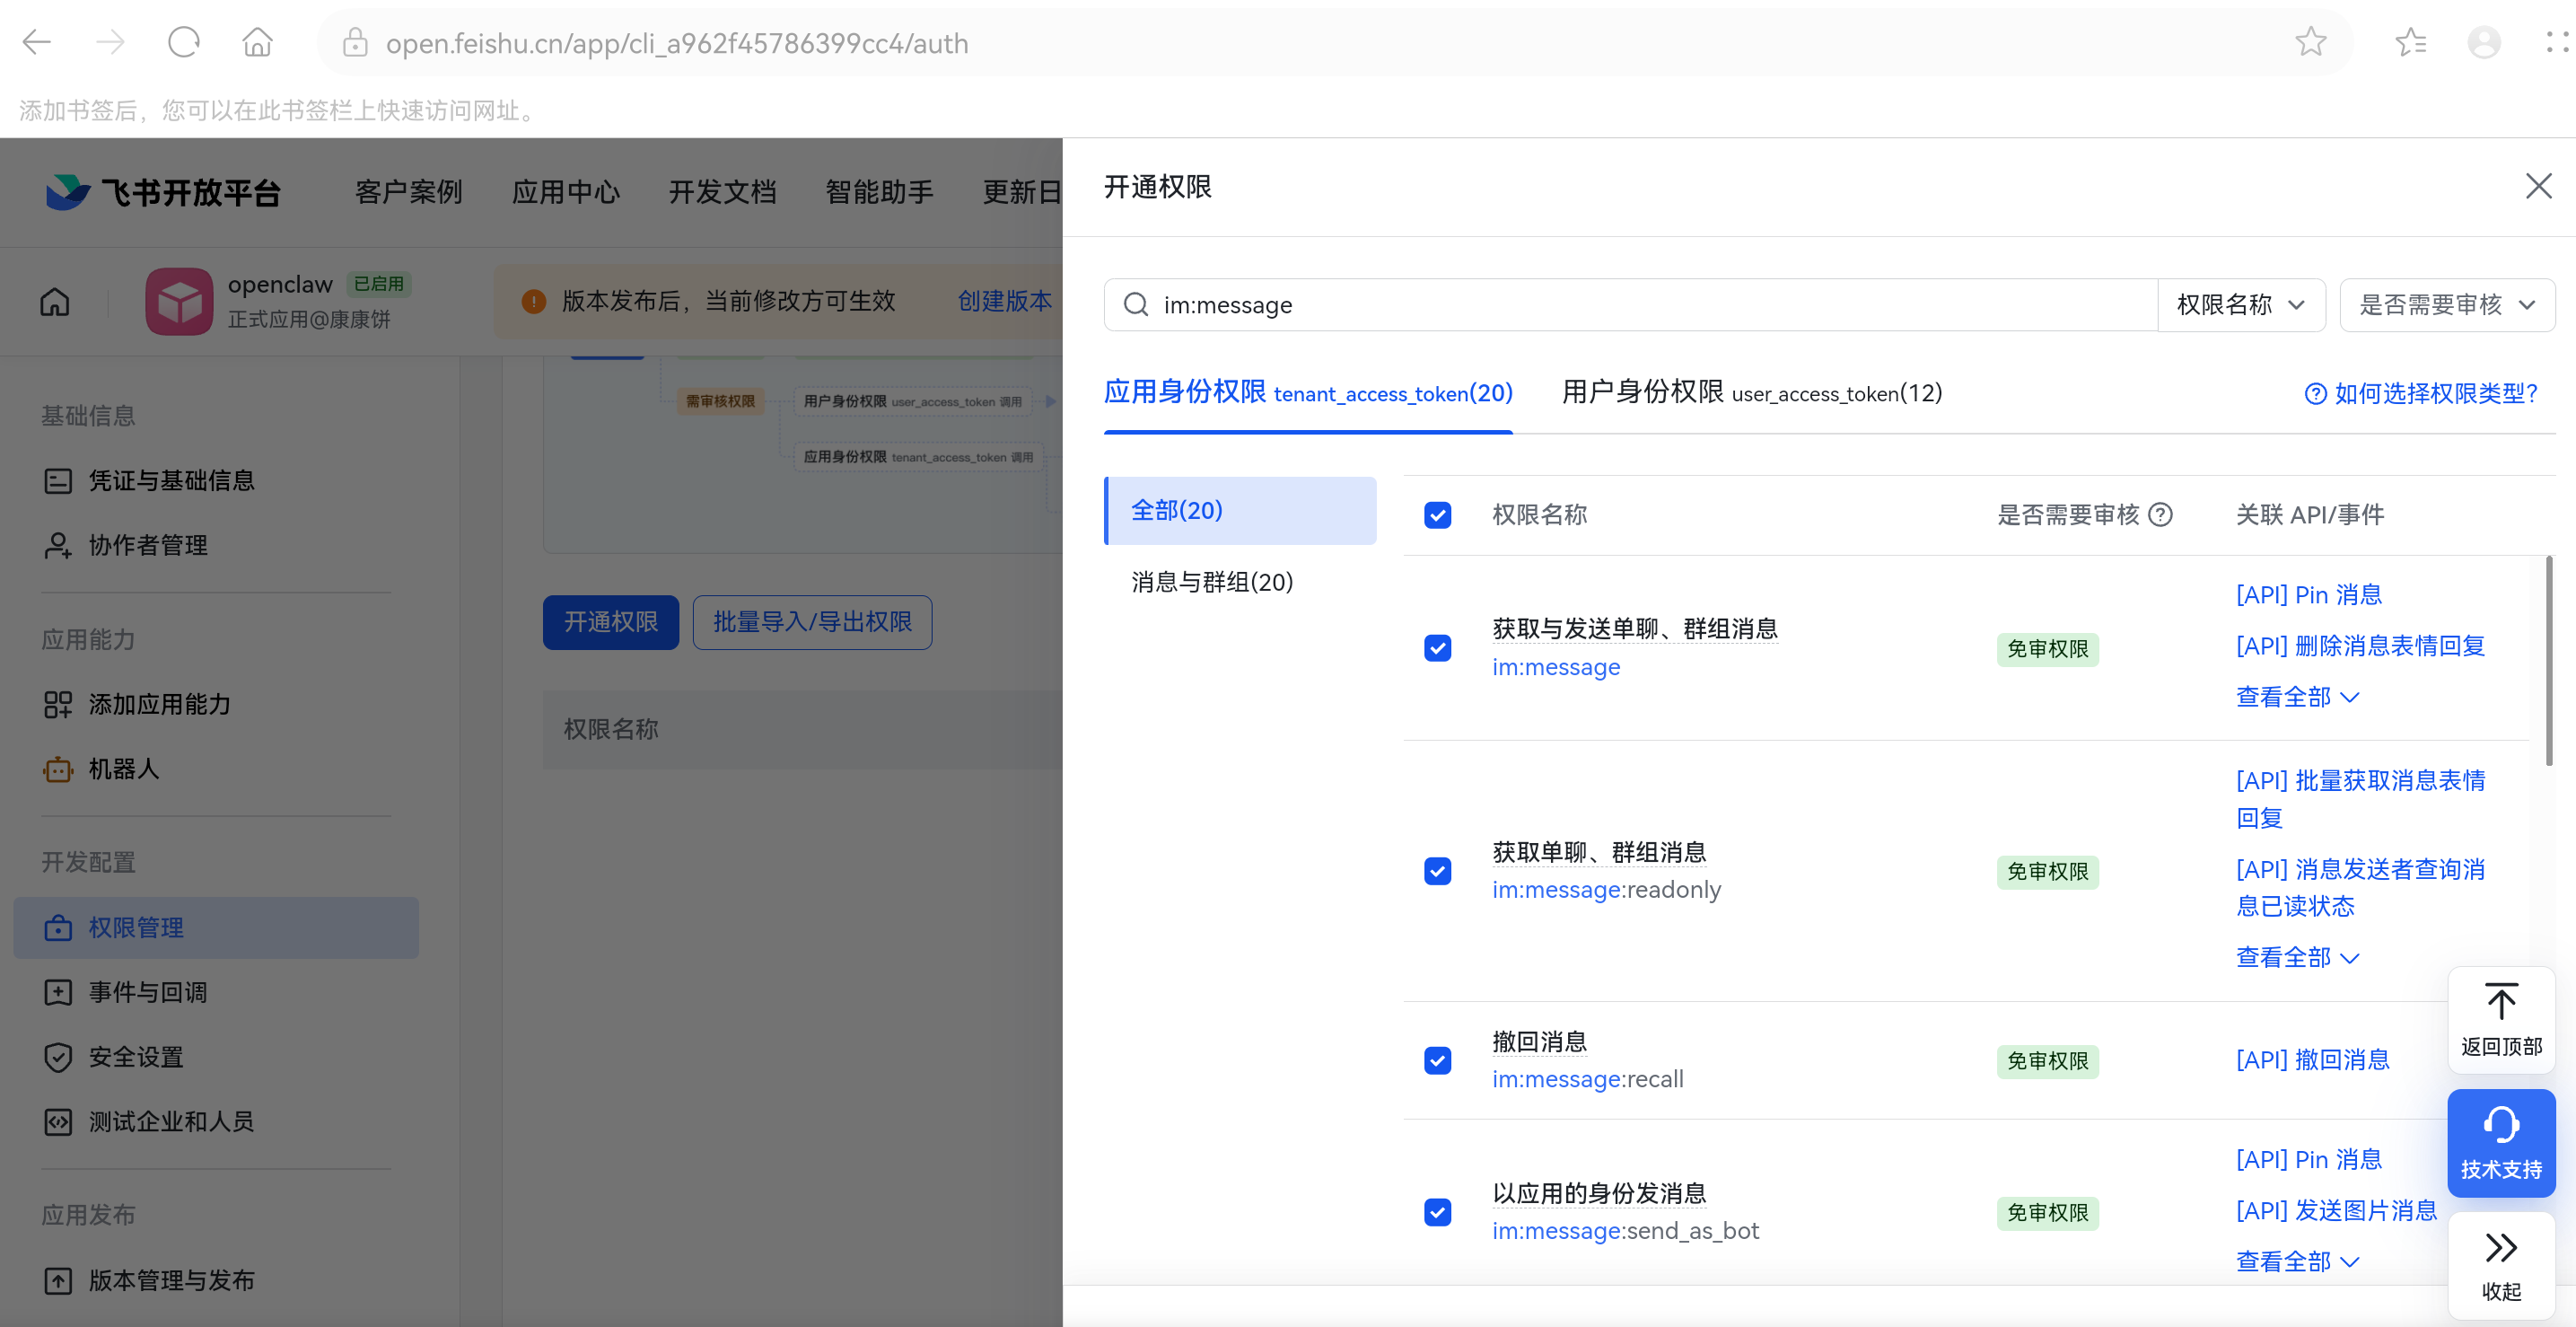
上面的配置告诉飞书:"把用户发送给机器人的消息推送过来"。然后需要开通相应权限,在左侧"权限管理"点击后,在右边的权限名称了搜索如下权限:
1.im:message
2.im:message.p2p_msg
3.im:message.group_at_msg
4.contact:contact.base:readonly
:
然后进入"事件与回调",选择订阅方式为"长连接":

点击右下角的"添加事件",在弹出的页面输入事件:im.message.receive_v1,然后选择添加这个事件:
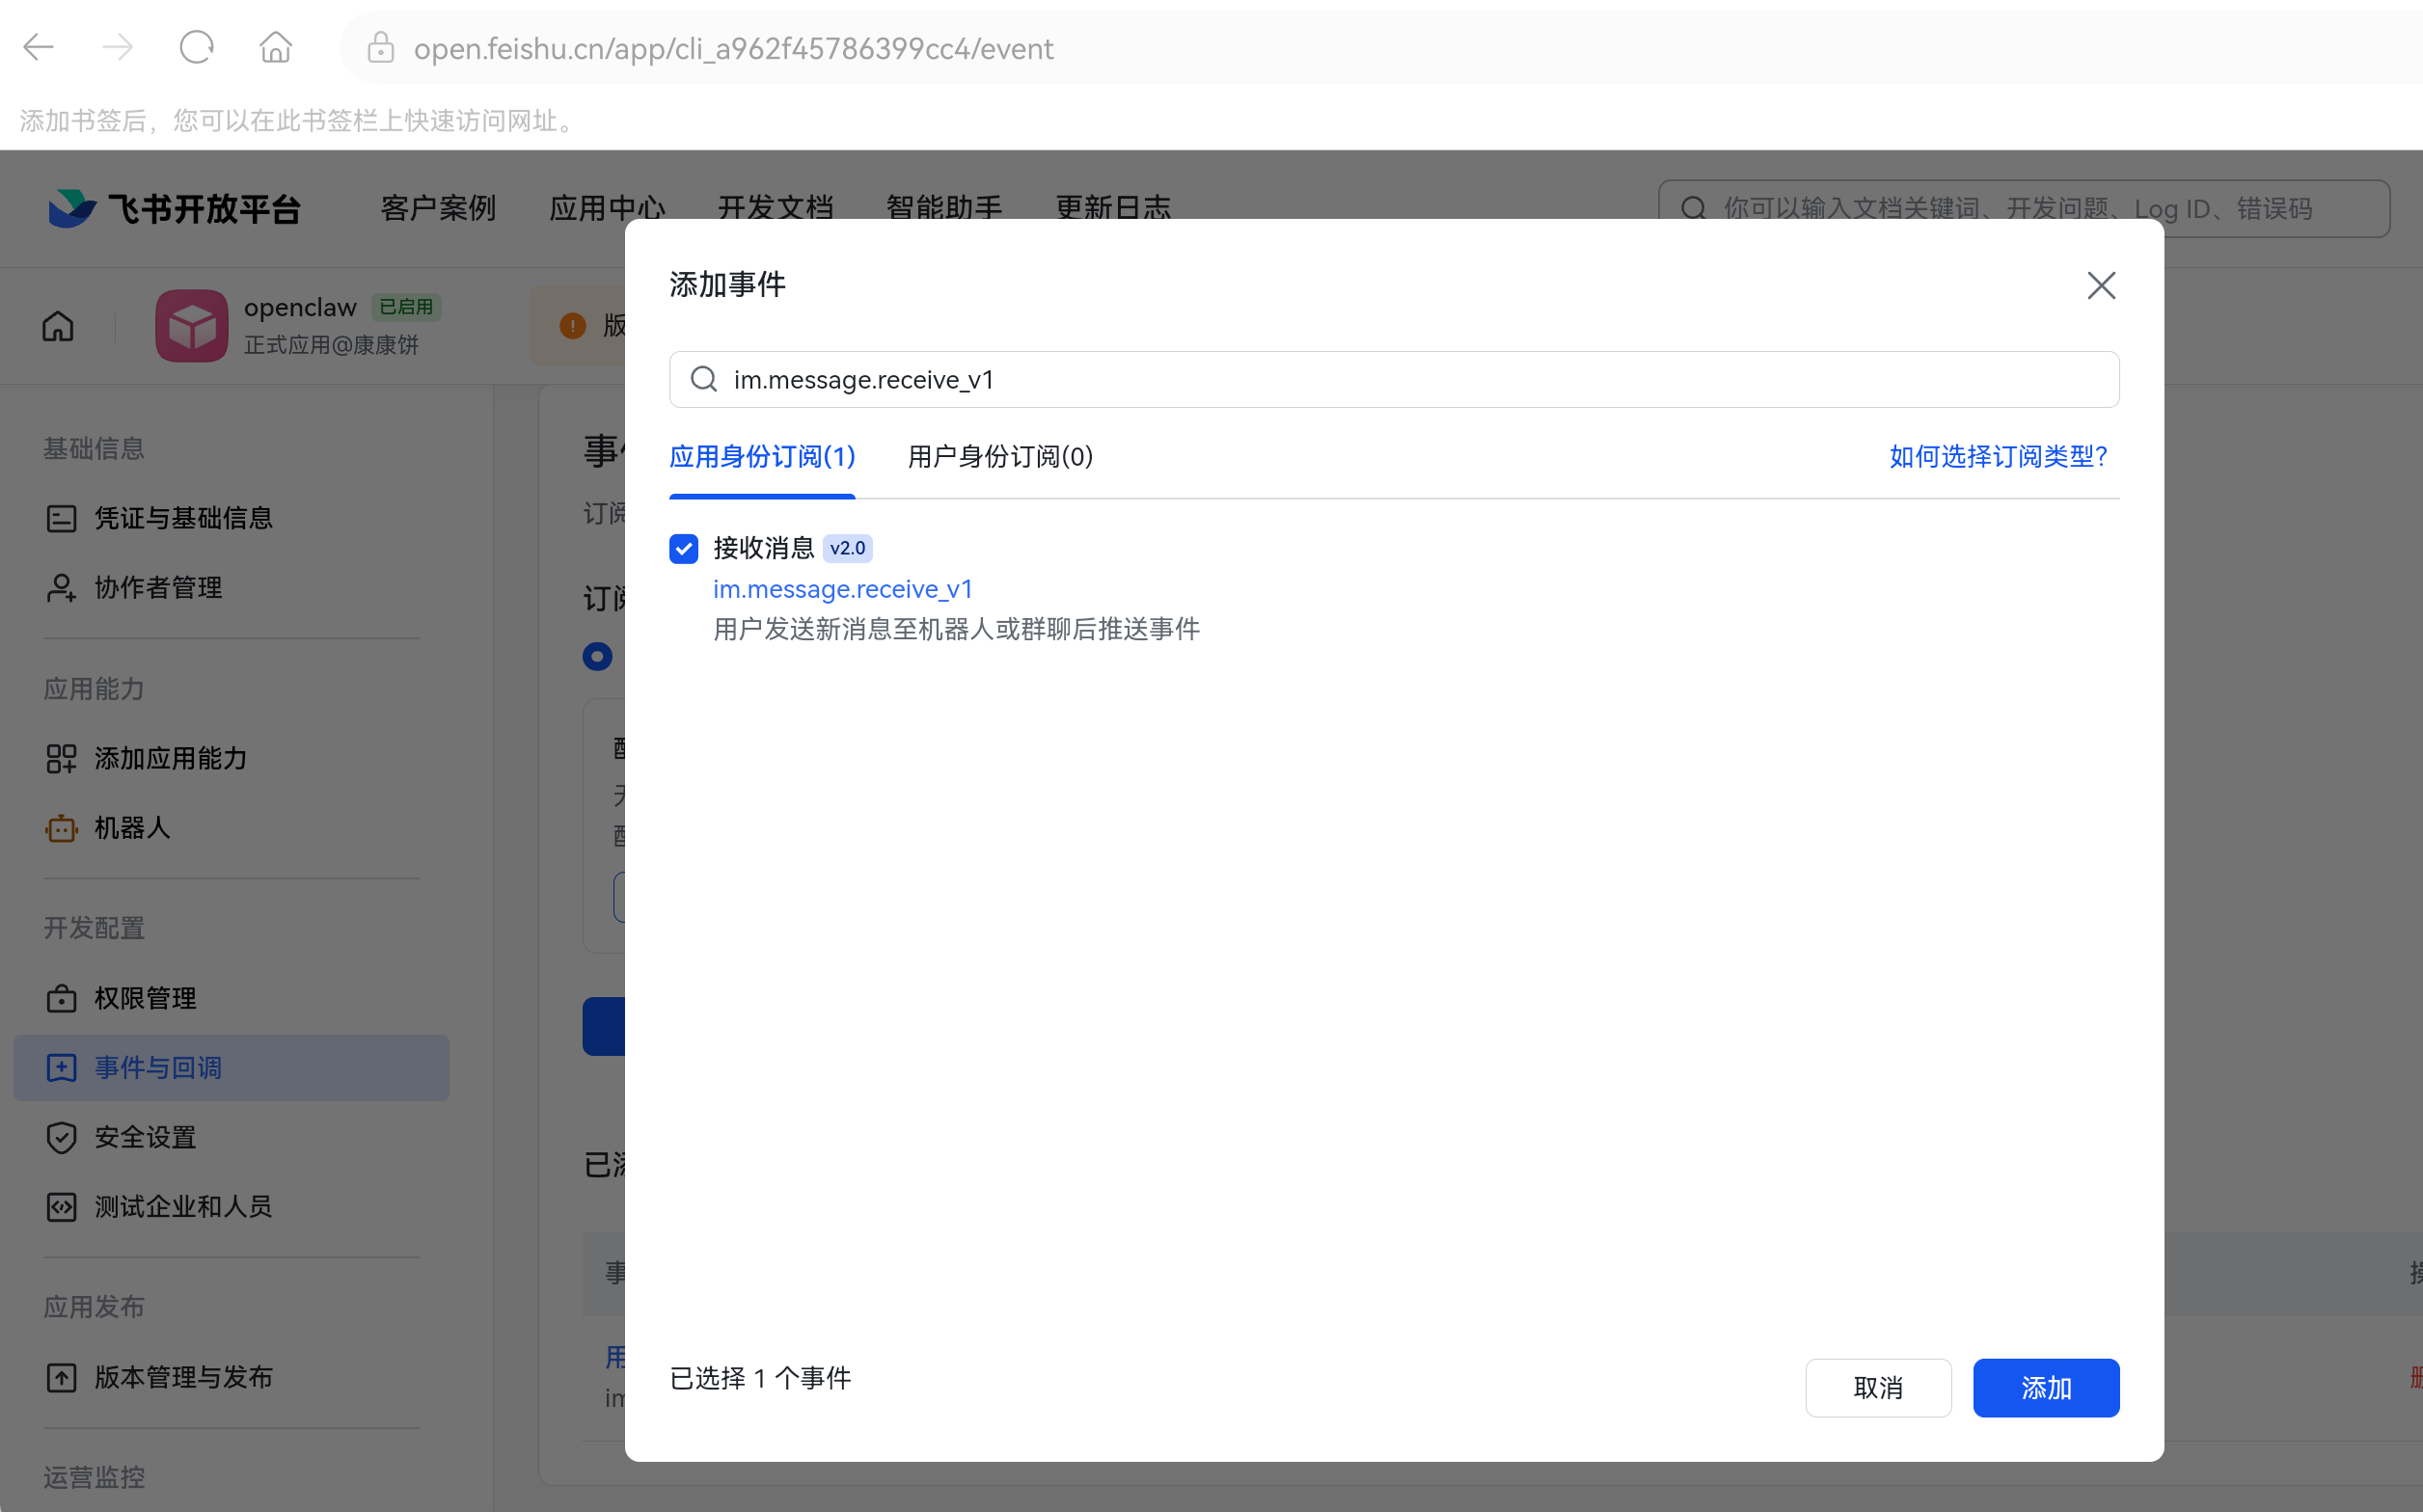
然后点击上方的"创建版本",让飞书管理员审核通过,通常情况下这个管理员都是你自己。接下来我们需要启动openclaw网关应用,使用管理员权限打开powershell,然后输入如下命令:
js
# 使用 cmd /c 来执行命令(会临时切换到 CMD 环境)
cmd /c "pnpm openclaw gateway install"
运行上面命令如果成功,你会得到如下输出:
js
OpenClaw 2026.5.20 (bde07dd) --- I run on caffeine, JSON5, and the audacity of "it worked on my machine."


Installed Scheduled Task: OpenClaw Gateway
Task script: C:\Users\OseasyVM\.openclaw\gateway.cmd
看到上面输出说明网关服务安装成功,接下来我们需要启动网关服务,使用在powershell中执行如下命令:
"""
cmd /c "pnpm openclaw gateway start"
"""
然后在你创建的飞书应用中随便输入一条消息,你会得到相应回复如下:
"""
OpenClaw: access not configured.
Your Feishu user id: XXXXXXXXXX
Pairing code:
XXXX
Ask the bot owner to approve with:
openclaw pairing approve feishu XXXX
openclaw pairing approve feishu XXXX
"""
看到上面回复后说明网关服务启动成功,同时也跟你配置的飞书机器人配对成功。