摘要 :本文是 HTML5 零基础系列的第四篇。你将学习如何用表单收集用户输入的信息:文本框、密码框、单选按钮、复选框、下拉列表、文本域、按钮等。我们会详细讲解 <form> 标签的 action 和 method 属性,解释 GET 与 POST 的区别;学习如何使用 <label> 标签提升用户体验;还会介绍 HTML5 新增的输入类型(如 email、number、date 等)。最后通过一个"用户注册"表单的实操,将所学标签串联起来。
一、前言
在前几篇中,我们学习了 HTML 骨架、文本格式化、列表、容器、超链接、图片和表格。但这些都只是单向展示 内容------用户只能看,不能输入信息。而现代网页(比如登录、注册、搜索、评论)都需要用户提交数据 给服务器。这就需要用到 表单。
表单是网页与用户交互的核心。你填写用户名、密码、选择性别、上传头像、发表评论......背后都是表单标签在起作用。今天我们就来彻底掌握 HTML 表单相关的所有基础标签。
注意:本系列不涉及后端(PHP、Node.js 等),我们只讲解前端的表单结构,提交后暂时看不到数据存储效果,但可以通过浏览器地址栏或开发者工具观察数据发送情况。
二、表单容器:<form> 标签
所有的输入控件都必须放在 <form> 标签内部,这样才能正确提交数据。
2.1 <form> 的核心属性
| 属性 | 作用 |
|---|---|
action |
指定提交数据后,服务器端处理程序的 URL(例如 register.php) |
method |
定义数据发送方式,常用值 get 或 post |
name |
表单名称,用于区分页面中的多个表单 |
target |
类似 <a> 的 target,指定提交结果在何处打开(_blank 等) |
最简单的表单结构(暂时不填控件):
<form action="https://www.example.com/submit" method="post">
    <!-- 这里放输入控件 -->
</form>
2.2 GET 与 POST 的区别(重要概念)
-
GET :数据附加在 URL 后面,以
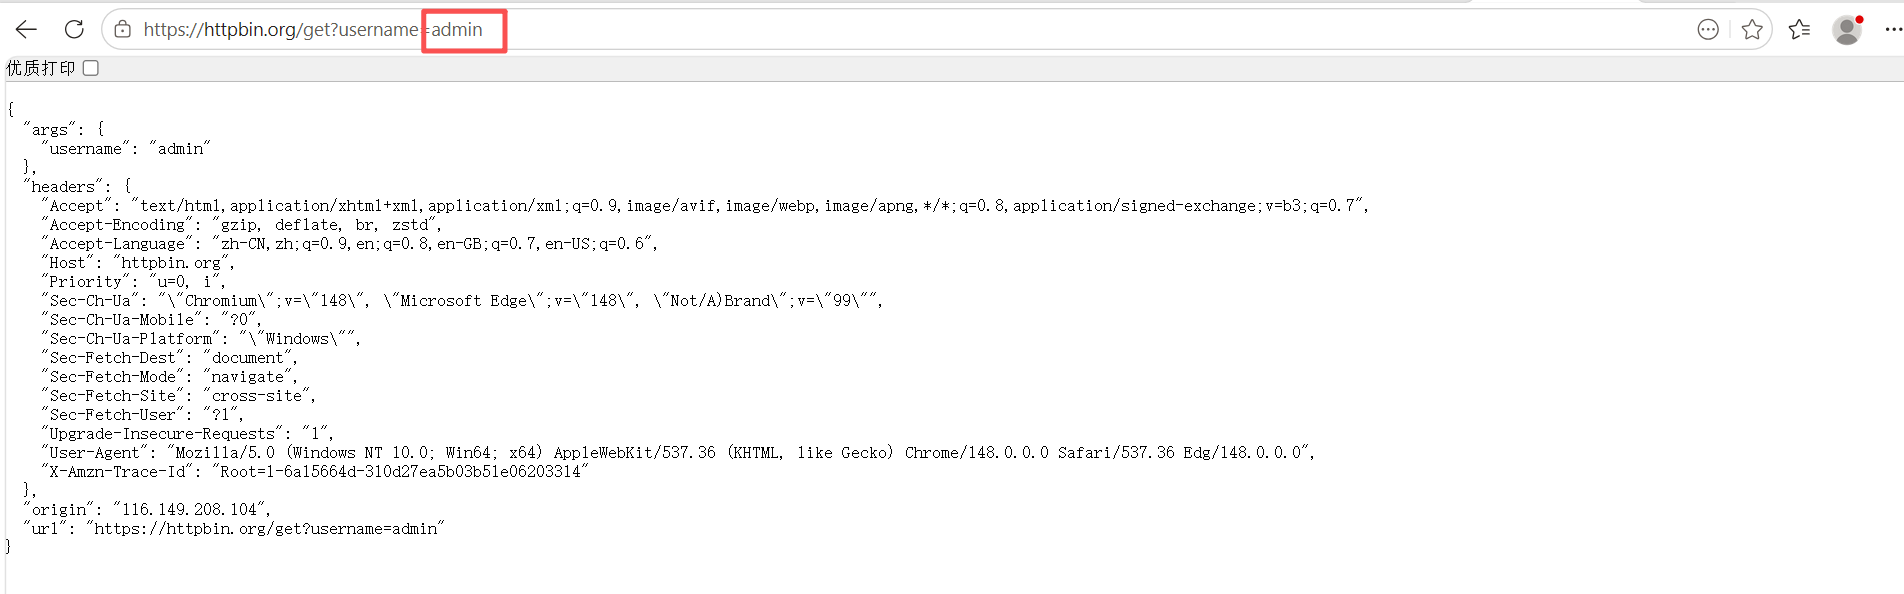
?key1=value1&key2=value2形式出现,适合搜索、筛选等非敏感且数据量小的场景。有长度限制(约 2048 字符),且数据暴露在地址栏,不安全。 -
POST:数据放在 HTTP 请求体中,不会显示在 URL 上,无长度限制,适合登录、注册、上传等敏感或大数据场景。
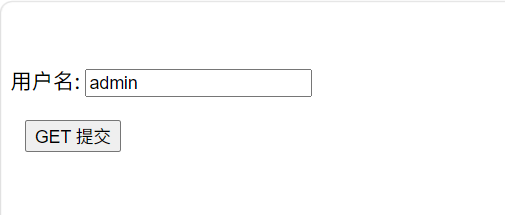
演示 GET 方式(你可以创建一个测试 HTML 文件,自己点提交看地址栏变化):
html
<form action="https://httpbin.org/get" method="get">
    <p>用户名: <input type="text" name="username"></p>
    <button type="submit">GET 提交</button>
</form>
点击提交后,浏览器地址栏会变成类似 https://httpbin.org/get?username=你输入的内容。
三、输入控件全解析
3.1 文本输入框 <input type="text">
作用:接收单行文本,比如用户名、搜索关键词。
常用属性:
-
name:控件的名称,提交时作为键(key)。 -
value:初始默认值。 -
placeholder:提示文本(HTML5 新增),用户输入前显示灰色占位文字。 -
maxlength:最大字符数。 -
size:输入框宽度(字符数),但不常用,推荐以后用 CSS。
示例:
html
<p>用户名:<input type="text" name="username" placeholder="请输入用户名" maxlength="20"></p>
3.2 密码框 <input type="password">
作用:输入密码,字符被圆点或星号隐藏。
属性 :与文本框相同(name、placeholder、maxlength 等)。
示例:
html
<p>密码:<input type="password" name="pwd" placeholder="6-16位字母数字" maxlength="16"></p>
3.3 单选框(radio)<input type="radio">
作用 :一组选项中只能选择一个(互斥)。必须保证同一组的 name 属性值相同,否则不会互斥。
示例:
html
<p>性别:</p>
<input type="radio" name="gender" value="male" id="male"> <label for="male">男</label>
<input type="radio" name="gender" value="female" id="female"> <label for="female">女</label>
<input type="radio" name="gender" value="other" id="other"> <label for="other">其他</label>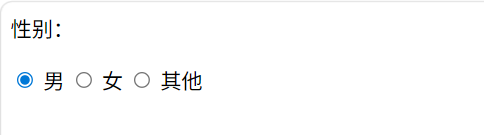
注意:
value属性很重要,提交时发送的值(如gender=male)。<label>标签稍后详解。
3.4 复选框(checkbox)<input type="checkbox">
作用:一组选项中可以选择多个(或单个独立)。
示例:
html
<p>爱好(可多选):</p>
<input type="checkbox" name="hobby" value="reading" id="reading"> <label for="reading">阅读</label>
<input type="checkbox" name="hobby" value="music" id="music"> <label for="music">音乐</label>
<input type="checkbox" name="hobby" value="sports" id="sports"> <label for="sports">运动</label>
3.5 文件上传 <input type="file">
作用:让用户选择本地文件上传。
示例:
html
<p>上传头像:<input type="file" name="avatar"></p>
3.6 按钮类型
type 值 |
作用 |
|---|---|
submit |
提交表单,点击后触发表单的 action |
reset |
重置表单内所有控件到初始状态 |
button |
普通按钮,没有默认行为,通常配合 JavaScript 使用(本系列暂不涉及) |
示例:
html
<form action="https://httpbin.org/post" method="post">
    <p>用户名:<input type="text" name="username"></p>
    <input type="submit" value="注册">
    <input type="reset" value="清空重填">
</form>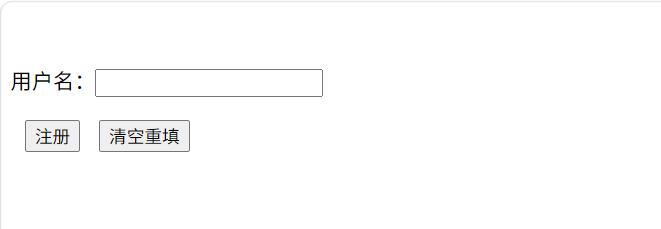
注意:
value属性决定了按钮上显示的文字。
3.7 <button> 标签(更现代的按钮)
<button> 标签比 <input type="button"> 更灵活,因为它内部可以包含其他 HTML 元素(比如图标、文字混合)。默认 type="submit"。
示例:
html
<button type="submit">提交注册</button>
<button type="reset">重置</button>
<button type="button" disabled>不可用按钮</button>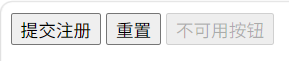
3.8 下拉选择框 <select> + <option>
-
<select>定义下拉框,name属性用于提交。 -
<option>定义每个选项,value属性是提交的值,selected属性设置默认选中。
示例:
html
<p>城市:</p>
<select name="city">
    <option value="bj">北京</option>
    <option value="sh" selected>上海</option>
    <option value="gz">广州</option>
</select>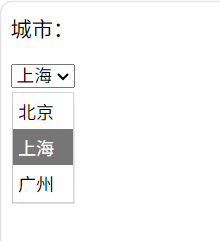
3.9 多行文本域 <textarea>
作用:输入多行文本,例如评论、个人简介。
常用属性 :rows(行数)、cols(列数)、name、placeholder(HTML5)。
示例:
html
<p>个人简介:</p>
<textarea name="bio" rows="5" cols="40" placeholder="介绍一下你自己..."></textarea>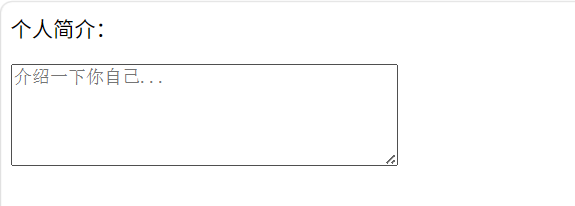
注意:
<textarea>是双标签,不要写成单标签。初始内容写在标签之间,例如<textarea>默认文本</textarea>。
四、<label> 标签 ------ 提升用户体验
<label> 用于关联表单控件,当用户点击 <label> 中的文字时,浏览器会自动聚焦到对应的控件(文本框、单选、复选框等)。这对提高可用性非常重要,特别是移动端。
两种使用方式:
隐式关联 :用 for 属性指向控件的 id。
显式关联 :将控件放在 <label> 内部。
示例(两种方式效果相同):
html
<!-- 方式一:for + id -->
<input type="checkbox" id="agree">
<label for="agree">我已阅读并同意用户协议</label>
<!-- 方式二:包裹 -->
<label>
<input type="radio" name="subscribe" value="yes"> 订阅新闻
</label>
强烈建议 :所有文本类的控件都应该配合 <label> 使用。
五、HTML5 新增的输入类型(部分)
HTML5 为 <input> 增加了许多新的 type 值,在支持的浏览器中会提供特定的输入界面或验证功能。
| 类型 | 作用 | 示例 |
|---|---|---|
email |
邮箱地址,会验证格式(浏览器提示) | <input type="email" name="user_email"> |
number |
数字输入框,带上下箭头 | <input type="number" name="age" min="1" max="120"> |
tel |
电话号码(移动端会调出数字键盘) | <input type="tel" name="phone"> |
url |
网址输入框 | <input type="url" name="website"> |
search |
搜索框,右侧可能有清除按钮 | <input type="search" name="q"> |
date |
日期选择器(弹出日历) | <input type="date" name="birthday"> |
datetime-local |
本地日期时间选择器 | <input type="datetime-local" name="meeting"> |
示例:
html
<p>邮箱:<input type="email" name="email" placeholder="example@domain.com"></p>
<p>年龄:<input type="number" name="age" min="0" max="150" step="1"></p>
<p>生日:<input type="date" name="birthday"></p>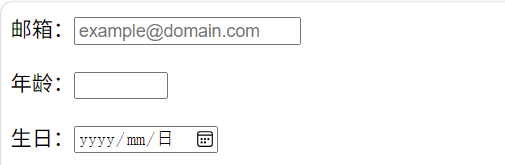
注意:这些新类型在不支持的浏览器中会降级为普通的
type="text",所以可以放心使用。
六、其他常用表单标签和属性
6.1 fieldset 和 legend ------ 分组框
<fieldset> 将一组相关的表单控件框在一起,<legend> 为该组提供标题。
示例:
html
<fieldset>
    <legend>个人信息</legend>
    <p>姓名:<input type="text" name="realname"></p>
    <p>年龄:<input type="number" name="age"></p>
</fieldset>
<fieldset>
    <legend>登录信息</legend>
    <p>用户名:<input type="text" name="username"></p>
    <p>密码:<input type="password" name="pwd"></p>
</fieldset>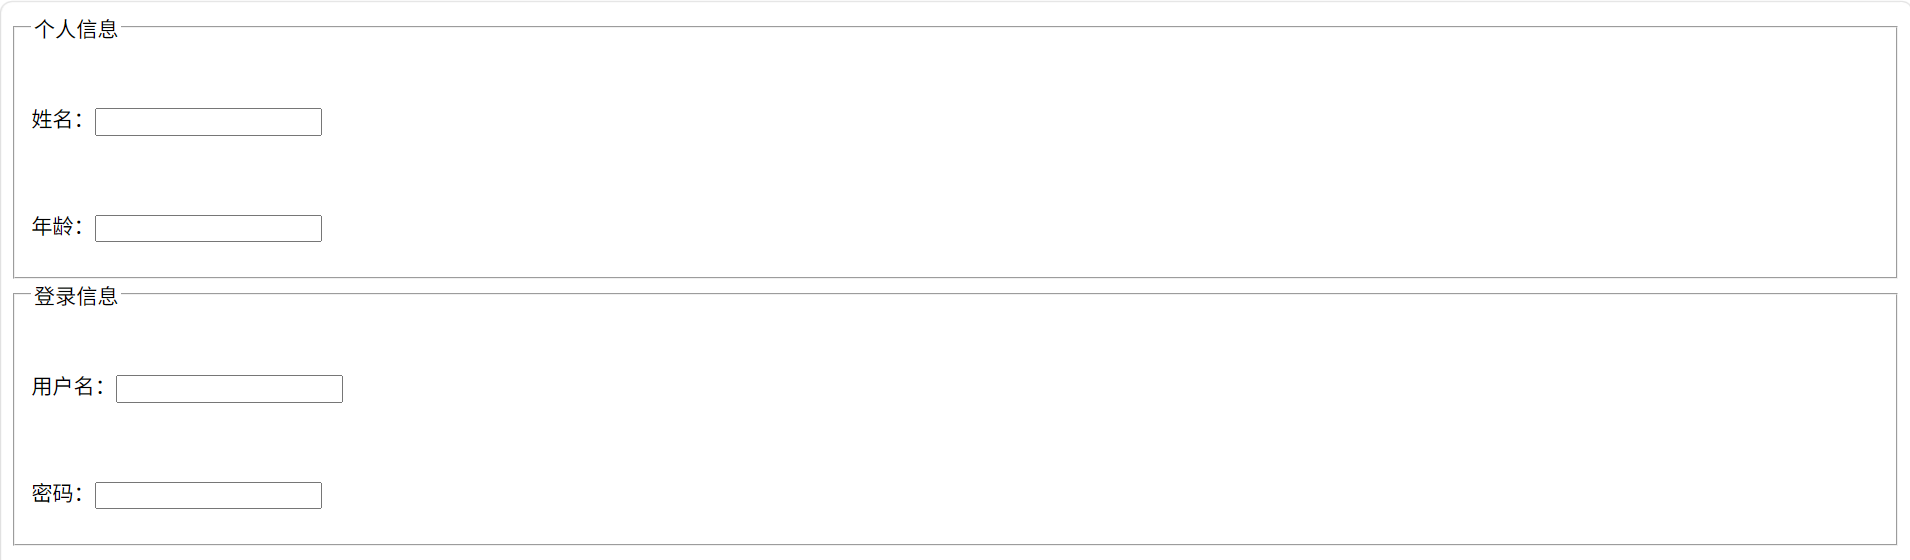
6.2 required 属性(HTML5 必填验证)
添加 required 属性后,用户提交时会检查该控件是否已填写,否则阻止提交并显示提示。
示例:
html
<p>用户名(必填):<input type="text" name="username" required></p>
6.3 readonly 与 disabled
-
readonly:只读,用户不能修改,但数据会提交。 -
disabled:禁用,用户不能操作,数据不会提交。
示例:
html
<p>用户名(只读):<input type="text" name="username" value="xiaoming" readonly></p>
<p>状态(禁用):<input type="text" name="status" value="正常" disabled></p>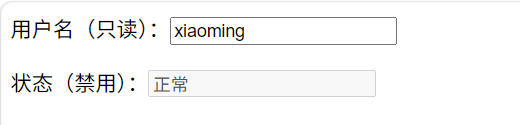
七、综合实操:制作一个完整的用户注册表单
新建 register.html,综合运用本课所学的表单标签。要求包含:用户名、密码、确认密码(普通文本,后面用 JS 验证)、性别、爱好(多选)、城市(下拉)、个人简介、上传头像、同意协议复选框、提交和重置按钮。
html
<!DOCTYPE html>
<html lang="zh-CN">
<head>
<meta charset="UTF-8">
<title>用户注册 - HTML5表单实战</title>
</head>
<body>
<h1>用户注册</h1>
<form action="https://httpbin.org/post" method="post">
<fieldset>
<legend>账号信息</legend>
<p>
<label for="username">用户名:</label>
<input type="text" name="username" id="username" placeholder="4-12个字符" required>
</p>
<p>
<label for="password">密码:</label>
<input type="password" name="password" id="password" placeholder="至少6位" required>
</p>
<p>
<label for="confirm_pwd">确认密码:</label>
<input type="password" name="confirm_pwd" id="confirm_pwd" placeholder="再次输入密码" required>
</p>
</fieldset>
<fieldset>
<legend>基本信息</legend>
<p>性别:</p>
<label><input type="radio" name="gender" value="male"> 男</label>
<label><input type="radio" name="gender" value="female"> 女</label>
<p>爱好:</p>
<label><input type="checkbox" name="hobby" value="read"> 阅读</label>
<label><input type="checkbox" name="hobby" value="music"> 音乐</label>
<label><input type="checkbox" name="hobby" value="travel"> 旅行</label>
<p>
<label for="city">所在城市:</label>
<select name="city" id="city">
<option value="bj">北京</option>
<option value="sh" selected>上海</option>
<option value="gz">广州</option>
<option value="sz">深圳</option>
</select>
</p>
<p>
<label for="bio">个人简介:</label><br>
<textarea name="bio" id="bio" rows="4" cols="50" placeholder="介绍一下你自己..."></textarea>
</p>
<p>
<label for="avatar">上传头像:</label>
<input type="file" name="avatar" id="avatar" accept="image/*">
</p>
</fieldset>
<p>
<label>
<input type="checkbox" name="agree" value="yes" required> 我已阅读并同意《用户协议》
</label>
</p>
<p>
<button type="submit">立即注册</button>
<button type="reset">重新填写</button>
</p>
</form>
</body>
</html>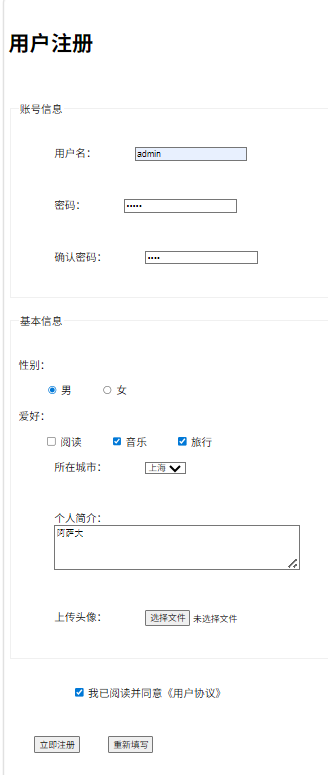
提交后,因为 action 指向 https://httpbin.org/post,会跳转到一个测试页面,显示你提交的所有数据(可以观察数据结构)。
八、Sublime Text 技巧 ------ 快速生成表单结构
使用 Emmet 快速生成带标签的表单:
-
输入
form按 Tab 生成<form action=""></form> -
输入
input:text按 Tab 生成<input type="text" name="" id=""> -
输入
input:radio按 Tab 生成<input type="radio" name="" id=""> -
输入
select按 Tab 生成<select name="" id=""></select>,然后按 Tab 键进入添加 option。
还可以组合:fieldset>legend+input 等。
九、常见问题与排错
9.1 表单提交后看不到效果?
-
如果没有真实的服务器,可以用
https://httpbin.org/post测试 POST 请求,它会回显你提交的数据。 -
对于 GET 方法,可以观察地址栏的变化。
9.2 单选按钮不能互斥?
- 检查所有单选按钮的
name属性是否完全一致。
9.3 点击 label 文字无反应?
-
确认
label的for属性值与对应控件的id一致。 -
或者控件放在
label内部。
9.4 文件上传没有反应?
- 文件上传必须设置
<form method="post" enctype="multipart/form-data">,否则文件内容不会发送。这是一个常见的遗漏点。本示例中为了简单没加,但实际开发中一定要加。
修正 :如果需要真正上传文件,<form> 必须加 enctype="multipart/form-data"。我们理解即可。
9.5 required 属性不生效?
-
确保浏览器支持 HTML5(主流都支持)。
-
检查是否把
required写成了require(拼写错误)。
十、本篇文章总结
核心知识点回顾:
<form> 标签 :action 指定提交地址,method 决定 GET 或 POST。
各种输入控件:
-
文本
type="text"、密码password、单选radio、多选checkbox、文件file。 -
按钮:
submit、reset、button,以及<button>标签。 -
下拉框
<select>+<option>。 -
文本域
<textarea>。
<label> 标签:提升点击区域,增加易用性。
HTML5 新输入类型 :email、number、date、tel、url 等。
分组与验证 :<fieldset>/<legend>、required、readonly、disabled。
综合实操:完成了一个包含多种控件的用户注册表单。
GET 与 POST 的核心区别:数据在 URL 中 vs 在请求体中,安全性及长度差异。
如果这篇文章帮你解决了实操上的困惑,别忘记点击点赞、分享,也可以留言告诉我你遇到的其它问题,我会尽快回复。动手练习是掌握编程最快的方法,请务必亲手敲一遍本文的所有示例代码,并截图保存你的成果。你的关注是我坚持原创和细节共享的力量来源,谢谢大家。