完整源码:HarmonyGestureLock
基于 HarmonyOS 5.0+,实现九宫格手势密码设置与验证,支持自动连线、中间点智能填充、防误触、安全存储。
核心特性:Canvas 绘制九宫格、线段插值检测、状态统一回调、Preferences 安全存储、美观半透明配色。
一、为什么需要自定义手势锁组件
在应用锁、支付验证、隐私保护等场景,原生组件难以满足定制需求。自定义手势锁可以:
- 完全控制九宫格布局和视觉样式。
- 实现自动连接中间点(如 1→3 自动经过 2),符合用户习惯。
- 安全存储手势密码(MD5 摘要),防止明文泄露。
- 灵活的交互反馈:连线颜色、圆点状态、错误重试、震动等。
本文将从零实现一款高精度、高可用的手势密码组件,支持设置/验证模式自动切换,并提供完整的存储和回调机制。
运行效果
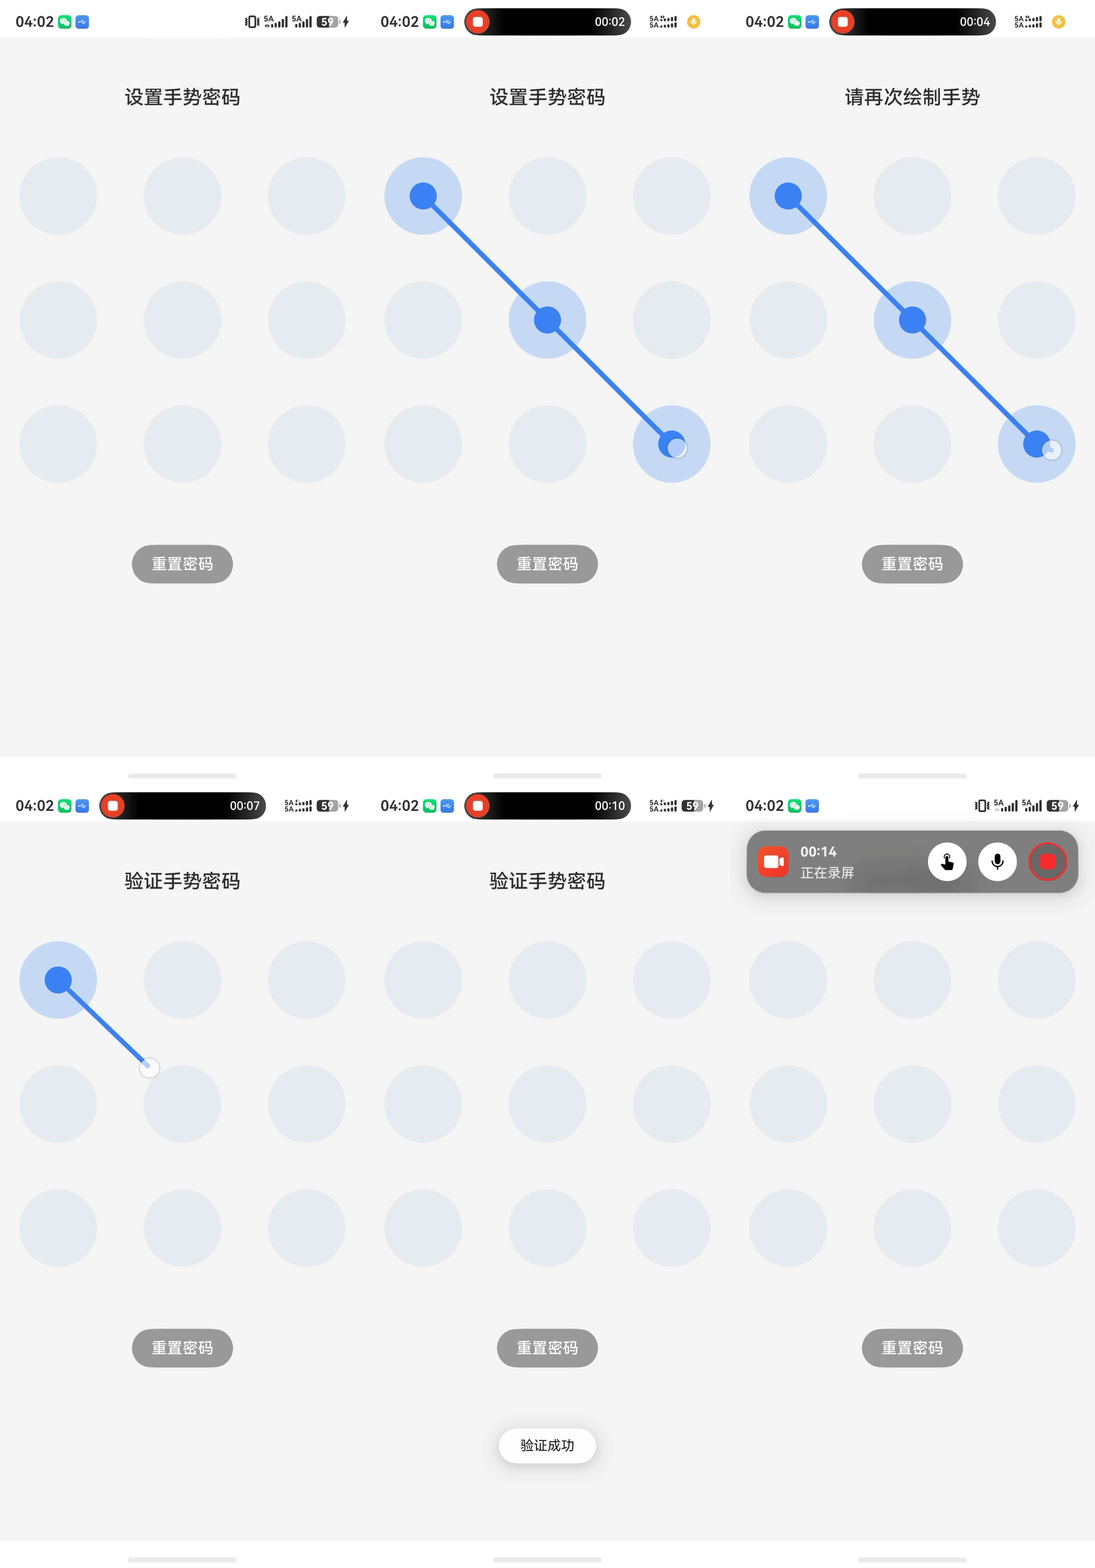
二、技术架构
| 模块 | 技术方案 | 作用 |
|---|---|---|
| UI 绘制 | Canvas + 路径绘制 | 精确控制九宫格圆点位置、连线动画、命中检测 |
| 状态管理 | MVVM + 回调 | 业务逻辑与绘制分离,单向数据流 |
| 布局计算 | 纯算法(无 Grid) | 适应任意屏幕宽度,支持内边距和正方形/矩形自适应 |
| 安全防护 | MD5 摘要 + Preferences 存储 | 手势模式不明文存储 |
| 智能填充 | 线段投影插值 | 自动添加经过的中间点,符合用户预期 |
| 回调统一 | onDrawComplete(status) | 统一返回 continue / success / fail ,简化页面逻辑 |
三、项目结构
entry/src/main/ets/
├── entryability/
│   └── EntryAbility.ets
├── pages/
│   └── GestureLockPage.ets            // 演示页面(自动判断设置/验证)
├── component/
│   └── GestureLock.ets                // 手势锁 UI 组件(Canvas 绘制)
├── viewmodel/
│   └── GestureLockViewModel.ets       // 业务逻辑(路径、模式、存储、回调)
├── model/
│   ├── PointInfo.ets                  // 圆点数据模型
│   ├── LockRect.ets                   // 矩形区域接口
│   └── VerifyMode.ets                 // 模式枚举
├── constants/
│   └── GestureLockConstants.ets       // 所有常量(尺寸、颜色、内边距)
└── utils/
    └── GesturePatternUtils.ets        // 工具类(编码/解码、MD5)
四、核心常量配置
常量类集中管理视觉与交互参数,便于全局调整。这里采用 无 _VP 后缀的 px 单位,简化开发(手势锁无需字体缩放)。
javascript
export class GestureLockConstants {
  static readonly MATRIX_SIZE: number = 3;
  static readonly TOTAL_POINTS: number = 9;

  // 尺寸
  static readonly LINE_WIDTH: number = 5;
  static readonly POINT_RADIUS: number = 40;
  static readonly TOUCH_SLOP: number = 22;
  static readonly GRID_PADDING: number = 20;

  // 配色
  static readonly POINT_OUTER_COLOR_NORMAL: string = 'rgba(226, 232, 240, 0.8)';
  static readonly POINT_INNER_COLOR_NORMAL: string = '#FFFFFF';
  static readonly POINT_OUTER_COLOR_SELECTED: string = 'rgba(59, 130, 246, 0.25)';
  static readonly POINT_INNER_COLOR_SELECTED: string = '#3B82F6';
  static readonly POINT_OUTER_COLOR_ERROR: string = 'rgba(239, 68, 68, 0.25)';
  static readonly POINT_INNER_COLOR_ERROR: string = '#EF4444';
  static readonly LINE_COLOR_NORMAL: string = '#3B82F6';
  static readonly LINE_COLOR_ERROR: string = '#EF4444';

  static readonly POINT_SELECTED_INNER_RADIUS_FACTOR: number = 0.35;
  static readonly MIN_PATTERN_LENGTH: number = 4;
  static readonly ERROR_RESET_DELAY: number = 800;

  static readonly PREFERENCES_NAME = 'lock_pref';
  static readonly PATTERN_MD5_KEY = 'saved_pattern_md5';
}
五、ViewModel:精确布局算法与智能连线
5.1 九宫格点坐标计算(贴边 + 内边距)
javascript
  computePointPositions(width: number, height: number): void {
    const r = this.pointRadius;
    const padding = GestureLockConstants.GRID_PADDING;
    const startX = padding + r;
    const endX = width - padding - r;
    const startY = padding + r;
    const endY = height - padding - r;
    const stepX = (endX - startX) / (GestureLockConstants.MATRIX_SIZE - 1);
    const stepY = (endY - startY) / (GestureLockConstants.MATRIX_SIZE - 1);
    let idx = 0;
    for (let row = 0; row < GestureLockConstants.MATRIX_SIZE; row++) {
      for (let col = 0; col < GestureLockConstants.MATRIX_SIZE; col++) {
        if (this.points[idx]) {
          this.points[idx].x = startX + col * stepX;
          this.points[idx].y = startY + row * stepY;
        }
        idx++;
      }
    }
  }
5.2 自动填充中间点(线段插值)
当手指从点 A 滑到点 B 时,自动检测并添加所有位于线段附近的未选中点(按距离 A 排序),实现"一键连线"体验。
如果不实现这一步会出现例如:1、2、3 可直接连接1-3 线穿过2并无连线。斜着绕过2拉长直接连三就能跳过2,这是bug。
javascript
  private getPointsBetween(p1: PointInfo, p2: PointInfo): PointInfo[] {
    const result: PointInfo[] = [];
    const x1 = p1.x, y1 = p1.y;
    const x2 = p2.x, y2 = p2.y;
    const dx = x2 - x1;
    const dy = y2 - y1;
    const len2 = dx * dx + dy * dy;
    if (len2 === 0) return result;
    for (const p of this.points) {
      if (p.selected) continue;
      if (p === p1 || p === p2) continue;
      const t = ((p.x - x1) * dx + (p.y - y1) * dy) / len2;
      if (t < 0 || t > 1) continue;
      const projX = x1 + t * dx;
      const projY = y1 + t * dy;
      const dist = Math.hypot(p.x - projX, p.y - projY);
      if (dist < this.pointRadius) result.push(p);
    }
    result.sort((a, b) => {
      const da = Math.hypot(a.x - p1.x, a.y - p1.y);
      const db = Math.hypot(b.x - p1.x, b.y - p1.y);
      return da - db;
    });
    return result;
  }
5.3 核心算法步骤:线段插值计算
为了保证用户从点 1 斜拉到点 3 时,中间的点 2 能被自动加入路径,采用点到线段投影距离检测法,完整流程如下:
-
输入 :上一个已选中端点 P 1 ( x 1 , y 1 ) P_1(x_1, y_1) P1(x1,y1)、当前命中端点 P 2 ( x 2 , y 2 ) P_2(x_2, y_2) P2(x2,y2)、全部未选中候选点 P ( x , y ) P(x, y) P(x,y)。
-
计算投影系数 t t t :
定义线段方向向量与目标点向量
v ⃗ = ( x 2 − x 1 , y 2 − y 1 ) , w ⃗ = ( x − x 1 , y − y 1 ) \vec{v} = (x_2 - x_1,\ y_2 - y_1),\quad \vec{w} = (x - x_1,\ y - y_1) v =(x2−x1, y2−y1),w =(x−x1, y−y1)
向量点积求解投影比例
t = w ⃗ ⋅ v ⃗ v ⃗ ⋅ v ⃗ t = \frac{\vec{w} \cdot \vec{v}}{\vec{v} \cdot \vec{v}} t=v ⋅v w ⋅v
t t t 代表候选点 P P P 在直线 P 1 P 2 P_1P_2 P1P2 上的投影相对起点 P 1 P_1 P1 的归一化位置。
-
线段范围约束 :若不满足 0 ≤ t ≤ 1 0 \le t \le 1 0≤t≤1,代表投影落在线段延长线上,直接过滤该候选点。
-
求解线段投影点坐标 :
P proj = ( x 1 + t ⋅ ( x 2 − x 1 ) , y 1 + t ⋅ ( y 2 − y 1 ) ) P_{\text{proj}} = \big( x_1 + t \cdot (x_2 - x_1),\ y_1 + t \cdot (y_2 - y_1) \big) Pproj=(x1+t⋅(x2−x1), y1+t⋅(y2−y1))
-
计算点到线段的垂直距离 :
d = ( x − x proj ) 2 + ( y − y proj ) 2 d = \sqrt{(x - x_{\text{proj}})^2 + (y - y_{\text{proj}})^2} d=(x−xproj)2+(y−yproj)2
-
阈值命中判定 :设定判定阈值为圆点半径 r r r,若 d < r d < r d<r,则判定该点被滑动路径覆盖,自动纳入手势路径。
-
有序插入路径 :将所有命中的中间点,按照到起点 P 1 P_1 P1 的欧氏距离升序排序,由近至远依次插入选中队列,保证连线顺序正确。
该算法仅基于基础向量与几何运算,性能轻量化;可兼容直线、斜线、跨多点复杂滑动场景。只要滑动轨迹靠近圆点感应范围,即可自动串联中间节点,无需精准按压圆心,贴合原生手势锁交互逻辑。
5.4 统一回调 onDrawComplete
所有绘制结束(包括长度不足、两次不一致、验证失败等)都通过同一个回调通知页面,携带状态 'continue'、'success'、'fail',简化页面逻辑。
javascript
  private handleSettingPattern(pattern: string): void {
    if (!this.waitingForSecond) {
      // 第一次绘制完成 -> 继续
      this.firstPattern = pattern;
      this.resetDrawing(false);
      this.waitingForSecond = true;
      this.notifyStateChanged();
      this.onDrawComplete?.('continue', pattern);
    } else {
      // 第二次绘制完成
      if (this.firstPattern === pattern) {
        const md5 = GesturePatternUtils.md5Sync(pattern);
        this.savedPatternMd5 = md5;
        this.resetDrawing(false);
        this.waitingForSecond = false;
        this.notifyStateChanged();
        this.onDrawComplete?.('success', pattern);
      } else {
        // 不一致 -> 失败
        this.triggerMismatch();
      }
    }
  }
六、自定义手势锁组件 GestureLock.ets
组件负责 Canvas 绘制、触摸事件分发和 ViewModel 状态监听。核心代码:
javascript
import { GestureLockViewModel } from '../viewmodel/GestureLockViewModel';
import { GestureLockConstants } from '../constants/GestureLockConstants';

@Component
export struct GestureLock {
  @Require viewModel: GestureLockViewModel;
  private settings: RenderingContextSettings = new RenderingContextSettings(true);
  private ctx: CanvasRenderingContext2D = new CanvasRenderingContext2D(this.settings);
  private canvasWidth: number = 0;
  private canvasHeight: number = 0;

  aboutToAppear(): void {
    this.viewModel.onStateChanged = () => {
      this.drawCanvas();
    };
  }


  private drawCanvas(): void {
    if (!this.ctx || this.canvasWidth <= 0 || this.canvasHeight <= 0) {
      return;
    }

    this.ctx.clearRect(0, 0, this.canvasWidth, this.canvasHeight);
    const selectedPoints = this.viewModel.getSelectedPoints();
    const isError = this.viewModel.isError;

    // 绘制连线
    if (selectedPoints.length > 0) {
      const lineColor = isError ? GestureLockConstants.LINE_COLOR_ERROR : GestureLockConstants.LINE_COLOR_NORMAL;
      this.ctx.save();
      this.ctx.lineWidth = GestureLockConstants.LINE_WIDTH;
      this.ctx.strokeStyle = lineColor;
      this.ctx.lineCap = 'round';
      this.ctx.lineJoin = 'round';

      this.ctx.beginPath();
      selectedPoints.forEach((p, i) => {
        if (i === 0) {
          this.ctx.moveTo(p.x, p.y);
        } else {
          this.ctx.lineTo(p.x, p.y);
        }
      });

      // 动态连线
      const tx = this.viewModel.currentTouchX;
      const ty = this.viewModel.currentTouchY;
      if (tx > 0 && ty > 0) {
        const last = selectedPoints[selectedPoints.length - 1];
        this.ctx.lineTo(tx, ty);
      }

      this.ctx.stroke();
      this.ctx.restore();
    }

    // 绘制圆点
    this.viewModel.points.forEach(p => {
      const selected = p.selected;
      let outerColor: string;

      if (isError) {
        outerColor = GestureLockConstants.POINT_OUTER_COLOR_ERROR;
      } else if (selected) {
        outerColor = GestureLockConstants.POINT_OUTER_COLOR_SELECTED;
      } else {
        outerColor = GestureLockConstants.POINT_OUTER_COLOR_NORMAL;
      }

      // 外圆
      this.ctx.beginPath();
      this.ctx.arc(p.x, p.y, GestureLockConstants.POINT_RADIUS, 0, Math.PI * 2);
      this.ctx.fillStyle = outerColor;
      this.ctx.fill();

      // 内圆
      if (selected || isError) {
        const innerR = GestureLockConstants.POINT_RADIUS * GestureLockConstants.POINT_SELECTED_INNER_RADIUS_FACTOR;
        const innerColor = isError ? GestureLockConstants.POINT_INNER_COLOR_ERROR : GestureLockConstants.POINT_INNER_COLOR_SELECTED;

        this.ctx.beginPath();
        this.ctx.arc(p.x, p.y, innerR, 0, Math.PI * 2);
        this.ctx.fillStyle = innerColor;
        this.ctx.fill();
      }
    });
  }

  private onTouchEvent = (event: TouchEvent): void => {
    if (event.touches.length === 0) return;

    const touch = event.touches[0];
    const hitRadius = GestureLockConstants.POINT_RADIUS + 6;

    switch (event.type) {
      case TouchType.Down:
      case TouchType.Move:
        this.viewModel.handleTouchMove(touch.x, touch.y, hitRadius);
        break;
      case TouchType.Up:
      case TouchType.Cancel:
        this.viewModel.handleTouchEnd();
        break;
    }
  };

  build() {
    Canvas(this.ctx)
      .width('100%')
      .aspectRatio(1)
      .backgroundColor(Color.Transparent)
      .onAreaChange((_, newArea) => {
        const w = newArea.width as number;
        const h = newArea.height as number;
        if (w > 0 && h > 0) {
          this.canvasWidth = w;
          this.canvasHeight = h;
          this.viewModel.computePointPositions(w, h);
          this.drawCanvas();
        }
      })
      .onTouch(this.onTouchEvent);
  }
}
七、页面集成与存储
页面通过 Preferences 读取/保存 MD5,根据是否有密码自动切换设置/验证模式。监听 onDrawComplete 统一处理 UI 反馈。
javascript
  aboutToAppear(): void {
    // 读取保存的密码 MD5
    const savedMd5 = PreferencesUtil.get(GestureLockConstants.PATTERN_MD5_KEY, '');
    if (savedMd5) {
      this.isSettingMode = false;
      this.titleText = '验证手势密码';
      this.viewModel.setVerifyMode(VerifyMode.VERIFYING);
      this.viewModel.setSavedPattern(savedMd5);
    } else {
      this.isSettingMode = true;
      this.titleText = '设置手势密码';
      this.viewModel.setVerifyMode(VerifyMode.SETTING);
    }

    // 统一的绘制完成回调
    this.viewModel.onDrawComplete =  (status: DrawCompleteStatus, pattern?: string) => {
      switch (status) {
        case 'continue':
          // 设置模式第一次绘制完成
          this.titleText = '请再次绘制手势';
          promptAction.showToast({ message: '请再次确认手势' });
          break;
        case 'success':
          if (this.isSettingMode) {
            // 设置模式第二次绘制成功
            const md5 = GesturePatternUtils.md5Sync(pattern!);
            PreferencesUtil.put(GestureLockConstants.PATTERN_MD5_KEY, md5);
            promptAction.showToast({ message: '手势密码设置成功' });
            this.isSettingMode = false;
            this.titleText = '验证手势密码';
            this.viewModel.setVerifyMode(VerifyMode.VERIFYING);
          } else {
            // 验证模式成功
            promptAction.showToast({ message: '验证成功' });
          }
          break;
        case 'fail':
          // 所有失败情况:长度不足、比对不一致、验证失败等
          if (this.isSettingMode) {
            // 设置模式下失败,重置状态并重新开始
            promptAction.showToast({ message: '两次绘制不一致,请重新设置' });
            this.viewModel.fullReset();
            this.viewModel.setVerifyMode(VerifyMode.SETTING);
            this.titleText = '设置手势密码';
          } else {
            promptAction.showToast({ message: '手势错误,请重试' });
          }
          break;
      }
    };
  }
八、三种状态样式
| 正常状态 | 连线状态 | 错误状态 |
|---|---|---|
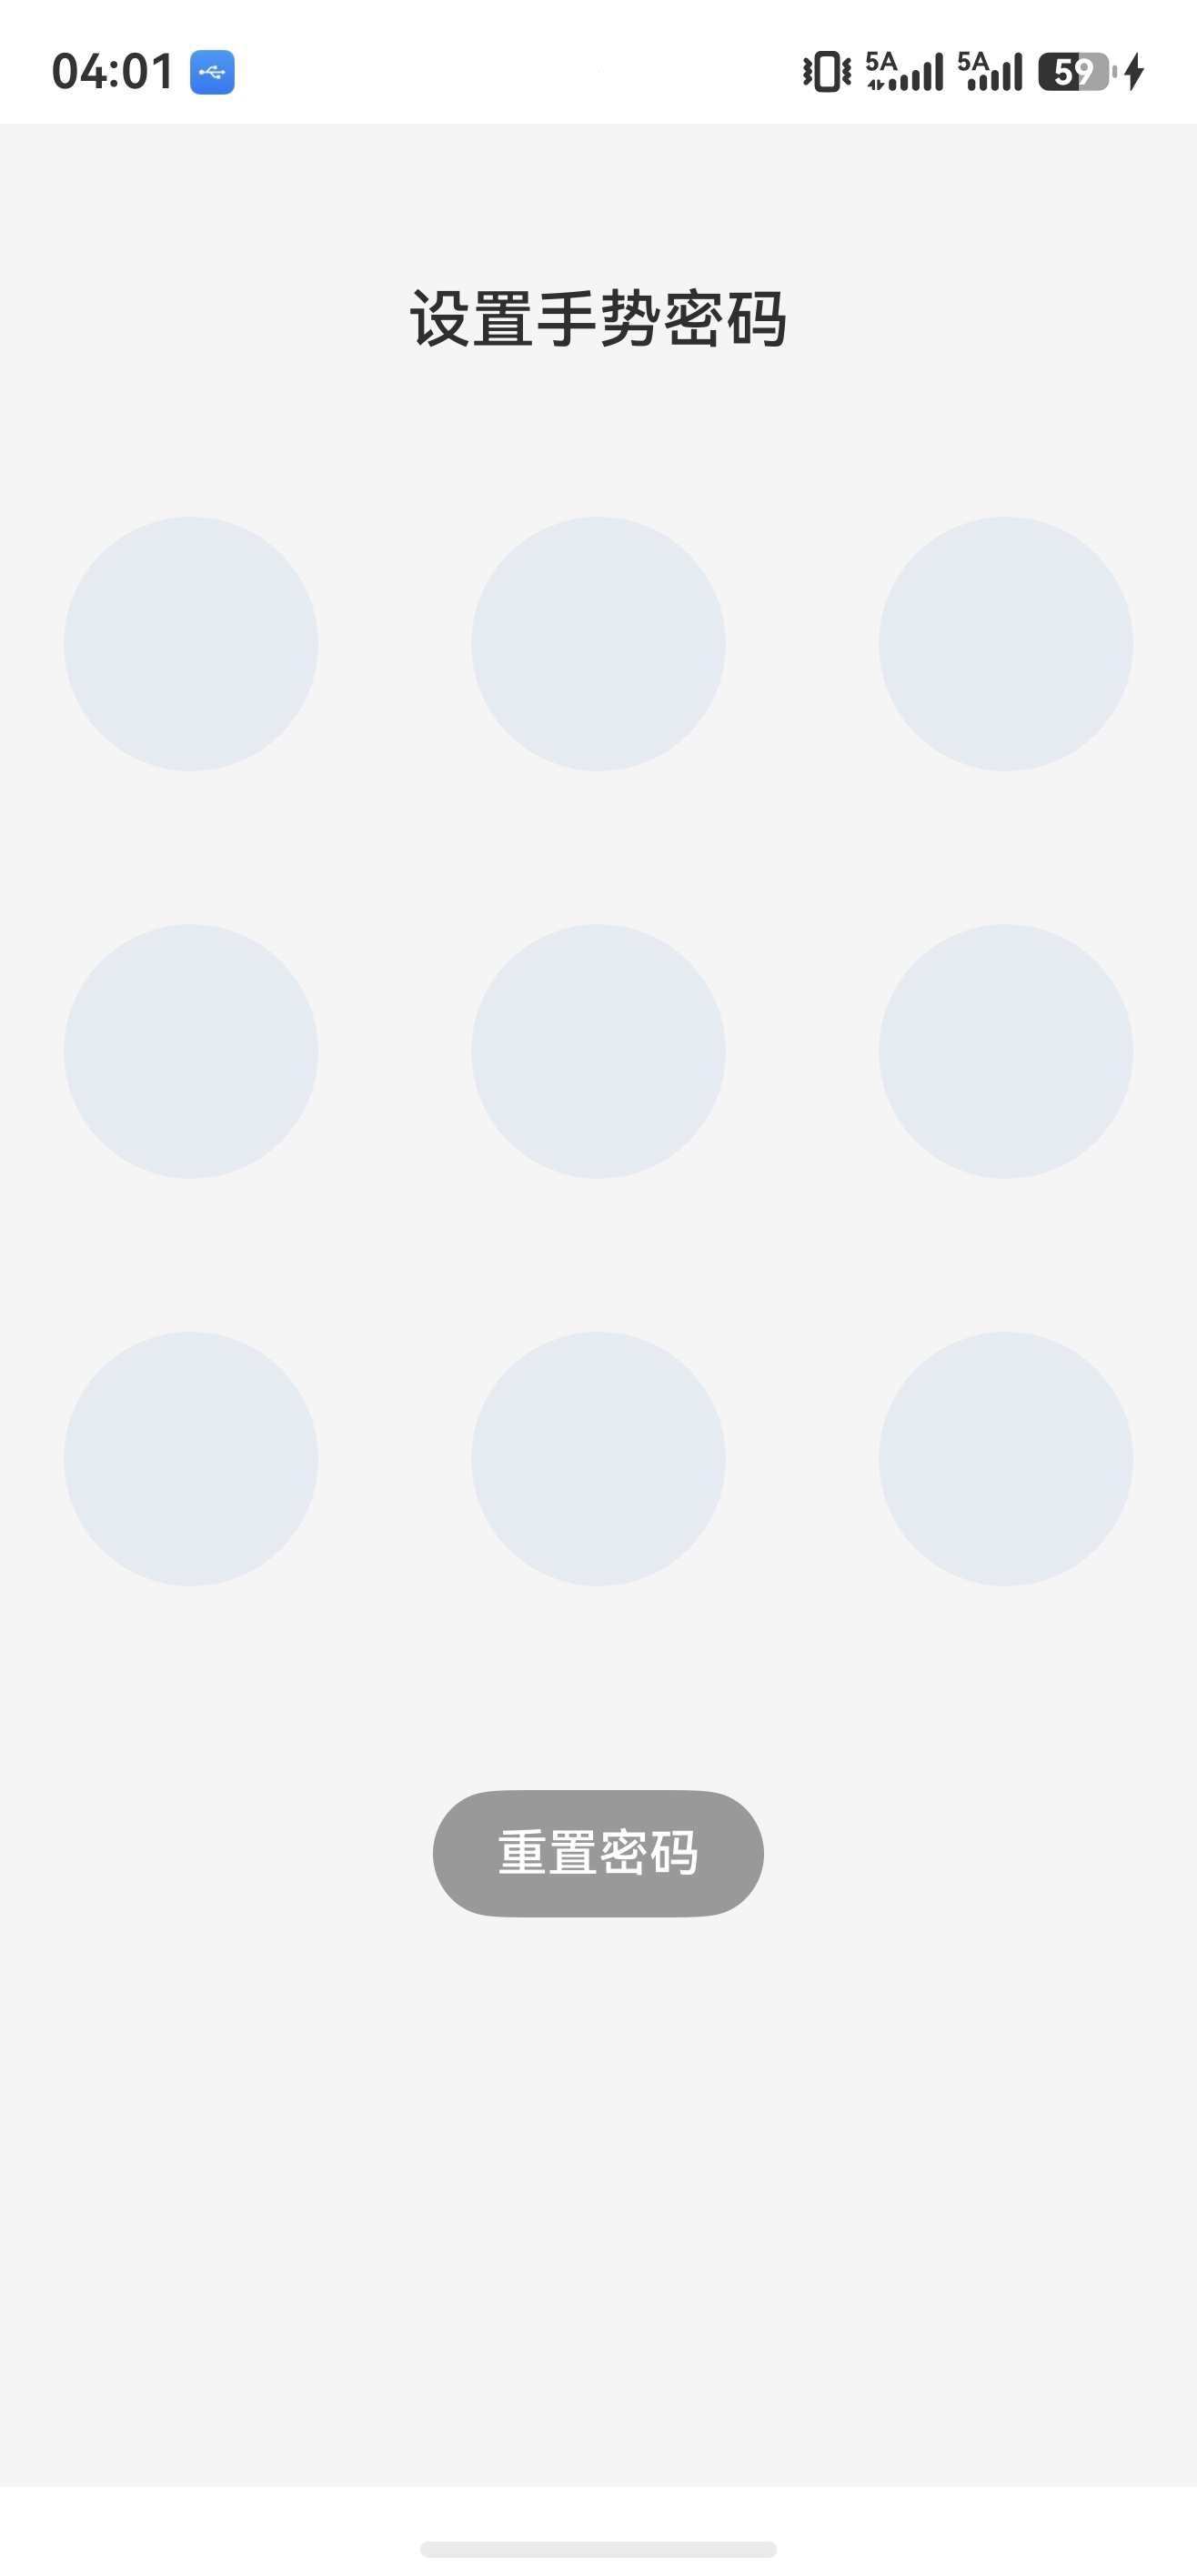 |
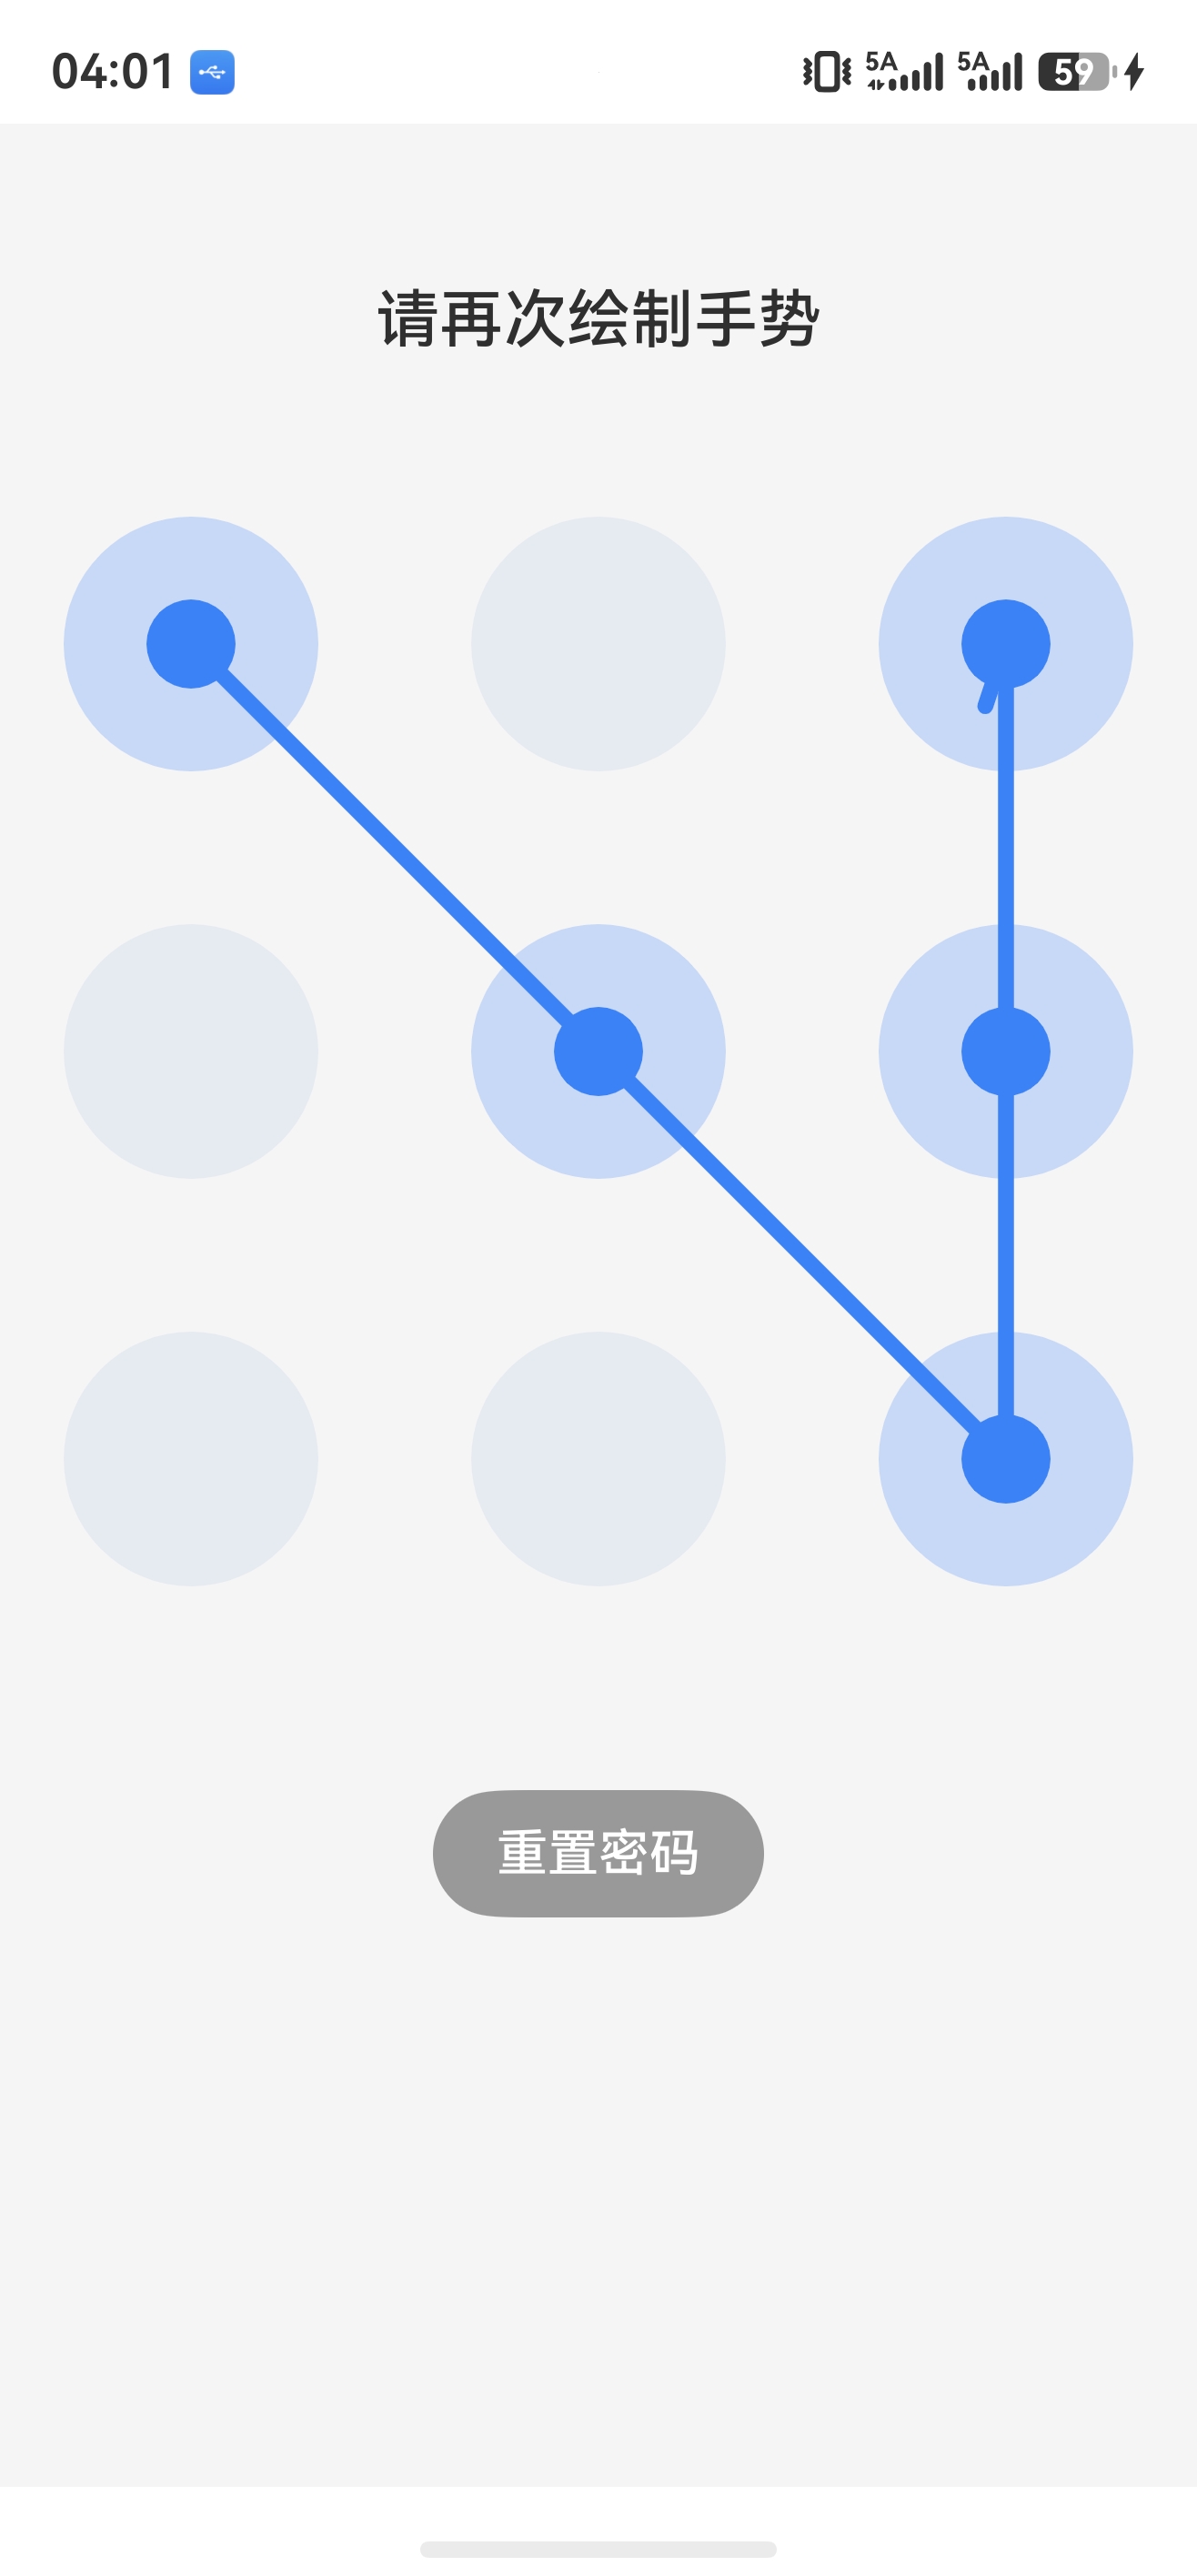 |
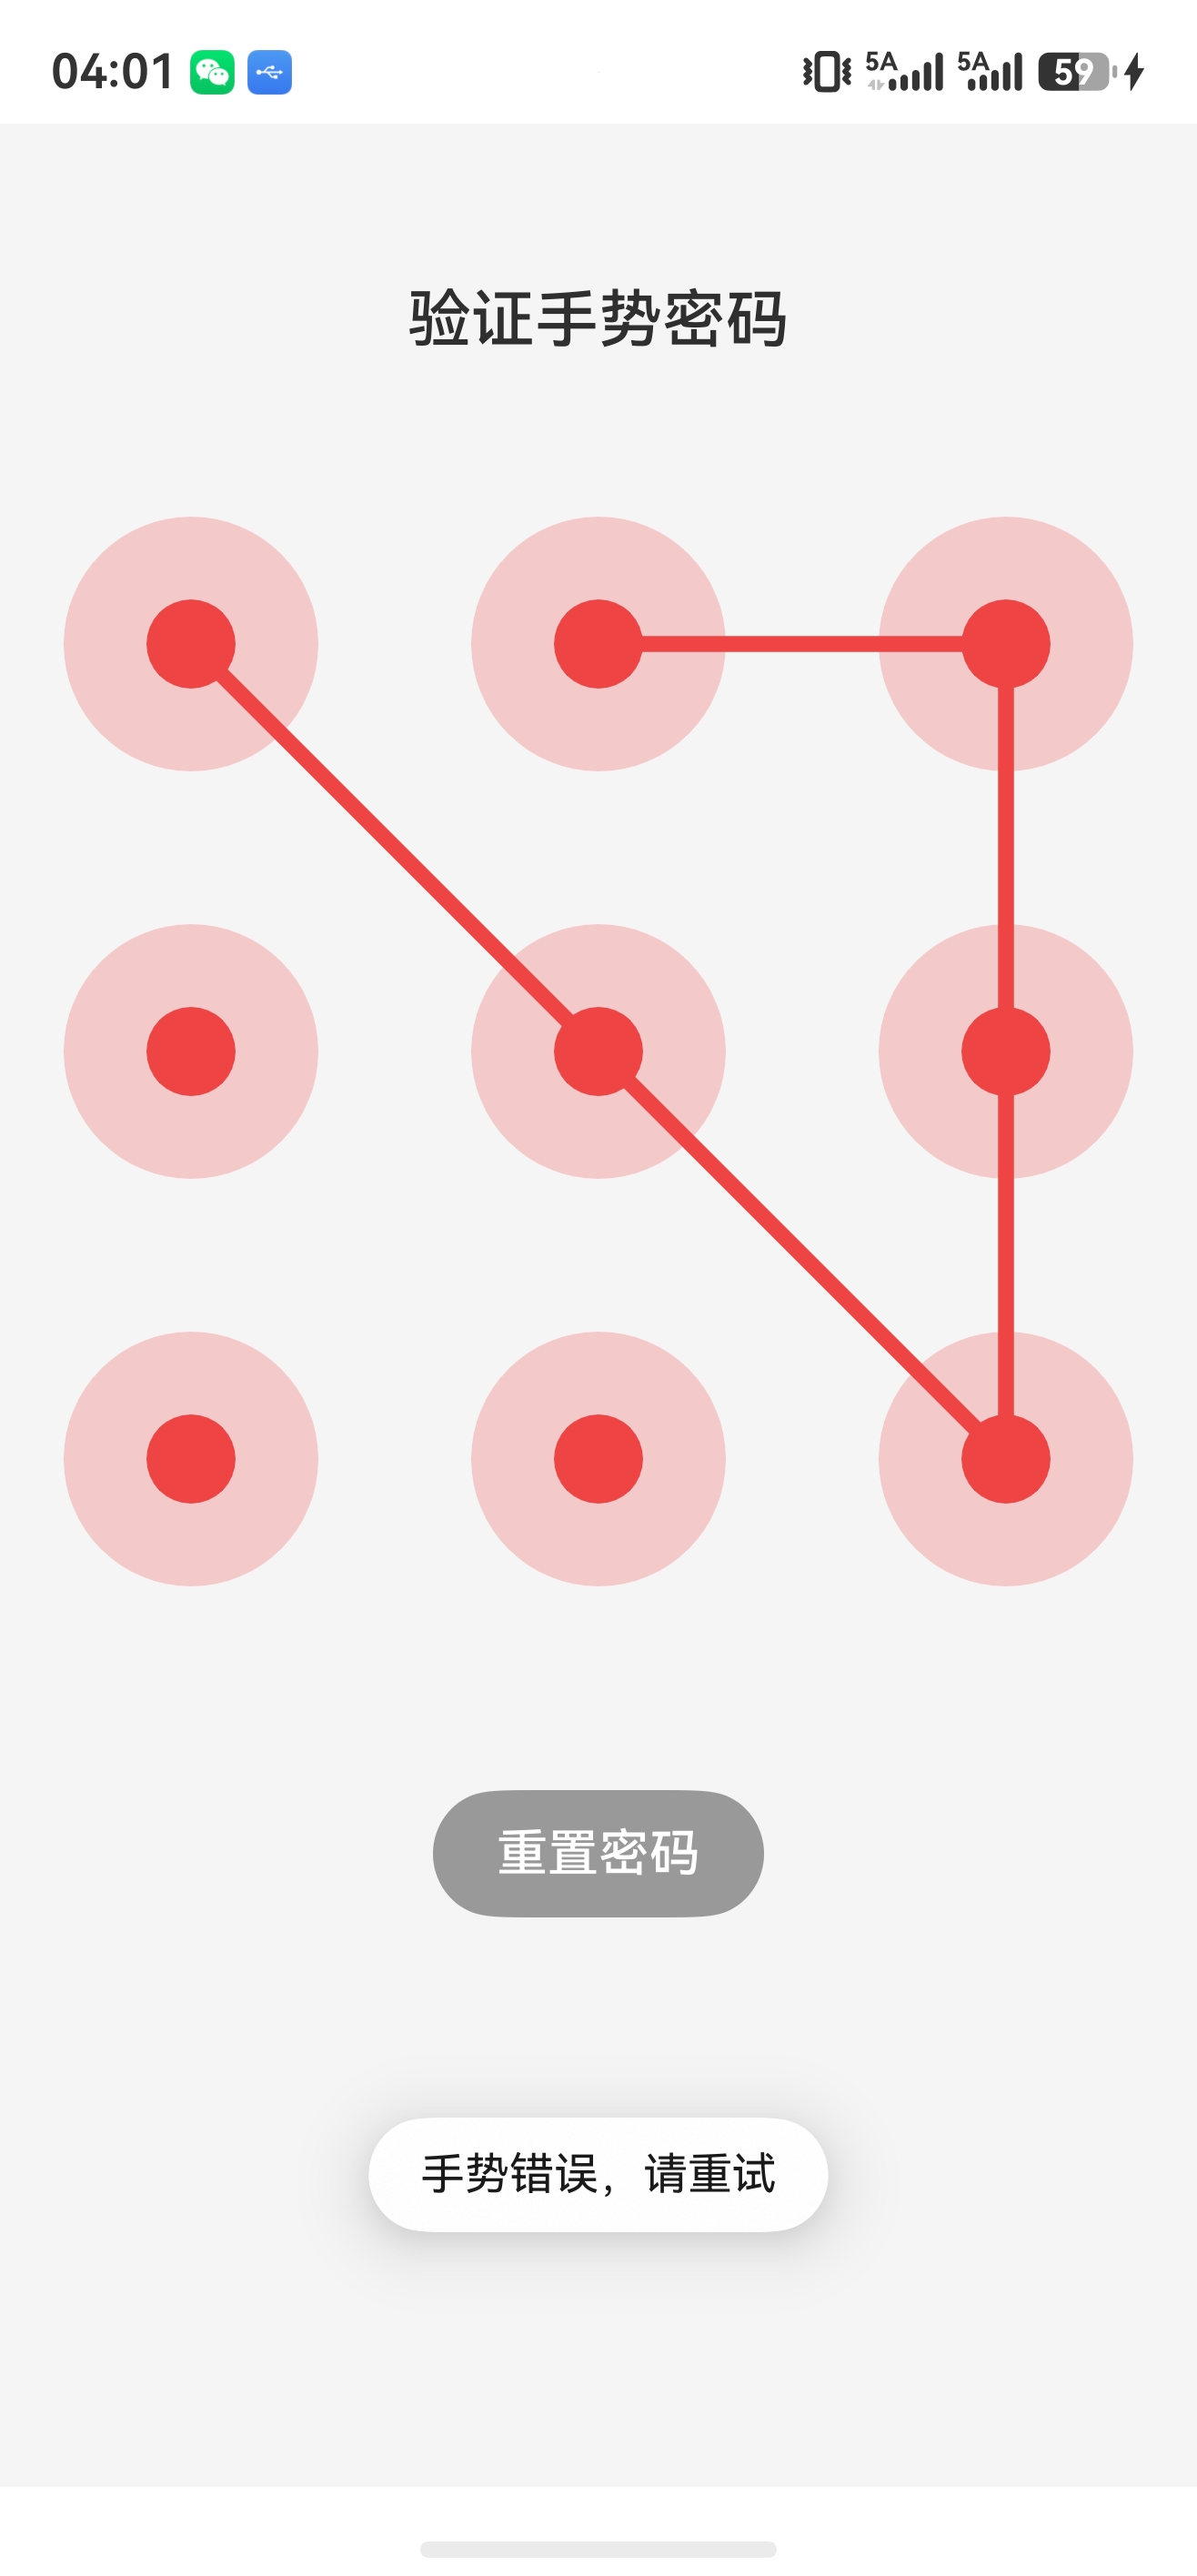 |
九、横竖屏与安全区域适配
Canvas 使用 aspectRatio(1) 保证九宫格为正方形,并在 computePointPositions 中根据宽高自动计算内边距和步长,完美适配横竖屏切换。手机中通常都是竖屏解锁,但防止异常还是做了适配。
十、总结
本文详细实现了鸿蒙手势密码组件,具备以下优点:
- 纯 Canvas 绘制:完全控制 UI,不受系统限制。
- 智能中间点填充:用户无需刻意经过每个点,体验流畅。
- 安全存储:MD5 摘要存储,防篡改。
- 统一回调 :一个
onDrawComplete处理所有场景,页面逻辑清晰。 - 常量配置:常量集中管理颜色、尺寸、延迟等。
源码已整理发布,可直接集成到鸿蒙应用中,为应用锁、支付验证等场景提供可靠的手势输入方案。如果觉得本文对你有帮助,请点赞、收藏、转发支持!