声明:以下内容仅作参考,正式环境请待官网发布。
1 背景
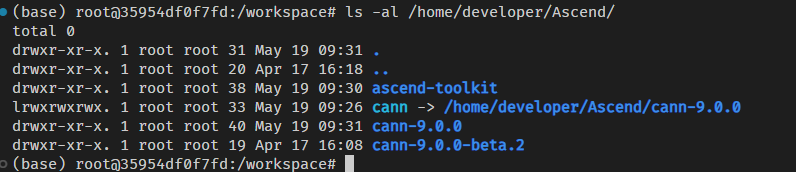
当前小主环境是容器,内部只安装了cann的环境,目的是需要在昇腾950pr的机器上跑起vllm。
cann的版本安装的是9.0.0的版本,
2 环境准备
2.1 python 3.11环境
通过conda官网下载https://repo.anaconda.com/miniconda conda安装包,
下载版本信息如下:

我设置miniconda安装路径是/workspace/miniconda3.
执行完成后,重新启动一个新的终端,确保python的环境信息准确。

这里,同样也要注意pip的版本环境,例如在我的环境默认走的是python3.12的版本,这个是错误的,与python的版本不匹配。

因此,通过设置为conda的安装pip环境,执行如下命令:
bash
export PATH=/workspace/miniconda3/bin/:$PATH再次执行命令,可以看到

2.2 CANN环境
安装cann之前,还有一些依赖要安装。protobuf的版本和numpy的版本是有要求的,这里提供安装的命令参考:
bash
pip install --no-cache-dir attrs cython numpy==1.24.0 psutil protobuf==3.2.0 scipy 由于容器内已经安装了cann环境,不再重复安装。
如果需要新安装,请访问:CANN安装
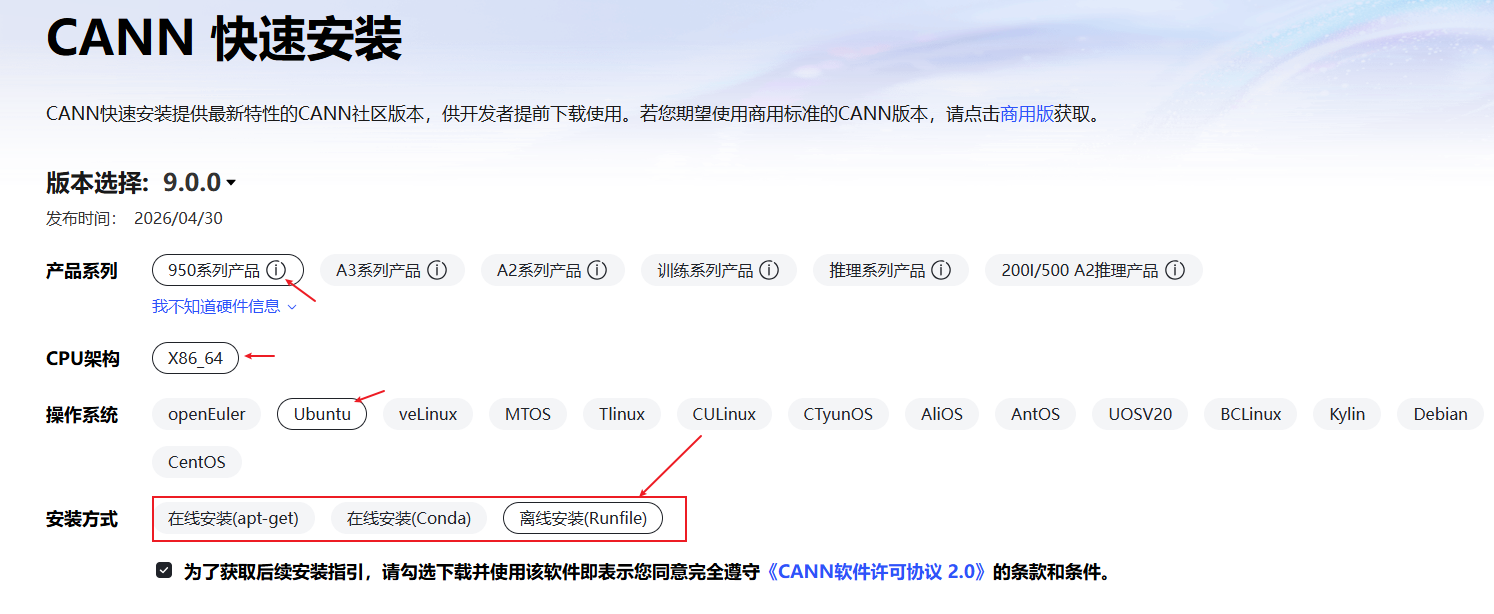
按照页面提供的选项,请选择自己喜欢 or 合适的方式安装。安装成功之后,设置环境变量:

当然,这里也可以参考vllm-ascend社区的提供的安装指导https://docs.vllm.ai/projects/ascend/en/latest/installation.html。
如下:算子记得要安装950-ops(社区文档后续可同步更新该部分)
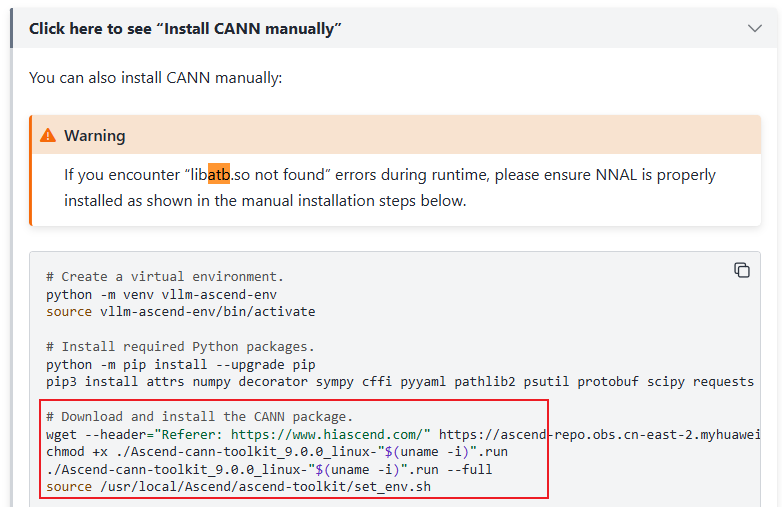
这里还需要安装nnal包,执行如下命令:
bash
wget --header="Referer: https://www.hiascend.com/" https://ascend-repo.obs.cn-east-2.myhuaweicloud.com/CANN/CANN%209.0.0/Ascend-cann-nnal_9.0.0_linux-"$(uname -i)".run
chmod +x ./Ascend-cann-nnal_9.0.0_linux-"$(uname -i)".run
./Ascend-cann-nnal_9.0.0_linux-"$(uname -i)".run --install

source /usr/local/Ascend/nnal/atb/set_env.sh
2.3 torch_npu安装
torch_npu需要安装2.10.0的版本,下载地址如下:Ascend Extension for PyTorch 2.10.0,我的选择如下:
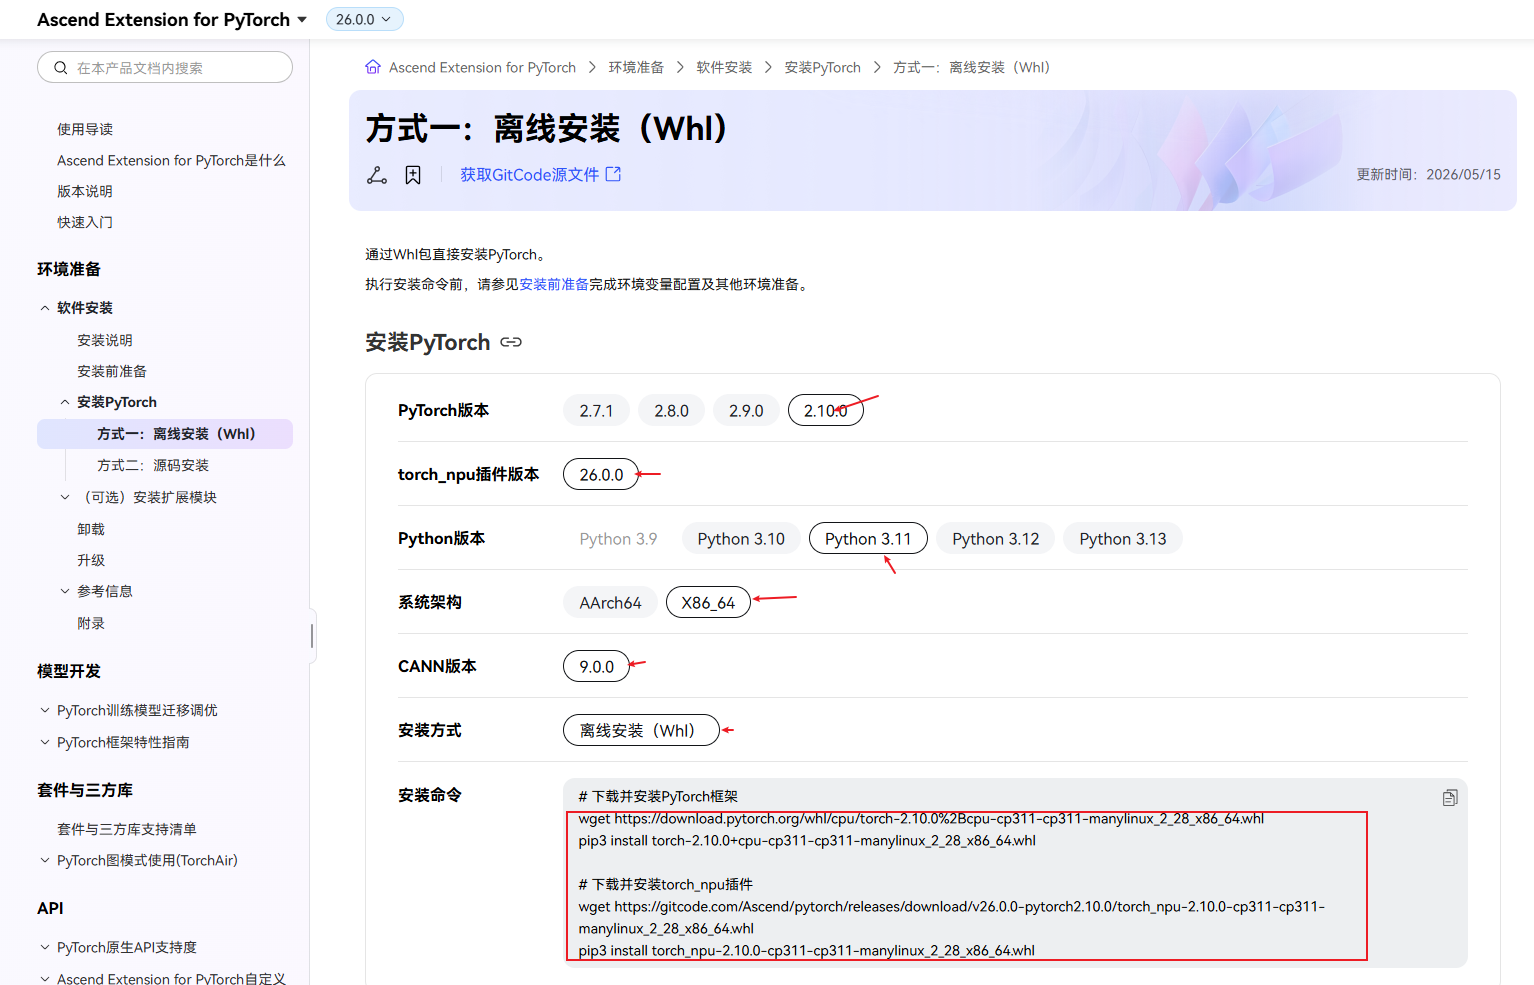
安装torch:
bash
pip install torch-2.10.0+cpu-cp311-cp311-manylinux_2_28_x86_64.whl --no-deps安装torch_npu:
bash
pip install torch_npu-2.10.0-cp311-cp311-manylinux_2_28_x86_64.whl --no-deps安装完成以后,继续执行如下命令:
bash
pip install pandas gevent sacrebleu rouge_score pybind11 pytest
pip cache purge
2.3 vllm安装
vllm通过源码的方式进行安装,执行命令如下:
bash
git clone --depth 1 --branch v0.20.2 https://github.com/vllm-project/vllm
cd vllm
VLLM_TARGET_DEVICE=empty pip install -v . --extra-index https://download.pytorch.org/whl/cpu/
cd ..
安装完成之后,需要卸载triton
bash
pip uninstall -y triton2.4 vllm-ascend安装
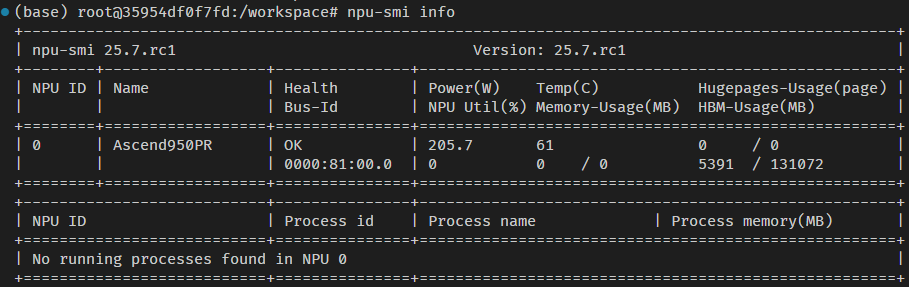
同样,vllm-ascend也通过源码的方式进行安装。安装之前,需要设置环境变量SOC_VERSION,在950的机器上,通过npu-smi的命令查询:
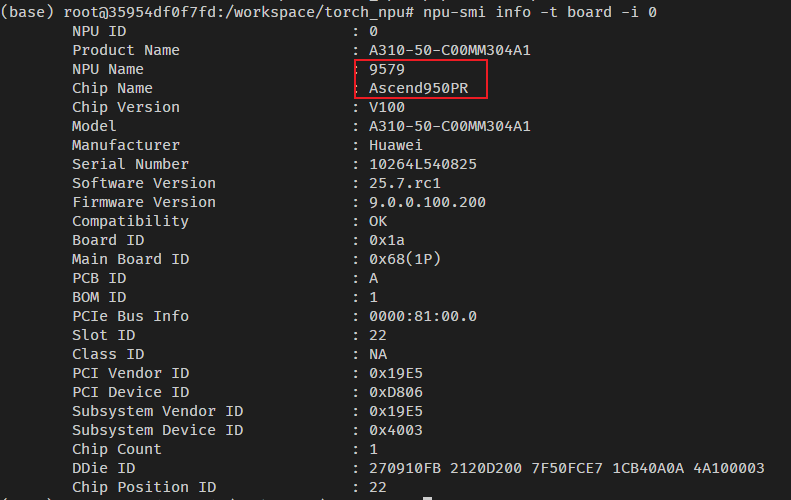
在我环境上,设置的SOC_VERSION如下:
bash
export SOC_VERSION=ascend950pr_9579然后,继续执行如下命令:
bash
git clone --depth 1 --branch main https://github.com/vllm-project/vllm-ascend.git
cd vllm-ascend
git submodule update --init --recursive
pip install -v . --extra-index-url https://download.pytorch.org/whl/cpu/ --extra-index-url https://mirrors.huaweicloud.com/ascend/repos/pypi --trusted-host download-r2.pytorch.org这个过程有点长,因为要从github上下载一些依赖库,耐心等待。如果中间报错,可以设置环境MAX_JOBS(设置参与编译的cpu线程数)观察具体的报错。
PS :执行pip install -v . --extra-index-url https://download.pytorch.org/whl/cpu/ --extra-index-url 过程中,确实有报错了,然后设置
bash
export MAX_JOBS=1居然没报错了,也就没继续深究了。继续执行
bash
pip uninstall -y triton && pip uninstall-y triton-ascend2.5 triton-ascend安装
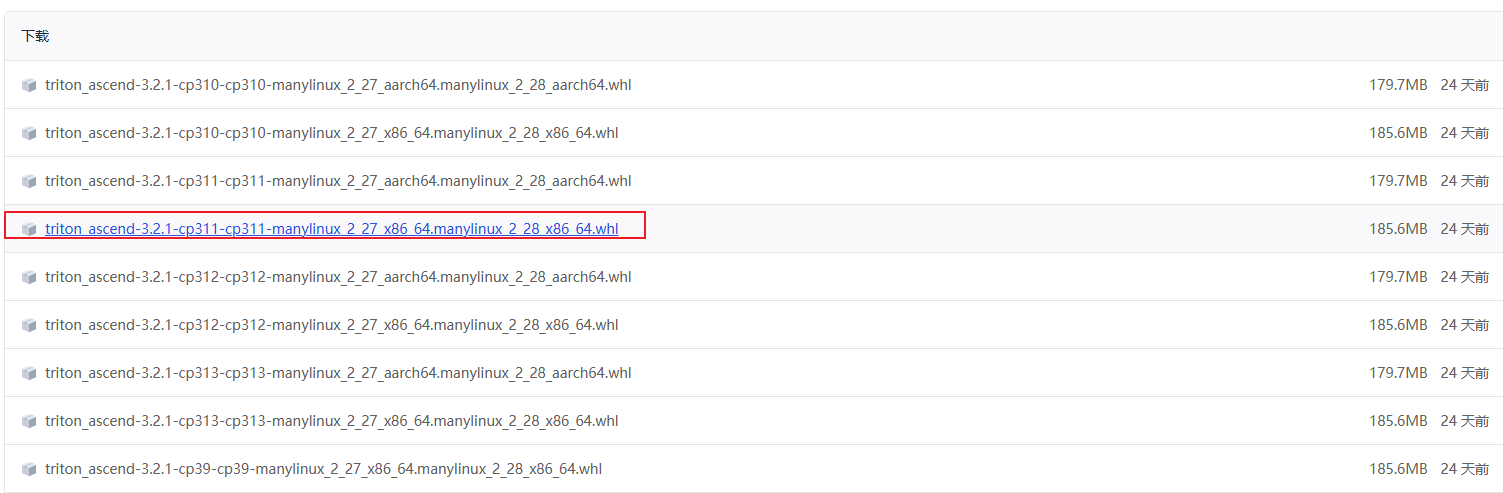
triton-ascend当前发布最新的v3.2.1的版本,下载地址如下:
https://gitcode.com/Ascend/triton-ascend/releases/v3.2.1
这里下载python3.11的版本
PS :triton-ascend后续移到github上进行开发了,不过当前最的版本依旧是3.2.1,不影响使用。后续请关注github上的仓库(https://github.com/triton-lang/triton-ascend)。
3 vllm验证
按照官网提供的脚本进行验证
https://docs.vllm.ai/projects/ascend/en/latest/installation.html
国内的环境,还是设置下modelscope的路径吧,从huggingface上下载速度一言难尽。
bash
export VLLM_USE_MODELSCOPE=True
pip install modelscopecopy代码如下代码保存文件为:test_vllm.py
python
from vllm import LLM, SamplingParams

prompts = [
    "Hello, my name is",
    "The president of the United States is",
    "The capital of France is",
    "The future of AI is",
]

# Create a sampling params object.
sampling_params = SamplingParams(temperature=0.8, top_p=0.95)
# Create an LLM.
llm = LLM(model="Qwen/Qwen3-0.6B")

# Generate texts from the prompts.
outputs = llm.generate(prompts, sampling_params)
for output in outputs:
    prompt = output.prompt
    generated_text = output.outputs[0].text
print(f"Prompt: {prompt!r}, Generated text: {generated_text!r}")执行python test_vllm.py

等待一段时间后,获得如下输出:
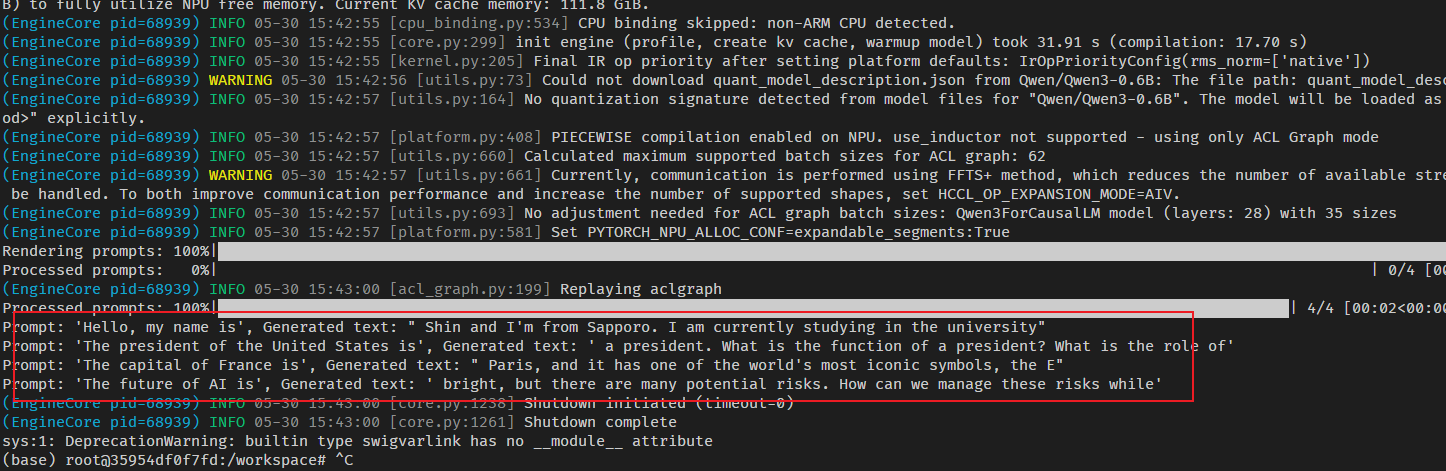
到这里,vllm在昇腾950上已经跑起来了。