本项目使用现成的UI组件库(快速集成)
1. Vue Weather UI 介绍
这是一个专为 Vue 3 设计的精美天气组件库,集成了和风天气(QWeather)API,并提供暗黑主题支持。
-
核心组件:
-
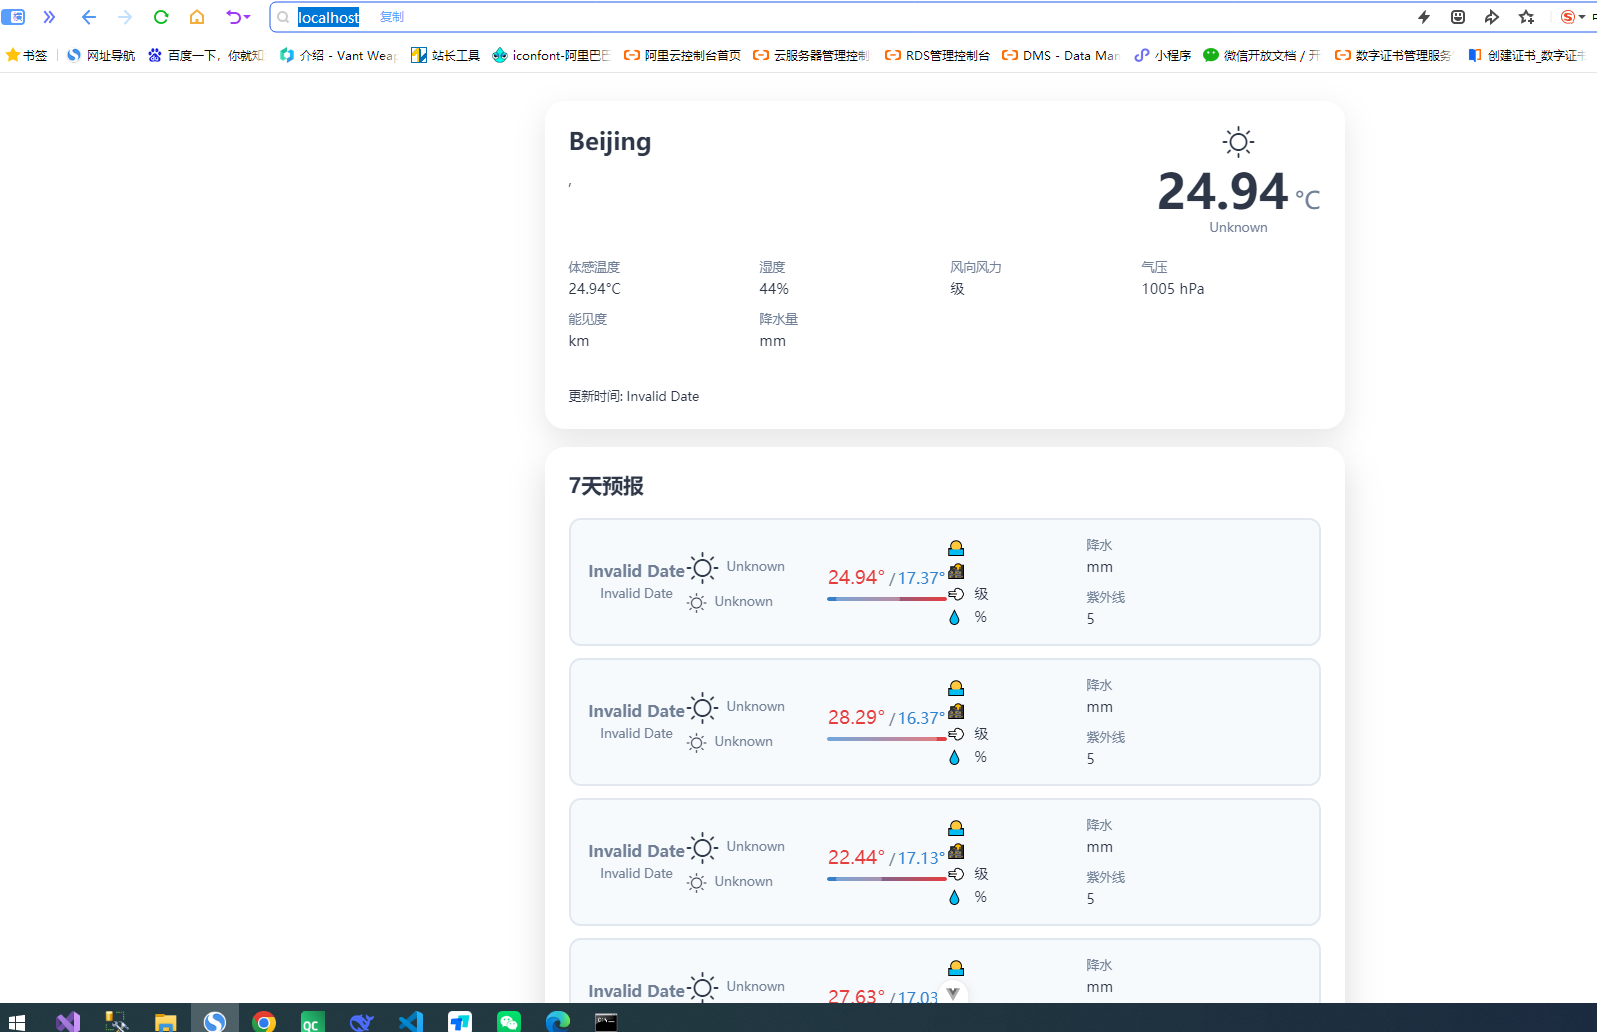
WeatherCard: 展示当前天气、温度、湿度、风速等详细信息。 -
HourlyForecast: 24小时天气预报,可横向滚动。 -
DailyForecast: 7天天气预报,包含温度趋势和日出日落时间。 -
HistoricalTimeline: 交互式历史天气时间线。
-
2、创建项目 weather_app, 如果不会,请移步 从零开始 Vue.js
开始编写代码:
第一步:安装依赖
npm install vue-weather-ui axios第二步:获取天气数据(核心逻辑)
根据 vue-weather-ui 的官方文档,组件需要的数据结构包含 location、now、daily 等字段。你需要从天气 API 获取数据并转换成这个格式。
<script setup>
import { ref, onMounted } from 'vue'
import axios from 'axios'
import { WeatherCard, DailyForecast } from 'vue-weather-ui'
import 'vue-weather-ui/dist/style.css'

// 天气数据
const weatherData = ref(null)
const loading = ref(true)
const error = ref(null)

// 配置(请替换为你的 API Key)
const API_KEY = '你的OpenWeatherMap API密钥'
const CITY = 'Beijing'

// 获取天气数据
const fetchWeather = async () => {
  loading.value = true
  error.value = null

  try {
    // 获取当前天气和天气预报
    const currentUrl = `https://api.openweathermap.org/data/2.5/weather?q=${CITY}&appid=${API_KEY}&units=metric&lang=zh_cn`
    const forecastUrl = `https://api.openweathermap.org/data/2.5/forecast?q=${CITY}&appid=${API_KEY}&units=metric&lang=zh_cn&cnt=40`

    const [currentRes, forecastRes] = await Promise.all([
      axios.get(currentUrl),
      axios.get(forecastUrl)
    ])

    // 转换为 vue-weather-ui 所需的数据结构
    weatherData.value = transformWeatherData(currentRes.data, forecastRes.data)
  } catch (err) {
    console.error('获取天气失败:', err)
    error.value = '获取天气失败,请检查网络或API密钥'
  } finally {
    loading.value = false
  }
}

// 数据转换函数(将 API 返回的数据转为组件需要的格式)
const transformWeatherData = (current, forecast) => {
  // 处理每日天气预报(从3小时间隔的数据中提取每天一条)
  const dailyMap = new Map()

  forecast.list.forEach(item => {
    const date = item.dt_txt.split(' ')[0]
    if (!dailyMap.has(date)) {
      dailyMap.set(date, {
        date: date,
        day: {
          temp: item.main.temp,
          weather: item.weather[0].description,
          weatherIcon: item.weather[0].icon,
          wind: item.wind.speed,
          humidity: item.main.humidity
        },
        night: {
          temp: item.main.temp,
          weather: item.weather[0].description,
          weatherIcon: item.weather[0].icon
        },
        tempMax: item.main.temp_max,
        tempMin: item.main.temp_min,
        uvIndex: 5 // API 不直接提供,可设为默认值
      })
    } else {
      // 更新当天的最高最低温
      const existing = dailyMap.get(date)
      existing.tempMax = Math.max(existing.tempMax, item.main.temp_max)
      existing.tempMin = Math.min(existing.tempMin, item.main.temp_min)
      dailyMap.set(date, existing)
    }
  })

  const dailyList = Array.from(dailyMap.values()).slice(0, 7)

  return {
    location: {
      name: current.name,
      country: current.sys.country,
      adm1: '',
      adm2: '',
      lat: current.coord.lat,
      lon: current.coord.lon,
      tz: ''
    },
    now: {
      temp: current.main.temp,
      feelsLike: current.main.feels_like,
      weather: current.weather[0].description,
      weatherIcon: current.weather[0].icon,
      wind: current.wind.speed,
      humidity: current.main.humidity,
      pressure: current.main.pressure,
      visibility: (current.visibility || 10000) / 1000,
      precipitation: 0,
      uvIndex: 5,
      updateTime: new Date().toISOString()
    },
    hourly: [], // 如需小时预报可另行处理
    daily: dailyList,
    historical: []
  }
}

// 组件挂载时获取数据
onMounted(() => {
  fetchWeather()
})
</script>

<template>
  <div class="weather-app">
    <div v-if="loading" class="loading">加载天气数据中...</div>
    <div v-else-if="error" class="error">{{ error }}</div>
    <template v-else-if="weatherData">
      <WeatherCard :data="weatherData" theme="light" locale="zh" />
      <DailyForecast :data="weatherData" :days="7" theme="light" locale="zh" />
    </template>
  </div>
</template>

<style scoped>
.weather-app {
  max-width: 800px;
  margin: 0 auto;
  padding: 20px;
}
.loading, .error {
  text-align: center;
  padding: 40px;
  font-size: 16px;
}
.error {
  color: #ff4444;
}
</style>
第三步:获取 OpenWeatherMap API Key
-
访问 OpenWeatherMap 注册账号
-
在控制台找到 API Keys 选项卡
-
复制你的 Key,替换代码中的
'你的OpenWeatherMap API密钥'
关于数据结构的重要说明
vue-weather-ui 组件要求的 WeatherData 接口包含以下字段:
| 字段 | 类型 | 说明 |
|---|---|---|
location |
Location | 城市名称、国家、坐标等 |
now |
WeatherNow | 当前温度、体感温度、天气描述、湿度、风速等 |
daily |
WeatherDaily\[\] | 每日预报数组(最高/低温、天气图标等) |
hourly |
WeatherHourly\[\] | 小时预报(可选) |
historical |
HistoricalWeather\[\] | 历史天气(可选) |
代码中的 transformWeatherData 函数就是负责将 OpenWeatherMap API 返回的原始数据转换成组件需要的格式。