文章目录
摘要
本周复现了CVPR2021的论文的实验GauHuman,经过前后三天的安装测试等内容,成功将实验运行起来,为后面的3D人体重建提供基础。
Abstract
This week, the experiment GauHuman from the CVPR2021 paper was reproduced. After three days of installation and testing, the experiment was successfully run, laying the foundation for subsequent 3D human body reconstruction.
1 GauHuman复现
1.1 系统
系统:Windows 11
显卡:NVIDIA GeForce RTX 3050
显卡驱动版本:Driver Version: 591.86
本次复现是在windows 11系统上进行,更推荐在Linux/WSL系统上复现,可以减少步骤。
1.2 安装
AnaConda安装
GauHuman代码下载
我并不在物理机上直接安装CUDA,我选择在Conda的虚拟环境内安装CUDA11.8。
下载VS2019的cl.exe
VS2019只需要点击使用桌面C++开发,选择第一个和第二个的MSVC和windows10 sdk安装即可,之后将cl.exe设置成环境变量,具体操作可百度。
按照GauHuman的README.md创建虚拟环境
python
conda create -n python3.8 python=3.8我的个人习惯,取名为python3.8可以清楚看到自己使用的python的版本。
然后安装CUDA
bash
conda activate python3.8
conda install -c nvidia cudatoolkit=11.8
conda install nvidia::cuda-nvcc==11.8.89
conda install nvidia::cuda-cudart-dev==11.8.89
conda install nvidia::libcusparse-dev
where nvcc
nvcc --version以上对应的版本可以在https://anaconda.org/channels/nvidia中找。
pytorch安装
在https://mirrors.aliyun.com/pytorch-wheels/cu118/?spm=a2c6h.25603864.0.0.5f6465533QYCVT找到
bash
conda activate python3.8
pip install torch-2.0.0+cu118-cp38-cp38-win_amd64.whl
pip install torchaudio-2.0.0+cu118-cp38-cp38-win_amd64whl
pip install torchvision-0.15.0+cu118-cp38-cp38-win_amd64.whl
1.2 安装submodules
运行
bash
conda activate python3.8
pip install .\submodules\diff-gaussian-rasterization
如果报错
bash
error: subprocess-exited-with-error

  × python setup.py bdist_wheel did not run successfully.
  │ exit code: 1
  ╰─> [9 lines of output]
      running bdist_wheel
      D:\miniconda\envs\python3.8\lib\site-packages\torch\utils\cpp_extension.py:476: UserWarning: Attempted to use ninja as the BuildExtension backend but we could not find ninja.. Falling back to using the slow distutils backend.
        warnings.warn(msg.format('we could not find ninja.'))
      running build
      running build_py
      creating build\lib.win-amd64-cpython-38\diff_gaussian_rasterization
      copying diff_gaussian_rasterization\__init__.py -> build\lib.win-amd64-cpython-38\diff_gaussian_rasterization
      running build_ext
      error: [WinError 2] 系统找不到指定的文件。
      [end of output]

  note: This error originates from a subprocess, and is likely not a problem with pip.
  ERROR: Failed building wheel for diff_gaussian_rasterization
  Running setup.py clean for diff_gaussian_rasterization
Failed to build diff_gaussian_rasterization
ERROR: ERROR: Failed to build installable wheels for some pyproject.toml based projects (diff_gaussian_rasterization)
按下windows键,搜索X64 Native Tools Command Prompt for VS 2019打开,然后cd D:\代码文件\,执行
bash
set DISTUTILS_USE_SDK=1
conda activate python3.8
pip install .\submodules\diff-gaussian-rasterization
pip install .\submodules\simple-knn安装KNN_CUDA,首先下载KNN_CUDA的代码
在windows安装Chocolate
然后安装make
bash
choco install make安装之后,编译KNN_CUDA,得到KNN_CUDA-0.2-py3-none-any.whl,运行
bash
conda activate python3.8
pip install KNN_CUDA-0.2-py3-none-any.whl
1.3 安装mmhuman3d
有作者移除了pickle5依赖的包https://github.com/Wei-Chen-hub/mmhuman3d.git,下载到本地进入文件夹,执行
bash
conda activate python3.8
pip install -r requirements.txt
pip install -v -e .
安装结束之后,回到GauHuman的文件夹,执行
bash
conda activate python3.8
pip install -r requirements.txt
1.4 数据集
数据集下载的是ZJU_MoCap,关于获取方式请自行百度,得到谷歌网盘的共享文件之后,文件的命名是Core_View_xxx,下载其中的一个作为这次复现的数据集。下载后解压,目录
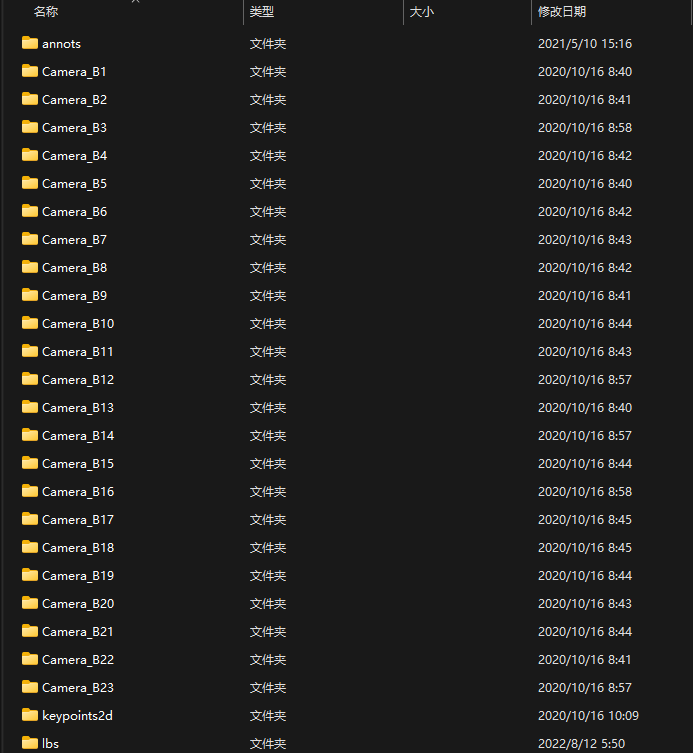
然后在文件夹新建一个images文件夹,将所有的Camera_B{x}剪切到images文件夹。 将数据集放到代码文件下,zju_mocap_refine自行创建。
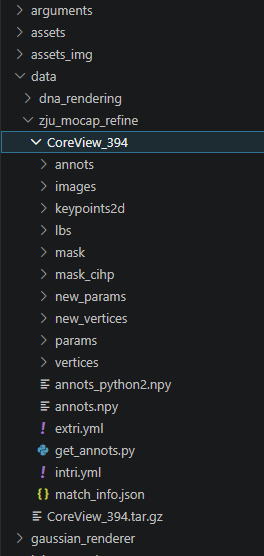
执行get_annots.py重新获取annots.npy scene下的dataset_readers.py的611行 ```python image_path = os.path.join(path, imspose_indexview_index.replace('\\', '/')) image_path = image_path.replace('.png', '.jpg') image_name = imspose_indexview_index.split('.')0 image = np.array(imageio.imread(image_path).astype(np.float32)/255.) msk_path = image_path.replace('images', 'mask').replace('jpg', 'png') ``` 以及664行 ```python vertices_path = os.path.join(path, 'new_vertices', '{}.npy'.format(i)) xyz = np.load(vertices_path).astype(np.float32) smpl_param_path = os.path.join(path, "new_params", '{}.npy'.format(i)) smpl_param = np.load(smpl_param_path, allow_pickle=True).item() ```
1.5 SMPL模型
SMPL下载,需要下载一个基础模型。
下载一个代码文件https://github.com/vchoutas/smplx.git,在smplx\\tools目录下的clean_ch.py中修改第34行的内容防止出现报错
python
def clean_fn(fn, output_folder='output'):
    with open(fn, 'rb') as body_file:
        body_data = pickle.load(body_file,encoding='latin1')
然后执行命令
python
conda activate python3.8
pip install chumpy
python tools/clean_ch.py --input-models \path\ --output-folder output-folder
然后将output的模型文件命名为SMPL_NEUTRAL.pkl,放到GauHuman的文件夹下的assets(自己创建)。
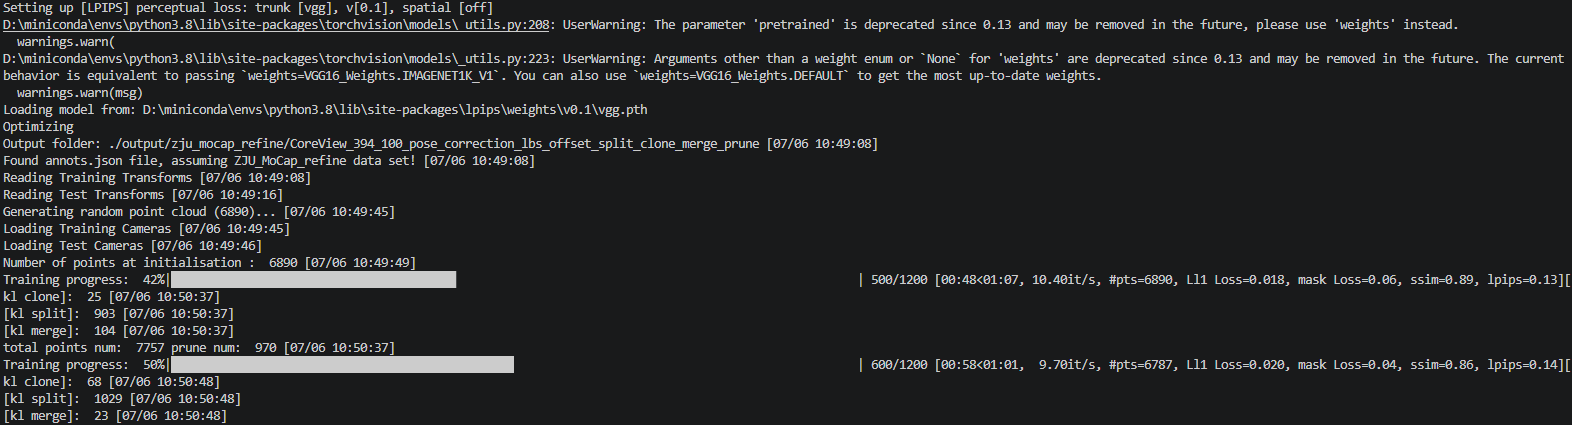
1.6 运行
执行命令
python
sh ./train_zju_mocap_refine.sh如果运行不了,就下载git,git可以在windows执行sh文件。
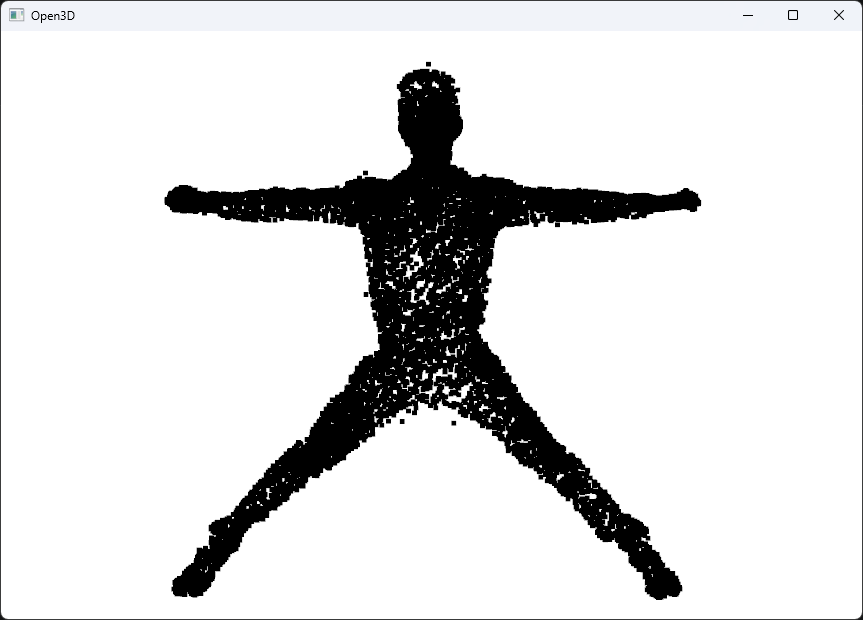
通过open3d可视化
总结
这个实验的论文在CVPR2021发布的,虽然已经距离现在很久了,但是可以作为入门进行探索。