问题描述
在vscode里开服务器登录codeX后发消息会一直reconnecting
原因分析:
大概率是端口配置的问题,可以进行如下测试
打开新终端,输入
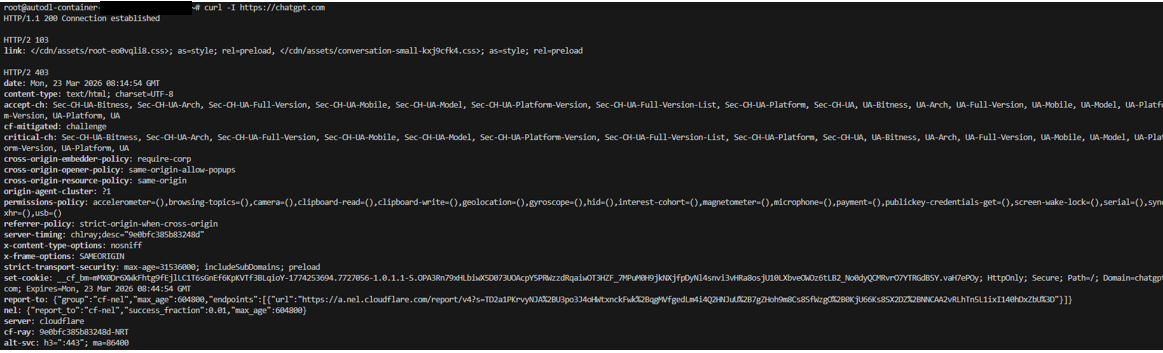
curl -I https://chatgpt.com
出现如下结果

这说明了一个非常关键的事实:远程服务器(AutoDL 的实例)被配置了全局代理,它正试图把所有的网络请求都发送到本地的 17890 端口上,但是,那个端口上根本没有代理软件在运行(或者代理软件挂掉了)。
解决方案:
解决配置问题
现在就要去看一下本地的config(一般在用户名下.ssh/config,在第一次连远程服务器建的)
Host xxx
    HostName connect.cqa1.seetacloud.com
    Port 31208
    User root
    IdentityFile "C:\Users\xxx\.ssh\id_ed25519"
    RemoteForward 7890 127.0.0.1:7890
问题在最后一行RemoteForward 7890 127.0.0.1:7890,意思是本地电脑的 7890 端口,映射到远程服务器的 7890 端口上。
应该改为:
RemoteForward 17890 127.0.0.1:7890即把远程服务器的 17890 端口,连接到我本地电脑的 7890 端口。(17890 是原因分析那里测出来的端口!)
再进行测试会像下图,解决问题:
相关探索过程:
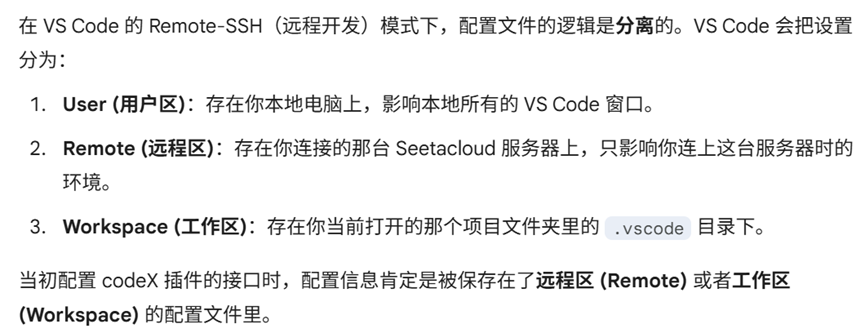
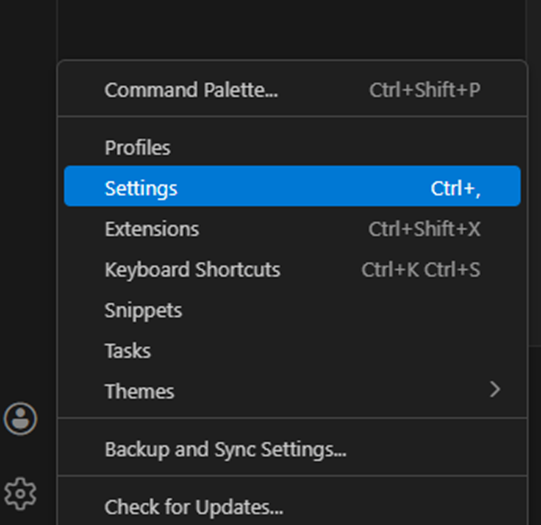
我们连上服务器后可以看远程区的settings,打开方式:

看得出来就是三个设置,用户、远程、工作区
然后就会发现:
哈哈根本没有配置的地方,因为:

codeX是"网页版逆向"路线,它把 ChatGPT 官方的网址直接写在了插件底层的代码里。那为什么会是17890端口呢,进行如下测试:

说明是以前手动加进去的,或者某个一键安装脚本写进了 ~/.bashrc 文件里,打开 ~/.bashrc 文件看到:
# ~/.bashrc: executed by bash(1) for non-login shells.
# see /usr/share/doc/bash/examples/startup-files (in the package bash-doc)
# for examples

# If not running interactively, don't do anything
[ -z "$PS1" ] && return

# don't put duplicate lines in the history. See bash(1) for more options
# ... or force ignoredups and ignorespace
HISTCONTROL=ignoredups:ignorespace

# append to the history file, don't overwrite it
shopt -s histappend

# for setting history length see HISTSIZE and HISTFILESIZE in bash(1)
HISTSIZE=1000
HISTFILESIZE=2000

# check the window size after each command and, if necessary,
# update the values of LINES and COLUMNS.
shopt -s checkwinsize

# make less more friendly for non-text input files, see lesspipe(1)
[ -x /usr/bin/lesspipe ] && eval "$(SHELL=/bin/sh lesspipe)"

# set variable identifying the chroot you work in (used in the prompt below)
if [ -z "$debian_chroot" ] && [ -r /etc/debian_chroot ]; then
    debian_chroot=$(cat /etc/debian_chroot)
fi

# set a fancy prompt (non-color, unless we know we "want" color)
case "$TERM" in
    xterm-color) color_prompt=yes;;
esac

# uncomment for a colored prompt, if the terminal has the capability; turned
# off by default to not distract the user: the focus in a terminal window
# should be on the output of commands, not on the prompt
#force_color_prompt=yes

if [ -n "$force_color_prompt" ]; then
    if [ -x /usr/bin/tput ] && tput setaf 1 >&/dev/null; then
	# We have color support; assume it's compliant with Ecma-48
	# (ISO/IEC-6429). (Lack of such support is extremely rare, and such
	# a case would tend to support setf rather than setaf.)
	color_prompt=yes
    else
	color_prompt=
    fi
fi

if [ "$color_prompt" = yes ]; then
    PS1='${debian_chroot:+($debian_chroot)}\[\033[01;32m\]\u@\h\[\033[00m\]:\[\033[01;34m\]\w\[\033[00m\]\$ '
else
    PS1='${debian_chroot:+($debian_chroot)}\u@\h:\w\$ '
fi
unset color_prompt force_color_prompt

# If this is an xterm set the title to user@host:dir
case "$TERM" in
xterm*|rxvt*)
    PS1="\[\e]0;${debian_chroot:+($debian_chroot)}\u@\h: \w\a\]$PS1"
    ;;
*)
    ;;
esac

# enable color support of ls and also add handy aliases
if [ -x /usr/bin/dircolors ]; then
    test -r ~/.dircolors && eval "$(dircolors -b ~/.dircolors)" || eval "$(dircolors -b)"
    alias ls='ls --color=auto'
    #alias dir='dir --color=auto'
    #alias vdir='vdir --color=auto'

    alias grep='grep --color=auto'
    alias fgrep='fgrep --color=auto'
    alias egrep='egrep --color=auto'
fi

# some more ls aliases
alias ll='ls -alF'
alias la='ls -A'
alias l='ls -CF'

# Alias definitions.
# You may want to put all your additions into a separate file like
# ~/.bash_aliases, instead of adding them here directly.
# See /usr/share/doc/bash-doc/examples in the bash-doc package.

if [ -f ~/.bash_aliases ]; then
    . ~/.bash_aliases
fi

# enable programmable completion features (you don't need to enable
# this, if it's already enabled in /etc/bash.bashrc and /etc/profile
# sources /etc/bash.bashrc).
#if [ -f /etc/bash_completion ] && ! shopt -oq posix; then
#    . /etc/bash_completion
#fi
source /etc/profile
source /etc/autodl-motd
export http_proxy=http://127.0.0.1:17890
export https_proxy=$http_proxy
关键就在最后两行了,应该是自己加的。
export http_proxy=http://127.0.0.1:17890
export https_proxy=$http_proxy
贴一张ai给出的配置流程:

记录自己的解决方式,希望有些帮助~