Azure Automation Runbook 使用 IMDS(实例元数据服务)地址来获取托管标识 Token
- 一、概述
- 二、步骤
-
- 1、创建自动化账户
- 2、创建Runbook
-
- [(1) 普通环境-脚本参考](#(1) 普通环境-脚本参考)
- [(2) 沙盒环境-脚本参考](#(2) 沙盒环境-脚本参考)
- [(3) 通用脚本](#(3) 通用脚本)
- 3、运行
- [三、拓展内容:使用 Power Automate获取Access Token](#三、拓展内容:使用 Power Automate获取Access Token)
一、概述
本文目的
使用Azure Automation Runbook 安全、自动地获取 Token,然后调用任何授权范围内的 Azure 资源,形成一个完整的自动化闭环。
说明
任何支持 Microsoft Entra ID(原 Azure AD)认证的 Azure 服务,都可以使用 Access Token 来调用。
在自动化脚本或后台服务这类没有用户交互的场景中,使用托管标识与 Access Token 被认为是 "最佳实践"。
优势
1、无须在代码、配置文件中存储或定期轮换密钥。
2、消除了密钥泄露的风险。Access Token 是短期有效的,权限也是事先通过 RBAC 精确授予的。
二、步骤
1、创建自动化账户
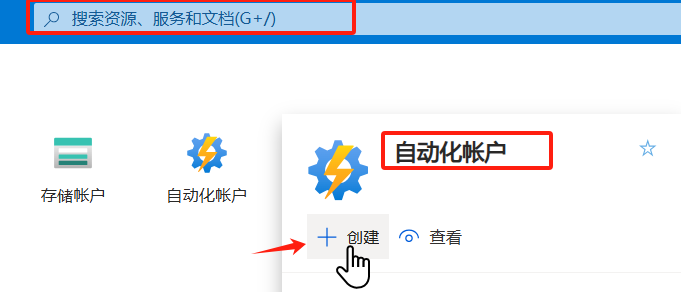
在Azure门户中搜索,自动化账户,然后创建自动化账户。
选择资源组,输入名称,然后审阅并创建就行了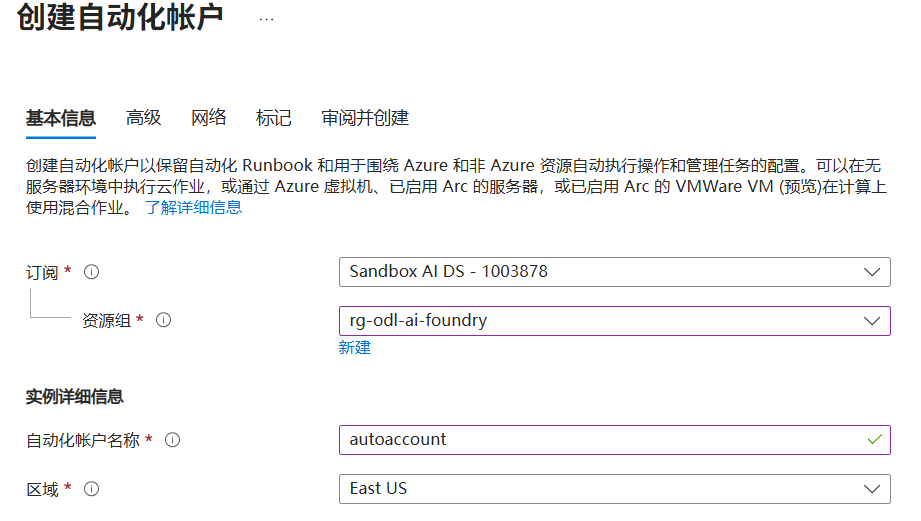
2、创建Runbook
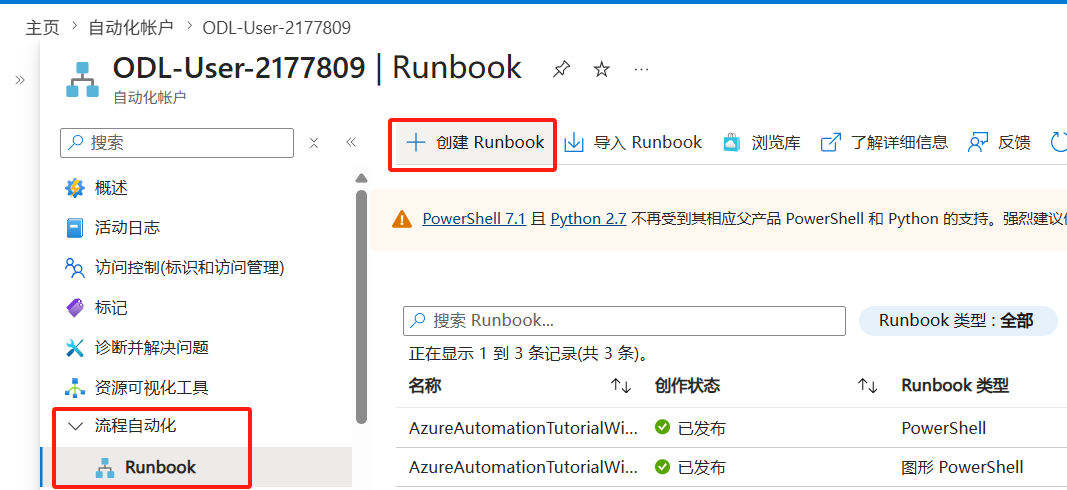
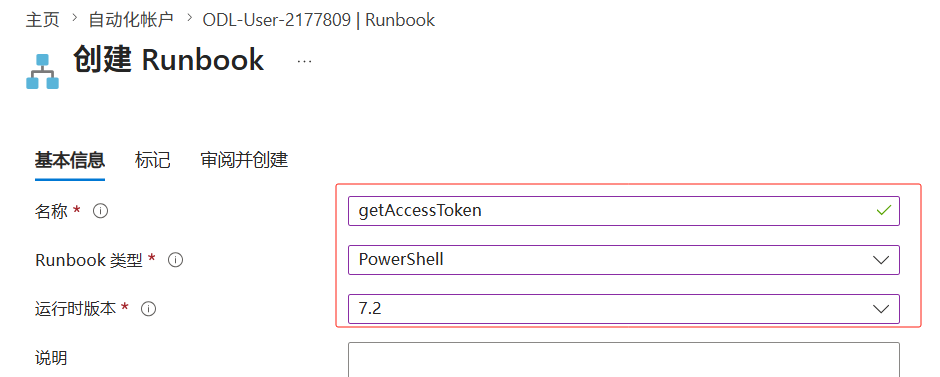
填好后,审阅并创建 ↓
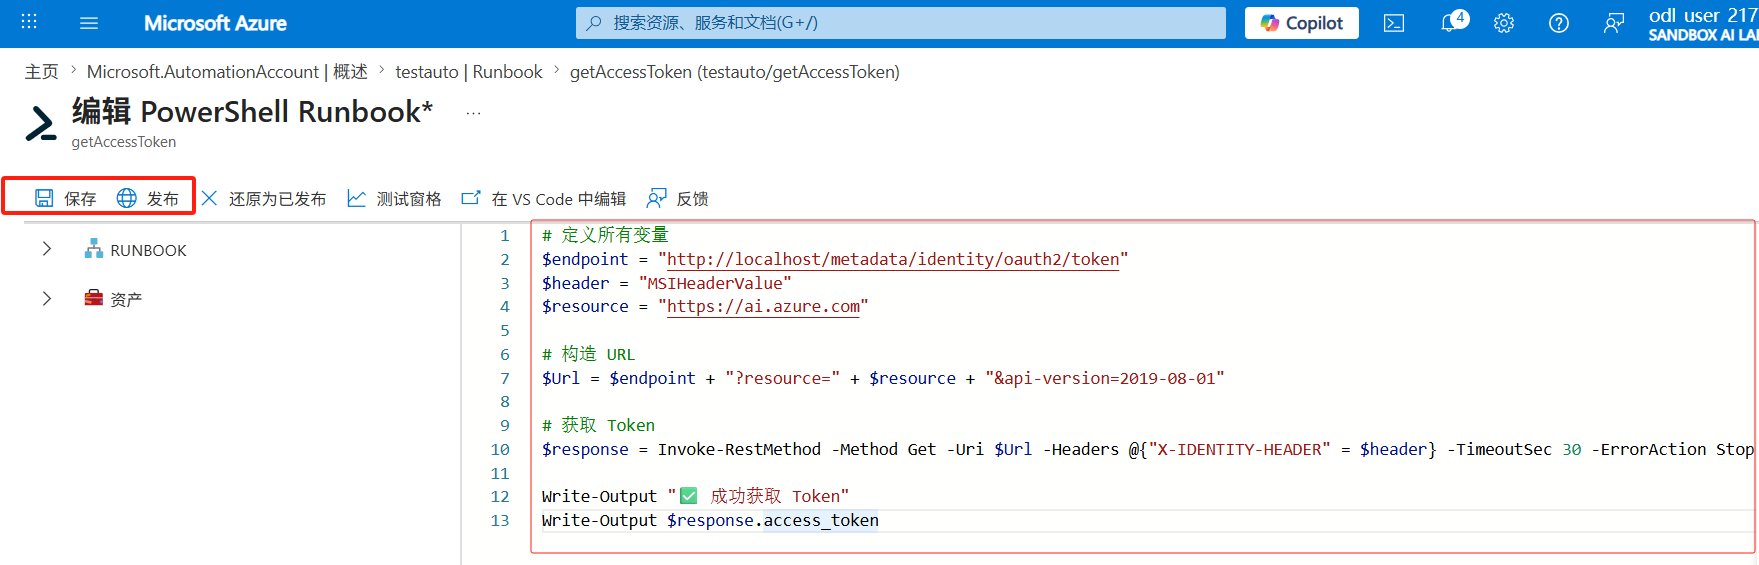
输入代码,保存,然后发布
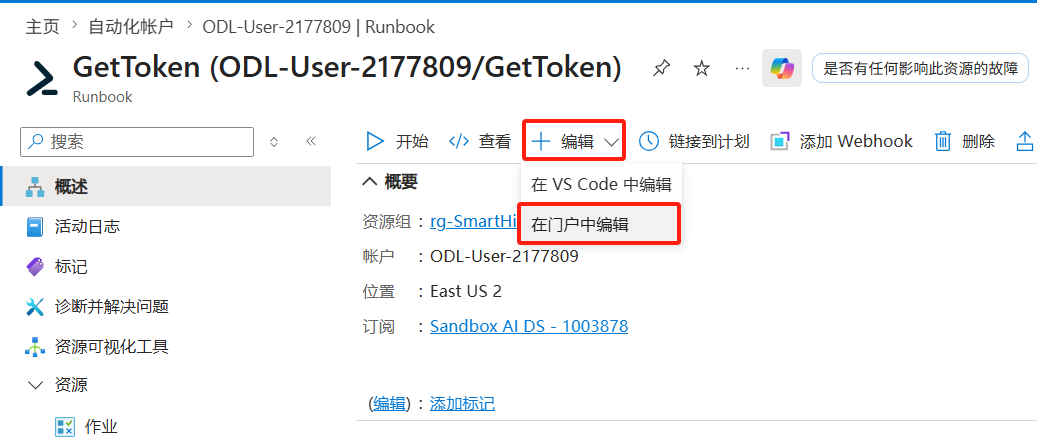
如果要修改代码,参考下图,选择在门户中编辑 ↓
(1) 普通环境-脚本参考
# 标准 IMDS 地址
$endpoint = "http://169.254.169.254/metadata/identity/oauth2/token"
$resource = "https://ai.azure.com"

# 构造 URL
$Url = $endpoint + "?resource=" + $resource + "&api-version=2018-02-01"

# 获取 Token(标准环境用 Metadata=true,不需要额外 header)
$response = Invoke-RestMethod -Method Get -Uri $Url -Headers @{Metadata="true"} -TimeoutSec 30 -ErrorAction Stop

Write-Output "✅ 成功获取 Token"
Write-Output $response.access_token
(2) 沙盒环境-脚本参考
Azure Automation 的 Runbook 运行在受限的沙盒环境中,微软对 IMDS 端点做了封装,需要用 localhost 加自定义 header。
# 定义所有变量
$endpoint = "http://localhost/metadata/identity/oauth2/token"
$header = "MSIHeaderValue"
$resource = "https://ai.azure.com"

# 构造 URL
$Url = $endpoint + "?resource=" + $resource + "&api-version=2019-08-01"

# 获取 Token
$response = Invoke-RestMethod -Method Get -Uri $Url -Headers @{"X-IDENTITY-HEADER" = $header} -TimeoutSec 30 -ErrorAction Stop

Write-Output "✅ 成功获取 Token"
Write-Output $response.access_token
(3) 通用脚本
两个环境都能跑的代码,沙盒环境已测试无误:
$resource = "https://ai.azure.com"

# 检测环境并使用正确的 endpoint 和 header
if ($env:IDENTITY_ENDPOINT) {
    # 沙盒环境(Automation Runbook)
    $endpoint = $env:IDENTITY_ENDPOINT
    $headers = @{"X-IDENTITY-HEADER" = $env:IDENTITY_HEADER}
    Write-Output "检测到沙盒环境"
} else {
    # 普通环境(VM / Function / App Service)
    $endpoint = "http://169.254.169.254/metadata/identity/oauth2/token"
    $headers = @{Metadata = "true"}
    Write-Output "检测到普通环境"
}

# 构造 URL 并获取 Token
$Url = $endpoint + "?resource=" + $resource + "&api-version=2019-08-01"
$response = Invoke-RestMethod -Method Get -Uri $Url -Headers $headers -TimeoutSec 30

Write-Output "✅ 成功获取 Token"
Write-Output $response.access_token
参考文章:
1、在不使用 Azure cmdlet 的情况下生成访问令牌
(在自动化 Runbook 的沙盒环境中,必须使用环境变量 env:IDENTITY_ENDPOINT 和 env:IDENTITY_HEADER)
(标准环境下的做法:使用固定的 IMDS 地址 169.254.169.254 和 Metadata: true 头)
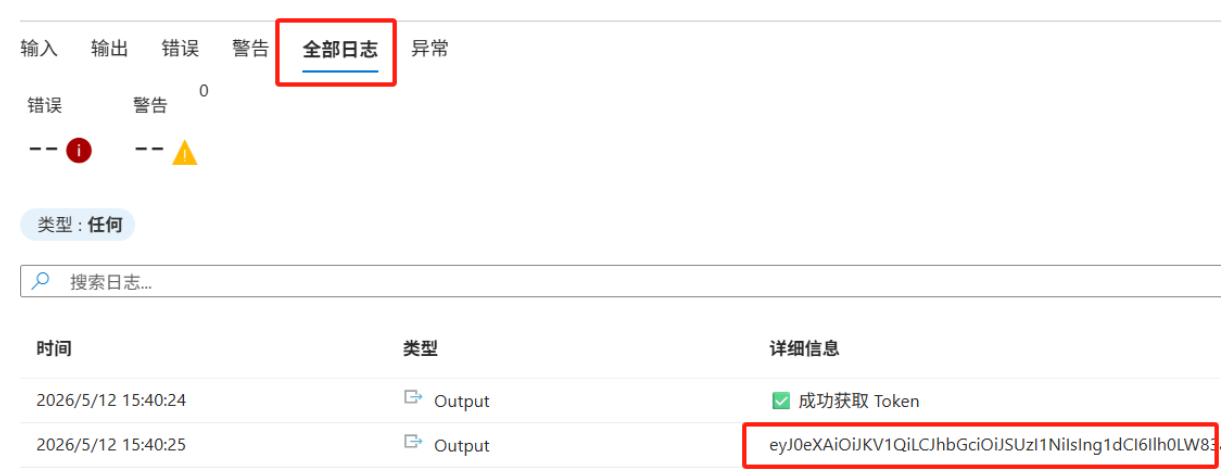
3、运行
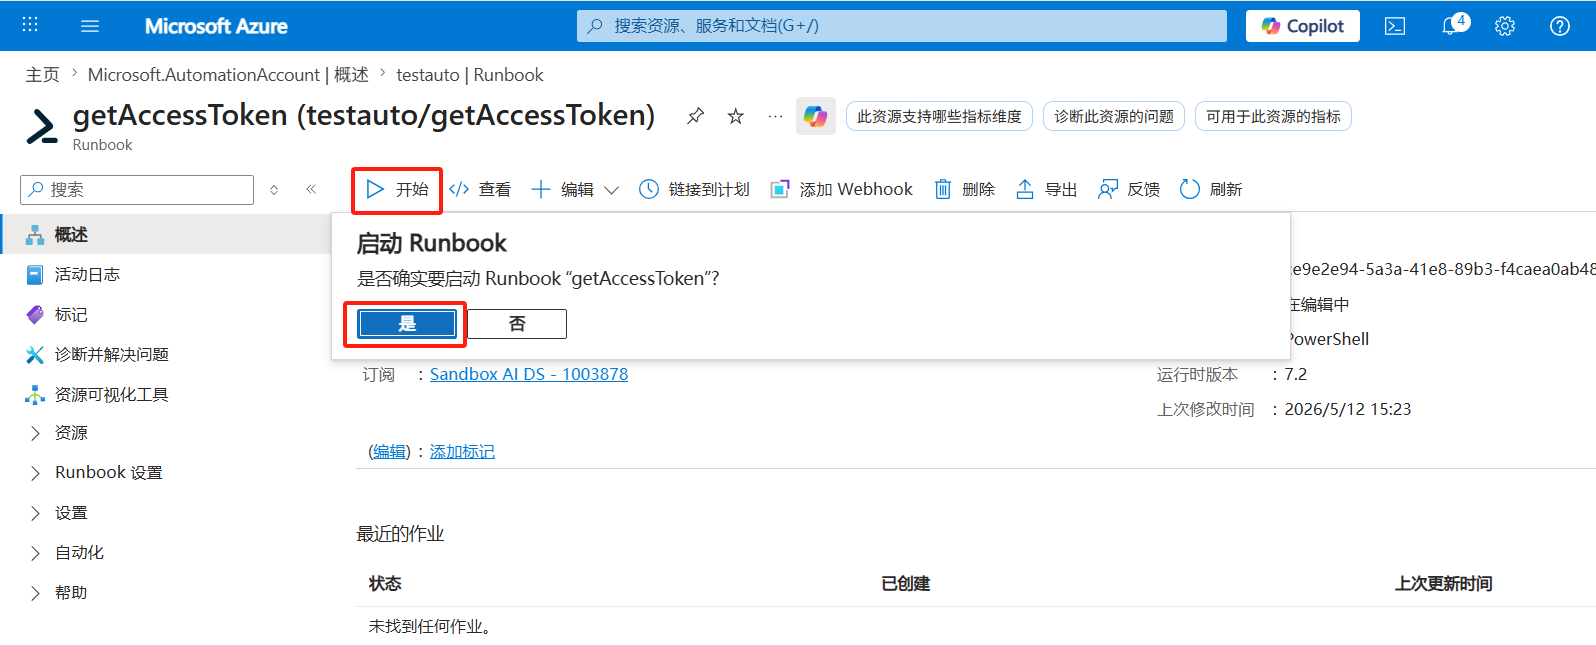
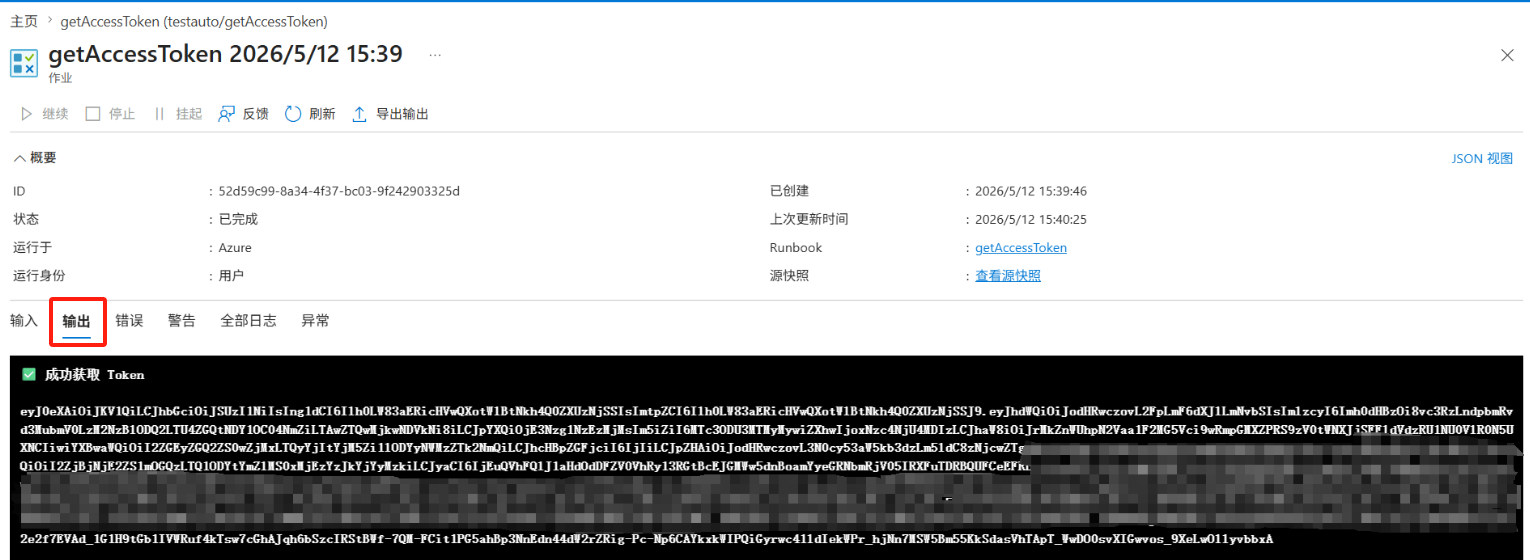
可以看到输出,和日志记录,启动运行有点慢,要等一会儿
三、拓展内容:使用 Power Automate获取Access Token
流程说明:
1、先创建一个Http触发的即时流,拿到Flow的调用链接。
2、通过Runbook写脚本,先获取Access Token,然后调用http,将token传给Power Automate的Flow。
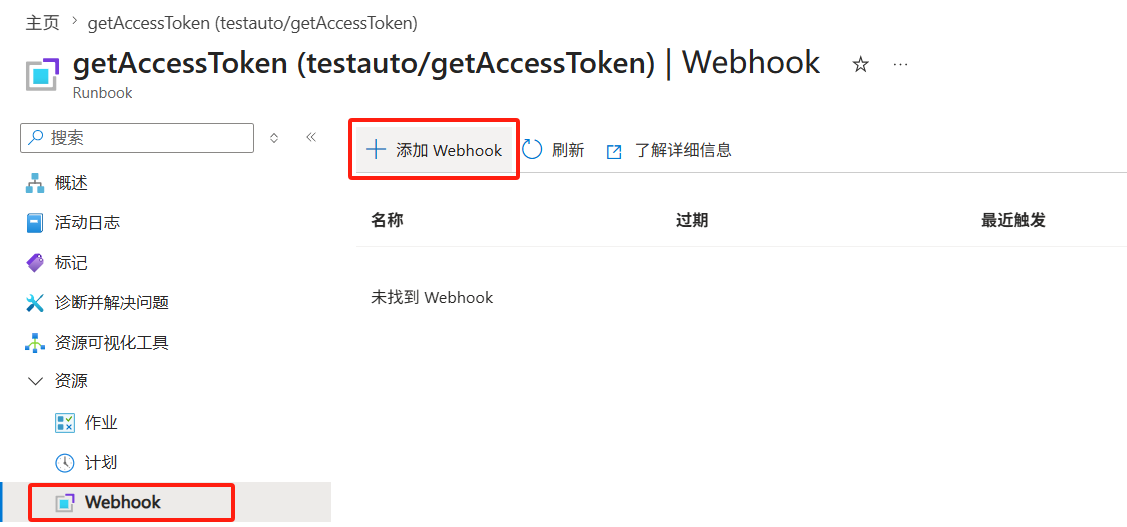
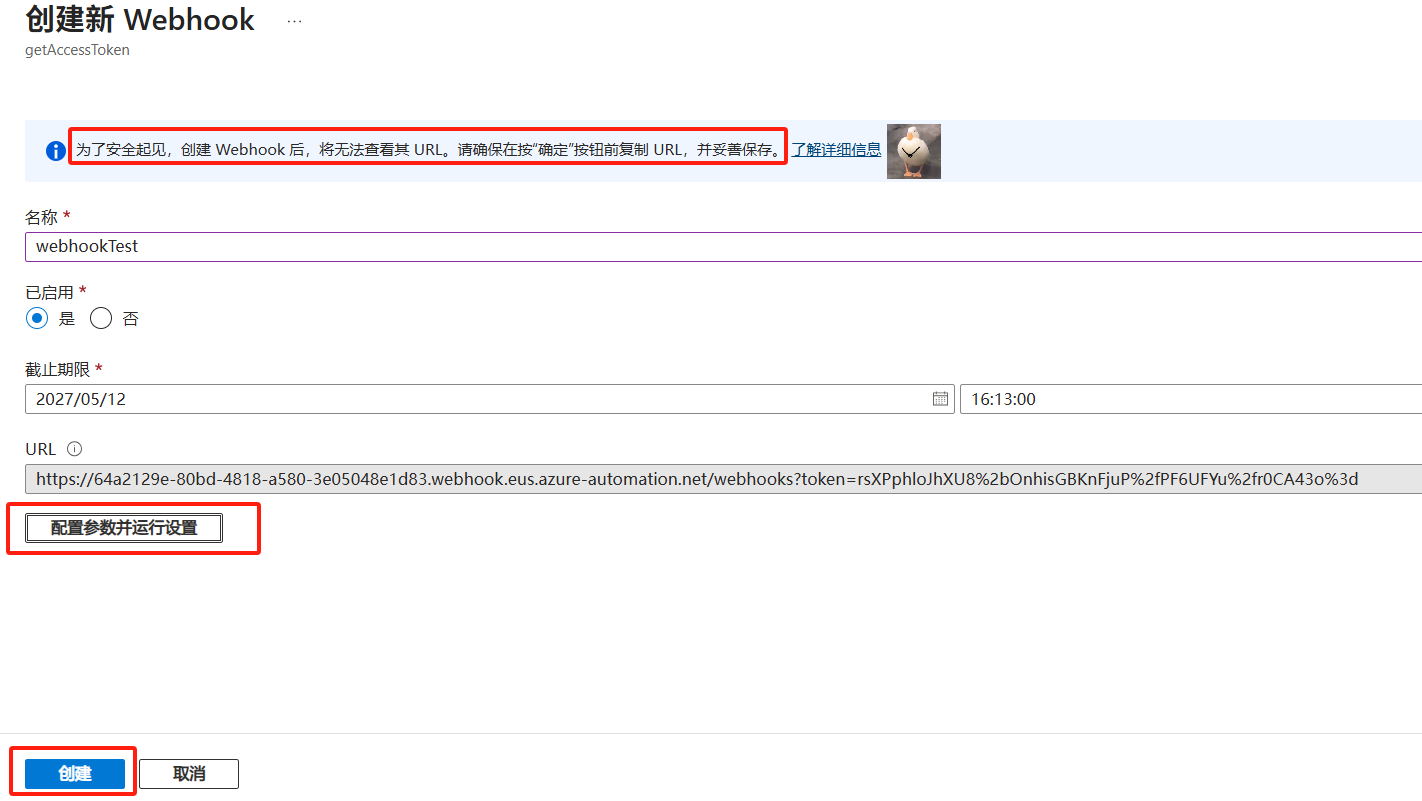
3、为Runbook创建一个 Webhook,保存Webhook链接。
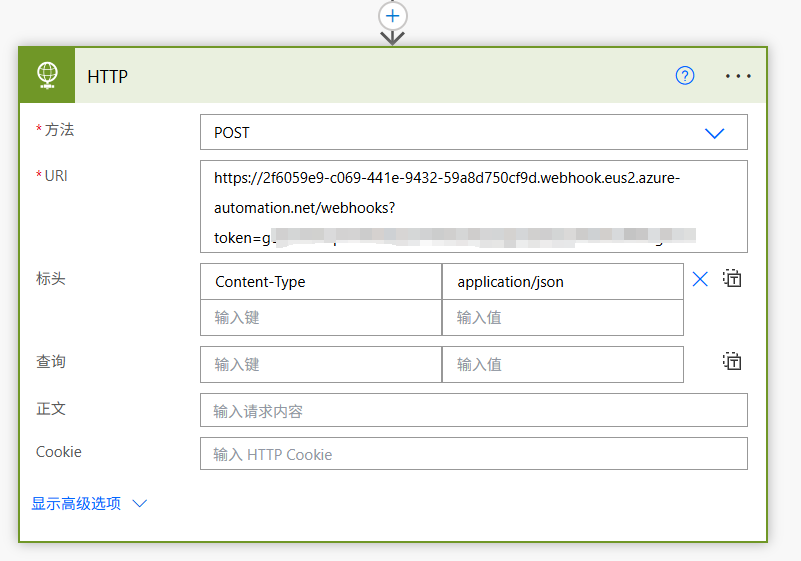
4、在Power Automate中创建一个定时Flow,定时运行,调用Azure Automation Webhook链接
整个过程:
定时Flow调用Webhook ------ Webhook启动 Runbook生成Token ------调用Http触发的Flow传递Token
1、添加Webhook
选择配置参数并运行,然后点Update按钮,之后下面的创建按钮才能点击,另外记得要保存链接,创建完就消失了。
2、Runbook脚本参考
记得替换代码里的Power Automate的Link
# 获取 Token
$endpoint = "http://localhost/metadata/identity/oauth2/token"
$header = "MSIHeaderValue"
$resource = "https://ai.azure.com"

$url = $endpoint + "?resource=" + $resource + "&api-version=2019-08-01"
$response = Invoke-RestMethod -Method Get -Uri $url -Headers @{"X-IDENTITY-HEADER" = $header} -TimeoutSec 30
$accessToken = $response.access_token

# 计算剩余秒数
$expiresInSeconds = 86400  # 默认24小时
if ($response.expires_on) { $expiresInSeconds = $response.expires_on - [int64]((Get-Date).ToUniversalTime() - (Get-Date "1970-01-01")).TotalSeconds }
if ($response.expires_in) { $expiresInSeconds = $response.expires_in }

# 过期时间(北京时间)
$expiresAt = (Get-Date).AddSeconds($expiresInSeconds).AddHours(8).ToString("yyyy-MM-dd HH:mm:ss")

Write-Output "resource: $resource"
Write-Output "token 前缀: $($accessToken.Substring(0, 50))..."
Write-Output "expiresAt: $expiresAt"
Write-Output "expiresInSeconds: $expiresInSeconds"

# 发送到 Power Automate
$powerAutomateUrl = "https://default3670e84658dd465886fb00e4029045.d6.environment.api.powerplatform.com:443/powerautomate/automations/direct/workflows/1d56556b0eb54970b5e4aa51eca915ea/triggers/manual/paths/invoke?api-version=1&sp=%2Ftriggers%2Fmanual%2Frun&sv=1.0&sig=dDb-byafrIPQE9mafGkAYohXjmLrbJewIHqY_v8n5vY"

$body = @{
    resource = $resource
    token = $accessToken
    expiresAt = $expiresAt
    expiresInSeconds = $expiresInSeconds
} | ConvertTo-Json

Write-Output "发送的 JSON: $bodyJson"

Invoke-RestMethod -Method Post -Uri $powerAutomateUrl -Body $body -ContentType "application/json"

Write-Output "✅ 发送成功"
3、Flow参考
(1) Http触发的Flow:
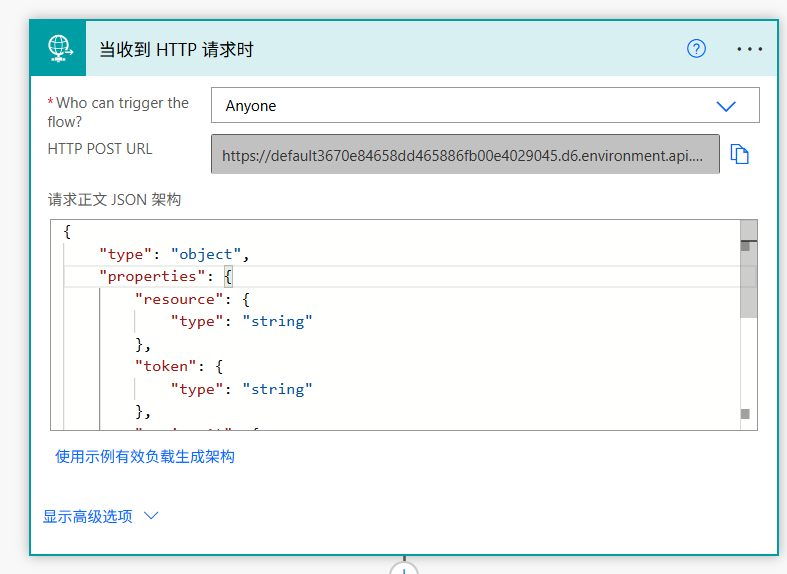
请求正文JSON架构
{
    "type": "object",
    "properties": {
        "resource": {
            "type": "string"
        },
        "token": {
            "type": "string"
        },
        "expiresAt": {
            "type": "string"
        },
        "expiresInSeconds": {
            "type": [
                "number",
                "integer"
            ]
        }
    }
}
(2)定时流:调用Webhook的节点
欢迎关注我的博客,与我一起学习,我将持续分享我的学习过程,我是 热爱学习的小翁同学~