概述
上节实现了嘟宝与嘟妈通过webrtc实现点对点通信。能够随时通过MQTT协议,拉取在后台运行嘟宝的音频流。 嘟宝是为监督孩子身边环境而创建的一套应用,它能够实现后台驻留长连接,随时接收嘟妈信令,建立音视频通道点对点通信,而不需要中转服务器。嘟妈是一套WEB 应用,使用vue3编写,能够兼容app、小程序开发 。而嘟宝采用原生Andorid开发,能够获取最大权限,保持在后台运行。 目前为止,嘟宝完成的基本功能设计包括
- MQTT 基础通信
- 后台驻留
- SQLite数据存储
- 二维码显示身份识别码
- 开启自启动前台服务
- 任务栏消息发送与点击
- 高德定位实时更新
- webrtc点对点通信
- mAgentWeb控件封装解决全屏与获取视频权限问题 嘟妈采用vue3编写它的核心需求已完成包含以下部分:
- 完成登录注册页面
- 完成二维码扫描完成与嘟宝绑定
- 与嘟妈建立音视频通信
- 查看嘟宝桌面共享视频 嘟妈使用vs code开发工具,将vue3同步到github上,同时安装GitHub Copilot与GitHub Copilot Chat。 Copilot free免费版本对于一般开发者用户,相当够用了。
GitHub Copilot Chat
本质上是 GitHub Copilot 的对话式交互版本,一种内置于 IDE 的 AI 编程助手。
- 上下文感知:它能理解你当前打开的代码文件、光标位置,甚至选中的代码片段,并基于这些上下文给出更精准的回答
- 多模态能力:除了纯文本对话,它通常支持通过 @ 命令(如 /explain、/fix、/tests)来触发特定的快捷操作,也能引用当前文件或工作区中的其他文件作为上下文
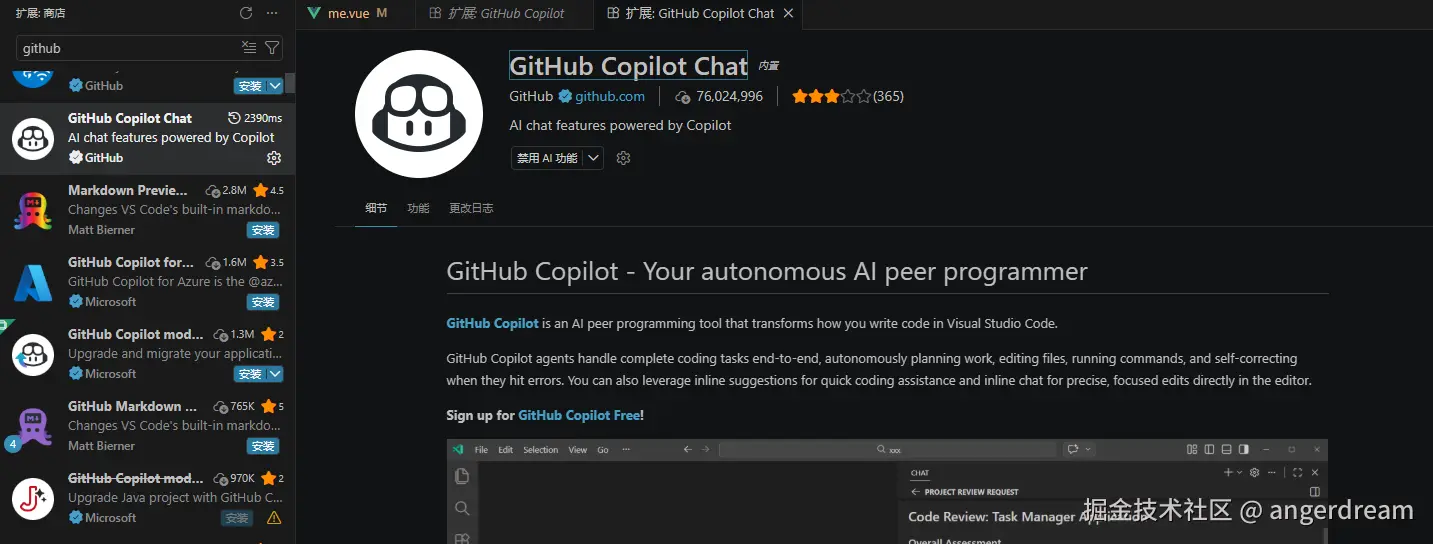
- 内联交互:你不仅可以在专门的聊天窗口提问,也可以直接在代码编辑器里选中代码,通过右键菜单或快捷键唤出内联聊天框,快速执行"解释这段代码"或"生成单元测试"等任务 在vscode扩展商店安装GitHub Copilot 与GitHub Copilot Chat两个控件,安装完成后,提示登录,若无法登录,则应考虑网络问题,如下图:
 安装完成后,在右侧出现 Copilot Chat,如下图:
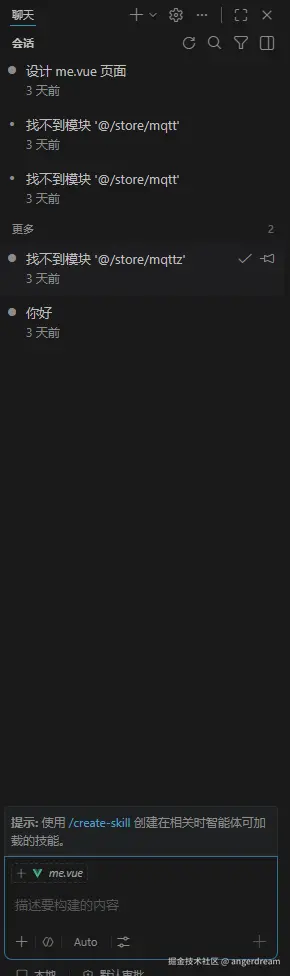
使用 Copilot Chat设计me.vue
嘟妈首页与扫码页面设计完成,me页面内容是空的,使用Copilot Chat设计该页面,只需要一句话描述的话即可。
clike
帮我设计me.vue我的页面如下图: 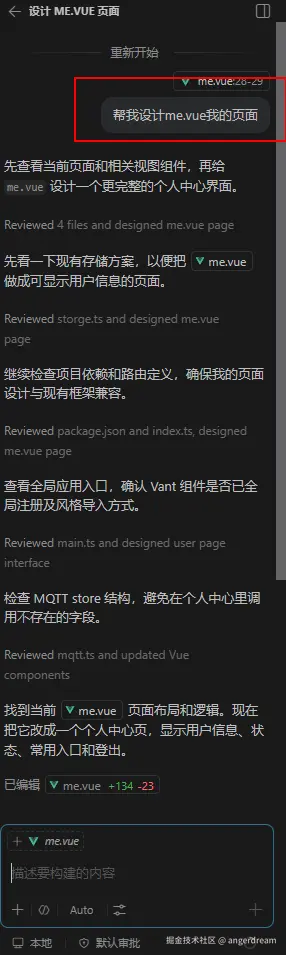
运行查看ai设计的页面是否够用,如下图: 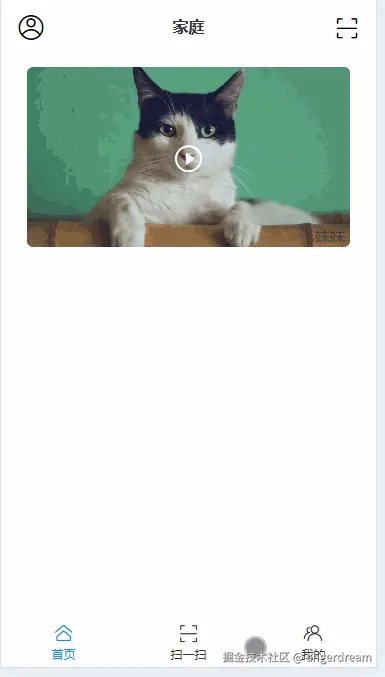
一句话,生成的页面,还是相当满意的。接下来看下源码,
clike
<template>
  <div class="me-page">
    <div class="profile-banner">
      <div class="profile-avatar">
        <van-icon name="user-circle-o" size="42" />
      </div>
      <div class="profile-info">
        <div class="profile-name">{{ userName }}</div>
        <div class="profile-subtitle">设备ID:{{ user.dumaId || '暂无' }}</div>
        <div class="profile-status">{{ connectionStatus }}</div>
      </div>
    </div>

    <van-cell-group>
      <van-cell title="账号" :value="user.account || '未绑定'" icon="contact" />
      <van-cell title="登录状态" :value="connectionStatus" icon="info-o" />
      <van-cell title="最新消息" :value="messagePreview" icon="chat-o" />
    </van-cell-group>

    <div class="menu-list">
      <van-cell title="扫一扫" is-link icon="scan" @click="goToCode" />
      <van-cell title="我的收藏" is-link icon="star-o" @click="showNotReady('我的收藏')" />
      <van-cell title="设置" is-link icon="setting-o" @click="showNotReady('设置')" />
      <van-cell title="关于我们" is-link icon="info-o" @click="showNotReady('关于我们')" />
    </div>

    <div class="action-area">
      <van-button block round type="primary" @click="handleLogout">退出登录</van-button>
    </div>
  </div>
</template>

<script setup lang="ts">
import { computed, reactive, onMounted } from 'vue'
import { useRouter } from 'vue-router'
import { showToast } from 'vant'
import { useMQTTStore } from '@/store/mqtt'
import { getUserData, removeUserData } from '@/api/storge'

const router = useRouter()
const mqtt = useMQTTStore()

const user = reactive({ account: '', dumaId: '' })
const userName = computed(() => (user.account ? user.account : '嘟妈用户'))
const messagePreview = computed(() => mqtt.datamsg || '暂无消息')
const connectionStatus = computed(() => (mqtt.duma ? '已连接' : '未连接'))

function loadUser() {
  const raw = getUserData()
  if (!raw) {
    router.replace('/login')
    return
  }
  try {
    const parsed = JSON.parse(raw)
    user.account = parsed.account || ''
    user.dumaId = parsed.dumaId || ''
  } catch (error) {
    console.warn('解析用户信息失败', error)
  }
}

function handleLogout() {
  removeUserData()
  showToast('已退出登录')
  router.replace('/login')
}

function goToCode() {
  router.push('/code')
}

function showNotReady(title: string) {
  showToast(`${title} 功能正在开发中`)
}

onMounted(() => {
  loadUser()
})
</script>

<style scoped>
.me-page {
  min-height: 100vh;
  background-color: #f5f7fb;
}

.profile-banner {
  display: flex;
  align-items: center;
  gap: 16px;
  padding: 30px 22px 28px;
  background: linear-gradient(135deg, #409eff 0%, #6f96ff 100%);
  color: #fff;
  border-bottom-left-radius: 20px;
  border-bottom-right-radius: 20px;
}

.profile-avatar {
  width: 72px;
  height: 72px;
  border-radius: 50%;
  background: rgba(255, 255, 255, 0.18);
  display: flex;
  align-items: center;
  justify-content: center;
}

.profile-info {
  flex: 1;
}

.profile-name {
  font-size: 20px;
  font-weight: 700;
  margin-bottom: 6px;
}

.profile-subtitle,
.profile-status {
  font-size: 14px;
  color: rgba(255, 255, 255, 0.84);
  line-height: 1.5;
}

.menu-list {
  margin-top: 18px;
}

.action-area {
  padding: 18px 22px;
}

:deep(.van-cell) {
  background-color: #fff;
}

:deep(.van-cell__title) {
  font-weight: 500;
}

:deep(.van-button) {
  margin-top: 10px;
}
</style>
它能够根据我开发的进度,使用ui库与第三方库,帮我生成对应的代码。 后面我只需要对该页面进行裁剪,就可得到想要的页面。