第 2 篇:设计第一套字节码:Opcode、Instruction 与 Constant Pool
1. 本文目标
上一篇我们写了一台最小 VM,它执行的是对象形式的指令:
javascript
[
  { op: 'LOAD_CONST', value: 1 },
  { op: 'LOAD_CONST', value: 2 },
  { op: 'ADD' },
  { op: 'RETURN' },
]
本篇要把这套"适合人读"的指令改造成更接近真实 VM 的数字 bytecode:
javascript
{
  bytecode: [1, 0, 1, 1, 2, 3],
  constantPool: [1, 2]
}
我们会亲手实现:
-
Opcode -
Instruction -
Bytecode -
Constant Pool -
一个能执行数字 bytecode 的最小 VM
2. 为什么需要字节码
对象指令很好懂,但不够像真正的机器语言:
javascript
{ op: 'LOAD_CONST', value: 1 }它像一张写得很清楚的便签。便签适合人类阅读,但机器更喜欢编号、索引和表格。
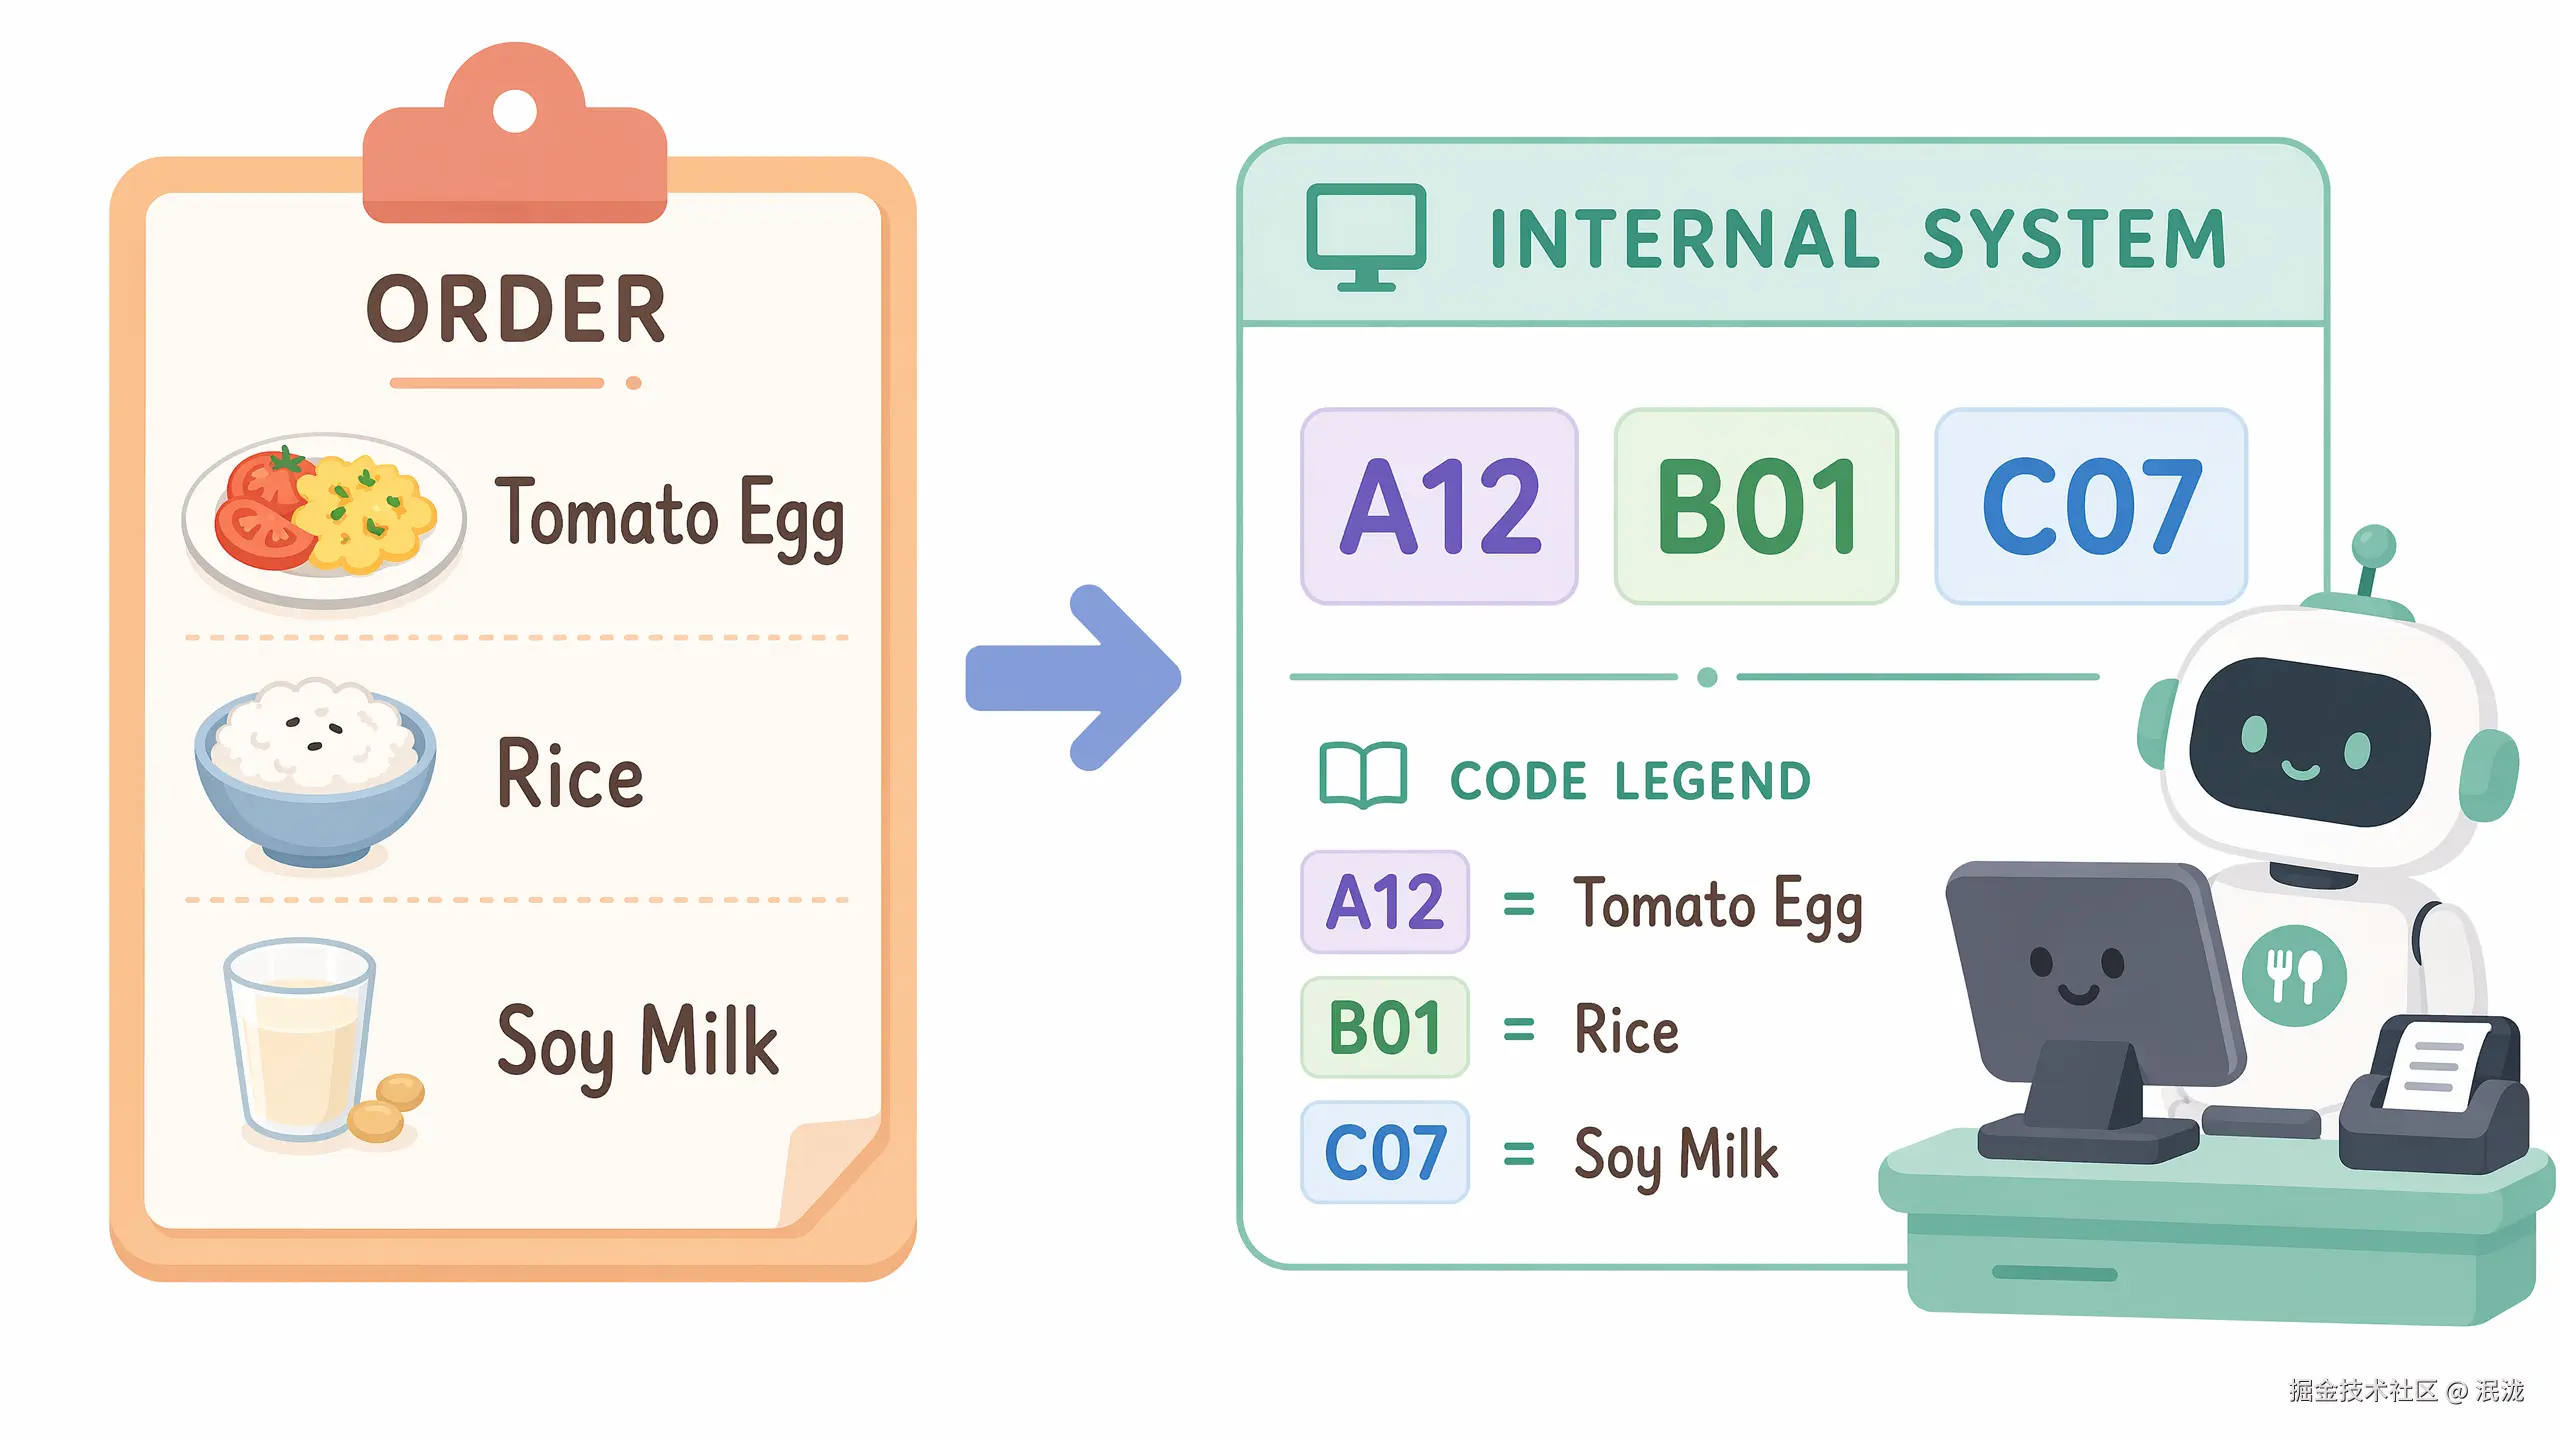
一个形象化比喻:菜单编号
在餐厅里,你可以对服务员说:
plaintext
我要一份番茄炒蛋,一份米饭,一杯豆浆。但餐厅内部系统可能只记录:
plaintext
A12 B01 C07其中:
plaintext
A12 = 番茄炒蛋
B01 = 米饭
C07 = 豆浆
为什么要这么做?
因为编号更短、更稳定,也更方便系统处理。VM 也是一样。
javascript
{ op: 'LOAD_CONST', value: 1 }适合人读。
javascript
[1, 0]适合 VM 执行。
3. 前置知识
| 概念 | 解释 |
|---|---|
| Opcode | 指令编号,例如 LOAD_CONST = 1 |
| Instruction | 编译阶段的人类可读指令 |
| Bytecode | VM 真正执行的数字数组 |
| Constant Pool | 保存常量的表,bytecode 只保存索引 |
4. 源码中的对应位置
| 概念 | 源码位置 | 说明 |
|---|---|---|
| Opcode | src/runtime/opcodes.ts |
定义正式 VM 支持的操作码 |
| Bytecode | src/compiler/types.ts |
ProgramArtifact.bytecode 是数字数组 |
| Constant Pool | src/compiler/emit.ts |
ConstantPool 类负责常量去重 |
| IR 到 Bytecode | src/compiler/emit.ts |
emitBytecode() 把 IR 编成数字 bytecode |
正式源码的 ProgramArtifact 包含 bytecode 和 constantPool,这两个字段就是 runtime 执行程序时最核心的数据。
5. 核心数据结构
5.1 Opcode
它解决什么问题
Opcode 用一个稳定编号表示一种 VM 操作。
它的数据结构
javascript
const OPCODES = {
  LOAD_CONST: 1,
  ADD: 2,
  RETURN: 3,
};
它在源码中的对应位置
正式源码的 OPCODES 定义在 src/runtime/opcodes.ts。正式实现有更多 opcode,例如 LOAD_CONST、BINARY、RETURN、CALL、MAKE_FUNCTION。
教学版简化实现
javascript
console.log(OPCODES.LOAD_CONST); // 1使用示例
javascript
const bytecode = [OPCODES.LOAD_CONST, 0];5.2 Instruction
它解决什么问题
Instruction 是 bytecode 之前的可读形态,方便编译器生成与调试。
它的数据结构
typescript
type Instruction =
  | { op: 'LOAD_CONST'; value: unknown }
  | { op: 'ADD' }
  | { op: 'RETURN' };
它在源码中的对应位置
正式源码中会先形成 IR 指令,再由 emitBytecode() 编成数字 bytecode。
教学版简化实现
javascript
const instructions = [
  { op: 'LOAD_CONST', value: 1 },
  { op: 'LOAD_CONST', value: 2 },
  { op: 'ADD' },
  { op: 'RETURN' },
];
使用示例
javascript
for (const instruction of instructions) {
  console.log(instruction.op);
}
5.3 Bytecode
它解决什么问题
Bytecode 用紧凑的数字数组表示程序。
它的数据结构
typescript
type Bytecode = number[];它在源码中的对应位置
正式源码中的 ProgramArtifact.bytecode 类型就是 number[]。
教学版简化实现
javascript
const bytecode = [
  OPCODES.LOAD_CONST, 0,
  OPCODES.LOAD_CONST, 1,
  OPCODES.ADD,
  OPCODES.RETURN,
];
使用示例
javascript
let pc = 0;
const opcode = bytecode[pc++];
console.log(opcode); // 1
5.4 Constant Pool
它解决什么问题
Constant Pool 把常量统一放到一张表里,bytecode 只保存索引。
一个形象化比喻:仓库货架
把常量池想象成仓库货架:
plaintext
0 号货架:1
1 号货架:2
2 号货架:"hello"
bytecode 不直接搬货物,只写货架编号:
plaintext
LOAD_CONST 0意思是:
plaintext
去 0 号货架取货。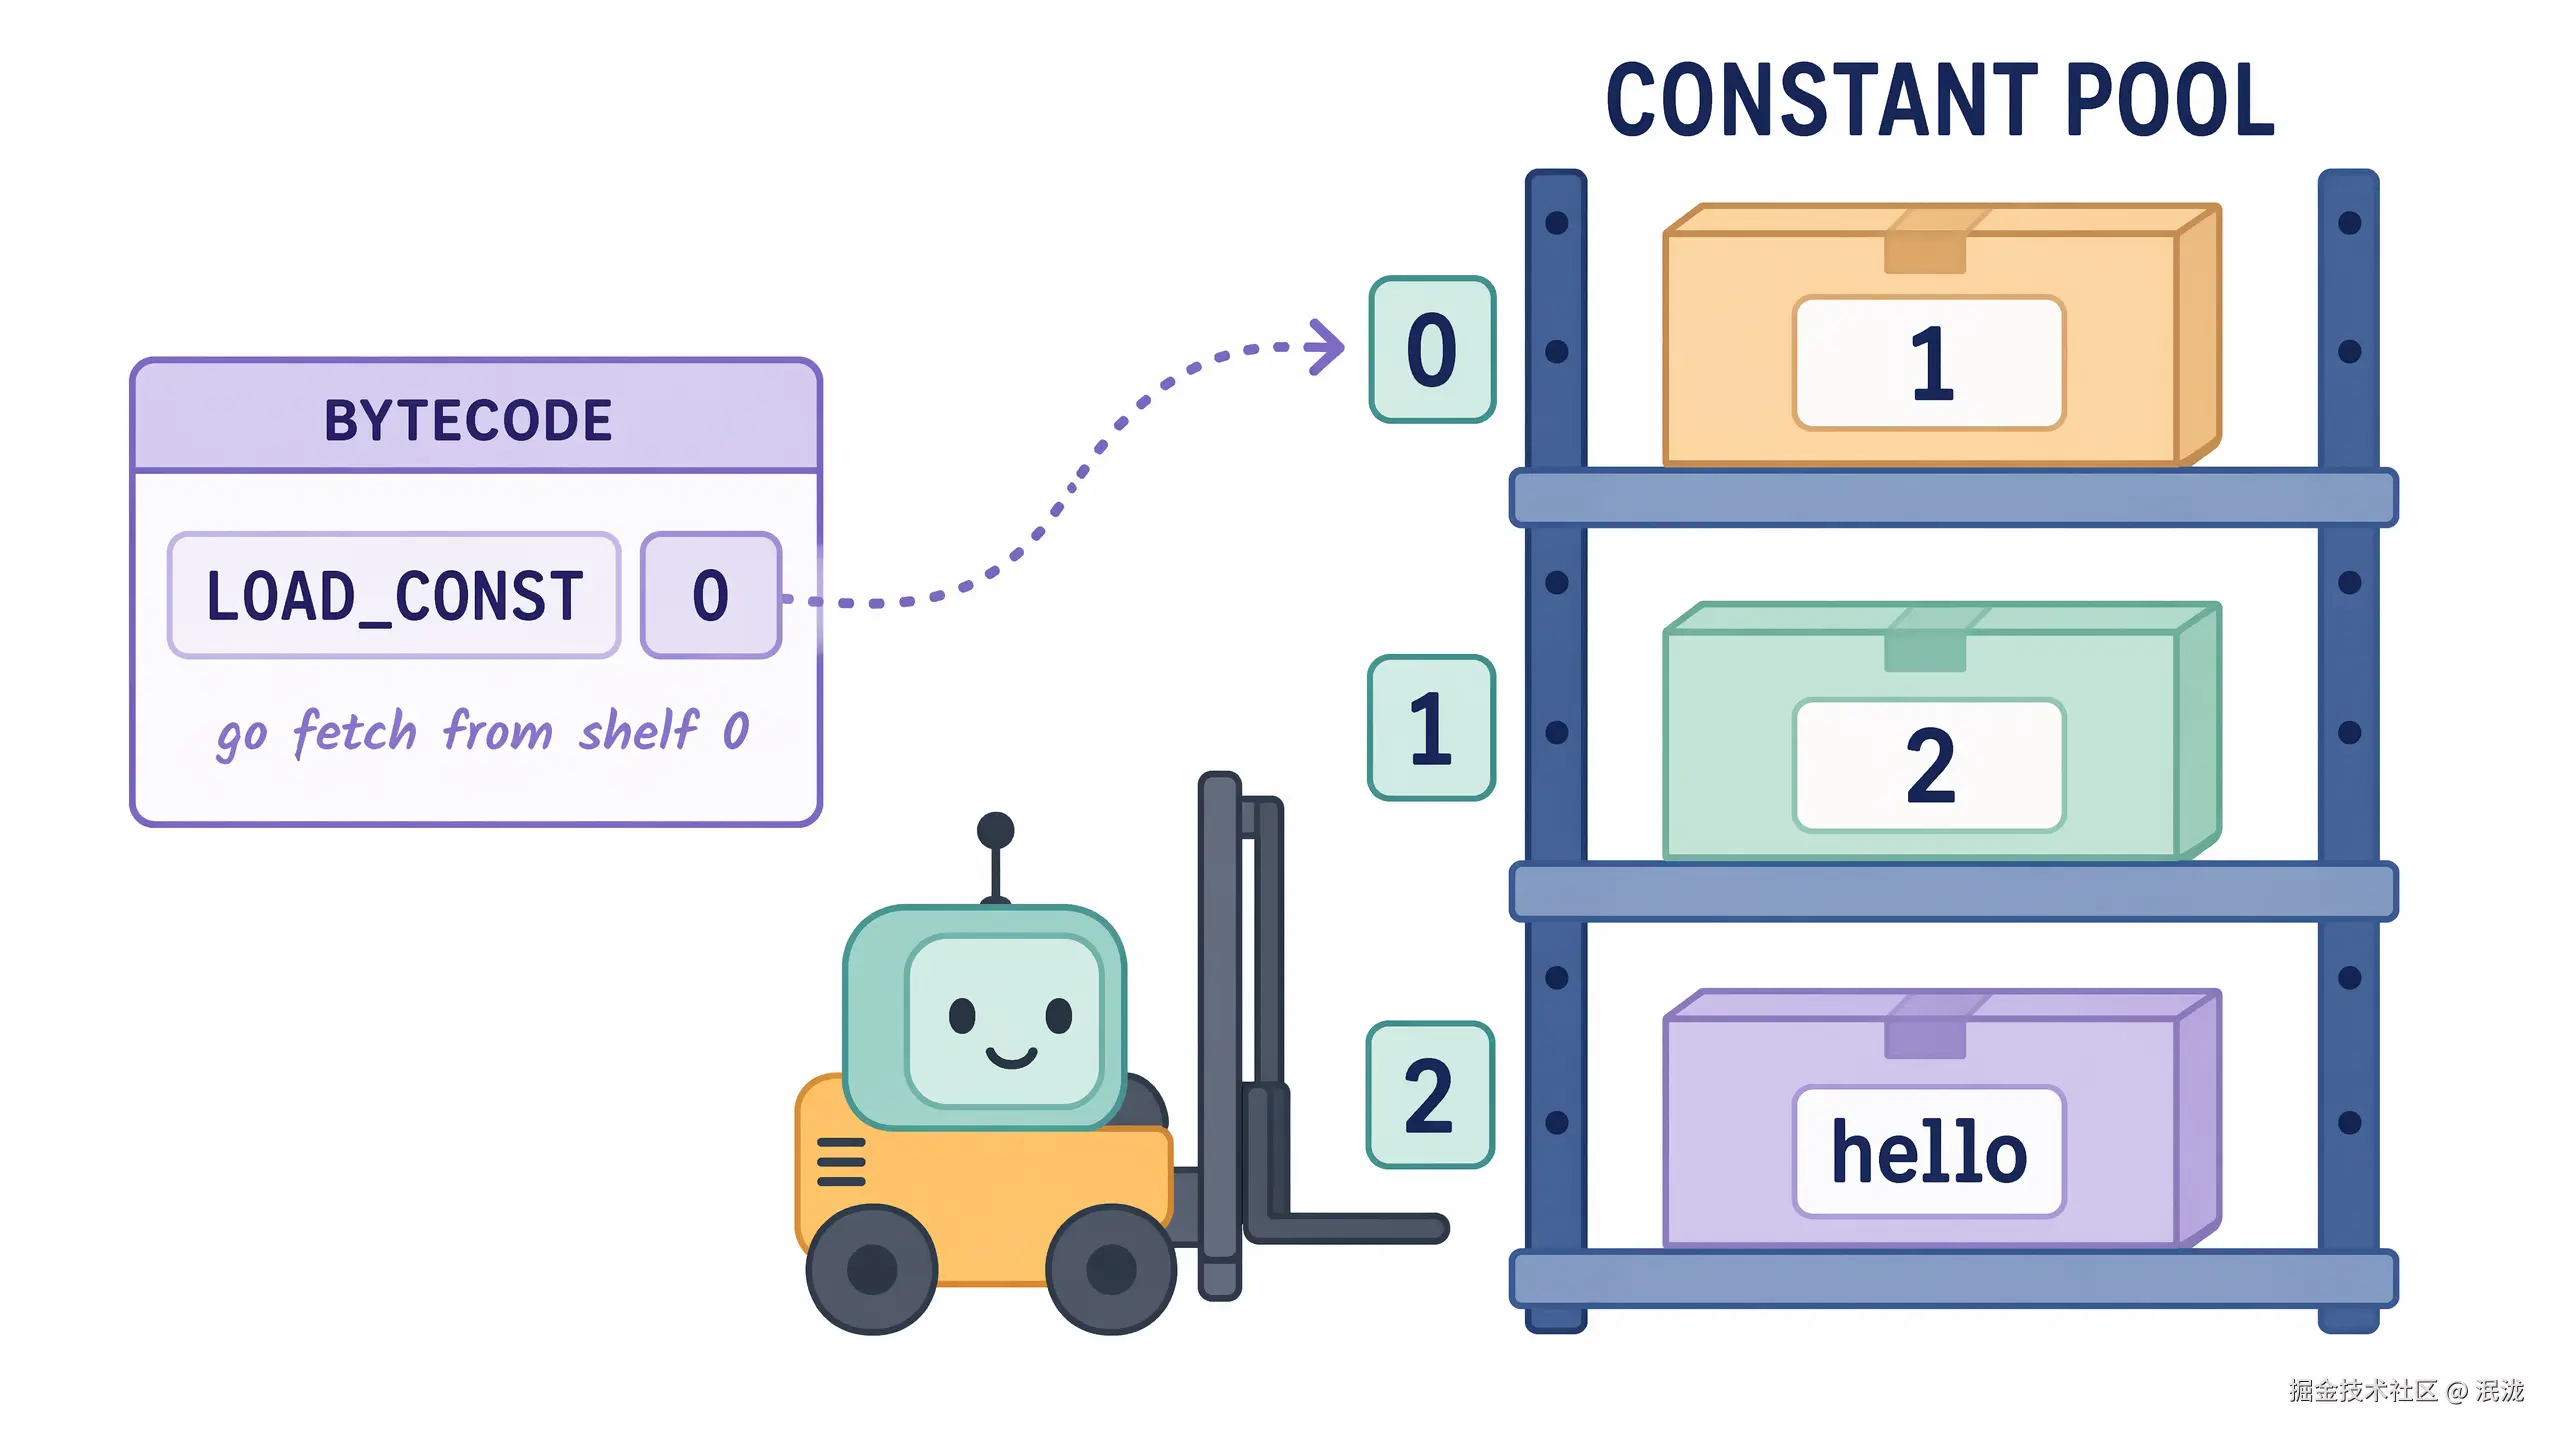
它的数据结构
javascript
class ConstantPool {
  constructor() {
    this.values = [];
    this.map = new Map();
  }

  add(value) {
    const key = JSON.stringify(value);

    if (this.map.has(key)) {
      return this.map.get(key);
    }

    const index = this.values.length;
    this.values.push(value);
    this.map.set(key, index);
    return index;
  }
}
它在源码中的对应位置
正式源码的 src/compiler/emit.ts 中也有 ConstantPool 类,维护 values 和 map,用 add(value) 返回常量索引。
教学版简化实现
javascript
const pool = new ConstantPool();

console.log(pool.add(1)); // 0
console.log(pool.add(2)); // 1
console.log(pool.add(1)); // 0
console.log(pool.values); // [1, 2]
使用示例
javascript
const constantPool = [1, 2];
const value = constantPool[0];
console.log(value); // 1
6. Mermaid 图解
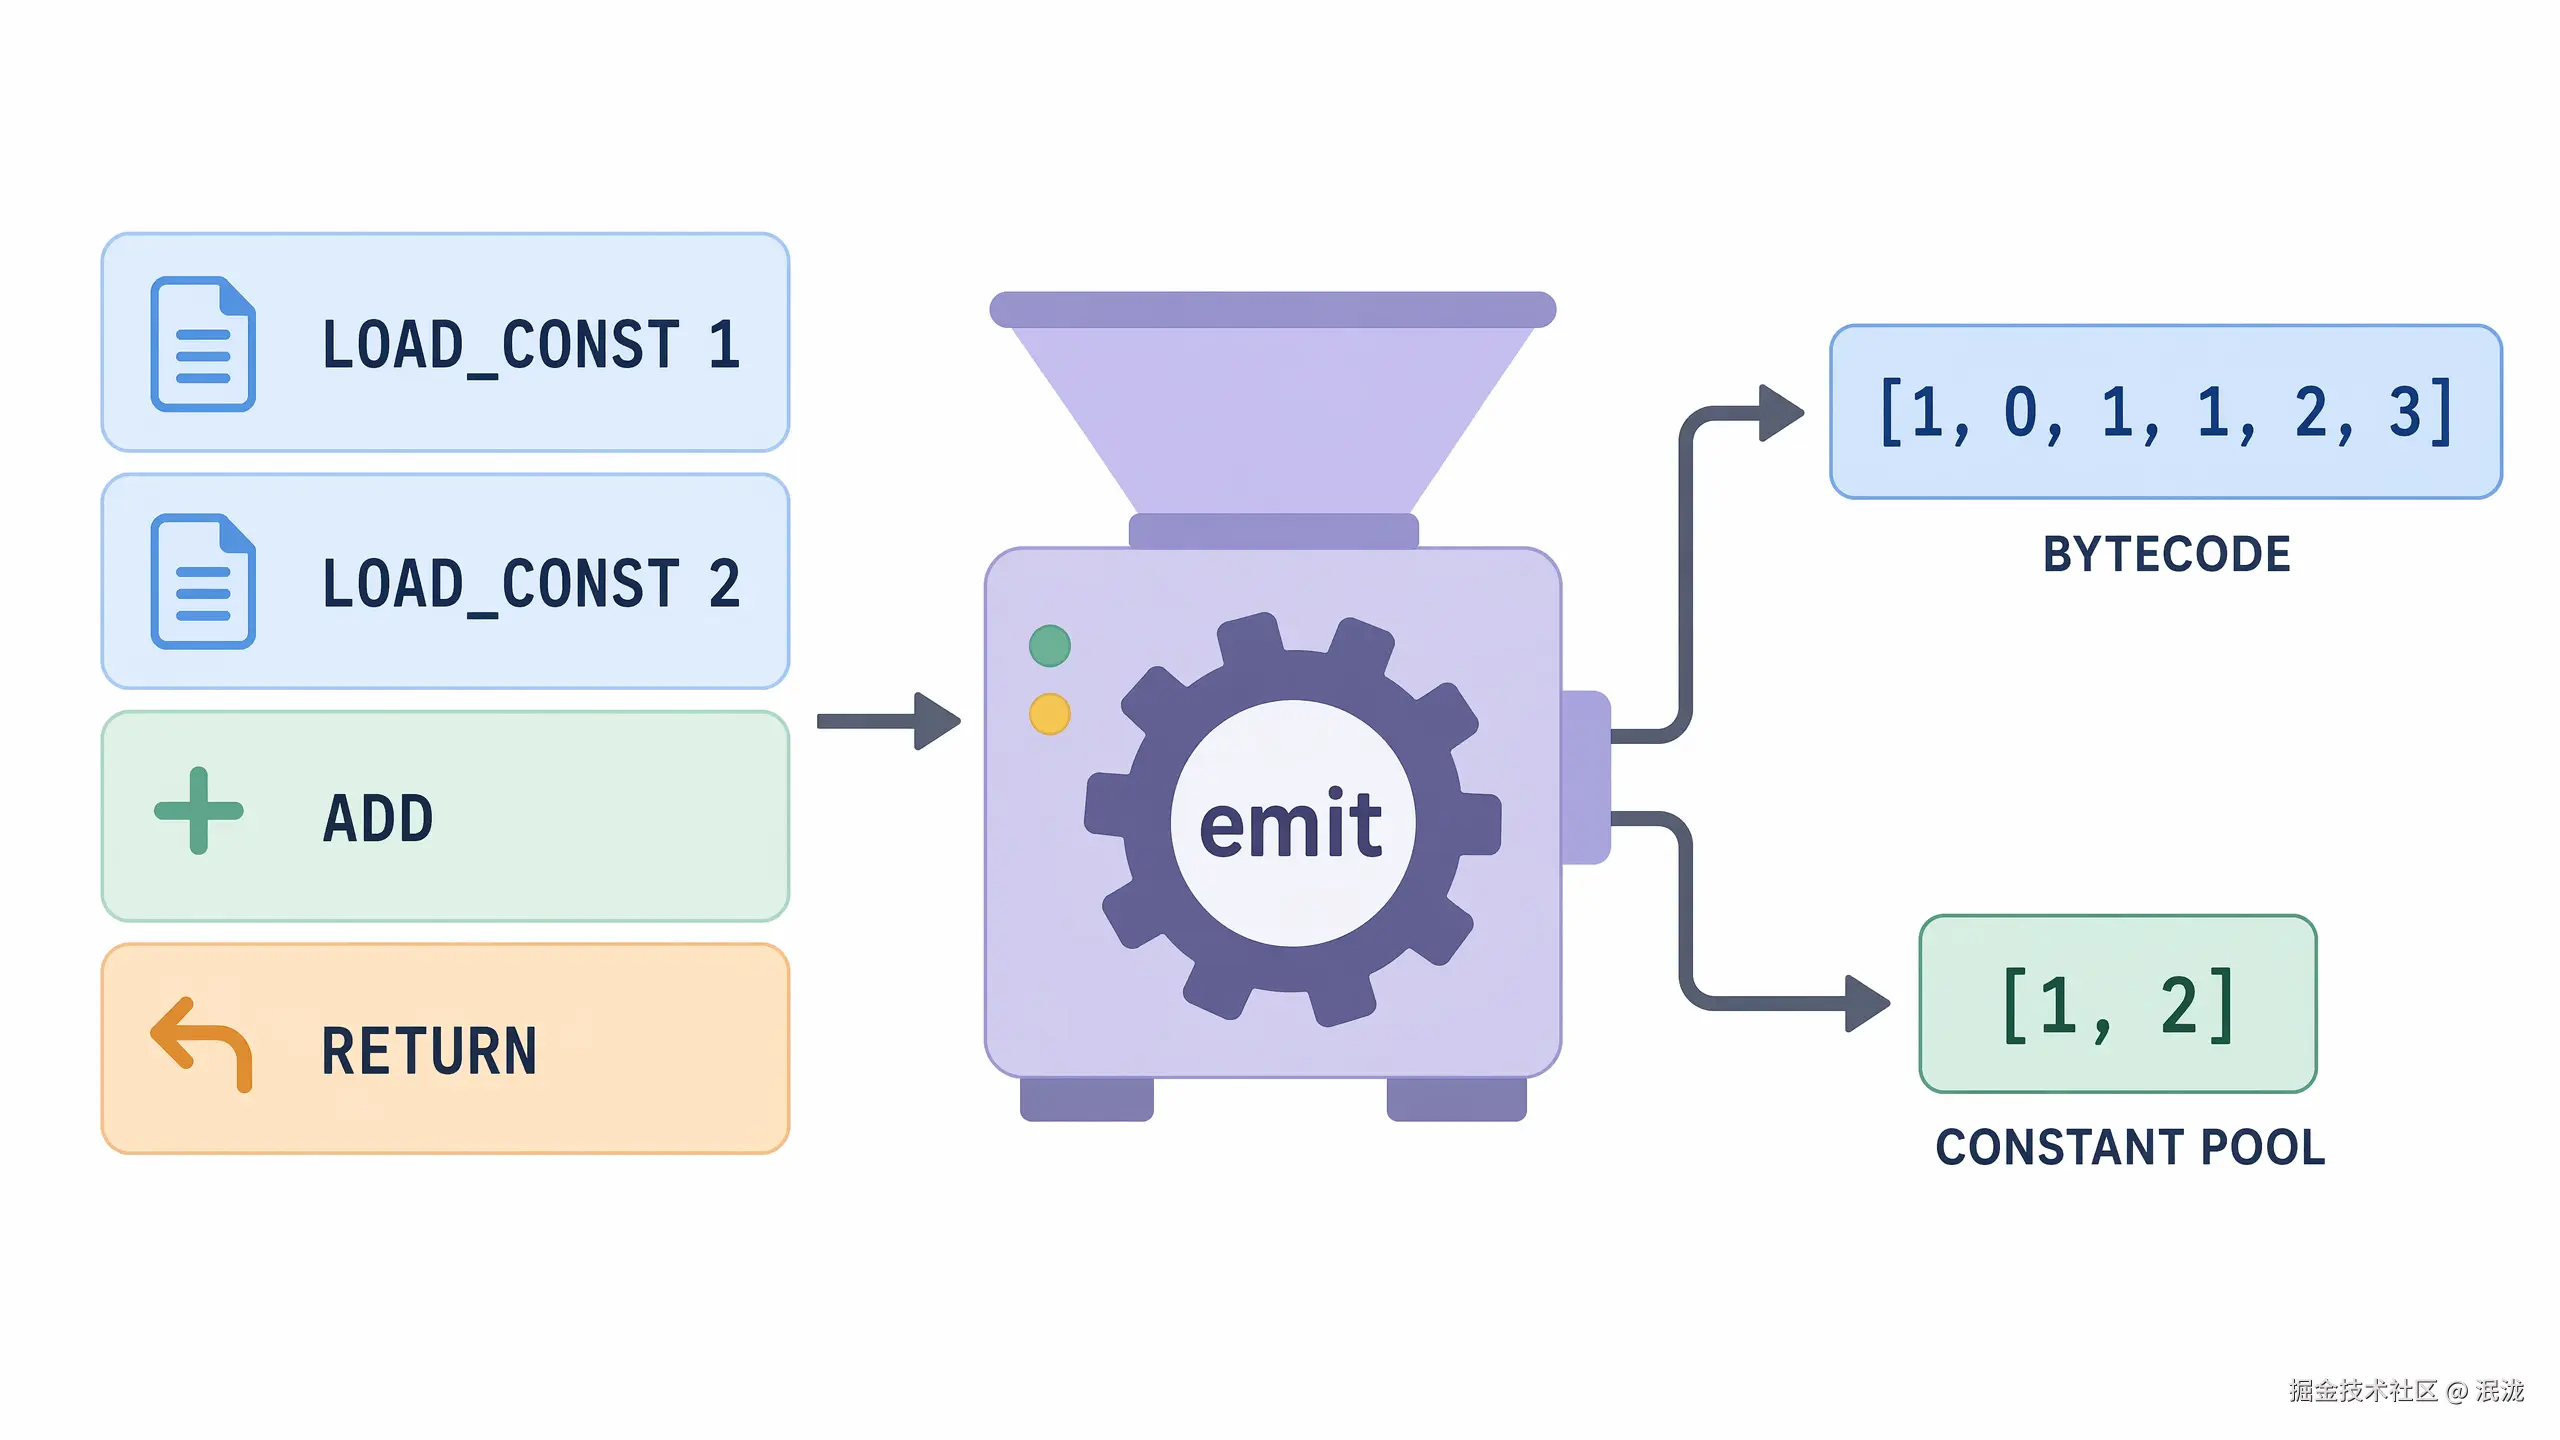
6.1 从对象指令到 bytecode
6.2 Constant Pool 工作方式
6.3 Bytecode 执行循环
7. 伪代码
7.1 emit:对象指令转 bytecode
plaintext
function emit(instructions):
    constantPool = []
    bytecode = []

    for each instruction in instructions:
        switch instruction.op:
            case LOAD_CONST:
                index = add instruction.value to constantPool
                push OPCODES.LOAD_CONST to bytecode
                push index to bytecode

            case ADD:
                push OPCODES.ADD to bytecode

            case RETURN:
                push OPCODES.RETURN to bytecode

    return { bytecode, constantPool }
7.2 run:执行数字 bytecode
plaintext
function run(bytecode, constantPool):
    stack = []
    pc = 0

    while pc < bytecode.length:
        opcode = bytecode[pc]
        pc = pc + 1

        switch opcode:
            case LOAD_CONST:
                constIndex = bytecode[pc]
                pc = pc + 1
                push constantPool[constIndex] to stack

            case ADD:
                right = pop stack
                left = pop stack
                push left + right to stack

            case RETURN:
                return pop stack
8. 教学版实现代码
javascript
const OPCODES = {
  LOAD_CONST: 1,
  ADD: 2,
  RETURN: 3,
};

class ConstantPool {
  constructor() {
    this.values = [];
    this.map = new Map();
  }

  add(value) {
    const key = JSON.stringify(value);

    if (this.map.has(key)) {
      return this.map.get(key);
    }

    const index = this.values.length;
    this.values.push(value);
    this.map.set(key, index);
    return index;
  }
}

function emit(instructions) {
  const pool = new ConstantPool();
  const bytecode = [];

  for (const instruction of instructions) {
    switch (instruction.op) {
      case 'LOAD_CONST': {
        const index = pool.add(instruction.value);
        bytecode.push(OPCODES.LOAD_CONST, index);
        break;
      }

      case 'ADD':
        bytecode.push(OPCODES.ADD);
        break;

      case 'RETURN':
        bytecode.push(OPCODES.RETURN);
        break;

      default:
        throw new Error(`Unknown instruction: ${instruction.op}`);
    }
  }

  return {
    bytecode,
    constantPool: pool.values,
  };
}

function run(bytecode, constantPool) {
  const stack = [];
  let pc = 0;

  while (pc < bytecode.length) {
    const opcode = bytecode[pc++];

    switch (opcode) {
      case OPCODES.LOAD_CONST: {
        const constIndex = bytecode[pc++];
        stack.push(constantPool[constIndex]);
        break;
      }

      case OPCODES.ADD: {
        const right = stack.pop();
        const left = stack.pop();
        stack.push(left + right);
        break;
      }

      case OPCODES.RETURN:
        return stack.pop();

      default:
        throw new Error(`Unknown opcode: ${opcode}`);
    }
  }
}

const instructions = [
  { op: 'LOAD_CONST', value: 1 },
  { op: 'LOAD_CONST', value: 2 },
  { op: 'ADD' },
  { op: 'RETURN' },
];

const artifact = emit(instructions);

console.log(artifact);
// { bytecode: [1, 0, 1, 1, 2, 3], constantPool: [1, 2] }

console.log(run(artifact.bytecode, artifact.constantPool)); // 3
9. 示例输入与输出
示例输入
javascript
[
  { op: 'LOAD_CONST', value: 1 },
  { op: 'LOAD_CONST', value: 2 },
  { op: 'ADD' },
  { op: 'RETURN' },
]
编译后 bytecode
javascript
[1, 0, 1, 1, 2, 3]Constant Pool
javascript
[1, 2]输出结果
javascript
310. 执行过程拆解
编译过程
| Step | Instruction | Constant Pool Before | Bytecode Before | Constant Pool After | Bytecode After |
|---|---|---|---|---|---|
| 1 | LOAD_CONST 1 |
[] |
[] |
[1] |
[1, 0] |
| 2 | LOAD_CONST 2 |
[1] |
[1, 0] |
[1, 2] |
[1, 0, 1, 1] |
| 3 | ADD |
[1, 2] |
[1, 0, 1, 1] |
[1, 2] |
[1, 0, 1, 1, 2] |
| 4 | RETURN |
[1, 2] |
[1, 0, 1, 1, 2] |
[1, 2] |
[1, 0, 1, 1, 2, 3] |
执行过程
| Step | PC Before | Opcode | Extra Operand | Stack Before | Stack After | PC After |
|---|---|---|---|---|---|---|
| 1 | 0 | LOAD_CONST |
0 |
[] |
[1] |
2 |
| 2 | 2 | LOAD_CONST |
1 |
[1] |
[1, 2] |
4 |
| 3 | 4 | ADD |
无 | [1, 2] |
[3] |
5 |
| 4 | 5 | RETURN |
无 | [3] |
[] |
6 |
11. 与原始源码的差异
| 主题 | 教学版 | 正式源码 |
|---|---|---|
| opcode | LOAD_CONST = 1 |
LOAD_CONST = 4 |
| 加法 | ADD |
BINARY + BINARY_OPS['+'] |
| 常量池 | 简化版 ConstantPool |
src/compiler/emit.ts 中的 ConstantPool |
| bytecode | 栈式 bytecode | 寄存器式 bytecode |
LOAD_CONST 参数 |
constIndex |
dstRegister, constIndex |
RETURN 参数 |
无,返回栈顶 | srcRegister |
正式源码中的 emitBytecode() 会遍历函数 IR,把每条 IR 编成数字,并写入统一的 bytecode 数组。
12. 常见问题
Q1:为什么不直接执行对象指令?
可以直接执行,但对象指令更像"调试格式",bytecode 更像"机器格式"。真实 VM 通常会选择更紧凑、更稳定的 bytecode。
Q2:Constant Pool 只是为了省空间吗?
不只是。它还让 bytecode 保持纯数字化,把字符串、数字、属性名等常量统一管理。
Q3:JSON.stringify 做常量去重有没有边界问题?
有。比如 undefined、函数、Symbol、循环引用都不适合用 JSON 序列化。教学版先接受这个简化;正式工程若要支持更复杂的常量,需要更严格的 key 生成策略。
13. 本文小结
这一篇我们完成了从对象指令到数字 bytecode 的第一步:
plaintext
Instruction[]
  -> emit()
  -> { bytecode, constantPool }
  -> run(bytecode, constantPool)
  -> result
我们新增了四个核心结构:
| 概念 | 作用 |
|---|---|
| Opcode | 用数字表示指令类型 |
| Instruction | 编译阶段的人类可读指令 |
| Bytecode | VM 执行的数字数组 |
| Constant Pool | 保存常量并返回索引 |
14. 下一篇预告
下一篇将继续讲:
plaintext
第 3 篇:从栈式 VM 到寄存器式 VM:为什么 jsvmp-next 选择寄存器我们会把:
plaintext
LOAD_CONST 0
LOAD_CONST 1
ADD
RETURN
改造成:
plaintext
LOAD_CONST r0, const[0]
LOAD_CONST r1, const[1]
BINARY r2, r0, r1, '+'
RETURN r2