女朋友想要专属桌宠?我用 AI 提示词,1 小时把照片变成 57 帧动画精灵
她看了一眼我的 Codex 桌宠,说:"为什么你的桌宠是猫,我的却是默认的?" 于是我用一个周末研究出了这套方法------用提示词生成专属人像桌宠精灵。
一、这事到底怎么做?
先给你看最终效果------我把女朋友的照片喂给 AI,生成了这样一个 57 帧的横版精灵图(Sprite Sheet):
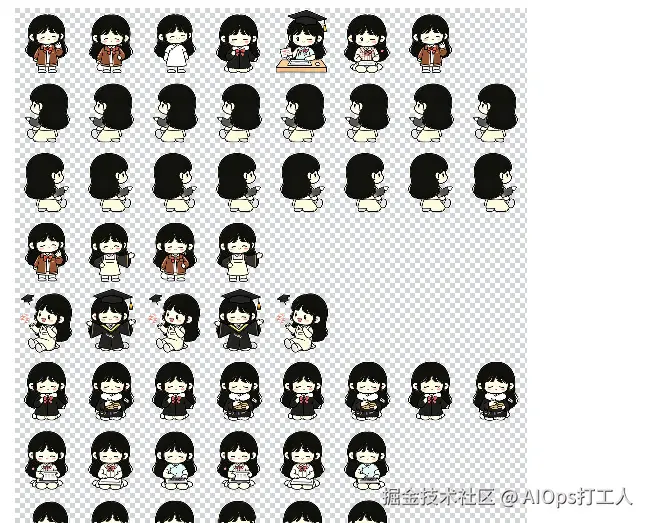
这张图里包含 9 种动作、共 57 帧动画:
| 动作 | 帧数 | 说明 |
|---|---|---|
| 待机眨眼 | 6 帧 | 自然站立,偶尔歪头眨眼 |
| 敲代码 | 6 帧 | 坐地上敲键盘,代码符号飘起 |
| 修 Bug | 6 帧 | 拿扳手修红色 Bug 图标 |
| 报错装死 | 8 帧 | 举"ERROR"牌子,表情无奈 |
| 加载等待 | 6 帧 | 坐等进度条慢慢走 |
| 庆祝完成 | 5 帧 | 跳起来撒花,进度条 100% |
| 偷看屏幕 | 8 帧 | 从窗口边探出半个身子 |
| 睡觉休息 | 4 帧 | 趴小枕头上,ZZZ 飘起 |
| 监工模式 | 8 帧 | 叉腰站在桌面边,表情严肃 |
把这张精灵图塞进 Codex 桌宠的配置里,你的桌宠就变成了专属定制的她。
整个流程长这样:
二、你需要准备什么
工具清单不多,三样就够了:
| 工具 | 作用 | 备注 |
|---|---|---|
| 一张参考照片 | AI 画角色的依据 | 正面照最好,表情清晰 |
| AI 绘图工具 | 生成精灵图 | 我用的是豆包,Midjourney / DALL·E 3 也行 |
| Codex 桌宠 | 桌面显示动画 | 支持自定义精灵图的版本 |
核心难点就一个------提示词怎么写。下面我把提示词逐段拆给你看。
三、核心提示词拆解:AI 是怎么听懂你的需求的
这份提示词是我和豆包来回沟通了 5 轮 才调出来的。我把它拆成 5 个模块,每个模块都有它的用意。 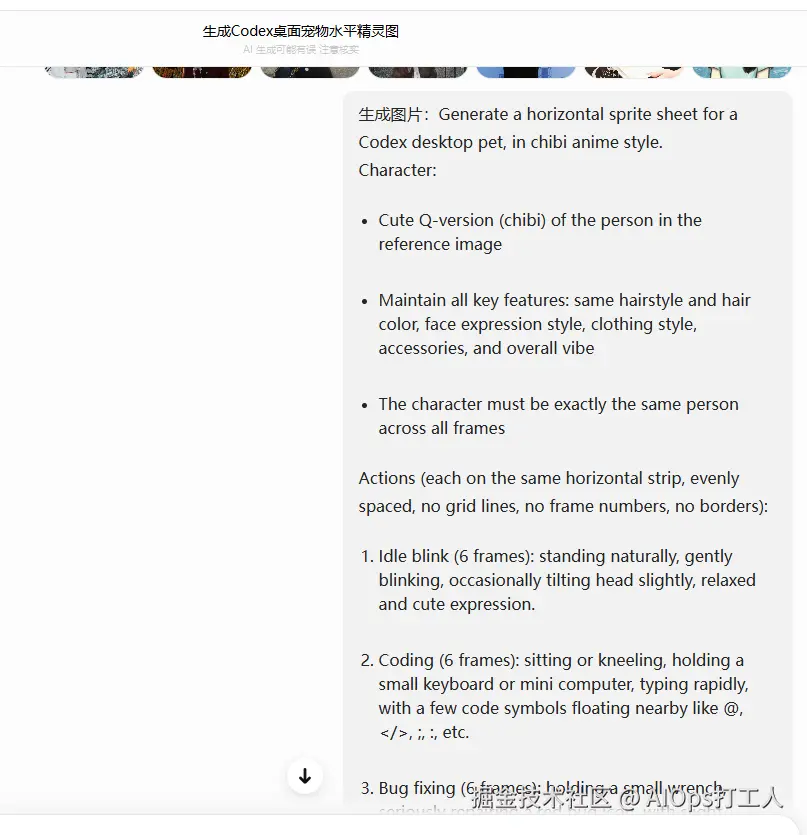
3.1 角色定义------让 AI 知道"画谁"
less
Generate a horizontal sprite sheet for a Codex desktop pet, in chibi anime style.

Character:

- Cute Q‑version (chibi) of the person in the reference image
- Maintain all key features: same hairstyle and hair color, face expression style,
  clothing style, accessories, and overall vibe
- The character must be exactly the same person across all frames这里的门道:
Q-version (chibi)是关键词,告诉 AI 画 Q 版不是写实same hairstyle / hair color / clothing style是保底条款------防止 AI 在不同帧里画出不同的角色- 最后一句话
exactly the same person across all frames是最关键的,没有这句,AI 会在不同动作帧里改角色长相
3.2 动作设计------9 种桌宠日常
桌宠之所以可爱,是因为它有"活着"的感觉。我设定了 9 种动作,覆盖了日常使用场景:
less
1. Idle blink (6 frames): standing naturally, gently blinking,
   occasionally tilting head slightly, relaxed and cute expression.

2. Coding (6 frames): sitting or kneeling, holding a small keyboard
   or mini computer, typing rapidly, with a few code symbols floating nearby
   like @, </>, ;, :, etc.

3. Bug fixing (6 frames): holding a small wrench, seriously repairing a red bug icon,
   with slight motion lines, final frame shows a satisfied smile.

...(后续动作省略,文末有完整版)设计思路:
- 待机 + 敲代码 + 修 Bug + 报错 + 加载 + 庆祝 = 程序员日常叙事线
- 偷看 + 睡觉 + 监工 = 互动感动作,让桌宠不只是"在那待着"
- 每个动作的帧数不是随便写的------眨眼 6 帧刚好 1 秒循环,敲代码 6 帧能看出节奏感
3.3 布局控制------让 57 帧不打架
sql
Layout:

- All frames arranged in one single horizontal strip
- Each frame shows the same character performing the action with only minor variations
- No crop on hair, head, hands, feet, props, or body
- Enough spacing between frames so they do not overlap最容易踩坑的地方:
minor variations------告诉 AI 每帧是微动不是重画No crop------防止 AI 切到头发或手脚,Codex 桌宠需要完整的角色轮廓Enough spacing------不加这句,AI 会把所有帧挤在一起,裁切时会很痛苦
3.4 画风控制------Q 版的灵魂
less
Art style:

- Chibi Q‑version anime style, clear thick outlines, flat cel‑shading,
  cute and clear expressions, well‑defined body contours
- High character consistency across all frames关键参数解释:
| 参数 | 作用 | 不加会怎样 |
|---|---|---|
clear thick outlines |
清晰粗线条 | 角色边缘模糊,抠图困难 |
flat cel‑shading |
平涂赛璐璐 | 出现阴影渐变,动画风格不统一 |
well-defined body contours |
轮廓清晰 | Q 版变形,认不出是谁 |
3.5 绿幕背景------省去抠图的麻烦
yaml
Background:

- Solid green screen color: #00ff00 (pure green)
- Entire background must be this solid green only
- No shadows, no gradients, no floor, no textures, no glow, no reflections
- Do NOT use #00ff00 anywhere in the character or props这一招是从视频抠图里学来的------#00ff00 纯绿背景 。Codex 桌宠支持透明背景,用纯绿底图方便后期一键去背。最后一句话是防呆设计,防止 AI 把绿色画到角色身上。
四、豆包出图:5 轮拉扯才拿到满意的精灵图
写提示词最大的错觉是------一次就能出图。实际上我前后沟通了 5 轮才拿到满意的结果。
整个过程大致是这样:
每一轮遇到的具体问题:
| 轮次 | 问题 | 怎么修的 |
|---|---|---|
| 第 1 轮 | 角色不像本人,脸型变了 | 加 same hairstyle, same face shape,并且明确说"based on reference image" |
| 第 2 轮 | 动作没有过渡感,像静态贴图 | 把 6 frames 改成 6 frames with slight motion,加 final frame shows... 描述最后一帧的落点 |
| 第 3 轮 | 背景带了渐变色,不是纯绿 | 加了 no shadows, no gradients, no floor |
| 第 4 轮 | 角色身上出现了绿色杂点 | 加了 Do NOT use #00ff00 anywhere in the character or props |
| 第 5 轮 | 表情不够自然 | 每个动作加了情绪描述,如 relaxed and cute / satisfied smile / curious expression |
最难调的是第 3 轮 ------AI 似乎天生喜欢给背景加光影,我明确说了"纯绿"、"无阴影",它还是偷偷给角色脚下画了投影。最后把 no floor 加上才彻底解决。
!NOTE 经验 跟 AI 沟通提示词,和跟人沟通需求是一样的------越精确的边界条件,越少出意外。 不要指望 AI "理解你的意图",而是要把每个约束写成"不能做什么"。
五、Codex 配置:精灵图拿到后怎么塞进桌宠
图生成好了,但怎么让它变成桌宠?这一步我在 Codex(Trae IDE)里问到的。 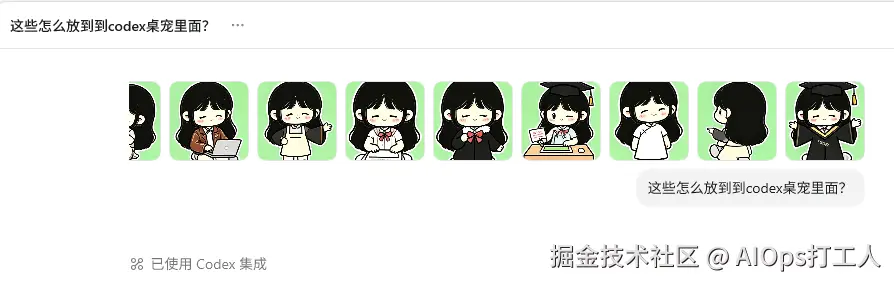
5.1 核心问题
拿到精灵图后,我遇到两个问题:
- 精灵图怎么切------57 帧在一张横图上,Codex 怎么知道每帧从哪里开始、到哪里结束?
- 配置往哪写------Codex 桌宠的配置文件在哪、什么格式?
5.2 Codex 的回答
把精灵图和截图发给 Codex,它告诉我:
精灵图要求:
- 所有帧排列在一张横向长图上(已经满足了)
- 每帧尺寸保持一致(我用 PS 做了统一裁剪)
- 背景透明或纯绿(选绿幕生成,后期去背)
配置方式:
- Codex 桌宠的精灵图通过
sprite配置项指定 - 需要告诉 Codex:精灵图路径、每帧宽高、总帧数、动作分组
- 配置格式一般是 JSON 或 YAML,定义每个动作对应哪些帧序号
举个例子,配置大致长这样:
json
{
  "sprite": "path/to/your-sprite.png",
  "frameWidth": 128,
  "frameHeight": 128,
  "totalFrames": 57,
  "animations": {
    "idle":    { "frames": [0,1,2,3,4,5], "loop": true },
    "coding":  { "frames": [6,7,8,9,10,11], "loop": true },
    "bugfix":  { "frames": [12,13,14,15,16,17], "loop": true },
    "error":   { "frames": [18,19,20,21,22,23,24,25], "loop": false },
    "loading": { "frames": [26,27,28,29,30,31], "loop": true },
    "celebrate": { "frames": [32,33,34,35,36], "loop": false },
    "peek":    { "frames": [37,38,39,40,41,42,43,44], "loop": true },
    "sleep":   { "frames": [45,46,47,48], "loop": true },
    "supervise": { "frames": [49,50,51,52,53,54,55,56], "loop": true }
  }
}
5.3 实际操作流程
从图到桌宠,完整链条是这样的:
具体步骤:
- 去背:用 Photoshop 或在线工具(remove.bg)把绿幕变成透明
- 等分:57 帧横图总宽度 ÷ 57 = 每帧宽度,确保每帧一样大
- 配帧:按提示词中的顺序,第 1-6 帧是待机、第 7-12 帧是敲代码......以此类推
- 写配置:把帧序号映射到动作名,告诉 Codex 哪个动作对应哪几帧
- 放目录:把精灵图和配置文件放进 Codex 的桌宠资源目录
- 重启:重新加载桌宠,看到专属角色动起来
!TIP 提示 如果你不确定配置文件的存放路径,直接在 Codex(Trae IDE)里问 AI------把精灵图发给它,说"帮我配成桌宠",它会告诉你具体怎么放。
六、完整提示词模板分享(可直接用)
下面是我的完整提示词,把 [参考照片] 换成你的照片,直接把这段复制给豆包/Midjourney 就行。
sql
Generate a horizontal sprite sheet for a Codex desktop pet, in chibi anime style.

Character:

- Cute Q‑version (chibi) of the person in the reference image
- Maintain all key features: same hairstyle and hair color, face expression style,
  clothing style, accessories, and overall vibe
- The character must be exactly the same person across all frames

Actions (each on the same horizontal strip, evenly spaced,
no grid lines, no frame numbers, no borders):

1. Idle blink (6 frames): standing naturally, gently blinking,
   occasionally tilting head slightly, relaxed and cute expression.

2. Coding (6 frames): sitting or kneeling, holding a small keyboard
   or mini computer, typing rapidly, with a few code symbols floating nearby
   like @, </>, ;, :, etc.

3. Bug fixing (6 frames): holding a small wrench, seriously repairing a red bug icon,
   with slight motion lines, final frame shows a satisfied smile.

4. Error display (8 frames): holding a small sign that says "ERROR",
   expression helpless or awkward, slight arm movements,
   one frame has eyes closed looking frustrated.

5. Loading wait (6 frames): sitting while holding a horizontal progress bar
   that gradually fills up, patient waiting expression, occasional blinks.

6. Celebration complete (5 frames): jumping happily with both arms raised,
   colorful confetti around, holding or next to a progress bar showing 100%,
   finally landing back on the ground.

7. Peeking at screen (8 frames): peeking half‑body from behind
   the edge of a vertical window, curious expression,
   slight lean‑in and lean‑out motion, one frame with a blink.

8. Sleepy rest (4 frames): lying on a small white pillow, eyes closed,
   slight breathing motion, with "ZZZ" floating nearby.

9. Supervising work (8 frames): standing at the edge of the desktop,
   hands on hips, serious but cute expression,
   one frame pointing forward, one frame blinking.

Layout:

- All frames arranged in one single horizontal strip
- Each frame shows the same character performing the action with only minor variations
- No crop on hair, head, hands, feet, props, or body
- Enough spacing between frames so they do not overlap

Art style:

- Chibi Q‑version anime style, clear thick outlines, flat cel‑shading,
  cute and clear expressions, well‑defined body contours,
  suitable for scaling down as a desktop pet
- High character consistency across all frames

Background:

- Solid green screen color: #00ff00 (pure green)
- Entire background must be this solid green only
- No shadows, no gradients, no floor, no textures, no glow, no reflections
- Do NOT use #00ff00 anywhere in the character or props使用说明:
- 把提示词 + 参考照片一起发给豆包(或 Midjourney)
- 如果第一次生成效果不好,别灰心------参照上面的"踩坑实录"逐轮修改
- 拿到精灵图后,用 PS 或在线工具把绿幕变透明(Codex 支持透明 PNG)
- 替换 Codex 桌宠的精灵图配置
七、写在最后:把女朋友做成桌宠是什么体验?
说两个真实感受:
第一,她看到后的反应。 我第一次把桌宠跑起来的时候,女朋友在旁边看着,说"诶,这真的是我?"然后她就盯着屏幕看了 5 分钟,看着自己的 Q 版小人敲代码、修 Bug、偷看屏幕......那 5 分钟里我没敢告诉她,其实我也就调了 5 轮提示词。
第二,这件事让我发现一件事------ AI 生成已经不是"能不能"的问题,而是**"怎么精确控制"**的问题。同样一个需求,提示词写得好不好,结果天差地别。我踩过的这 5 个坑,你看了这篇文章就能避开。
工具的价值,不在于它有多强,而在于它能帮上多少忙。
项目本身不涉及代码,整个流程全靠提示词驱动。如果你也想要一个专属桌宠,把提示词复制走,换张照片就行。
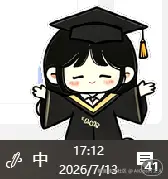
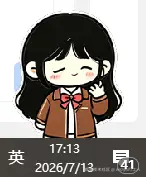
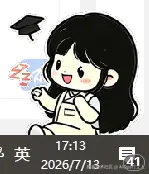
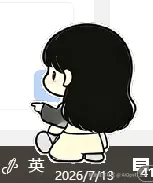
八、部分动作展示: