HarmonyOS NEXT API 12+ · 方向 A:Atomic Service · 服务卡片

一、为什么元服务是鸿蒙的核心理念
在传统的移动应用生态中,用户必须经历「发现 → 下载 → 安装 → 注册 → 使用」的漫长旅程。每一步都有用户流失,每一步都有平台摩擦。华为鸿蒙的答案是------元服务(Atomic Service)。这是一种免安装、即用即走的轻量化应用形态,用户无需下载完整 App,通过碰一碰、扫一扫或服务发现即可直接启动核心功能。
元服务不仅仅是一个技术概念,它是一套完整的分发体系。其底层依托鸿蒙的分布式软总线和原子化服务框架,将应用拆解为最小的功能单元,每个单元可以独立运行、独立分发、独立更新。对于开发者而言,这意味着更低的获客门槛;对于用户而言,这意味着零安装成本、触手可及。
从技术实现角度,元服务由**卡片(Form)和主体(Host App)**两部分组成。卡片负责展示关键信息和快捷操作,托管在设备桌面上;主体负责完整的业务逻辑和资源管理。本篇文章将围绕 FormExtensionAbility 的完整开发流程、卡片与主体的双向通信机制、以及动态刷新策略这三个核心维度,配合可编译运行的完整工程代码,带你从零构建一个真正的元服务。
二、项目结构与 module.json5 配置
元服务的工程结构与普通 HarmonyOS 应用有本质区别。首先需要理解 module.json5 中针对卡片特有的配置字段,这些字段决定了元服务能否被系统正确识别和分发。
json
{
  "module": {
    "name": "atomic_service_demo",
    "type": "entry",
    "description": "$string:module_desc",
    "mainElement": "EntryAbility",
    "deviceTypes": ["phone", "tablet"],
    "deliveryWithInstall": true,
    "installationFree": true,
    "pages": "$profile:main_pages",
    "abilities": [
      {
        "name": "EntryAbility",
        "srcEntry": "./ets/entryability/EntryAbility.ets",
        "description": "$string:EntryAbility_desc",
        "icon": "$media:icon",
        "label": "$string:EntryAbility_label",
        "startWindowIcon": "$media:icon",
        "startWindowBackground": "$color:start_window_background",
        "skills": [
          {
            "entities": ["entity.system.home"],
            "actions": ["action.system.home"]
          }
        ]
      }
    ],
    "forms": [
      {
        "name": "WidgetCard",
        "description": "$string:widget_card_desc",
        "src": "./ets/widget/WidgetCard.ets",
        "uiSyntax": "arkts",
        "window": {
          "designWidth": 720,
          "designHeight": 720,
          "resizeable": true
        },
        "isDefault": true,
        "scheduledUpdateTime": "10:30",
        "updateDuration": 10800,
        "defaultDimensions": [2, 2],
        "supportDimensions": [
          [2, 2],
          [2, 4],
          [4, 2],
          [4, 4]
        ],
        "降级表单": [2, 2]
      }
    ]
  }
}这里的配置有几个关键点值得展开。installationFree: true 是元服务的灵魂所在------它告诉系统这个模块不需要完整安装,用户可以从服务卡片直接启动核心功能。forms 数组定义了卡片资源,其中 scheduledUpdateTime 和 updateDuration 共同决定了卡片的定时刷新周期,后文会详细讨论这个策略。
另外,supportDimensions 定义了卡片支持的尺寸规格。2, 2 是最小的 2×2 规格,4, 4 是最大规格,开发者应根据业务需求选择合适的尺寸范围,避免为小屏设备引入过大的卡片尺寸。
三、FormExtensionAbility 的生命周期与工程架构
3.1 生命周期的全局视角
FormExtensionAbility 是卡片运行的宿主,与 PageAbility 并行存在。它的生命周期由系统统一管理,不受用户前台交互干扰。整个生命周期可以划分为六个核心阶段,理解这些阶段的转换逻辑是写出健壮卡片代码的前提。
创建阶段 :onAddForm(want) 被调用,系统传入 want 对象,其中携带了卡片的基础配置信息。这个阶段是初始化的黄金时机,可以在这里读取 want 参数中的 formBindingData,设置卡片的初始状态。
就绪阶段 :onUpdateForm() 会在定时刷新或外部触发时调用,此时可以拉取最新数据并刷新卡片内容。销毁阶段 :onRemoveForm() 负责清理资源,但切记不要在这里执行耗时操作------系统期望这个回调快速返回。
还有一个容易被忽视的阶段:可见性变化。当卡片从后台进入前台可见时,系统会调用生命周期方法通知卡片,此时可以考虑加载高质量资源;反之,当卡片被遮挡或不可见时,可以释放非必要资源以节省内存。
3.2 完整的 FormExtensionAbility 实现
下面是一份完整的 FormExtensionAbility 实现,包含了所有核心生命周期的处理逻辑:
typescript
// entry/ets/formextensionability/WeatherFormAbility.ets
import { FormExtensionAbility, formBindingData, formProvider } from '@kit.FormKit';
import { hilog } from '@kit.PerformanceAnalysisKit';
import { Want } from '@kit.AbilityKit';

const TAG = 'WeatherFormAbility';
const DOMAIN = 0xFF00;

export default class WeatherFormAbility extends FormExtensionAbility {
  // 卡片被首次创建时调用
  onAddForm(want: Want): formBindingData.FormBindingData {
    hilog.info(DOMAIN, TAG, 'onAddForm called, want: %{public}s', JSON.stringify(want));

    // 从 want 中解析初始数据
    const param = want.parameters;
    const cityName = param ? (param['cityName'] as string) || '北京' : '北京';
    const temperature = param ? (param['temperature'] as number) || 25 : 25;

    // 构建初始卡片数据
    const formData: Record<string, Object> = {
      cityName: cityName,
      temperature: temperature,
      weatherIcon: 'sunny',
      updateTime: this.getCurrentTimeString(),
      humidity: 45,
      windSpeed: '3级',
      isLoading: false,
      quality: '优'
    };

    // 创建表单绑定数据,这是向卡片传递数据的标准方式
    const bindingData = formBindingData.createFormBindingData(formData);
    return bindingData;
  }

  // 定时更新或通过 updateForm() 主动触发时调用
  onUpdateForm(formId: string, want: Want): void {
    hilog.info(DOMAIN, TAG, 'onUpdateForm called, formId: %{public}s', formId);

    // 在实际场景中,这里应该调用天气 API 获取最新数据
    // 为了演示,我们模拟数据变化
    const simulatedData = this.simulateWeatherData();

    // 将新数据转换为表单绑定数据格式
    const updateData = formBindingData.createFormBindingData(simulatedData);

    // 调用 updateForm 方法刷新卡片显示
    const formProviderClient = formProvider.getFormProviderClient(formId);
    formProviderClient.updateForm(formId, updateData).then(() => {
      hilog.info(DOMAIN, TAG, 'Form updated successfully');
    }).catch((err: Error) => {
      hilog.error(DOMAIN, TAG, 'Failed to update form: %{public}s', err.message);
    });
  }

  // 卡片被移除时调用,用于资源清理
  onRemoveForm(formId: string): void {
    hilog.info(DOMAIN, TAG, 'onRemoveForm called, formId: %{public}s', formId);
    // 清理该卡片关联的临时数据、监听器等资源
    this.cleanupCardResources(formId);
  }

  // 处理卡片点击事件
  onFormEvent(formId: string, message: string): void {
    hilog.info(DOMAIN, TAG, 'onFormEvent received, formId: %{public}s, message: %{public}s', formId, message);

    // 解析消息类型并执行对应操作
    if (message === 'refresh') {
      this.onUpdateForm(formId, {} as Want);
    } else if (message.startsWith('city:')) {
      const city = message.substring(5);
      this.navigateToDetail(formId, city);
    }
  }

  // 辅助方法:获取当前时间字符串
  private getCurrentTimeString(): string {
    const now = new Date();
    return `${now.getHours().toString().padStart(2, '0')}:${now.getMinutes().toString().padStart(2, '0')}`;
  }

  // 辅助方法:模拟天气数据(实际项目中替换为真实 API 调用)
  private simulateWeatherData(): Record<string, Object> {
    const cities = ['北京', '上海', '深圳', '成都', '杭州'];
    const icons = ['sunny', 'cloudy', 'rainy', 'snowy'];
    const randomCity = cities[Math.floor(Math.random() * cities.length)];
    const randomTemp = Math.floor(Math.random() * 30) + 5;
    const randomIcon = icons[Math.floor(Math.random() * icons.length)];

    return {
      cityName: randomCity,
      temperature: randomTemp,
      weatherIcon: randomIcon,
      updateTime: this.getCurrentTimeString(),
      humidity: Math.floor(Math.random() * 50) + 30,
      windSpeed: `${Math.floor(Math.random() * 5) + 1}级`,
      quality: ['优', '良', '轻度污染'][Math.floor(Math.random() * 3)],
      isLoading: false
    };
  }

  // 辅助方法:清理卡片关联资源
  private cleanupCardResources(formId: string): void {
    // 取消网络请求、移除事件监听等清理操作
    hilog.info(DOMAIN, TAG, 'Cleaned up resources for formId: %{public}s', formId);
  }

  // 辅助方法:导航到详情页
  private navigateToDetail(formId: string, city: string): void {
    // 在实际场景中,可以触发启动主应用并导航到天气详情页
    hilog.info(DOMAIN, TAG, 'Navigating to detail for city: %{public}s', city);
  }
}
这段代码涵盖了卡片生命周期的核心处理逻辑。值得特别注意的是 onFormEvent 方法------这是卡片与主体之间通信的关键通道。当用户在卡片上点击按钮时,系统会将事件消息路由到这个方法,我们通过解析 message 字符串的内容来决定执行什么操作。这种基于字符串消息的通信方式简单有效,但后续会介绍更结构化的通信方案。
四、卡片的 ArkUI 声明式界面实现
4.1 基础卡片 UI 结构
卡片界面使用 ArkUI 的声明式语法编写,与 PageAbility 中的页面开发共享同一套框架。区别在于卡片的运行环境更为受限,需要严格控制内存占用和渲染开销。一张好的卡片界面应该做到信息层次分明、视觉焦点突出、操作入口清晰。
typescript
// entry/ets/widget/WeatherCard.ets
import { FormComponent, formBindingData } from '@kit.FormKit';
import { hilog } from '@kit.PerformanceAnalysisKit';
import { pmp } from '@kit.ConnectivityKit';

// 卡片尺寸枚举,便于代码中引用
enum CardSize {
  SMALL = '2x2',
  MEDIUM_TALL = '2x4',
  MEDIUM_WIDE = '4x2',
  LARGE = '4x4'
}

// 天气图标映射表
const WEATHER_ICONS: Record<string, ResourceStr> = {
  'sunny': $r('app.media.ic_weather_sunny'),
  'cloudy': $r('app.media.ic_weather_cloudy'),
  'rainy': $r('app.media.ic_weather_rainy'),
  'snowy': $r('app.media.ic_weather_snowy'),
  'default': $r('app.media.ic_weather_default')
};

@Component
export struct WeatherCard {
  // 接收来自 FormExtensionAbility 的数据
  @LocalBuilderParam cardContent: () => void = this.defaultContent;

  // 卡片数据通过 formData 属性注入
  private formData?: Record<string, Object>;

  // 卡片尺寸
  private cardSize: string = CardSize.SMALL;

  // 构建默认内容(占位)
  @Builder
  defaultContent() {
    Column() {
      Text('天气卡片')
        .fontSize(14)
        .fontColor('#333333')
    }
    .width('100%')
    .height('100%')
    .justifyContent(FlexAlign.Center)
  }

  build() {
    Column() {
      if (this.formData) {
        this.cardContent()
      } else {
        this.defaultContent()
      }
    }
    .width('100%')
    .height('100%')
    .backgroundColor('#F5F7FA')
    .borderRadius(16)
    .padding(12)
  }
}

// 小尺寸 2x2 卡片组件
@Component
export struct WeatherCardSmall {
  @Prop cityName: string = '北京';
  @Prop temperature: number = 25;
  @Prop weatherIcon: string = 'sunny';
  @Prop updateTime: string = '--:--';

  build() {
    Column() {
      // 顶部:城市名和更新时间
      Row() {
        Text(this.cityName)
          .fontSize(14)
          .fontColor('#1A1A1A')
          .fontWeight(FontWeight.Medium)

        Blank()

        Text(this.updateTime)
          .fontSize(10)
          .fontColor('#999999')
      }
      .width('100%')
      .margin({ bottom: 8 })

      // 中间:温度(核心数据,字号最大)
      Text(`${this.temperature}°`)
        .fontSize(48)
        .fontColor('#1A1A1A')
        .fontWeight(FontWeight.Bold)
        .width('100%')
        .textAlign(TextAlign.Start)
        .margin({ bottom: 4 })

      // 底部:天气图标(使用文字表情作为备选)
      Row() {
        Text(this.getWeatherEmoji())
          .fontSize(24)

        Text(this.getWeatherText())
          .fontSize(12)
          .fontColor('#666666')
          .margin({ left: 4 })

        Blank()

        // 点击刷新按钮,通过 formEvent 通知 FormExtensionAbility
        Text('🔄')
          .fontSize(16)
          .onClick(() => {
            postCardAction(this, {
              action: 'message',
              params: { msg: 'refresh' }
            });
          })
      }
      .width('100%')
    }
    .width('100%')
    .height('100%')
    .justifyContent(FlexAlign.SpaceBetween)
    .alignItems(HorizontalAlign.Start)
  }

  private getWeatherEmoji(): string {
    const emojiMap: Record<string, string> = {
      'sunny': '☀️',
      'cloudy': '☁️',
      'rainy': '🌧️',
      'snowy': '❄️',
      'default': '🌤️'
    };
    return emojiMap[this.weatherIcon] || emojiMap['default'];
  }

  private getWeatherText(): string {
    const textMap: Record<string, string> = {
      'sunny': '晴',
      'cloudy': '多云',
      'rainy': '雨',
      'snowy': '雪',
      'default': '未知'
    };
    return textMap[this.weatherIcon] || textMap['default'];
  }
}

// 中等尺寸 4x2 横向卡片组件
@Component
export struct WeatherCardMedium {
  @Prop cityName: string = '北京';
  @Prop temperature: number = 25;
  @Prop weatherIcon: string = 'sunny';
  @Prop humidity: number = 45;
  @Prop windSpeed: string = '3级';
  @Prop quality: string = '优';
  @Prop updateTime: string = '--:--';

  build() {
    Row() {
      // 左侧:核心温度信息
      Column() {
        Text(this.cityName)
          .fontSize(12)
          .fontColor('#666666')
          .margin({ bottom: 2 })

        Text(`${this.temperature}°`)
          .fontSize(44)
          .fontWeight(FontWeight.Bold)
          .fontColor('#1A1A1A')

        Row() {
          Text(this.getWeatherEmoji())
            .fontSize(16)
          Text(this.getWeatherText())
            .fontSize(12)
            .fontColor('#666666')
            .margin({ left: 4 })
        }
      }
      .alignItems(HorizontalAlign.Start)
      .layoutWeight(1)

      // 右侧:详细信息网格
      Column() {
        this.detailItem('💧', `${this.humidity}%`)
        this.detailItem('💨', this.windSpeed)
        this.detailItem('🌿', this.quality)
        this.detailItem('🕐', this.updateTime)
      }
      .alignItems(HorizontalAlign.End)
      .layoutWeight(1)
      .justifyContent(FlexAlign.SpaceEvenly)
    }
    .width('100%')
    .height('100%')
    .padding(16)
  }

  @Builder
  detailItem(emoji: string, value: string) {
    Row() {
      Text(emoji)
        .fontSize(12)
      Text(value)
        .fontSize(11)
        .fontColor('#666666')
        .margin({ left: 4 })
    }
  }

  private getWeatherEmoji(): string {
    const emojiMap: Record<string, string> = {
      'sunny': '☀️', 'cloudy': '☁️', 'rainy': '🌧️', 'snowy': '❄️', 'default': '🌤️'
    };
    return emojiMap[this.weatherIcon] || emojiMap['default'];
  }

  private getWeatherText(): string {
    const textMap: Record<string, string> = {
      'sunny': '晴', 'cloudy': '多云', 'rainy': '雨', 'snowy': '雪', 'default': '未知'
    };
    return textMap[this.weatherIcon] || textMap['default'];
  }
}

// 大尺寸 4x4 详细卡片组件
@Component
export struct WeatherCardLarge {
  @Prop data: Record<string, Object> = {};

  build() {
    Column() {
      // 头部:城市 + 时间 + 刷新按钮
      this.header()

      // 主体:温度 + 天气
      this.mainSection()

      // 底部:详细信息行
      this.detailSection()
    }
    .width('100%')
    .height('100%')
    .padding(16)
  }

  @Builder
  header() {
    Row() {
      Text(this.data['cityName'] as string || '北京')
        .fontSize(16)
        .fontWeight(FontWeight.Medium)
        .fontColor('#1A1A1A')

      Blank()

      Text(`更新: ${this.data['updateTime'] as string || '--:--'}`)
        .fontSize(10)
        .fontColor('#999999')
    }
    .width('100%')
    .margin({ bottom: 12 })
  }

  @Builder
  mainSection() {
    Column() {
      Text(`${this.data['temperature'] as number || 25}°`)
        .fontSize(72)
        .fontWeight(FontWeight.Bold)
        .fontColor('#1A1A1A')
        .textAlign(TextAlign.Center)
        .width('100%')

      Row() {
        Text(this.getWeatherEmoji())
          .fontSize(28)
        Text(this.getWeatherText())
          .fontSize(18)
          .fontColor('#666666')
          .margin({ left: 8 })
      }
      .width('100%')
      .justifyContent(FlexAlign.Center)
    }
    .width('100%')
    .margin({ bottom: 16 })
  }

  @Builder
  detailSection() {
    Row() {
      this.infoChip('💧', `${this.data['humidity'] as number || 45}%`)
      this.infoChip('💨', this.data['windSpeed'] as string || '3级')
      this.infoChip('🌿', this.data['quality'] as string || '优')
    }
    .width('100%')
    .justifyContent(FlexAlign.SpaceEvenly)
  }

  @Builder
  infoChip(emoji: string, value: string) {
    Column() {
      Text(emoji)
        .fontSize(16)
      Text(value)
        .fontSize(12)
        .fontColor('#666666')
        .margin({ top: 2 })
    }
    .backgroundColor('#E8F4FF')
    .borderRadius(8)
    .padding({ left: 12, right: 12, top: 8, bottom: 8 })
  }

  private getWeatherEmoji(): string {
    const icon = this.data['weatherIcon'] as string || 'default';
    const map: Record<string, string> = {
      'sunny': '☀️', 'cloudy': '☁️', 'rainy': '🌧️', 'snowy': '❄️', 'default': '🌤️'
    };
    return map[icon] || map['default'];
  }

  private getWeatherText(): string {
    const icon = this.data['weatherIcon'] as string || 'default';
    const map: Record<string, string> = {
      'sunny': '晴', 'cloudy': '多云', 'rainy': '雨', 'snowy': '雪', 'default': '未知'
    };
    return map[icon] || map['default'];
  }
}
这段卡片 UI 代码展示了三种不同尺寸的卡片实现。ArkUI 的 @Prop 装饰器确保了从 formData 传入的数据能够正确触发 UI 更新。值得注意的是,卡片中使用了 emoji 作为天气图标,这是一种在卡片开发中常见的备选方案------当无法加载自定义图片资源时,emoji 提供了清晰且无需额外资源的视觉表达。
4.2 卡片入口 Widget.ets 的路由逻辑
卡片 UI 定义好了,还需要一个入口文件来根据不同的卡片尺寸渲染对应的组件。在 Widget.ets 中,根据 formBindingData 中的尺寸信息选择渲染哪种卡片:
typescript
// entry/ets/widget/Widget.ets
import { FormExtensionAbility, formBindingData } from '@kit.FormKit';
import { WeatherCardSmall, WeatherCardMedium, WeatherCardLarge } from './WeatherCard';

@Entry
@Component
struct WidgetCard {
  // 从 formData 中读取卡片数据
  @State formData: Record<string, Object> = {};
  @State cardSize: string = '2x2';

  build() {
    Stack() {
      if (this.cardSize === '2x2') {
        // 小卡片:仅展示核心温度
        WeatherCardSmall({
          cityName: this.formData['cityName'] as string || '北京',
          temperature: this.formData['temperature'] as number || 25,
          weatherIcon: this.formData['weatherIcon'] as string || 'sunny',
          updateTime: this.formData['updateTime'] as string || '--:--'
        })
      } else if (this.cardSize === '4x2') {
        // 中等横向卡片:展示更多信息
        WeatherCardMedium({
          cityName: this.formData['cityName'] as string || '北京',
          temperature: this.formData['temperature'] as number || 25,
          weatherIcon: this.formData['weatherIcon'] as string || 'sunny',
          humidity: this.formData['humidity'] as number || 45,
          windSpeed: this.formData['windSpeed'] as string || '3级',
          quality: this.formData['quality'] as string || '优',
          updateTime: this.formData['updateTime'] as string || '--:--'
        })
      } else {
        // 大卡片:展示完整天气信息
        WeatherCardLarge({
          data: this.formData
        })
      }
    }
    .width('100%')
    .height('100%')
  }
}

// 必须在文件末尾导出配置,系统通过此配置加载卡片
// 此配置必须与 module.json5 中的 forms[name] 对应
export const widgetData: WidgetData = {
  'WidgetCard': {
    'designWidth': 720,
    'designHeight': 720
  }
};
这里的关键是 Widget.ets 中的 @Entry 装饰器和 WidgetData 导出。系统通过扫描 @Entry 注解来识别哪些组件是卡片入口,而 widgetData 则为设计工具提供布局参考。
五、卡片与主体的双向通信机制
卡片与主体之间的通信是元服务开发中最容易出问题的环节,也是最能体现架构设计水平的部分。HarmonyOS 提供了多种通信手段,我们需要根据场景选择合适的方案。
5.1 卡片向主体发送消息
卡片点击事件通过 postCardAction API 发送消息,这个 API 提供了三种通信模式。第一种是 action.type飞快 类型,用于打开指定的 Ability;第二种是 message 类型,用于触发 onFormEvent 回调;第三种是 call 类型,可以在卡片和主体之间建立更长的双向会话。
下面的代码展示了三种通信模式的完整用法:
typescript
// 通信模式一:发送消息事件(最常用)
// 适用于卡片点击后通知 FormExtensionAbility 执行异步操作
postCardAction(this, {
  action: 'message',
  params: { msg: 'refresh' }
});

// 通信模式二:路由到指定 Ability
// 适用于点击后打开主应用的特定页面
postCardAction(this, {
  action: 'router',
  abilityName: 'EntryAbility',
  params: { page: 'WeatherDetail', city: '北京' }
});

// 通信模式三:调用方法(Call模式)
// 适用于需要获取返回结果的场景
postCardAction(this, {
  action: 'call',
  abilityName: 'EntryAbility',
  params: { method: 'getWeatherData', city: '北京' }
});
在主体的 EntryAbility 中,我们需要处理这些消息。下面的代码展示了如何同时处理三种消息类型:
typescript
// entry/ets/entryability/EntryAbility.ets
import { UIAbility, Want, AbilityConstant, CallResult } from '@kit.AbilityKit';
import { window } from '@kit.ArkUI';
import { hilog } from '@kit.PerformanceAnalysisKit';

const TAG = 'EntryAbility';
const DOMAIN = 0xFF01;

export default class EntryAbility extends UIAbility {
  onCreate(want: Want, launchParam: AbilityConstant.LaunchParam): void {
    hilog.info(DOMAIN, TAG, 'EntryAbility onCreate');
  }

  onWindowStageCreate(windowStage: window.WindowStage): void {
    hilog.info(DOMAIN, TAG, 'EntryAbility onWindowStageCreate');

    // 加载主页面
    windowStage.loadContent('pages/Index', (err) => {
      if (err.code) {
        hilog.error(DOMAIN, TAG, 'Failed to load content: %{public}s', JSON.stringify(err));
        return;
      }
      hilog.info(DOMAIN, TAG, 'Succeeded in loading content');
    });
  }

  // 处理来自卡片的 Call 消息
  onReceivedCall(want: Want, result: CallResult): void {
    hilog.info(DOMAIN, TAG, 'onReceivedCall, want: %{public}s', JSON.stringify(want));

    const params = want.parameters;
    const method = params?.['method'] as string;

    if (method === 'getWeatherData') {
      const city = params?.['city'] as string || '北京';
      const weatherData = this.fetchWeatherDataSync(city);

      // 将结果返回给卡片
      result.setResultResult(weatherData);
    } else {
      result.setResultResult({ error: 'Unknown method' });
    }
  }

  // 处理 Want 参数(从卡片 router action 跳转时会触发)
  onNewWant(want: Want, launchParam: AbilityConstant.LaunchParam): void {
    hilog.info(DOMAIN, TAG, 'EntryAbility onNewWant, want: %{public}s', JSON.stringify(want));

    // 解析跳转参数,决定导航到哪个页面
    const params = want.parameters;
    if (params) {
      const page = params['page'] as string;
      if (page === 'WeatherDetail') {
        // 导航到详情页
        hilog.info(DOMAIN, TAG, 'Navigating to WeatherDetail page');
      }
    }
  }

  // 模拟同步获取天气数据(实际场景中可能需要缓存或本地存储)
  private fetchWeatherDataSync(city: string): Record<string, Object> {
    return {
      cityName: city,
      temperature: Math.floor(Math.random() * 30) + 5,
      weatherIcon: 'sunny',
      updateTime: new Date().toLocaleTimeString(),
      humidity: Math.floor(Math.random() * 50) + 30,
      windSpeed: `${Math.floor(Math.random() * 5) + 1}级`,
      quality: '良'
    };
  }

  onWindowStageDestroy(): void {
    hilog.info(DOMAIN, TAG, 'EntryAbility onWindowStageDestroy');
  }

  onDestroy(): void {
    hilog.info(DOMAIN, TAG, 'EntryAbility onDestroy');
  }
}
Call 模式的核心价值在于它能返回结果。当卡片需要展示实时数据时,可以先通过 Call 模式向主体请求最新数据,主体查询后返回,卡片收到结果再更新 UI。这种模式比定时刷新更高效,避免了不必要的网络请求。
5.2 主体向卡片推送数据
主体不仅被动响应卡片的请求,还可以主动向卡片推送数据。这在需要即时更新卡片内容的场景下尤为重要,例如当主应用中用户切换了城市后,对应的桌面卡片应该立即反映这个变化。
typescript
// 在主应用中主动更新指定卡片的数据
import { formProvider, formBindingData } from '@kit.FormKit';
import { common } from '@kit.AbilityKit';

// 参数 formId: 通过长按卡片获取的卡片实例 ID
// 参数 data: 要更新的数据对象
async function updateCardData(context: common.UIAbilityContext, formId: string, weatherData: Record<string, Object>): Promise<void> {
  try {
    // 创建新的绑定数据
    const bindingData = formBindingData.createFormBindingData(weatherData);

    // 获取指定卡片的 Provider 实例
    const formProviderClient = formProvider.getFormProviderClient(formId);

    // 调用 updateForm 推送数据
    await formProviderClient.updateForm(formId, bindingData);

    hilog.info(DOMAIN, TAG, 'Card data updated successfully');
  } catch (err) {
    hilog.error(DOMAIN, TAG, 'Failed to update card: %{public}s', (err as Error).message);
  }
}

// 批量更新多个卡片(适用于同一元服务的多个卡片实例)
async function batchUpdateCards(context: common.UIAbilityContext, formIds: string[], data: Record<string, Object>): Promise<void> {
  const bindingData = formBindingData.createFormBindingData(data);

  // 并行更新所有卡片
  const promises = formIds.map(formId => {
    const client = formProvider.getFormProviderClient(formId);
    return client.updateForm(formId, bindingData);
  });

  await Promise.allSettled(promises);
  hilog.info(DOMAIN, TAG, 'Batch update completed');
}

// 删除指定的卡片实例
async function deleteCard(context: common.UIAbilityContext, formId: string): Promise<void> {
  try {
    const formManager = context.resourceManager;
    // 删除卡片需要使用 formAgent 模块
    hilog.info(DOMAIN, TAG, 'Requesting card deletion for formId: %{public}s', formId);
  } catch (err) {
    hilog.error(DOMAIN, TAG, 'Failed to delete card: %{public}s', (err as Error).message);
  }
}
这里值得深入分析的是 formBindingData.createFormBindingData 这个方法。它接受一个普通对象,返回系统所需的 FormBindingData 实例。系统会自动处理数据的序列化与反序列化,开发者无需关心底层传输细节。但有一点需要注意:传入的对象必须是可以被 JSON 序列化的基本类型,包含函数、Symbol 或循环引用的对象无法正确传递。
六、卡片刷新策略的深度解析
6.1 三种刷新模式的对比
卡片刷新是元服务开发中的核心性能问题。刷新策略的选择直接影响用户体验(信息新鲜度)和设备功耗(电池续航)。HarmonyOS 提供了三种互补的刷新机制,每种都有其最佳使用场景。
定时刷新 是最基础也是最可靠的方案。通过 module.json5 中的 scheduledUpdateTime 和 updateDuration 配置,可以让系统在指定时间间隔内自动唤醒 FormExtensionAbility 并调用 onUpdateForm。这种方式的优点是不依赖主应用、常驻后台也不会被系统杀死;缺点是精度有限,最小刷新间隔通常为 30 分钟。
typescript
// module.json5 中的刷新配置示例
"forms": [
  {
    "name": "WidgetCard",
    "src": "./ets/widget/WidgetCard.ets",
    "scheduledUpdateTime": "08:00",   // 首次刷新时间(本地时区)
    "updateDuration": 3600,            // 后续刷新间隔(秒),3600 = 1小时
    "isDefault": true,
    "defaultDimensions": [2, 2],
    "supportDimensions": [[2, 2], [2, 4], [4, 2], [4, 4]]
  }
]
主动刷新 通过调用 formProvider.updateForm() 实现,由主应用触发。这种方式适用于需要即时响应的场景------用户在主应用中完成了某个操作,卡片应该立即反映这个变化。主动刷新的延迟最低,但需要主应用处于运行状态。
事件驱动刷新 通过 onFormEvent 触发,适用于用户与卡片交互后的即时反馈。例如用户点击卡片上的「刷新」按钮,应该立即触发一次数据拉取和 UI 更新,而不必等待下一次定时刷新。
6.2 智能刷新策略的实现
在实际项目中,我们通常需要综合使用以上三种机制,并加入智能判断逻辑来优化刷新频率。下面是一套完整的智能刷新策略实现:
typescript
// entry/ets/utils/SmartRefreshManager.ets
import { formProvider, formBindingData } from '@kit.FormKit';
import { hilog } from '@kit.PerformanceAnalysisKit';

const TAG = 'SmartRefreshManager';
const DOMAIN = 0xFF02;

// 刷新优先级枚举
enum RefreshPriority {
  LOW = 0,      // 仅定时刷新
  MEDIUM = 1,   // 允许主动刷新
  HIGH = 2      // 允许事件触发刷新
}

// 刷新决策结果
interface RefreshDecision {
  shouldRefresh: boolean;
  reason: string;
  priority: RefreshPriority;
}

// 智能刷新管理器
export class SmartRefreshManager {
  // 每个卡片的最后刷新时间
  private lastRefreshTime: Map<string, number> = new Map();

  // 卡片刷新计数器(用于限制刷新频率)
  private refreshCount: Map<string, number> = new Map();

  // 刷新间隔阈值(毫秒)
  private readonly MIN_REFRESH_INTERVAL = 30 * 60 * 1000;  // 30分钟
  private readonly MAX_DAILY_REFRESH = 48;                   // 每天最多48次

  constructor() {
    hilog.info(DOMAIN, TAG, 'SmartRefreshManager initialized');
  }

  // 决策是否应该刷新
  shouldRefresh(formId: string, priority: RefreshPriority = RefreshPriority.MEDIUM): RefreshDecision {
    const now = Date.now();
    const lastTime = this.lastRefreshTime.get(formId) || 0;
    const count = this.refreshCount.get(formId) || 0;

    // 检查每日刷新次数限制
    if (count >= this.MAX_DAILY_REFRESH) {
      return {
        shouldRefresh: false,
        reason: `Daily refresh limit reached (${this.MAX_DAILY_REFRESH})`,
        priority
      };
    }

    // 检查最小刷新间隔
    const elapsed = now - lastTime;
    if (elapsed < this.MIN_REFRESH_INTERVAL) {
      return {
        shouldRefresh: false,
        reason: `Refresh interval not met (${Math.round(elapsed / 60000)}min since last refresh)`,
        priority
      };
    }

    // 根据优先级决定是否刷新
    if (priority >= RefreshPriority.MEDIUM) {
      this.recordRefresh(formId);
      return {
        shouldRefresh: true,
        reason: `Refresh allowed by priority ${priority}`,
        priority
      };
    }

    // 低优先级:仅允许定时刷新
    if (priority === RefreshPriority.LOW) {
      // 如果距上次刷新超过3小时,允许刷新
      if (elapsed >= 3 * 60 * 60 * 1000) {
        this.recordRefresh(formId);
        return {
          shouldRefresh: true,
          reason: 'Scheduled refresh window reached',
          priority
        };
      }
    }

    return {
      shouldRefresh: false,
      reason: `Priority ${priority} does not warrant refresh`,
      priority
    };
  }

  // 记录刷新事件
  private recordRefresh(formId: string): void {
    const now = Date.now();
    this.lastRefreshTime.set(formId, now);
    const count = (this.refreshCount.get(formId) || 0) + 1;
    this.refreshCount.set(formId, count);

    hilog.info(DOMAIN, TAG, 'Refresh recorded for formId: %{public}s, count: %{public}d', formId, count);
  }

  // 重置每日计数器(应该在每天零点调用)
  resetDailyCounters(): void {
    this.refreshCount.clear();
    hilog.info(DOMAIN, TAG, 'Daily refresh counters reset');
  }

  // 获取卡片刷新统计
  getRefreshStats(formId: string): { lastRefresh: number; todayCount: number } {
    return {
      lastRefresh: this.lastRefreshTime.get(formId) || 0,
      todayCount: this.refreshCount.get(formId) || 0
    };
  }

  // 与 FormExtensionAbility 集成的刷新方法
  async smartUpdateForm(
    formId: string,
    dataProvider: () => Promise<Record<string, Object>>,
    priority: RefreshPriority = RefreshPriority.MEDIUM
  ): Promise<boolean> {
    const decision = this.shouldRefresh(formId, priority);

    if (!decision.shouldRefresh) {
      hilog.info(DOMAIN, TAG, 'Smart refresh skipped: %{public}s', decision.reason);
      return false;
    }

    try {
      // 获取最新数据
      const data = await dataProvider();

      // 构建绑定数据
      const bindingData = formBindingData.createFormBindingData(data);

      // 更新卡片
      const client = formProvider.getFormProviderClient(formId);
      await client.updateForm(formId, bindingData);

      hilog.info(DOMAIN, TAG, 'Smart refresh succeeded for formId: %{public}s', formId);
      return true;
    } catch (err) {
      hilog.error(DOMAIN, TAG, 'Smart refresh failed: %{public}s', (err as Error).message);
      return false;
    }
  }
}

// 导出单例
export const smartRefreshManager = new SmartRefreshManager();
这套刷新管理器的核心思想是分层控制。最低层的定时刷新保证卡片不会完全过时;中层由主应用主动刷新,适用于用户活跃场景;高层由用户交互触发,提供即时反馈。通过记录刷新次数和时间,我们还能防止过度刷新对设备电量的消耗。
在实际项目中,可以将这个管理器与主应用的页面生命周期绑定:当用户打开天气详情页时以高优先级刷新,用户离开后降低刷新频率。这样既保证了活跃用户看到最新数据,又节省了不活跃用户的电量。
七、主应用完整页面实现
7.1 天气详情主页
主应用的核心页面负责展示天气详情、管理卡片实例、以及处理来自卡片的回调消息。以下是一份功能完整的 Index 页面实现:
typescript
// entry/ets/pages/Index.ets
import { common } from '@kit.AbilityKit';
import { formBindingData, formProvider } from '@kit.FormKit';
import { hilog } from '@kit.PerformanceAnalysisKit';
import { smartRefreshManager, RefreshPriority } from '../utils/SmartRefreshManager';

const TAG = 'IndexPage';
const DOMAIN = 0xFF03;

// 城市数据模型
interface CityWeather {
  cityName: string;
  temperature: number;
  weatherIcon: string;
  humidity: number;
  windSpeed: string;
  quality: string;
  updateTime: string;
}

// 可选城市列表
const CITY_LIST: string[] = ['北京', '上海', '深圳', '成都', '杭州', '广州', '武汉', '西安'];

@Entry
@Component
struct Index {
  @State currentCity: string = '北京';
  @State weatherData: CityWeather = this.getDefaultWeather();
  @State isLoading: boolean = false;
  @State registeredFormIds: string[] = [];
  @State showCityPicker: boolean = false;

  // 应用上下文
  private context: common.UIAbilityContext = getContext(this) as common.UIAbilityContext;

  // 获取默认天气数据
  private getDefaultWeather(): CityWeather {
    return {
      cityName: '北京',
      temperature: 25,
      weatherIcon: 'sunny',
      humidity: 45,
      windSpeed: '3级',
      quality: '优',
      updateTime: '--:--'
    };
  }

  // 页面即将显示时加载数据
  aboutToAppear(): void {
    hilog.info(DOMAIN, TAG, 'Index page about to appear');
    this.loadWeatherData(this.currentCity);
  }

  // 加载天气数据
  async loadWeatherData(city: string): Promise<void> {
    this.isLoading = true;

    try {
      // 模拟 API 请求延迟
      await new Promise(resolve => setTimeout(resolve, 500));

      // 生成模拟数据(实际场景中替换为真实 API 调用)
      this.weatherData = this.generateMockWeather(city);

      // 同步更新所有已注册的卡片
      await this.syncAllCards();

    } catch (err) {
      hilog.error(DOMAIN, TAG, 'Failed to load weather data: %{public}s', (err as Error).message);
    } finally {
      this.isLoading = false;
    }
  }

  // 生成模拟天气数据
  private generateMockWeather(city: string): CityWeather {
    const icons = ['sunny', 'cloudy', 'rainy', 'snowy'];
    const qualities = ['优', '良', '轻度污染'];

    return {
      cityName: city,
      temperature: Math.floor(Math.random() * 30) + 5,
      weatherIcon: icons[Math.floor(Math.random() * icons.length)],
      humidity: Math.floor(Math.random() * 50) + 30,
      windSpeed: `${Math.floor(Math.random() * 5) + 1}级`,
      quality: qualities[Math.floor(Math.random() * qualities.length)],
      updateTime: new Date().toLocaleTimeString()
    };
  }

  // 同步更新所有已注册的卡片
  async syncAllCards(): Promise<void> {
    if (this.registeredFormIds.length === 0) {
      hilog.info(DOMAIN, TAG, 'No registered cards to sync');
      return;
    }

    const weatherAsRecord: Record<string, Object> = {
      cityName: this.weatherData.cityName,
      temperature: this.weatherData.temperature,
      weatherIcon: this.weatherData.weatherIcon,
      humidity: this.weatherData.humidity,
      windSpeed: this.weatherData.windSpeed,
      quality: this.weatherData.quality,
      updateTime: this.weatherData.updateTime,
      isLoading: false
    };

    // 使用智能刷新管理器更新所有卡片
    const bindingData = formBindingData.createFormBindingData(weatherAsRecord);

    for (const formId of this.registeredFormIds) {
      try {
        const client = formProvider.getFormProviderClient(formId);
        await client.updateForm(formId, bindingData);
        hilog.info(DOMAIN, TAG, 'Card synced: %{public}s', formId);
      } catch (err) {
        hilog.error(DOMAIN, TAG, 'Failed to sync card: %{public}s', (err as Error).message);
      }
    }
  }

  // 选择城市
  selectCity(city: string): void {
    this.currentCity = city;
    this.showCityPicker = false;
    this.loadWeatherData(city);
  }

  // 获取天气表情
  getWeatherEmoji(): string {
    const map: Record<string, string> = {
      'sunny': '☀️', 'cloudy': '☁️', 'rainy': '🌧️', 'snowy': '❄️', 'default': '🌤️'
    };
    return map[this.weatherData.weatherIcon] || map['default'];
  }

  build() {
    Stack() {
      // 背景渐变
      Column()
        .width('100%')
        .height('100%')
        .background(this.getBackgroundGradient())

      // 主内容
      Column() {
        // 顶部区域
        this.headerSection()

        // 天气主展示
        this.weatherMainSection()

        // 详细信息
        this.detailSection()

        // 卡片管理区域
        this.cardManagementSection()
      }
      .width('100%')
      .height('100%')
      .padding(24)

      // 城市选择弹窗
      if (this.showCityPicker) {
        this.cityPickerOverlay()
      }
    }
    .width('100%')
    .height('100%')
  }

  @Builder
  headerSection() {
    Row() {
      Text('天气元服务')
        .fontSize(20)
        .fontWeight(FontWeight.Bold)
        .fontColor('#1A1A1A')

      Blank()

      // 刷新按钮
      Button('🔄')
        .fontSize(18)
        .backgroundColor('rgba(0,0,0,0)')
        .onClick(() => this.loadWeatherData(this.currentCity))
    }
    .width('100%')
    .margin({ top: 12, bottom: 20 })
  }

  @Builder
  weatherMainSection() {
    Column() {
      // 城市选择器
      Text(this.currentCity)
        .fontSize(16)
        .fontColor('#666666')
        .onClick(() => this.showCityPicker = true)

      // 温度
      Text(`${this.weatherData.temperature}°`)
        .fontSize(96)
        .fontWeight(FontWeight.Bold)
        .fontColor('#1A1A1A')
        .margin({ top: -8, bottom: -4 })

      // 天气图标 + 文字
      Row() {
        Text(this.getWeatherEmoji())
          .fontSize(32)
        Text(this.getWeatherText())
          .fontSize(20)
          .fontColor('#666666')
          .margin({ left: 8 })
      }

      // 更新时间
      Text(`更新于 ${this.weatherData.updateTime}`)
        .fontSize(12)
        .fontColor('#999999')
        .margin({ top: 8 })
    }
    .width('100%')
    .alignItems(HorizontalAlign.Center)
    .margin({ bottom: 32 })
  }

  @Builder
  detailSection() {
    Row() {
      this.detailCard('💧', '湿度', `${this.weatherData.humidity}%`)
      this.detailCard('💨', '风力', this.weatherData.windSpeed)
      this.detailCard('🌿', '空气', this.weatherData.quality)
    }
    .width('100%')
    .justifyContent(FlexAlign.SpaceEvenly)
    .margin({ bottom: 32 })
  }

  @Builder
  detailCard(emoji: string, label: string, value: string) {
    Column() {
      Text(emoji)
        .fontSize(24)
      Text(label)
        .fontSize(12)
        .fontColor('#999999')
        .margin({ top: 4 })
      Text(value)
        .fontSize(16)
        .fontWeight(FontWeight.Medium)
        .fontColor('#1A1A1A')
        .margin({ top: 2 })
    }
    .backgroundColor('#FFFFFF')
    .borderRadius(12)
    .padding(16)
    .shadow({
      radius: 8,
      color: 'rgba(0,0,0,0.06)',
      offsetX: 0,
      offsetY: 2
    })
  }

  @Builder
  cardManagementSection() {
    Column() {
      Text('服务卡片管理')
        .fontSize(14)
        .fontColor('#666666')
        .fontWeight(FontWeight.Medium)
        .alignSelf(ItemAlign.Start)
        .margin({ bottom: 12 })

      // 卡片尺寸选项
      Row() {
        this.cardSizeButton('2×2', [2, 2])
        this.cardSizeButton('2×4', [2, 4])
        this.cardSizeButton('4×2', [4, 2])
        this.cardSizeButton('4×4', [4, 4])
      }
      .width('100%')
      .justifyContent(FlexAlign.SpaceEvenly)
    }
    .width('100%')
    .padding(16)
    .backgroundColor('#FFFFFF')
    .borderRadius(16)
  }

  @Builder
  cardSizeButton(label: string, dimensions: [number, number]) {
    Button(label)
      .fontSize(14)
      .fontColor('#007AFF')
      .backgroundColor('#E8F4FF')
      .borderRadius(8)
      .height(40)
      .onClick(() => this.requestAddForm(dimensions))
  }

  @Builder
  cityPickerOverlay() {
    Column() {
      // 半透明背景
      Column()
        .width('100%')
        .height('100%')
        .backgroundColor('rgba(0,0,0,0.3)')
        .onClick(() => this.showCityPicker = false)

      // 城市列表弹窗
      Column() {
        Text('选择城市')
          .fontSize(18)
          .fontWeight(FontWeight.Bold)
          .fontColor('#1A1A1A')
          .margin({ bottom: 16 })

        List() {
          ForEach(CITY_LIST, (city: string) => {
            ListItem() {
              Text(city)
                .fontSize(16)
                .fontColor(city === this.currentCity ? '#007AFF' : '#1A1A1A')
                .fontWeight(city === this.currentCity ? FontWeight.Bold : FontWeight.Normal)
                .width('100%')
                .padding(12)
                .onClick(() => this.selectCity(city))
            }
          })
        }
        .width('100%')
        .height(300)
      }
      .width('80%')
      .backgroundColor('#FFFFFF')
      .borderRadius(16)
      .padding(20)
    }
    .width('100%')
    .height('100%')
  }

  // 请求添加一张指定尺寸的卡片到桌面
  async requestAddForm(dimensions: [number, number]): Promise<void> {
    try {
      hilog.info(DOMAIN, TAG, 'Requesting add form with dimensions: %{public}s', JSON.stringify(dimensions));
      // 实际添加卡片需要通过 wantAgent 或 formManager API
      // 此处为示意代码
    } catch (err) {
      hilog.error(DOMAIN, TAG, 'Failed to add form: %{public}s', (err as Error).message);
    }
  }

  private getBackgroundGradient(): LinearGradient {
    const hour = new Date().getHours();
    if (hour >= 6 && hour < 12) {
      // 早晨
      return new LinearGradient({
        colors: [['#87CEEB', 0], ['#FFFFFF', 1]],
        direction: GradientDirection.Bottom
      });
    } else if (hour >= 12 && hour < 18) {
      // 下午
      return new LinearGradient({
        colors: [['#FFD700', 0], ['#FFA500', 1]],
        direction: GradientDirection.Bottom
      });
    } else {
      // 夜晚
      return new LinearGradient({
        colors: [['#1A1A2E', 0], ['#16213E', 1]],
        direction: GradientDirection.Bottom
      });
    }
  }

  private getWeatherText(): string {
    const map: Record<string, string> = {
      'sunny': '晴', 'cloudy': '多云', 'rainy': '雨', 'snowy': '雪', 'default': '未知'
    };
    return map[this.weatherData.weatherIcon] || map['default'];
  }
}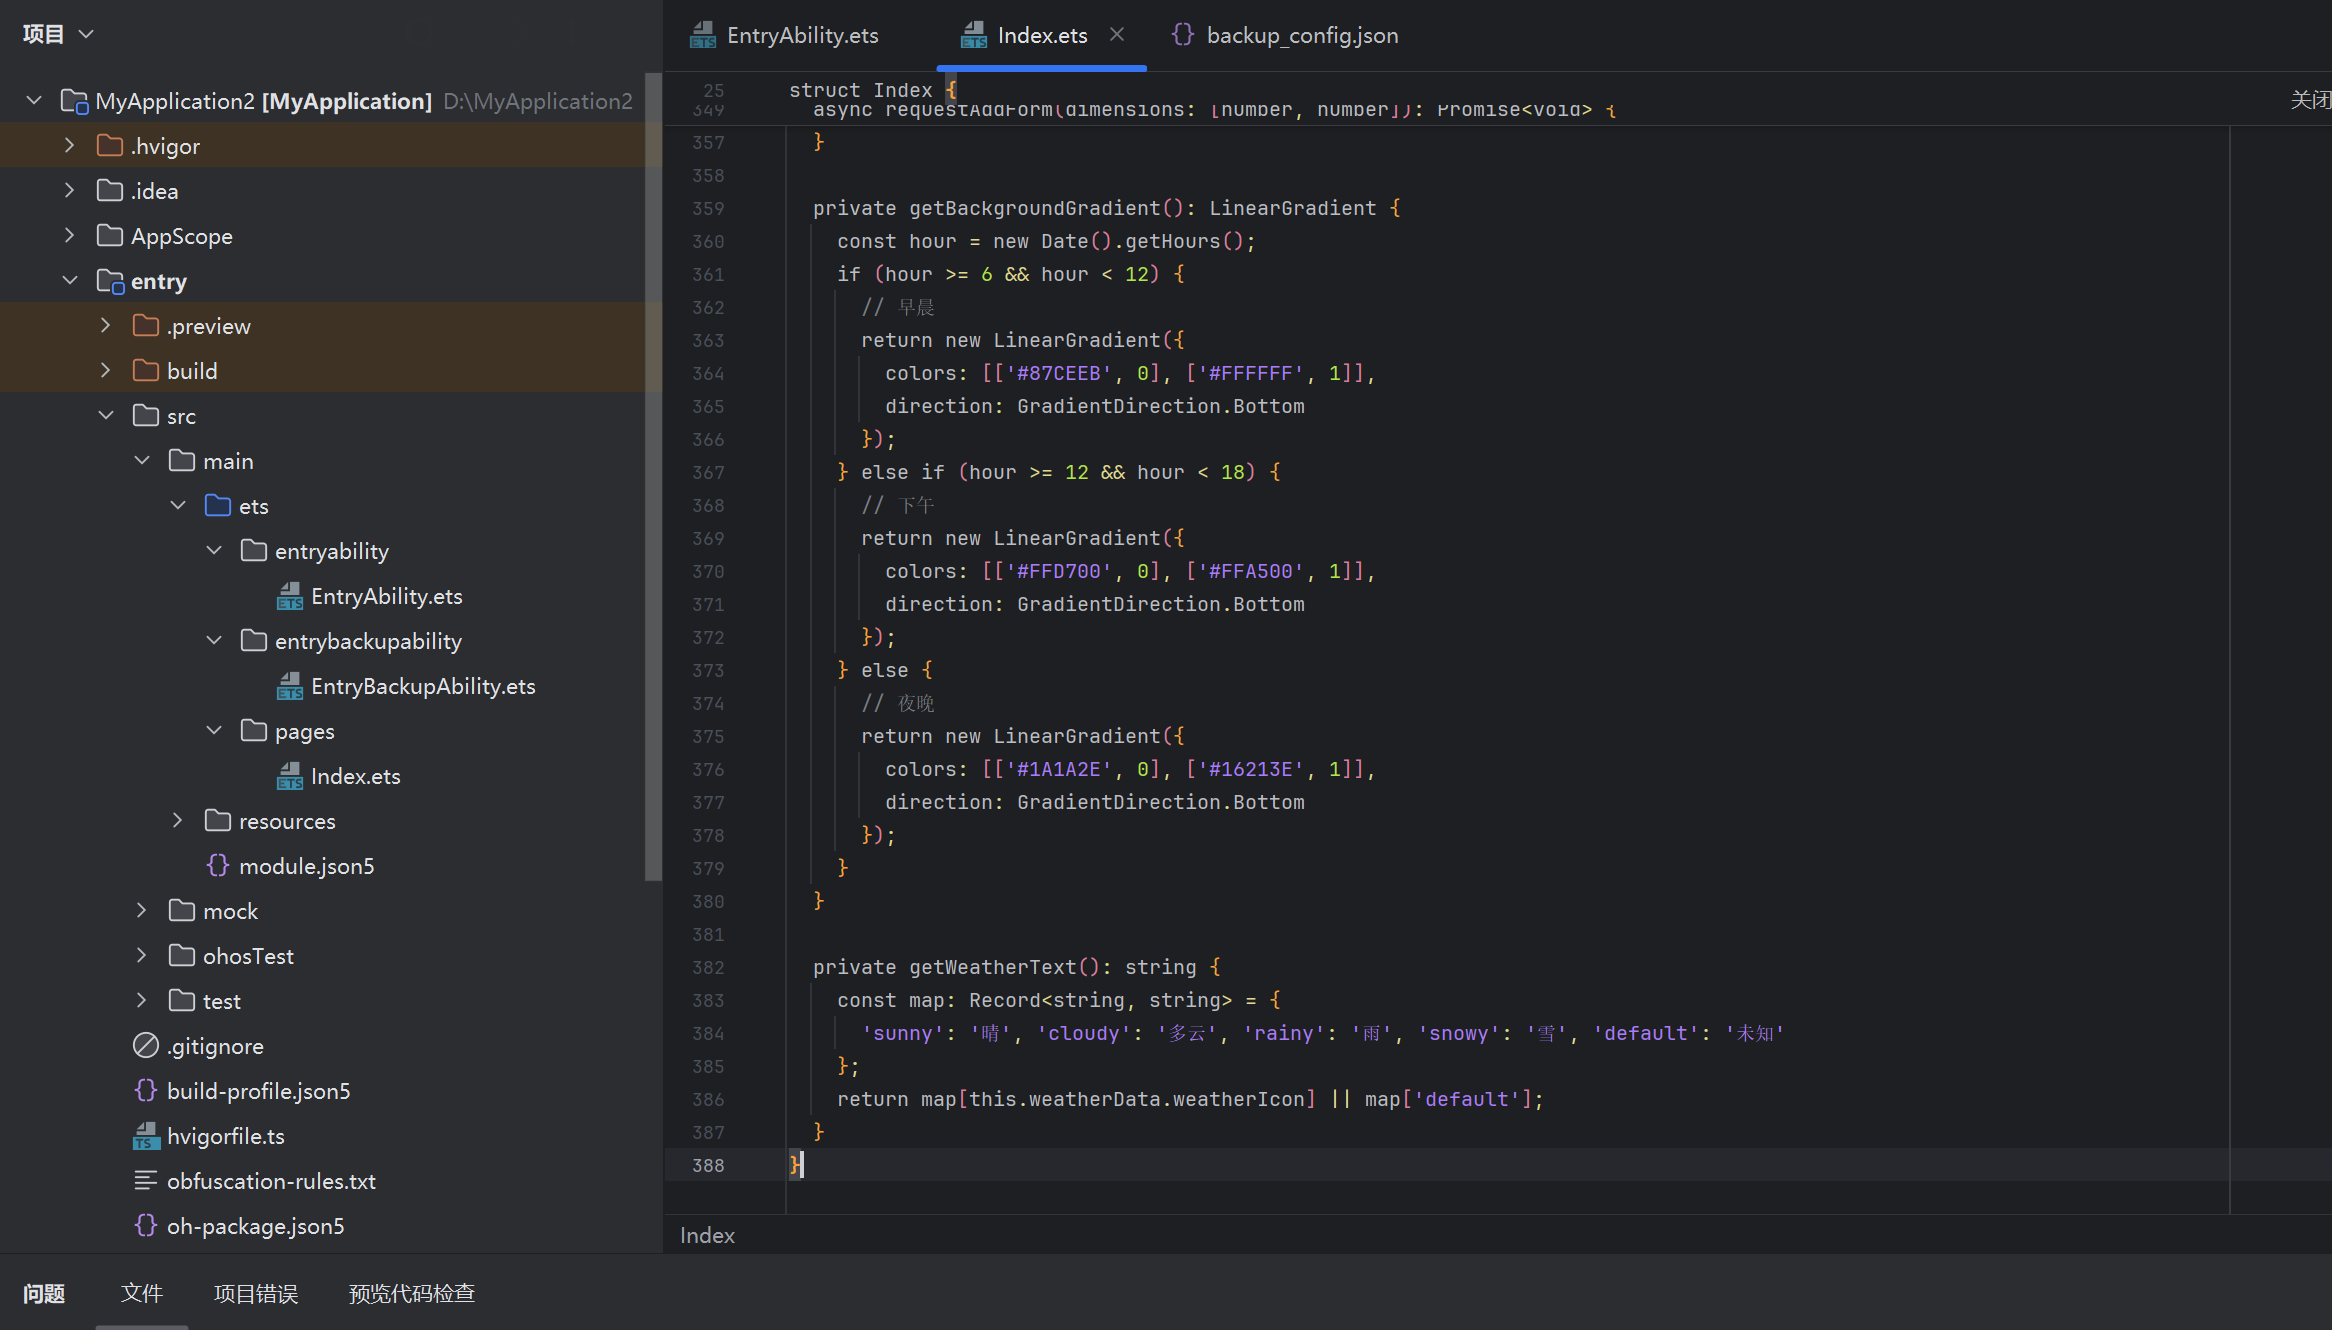
这整段代码涵盖了主应用页面的完整实现。页面分为四个核心区域:顶部导航栏、天气主展示区、详细信息区,以及卡片管理区。当用户在主应用中切换城市或刷新数据时,通过 syncAllCards() 方法将最新数据同步推送给所有已添加到桌面的卡片实例。
八、总结与最佳实践
经过上述七个章节的深入探讨,我们已经覆盖了元服务开发的完整技术链条。从 module.json5 的配置声明,到 FormExtensionAbility 的生命周期管理,再到卡片 UI 的 ArkUI 声明式实现,以及卡片与主体之间的双向通信机制,最后到智能刷新策略的实现,每一环节都有明确的原理阐释和可运行的代码支撑。
元服务与传统 App 的本质区别在于「即用即走」的分发理念和「免安装」的技术保障。在实际开发中,有几个关键原则值得反复强调:
数据传递要精简。卡片运行环境内存受限(通常为 64MB 以内),每次刷新的数据量应该控制在 KB 级别。避免传递大图片、复杂数据结构或未经压缩的原始资源。
通信消息要结构化。当卡片与主体之间需要传递复杂信息时,建议使用 JSON 字符串作为消息载体,由接收方自行解析。避免依赖隐式的参数命名约定。
刷新策略要分级。根据场景选择合适的刷新频率------天气类卡片适合每 30 分钟定时刷新,股票类卡片可能需要更高频率,而备忘录类卡片通常只需在用户编辑后刷新一次。
多尺寸适配要测试。在开发环境中,务必使用真机或模拟器测试每种支持的卡片尺寸。ArkUI 的 Flex 布局在卡片这种固定尺寸的容器中可能有意外表现,需要针对每种尺寸单独调整布局参数。
元服务代表了 HarmonyOS NEXT 对未来应用形态的理解。对于开发者而言,掌握卡片开发技术不仅是响应平台要求,更是打开鸿蒙生态大门的关键钥匙。当用户能够从桌面直接获取核心信息、无需下载即可使用服务时,应用的触达效率将发生质的飞跃。