python爬虫-分组(子表达式)与捕获
子表达式(分组)
在正则表达式中,通过一对圆括号起来的内容,我们就称之为'子表达式'
python
import re

str = re.search(r'\d(\d)(\d)','xzczxdsa123eojvkv')
print(str)
输出结果:

注意:Python正则表达式前的r表示原生字符串(rawstring),该字符串声明了引用中的内容表达该内容的原始含义,避免了多次转义造成的反斜杠困扰。
正则表达式中\d\d\d中,(\d)(\d)就是子表达式,一共由两个()圆括号,则代表两个表达式
说明:findall方法,如果pattern中有分组则返回与分组匹配的列表,所以分组操作中不适合使用findall方法,建议使用search(匹配一个)或者finditer(匹配多个)方法。
2.捕获
当正则表达式在字符串中匹配到相应的内容后,计算机系统会自动把子表达式所匹配的内容放到系统的对应缓存区(缓存区送$1开始)
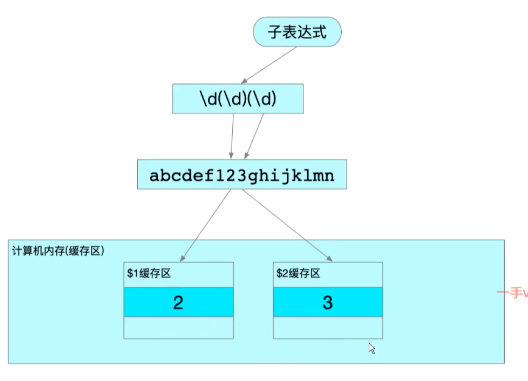
案例演示:
python
import re

#定义一个字符串匹配字符串中的123,然后能单独获取2和3
str1 ='azxvzxca123ds'

#如果正则中带有分组(子表达式)数据,建议使用search方法或者finditer方法获取
result = re.search(r'\d(\d)(\d)',str1)

print(result.group())    # 匹配整体
print(result.group(1))   # 第1分组
print(result.group(2))   # 第2分组
输出结果:
python
123
2
3
逐行讲解
- 正则
r'\d(\d)(\d)'
\d:匹配任意数字(这里捕获数字1,没有括号,不属于分组)(\d):第 1 捕获组 ,匹配数字2(\d):第 2 捕获组 ,匹配数字3
- group () 规则
result.group()/result.group(0)→ 返回完整匹配内容 :123result.group(1)→ 返回第一个括号分组 :2result.group(2)→ 返回第二个括号分组 :3
关键知识点
-
re.search():扫描整个字符串,找到第一个匹配项 就停止(适合本例pythonstr1 = '12222abc' result =re.search(r'(\d)\1\1\1',str1) print(result.gr)
-
re.match():只从字符串开头匹配,本例不能使用 -
括号
()作用:捕获分组,单独提取括号内匹配内容 -
不带括号的匹配内容,无法单独提取,只能拿到整体匹配结果
反向引用(后向引用)
在正则表达式中,我们可以通过\n(n代表第n个缓存区的编号)来引用缓存区中的内容,我们把这个过程就称之为'反向引用'
① 连续 4 个数字 re.search (r'\d\d\d\d', str1)
1234、5678、6789
② 连续的 4 个数字,但是数字的格式为 1111、2222、3333、4444、5555 效果?
re.search (r'(\d)\1\1\1', str1)
示例:
python
import re
str1 = '12222abc'

result =re.search(r'(\d)\1\1\1',str1)
print(result.group())输出结果:

代码分析:
- 正则
r'(\d)\1\1\1'(\d):捕获任意 1 个数字,存入分组 1\1:反向引用,代表必须和分组 1 捕获到的字符完全相同- 整体含义:匹配连续 4 个一模一样的数字
- 字符串
12222abc- 字符序列:
1、2、2、2、2 2222满足连续 4 个相同数字,匹配成功
- 字符序列:
re.search()从左向右扫描字符串,找到第一个符合条件的子串。
💡 如果想匹配至少 4 个相同数字,可以改成量词写法:
result =re.search(r'(\d)\1{3,}',str1)\1{3,} 代表:分组 1 的数字重复 3 次及以上,加上前面 1 个,总长度≥4。
正则表达式其他方法
1.选择匹配符
可以匹配多个规则
案例:匹配字符串hellojava或者hellopython
python
str = 'hellojava , hellopython'
result = re.finditer(r'hello(java|python)',str)
if result:
    for i in result:
        print(i.group())
else:
    print('匹配失败')
输出结果:

代码分析:
1. 正则表达式拆解 hello(java|python)
hello:精准匹配字面字符串 hello(java|python):分组 + 多选分支|代表或者- 含义:匹配
java或者python
- 整体规则:匹配
hellojava或者hellopython
2. 方法说明 re.finditer()
- 返回迭代器对象,保存所有匹配成功的结果(不是列表)
- 需要用 for 循环遍历取出每一个匹配对象
- 和
re.findall()区别:- findall:直接返回匹配字符串列表
- finditer:返回匹配对象,可以使用
.group(1)获取分组内容
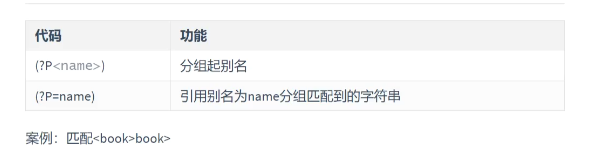
2.分组别名
python
import re
str_data = '<book>python</book>'
# 正确正则写法
result = re.search(r'<(?P<mark>\w+)>\w+<\/(?P=mark)>', str_data)
print(result.group())
输出结果:

正则拆分 r'<(?P<mark>\w+)>\w+<\/(?P=mark)>'
(?P<mark>\w+)(?P<名称>表达式):命名捕获分组- 把标签名
book捕获,分组别名叫做mark
(?P=mark)- 命名反向引用
- 代表:和名为
mark分组捕获到的内容完全一致 - 作用:保证开始标签和闭合标签名称相同 (
<book>...</book>,不会匹配<book>...</page>)
- 其余部分
<></:匹配标签符号\w+:匹配标签中间的文本(python)
综合案例:
需求:在列表中'apple', 'banana', 'orange', 'pear', 'watermelon'匹配apple
python
import  re


list1 = ['apple', 'banana', 'orange', 'pear', 'watermelon']
str1 = str(list1)
result = re.finditer('(apple)',str1)
if result:
    for i in result:
        print(i.group())
else:
    print('匹配失败')
输出结果:

代码分析:
-
str(list1)列表转为字符串,内部元素变成带引号的文本,字符串中包含子串apple,所以可以匹配成功。 -
正则
(apple)括号创建捕获分组,这里分组没有实际业务作用,等价于直接写apple; 可以通过i.group(1)取出分组内容。 -
重要提醒(老生常谈)
re.finditer()返回迭代器对象,永远不为 None 。 哪怕没有匹配内容,result依旧是迭代器,if result:判断恒成立。 👉 如果匹配不到内容,for循环不会执行,不会进入else分支!2.需求:怕匹配出163、126、qq等邮箱
Python简单爬虫实践案例
学习目标
基于FastAPI之Web站点开发
1.基于FastAPI搭建Web服务器
python
#导入FastAPI
from fastapi import  FastAPI
#导入响应Respons模块
from fastapi import  Response
#导入服务器uvicorn模块
import uvicorn


#创建一个FastAPI实例对象
app = FastAPI()
#通过@app路由装饰器收发数据
#@app.get(参数):按照get方法接收请求参数
#请求资源的url
@app.get("index.html")
def main():
    with open('source/index.html') as f:
        data = f.read()
    return Response(data, media_type="text/html")
#启动服务器
uvicorn.run(app, host="127.0.0.1", port=8000)
web服务器和游览器的通讯流程
实际上web服务器和浏览器的通讯流程过程并不是一次性完成的,这里HTML代码中也会有访问服务器的代码,比如请求图片资源。
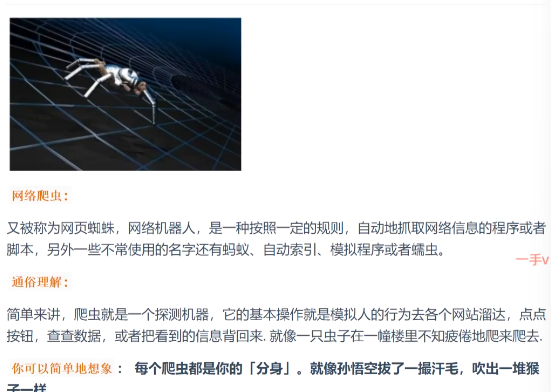
python爬虫
介绍
爬虫的基本步骤:
基本步骤:
1.起始url地址
2.发出请求获取响应数据
3.对响应数据解析
4.数据入库
安装requests模块
requests:可以模拟游览器请求
打开命令行工具(Windows的CMD/PowerShell或macOS/Linux的终端),输入以下命令:
如果使用的是Python 3,可能需要明确指定pip版本:
bash
pip3 install requests
对于使用Anaconda的用户,可以通过conda命令安装:
bash
conda install requests
使用requests模拟浏览器请求
安装完成后,可以通过requests模块发送HTTP请求。以下是一个简单的GET请求示例,模拟浏览器访问网页:
python
import requests

# 设置请求头,模拟浏览器
headers = {
    'User-Agent': 'Mozilla/5.0 (Windows NT 10.0; Win64; x64) AppleWebKit/537.36 (KHTML, like Gecko) Chrome/91.0.4472.124 Safari/537.36'
}

response = requests.get('https://www.example.com', headers=headers)
print(response.text)  # 输出网页内容
如果需要发送POST请求,可以这样操作:
python
data = {'key1': 'value1', 'key2': 'value2'}
response = requests.post('https://httpbin.org/post', data=data, headers=headers)
print(response.json())  # 输出JSON响应
用爬虫爬取网页图片的信息
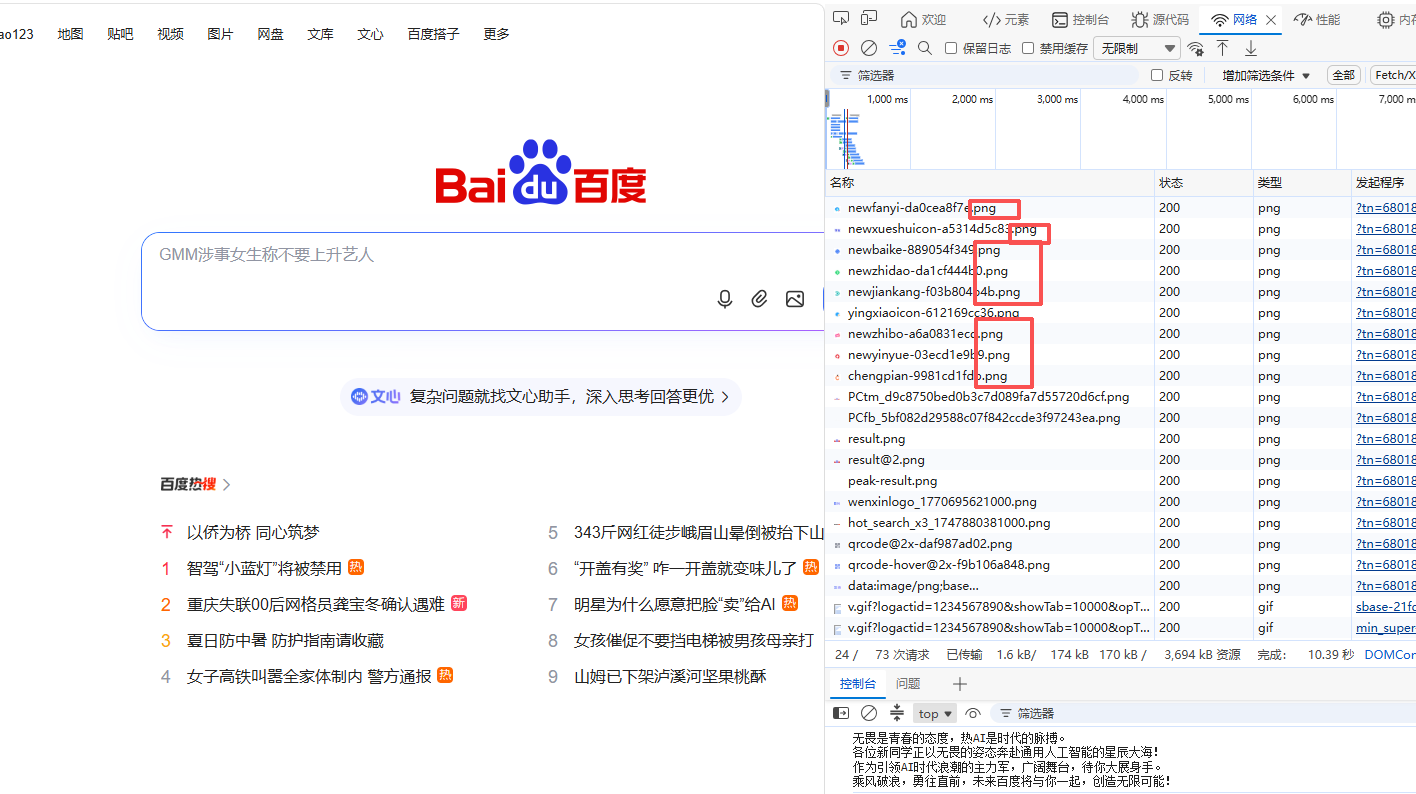
访问百度的首页资源,在控制台可以看见照片都是以.png结尾
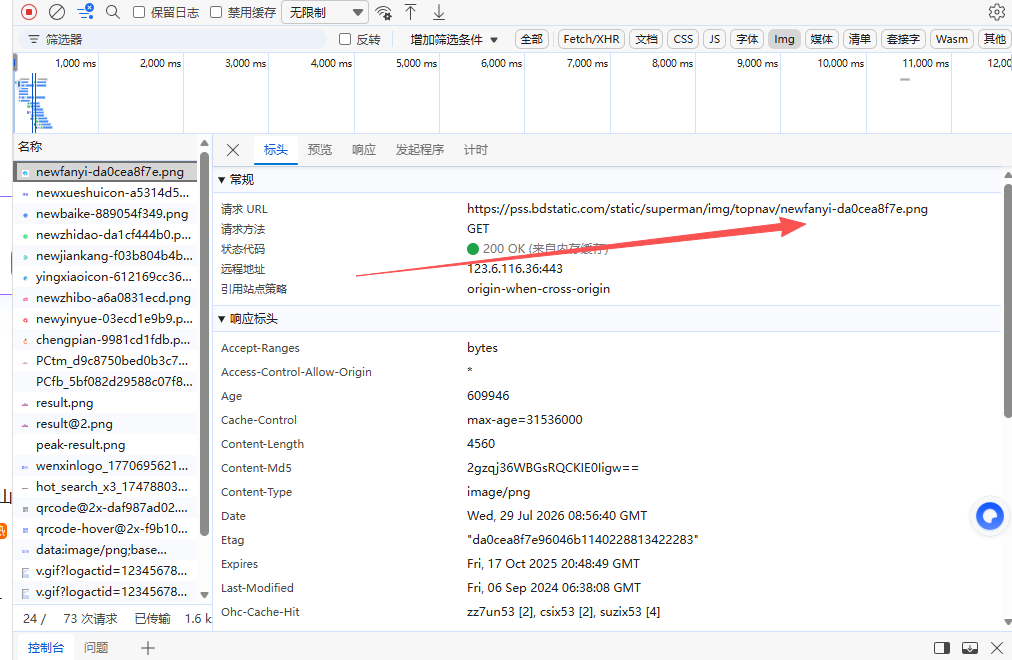
点击第一个现实请求的URL是https://pss.bdstatic.com/static/superman/img/topnav/newfanyi-da0cea8f7e.png,正真的图片获取地址,爬取图片就是通过图片url保存在本地
爬取照片的步骤
1.获取html代码
2.解析html代码获取图片URL
3.通过图片url获取图片
获取html代码
python
import requests
data = requests.get('https://www.baidu.com')

data = data.content.decode('utf-8')
print(dat
输出结果:
html
<!DOCTYPE html>
<!--STATUS OK--><html> <head><meta http-equiv=content-type content=text/html;charset=utf-8><meta http-equiv=X-UA-Compatible content=IE=Edge><meta content=always name=referrer><link rel=stylesheet type=text/css href=https://ss1.bdstatic.com/5eN1bjq8AAUYm2zgoY3K/r/www/cache/bdorz/baidu.min.css><title>百度一下,你就知道</title></head> <body link=#0000cc> <div id=wrapper> <div id=head> <div class=head_wrapper> <div class=s_form> <div class=s_form_wrapper> <div id=lg> <img hidefocus=true src=//www.baidu.com/img/bd_logo1.png width=270 height=129> </div> <form id=form name=f action=//www.baidu.com/s class=fm> <input type=hidden name=bdorz_come value=1> <input type=hidden name=ie value=utf-8> <input type=hidden name=f value=8> <input type=hidden name=rsv_bp value=1> <input type=hidden name=rsv_idx value=1> <input type=hidden name=tn value=baidu><span class="bg s_ipt_wr"><input id=kw name=wd class=s_ipt value maxlength=255 autocomplete=off autofocus=autofocus></span><span class="bg s_btn_wr"><input type=submit id=su value=百度一下 class="bg s_btn" autofocus></span> </form> </div> </div> <div id=u1> <a href=http://news.baidu.com name=tj_trnews class=mnav>新闻</a> <a href=https://www.hao123.com name=tj_trhao123 class=mnav>hao123</a> <a href=http://map.baidu.com name=tj_trmap class=mnav>地图</a> <a href=http://v.baidu.com name=tj_trvideo class=mnav>视频</a> <a href=http://tieba.baidu.com name=tj_trtieba class=mnav>贴吧</a> <noscript> <a href=http://www.baidu.com/bdorz/login.gif?login&tpl=mn&u=http%3A%2F%2Fwww.baidu.com%2f%3fbdorz_come%3d1 name=tj_login class=lb>登录</a> </noscript> <script>document.write('<a href="http://www.baidu.com/bdorz/login.gif?login&tpl=mn&u='+ encodeURIComponent(window.location.href+ (window.location.search === "" ? "?" : "&")+ "bdorz_come=1")+ '" name="tj_login" class="lb">登录</a>');
</script> <a href=//www.baidu.com/more/ name=tj_briicon class=bri style="display: block;">更多产品</a> </div> </div> </div> <div id=ftCon> <div id=ftConw> <p id=lh> <a href=http://home.baidu.com>关于百度</a> <a href=http://ir.baidu.com>About Baidu</a> </p> <p id=cp>©2017 Baidu <a href=http://www.baidu.com/duty/>使用百度前必读</a> <a href=http://jianyi.baidu.com/ class=cp-feedback>意见反馈</a> 京ICP证030173号 <img src=//www.baidu.com/img/gs.gif> </p> </div> </div> </div> </body> </html>使用open方法通过图片url获取图片
python
import requests


data = requests.get('https://pss.bdstatic.com/static/superman/img/topnav/newfanyi-da0cea8f7e.png')
#图片不需要解码
getpic = data.content

#使用with创建一个本地文件
with open('source/newfanyi.png','wb') as f:
    f.write(getpic)
输出结果: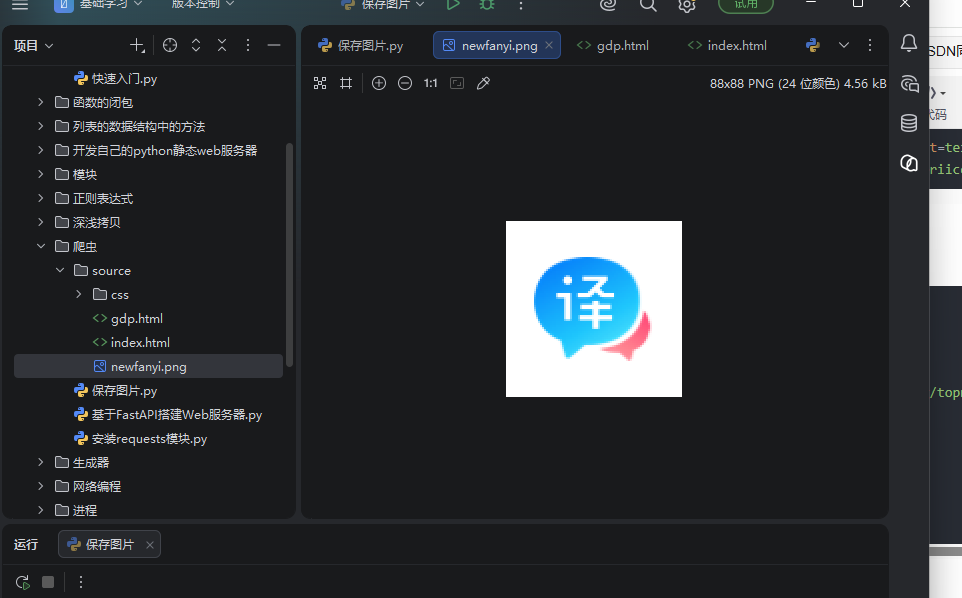
代码分析:
-
导入第三方网络请求库
requests,用于发送 HTTP 请求,获取网络资源。data = requests.get('https://pss.bdstatic.com/static/superman/img/topnav/newfanyi-da0cea8f7e.png')
-
发送 GET 请求 ,访问图片 URL;
- 返回的
data不是图片本身 ,是一个Response响应对象; - 对象内部包含响应状态码、响应头、图片二进制数据等信息。
getpic = data.content
- 返回的
-
data.content:获取原始二进制字节数据
重点区分:
.content:原始 bytes,图片、音视频、压缩包必须使用.text:自动编码转为字符串,仅用于网页文本,图片使用会损坏文件
with open('source/newfanyi.png','wb') as f:
    f.write(getpic)
with open(...):上下文管理器打开文件,代码执行结束自动关闭文件 ,不需要手动f.close()- 打开模式
wb:write binaryw:覆盖写入;b:二进制模式- 二进制模式不会自动处理编码换行,保存图片必备
- 打开模式
f.write(getpic):把图片二进制字节写入本地文件,完成保存。
解析html代码获取图片URL
python
html = resp.text

# 解析网页
soup = BeautifulSoup(html, "html.parser")
# 找到页面所有<img>标签
img_tags = soup.find_all("img")

img_url_list = []
for img in img_tags:
    src = img.get("src")
    if not src:
        continue
    # 补全url
    if src.startswith("//"):
        full_src = "https:" + src
    elif src.startswith("/"):
        full_src = "https://www.baidu.com" + src
    else:
        full_src = src

    img_url_list.append(full_src)
    print("图片链接:", full_src)

print(f"\n一共找到 {len(img_url_list)} 张图片")
输出结果:、
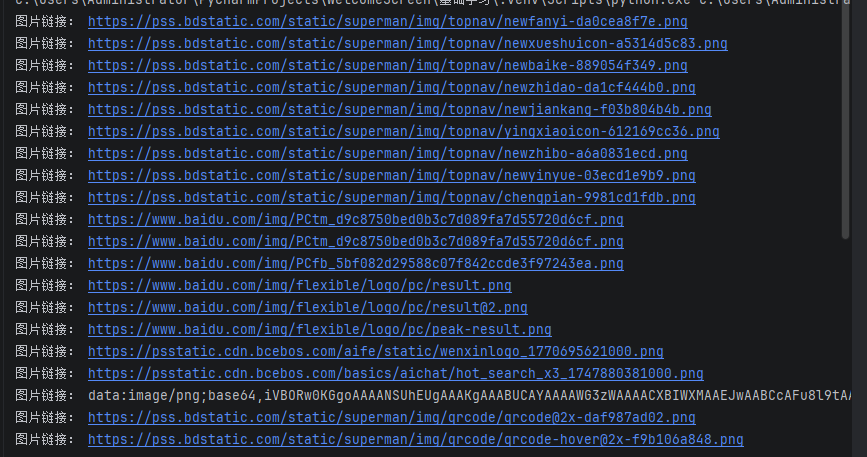
代码分析:
BeautifulSoup(html, "html.parser")- 作用:把杂乱的文本格式 HTML 字符串,转换成结构化文档对象(DOM 树)
- 第一个参数:原始网页文本
- 第二个参数:解析器,
html.parser是 Python 内置解析器,无需额外安装
soup对象:可以使用专门方法快速查找标签,代替手写split()/find()字符串切割
python
运行
# 找到页面所有<img>标签
img_tags = soup.find_all("img")find_all("img"):查找页面中全部<img>标签- 返回值:列表,列表内每一个元素都是一个图片标签对象
对比手写字符串截取:不用逐行遍历、不用处理换行,一行找到所有图片标签
python
运行
img_url_list = []创建空列表,用来存放处理完成的完整图片链接,方便后续统一遍历下载
python
运行
for img in img_tags:
    src = img.get("src")
    if not src:
continue- 循环遍历每一个图片标签对象
img.get("src"):获取标签里src属性的值(图片地址) ✅ 推荐使用.get();不推荐img['src']- 如果标签缺少 src 属性 ,
img['src']会直接报错崩溃 .get("src")找不到属性会返回None,程序不会崩溃
- 如果标签缺少 src 属性 ,
if not src: continue判断:如果 src 是空 / None,直接跳过当前循环,不处理无效图片
完整demo:
python
import requests
from bs4 import BeautifulSoup
import os

# 目标网址
url = "https://www.baidu.com"
headers = {
    "User-Agent": "Mozilla/5.0 (Windows NT 10.0; Win64; x64) Chrome/120.0.0.0 Safari/537.36"
}

resp = requests.get(url, headers=headers)
resp.encoding = "utf-8"
html = resp.text

# 解析网页
soup = BeautifulSoup(html, "html.parser")
# 找到页面所有<img>标签
img_tags = soup.find_all("img")

img_url_list = []
for img in img_tags:
    src = img.get("src")
    if not src:
        continue
    # 补全url
    if src.startswith("//"):
        full_src = "https:" + src
    elif src.startswith("/"):
        full_src = "https://www.baidu.com" + src
    else:
        full_src = src

    img_url_list.append(full_src)
    print("图片链接:", full_src)

print(f"\n一共找到 {len(img_url_list)} 张图片")

# ============可选:批量全部下载============
os.makedirs("baidu_img", exist_ok=True)
for idx, pic_url in enumerate(img_url_list):
    try:
        pic_resp = requests.get(pic_url, headers=headers, timeout=10)
        save_path = f"baidu_img/pic_{idx}.png"
        with open(save_path, "wb") as f:
            f.write(pic_resp.content)
        print(f"已下载:{pic_url} → {save_path}")
    except Exception as e:
        print(f"下载失败 {pic_url},原因:{e}")
多任务爬虫实现
为什么要使用多任务爬取数据
在真正的工作环境中,我们爬取的数据可能非常的多,如果还是使用单任务实现,这时候就会让我们爬取数据的时间很长,那么显然使用多任务可以大大提升我们爬取数据的效率
多任务代码实现
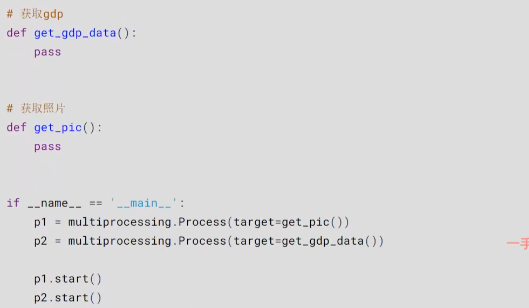
具体爬取实现:
python
import requests
from bs4 import BeautifulSoup
import os
import multiprocessing

headers = {
    "User-Agent": "Mozilla/5.0 (Windows NT 10.0; Win64; x64) Chrome/120.0.0.0 Safari/537.36"
}

# 获取图片函数(交给子进程执行)
def get_pic():
    url = "https://www.baidu.com"
    resp = requests.get(url, headers=headers)
    resp.encoding = "utf-8"
    html = resp.text

    soup = BeautifulSoup(html, "html.parser")
    img_tags = soup.find_all("img")

    img_url_list = []
    for img in img_tags:
        src = img.get("src")
        if not src:
            continue
        # 补全url
        if src.startswith("//"):
            full_src = "https:" + src
        elif src.startswith("/"):
            full_src = "https://www.baidu.com" + src
        else:
            full_src = src
        img_url_list.append(full_src)
        print("图片链接:", full_src)

    print(f"\n一共找到 {len(img_url_list)} 张图片")

    # 批量下载
    os.makedirs("baidu_img", exist_ok=True)
    for idx, pic_url in enumerate(img_url_list):
        try:
            pic_resp = requests.get(pic_url, headers=headers, timeout=10)
            save_path = f"baidu_img/pic_{idx}.png"
            with open(save_path, "wb") as f:
                f.write(pic_resp.content)
            print(f"已下载:{pic_url} → {save_path}")
        except Exception as e:
            print(f"下载失败 {pic_url},原因:{e}")


if __name__ == '__main__':
    # 创建进程 target=函数名,不加括号!
    p1 = multiprocessing.Process(target=get_pic)
    # 启动进程
    p1.start()
    # 等待子进程执行完毕(可选)
    p1.join()