快速阅读:可直接跳转至第五部分
一、优点
连接池的优点:优化系统性能。
作为一个池子不必要需要的时候连接,不需要时候关闭(十分影响性能)
作为连接池,使用的时候借,不用的时候还。
二、开发步骤
- 导入数据源坐标与数据库的驱动坐标
2.创建数据源对象
3.设置数据源的基本连接信息
- 使用数据源连接资源与归还资源
三、c3p0实现
(1)不使用jdbc. properties文件
- 导入数据源坐标与数据库的驱动坐标
pom.xml中导入依赖关系
  <dependencies>

      <dependency>
          <groupId>com.mchange</groupId>
          <artifactId>c3p0</artifactId>
          <version>0.9.5.2</version>
      </dependency>

      <dependency>
          <groupId>mysql</groupId>
          <artifactId>mysql-connector-java</artifactId>
          <version>8.0.28</version>
      </dependency>

      <dependency>
          <groupId>com.alibaba</groupId>
          <artifactId>druid</artifactId>
          <version>1.1.21</version>
      </dependency>

      <dependency>
          <groupId>junit</groupId>
          <artifactId>junit</artifactId>
          <version>4.12</version>
          <scope>test</scope>
      </dependency>
      <dependency>
          <groupId>org.junit.jupiter</groupId>
          <artifactId>junit-jupiter</artifactId>
          <version>RELEASE</version>
          <scope>compile</scope>
      </dependency>

      <dependency>
          <groupId>org.springframework</groupId>
          <artifactId>spring-context</artifactId>
          <version>6.1.2</version>
      </dependency>

      <dependency>
          <groupId>org.springframework</groupId>
          <artifactId>spring-test</artifactId>
          <version>5.3.12</version>
      </dependency>
2.创建数据源对象
public class dataSourceTest(){

    //    手动测试C3P0
    @Test
    public void test01() throws Exception {
        ComboPooledDataSource ds = new ComboPooledDataSource();
        ds.setDriverClass("com.mysql.cj.jdbc.Driver");
        ds.setJdbcUrl("jdbc:mysql://localhost:3306/你的名字?serverTimezone=Asia/Shanghai&useSSL=false");
        ds.setUser("root");
        ds.setPassword("admin");
        Connection connection = ds.getConnection();
        System.out.println("connection = " + connection);
        connection.close();
    }

}
(2)使用jdbc. properties文件
为什么要用,耦合了。想要修改数据库名称结果要去源码里慢慢翻
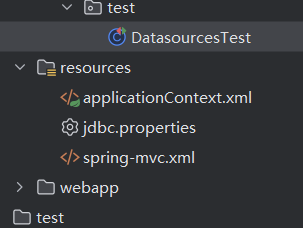
jdbc.properties
jdbc.url=jdbc:mysql://localhost:3306/test?serverTimezone=Asia/Shanghai&useSSL=false
jdbc.username=root
jdbc.password=root
jdbc.driver=com.mysql.cj.jdbc.Driver

手动测试C3P0(加载properties文件形式)
@Test
public void test03() throws Exception {
    ResourceBundle rb = ResourceBundle.getBundle("jdbc");
    String url = rb.getString("jdbc.url");
    String username = rb.getString("jdbc.username");
    String password = rb.getString("jdbc.password");
    String driverClassName = rb.getString("jdbc.driver");
    ComboPooledDataSource ds = new ComboPooledDataSource();
        ds.setDriverClass(driverClassName);
        ds.setJdbcUrl(url);
        ds.setUser(username);
       ds.setPassword(password);
    Connection connection = ds.getConnection();
    System.out.println("connection = " + connection);
    connection.close();
}
四、druid实现
//    手动测试druid
    @Test
    public void test02() throws Exception {
        DruidDataSource dds = new DruidDataSource();
        dds.setDriverClassName("com.mysql.cj.jdbc.Driver");
        dds.setUrl("jdbc:mysql://localhost:3306/test?serverTimezone=Asia/Shanghai&useSSL=false");
        dds.setUsername("root");
        dds.setPassword("root");
        Connection connection = dds.getConnection();
        System.out.println("connection = " + connection);
        connection.close();
    }

    @Test
//    测试spring容器创建数据源的代码
    public void test04() throws Exception {
        ApplicationContext applicationContext = new ClassPathXmlApplicationContext("applicationContext.xml");
        ComboPooledDataSource bean = applicationContext.getBean(ComboPooledDataSource.class);
        Connection connection = bean.getConnection();
        System.out.println("connection = " + connection);
        connection.close();
    }
五、使用Spring产生数据源对象
我们知道一般产生对象有两种方式,1.使用构造方法进行注入。2. 使用set方法进行注入
上述多次使用过SET方法,可以借此使用Spring进行优化处理
-
pom.xml中导入Spring-framework坐标
-
创建配置文件 即resources 目录下的 applicationContext.xml
1)以下为使用c3p0
<?xml version="1.0" encoding="UTF-8"?>
<beans xmlns="http://www.springframework.org/schema/beans"
       xmlns:xsi="http://www.w3.org/2001/XMLSchema-instance"
       xmlns:context="http://www.springframework.org/schema/context"
       xsi:schemaLocation=
               "http://www.springframework.org/schema/beans
                http://www.springframework.org/schema/beans/spring-beans.xsd
                http://www.springframework.org/schema/context
                http://www.springframework.org/schema/context/spring-context.xsd">

<!--    配置组件扫描-->
    <context:component-scan base-package="com.Itheima"/>

<!--    加载外部的properties文件-->
    <context:property-placeholder location="classpath:jdbc.properties"/>
    <!-- 在这里配置bean -->
<bean id="dataSource" class="com.mchange.v2.c3p0.ComboPooledDataSource">
    <property name="driverClass" value="${jdbc.driver}"></property>
    <property name="jdbcUrl" value="${jdbc.url}"></property>
    <property name="user" value="${jdbc.username}"></property>
    <property name="password" value="${jdbc.password}"></property>
</bean>

</beans>-
以下为使用druid方法
<context:component-scan base-package="com.Itheima"/><context:property-placeholder location="classpath:jdbc.properties"/> <!-- 在这里配置bean -->
额外补充:
