📋 准备工作
- 拥有 DeepSeek API Key :在 DeepSeek 平台注册并充值,拿到了一个以
sk-开头的 API Key。 - 安装 Codex 客户端:安装 Codex(比如 ChatGPT 桌面应用、Codex CLI 或 VS Code 扩展),并且至少运行过一次,这样才会在本地生成配置文件目录。
- 用这个
sk-开头的key登录chatGPT。
⚙️ 安装与配置
-
以管理员身份打开 PowerShell(在开始菜单搜索 PowerShell,右键选择"以管理员身份运行")。
-
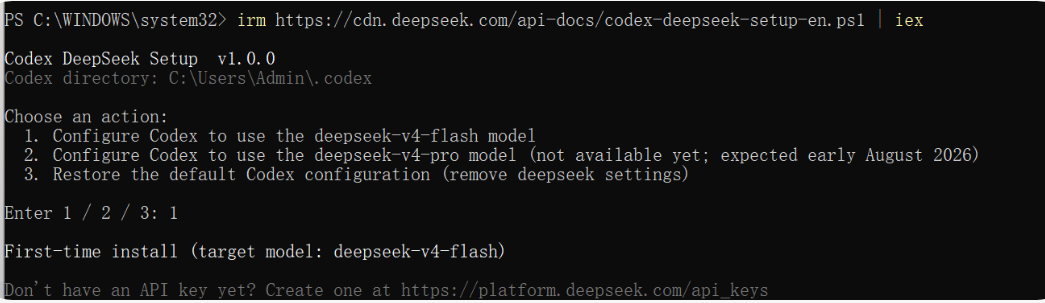
执行安装命令 :复制并粘贴以下命令到 PowerShell 窗口,按回车:
powershellirm https://cdn.deepseek.com/api-docs/codex-deepseek-setup-en.ps1 | iex -
选择模型 :脚本启动后会显示菜单,输入
1选择deepseek-v4-flash模型。 -
输入 API Key :根据脚本提示,粘贴你的 DeepSeek API Key(以
sk-开头),然后按回车。
✅ 验证是否成功
脚本执行完毕后,检查以下几点:
- 查看输出日志,确认出现
[OK] Installation complete.字样。 - 如果使用 ChatGPT 桌面应用 ,重启后查看右下角,应该显示
deepseek-v4-flash模型名称。 - 如果使用 Codex CLI ,启动时命令行横幅会显示
model: deepseek-v4-flash。
bash
[OK] Backed up config.toml -> C:\Users\Admin\.codex\backup-deepseek\config.toml
[OK] Wrote C:\Users\Admin\.codex\models.json (contains deepseek-v4-flash and deepseek-v4-pro)
[OK] Updated C:\Users\Admin\.codex\config.toml

Changes made to your existing configuration (2 total)
  - Rewrote model: "gpt-5.6-sol" -> "deepseek-v4-flash"
  - Rewrote model_reasoning_effort: "low" -> "high"

Configuration written
  model                  = "deepseek-v4-flash"
  model_provider         = "deepseek"
  preferred_auth_method  = "apikey"
  forced_login_method    = "api"
  model_reasoning_effort = "high"
  model_catalog_json     = "C:/Users/Admin/.codex/models.json"

  [model_providers.deepseek]
  base_url  = "https://api.deepseek.com/"
  wire_api  = "responses"

Validation
[OK] models.json is valid JSON
[OK] config.toml has no duplicate top-level keys

[OK] Installation complete.

How to verify it took effect:
  - ChatGPT desktop app: after launch, the bottom-right corner showing the DeepSeek model name means success
    (that is deepseek-v4-flash; if it still shows "Custom", models.json was not loaded)
  - Codex CLI: the startup banner shows model: deepseek-v4-flash

If the logs show "fallback model metadata" or "Unknown model",
models.json was not loaded -- please reinstall.

How to switch / restore
Your original configuration was backed up to C:\Users\Admin\.codex\backup-deepseek
Just run this script again:

  irm https://cdn.deepseek.com/api-docs/codex-deepseek-setup-en.ps1 | iex

  Pick 1/2 to switch between flash / pro, or 3 to restore the pre-install configuration.
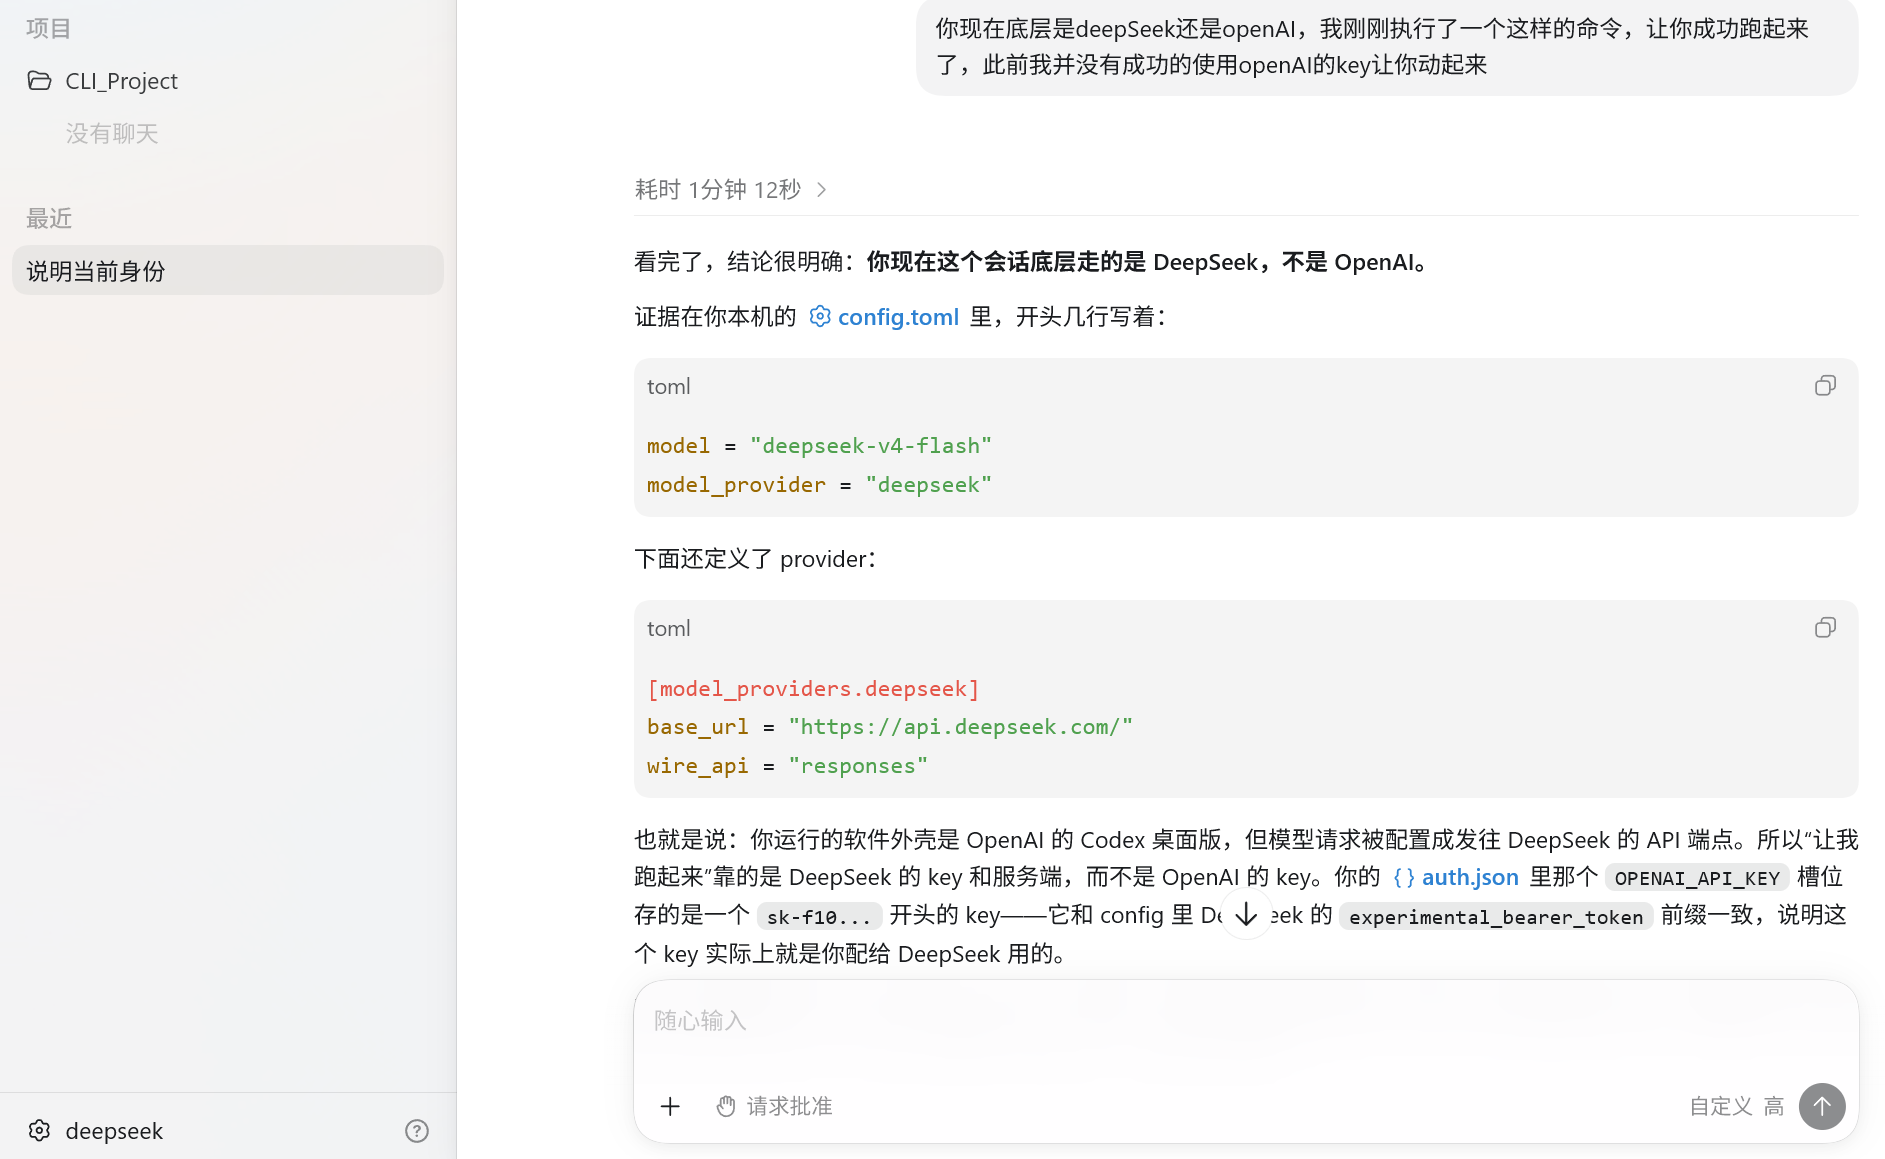
提问codeX它的底层模型
💡 后续管理
- 切换模型 :再次运行安装命令,选
1(Flash)或2(Pro,如果可用)。 - 恢复原配置 :再次运行安装命令,选
3,即可一键恢复到安装前的状态(比如 OpenAI 的默认模型)。