如图所示,是拍摄一个平面显示器的坐标图,该坐标图由于"近大远小"、摄像机旋转等操作变得"畸形",希望能够手动拾取这个坐标图的四个角点,然后自动"畸变矫正",输出严格的平面图
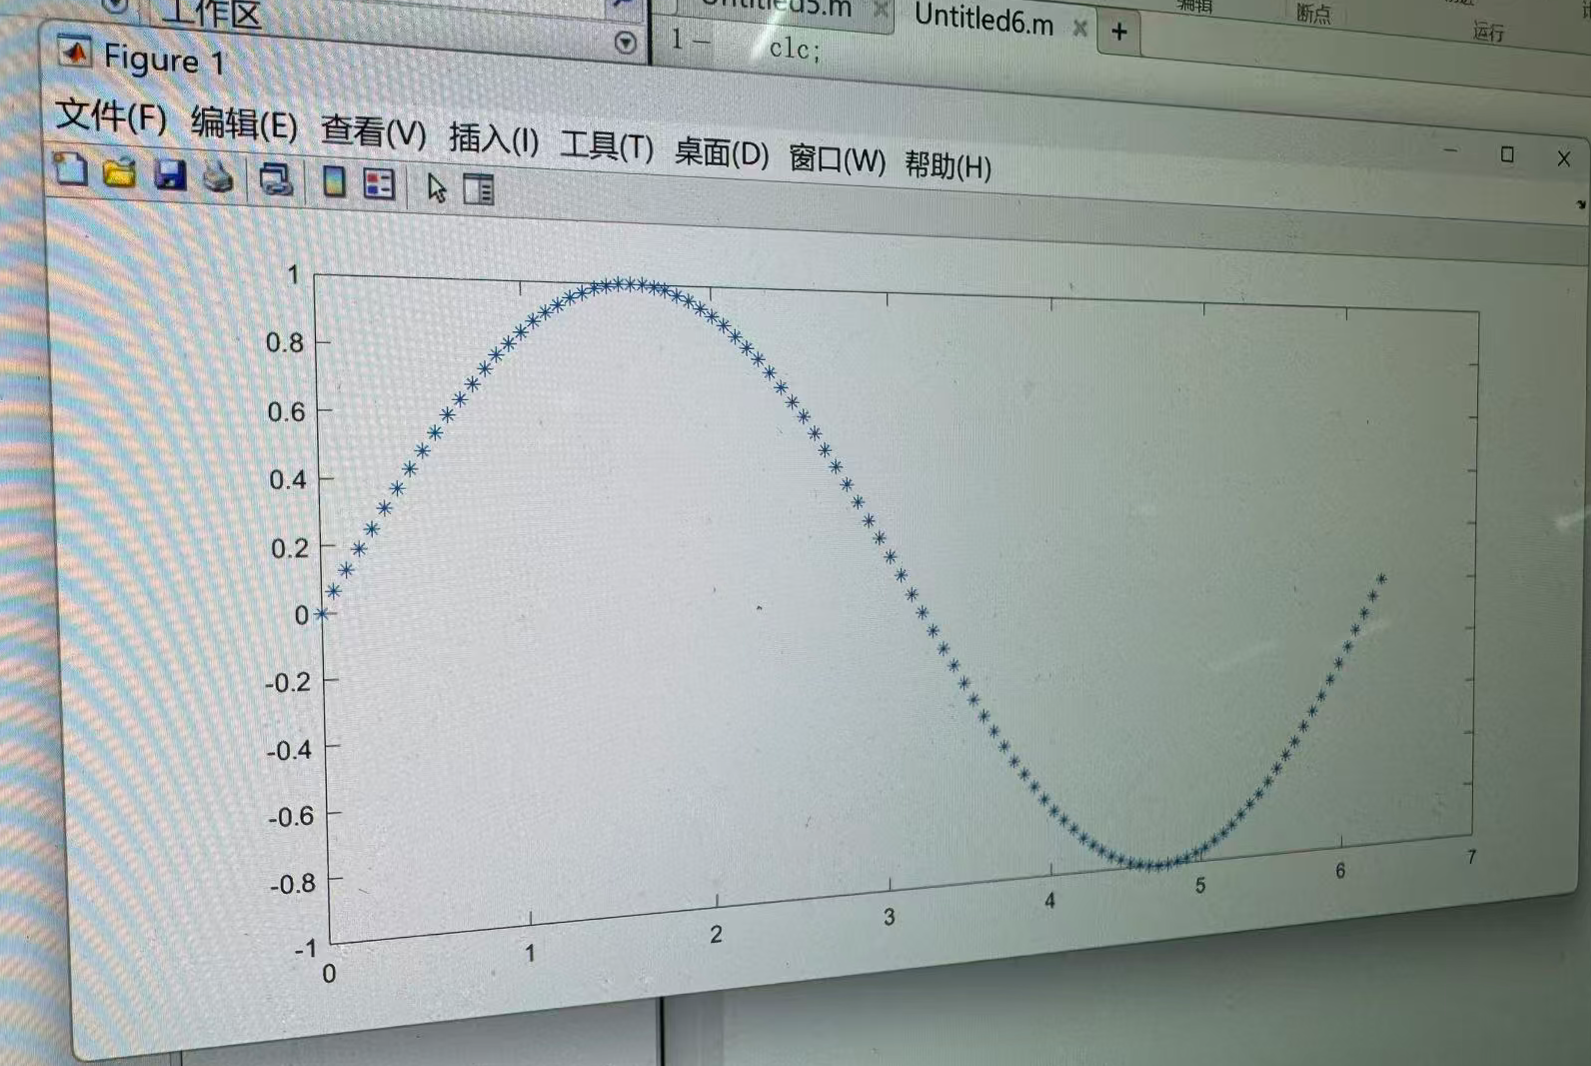
主代码
matlab
clc;
clear;
close all;

%% 1. 读取图像
[filename, pathname] = uigetfile({'*.png;*.jpg;*.jpeg;*.bmp;*.tif','图像文件 (*.png,*.jpg,*.jpeg,*.bmp,*.tif)'}, '选择要矫正的图像');
if isequal(filename, 0)
    disp('用户取消选择');
    return;
end
img = imread(fullfile(pathname, filename));

%% 2. 显示图像并手动拾取四个角点
figure('Name', '畸变矫正 - 拾取角点', 'NumberTitle', 'off', 'Color', 'w');
imshow(img);
title('请按顺序点击四个角点:左上 -> 右上 -> 右下 -> 左下(点击4次后自动继续)');
hold on;

% 拾取 4 个角点(ginput 为基础函数,无需额外工具箱)
[x, y] = ginput(4);

if length(x) < 4
    error('必须选择4个角点!');
end

% 可视化确认选中的区域
corners = [x, y; x(1), y(1)]; % 闭合
plot(corners(:,1), corners(:,2), 'r-o', 'LineWidth', 2, ...
    'MarkerSize', 10, 'MarkerFaceColor', 'r');
text(x(1), y(1), ' 左上', 'Color', 'g', 'FontSize', 14, 'FontWeight', 'bold');
text(x(2), y(2), ' 右上', 'Color', 'g', 'FontSize', 14, 'FontWeight', 'bold');
text(x(3), y(3), ' 右下', 'Color', 'g', 'FontSize', 14, 'FontWeight', 'bold');
text(x(4), y(4), ' 左下', 'Color', 'g', 'FontSize', 14, 'FontWeight', 'bold');
hold off;
drawnow;

%% 3. 定义投影变换参数
% 畸变图中的四个角点(movingPoints)
movingPoints = [x, y];

% 根据原四边形边长估算输出矩形尺寸(像素)
w1 = sqrt((x(2)-x(1))^2 + (y(2)-y(1))^2); % 上边
w2 = sqrt((x(3)-x(4))^2 + (y(3)-y(4))^2); % 下边
h1 = sqrt((x(4)-x(1))^2 + (y(4)-y(1))^2); % 左边
h2 = sqrt((x(3)-x(2))^2 + (y(3)-y(2))^2); % 右边

outputWidth  = round(max(w1, w2));
outputHeight = round(max(h1, h2));

% 矫正后的目标矩形角点(fixedPoints),左上为 (1,1)
fixedPoints = [
    1, 1;                           % 左上
    outputWidth, 1;                 % 右上
    outputWidth, outputHeight;      % 右下
    1, outputHeight                 % 左下
];

% 计算投影变换矩阵
tform = fitgeotrans(movingPoints, fixedPoints, 'projective');

%% 4. 执行畸变矫正
outputView = imref2d([outputHeight, outputWidth]);
img_rectified = imwarp(img, tform, 'OutputView', outputView);

%% 5. 显示并保存结果
figure('Name', '矫正结果', 'NumberTitle', 'off', 'Color', 'w');
imshow(img_rectified);
title('畸变矫正后的平面图');

[~, name, ext] = fileparts(filename);
outputName = fullfile(pathname, [name '_rectified' ext]);
imwrite(img_rectified, outputName);
fprintf('矫正完成!图像已保存至:\n  %s\n', outputName);
操作:
按照顺时针顺序依次拾取左上、右上、右下、左下点即可:
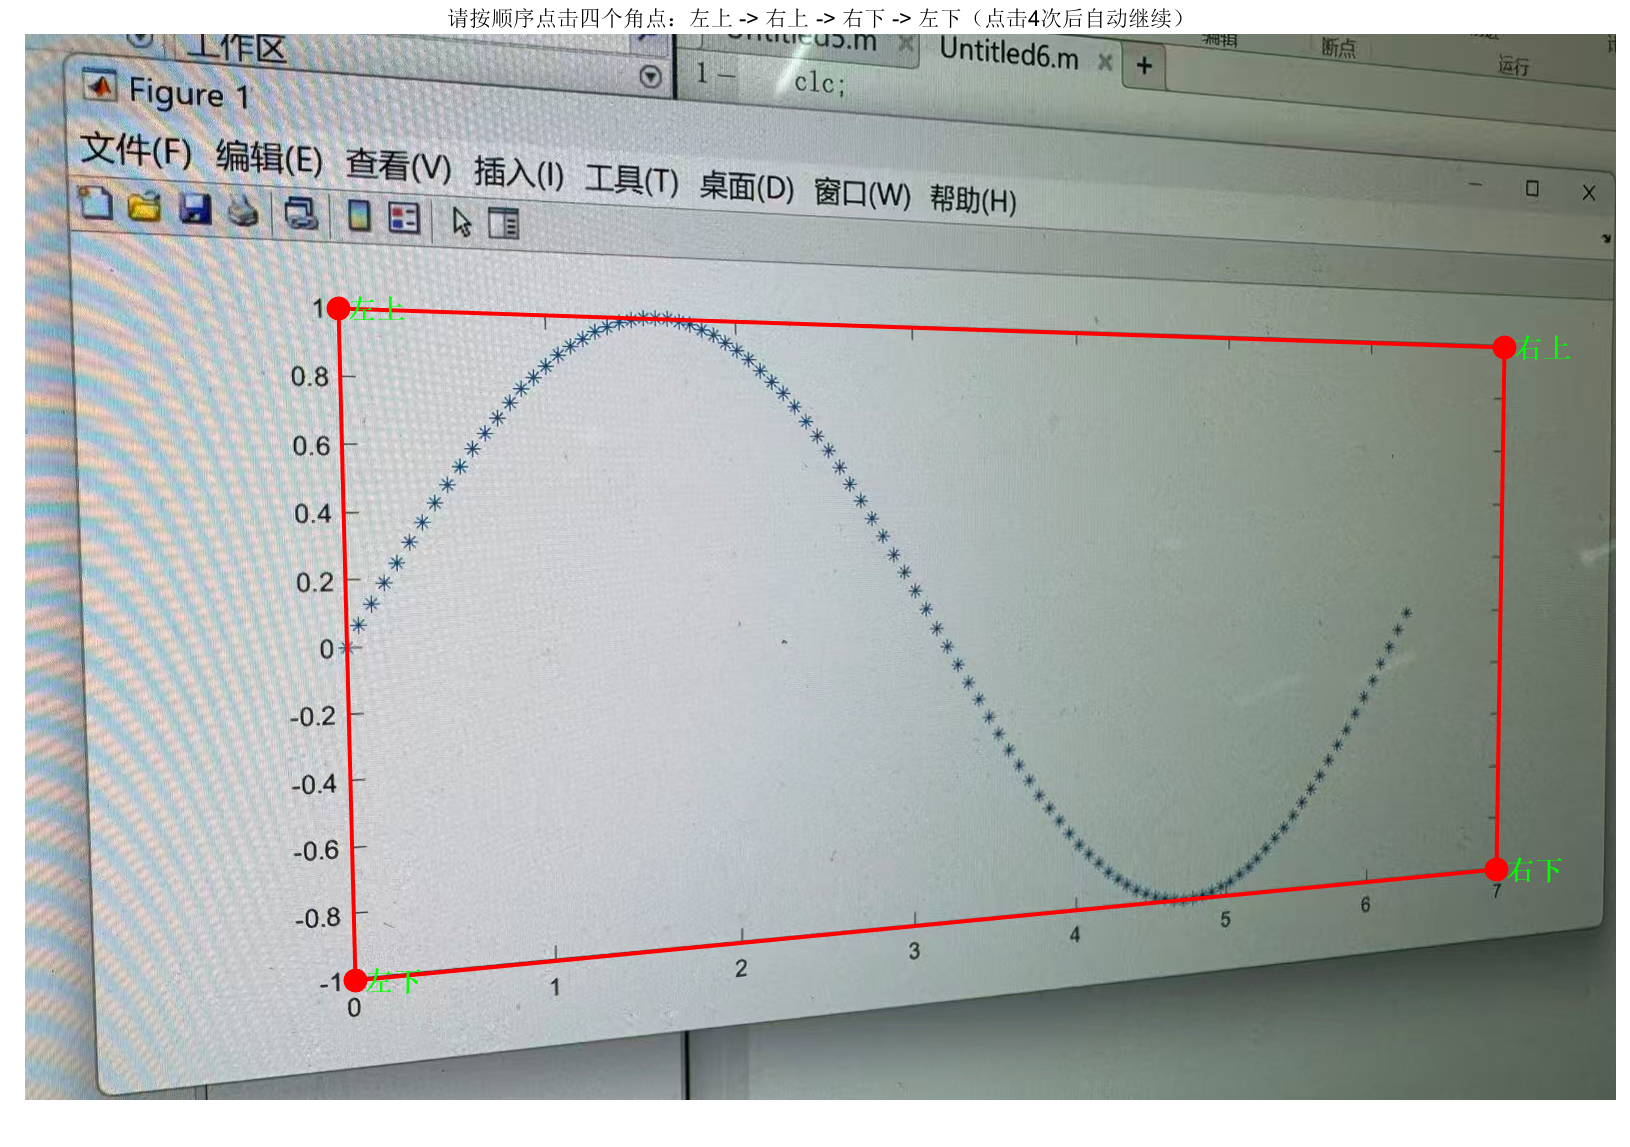
输出: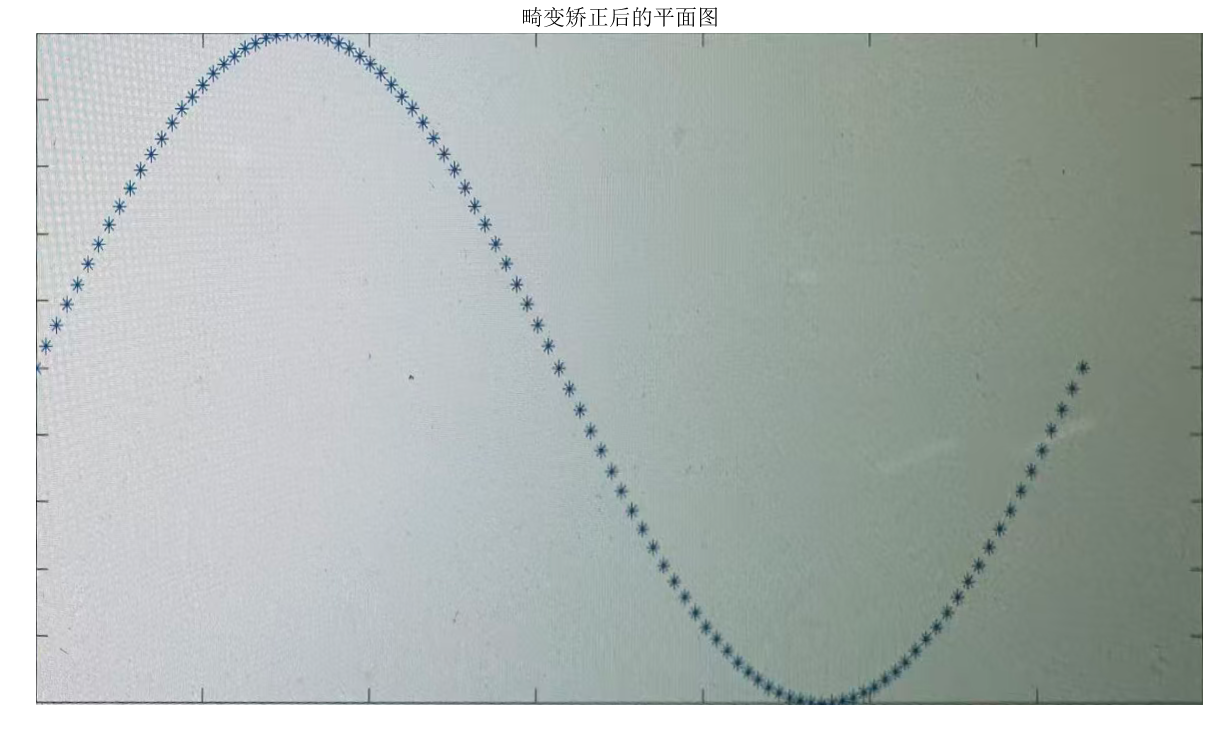
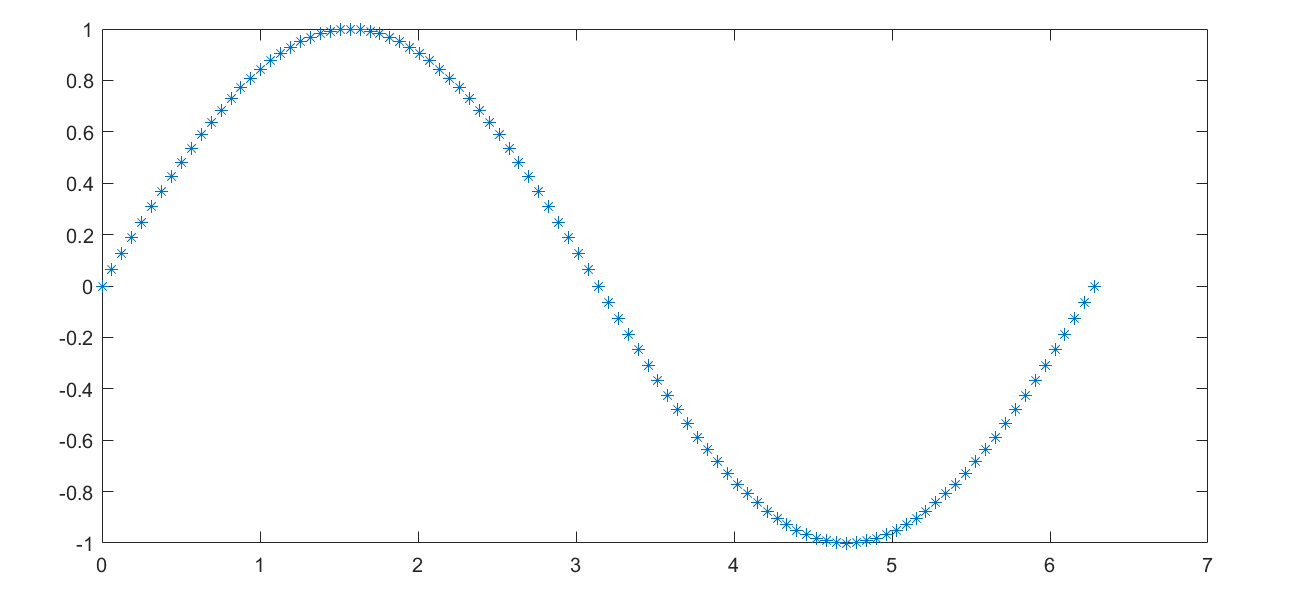
与原图(如下所示)比较,二者形状一致: