一、前言
在Spring Boot中集成Shiro进行用户的认证过程主要可以归纳为以下三点:
1、定义一个ShiroConfig,然后配置SecurityManager Bean,SecurityManager为Shiro的安全管理器,管理着所有Subject;
2、在ShiroConfig中配置ShiroFilterFactoryBean,其为Shiro过滤器工厂类,依赖于SecurityMan
3、自定义Realm实现,Realm包含doGetAuthorizationInfo()和doGetAuthenticationInfo()方法,因为本文只涉及用户认证,所以只实现doGetAuthenticationInfo()方法。
二、引入依赖
首先可根据文章《Spring-Boot基础配置》搭建一个Spring Boot Web程序,然后引入Shiro、MyBatis、数据库和thymeleaf依赖:
xml
        <dependency>
            <groupId>org.springframework.boot</groupId>
            <artifactId>spring-boot-starter</artifactId>
        </dependency>
        <dependency>
            <groupId>org.springframework.boot</groupId>
            <artifactId>spring-boot-starter-web</artifactId>
        </dependency>
        <!-- MyBatis -->
        <dependency>
            <groupId>org.mybatis.spring.boot</groupId>
            <artifactId>mybatis-spring-boot-starter</artifactId>
            <version>2.1.1</version>
        </dependency>
        <!-- thymeleaf -->
        <dependency>
            <groupId>org.springframework.boot</groupId>
            <artifactId>spring-boot-starter-thymeleaf</artifactId>
        </dependency>
        <!-- shiro-spring -->
        <dependency>
            <groupId>org.apache.shiro</groupId>
            <artifactId>shiro-spring</artifactId>
            <version>1.6.0</version>
        </dependency>
        <!-- mysql 驱动 -->
        <dependency>
            <groupId>mysql</groupId>
            <artifactId>mysql-connector-java</artifactId>
            <scope>runtime</scope>
        </dependency>
        <dependency>
            <groupId>com.alibaba</groupId>
            <artifactId>druid-spring-boot-starter</artifactId>
            <version>1.1.22</version>
        </dependency>
三、ShiroConfig
定义一个Shiro配置类,名称为ShiroConfig
java
@Configuration
public class ShiroConfig {
    @Bean
    public ShiroFilterFactoryBean shiroFilterFactoryBean(SecurityManager securityManager) {
        ShiroFilterFactoryBean shiroFilterFactoryBean = new ShiroFilterFactoryBean();
        // 设置securityManager
        shiroFilterFactoryBean.setSecurityManager(securityManager);
        // 登录的url
        shiroFilterFactoryBean.setLoginUrl("/login");
        // 登录成功后跳转的url
        shiroFilterFactoryBean.setSuccessUrl("/index");
        // 未授权url
        shiroFilterFactoryBean.setUnauthorizedUrl("/403");
        LinkedHashMap<String, String> filterChainDefinitionMap = new LinkedHashMap<>();
        // 定义filterChain,静态资源不拦截
        filterChainDefinitionMap.put("/css/**", "anon");
        filterChainDefinitionMap.put("/js/**", "anon");
        filterChainDefinitionMap.put("/fonts/**", "anon");
        filterChainDefinitionMap.put("/img/**", "anon");
        //点击登录 防止显示302,和多次执行ShiroRealm问题
        filterChainDefinitionMap.put("/login", "anon");
        // druid数据源监控页面不拦截
        filterChainDefinitionMap.put("/druid/**", "anon");
        // 配置退出过滤器,其中具体的退出代码Shiro已经替我们实现了
        filterChainDefinitionMap.put("/logout", "logout");
        filterChainDefinitionMap.put("/", "anon");
        // 除上以外所有url都必须认证通过才可以访问,未通过认证自动访问LoginUrl
        filterChainDefinitionMap.put("/**", "authc");
        shiroFilterFactoryBean.setFilterChainDefinitionMap(filterChainDefinitionMap);
        return shiroFilterFactoryBean;
    }

    @Bean
    public SecurityManager securityManager(){
        // 配置SecurityManager,并注入shiroRealm
        DefaultWebSecurityManager securityManager =  new DefaultWebSecurityManager();
        securityManager.setRealm(shiroRealm());
        return securityManager;
    }

    @Bean
    public ShiroRealm shiroRealm(){
        // 配置Realm,需自己实现
        ShiroRealm shiroRealm = new ShiroRealm();
        return shiroRealm;
    }
}
需要注意的是filterChain基于短路机制,即最先匹配原则,如:
/user/**=anon
/user/aa=authc 永远不会执行
其中anon、authc等为Shiro为我们实现的过滤器,具体如下表所示:
| Filter Name | Class | Description |
|---|---|---|
| anon | org.apache.shiro.web.filter.authc.AnonymousFilter | 匿名拦截器,即不需要登录即可访问;一般用于静态资源过滤;示例/static/**=anon |
| authc | org.apache.shiro.web.filter.authc.FormAuthenticationFilter | 基于表单的拦截器;如/**=authc,如果没有登录会跳到相应的登录页面登录 |
| authcBasic | org.apache.shiro.web.filter.authc.BasicHttpAuthenticationFilter | Basic HTTP身份验证拦截器 |
| logout | org.apache.shiro.web.filter.authc.LogoutFilter | 退出拦截器,主要属性:redirectUrl:退出成功后重定向的地址(/),示例/logout=logout |
| noSessionCreation | org.apache.shiro.web.filter.session.NoSessionCreationFilter | 不创建会话拦截器,调用subject.getSession(false)不会有什么问题,但是如果subject.getSession(true)将抛出DisabledSessionException异常 |
| perms | org.apache.shiro.web.filter.authz.PermissionsAuthorizationFilter | 权限授权拦截器,验证用户是否拥有所有权限;属性和roles一样;示例/user/**=perms"user:create" |
| port | org.apache.shiro.web.filter.authz.PortFilter | 端口拦截器,主要属性port(80):可以通过的端口;示例/test= port80,如果用户访问该页面是非80,将自动将请求端口改为80并重定向到该80端口,其他路径/参数等都一样 |
| rest | org.apache.shiro.web.filter.authz.HttpMethodPermissionFilter | rest风格拦截器,自动根据请求方法构建权限字符串;示例/users=restuser,会自动拼出user:read,user:create,user:update,user:delete权限字符串进行权限匹配(所有都得匹配,isPermittedAll) |
| roles | org.apache.shiro.web.filter.authz.RolesAuthorizationFilter | 角色授权拦截器,验证用户是否拥有所有角色;示例/admin/**=rolesadmin |
| ssl | org.apache.shiro.web.filter.authz.SslFilter | SSL拦截器,只有请求协议是https才能通过;否则自动跳转会https端口443;其他和port拦截器一样; |
| user | org.apache.shiro.web.filter.authc.UserFilter | 用户拦截器,用户已经身份验证/记住我登录的都可;示例/**=user |
配置完ShiroConfig后,接下来对Realm进行实现,然后注入到SecurityManager中。
四、Realm
自定义Realm实现只需继承AuthorizingRealm类,然后实现doGetAuthorizationInfo()和doGetAuthenticationInfo()方法即可。这两个方法名乍看有点像,authorization-授权,批准的意思,即获取用户的角色和权限等信息;authentication-认证,身份验证的意思,即登录时验证用户的合法性,比如验证用户名和密码。
java
public class ShiroRealm extends AuthorizingRealm {
    @Autowired
    private UserMapper userMapper;

    @Override
    protected AuthorizationInfo doGetAuthorizationInfo(PrincipalCollection principalCollection) {
        return null;
    }

    @Override
    protected AuthenticationInfo doGetAuthenticationInfo(AuthenticationToken token) throws AuthenticationException {
        String userName = (String) token.getPrincipal();
        String password = new String((char[]) token.getCredentials());
        System.out.println("用户" + userName + "认证-----ShiroRealm.doGetAuthenticationInfo");
        User user = userMapper.findByUserName(userName);
        if (user == null) {
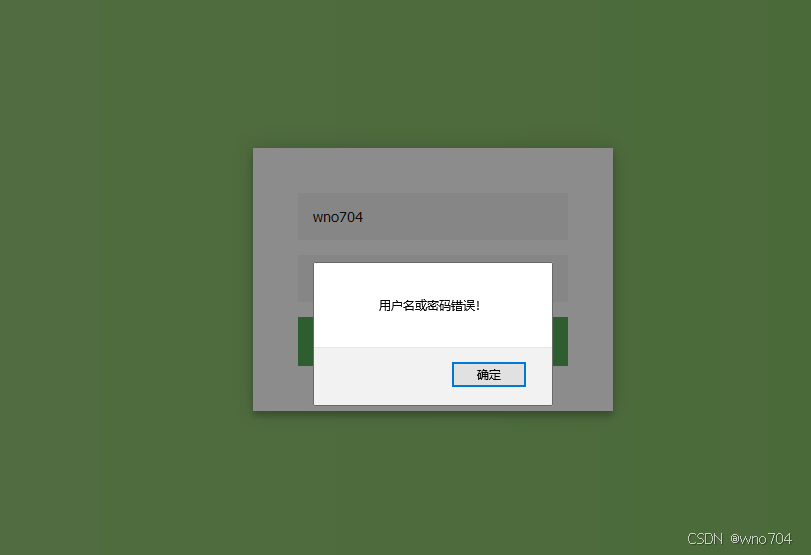
            throw new UnknownAccountException("用户名或密码错误!");
        }
        if (!password.equals(user.getPassword())) {
            throw new IncorrectCredentialsException("用户名或密码错误!");
        }
        if (user.getStatus().equals("0")) {
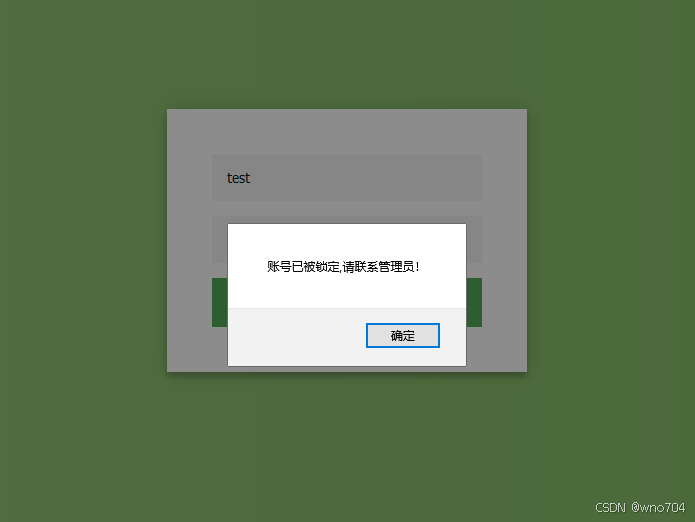
            throw new LockedAccountException("账号已被锁定,请联系管理员!");
        }
        SimpleAuthenticationInfo info = new SimpleAuthenticationInfo(user, password, getName());
        return info;
    }
}
因为本节只讲述用户认证,所以doGetAuthorizationInfo()方法先不进行实现。
其中UnknownAccountException等异常为Shiro自带异常,Shiro具有丰富的运行时AuthenticationException层次结构,可以准确指出尝试失败的原因。你可以包装在一个try/catch块,并捕捉任何你希望的异常,并作出相应的反应。例如:
java
try {
    currentUser.login(token);
} catch ( UnknownAccountException uae ) { ...
} catch ( IncorrectCredentialsException ice ) { ...
} catch ( LockedAccountException lae ) { ...
} catch ( ExcessiveAttemptsException eae ) { ...
} ... catch your own ...
} catch ( AuthenticationException ae ) {
    //unexpected error?
}注意:虽然我们可以准确的获取异常信息,并根据这些信息给用户提示具体错误,但最安全的做法是在登录失败时仅向用户显示通用错误提示信息,例如"用户名或密码错误"。这样可以防止数据库被恶意扫描。
在Realm中UserMapper为Dao层,标准的做法应该还有Service层,但这里为了方便就不再定义Service层了。接下来编写和数据库打交道的Dao层。
四、数据层
4.1 建表
首先创建一张用户表,用于存储用户的基本信息:
sql
-- ----------------------------
-- Table structure for t_user
-- ----------------------------

DROP TABLE IF EXISTS `t_user`;
CREATE TABLE `t_user`  (
  `id` int(11) NOT NULL AUTO_INCREMENT COMMENT '主键',
  `username` varchar(64) CHARACTER SET utf8 COLLATE utf8_general_ci NOT NULL COMMENT '用户名',
  `passwd` varchar(128) CHARACTER SET utf8 COLLATE utf8_general_ci NOT NULL COMMENT '密码',
  `create_time` datetime(0) DEFAULT CURRENT_TIMESTAMP COMMENT '创建时间',
  `status` varchar(1) CHARACTER SET utf8 COLLATE utf8_general_ci NOT NULL COMMENT '是否有效 1:有效  0:锁定',
  PRIMARY KEY (`id`) USING BTREE
) ENGINE = InnoDB AUTO_INCREMENT = 3 CHARACTER SET = utf8 COLLATE = utf8_general_ci ROW_FORMAT = Dynamic;

-- ----------------------------
-- Records of t_user
-- ----------------------------

INSERT INTO `t_user` VALUES (1, 'wno704', '11e4cee149fc05e970cd779988d866a8', '2020-08-19 17:20:21', '1');
INSERT INTO `t_user` VALUES (2, 'test', 'b7f4b4c54a0beeeeb9eb299d9dbb5157', '2020-08-19 17:20:21', '1');数据源的配置这里就不贴出来了,具体可参考源码,或者参考《Spring-Boot整合MyBatis》。
4.2 实体
库表对应的实体类:
java
@Getter
@Setter
public class User implements Serializable {
    private static final long serialVersionUID = -5440372534300871944L;

    private Integer id;

    private String userName;

    private String password;

    private Date createTime;

    private String status;

}
4.3 定义Mapper
定义接口UserMapper:
java
@Mapper
public interface UserMapper {
    User findByUserName(String userName);
}
4.4 xml
xml实现:
xml
<?xml version="1.0" encoding="UTF-8"?>
<!DOCTYPE mapper PUBLIC "-//mybatis.org//DTD Mapper 3.0//EN" "http://mybatis.org/dtd/mybatis-3-mapper.dtd">
<mapper namespace="com.wno704.shiro.mapper.UserMapper">

<resultMap type="com.wno704.shiro.model.User" id="User">
   <id column="id" property="id" javaType="java.lang.Integer" jdbcType="NUMERIC"/>
   <id column="username" property="userName" javaType="java.lang.String" jdbcType="VARCHAR"/>
   <id column="passwd" property="password" javaType="java.lang.String" jdbcType="VARCHAR"/>
   <id column="create_time" property="createTime" javaType="java.util.Date" jdbcType="DATE"/>
   <id column="status" property="status" javaType="java.lang.String" jdbcType="VARCHAR"/>
</resultMap>

<select id="findByUserName" resultMap="User">
	select * from t_user where username = #{userName}
</select>

</mapper>
数据层准备完了,接下来编写login.html和index.html页面。
五、页面准备
5.1 login.html
编写登录页面login.html:
html
<!DOCTYPE html>
<html xmlns:th="http://www.thymeleaf.org">
<head>
	<meta charset="UTF-8">
	<title>登录</title>
	<link rel="stylesheet" th:href="@{/css/login.css}" type="text/css">
	<script th:src="@{/js/jquery-1.11.1.min.js}"></script>
</head>

<body>
	<div class="login-page">
	  <div class="form">
	      <input type="text" placeholder="用户名" name="username" required="required"/>
	      <input type="password" placeholder="密码" name="password" required="required"/>
	      <button onclick="login()">登录</button>
	  </div>
	</div>
</body>

<script th:inline="javascript">
	var ctx = [[@{/}]];
    function login() {
    	var username = $("input[name='username']").val();
    	var password = $("input[name='password']").val();
        $.ajax({
            type: "post",
            url: ctx + "login",
            data: {"username": username,"password": password},
            dataType: "json",
            success: function (r) {
                if (r.code == 0) {
                    location.href = ctx + 'index';
                } else {
					alert(r.msg);
                }
            }
        });
    }
</script>
</html>
5.2 index.html
主页index.html
html
<!DOCTYPE html>
<html xmlns:th="http://www.thymeleaf.org">
<head>
	<meta charset="UTF-8">
	<title>首页</title>
</head>
<body>
	<p>你好![[${user.userName}]]</p>
	<a th:href="@{/logout}">注销</a>
</body>
</html>
页面准备完毕,接下来编写LoginController。
六、Controller
LoginController代码如下:
java
@Controller
public class LoginController {
    @GetMapping("/login")
    public String login() {
        return "login";
    }

    @PostMapping("/login")
    @ResponseBody
    public ResponseBo login(String username, String password) {
        password = MD5Utils.encrypt(username, password);
        UsernamePasswordToken token = new UsernamePasswordToken(username, password);
        Subject subject = SecurityUtils.getSubject();
        try {
            subject.login(token);
            return ResponseBo.ok();
        } catch (UnknownAccountException e) {
            return ResponseBo.error(e.getMessage());
        } catch (IncorrectCredentialsException e) {
            return ResponseBo.error(e.getMessage());
        } catch (LockedAccountException e) {
            return ResponseBo.error(e.getMessage());
        } catch (AuthenticationException e) {
            return ResponseBo.error("认证失败!");
        }
    }

    @RequestMapping("/")
    public String redirectIndex() {
        return "redirect:/index";
    }

    @RequestMapping("/index")
    public String index(Model model) {
        User user = (User) SecurityUtils.getSubject().getPrincipal();
        model.addAttribute("user", user);
        return "index";
    }
}
登录成功后,根据之前在ShiroConfig中的配置shiroFilterFactoryBean.setSuccessUrl("/index"),页面会自动访问/index路径。
七、测试
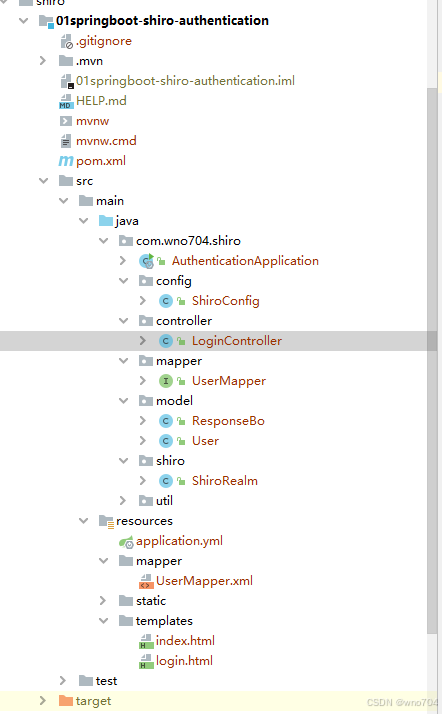
最终项目目录如下图所示:
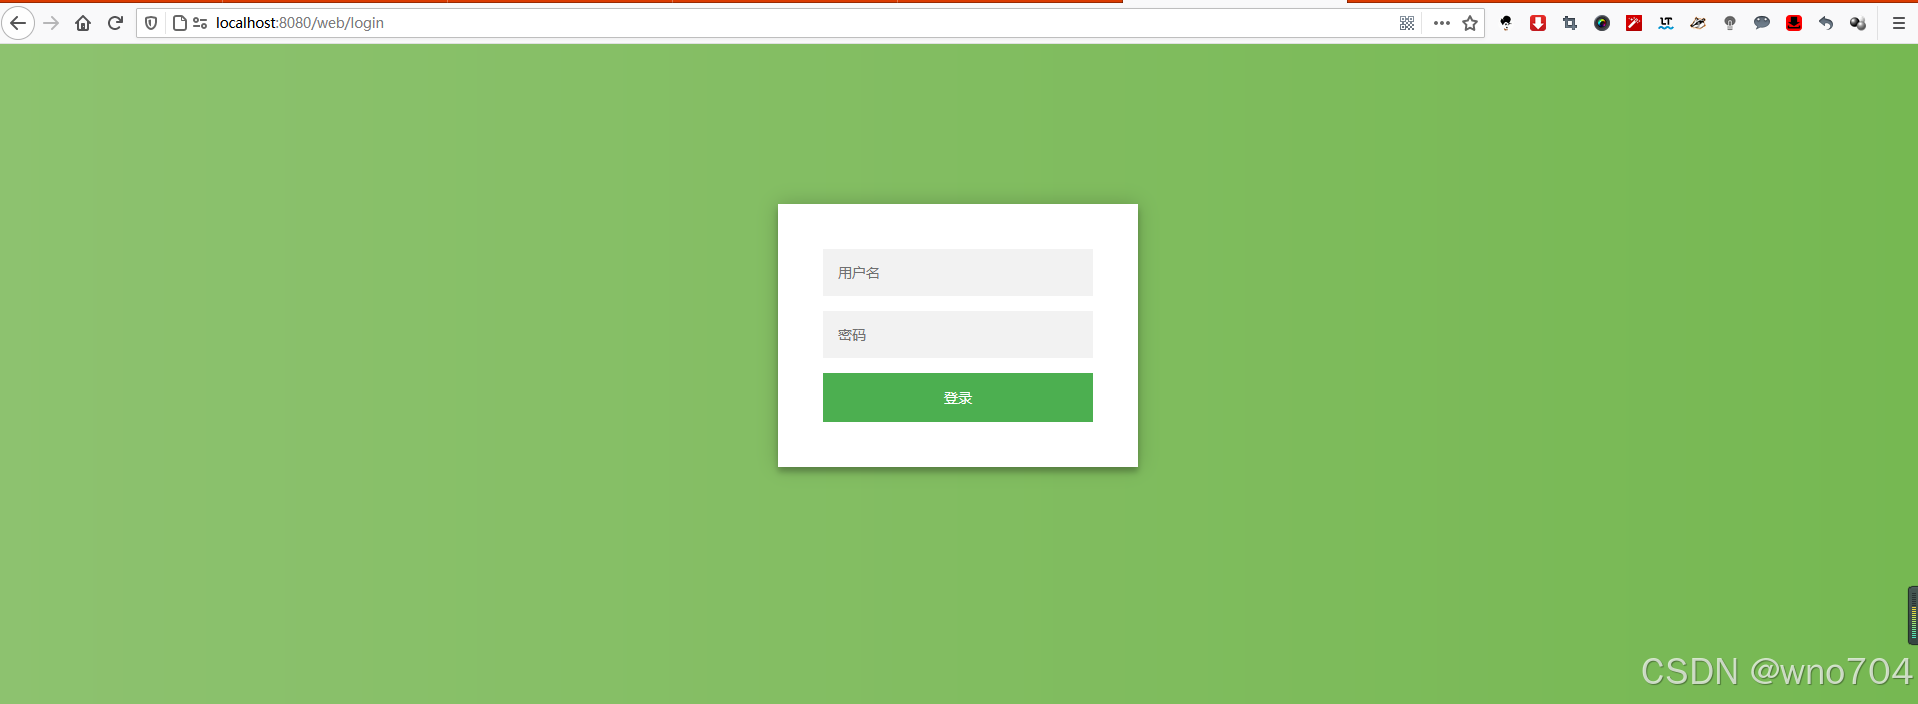
启动项目,分别访问:
http://localhost:8080/web/index
http://localhost:8080/web/aaaaaaa
可发现页面都被重定向到http://localhost:8080/web/login:
当输入错误的用户信息时:
用test的账户登录(test账户的status为0,已被锁定):
当输入正确的用户名密码时候:
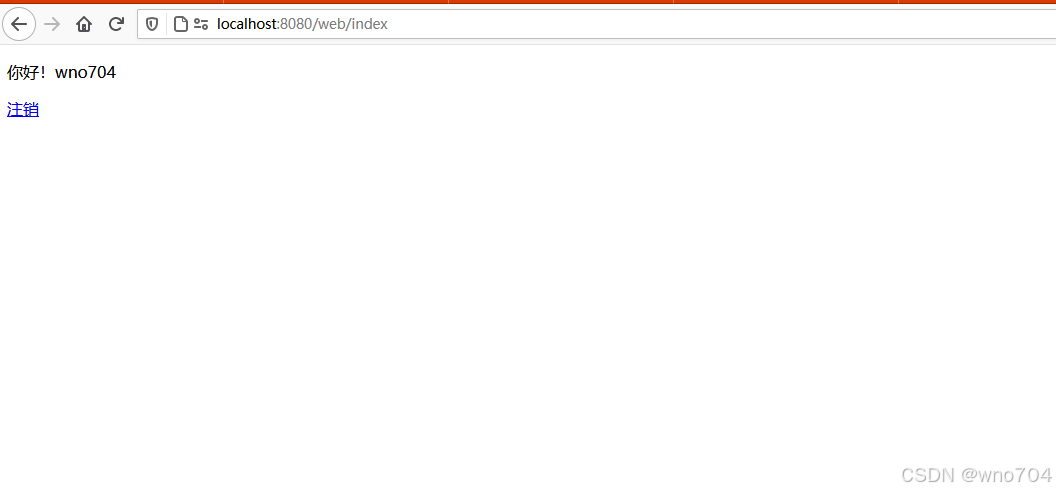
点击注销连接,根据ShiroConfig的配置filterChainDefinitionMap.put("/logout", "logout"),Shiro会自动帮我们注销用户信息,并重定向到/路径。
Spring Boot集成Shiro进行用户认证到此就结束了。