第十节:动态侧边栏菜单(根据路由 meta 自动渲染菜单)
当前写死 el‑menu‑item,本节改成循环渲染;读取路由配置
meta.title生成侧边栏菜单,为后续后端返回动态菜单做铺垫。
步骤 1:新建 src/layout/components/SidebarMenu.vue
把菜单抽成独立组件
<template>
  <el-menu
    :collapse="appStore.sidebarCollapse"
    mode="vertical"
    router
    background-color="#304156"
    text-color="#bfcbd9"
    active-text-color="#409eff"
  >
    <template v-for="item in menuList" :key="item.path">
      <el-menu-item v-if="!item.children" :index="item.childrenPath">
        <el-icon><House /></el-icon>
        <template #title>{{ item.meta.title }}</template>
      </el-menu-item>
    </template>
  </el-menu>
</template>

<script setup>
import { computed } from 'vue'
import { useAppStore } from '@/stores/app'
import { asyncRoutes } from '@/router'

const appStore = useAppStore()

// 处理路由,提取菜单
const menuList = computed(() => {
  const res = []
  asyncRoutes.forEach(route => {
    if(route.children && route.children.length>0){
      const child = route.children[0]
      res.push({
        path: route.path,
        childrenPath: `${route.path}/${child.path}`,
        meta: child.meta
      })
    }
  })
  return res
})
</script>
步骤 2:修改 src/layout/index.vue,替换写死的 el‑menu
<template>
  <el-container class="layout-container">
    <!-- 侧边栏 -->
    <el-aside :width="appStore.sidebarCollapse ? '64px' : '210px'" class="sidebar">
      <div class="logo">
        <span v-if="!appStore.sidebarCollapse">管理系统</span>
      </div>
      <!-- 使用抽离的菜单组件 -->
      <SidebarMenu />
    </el-aside>

    <el-container>
      <!-- 顶部头部 -->
      <el-header class="layout-header">
        <div class="header-left">
          <el-button
            :icon="Expand"
            circle
            @click="appStore.toggleSidebar()"
          ></el-button>
        </div>
        <div class="header-right">
          <el-dropdown @command="handleCommand">
            <span class="user-info">
              <el-icon><User /></el-icon>
              {{ userStore.username }}
            </span>
            <template #dropdown>
              <el-dropdown-menu>
                <el-dropdown-item command="logout">退出登录</el-dropdown-item>
              </el-dropdown-menu>
            </template>
          </el-dropdown>
        </div>
      </el-header>

      <!-- 主内容区域 -->
      <el-main class="layout-main">
        <router-view />
      </el-main>
    </el-container>
  </el-container>
</template>

<script setup>
import { useAppStore } from '@/stores/app'
import { useUserStore } from '@/stores/user'
import { useRouter } from 'vue-router'
import { House, Expand, User } from '@element-plus/icons-vue'
// 引入菜单组件
import SidebarMenu from './components/SidebarMenu.vue'

const appStore = useAppStore()
const userStore = useUserStore()
const router = useRouter()

const handleCommand = async (command) => {
  if (command === 'logout') {
    userStore.logout()
    ElMessage.success('退出成功')
    router.push('/login')
  }
}
</script>

<style scoped>
.layout-container {
  height: 100vh;
}
.sidebar {
  background-color: #304156;
  transition: width 0.3s;
}
.logo {
  height: 50px;
  line-height: 50px;
  text-align: center;
  color: #fff;
  font-size: 16px;
  background-color: #263445;
}
.layout-header {
  background: #fff;
  border-bottom: 1px solid #e6e6e6;
  display: flex;
  justify-content: space-between;
  align-items: center;
  padding: 0 16px;
}
.user-info {
  cursor: pointer;
  display: flex;
  align-items: center;
  gap:4px;
}
.layout-main {
  background-color: #f5f7fa;
  padding: 16px;
  overflow: auto;
}
</style>
步骤 3:新增一个测试业务路由,验证动态菜单生效
修改 src/router/index.js 的asyncRoutes,增加【系统管理】页面
export const asyncRoutes = [
  {
    path: '/dashboard',
    component: Layout,
    redirect: '/dashboard/index',
    children: [
      {
        path: 'index',
        name: 'Dashboard',
        component: () => import('@/views/dashboard/index.vue'),
        meta: { title: '首页看板' }
      }
    ]
  },
  //新增测试菜单
  {
    path: '/system',
    component: Layout,
    redirect: '/system/user',
    children: [
      {
        path: 'user',
        name: 'UserManage',
        component: () => import('@/views/system/user.vue'),
        meta: { title: '用户管理' }
      }
    ]
  }
]
新建页面 src/views/system/user.vue
<template>
  <PageCard title="用户管理">
    <el-table :data="tableData" border>
      <el-table-column prop="id" label="ID"></el-table-column>
      <el-table-column prop="name" label="用户名"></el-table-column>
    </el-table>
  </PageCard>
</template>

<script setup>
const tableData = [
  {id:1,name:'admin'},
  {id:2,name:'test'}
]
</script>
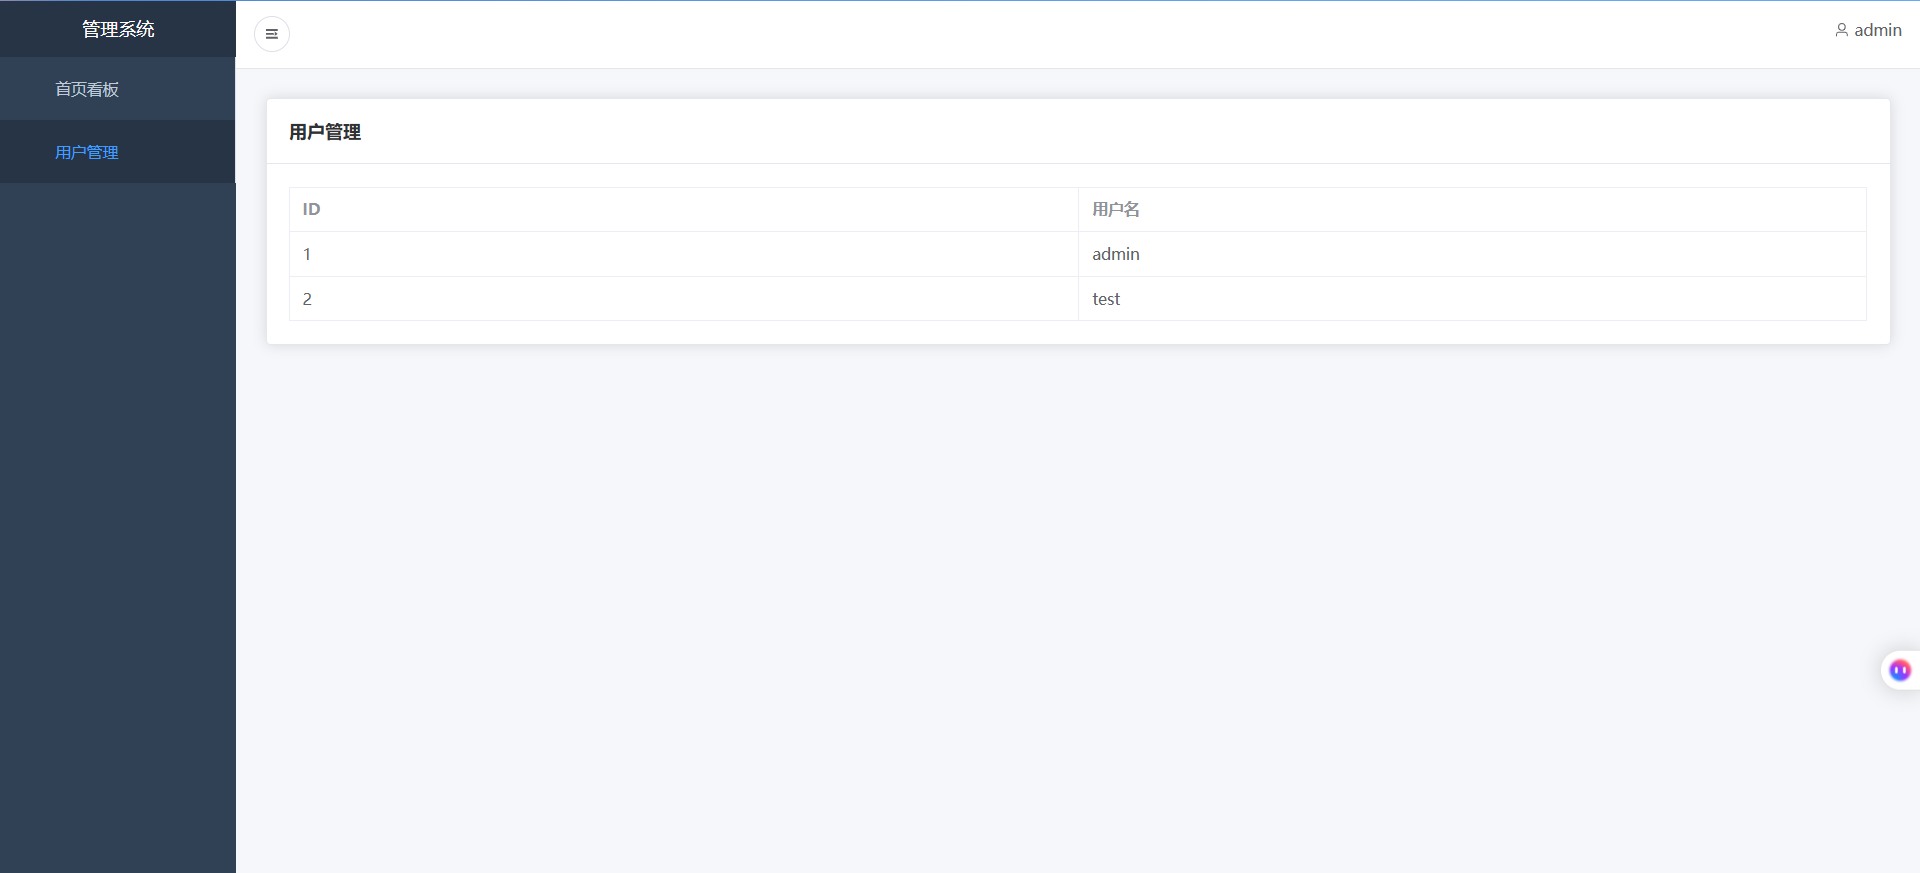
✅第十节测试
- 重启
pnpm dev,登录系统 - 侧边栏自动渲染两条菜单:
首页看板、用户管理✔ - 点击菜单,正常跳转对应页面 ✔
- 侧边栏折叠展开功能依旧正常,控制台无红色报错。
现在菜单不再写死,全部读取路由
meta.title渲染;下一节做面包屑导航 + tag‑view 标签页(仿若依多标签)