《SpringBoot 3:入门与应用实战》第 10 章 REST 服务请求与调用 Reactor 与 WebFlux 笔记 28
10.5 REST 服务请求与调用
10.5.1 RestTemplate
在 Spring Framework 6.0 之前使用最多的 HTTP 服务调用 API 是 RestTemplate,这个类从 Spring Framework 3.0 就已经出现,它提供了一种基于模板思想封装的简易 HTTP 操作 API,包括发送 GET、POST 等方式的请求。Spring Framework 中提供了非常多的模板类API,使用它们可以实现比原生编码更为简单的操作,后面学到 JDBC 部分还会接触到更多的模板类 API。
1.发送简单的 GET 请求
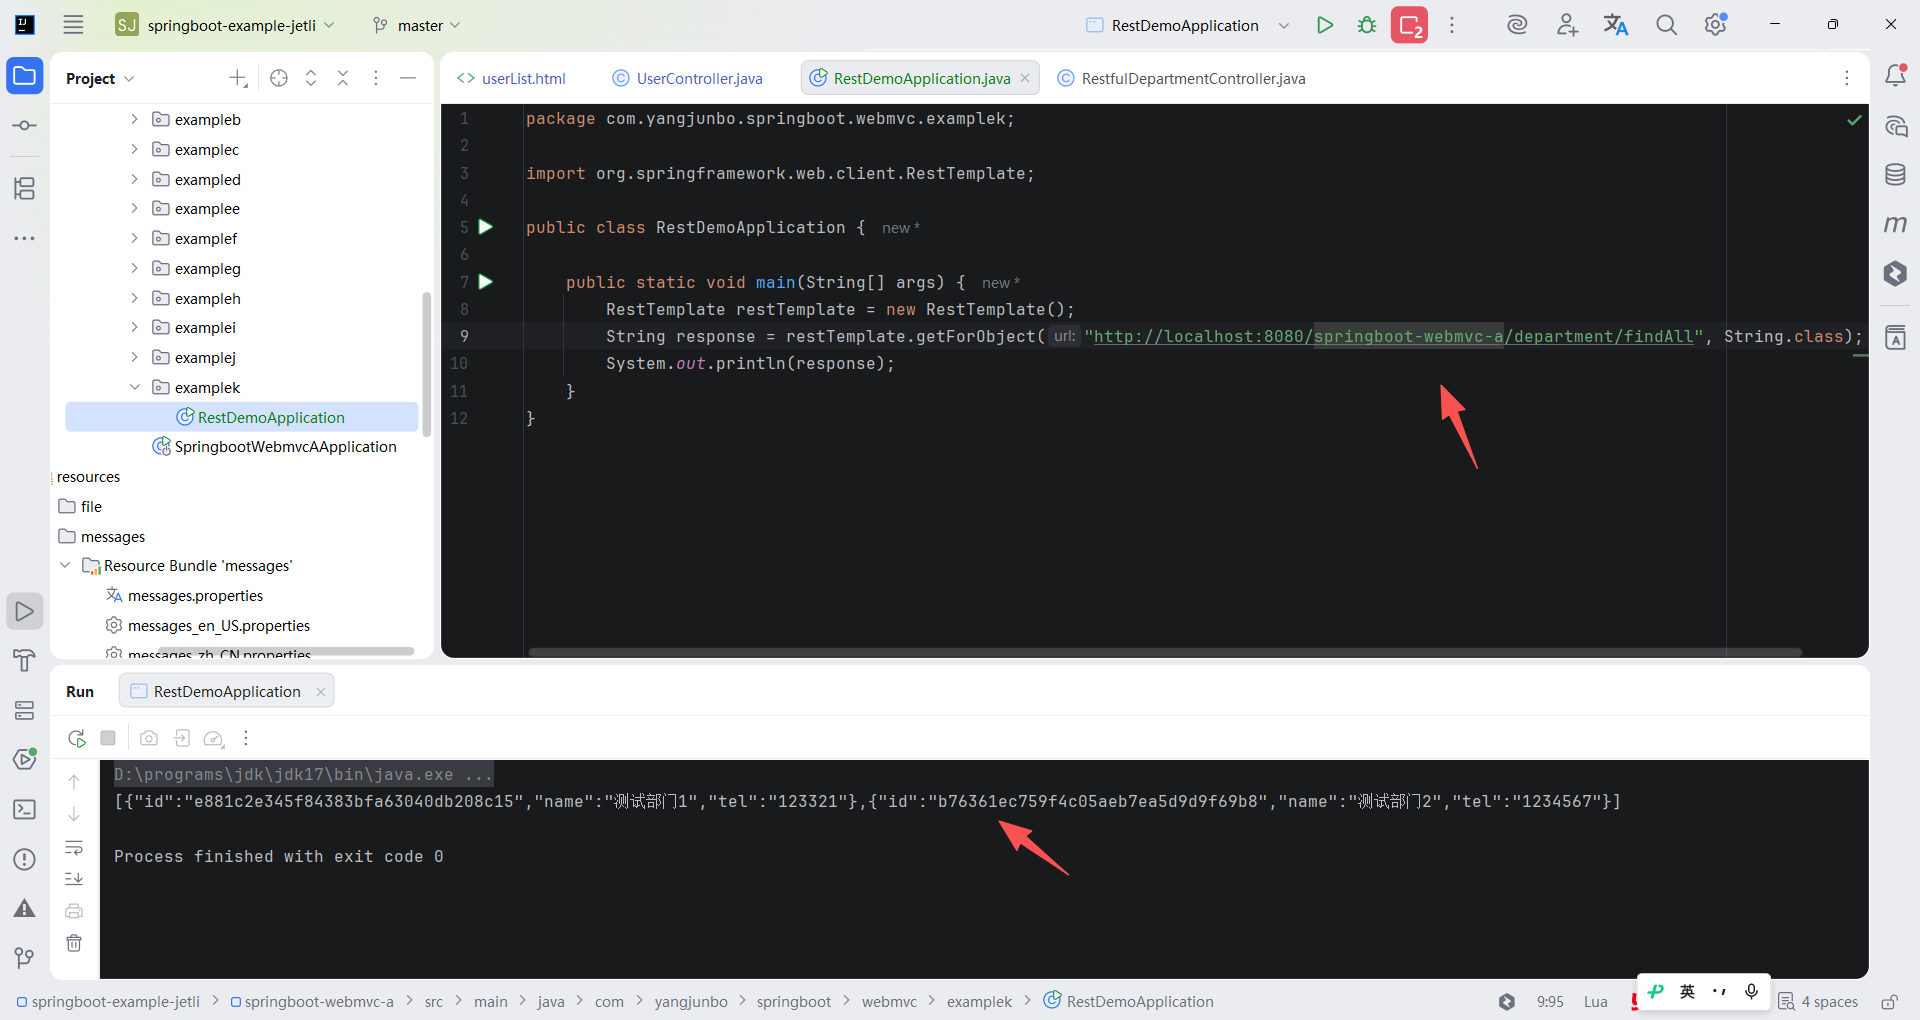
首先了解如何通过 RestTemplate 完成最简单的 GET 请求调用,在 RestfulDepartmentController 中提供了一个 findAll 方法获取所有的部门信息,可以使用 RestTemplate 发送一个 GET 请求获取。RestTemplate 本身只是一个发起 HTTP 请求的客户端,它不需要依赖任何Web 运行环境,所以使用普通的 main 方法即可完成简单测试,对于发送 GET 请求的方法可以选择 getForObject 方法,它需要指定响应体转换的格式(数据封装的实体或 VO 类型),先不指定任何类型,直接以字符串的形式接收即可。
java
package com.yangjunbo.springboot.webmvc.examplek;

import org.springframework.web.client.RestTemplate;

public class RestDemoApplication {

    public static void main(String[] args) {
        RestTemplate restTemplate = new RestTemplate();
        String response = restTemplate.getForObject("http://localhost:8080/springboot-webmvc-a/department/findAll", String.class);
        System.out.println(response);
    }
}
2.使用 HttpEntity
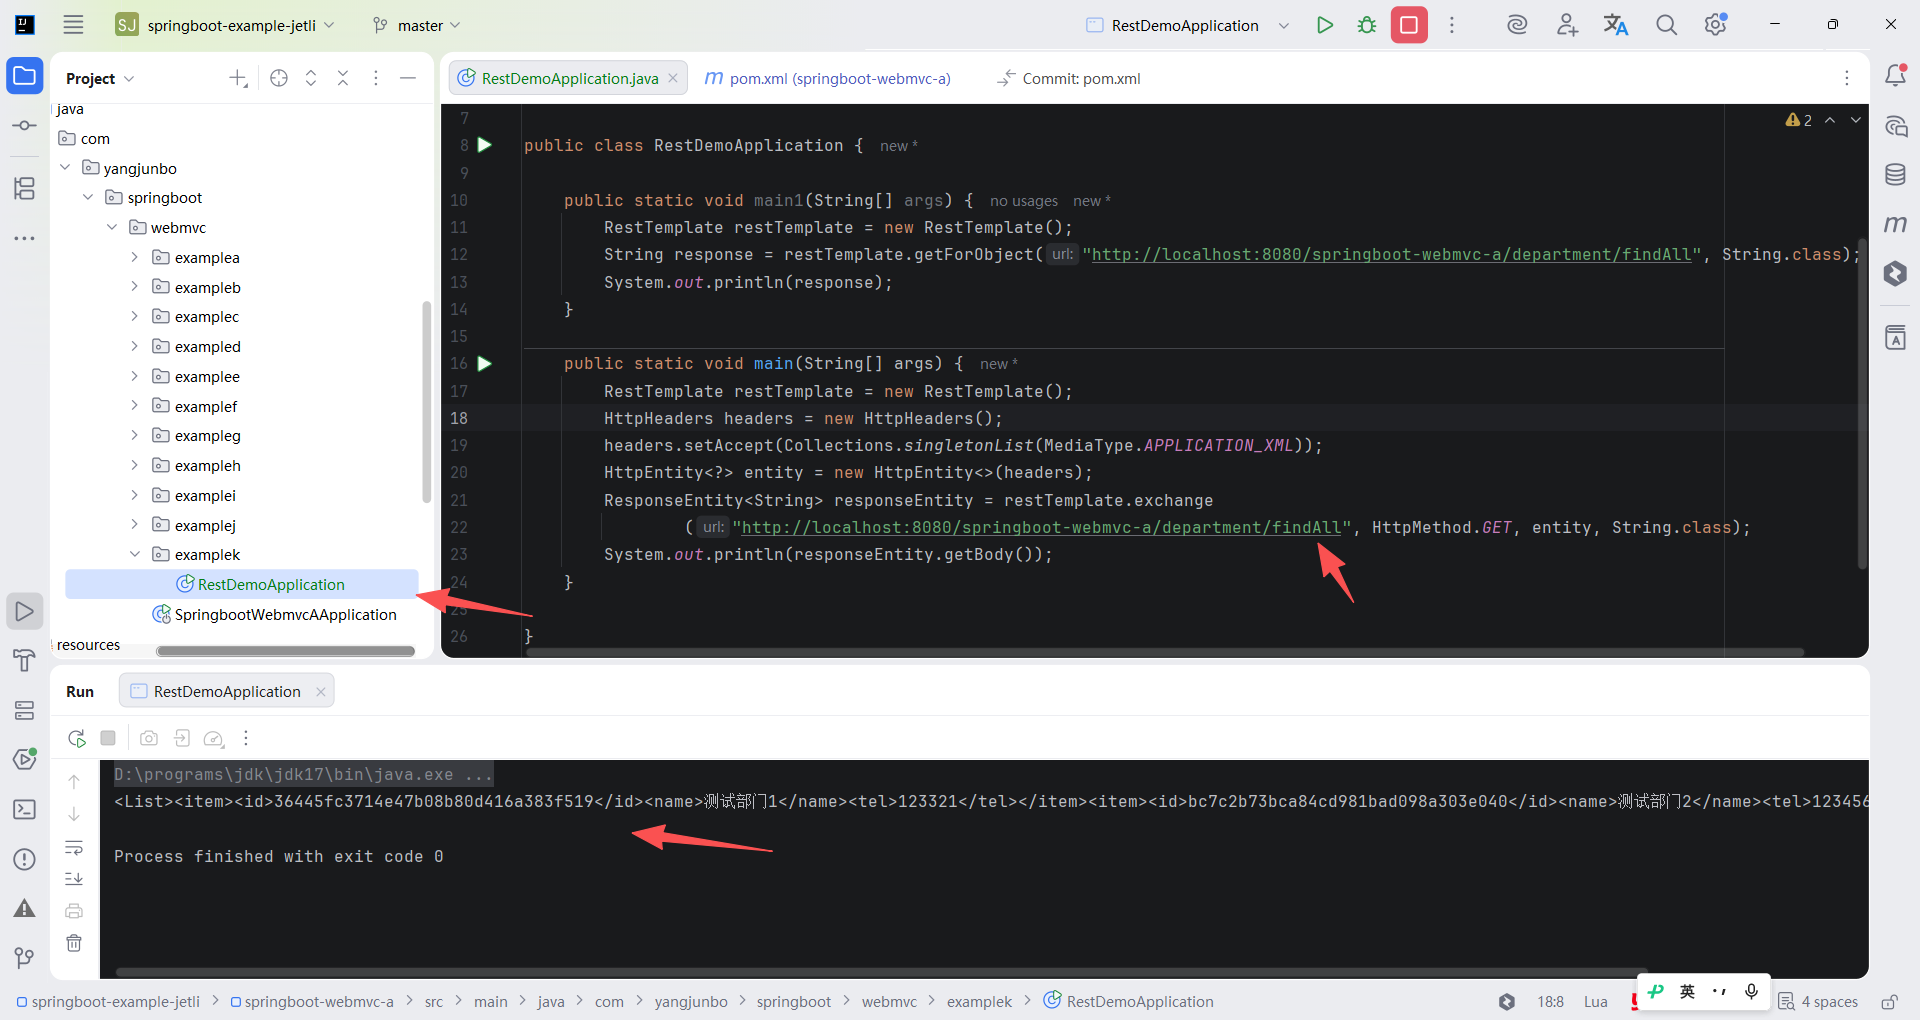
RestTemplate 中设置请求头的方式有两种,先接触第一种方式:使用 HttpEntity。HttpEntity 可以简单理解为一个请求头和响应体的结合,可以在发送 POST 等类型的请求时设置请求体,也可以在发送请求时指定请求头。代码中就利用 HttpHeaders 和 HttpEntity 完成了请求头 accept 的设置,注意这次使用的方法不再是简单的 getForObject 方法,而是稍微复杂的 exchange 方法,这个方法不局限于发送GET 或 POST 请求,而是可以手动指定。
java
package com.yangjunbo.springboot.webmvc.examplek;

import org.springframework.http.*;
import org.springframework.web.client.RestTemplate;

import java.util.Collections;

public class RestDemoApplication {

    public static void main1(String[] args) {
        RestTemplate restTemplate = new RestTemplate();
        String response = restTemplate.getForObject("http://localhost:8080/springboot-webmvc-a/department/findAll", String.class);
        System.out.println(response);
    }

    public static void main(String[] args) {
        RestTemplate restTemplate = new RestTemplate();
        HttpHeaders headers = new HttpHeaders();
        headers.setAccept(Collections.singletonList(MediaType.APPLICATION_XML));
        HttpEntity<?> entity = new HttpEntity<>(headers);
        ResponseEntity<String> responseEntity = restTemplate.exchange
                ("http://localhost:8080/springboot-webmvc-a/department/findAll", HttpMethod.GET, entity, String.class);
        System.out.println(responseEntity.getBody());
    }

}
3.使用泛型
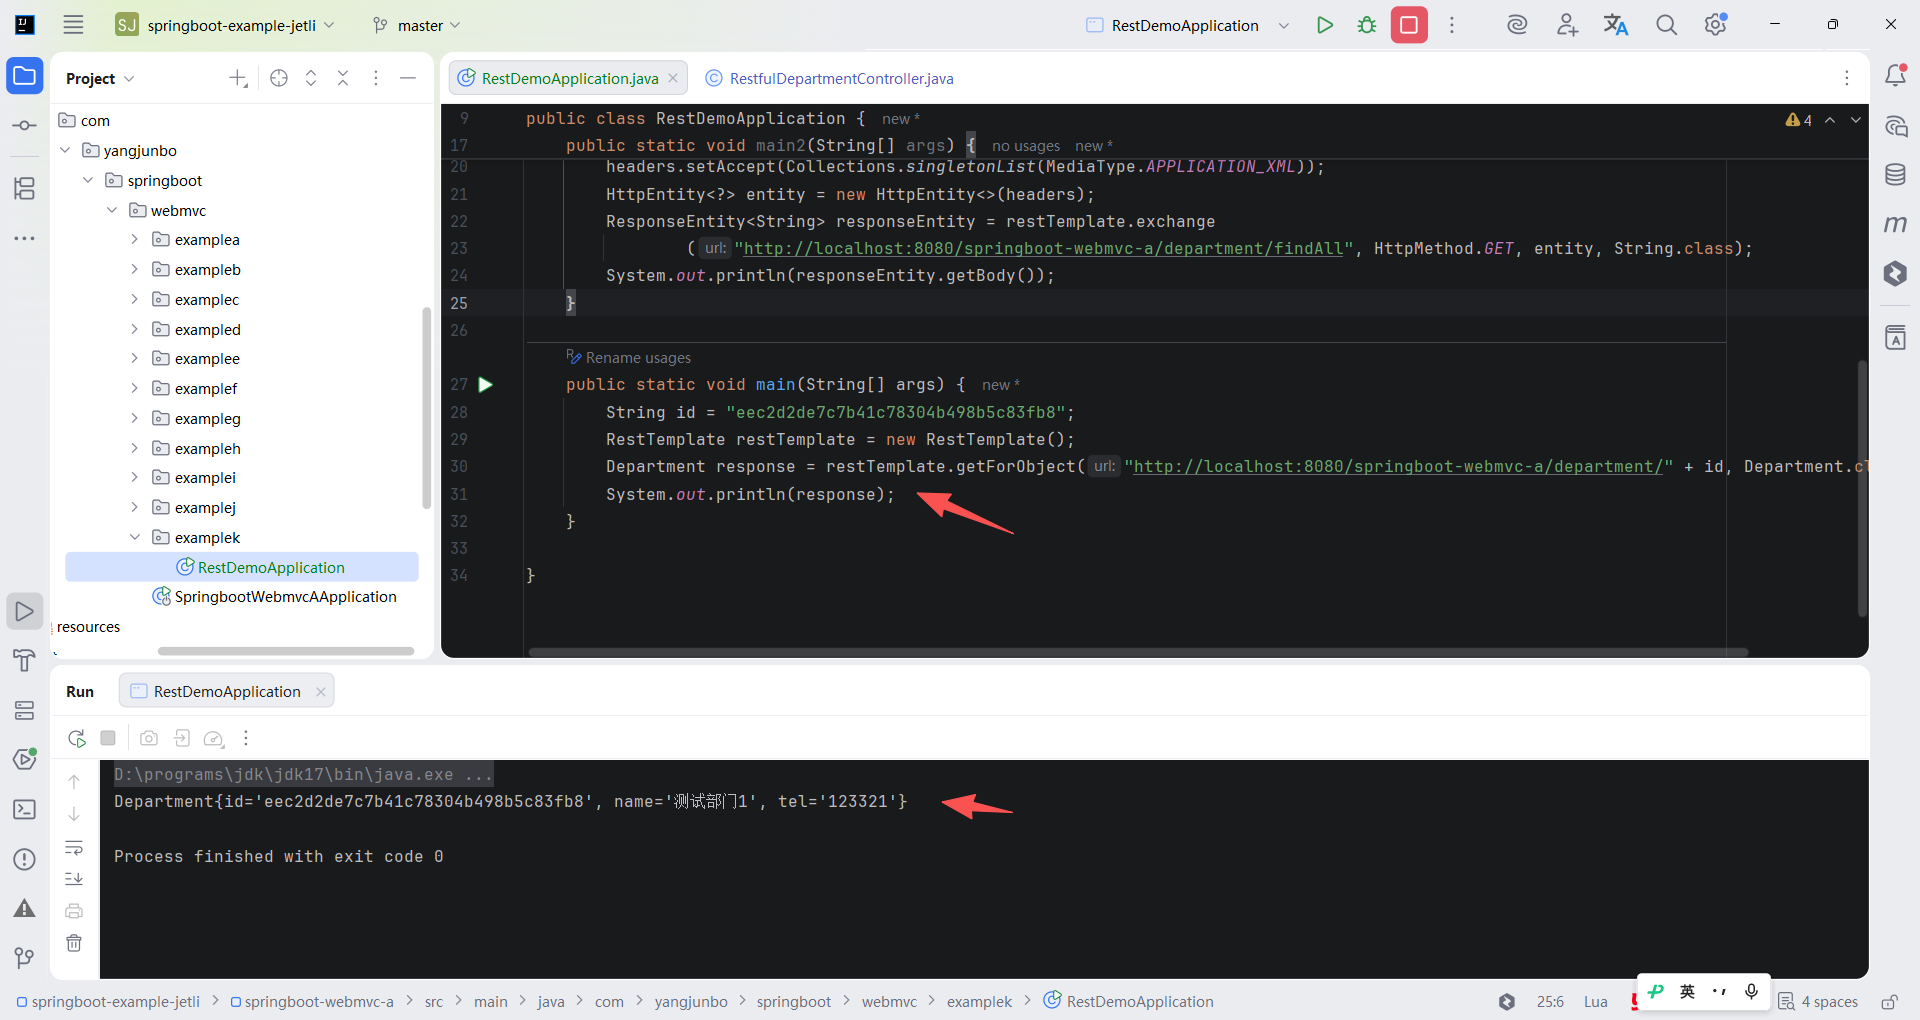
到目前为止获取的响应体都是纯字符串,希望能将响应体的数据直接转换为模型类对象,RestTemplate 同样支持这样做,只需要在发送请求时指定期望接收的数据类型。比方说发起一个查询单个部门的请求 /department/{id}。运行这段代码后可以在控制台得到一个正确的部门数据,这证明 RestTemplate 具备将 JSON 或 XML 数据转换为模型对象的能力。
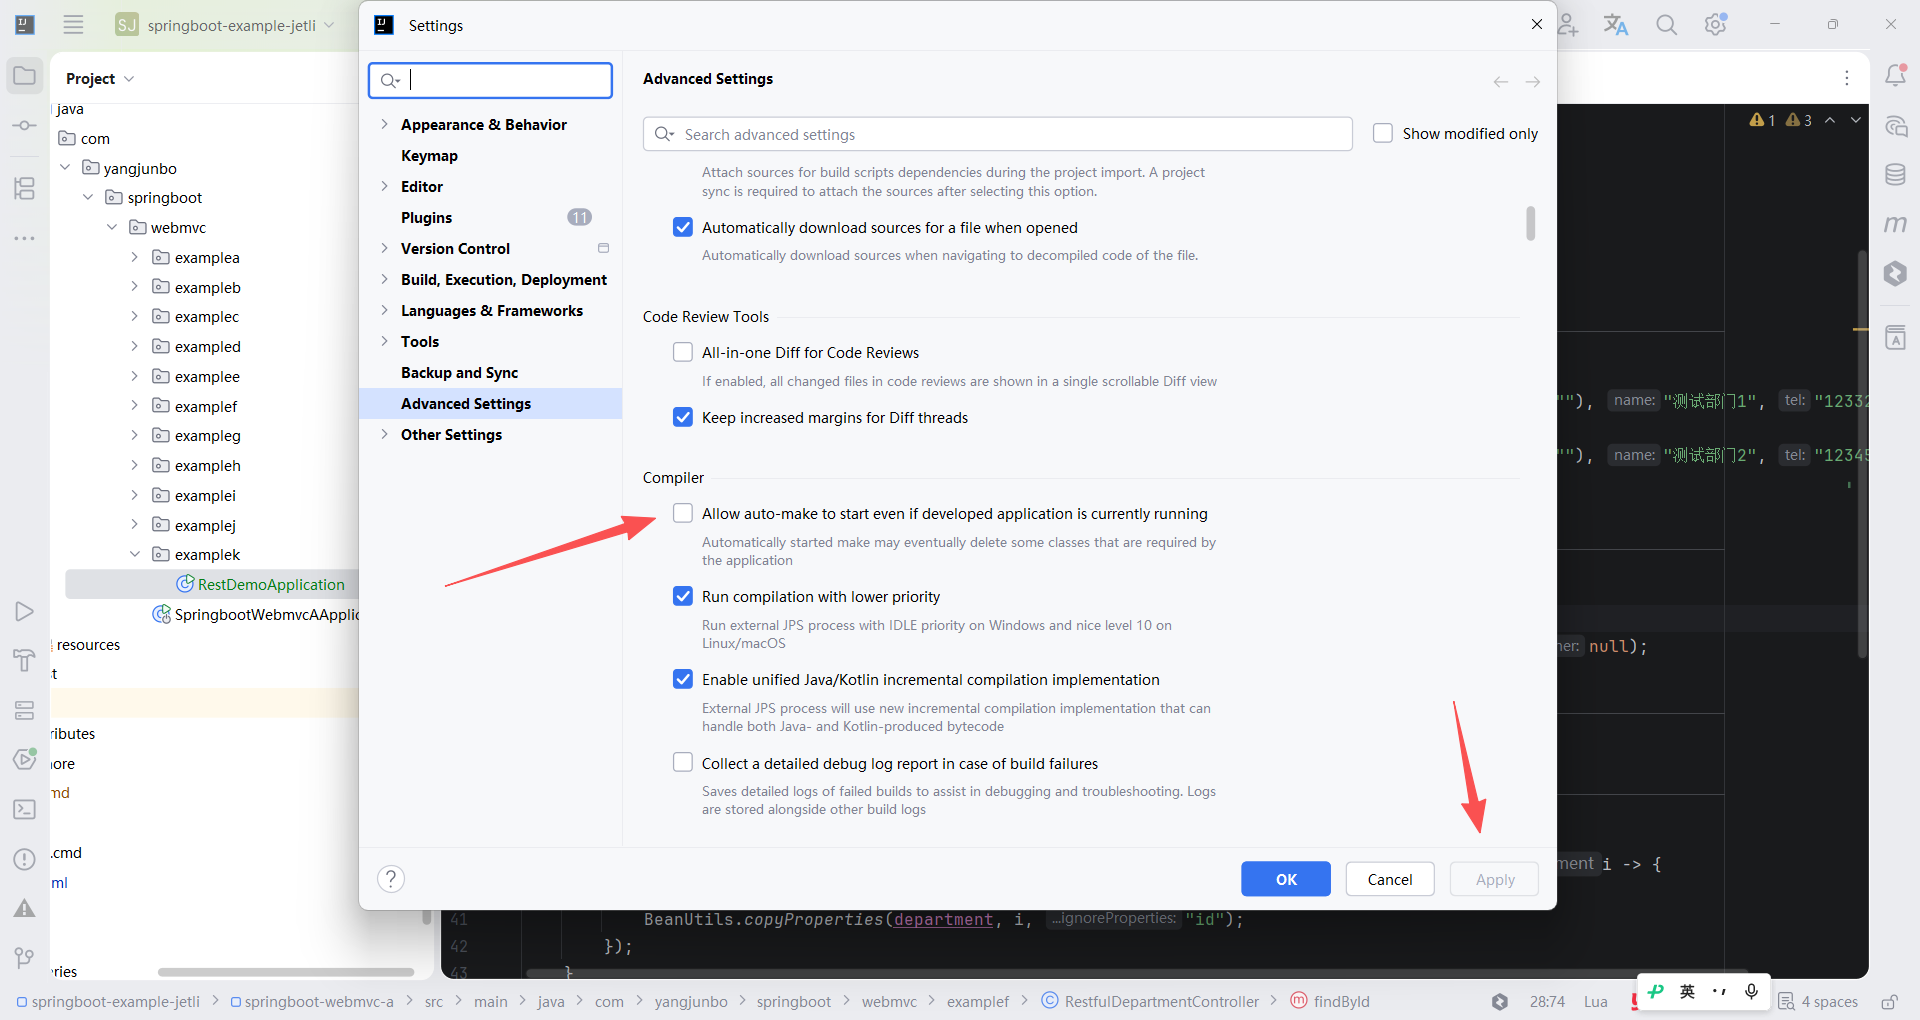
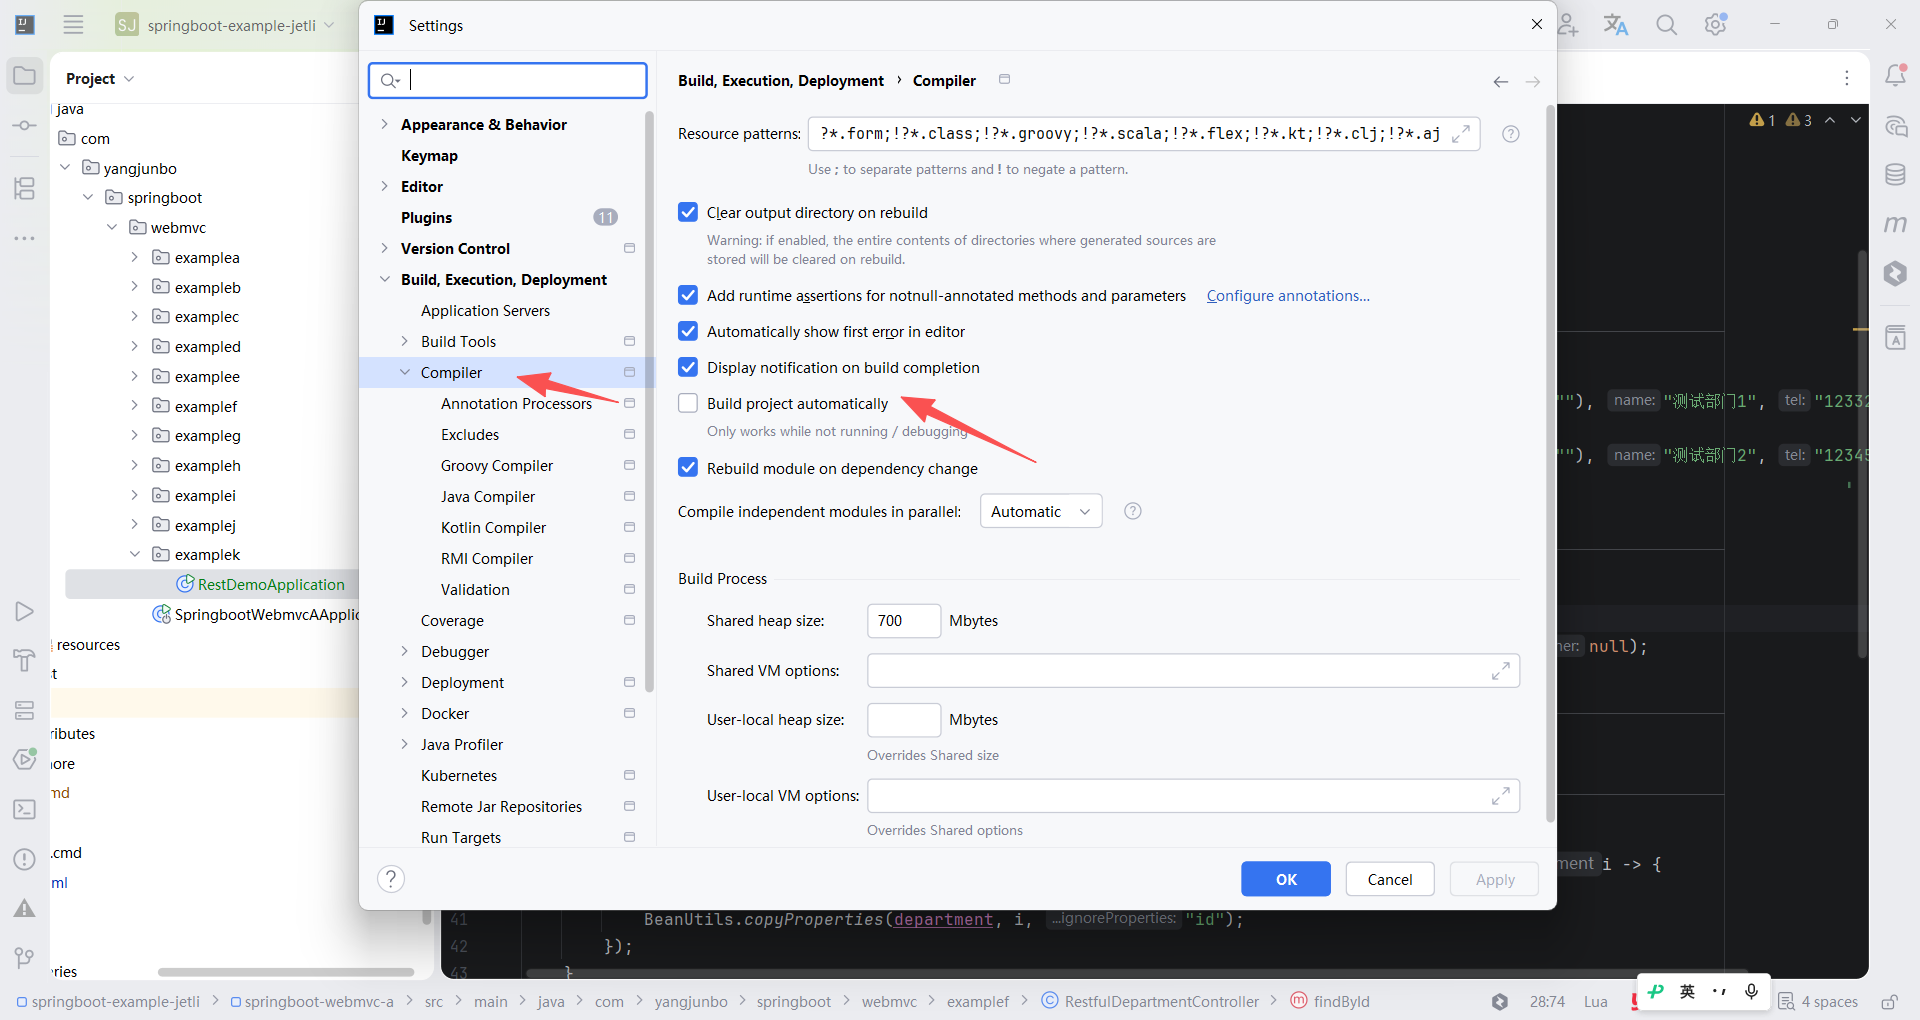
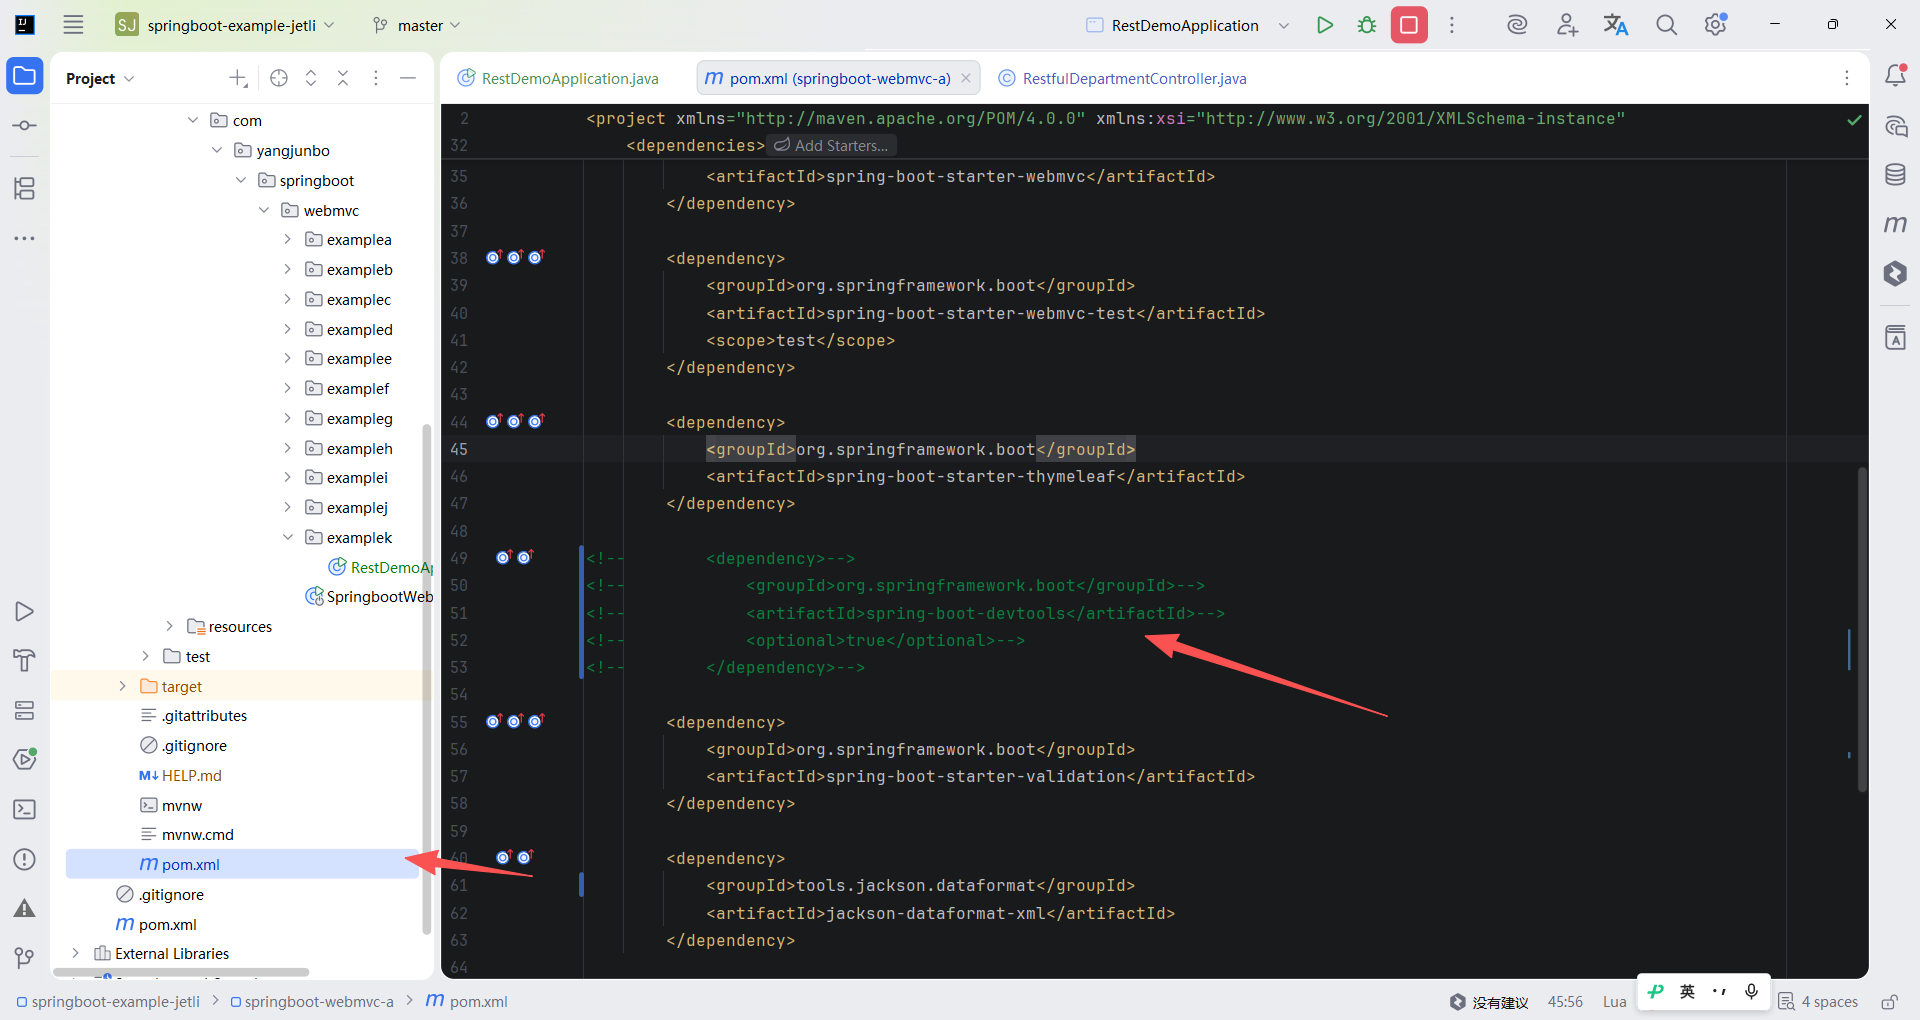
关闭自动编译和热部署。
java
package com.yangjunbo.springboot.webmvc.examplek;

import com.yangjunbo.springboot.webmvc.examplec.Department;
import org.springframework.http.*;
import org.springframework.web.client.RestTemplate;

import java.util.Collections;

public class RestDemoApplication {

    public static void main1(String[] args) {
        RestTemplate restTemplate = new RestTemplate();
        String response = restTemplate.getForObject("http://localhost:8080/springboot-webmvc-a/department/findAll", String.class);
        System.out.println(response);
    }

    public static void main2(String[] args) {
        RestTemplate restTemplate = new RestTemplate();
        HttpHeaders headers = new HttpHeaders();
        headers.setAccept(Collections.singletonList(MediaType.APPLICATION_XML));
        HttpEntity<?> entity = new HttpEntity<>(headers);
        ResponseEntity<String> responseEntity = restTemplate.exchange
                ("http://localhost:8080/springboot-webmvc-a/department/findAll", HttpMethod.GET, entity, String.class);
        System.out.println(responseEntity.getBody());
    }

    public static void main(String[] args) {
        String id = "eec2d2de7c7b41c78304b498b5c83fb8";
        RestTemplate restTemplate = new RestTemplate();
        Department response = restTemplate.getForObject("http://localhost:8080/springboot-webmvc-a/department/" + id, Department.class);
        System.out.println(response);
    }

}
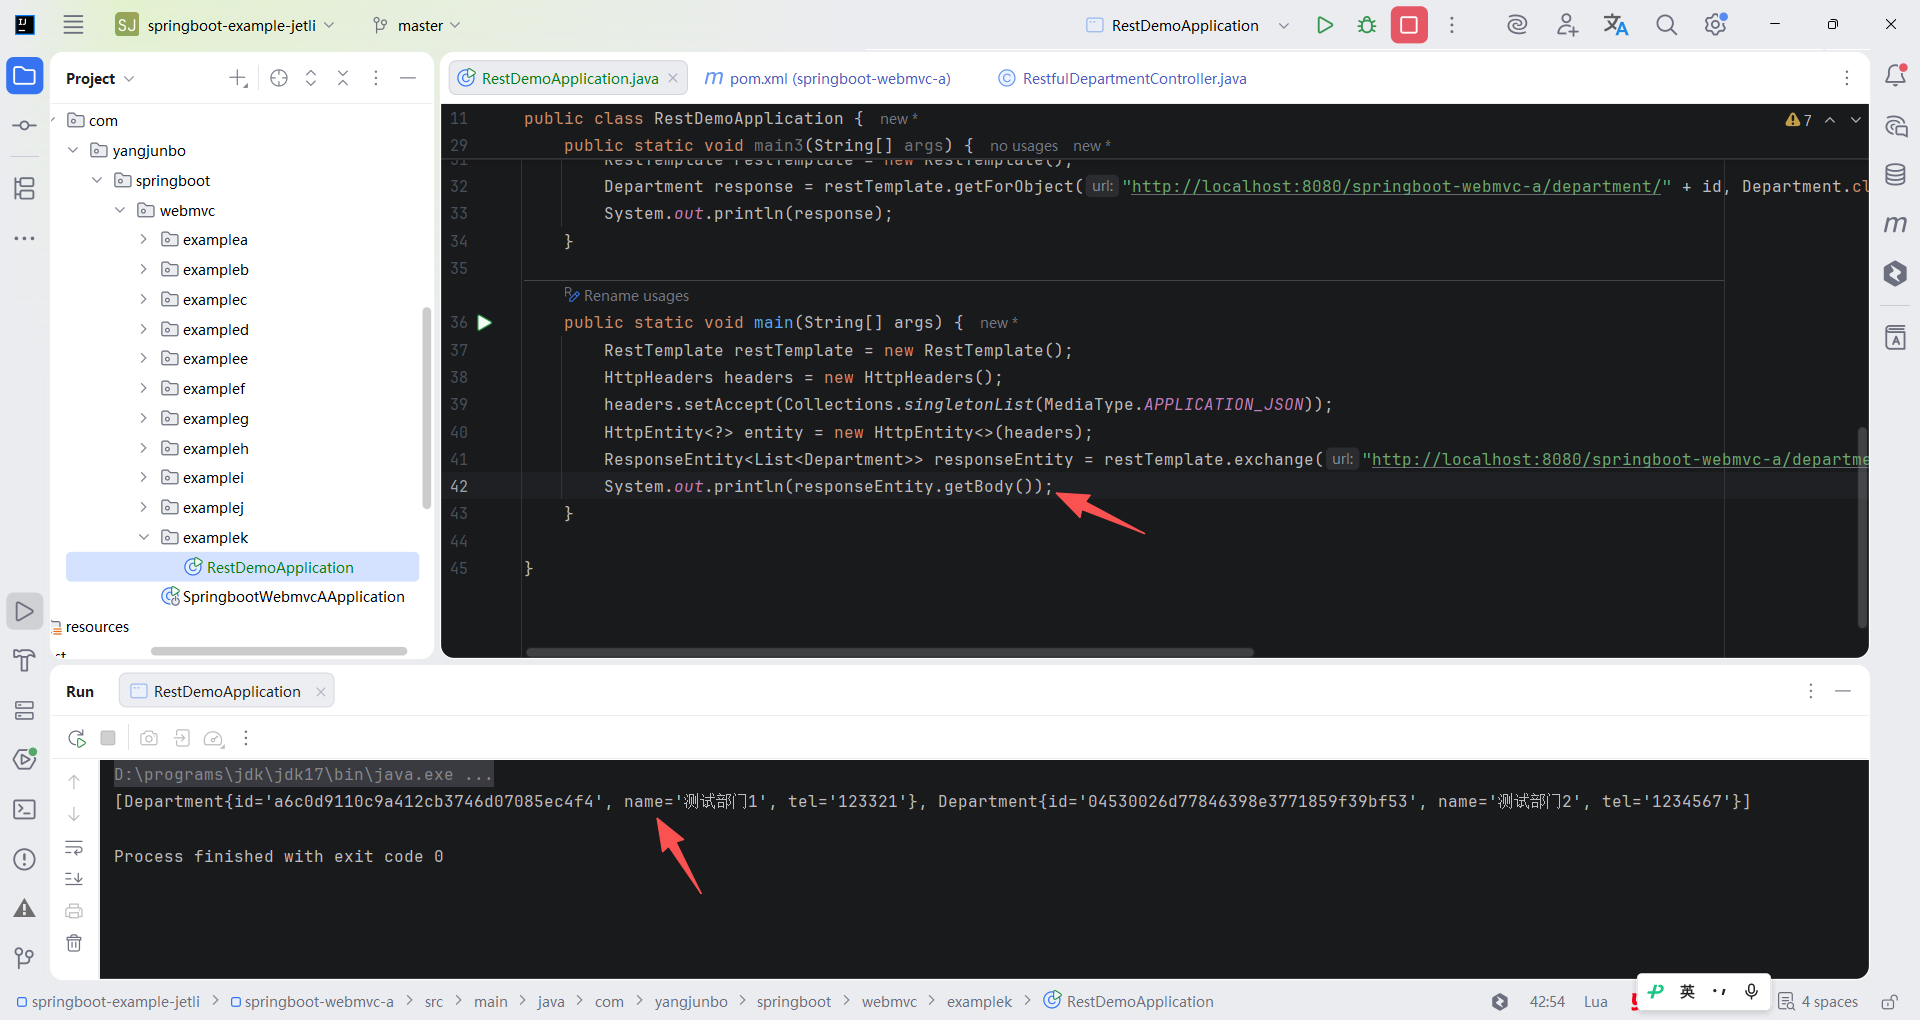
如果是获取一组数据,则使用 RestTemplate 会稍麻烦,因为设置响应数据类型时只能传入 List.class 而不能传入 List.class,所以还是得用最通用的 exchange 方法实现。指定 List 泛型类型的方式是传入一个 ParameterizedTypeReference 对象,并指定 ParameterizedTypeReference 和内部 List 集合的泛型类型。使用该方式后重新运行 main 方法,控制台打印的内容不再是 JSON 格式的数据,而是正确的两个 Department 对象,说明集合泛型也指定正确。
java
package com.yangjunbo.springboot.webmvc.examplek;

import com.yangjunbo.springboot.webmvc.examplec.Department;
import org.springframework.core.ParameterizedTypeReference;
import org.springframework.http.*;
import org.springframework.web.client.RestTemplate;

import java.util.Collections;
import java.util.List;

public class RestDemoApplication {

    public static void main1(String[] args) {
        RestTemplate restTemplate = new RestTemplate();
        String response = restTemplate.getForObject("http://localhost:8080/springboot-webmvc-a/department/findAll", String.class);
        System.out.println(response);
    }

    public static void main2(String[] args) {
        RestTemplate restTemplate = new RestTemplate();
        HttpHeaders headers = new HttpHeaders();
        headers.setAccept(Collections.singletonList(MediaType.APPLICATION_XML));
        HttpEntity<?> entity = new HttpEntity<>(headers);
        ResponseEntity<String> responseEntity = restTemplate.exchange
                ("http://localhost:8080/springboot-webmvc-a/department/findAll", HttpMethod.GET, entity, String.class);
        System.out.println(responseEntity.getBody());
    }

    public static void main3(String[] args) {
        String id = "a6c0d9110c9a412cb3746d07085ec4f4";
        RestTemplate restTemplate = new RestTemplate();
        Department response = restTemplate.getForObject("http://localhost:8080/springboot-webmvc-a/department/" + id, Department.class);
        System.out.println(response);
    }

    public static void main(String[] args) {
        RestTemplate restTemplate = new RestTemplate();
        HttpHeaders headers = new HttpHeaders();
        headers.setAccept(Collections.singletonList(MediaType.APPLICATION_JSON));
        HttpEntity<?> entity = new HttpEntity<>(headers);
        ResponseEntity<List<Department>> responseEntity = restTemplate.exchange("http://localhost:8080/springboot-webmvc-a/department/findAll",HttpMethod.GET, entity, new ParameterizedTypeReference<List<Department>>() {});
        System.out.println(responseEntity.getBody());
    }

}
4.发送 POST 请求传递请求体
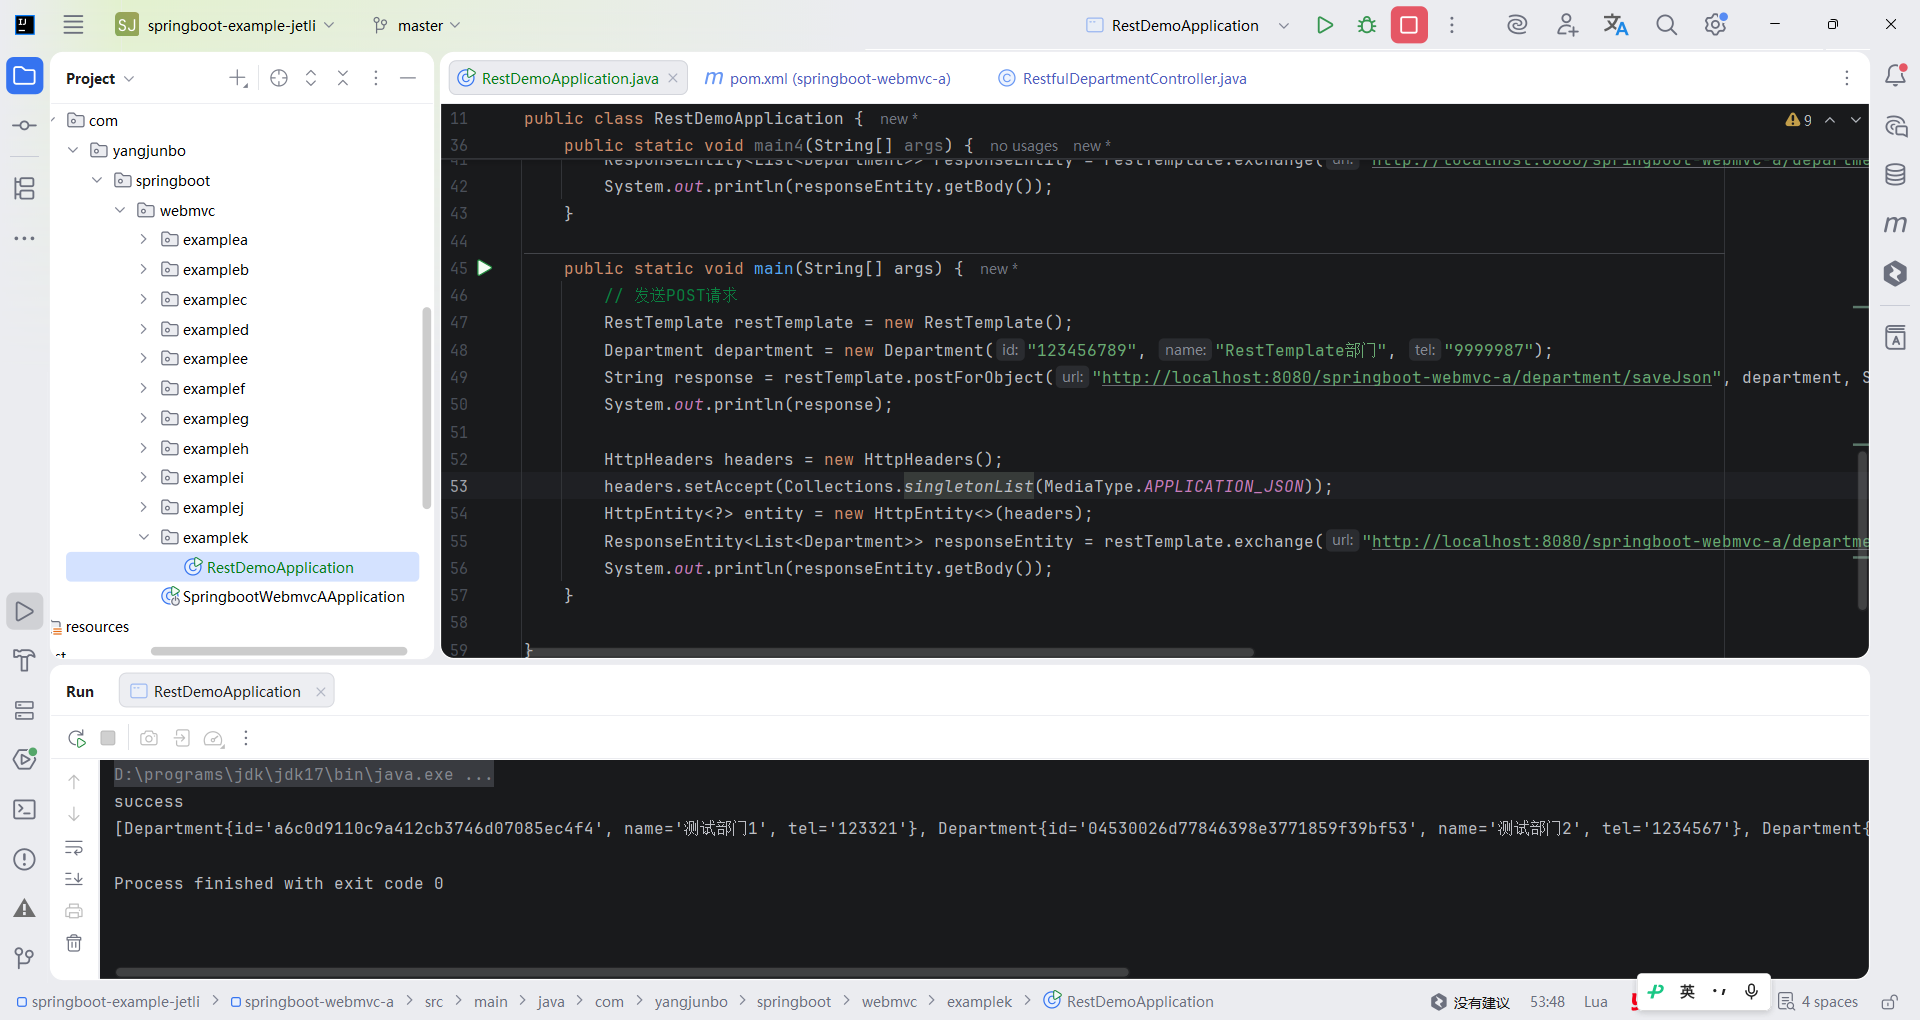
前面发送的请求都是 GET 请求,而发送 POST 请求的方式也大致相同,与 GET 请求不同的是,POST 请求可以携带请求体,所以可以将请求数据放入请求体中。代码展示了一个请求体传递数据的方式,可以发现 postForObject 方法与 getForObject 方法的区别是第二个位置多了一个 Object 类型的参数,它可以传递任意对象作为请求体,刚好编写的 RestfulDepartmentController 中有一个 saveJson 方法可以接收请求体传递的数据,所以下面调用的就是 /department/saveJson 接口。为了验证接口是否调用成功,可以在调用完毕后再发送 /department/findAll 请求查询一次数据。编写完毕后重新运行 main 方法,控制台中依次打印了 success 字符串与三条数据,证明请求体中的数据已经正确传递。
java
package com.yangjunbo.springboot.webmvc.examplek;

import com.yangjunbo.springboot.webmvc.examplec.Department;
import org.springframework.core.ParameterizedTypeReference;
import org.springframework.http.*;
import org.springframework.web.client.RestTemplate;

import java.util.Collections;
import java.util.List;

public class RestDemoApplication {

    public static void main1(String[] args) {
        RestTemplate restTemplate = new RestTemplate();
        String response = restTemplate.getForObject("http://localhost:8080/springboot-webmvc-a/department/findAll", String.class);
        System.out.println(response);
    }

    public static void main2(String[] args) {
        RestTemplate restTemplate = new RestTemplate();
        HttpHeaders headers = new HttpHeaders();
        headers.setAccept(Collections.singletonList(MediaType.APPLICATION_XML));
        HttpEntity<?> entity = new HttpEntity<>(headers);
        ResponseEntity<String> responseEntity = restTemplate.exchange
                ("http://localhost:8080/springboot-webmvc-a/department/findAll", HttpMethod.GET, entity, String.class);
        System.out.println(responseEntity.getBody());
    }

    public static void main3(String[] args) {
        String id = "a6c0d9110c9a412cb3746d07085ec4f4";
        RestTemplate restTemplate = new RestTemplate();
        Department response = restTemplate.getForObject("http://localhost:8080/springboot-webmvc-a/department/" + id, Department.class);
        System.out.println(response);
    }

    public static void main4(String[] args) {
        RestTemplate restTemplate = new RestTemplate();
        HttpHeaders headers = new HttpHeaders();
        headers.setAccept(Collections.singletonList(MediaType.APPLICATION_JSON));
        HttpEntity<?> entity = new HttpEntity<>(headers);
        ResponseEntity<List<Department>> responseEntity = restTemplate.exchange("http://localhost:8080/springboot-webmvc-a/department/findAll",HttpMethod.GET, entity, new ParameterizedTypeReference<List<Department>>() {});
        System.out.println(responseEntity.getBody());
    }

    public static void main(String[] args) {
        // 发送POST请求
        RestTemplate restTemplate = new RestTemplate();
        Department department = new Department("123456789", "RestTemplate部门", "9999987");
        String response = restTemplate.postForObject("http://localhost:8080/springboot-webmvc-a/department/saveJson", department, String.class);
        System.out.println(response);

        HttpHeaders headers = new HttpHeaders();
        headers.setAccept(Collections.singletonList(MediaType.APPLICATION_JSON));
        HttpEntity<?> entity = new HttpEntity<>(headers);
        ResponseEntity<List<Department>> responseEntity = restTemplate.exchange("http://localhost:8080/springboot-webmvc-a/department/findAll",HttpMethod.GET, entity, new ParameterizedTypeReference<>() {});
        System.out.println(responseEntity.getBody());
    }

}
5.发送 POST 请求传递表单数据
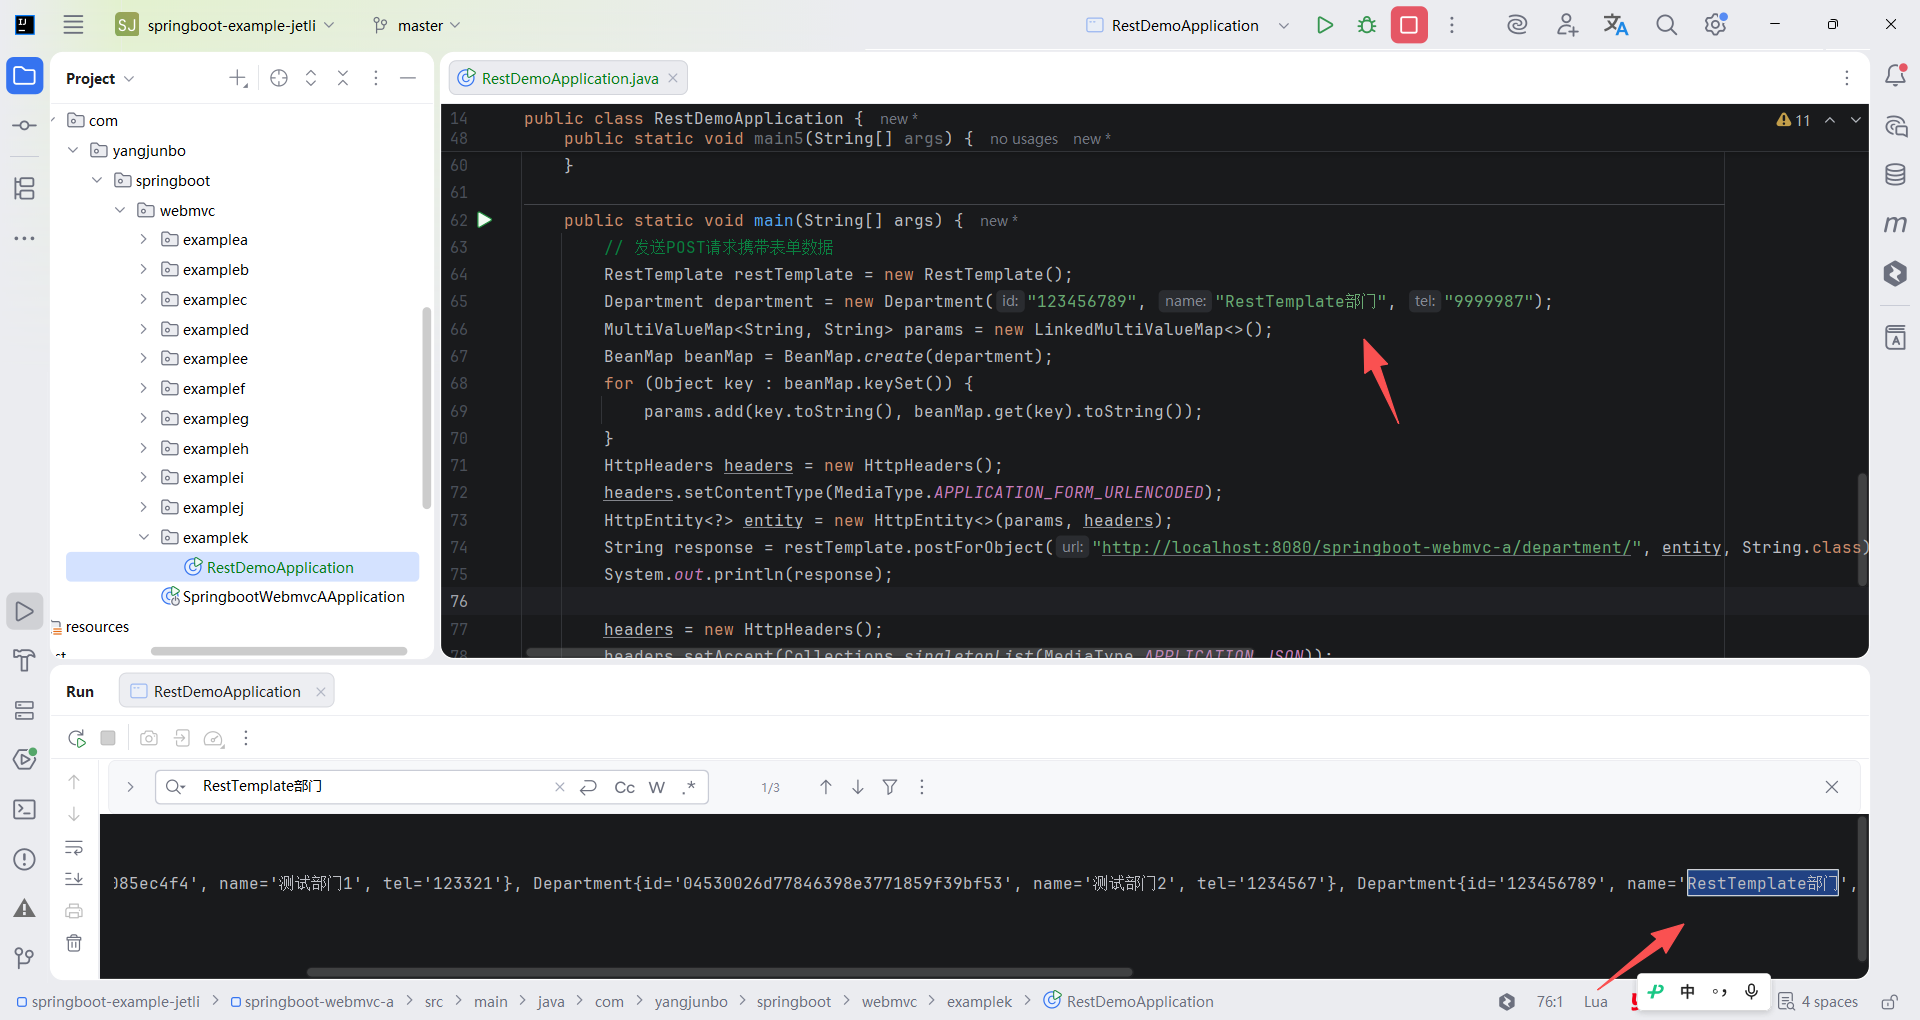
通常发送 POST 请求携带数据的方式除了借助请求体,还可以使用 FormData 传递表单数据。与请求体 JSON 数据不同的是,FormData的格式都是 key-value,正常传递的话这种格式会被 RestTemplate 当作 application/json 格式,所以需要同时构造 FormData 形式的数据以及设置请求头。
代码提供了一个携带表单数据的 POST 请求示例,RestTemplate 规定传递 FormData 形式的数据时需要传入一个 MultiValueMap 类型的对象,这个 MultiValueMap 与 Map 有所不同,它的内部其实是一个 Map<String,List> 结构,即一个 key 可以对应多个value,这种结构也刚好对应 HTML 中 表单的数据传递规则(表单可以传递一组相同的 key 代表数组数据)。既然如此,那么起初构造的 Department 数据就需要转换为 FormData 形式的数据,Spring Framework 提供了一个 Bean 转换为 Map 的工具类BeanMap,可以利用它将 Department 转换为 BeanMap,并在转换后循环这个 BeanMap 将数据逐个设置到 MultiValueMap 中。封装FormData 完毕后再设置请求头的 Content-Type 为 application/x-www-form-urlencoded,即表单格式的数据,这样就完成了请求数据的构造。最后将这两部分数据封装到 HttpEntity 后,调用 postForObject 传入即可。
java
package com.yangjunbo.springboot.webmvc.examplek;

import com.yangjunbo.springboot.webmvc.examplec.Department;
import org.springframework.cglib.beans.BeanMap;
import org.springframework.core.ParameterizedTypeReference;
import org.springframework.http.*;
import org.springframework.util.LinkedMultiValueMap;
import org.springframework.util.MultiValueMap;
import org.springframework.web.client.RestTemplate;

import java.util.Collections;
import java.util.List;

public class RestDemoApplication {

    public static void main1(String[] args) {
        RestTemplate restTemplate = new RestTemplate();
        String response = restTemplate.getForObject("http://localhost:8080/springboot-webmvc-a/department/findAll", String.class);
        System.out.println(response);
    }

    public static void main2(String[] args) {
        RestTemplate restTemplate = new RestTemplate();
        HttpHeaders headers = new HttpHeaders();
        headers.setAccept(Collections.singletonList(MediaType.APPLICATION_XML));
        HttpEntity<?> entity = new HttpEntity<>(headers);
        ResponseEntity<String> responseEntity = restTemplate.exchange
                ("http://localhost:8080/springboot-webmvc-a/department/findAll", HttpMethod.GET, entity, String.class);
        System.out.println(responseEntity.getBody());
    }

    public static void main3(String[] args) {
        String id = "a6c0d9110c9a412cb3746d07085ec4f4";
        RestTemplate restTemplate = new RestTemplate();
        Department response = restTemplate.getForObject("http://localhost:8080/springboot-webmvc-a/department/" + id, Department.class);
        System.out.println(response);
    }

    public static void main4(String[] args) {
        RestTemplate restTemplate = new RestTemplate();
        HttpHeaders headers = new HttpHeaders();
        headers.setAccept(Collections.singletonList(MediaType.APPLICATION_JSON));
        HttpEntity<?> entity = new HttpEntity<>(headers);
        ResponseEntity<List<Department>> responseEntity = restTemplate.exchange("http://localhost:8080/springboot-webmvc-a/department/findAll",HttpMethod.GET, entity, new ParameterizedTypeReference<List<Department>>() {});
        System.out.println(responseEntity.getBody());
    }

    public static void main5(String[] args) {
        // 发送POST请求
        RestTemplate restTemplate = new RestTemplate();
        Department department = new Department("123456789", "RestTemplate部门", "9999987");
        String response = restTemplate.postForObject("http://localhost:8080/springboot-webmvc-a/department/saveJson", department, String.class);
        System.out.println(response);

        HttpHeaders headers = new HttpHeaders();
        headers.setAccept(Collections.singletonList(MediaType.APPLICATION_JSON));
        HttpEntity<?> entity = new HttpEntity<>(headers);
        ResponseEntity<List<Department>> responseEntity = restTemplate.exchange("http://localhost:8080/springboot-webmvc-a/department/findAll",HttpMethod.GET, entity, new ParameterizedTypeReference<>() {});
        System.out.println(responseEntity.getBody());
    }

    public static void main(String[] args) {
        // 发送POST请求携带表单数据
        RestTemplate restTemplate = new RestTemplate();
        Department department = new Department("123456789", "RestTemplate部门", "9999987");
        MultiValueMap<String, String> params = new LinkedMultiValueMap<>();
        BeanMap beanMap = BeanMap.create(department);
        for (Object key : beanMap.keySet()) {
            params.add(key.toString(), beanMap.get(key).toString());
        }
        HttpHeaders headers = new HttpHeaders();
        headers.setContentType(MediaType.APPLICATION_FORM_URLENCODED);
        HttpEntity<?> entity = new HttpEntity<>(params, headers);
        String response = restTemplate.postForObject("http://localhost:8080/springboot-webmvc-a/department/", entity, String.class);
        System.out.println(response);

        headers = new HttpHeaders();
        headers.setAccept(Collections.singletonList(MediaType.APPLICATION_JSON));
        entity = new HttpEntity<>(headers);
        ResponseEntity<List<Department>> responseEntity = restTemplate.exchange("http://localhost:8080/springboot-webmvc-a/department/findAll",HttpMethod.GET, entity, new ParameterizedTypeReference<>() {});
        System.out.println(responseEntity.getBody());
    }

}
6.定制 RestTemplate
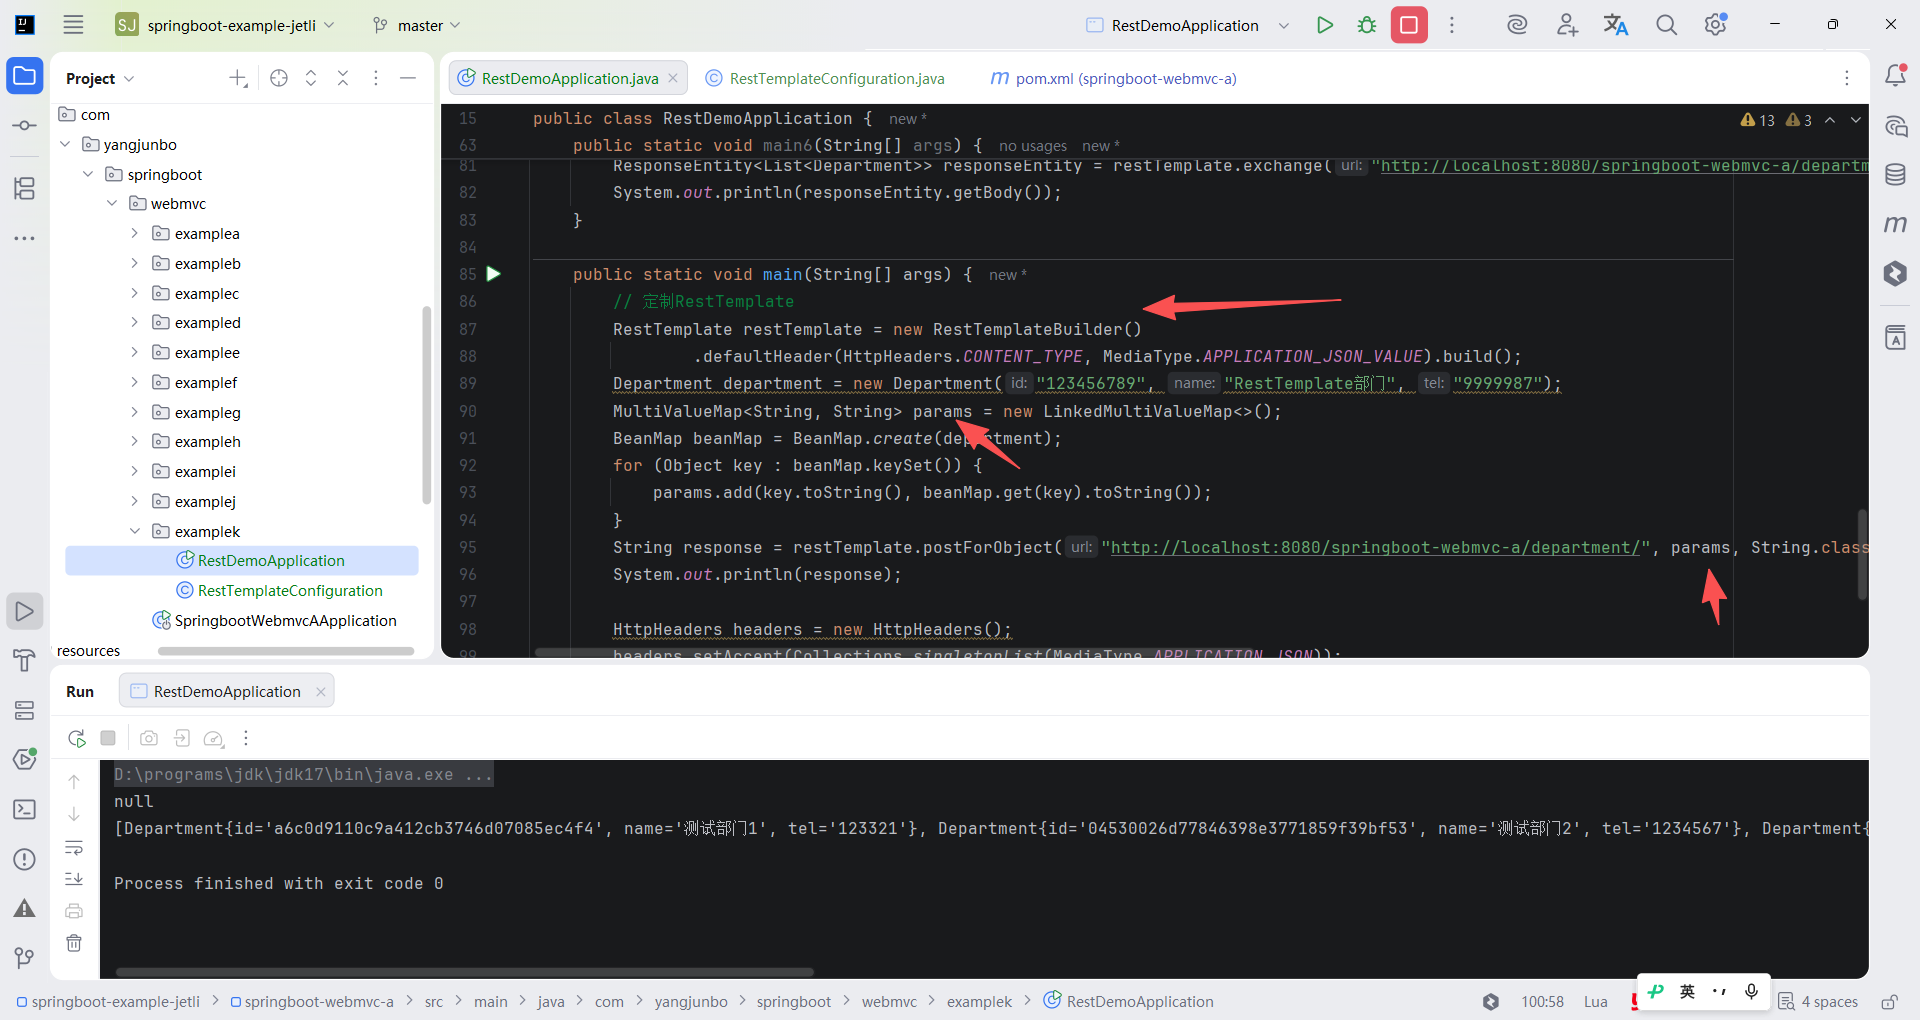
如果需要频繁发送表单数据的 POST 请求,则每次都设置请求头的 Content-Type 信息未免有些麻烦,可以对 RestTemplate 进行定制,让它每次发送请求时都携带这个请求即可。RestTemplate 的定制方式有两种:(1) 创建 RestTemplate 后调用其 setter 系列方法修改;(2) 借助建造器 RestTemplateBuilder。实际的项目中更多的是使用 RestTemplateBuilder 来完成 RestTemplate 的定制,在 Spring Boot 整合 WebMvc 的工程中,Spring Boot 已经注册了一个 RestTemplateBuilder 对象,可以直接获取它,并通过调用其方法完成对RestTemplate 的定制。代码展示了注册 RestTemplate 的方式,使用 @Bean 标注的方法注册 Bean 时,可以直接在方法参数中声明 IOC容器中存在的对象以完成依赖注入,随后就可以使用 RestTemplateBuilder 设置默认的请求头。
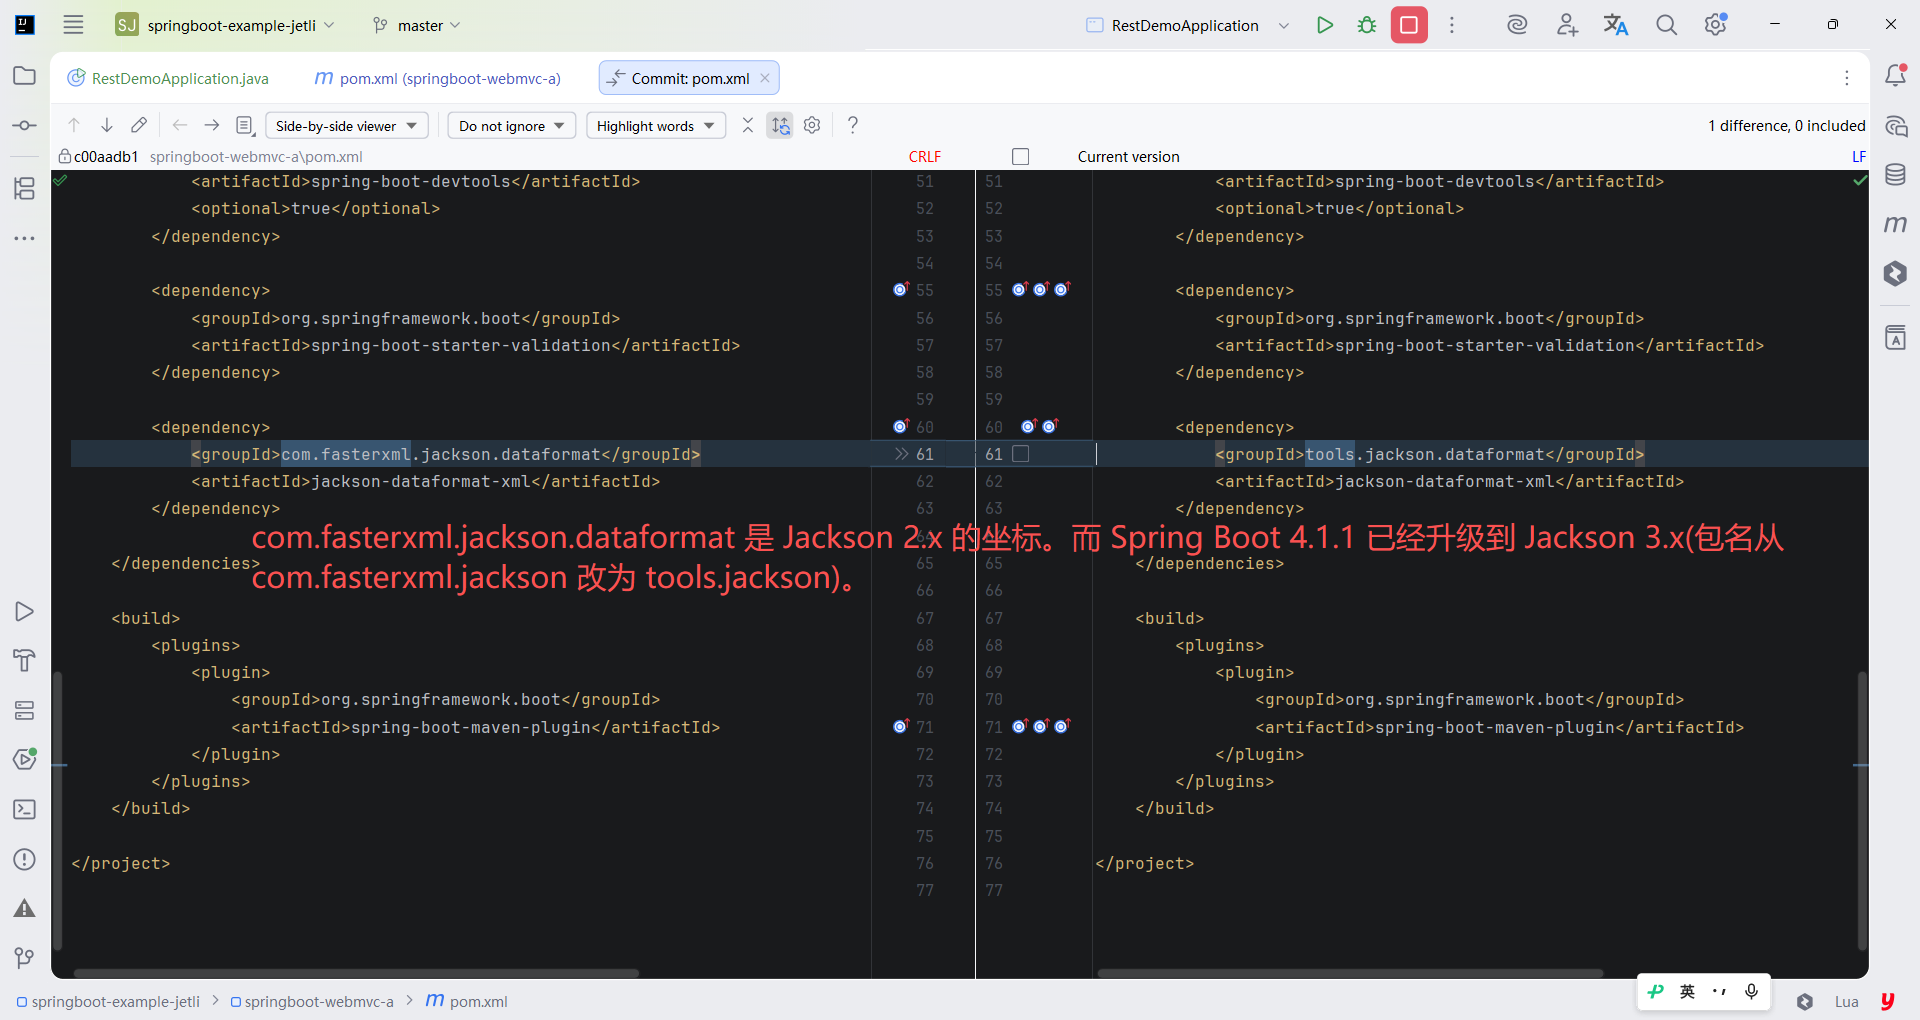
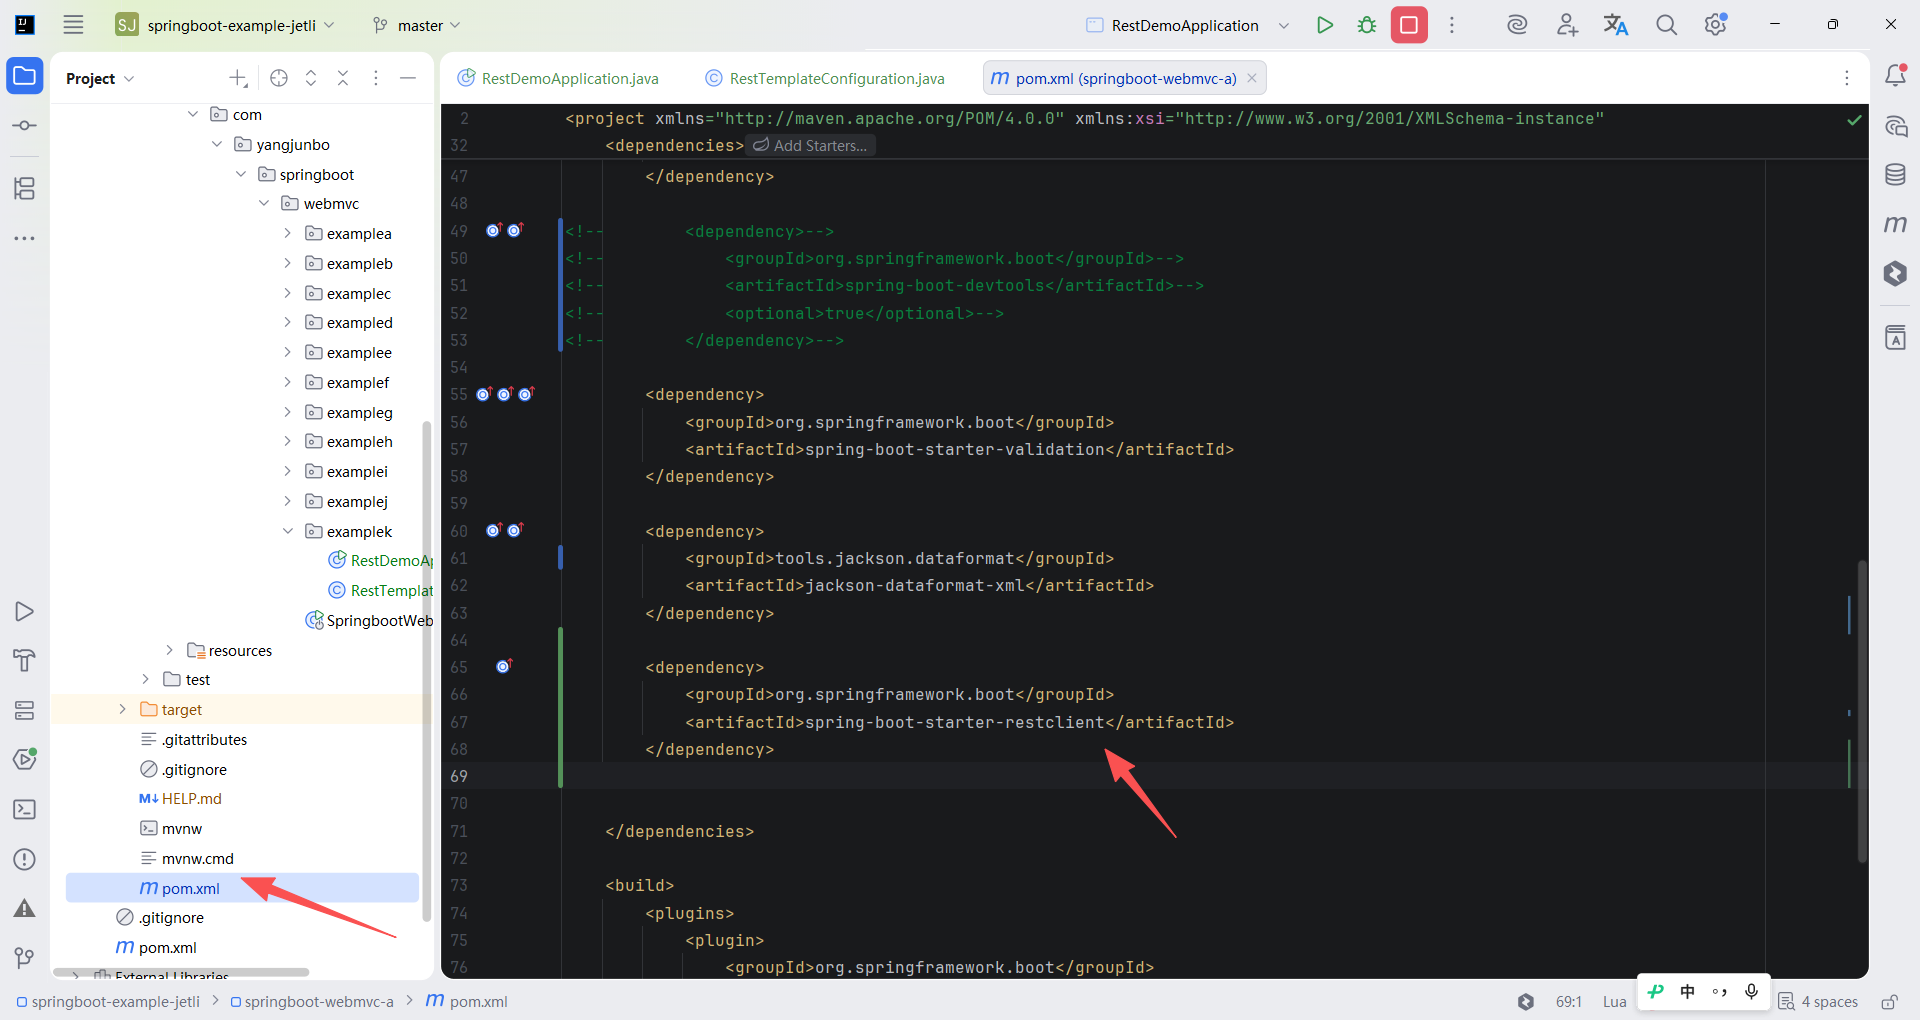
Spring Boot 4 对 HTTP 客户端做了模块拆分和包移动,导致 RestTemplateBuilder 既不在原包路径,也不在 classpath 里。需要补充一个依赖。
xml
<?xml version="1.0" encoding="UTF-8"?>
<project xmlns="http://maven.apache.org/POM/4.0.0" xmlns:xsi="http://www.w3.org/2001/XMLSchema-instance"
         xsi:schemaLocation="http://maven.apache.org/POM/4.0.0 https://maven.apache.org/xsd/maven-4.0.0.xsd">
    <modelVersion>4.0.0</modelVersion>
    <parent>
        <groupId>org.springframework.boot</groupId>
        <artifactId>spring-boot-starter-parent</artifactId>
        <version>4.1.1</version>
        <relativePath/> <!-- lookup parent from repository -->
    </parent>
    <groupId>com.yangjunbo</groupId>
    <artifactId>springboot-webmvc-a</artifactId>
    <version>0.0.1-SNAPSHOT</version>
    <name>springboot-webmvc-a</name>
    <description>springboot-webmvc-a</description>
    <url/>
    <licenses>
        <license/>
    </licenses>
    <developers>
        <developer/>
    </developers>
    <scm>
        <connection/>
        <developerConnection/>
        <tag/>
        <url/>
    </scm>
    <properties>
        <java.version>17</java.version>
    </properties>
    <dependencies>
        <dependency>
            <groupId>org.springframework.boot</groupId>
            <artifactId>spring-boot-starter-webmvc</artifactId>
        </dependency>

        <dependency>
            <groupId>org.springframework.boot</groupId>
            <artifactId>spring-boot-starter-webmvc-test</artifactId>
            <scope>test</scope>
        </dependency>

        <dependency>
            <groupId>org.springframework.boot</groupId>
            <artifactId>spring-boot-starter-thymeleaf</artifactId>
        </dependency>

<!--        <dependency>-->
<!--            <groupId>org.springframework.boot</groupId>-->
<!--            <artifactId>spring-boot-devtools</artifactId>-->
<!--            <optional>true</optional>-->
<!--        </dependency>-->

        <dependency>
            <groupId>org.springframework.boot</groupId>
            <artifactId>spring-boot-starter-validation</artifactId>
        </dependency>

        <dependency>
            <groupId>tools.jackson.dataformat</groupId>
            <artifactId>jackson-dataformat-xml</artifactId>
        </dependency>

        <dependency>
            <groupId>org.springframework.boot</groupId>
            <artifactId>spring-boot-starter-restclient</artifactId>
        </dependency>

    </dependencies>

    <build>
        <plugins>
            <plugin>
                <groupId>org.springframework.boot</groupId>
                <artifactId>spring-boot-maven-plugin</artifactId>
            </plugin>
        </plugins>
    </build>

</project>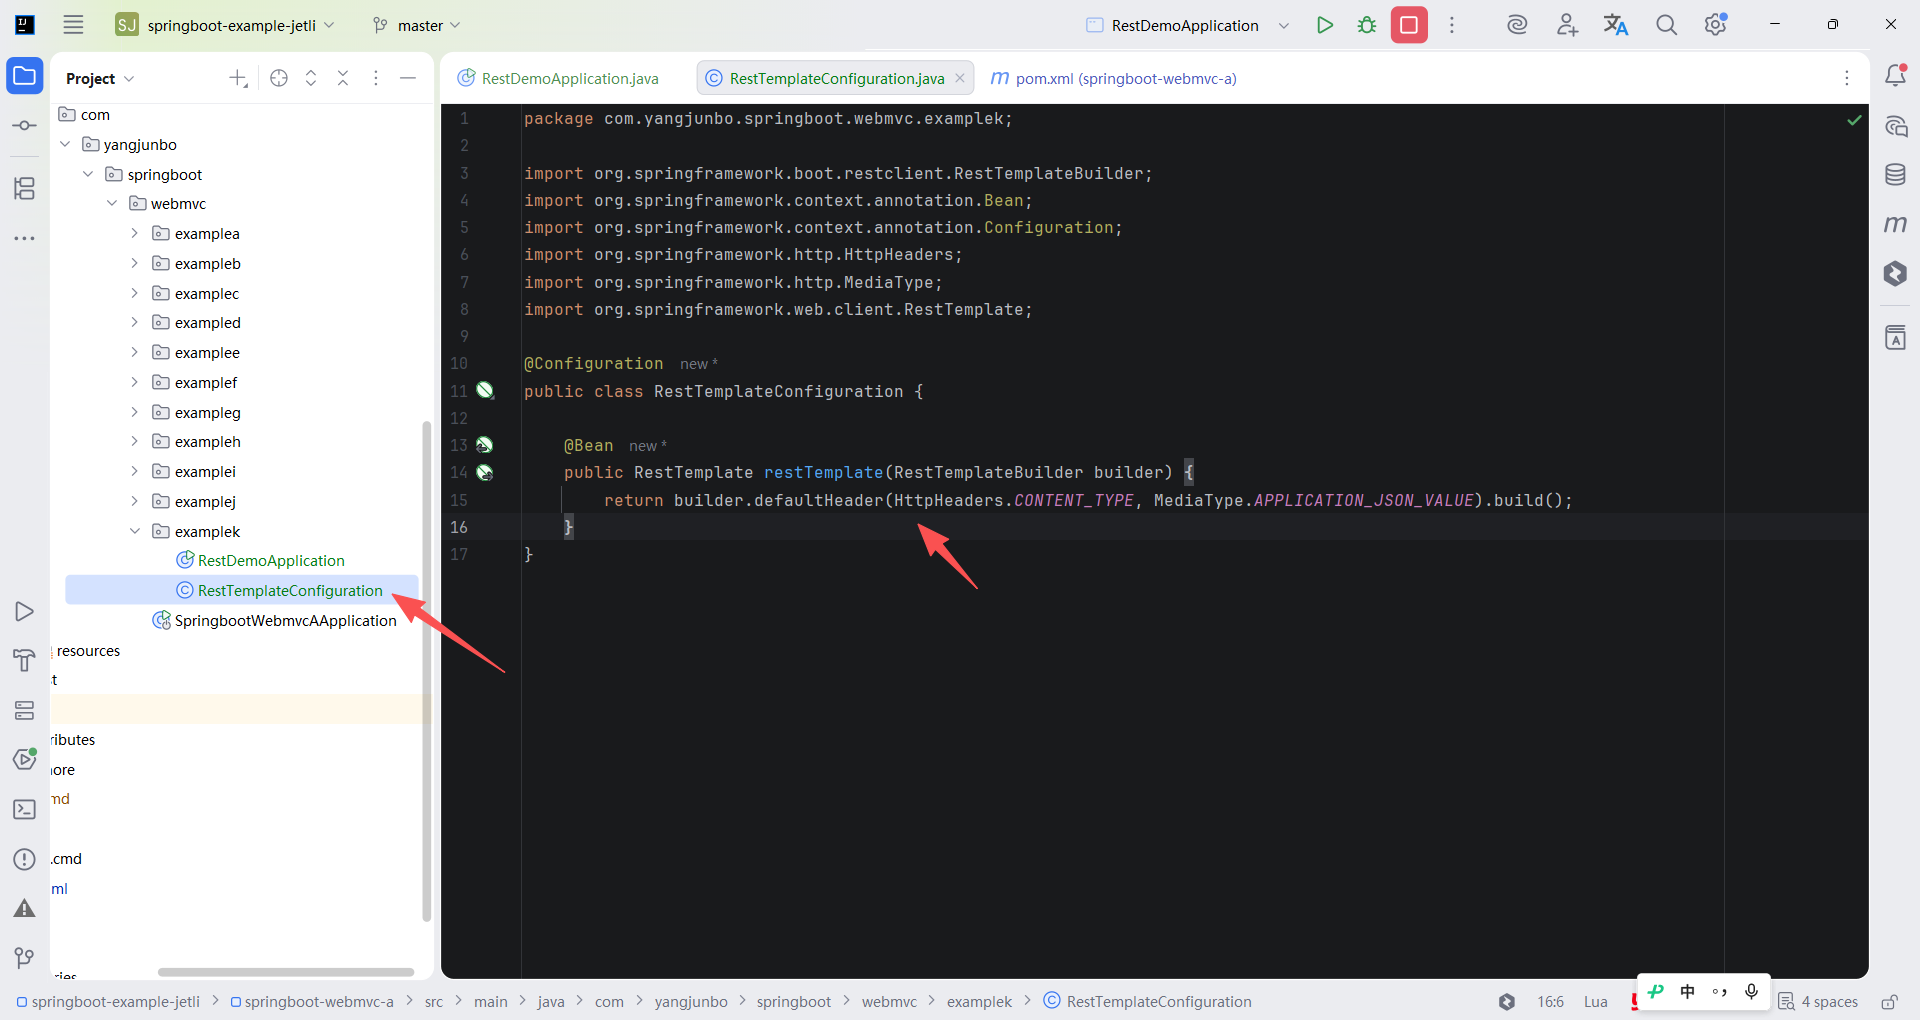
java
package com.yangjunbo.springboot.webmvc.examplek;

import org.springframework.boot.restclient.RestTemplateBuilder;
import org.springframework.context.annotation.Bean;
import org.springframework.context.annotation.Configuration;
import org.springframework.http.HttpHeaders;
import org.springframework.http.MediaType;
import org.springframework.web.client.RestTemplate;

@Configuration
public class RestTemplateConfiguration {

    @Bean
    public RestTemplate restTemplate(RestTemplateBuilder builder) {
        return builder.defaultHeader(HttpHeaders.CONTENT_TYPE, MediaType.APPLICATION_JSON_VALUE).build();
    }
}
在普通的 Java 类中使用 RestTemplateBuilder 的方式也类似,修改代码,将直接创建 RestTemplate 的动作改为借助RestTemplateBuilder。这次重新运行 main 方法仍然可行,证明 RestTemplate 的定制成功。注意一个细节,这次发送请求时由于不需要单独再设置请求头数据,因此也就不需要借助 HttpEntity 封装数据,直接传入 MultiValueMap 表单数据也是可行的。
java
package com.yangjunbo.springboot.webmvc.examplek;

import com.yangjunbo.springboot.webmvc.examplec.Department;
import org.springframework.boot.restclient.RestTemplateBuilder;
import org.springframework.cglib.beans.BeanMap;
import org.springframework.core.ParameterizedTypeReference;
import org.springframework.http.*;
import org.springframework.util.LinkedMultiValueMap;
import org.springframework.util.MultiValueMap;
import org.springframework.web.client.RestTemplate;

import java.util.Collections;
import java.util.List;

public class RestDemoApplication {

    public static void main1(String[] args) {
        RestTemplate restTemplate = new RestTemplate();
        String response = restTemplate.getForObject("http://localhost:8080/springboot-webmvc-a/department/findAll", String.class);
        System.out.println(response);
    }

    public static void main2(String[] args) {
        RestTemplate restTemplate = new RestTemplate();
        HttpHeaders headers = new HttpHeaders();
        headers.setAccept(Collections.singletonList(MediaType.APPLICATION_XML));
        HttpEntity<?> entity = new HttpEntity<>(headers);
        ResponseEntity<String> responseEntity = restTemplate.exchange
                ("http://localhost:8080/springboot-webmvc-a/department/findAll", HttpMethod.GET, entity, String.class);
        System.out.println(responseEntity.getBody());
    }

    public static void main3(String[] args) {
        String id = "a6c0d9110c9a412cb3746d07085ec4f4";
        RestTemplate restTemplate = new RestTemplate();
        Department response = restTemplate.getForObject("http://localhost:8080/springboot-webmvc-a/department/" + id, Department.class);
        System.out.println(response);
    }

    public static void main4(String[] args) {
        RestTemplate restTemplate = new RestTemplate();
        HttpHeaders headers = new HttpHeaders();
        headers.setAccept(Collections.singletonList(MediaType.APPLICATION_JSON));
        HttpEntity<?> entity = new HttpEntity<>(headers);
        ResponseEntity<List<Department>> responseEntity = restTemplate.exchange("http://localhost:8080/springboot-webmvc-a/department/findAll",HttpMethod.GET, entity, new ParameterizedTypeReference<List<Department>>() {});
        System.out.println(responseEntity.getBody());
    }

    public static void main5(String[] args) {
        // 发送POST请求
        RestTemplate restTemplate = new RestTemplate();
        Department department = new Department("123456789", "RestTemplate部门", "9999987");
        String response = restTemplate.postForObject("http://localhost:8080/springboot-webmvc-a/department/saveJson", department, String.class);
        System.out.println(response);

        HttpHeaders headers = new HttpHeaders();
        headers.setAccept(Collections.singletonList(MediaType.APPLICATION_JSON));
        HttpEntity<?> entity = new HttpEntity<>(headers);
        ResponseEntity<List<Department>> responseEntity = restTemplate.exchange("http://localhost:8080/springboot-webmvc-a/department/findAll",HttpMethod.GET, entity, new ParameterizedTypeReference<>() {});
        System.out.println(responseEntity.getBody());
    }

    public static void main6(String[] args) {
        // 发送POST请求携带表单数据
        RestTemplate restTemplate = new RestTemplate();
        Department department = new Department("123456789", "RestTemplate部门", "9999987");
        MultiValueMap<String, String> params = new LinkedMultiValueMap<>();
        BeanMap beanMap = BeanMap.create(department);
        for (Object key : beanMap.keySet()) {
            params.add(key.toString(), beanMap.get(key).toString());
        }
        HttpHeaders headers = new HttpHeaders();
        headers.setContentType(MediaType.APPLICATION_FORM_URLENCODED);
        HttpEntity<?> entity = new HttpEntity<>(params, headers);
        String response = restTemplate.postForObject("http://localhost:8080/springboot-webmvc-a/department/", entity, String.class);
        System.out.println(response);

        headers = new HttpHeaders();
        headers.setAccept(Collections.singletonList(MediaType.APPLICATION_JSON));
        entity = new HttpEntity<>(headers);
        ResponseEntity<List<Department>> responseEntity = restTemplate.exchange("http://localhost:8080/springboot-webmvc-a/department/findAll",HttpMethod.GET, entity, new ParameterizedTypeReference<>() {});
        System.out.println(responseEntity.getBody());
    }

    public static void main(String[] args) {
        // 定制RestTemplate
        RestTemplate restTemplate = new RestTemplateBuilder()
                .defaultHeader(HttpHeaders.CONTENT_TYPE, MediaType.APPLICATION_JSON_VALUE).build();
        Department department = new Department("123456789", "RestTemplate部门", "9999987");
        MultiValueMap<String, String> params = new LinkedMultiValueMap<>();
        BeanMap beanMap = BeanMap.create(department);
        for (Object key : beanMap.keySet()) {
            params.add(key.toString(), beanMap.get(key).toString());
        }
        String response = restTemplate.postForObject("http://localhost:8080/springboot-webmvc-a/department/", params, String.class);
        System.out.println(response);

        HttpHeaders headers = new HttpHeaders();
        headers.setAccept(Collections.singletonList(MediaType.APPLICATION_JSON));
        HttpEntity<?> entity = new HttpEntity<>(headers);
        ResponseEntity<List<Department>> responseEntity = restTemplate.exchange("http://localhost:8080/springboot-webmvc-a/department/findAll",HttpMethod.GET, entity, new ParameterizedTypeReference<>() {});
        System.out.println(responseEntity.getBody());
    }

}
7.ResponseEntity
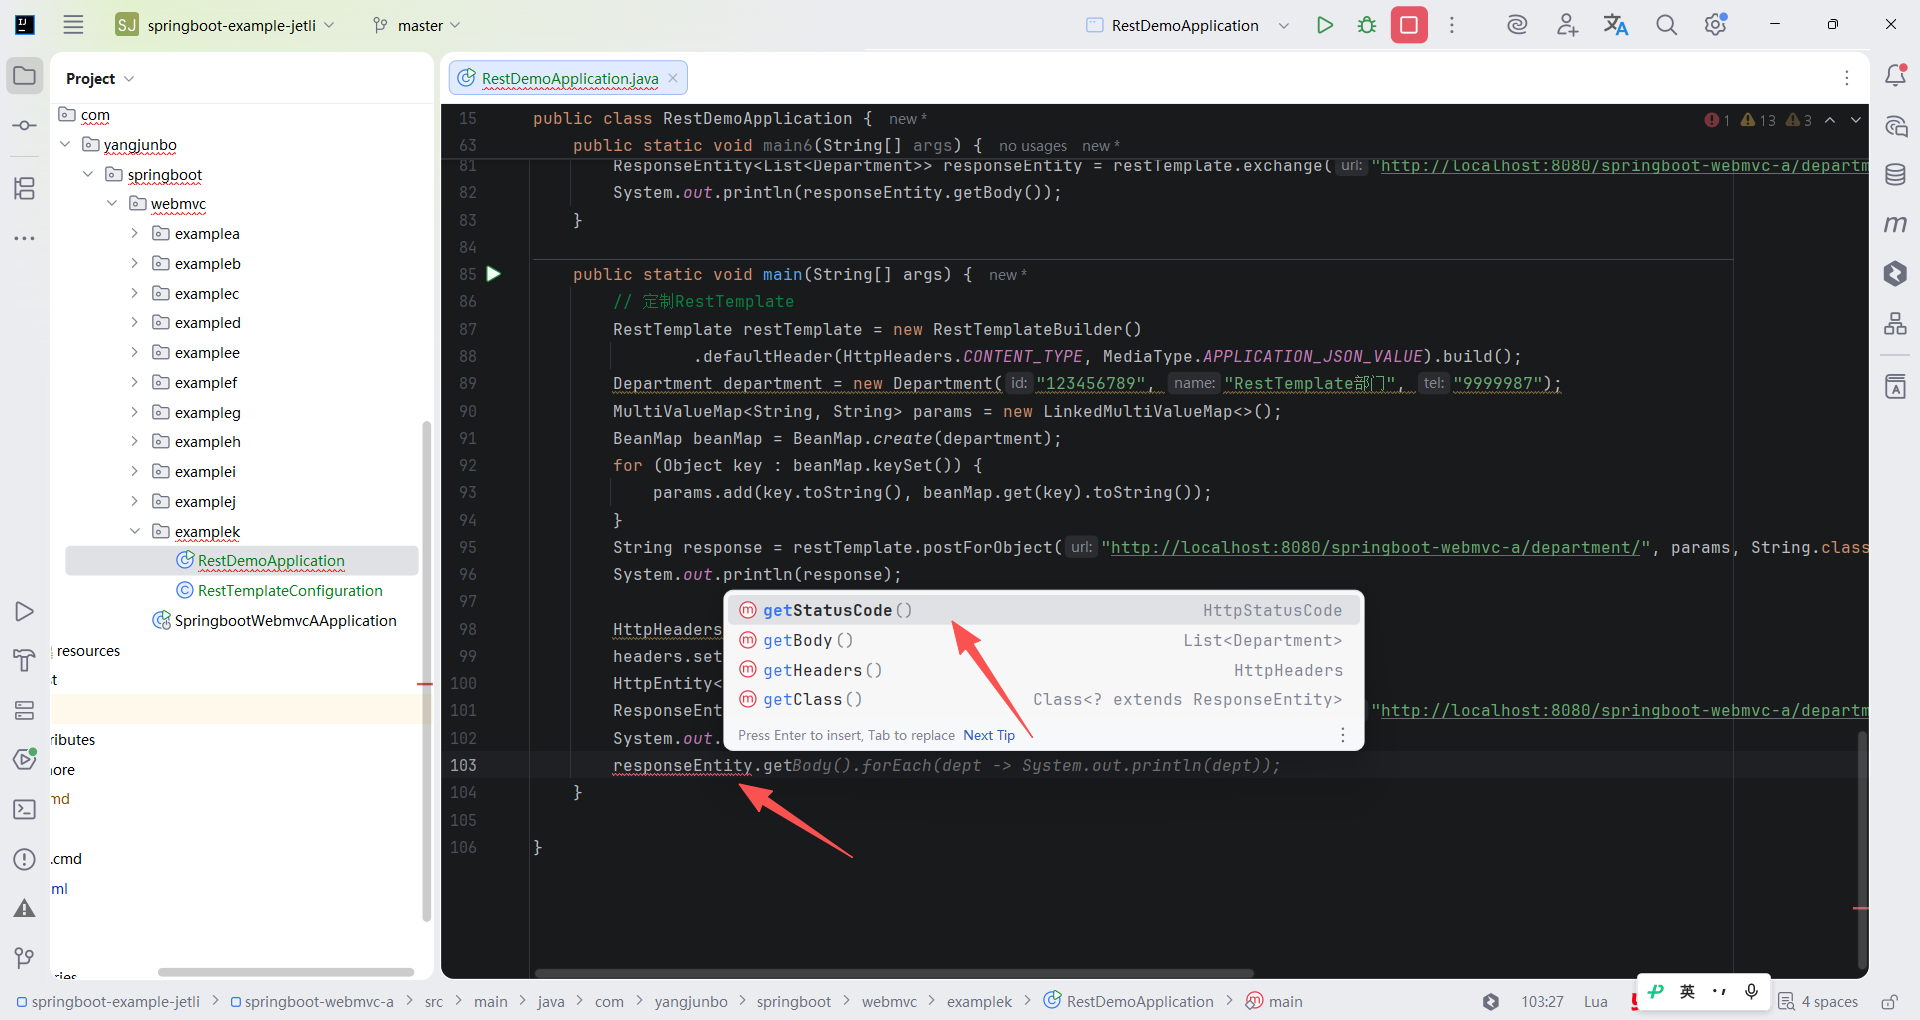
最后关注一下封装了响应头和响应体的模型 ResponseEntity,借助 IDE 可以发现从 ResponseEntity 中可以得到响应状态码、响应头和响应体信息,可以通过获取响应状态码来判定这次请求是否正常。
10.5.2 RestClient
从 Spring Framework 6.1 版本开始(对应的 Spring Boot 版本为 3.2.0),WebMvc 引入了两个新的 REST 服务调用方式,分别是编程式的 RestClient 和声明式的 HTTP 接口,本节先简单学习编程式的 RestClient 使用。
RestClient 本身是类似 RestTemplate 的远程服务调用客户端,在 Spring Framework 6.1 版本之后被官方标注为最推荐使用的 API,得益于它的链式 AP I调用和更优秀的方法设计,在使用 RestClient 的时候要比使用 RestTemplate 顺畅得多,下面通过几个示例演示RestClient 的使用。
1.发送 GET 请求
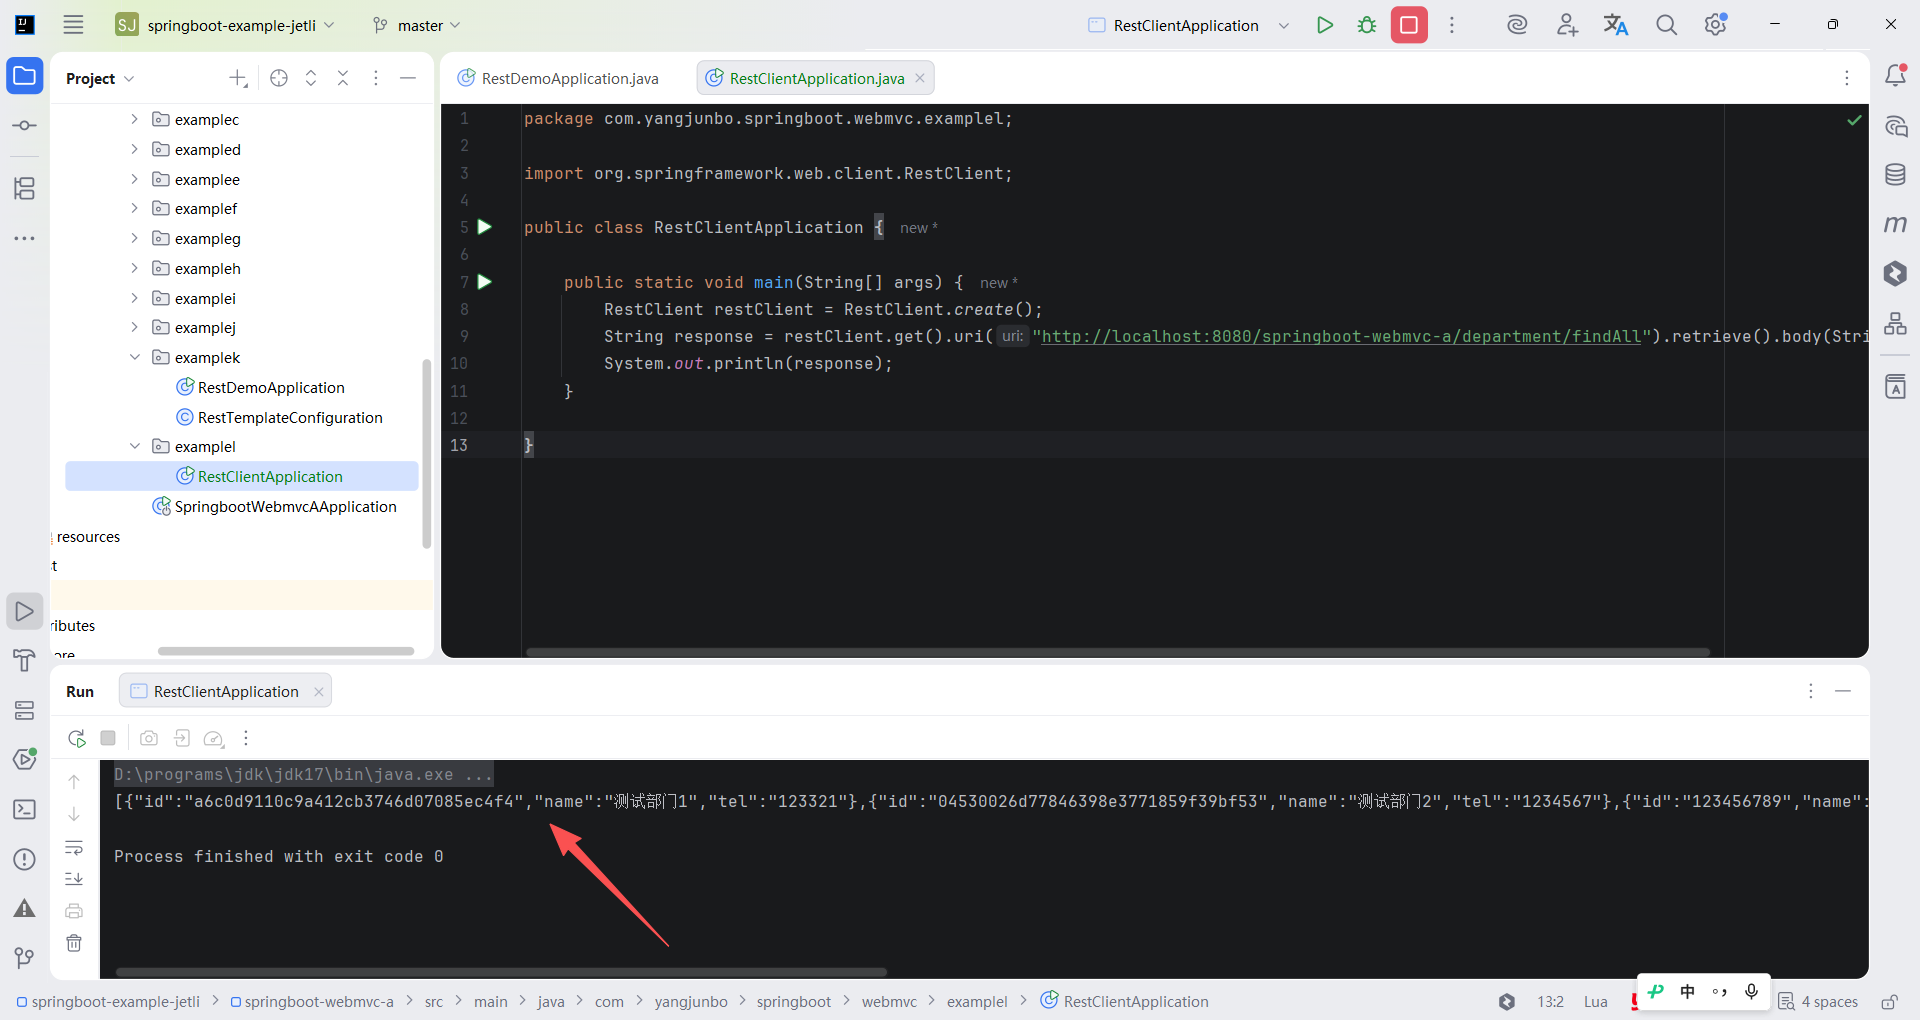
创建 RestClient 的方式非常简单,只需要调用其静态方法 create,即可得到一个 RestClient 的实例,当然也可以传入一个 RestTemplate对象来复制其中的配置。得到实例后只需要调用它的 get 方法,即可得到一个发送 GET 请求的封装对象,随后指定要请求的接口地址,调用 retrieve 方法,即可发送请求。得到响应结果后可以调用 body 方法传入 String.class,即可得到字符串形式的响应体。
java
package com.yangjunbo.springboot.webmvc.examplel;

import org.springframework.web.client.RestClient;

public class RestClientApplication {

    public static void main(String[] args) {
        RestClient restClient = RestClient.create();
        String response = restClient.get().uri("http://localhost:8080/springboot-webmvc-a/department/findAll").retrieve().body(String.class);
        System.out.println(response);
    }

}
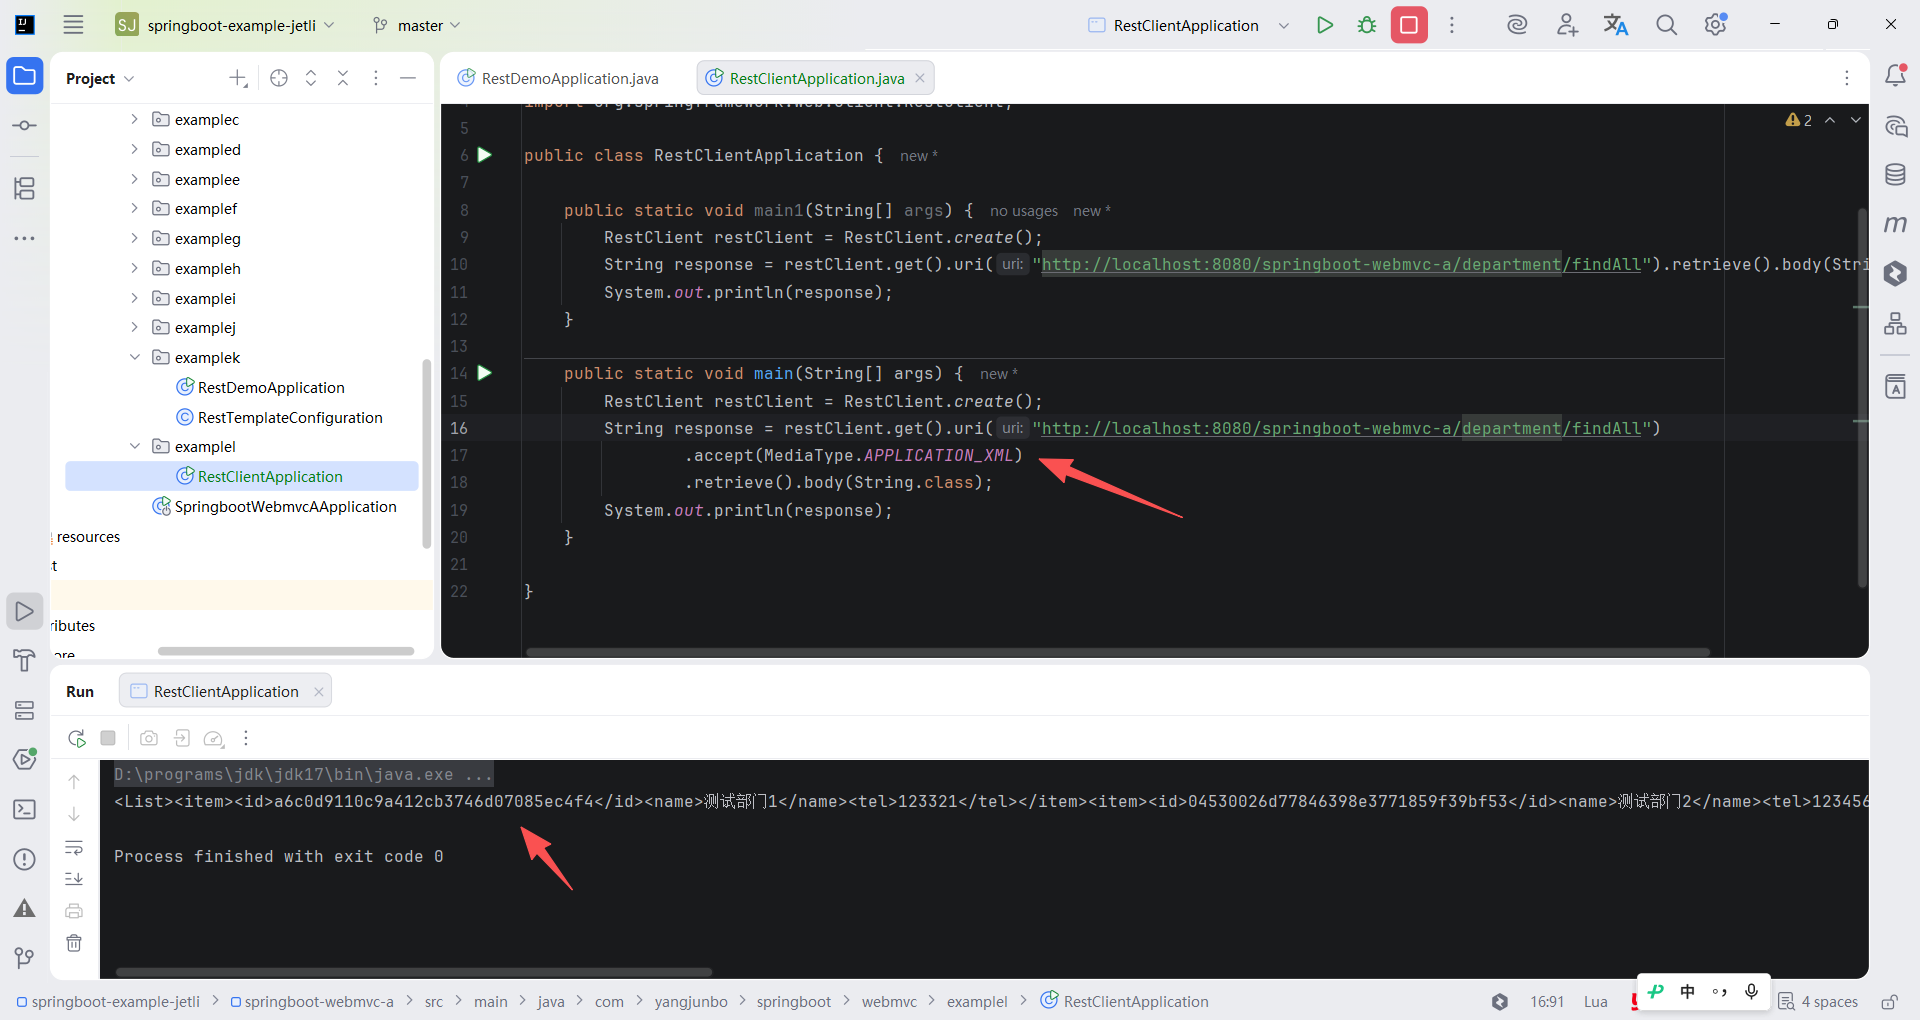
以此方法发送的请求默认得到的响应体是 JSON 格式的数据,如果需要接收 XML 格式的数据,可以在发送请求之前调用 accept 方法,指定获取 application/xml 格式的数据。
java
package com.yangjunbo.springboot.webmvc.examplel;

import org.springframework.http.MediaType;
import org.springframework.web.client.RestClient;

public class RestClientApplication {

    public static void main1(String[] args) {
        RestClient restClient = RestClient.create();
        String response = restClient.get().uri("http://localhost:8080/springboot-webmvc-a/department/findAll").retrieve().body(String.class);
        System.out.println(response);
    }

    public static void main(String[] args) {
        RestClient restClient = RestClient.create();
        String response = restClient.get().uri("http://localhost:8080/springboot-webmvc-a/department/findAll")
                .accept(MediaType.APPLICATION_XML)
                .retrieve().body(String.class);
        System.out.println(response);
    }

}
另外注意一个细节,在创建 RestClient 时可以传入一个 baseUrl,这个作用类似于编写 Controller 时在类上标注 @RequestMapping,只要创建 RestClient 时指定了 baseUrl,那么这个 RestClient 发送的所有请求都会在请求地址上追加 baseUrl 作为前缀,这样做的好处是同一个根地址下的所有接口只需要声明一次,而不需要每次指定 URL 时都编写。
2.发送 POST 请求
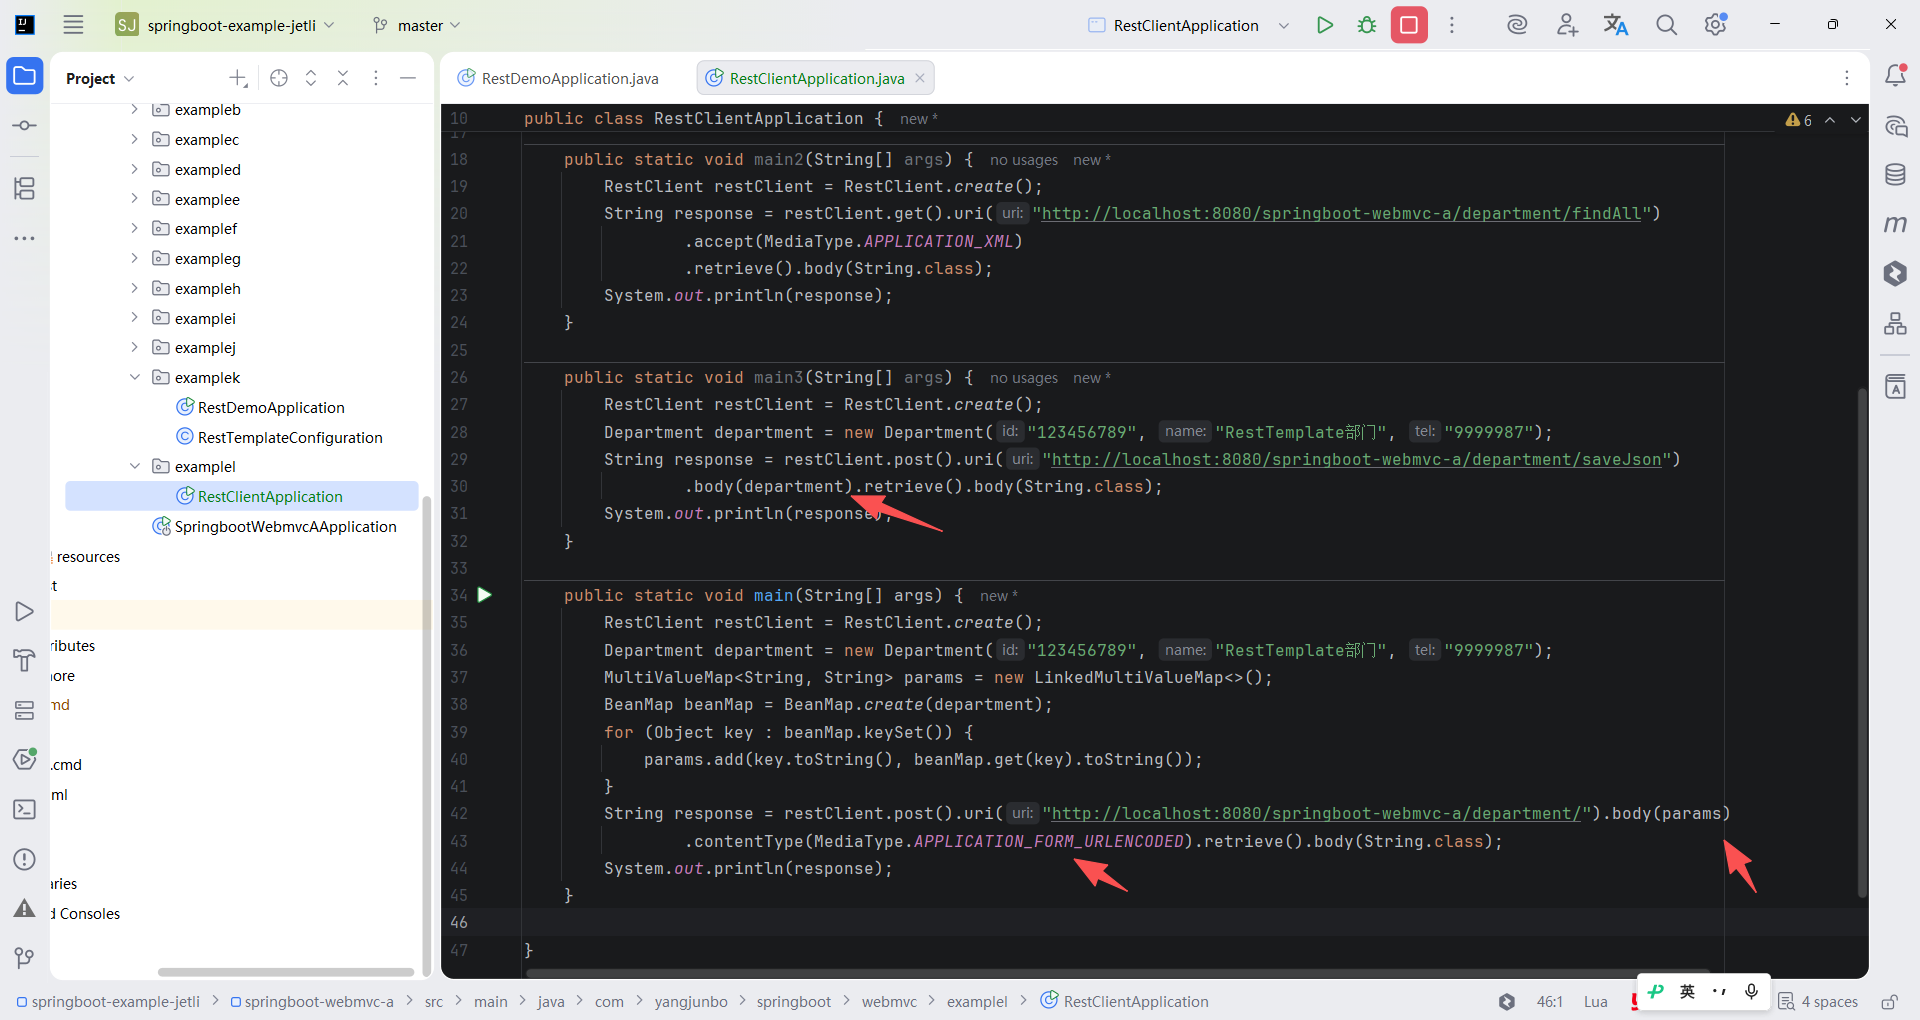
RestClient 发送 POST 请求的方式也非常简单,常用的发送 JSON 数据和发送表单数据的方式都可以得到很好的支持。代码分别展示了使用 application/json 和 application/x-www-form-urlencoded 发送 POST 请求的代码编写方式。剥离掉准备工作的代码,从只关注RestClient 本身的操作来看,使用 RestClient 的确比使用 RestTemplate 优雅,这就印证了 Spring Framework 官方推荐在 6.1 版本之后使用 RestClient 而不再是 RestTemplate。
java
package com.yangjunbo.springboot.webmvc.examplel;

import com.yangjunbo.springboot.webmvc.examplec.Department;
import org.springframework.cglib.beans.BeanMap;
import org.springframework.http.MediaType;
import org.springframework.util.LinkedMultiValueMap;
import org.springframework.util.MultiValueMap;
import org.springframework.web.client.RestClient;

public class RestClientApplication {

    public static void main1(String[] args) {
        RestClient restClient = RestClient.create();
        String response = restClient.get().uri("http://localhost:8080/springboot-webmvc-a/department/findAll").retrieve().body(String.class);
        System.out.println(response);
    }

    public static void main2(String[] args) {
        RestClient restClient = RestClient.create();
        String response = restClient.get().uri("http://localhost:8080/springboot-webmvc-a/department/findAll")
                .accept(MediaType.APPLICATION_XML)
                .retrieve().body(String.class);
        System.out.println(response);
    }

    public static void main3(String[] args) {
        RestClient restClient = RestClient.create();
        Department department = new Department("123456789", "RestTemplate部门", "9999987");
        String response = restClient.post().uri("http://localhost:8080/springboot-webmvc-a/department/saveJson")
                .body(department).retrieve().body(String.class);
        System.out.println(response);
    }

    public static void main(String[] args) {
        RestClient restClient = RestClient.create();
        Department department = new Department("123456789", "RestTemplate部门", "9999987");
        MultiValueMap<String, String> params = new LinkedMultiValueMap<>();
        BeanMap beanMap = BeanMap.create(department);
        for (Object key : beanMap.keySet()) {
            params.add(key.toString(), beanMap.get(key).toString());
        }
        String response = restClient.post().uri("http://localhost:8080/springboot-webmvc-a/department/").body(params)
                .contentType(MediaType.APPLICATION_FORM_URLENCODED).retrieve().body(String.class);
        System.out.println(response);
    }

}
10.5.3 HTTP 声明式接口
与编程式相对应的是声明式,Spring Framework 6.1 版本同时推出了基于 WebMvc 的 HTTP 声明式远程调用接口,只需要像编写Controller 的方法那样编写远程调用的接口,加上少量的支撑代码,就可以完成更加优雅的远程调用,而且代码的可读性和可维护性都更高。
1.发送 GET 请求
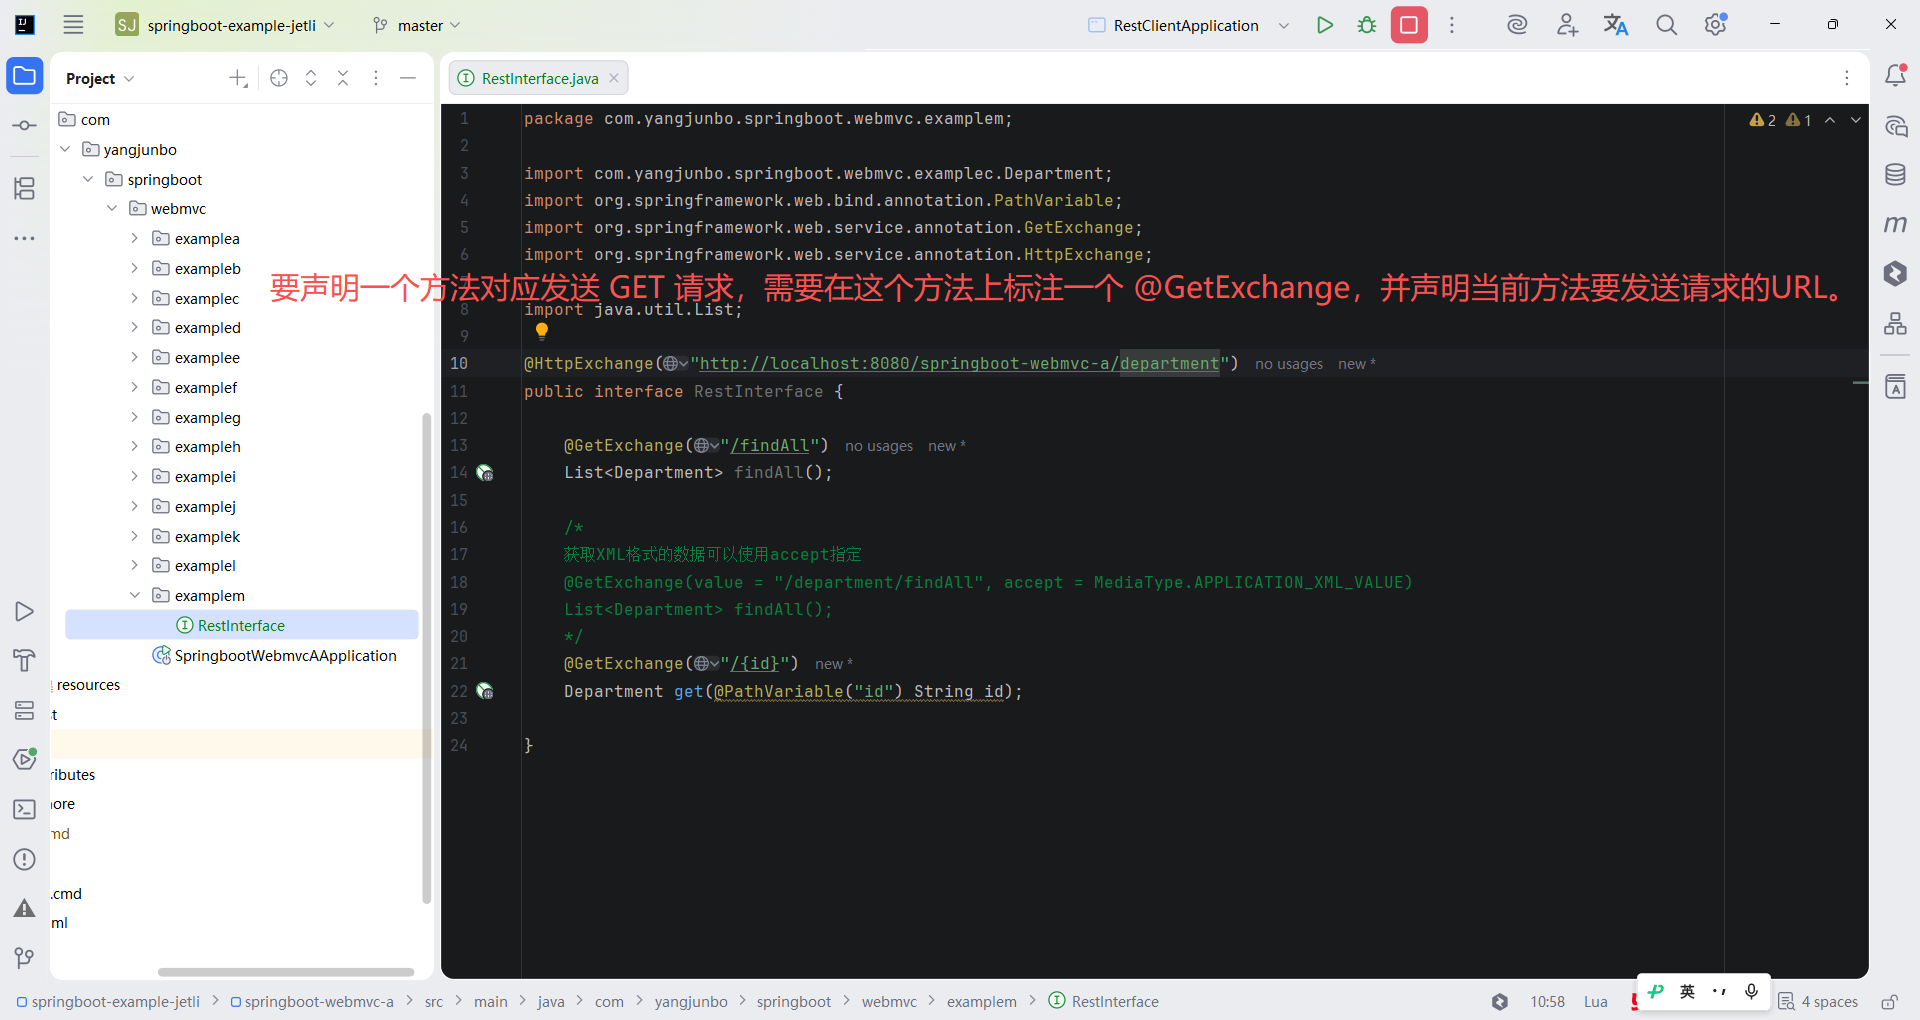
先来讲解 GET 请求的编写,声明式的远程调用接口本身是一个接口,所以这次不再创建类,而是创建一个接口,并在其中声明两个方法。要声明一个方法对应发送 GET 请求,需要在这个方法上标注一个 @GetExchange,并声明当前方法要发送请求的URL(可以发现这类似于 @GetMapping)。至于声明参数的方式,跟前面使用的注解完全一致,包括 @RequestParam、@PathVariable、@RequestHeader 等。另外注意一点,由于发送的几个请求都有相同的前缀,因此可以仿照 @RequestMapping 的套路,在整个接口上标注 @HttpExchange 声明根路径即可。
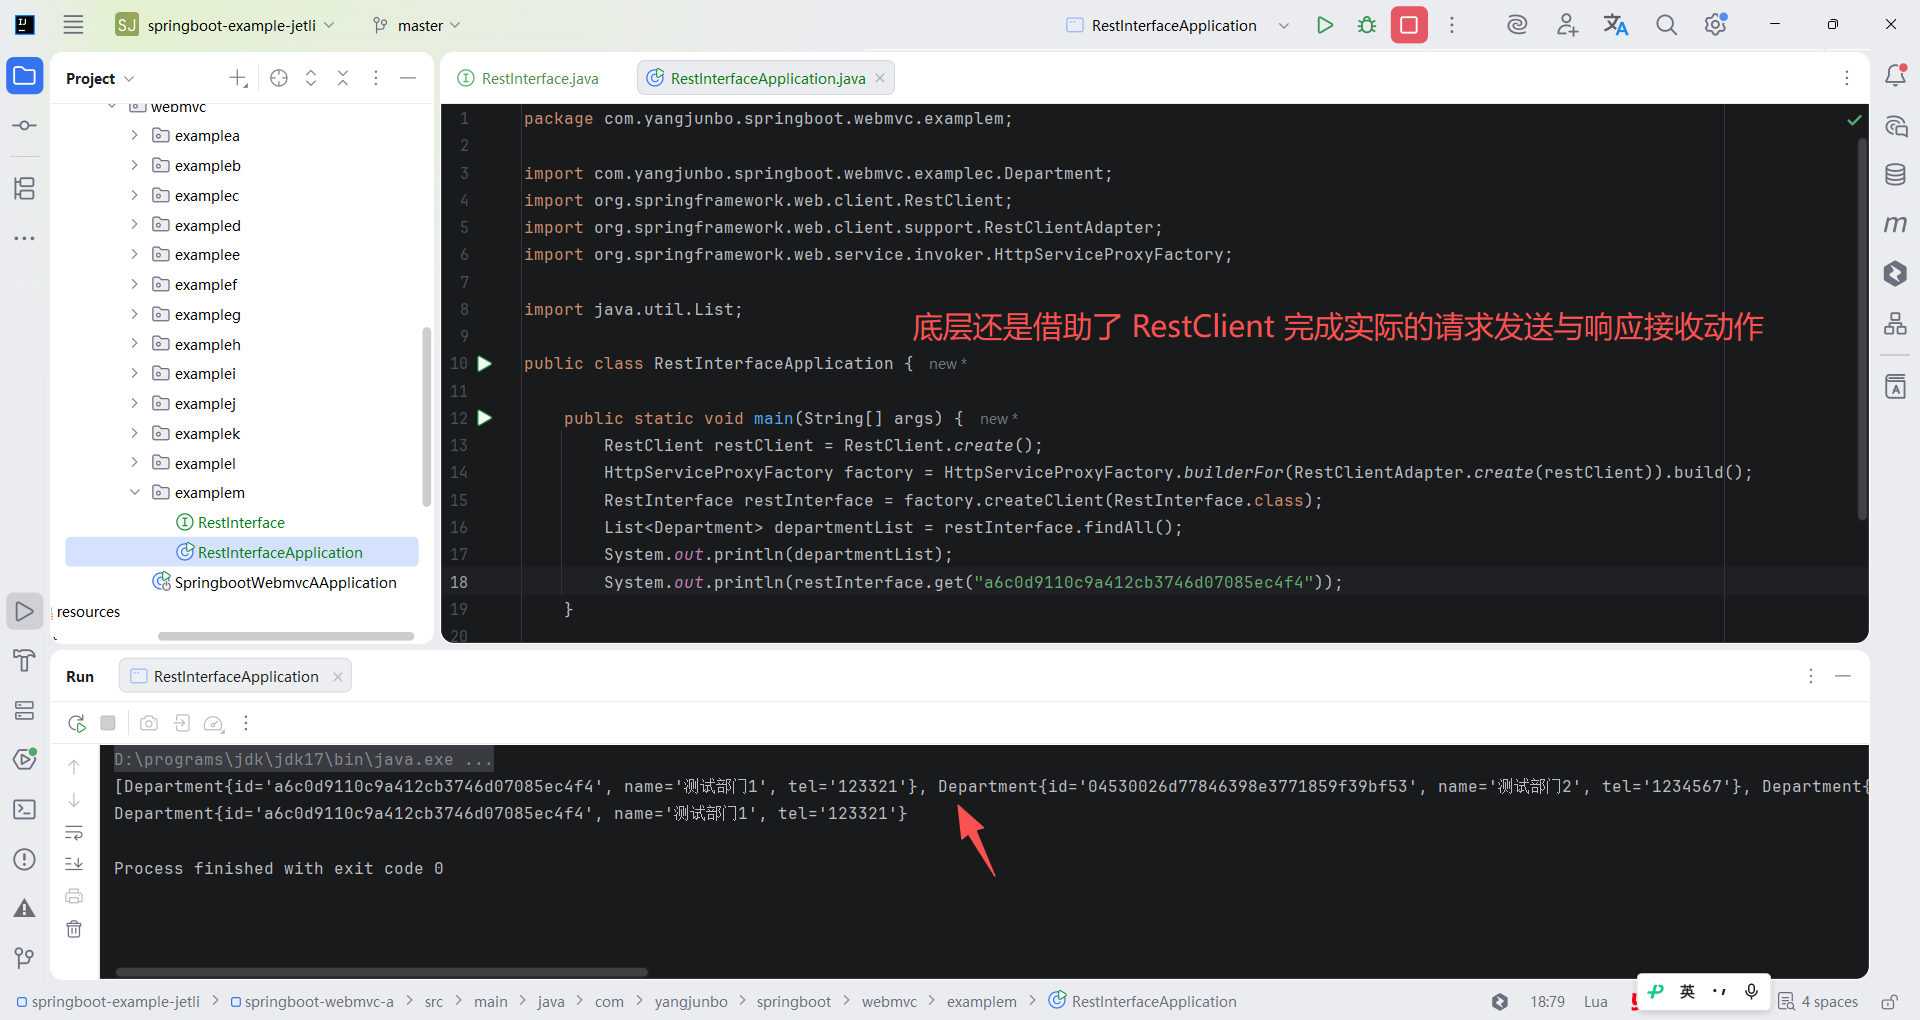
接口编写完毕后还不能发送请求,需要根据这个接口创建一个对应的代理对象(只有接口也可以使用动态代理创建代理对象),而创建代理对象的代码编写比较固定,核心的代理工厂是 HttpServiceProxyFactory。可以发现声明式接口的底层还是借助了 RestClient 完成实际的请求发送与响应接收动作,只是落到代码调用的环节变得更加简单而已。
java
package com.yangjunbo.springboot.webmvc.examplem;

import com.yangjunbo.springboot.webmvc.examplec.Department;
import org.springframework.web.client.RestClient;
import org.springframework.web.client.support.RestClientAdapter;
import org.springframework.web.service.invoker.HttpServiceProxyFactory;

import java.util.List;

public class RestInterfaceApplication {

    public static void main(String[] args) {
        RestClient restClient = RestClient.create();
        HttpServiceProxyFactory factory = HttpServiceProxyFactory.builderFor(RestClientAdapter.create(restClient)).build();
        RestInterface restInterface = factory.createClient(RestInterface.class);
        List<Department> departmentList = restInterface.findAll();
        System.out.println(departmentList);
        System.out.println(restInterface.get("a6c0d9110c9a412cb3746d07085ec4f4"));
    }

}
简单测试上述两个方法,可以发现两个方法都可以得到正确的响应结果,由此可见使用声明式接口的开发效率的确更高。
2.发送 POST 请求
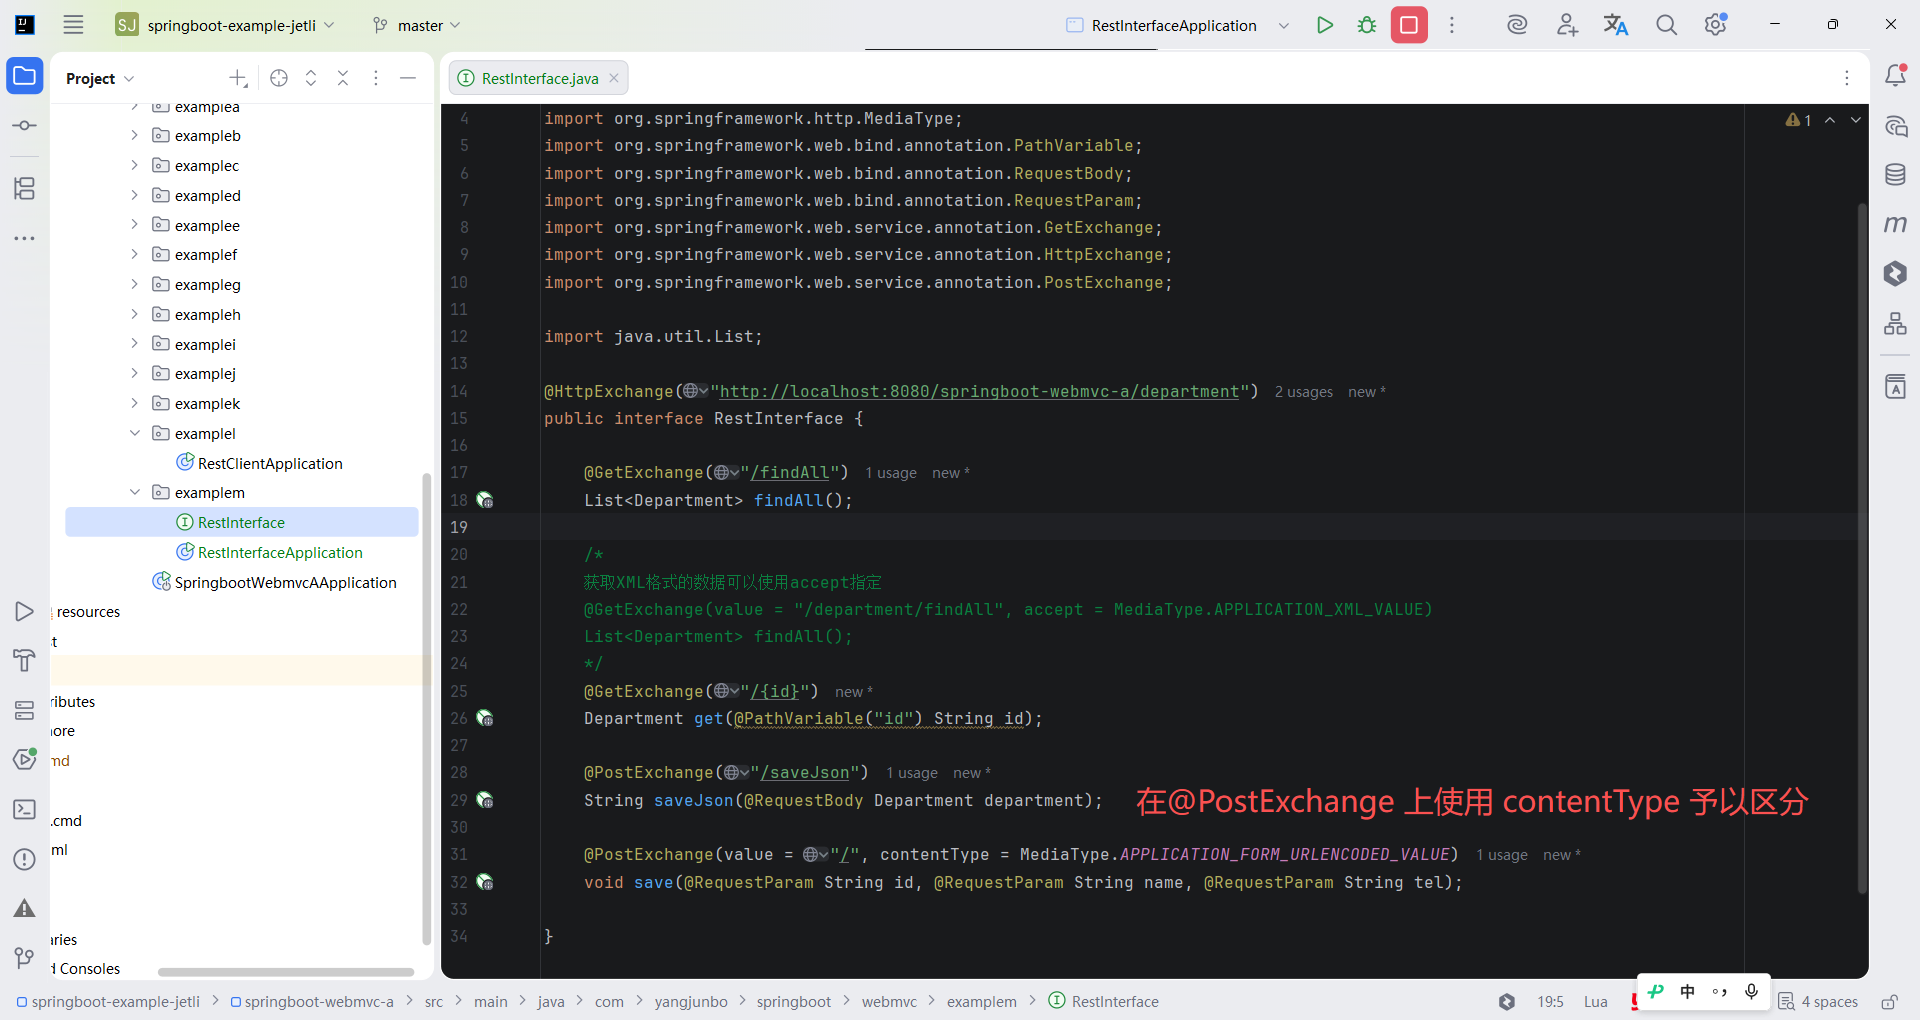
下面再简单测试一下 POST 请求,代码中声明了两个发送 POST 请求的方法,由于两个方法分别需要发送 JSON 数据和表单数据,因此在@PostExchange 上使用 contentType 予以区分。需要注意的是,这次声明的接口方法中全都使用了模型类,没有出现任何通用的类(如MultiValueMap 等)。
java
package com.yangjunbo.springboot.webmvc.examplem;

import com.yangjunbo.springboot.webmvc.examplec.Department;
import org.springframework.http.MediaType;
import org.springframework.web.bind.annotation.PathVariable;
import org.springframework.web.bind.annotation.RequestBody;
import org.springframework.web.bind.annotation.RequestParam;
import org.springframework.web.service.annotation.GetExchange;
import org.springframework.web.service.annotation.HttpExchange;
import org.springframework.web.service.annotation.PostExchange;

import java.util.List;

@HttpExchange("http://localhost:8080/springboot-webmvc-a/department")
public interface RestInterface {

    @GetExchange("/findAll")
    List<Department> findAll();

    /*
    获取XML格式的数据可以使用accept指定
    @GetExchange(value = "/department/findAll", accept = MediaType.APPLICATION_XML_VALUE)
    List<Department> findAll();
    */
    @GetExchange("/{id}")
    Department get(@PathVariable("id") String id);

    @PostExchange("/saveJson")
    String saveJson(@RequestBody Department department);

    @PostExchange(value = "/", contentType = MediaType.APPLICATION_FORM_URLENCODED_VALUE)
    void save(@RequestParam String id, @RequestParam String name, @RequestParam String tel);

}
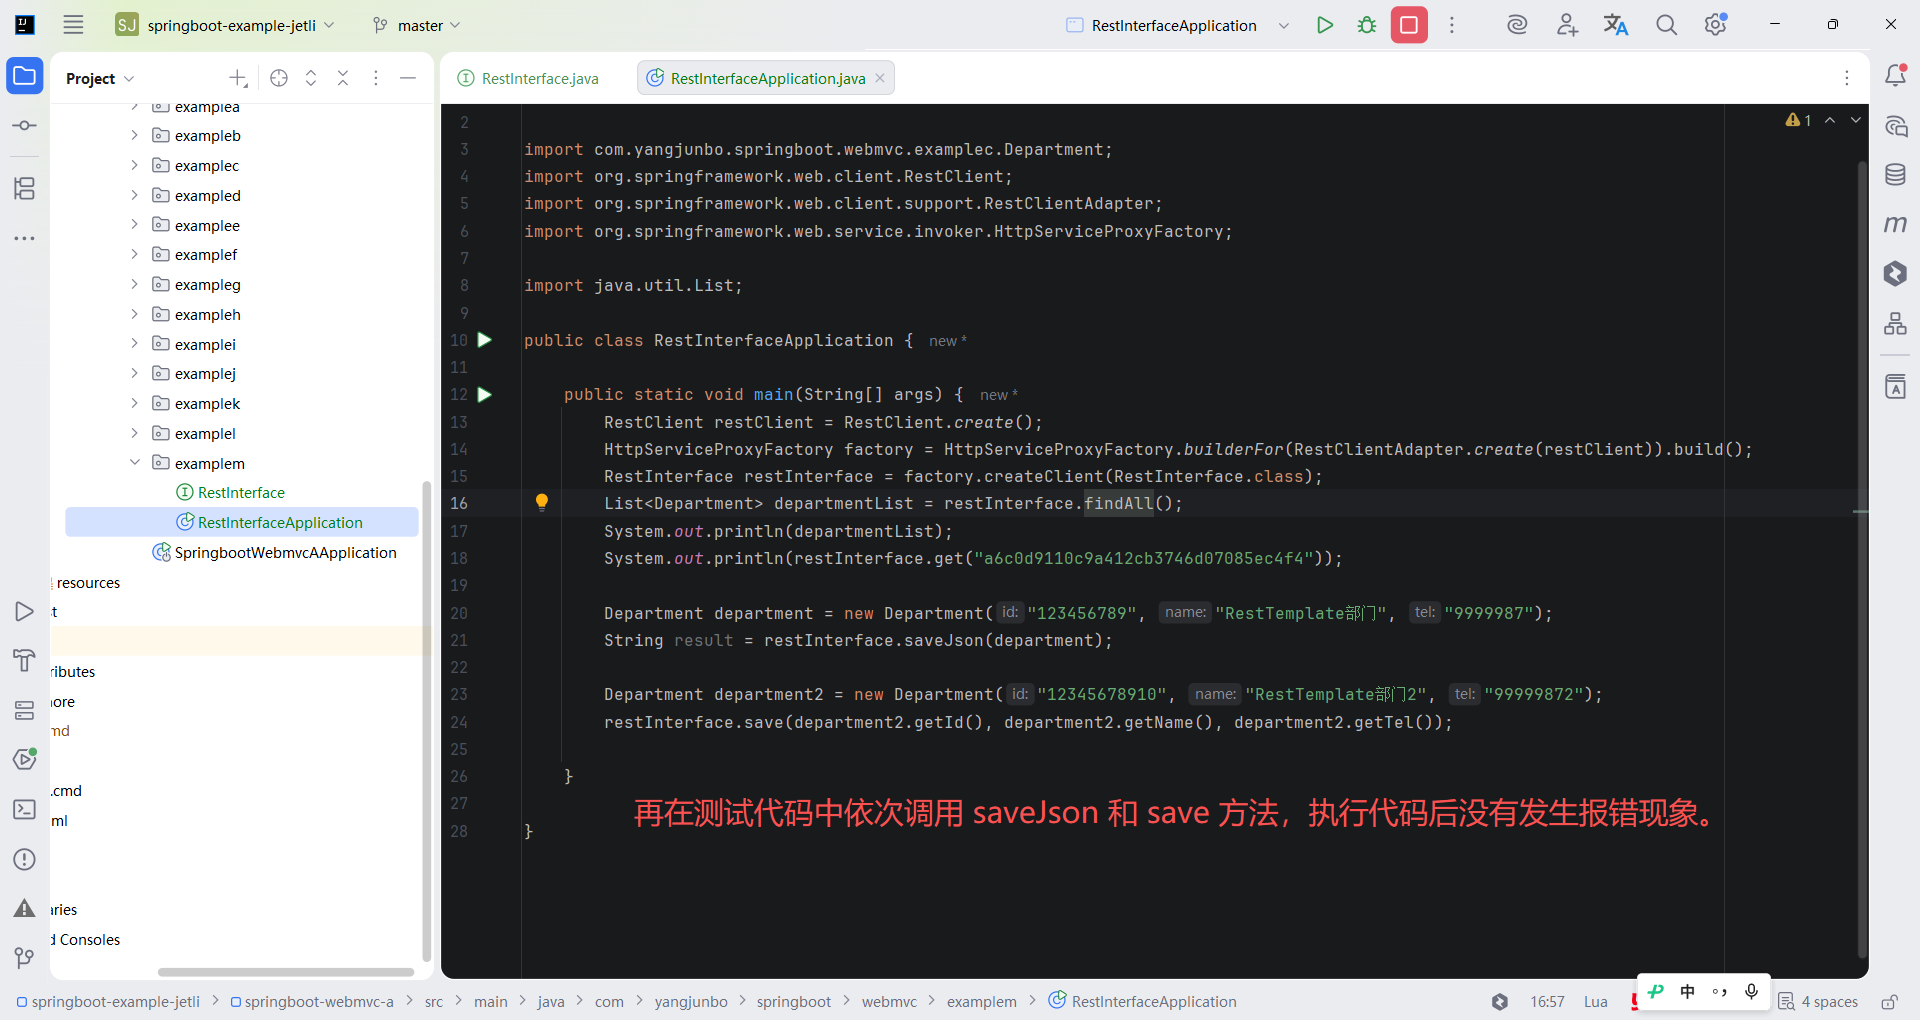
类似地,再在测试代码中依次调用 saveJson 和 save 方法,执行代码后没有发生报错现象,两个 Department 对象都保存成功,这说明两种传递数据的方式都可行。由于整个过程没有出现与业务无关的 API,编码的内容也相对纯粹,因此笔者也推荐在 Spring Framework 6.1 版本后尽可能使用声明式接口发送请求。
java
package com.yangjunbo.springboot.webmvc.examplem;

import com.yangjunbo.springboot.webmvc.examplec.Department;
import org.springframework.web.client.RestClient;
import org.springframework.web.client.support.RestClientAdapter;
import org.springframework.web.service.invoker.HttpServiceProxyFactory;

import java.util.List;

public class RestInterfaceApplication {

    public static void main(String[] args) {
        RestClient restClient = RestClient.create();
        HttpServiceProxyFactory factory = HttpServiceProxyFactory.builderFor(RestClientAdapter.create(restClient)).build();
        RestInterface restInterface = factory.createClient(RestInterface.class);
        List<Department> departmentList = restInterface.findAll();
        System.out.println(departmentList);
        System.out.println(restInterface.get("a6c0d9110c9a412cb3746d07085ec4f4"));

        Department department = new Department("123456789", "RestTemplate部门", "9999987");
        String result = restInterface.saveJson(department);

        Department department2 = new Department("12345678910", "RestTemplate部门2", "99999872");
        restInterface.save(department2.getId(), department2.getName(), department2.getTel());

    }

}
10.6 Reactor 与 WebFlux
到目前为止,本书中讲解的 Web 开发全部都基于 WebMvc,WebMvc 的特点是同步、阻塞式,当客户端的请求到达 Web 服务器(如 Tomcat)时,Web 服务器会分配一个线程处理这个请求,而当客户端的请求越来越多,Web 服务器的线程来不及处理,等待处理的请求就会被阻塞。为了解决该问题,在 Spring Framework 5.0 之后引入了 WebMvc 的孪生兄弟 WebFlux,它是一个异步非阻塞式 Web 框架,且 Spring Framework 5.x 基于 JDK 1.8,Java 底层已经支持函数式编程,这也为 WebFlux 提供了强有力的语言级支撑。响应式、非阻塞代表着承载更高的并发量,所以基于 WebFlux 的项目可以在单位时间内处理更多的请求。由于 WebFlux 不基于 Servlet 规范,因此它也就不再强依赖于 Servlet 环境,而是必须运行在非阻塞环境的 Web 容器(如 Netty、Undertow 等)。另外 WebFlux 基于响应式设计,因此它也需要有一套响应式框架作为支撑,在Reactor 和 RxJava 中,WebFlux 选择了 Reactor,这就意味着使用 WebFlux 之前,还要先了解 Reactor 响应式编程。
综合来看,由于 WebFlux 学习所需的前置知识较多,且理解难度较大,不是很利于初学者学习,加上企业项目开发中使用 WebFlux 技术栈的规模很小,因此本书不对 WebFlux 予以展开,感兴趣的读者可以移步笔者的另一著作《Spring Boot 源码解读与原理分析》第 13 章进行学习。
10.7 小结
WebMvc 中借助 HandlerInterceptor 拦截器机制可以实现类似 AOP 的效果,利用该机制可以完成鉴权、性能分析、日志记录等工作。对于多语言的应用场景而言,国际化是必不可少的支持,WebMvc 依靠 Spring Framework 的国际化能力支持,可以很好地实现多种语言的国际化效果。WebMvc 封装的过程中尽可能多地屏蔽了原生 Servlet API 的使用,但仍开放了对其获取和使用的能力,而使用 WebMvc 提供的方案可以更方便而优雅地代替原生 Servlet API 的操作。后面还了解了前后端分离开发中对于跨域问题的处理,以及整合第三方应用和接口时发送远程请求的方式,包括经典的 RestTemplate 以及新版本推出的 RestClient 和声明式接口。
使用 Spring Boot 构建的 Web 项目之所以启动方便,其内部的嵌入式 Web 容器立了大功,第 11 章中将深入 Spring Boot 内部的嵌入式 Web 容器,探究其整合结构和运行机制。