(14 - 1 )
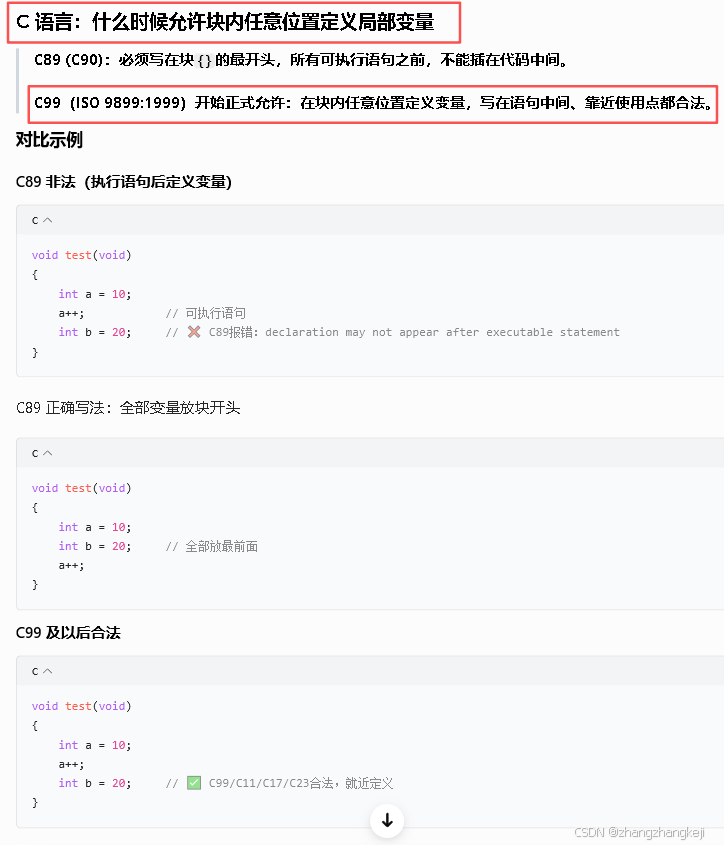
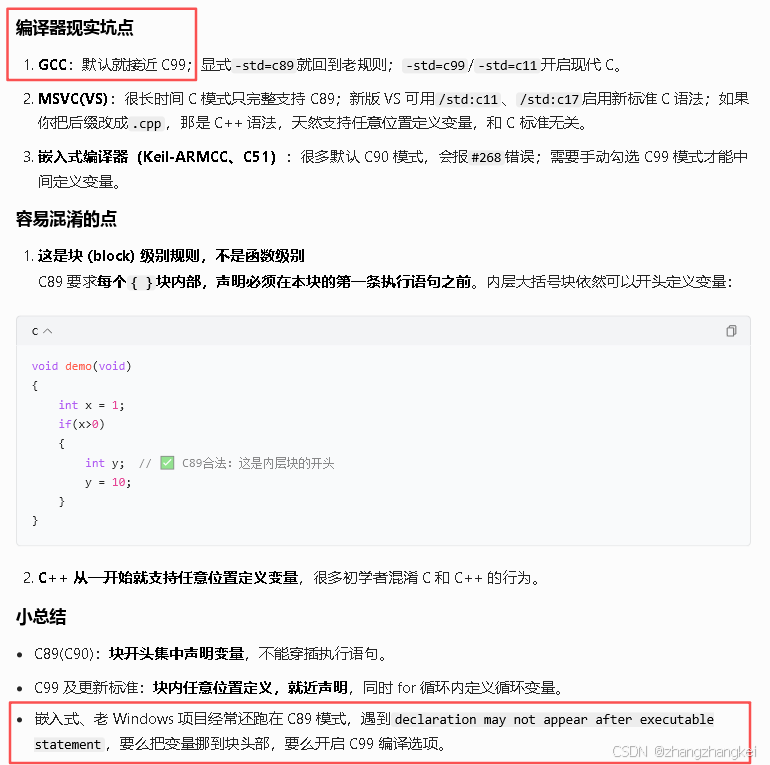
(14 - 2)
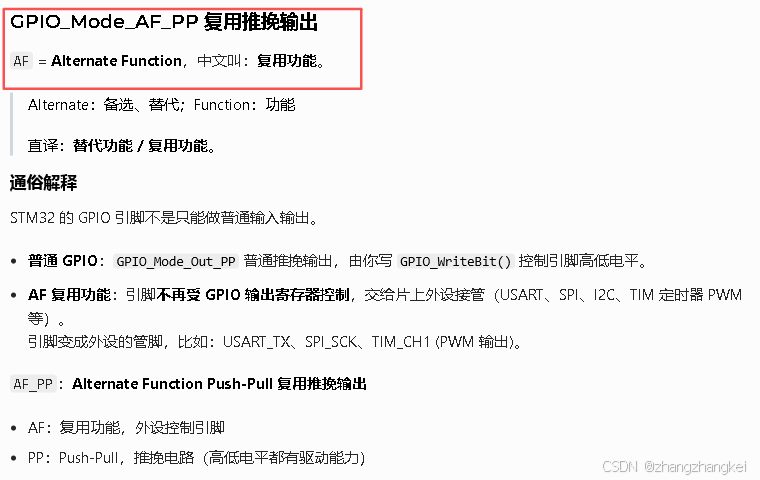
(15)
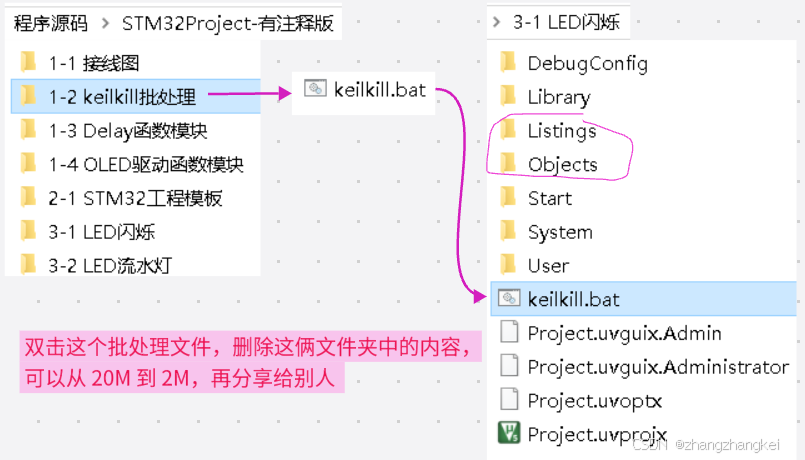
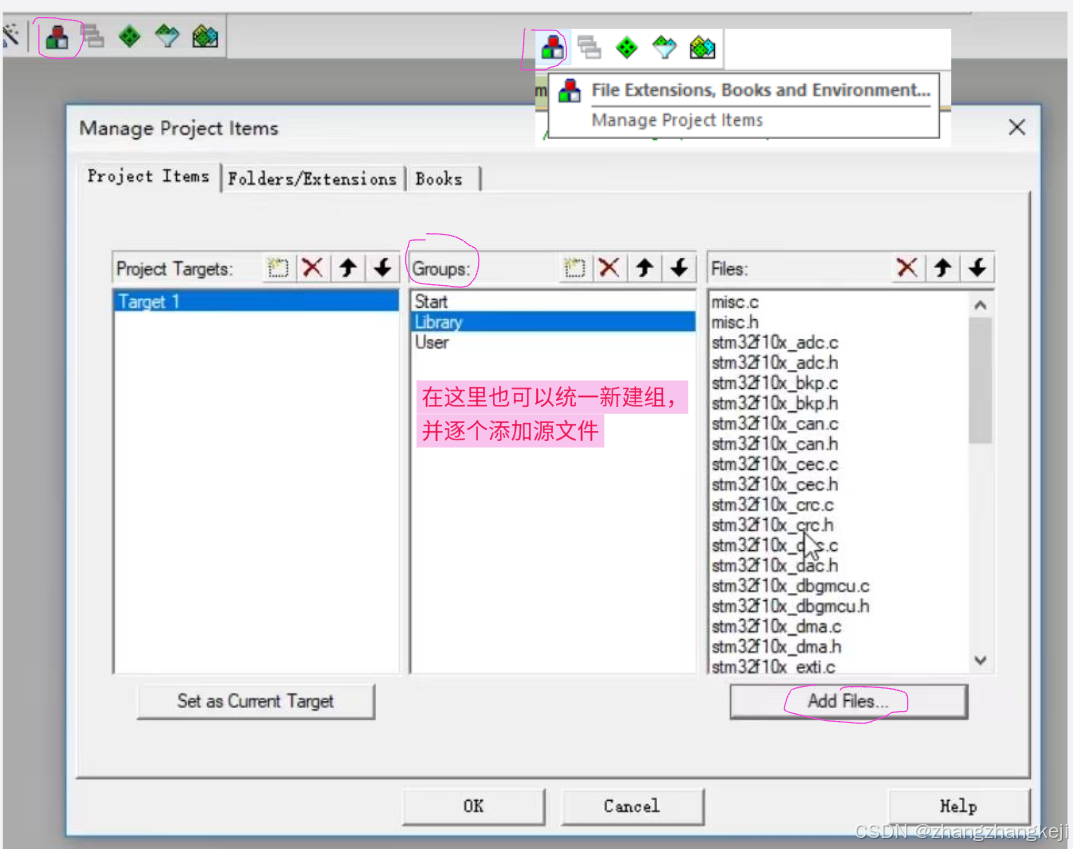
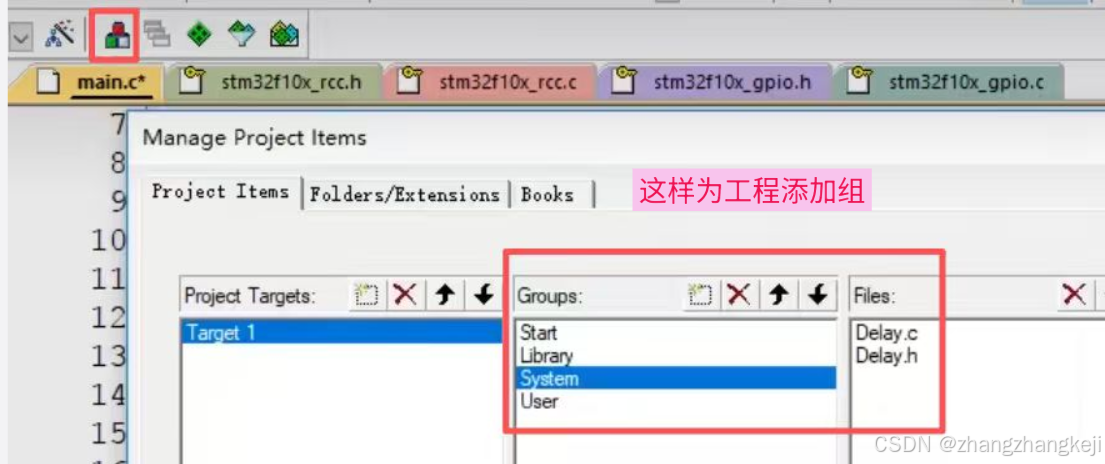
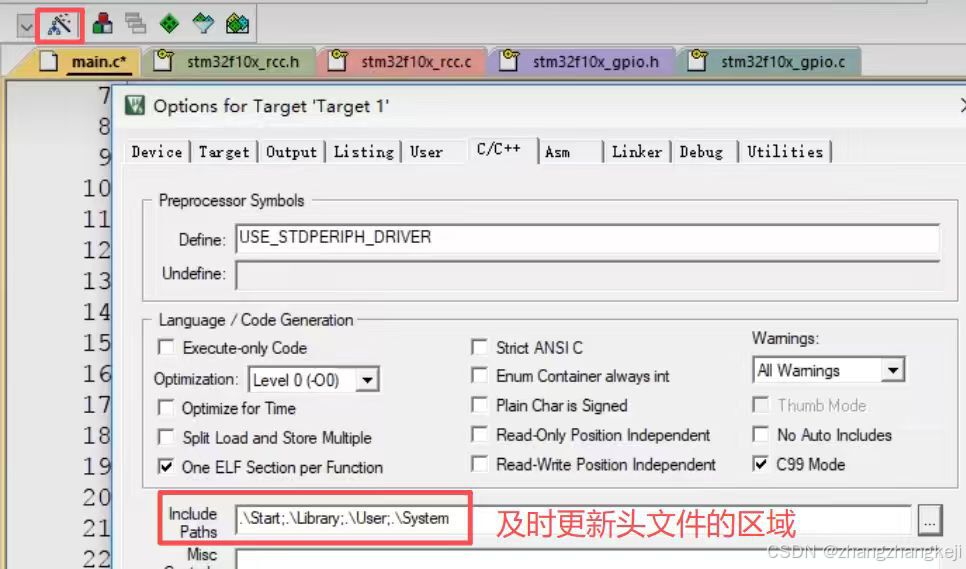
(16)本节,老师又重新讲了工程的文件建立 :
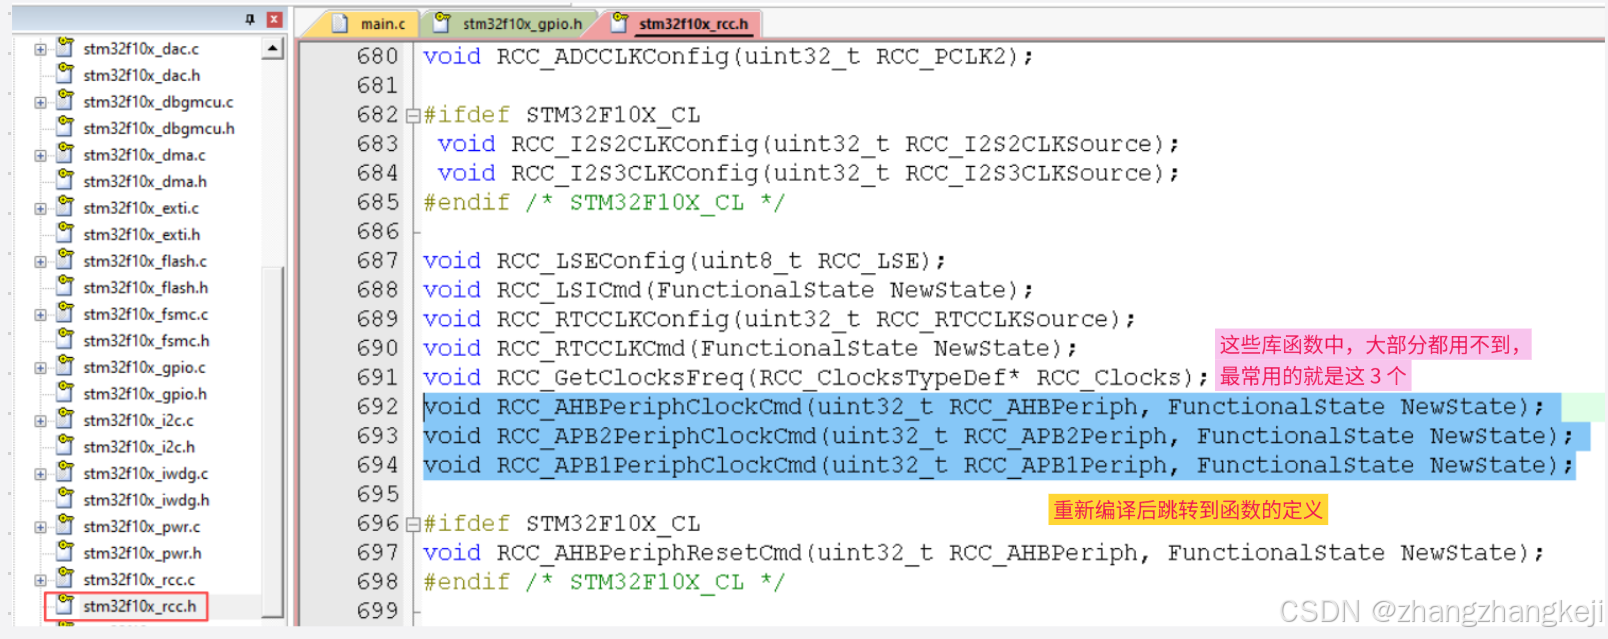
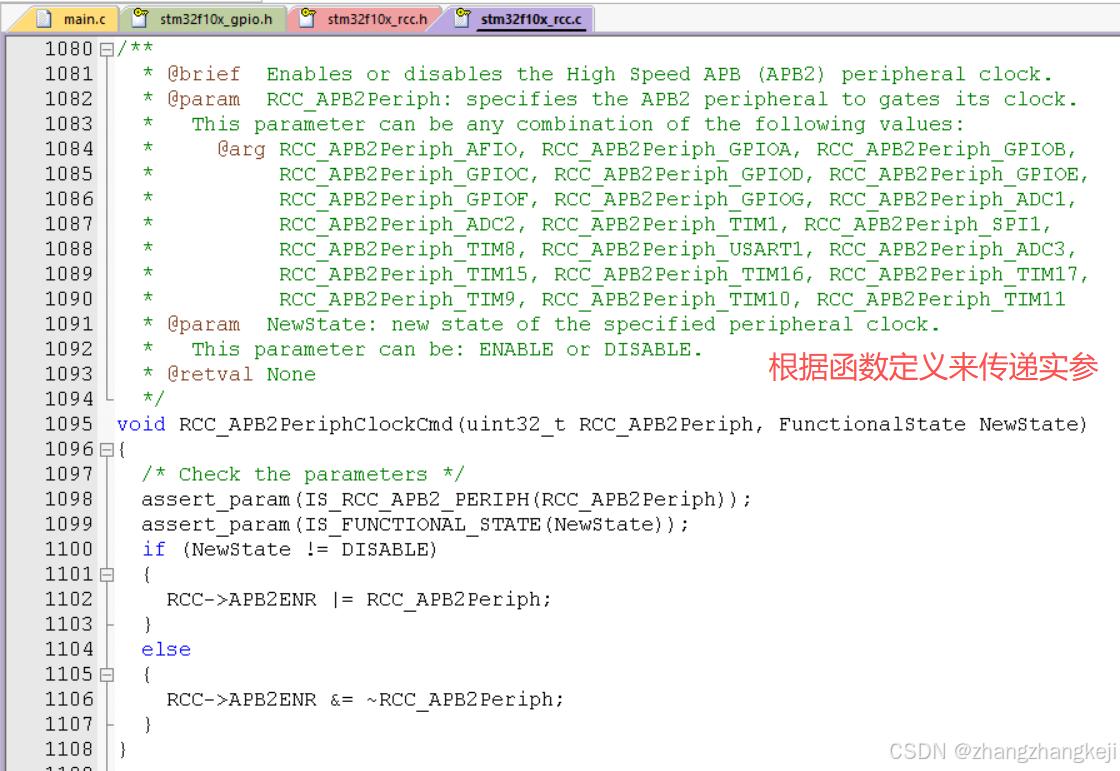
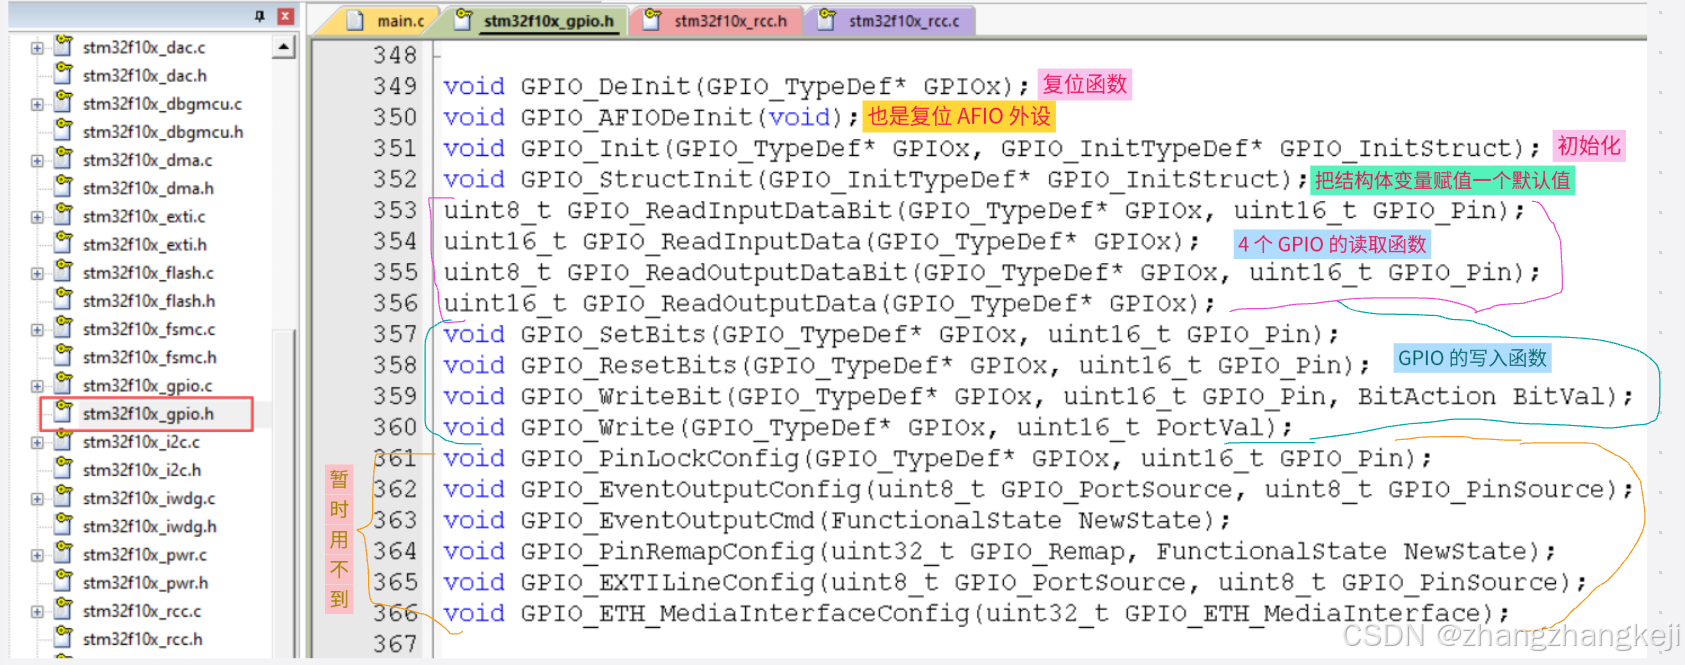
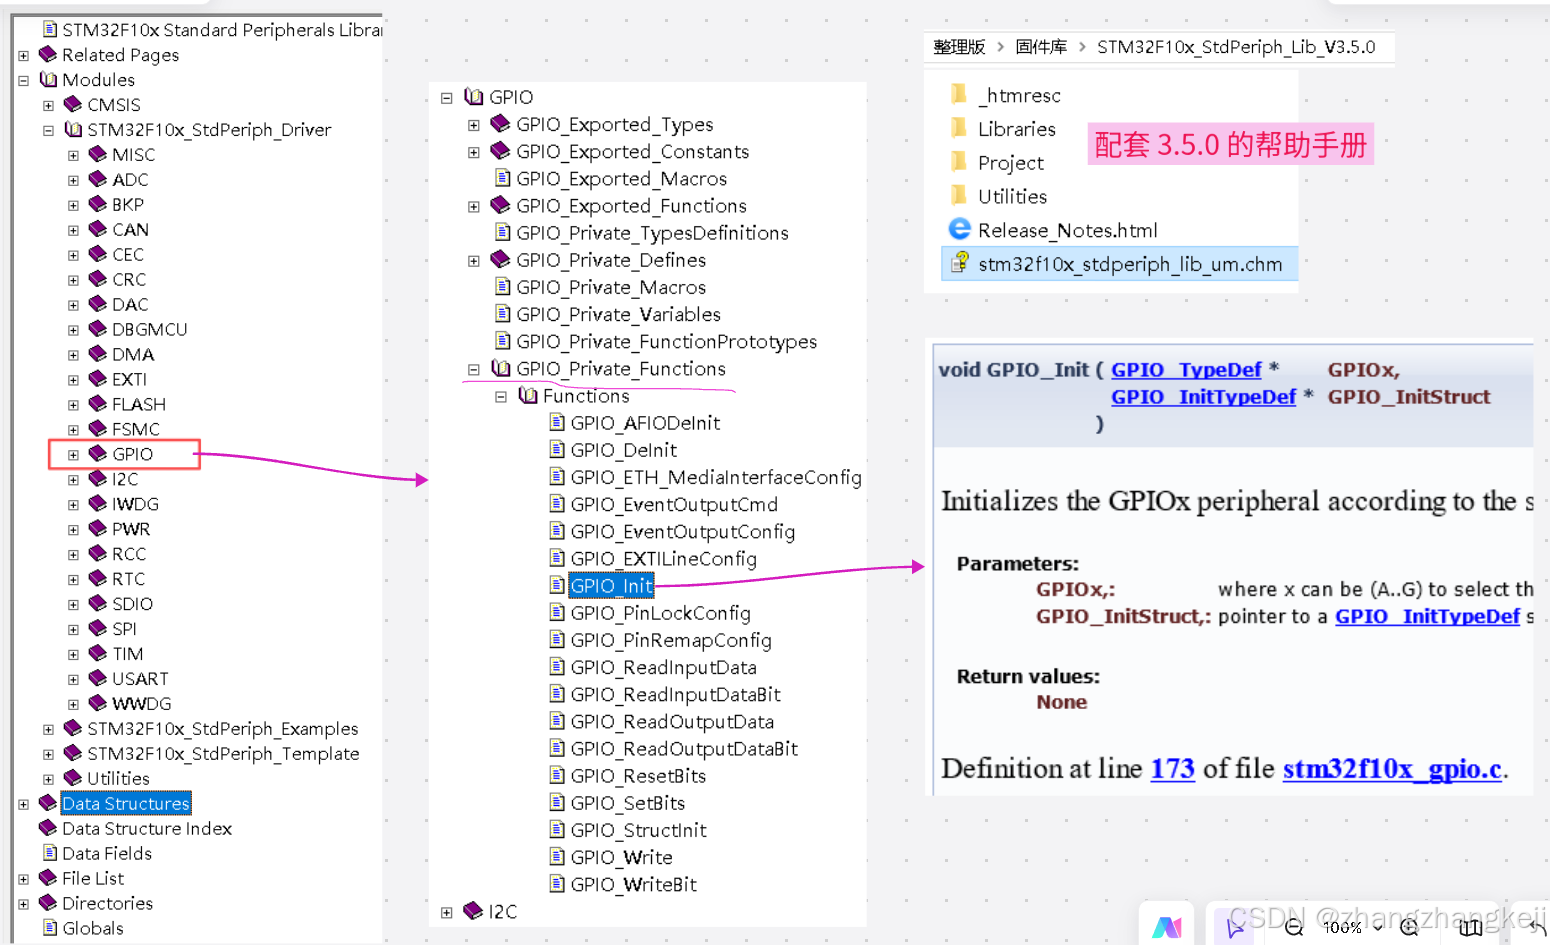
(17)这些头文件里,都是把函数声明放在了最后 :
++
++
(18) led 闪烁的代码, A.0 :
c
int main(void)
{
	/*开启时钟*/
	RCC_APB2PeriphClockCmd(RCC_APB2Periph_GPIOA, ENABLE);	//开启GPIOA的时钟
															//使用各个外设前必须开启时钟,否则对外设的操作无效

	/*GPIO初始化*/
	GPIO_InitTypeDef GPIO_InitStructure;					//定义结构体变量

	GPIO_InitStructure.GPIO_Mode = GPIO_Mode_Out_PP;		//GPIO模式,赋值为推挽输出模式
	GPIO_InitStructure.GPIO_Pin = GPIO_Pin_0;				//GPIO引脚,赋值为第0号引脚
	GPIO_InitStructure.GPIO_Speed = GPIO_Speed_50MHz;		//GPIO速度,赋值为50MHz

	GPIO_Init(GPIOA, &GPIO_InitStructure);					//将赋值后的构体变量传递给GPIO_Init函数
															//函数内部会自动根据结构体的参数配置相应寄存器
															//实现GPIOA的初始化

	/*主循环,循环体内的代码会一直循环执行*/
	while (1)
	{
		/*设置PA0引脚的高低电平,实现LED闪烁,下面展示3种方法*/

		/*方法1:GPIO_ResetBits设置低电平,GPIO_SetBits设置高电平*/
		GPIO_ResetBits(GPIOA, GPIO_Pin_0);					//将PA0引脚设置为低电平
		Delay_ms(500);										//延时500ms
		GPIO_SetBits(GPIOA, GPIO_Pin_0);					//将PA0引脚设置为高电平
		Delay_ms(500);										//延时500ms

		/*方法2:GPIO_WriteBit设置低/高电平,由Bit_RESET/Bit_SET指定*/
		GPIO_WriteBit(GPIOA, GPIO_Pin_0, Bit_RESET);		//将PA0引脚设置为低电平
		Delay_ms(500);										//延时500ms
		GPIO_WriteBit(GPIOA, GPIO_Pin_0, Bit_SET);			//将PA0引脚设置为高电平
		Delay_ms(500);										//延时500ms

		/*方法3:GPIO_WriteBit设置低/高电平,由数据0/1指定,数据需要强转为BitAction类型*/
		GPIO_WriteBit(GPIOA, GPIO_Pin_0, (BitAction)0);		//将PA0引脚设置为低电平
		Delay_ms(500);										//延时500ms
		GPIO_WriteBit(GPIOA, GPIO_Pin_0, (BitAction)1);		//将PA0引脚设置为高电平
		Delay_ms(500);										//延时500ms
	}
}
(19)
++
(20) 延时函数 :
c
#include "stm32f10x.h"

/**
  * @brief  微秒级延时
  * @param  xus 延时时长,范围:0~233015
  * @retval 无
  */
void Delay_us(uint32_t xus)
{
	SysTick->LOAD = 72 * xus;				//设置定时器重装值
	SysTick->VAL = 0x00;					//清空当前计数值
	SysTick->CTRL = 0x00000005;				//设置时钟源为HCLK,启动定时器
	while(!(SysTick->CTRL & 0x00010000));	//等待计数到0
	SysTick->CTRL = 0x00000004;				//关闭定时器
}

/**
  * @brief  毫秒级延时
  * @param  xms 延时时长,范围:0~4294967295
  * @retval 无
  */
void Delay_ms(uint32_t xms)
{
	while(xms--)
	{
		Delay_us(1000);
	}
}

/**
  * @brief  秒级延时
  * @param  xs 延时时长,范围:0~4294967295
  * @retval 无
  */
void Delay_s(uint32_t xs)
{
	while(xs--)
	{
		Delay_ms(1000);
	}
}
(21) 枚举量的按位或 :

(22)流水灯 :
c
int main(void)
{
	/*开启时钟*/
	RCC_APB2PeriphClockCmd(RCC_APB2Periph_GPIOA, ENABLE);	//开启GPIOA的时钟
															//使用各个外设前必须开启时钟,否则对外设的操作无效

	/*GPIO初始化*/
	GPIO_InitTypeDef GPIO_InitStructure;					//定义结构体变量

	GPIO_InitStructure.GPIO_Mode = GPIO_Mode_Out_PP;		//GPIO模式,赋值为推挽输出模式
	GPIO_InitStructure.GPIO_Pin = GPIO_Pin_All;				//GPIO引脚,赋值为所有引脚
	GPIO_InitStructure.GPIO_Speed = GPIO_Speed_50MHz;		//GPIO速度,赋值为50MHz

	GPIO_Init(GPIOA, &GPIO_InitStructure);					//将赋值后的构体变量传递给GPIO_Init函数
															//函数内部会自动根据结构体的参数配置相应寄存器
															//实现GPIOA的初始化

	/*主循环,循环体内的代码会一直循环执行*/
	while (1)
	{
		/*使用GPIO_Write,同时设置GPIOA所有引脚的高低电平,实现LED流水灯*/
		GPIO_Write(GPIOA, ~0x0001);	//0000 0000 0000 0001,PA0引脚为低电平,其他引脚均为高电平,注意数据有按位取反
		Delay_ms(100);				//延时100ms
		GPIO_Write(GPIOA, ~0x0002);	//0000 0000 0000 0010,PA1引脚为低电平,其他引脚均为高电平
		Delay_ms(100);				//延时100ms
		GPIO_Write(GPIOA, ~0x0004);	//0000 0000 0000 0100,PA2引脚为低电平,其他引脚均为高电平
		Delay_ms(100);				//延时100ms
		GPIO_Write(GPIOA, ~0x0008);	//0000 0000 0000 1000,PA3引脚为低电平,其他引脚均为高电平
		Delay_ms(100);				//延时100ms
		GPIO_Write(GPIOA, ~0x0010);	//0000 0000 0001 0000,PA4引脚为低电平,其他引脚均为高电平
		Delay_ms(100);				//延时100ms
		GPIO_Write(GPIOA, ~0x0020);	//0000 0000 0010 0000,PA5引脚为低电平,其他引脚均为高电平
		Delay_ms(100);				//延时100ms
		GPIO_Write(GPIOA, ~0x0040);	//0000 0000 0100 0000,PA6引脚为低电平,其他引脚均为高电平
		Delay_ms(100);				//延时100ms
		GPIO_Write(GPIOA, ~0x0080);	//0000 0000 1000 0000,PA7引脚为低电平,其他引脚均为高电平
		Delay_ms(100);				//延时100ms
	}
}
(23)
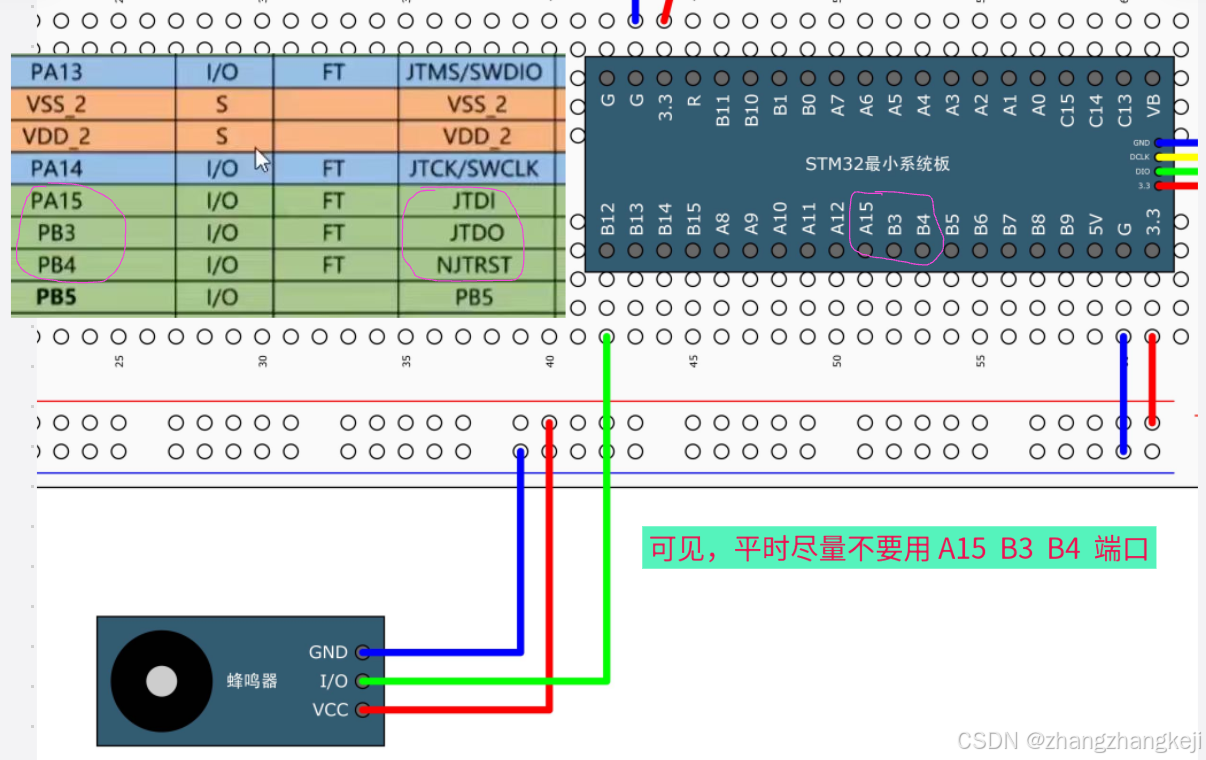
++
c
#include "stm32f10x.h"                  // Device header
#include "Delay.h"

int main(void)
{
	/*开启时钟*/
	RCC_APB2PeriphClockCmd(RCC_APB2Periph_GPIOB, ENABLE);	//开启GPIOB的时钟
															//使用各个外设前必须开启时钟,否则对外设的操作无效

	/*GPIO初始化*/
	GPIO_InitTypeDef GPIO_InitStructure;					//定义结构体变量

	GPIO_InitStructure.GPIO_Mode = GPIO_Mode_Out_PP;		//GPIO模式,赋值为推挽输出模式
	GPIO_InitStructure.GPIO_Pin = GPIO_Pin_12;				//GPIO引脚,赋值为第12号引脚
	GPIO_InitStructure.GPIO_Speed = GPIO_Speed_50MHz;		//GPIO速度,赋值为50MHz

	GPIO_Init(GPIOB, &GPIO_InitStructure);					//将赋值后的构体变量传递给GPIO_Init函数
															//函数内部会自动根据结构体的参数配置相应寄存器
															//实现GPIOB的初始化

	/*主循环,循环体内的代码会一直循环执行*/
	while (1)
	{
		GPIO_ResetBits(GPIOB, GPIO_Pin_12);		//将PB12引脚设置为低电平,蜂鸣器鸣叫
		Delay_ms(100);							//延时100ms
		GPIO_SetBits(GPIOB, GPIO_Pin_12);		//将PB12引脚设置为高电平,蜂鸣器停止
		Delay_ms(100);							//延时100ms
		GPIO_ResetBits(GPIOB, GPIO_Pin_12);		//将PB12引脚设置为低电平,蜂鸣器鸣叫
		Delay_ms(100);							//延时100ms
		GPIO_SetBits(GPIOB, GPIO_Pin_12);		//将PB12引脚设置为高电平,蜂鸣器停止
		Delay_ms(700);							//延时700ms
	}
}
(24)
(25)
谢谢