这日子一天天的,干饭都吃不到热热乎的,也不知道咋想的,这游戏都出来多久了。
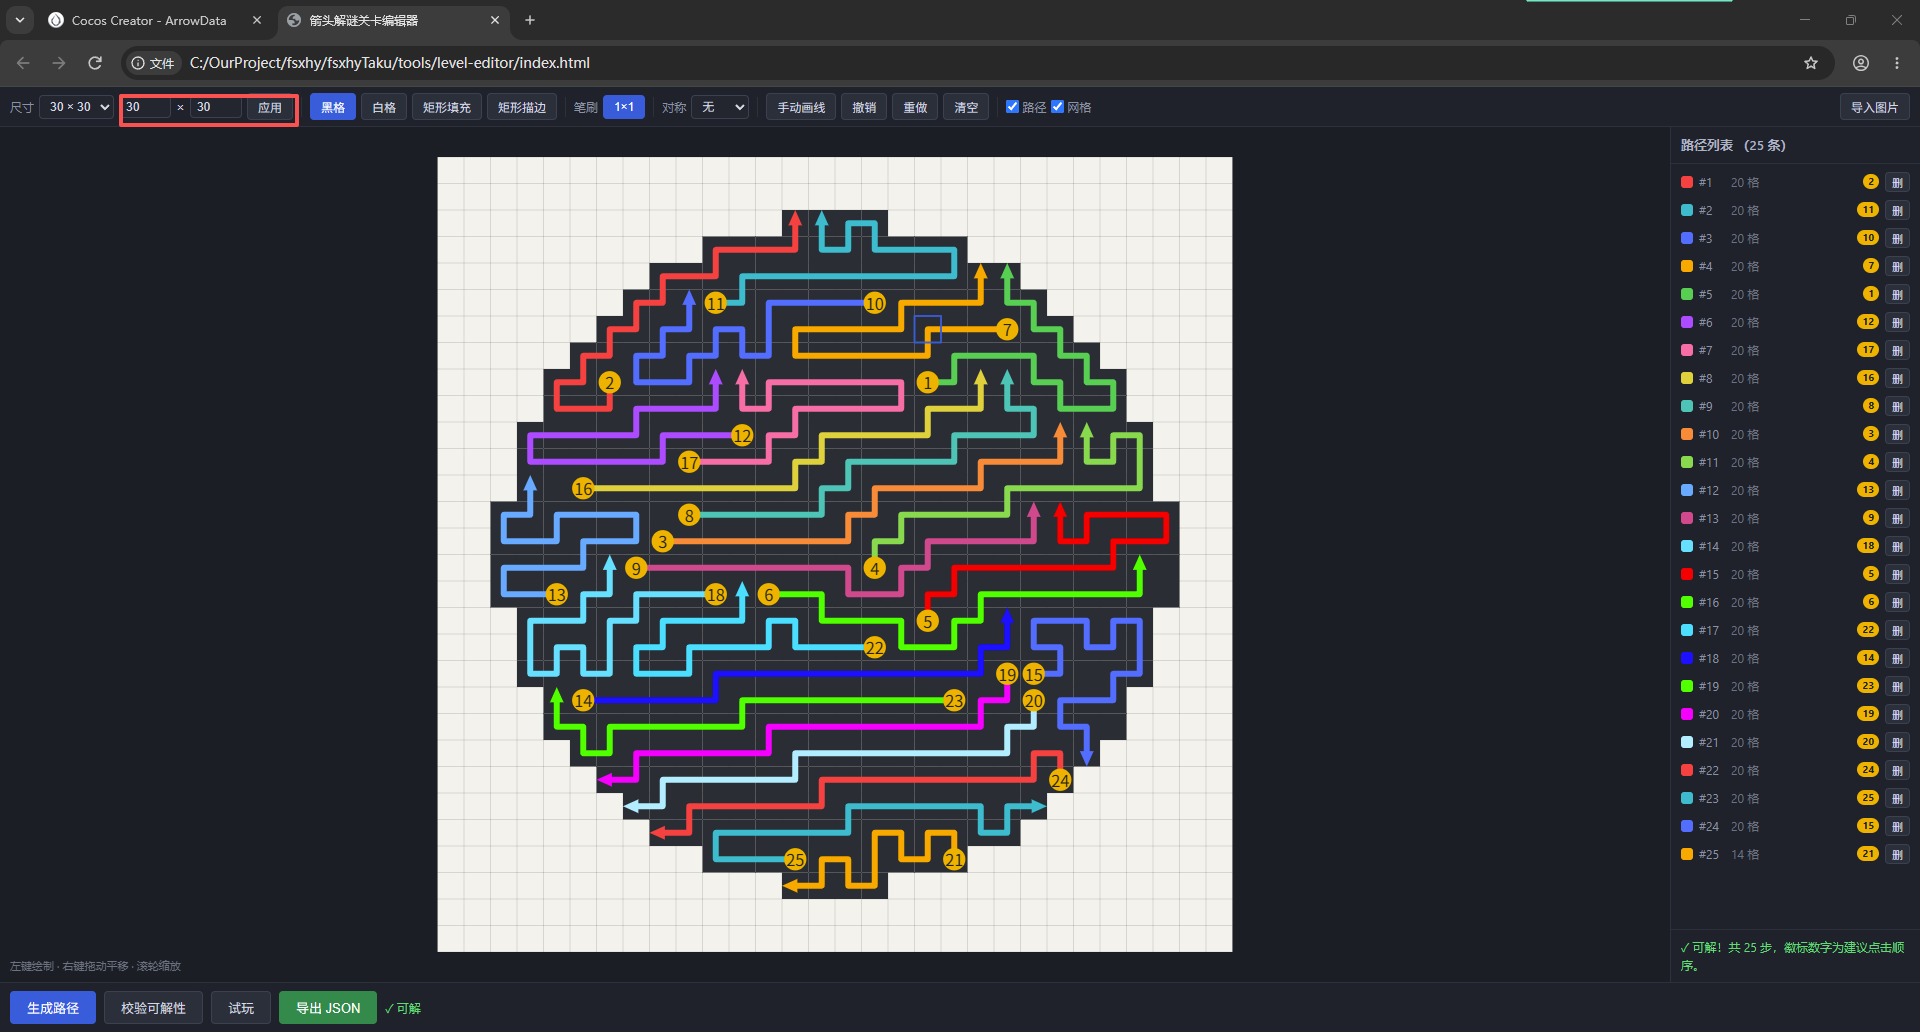
算了,折腾就折腾吧。这游戏最讨厌的就是关卡编辑器了,实现起来倒是不太麻烦。
按照俺们写游戏的习惯,中心点肯定是0,0,然后根据阈值向外衍生,一堆放格,取中心点,再来个箭头,当然不要超出屏幕尺寸。
导出的数据就是这样的,肯定不可能就一条箭头线段
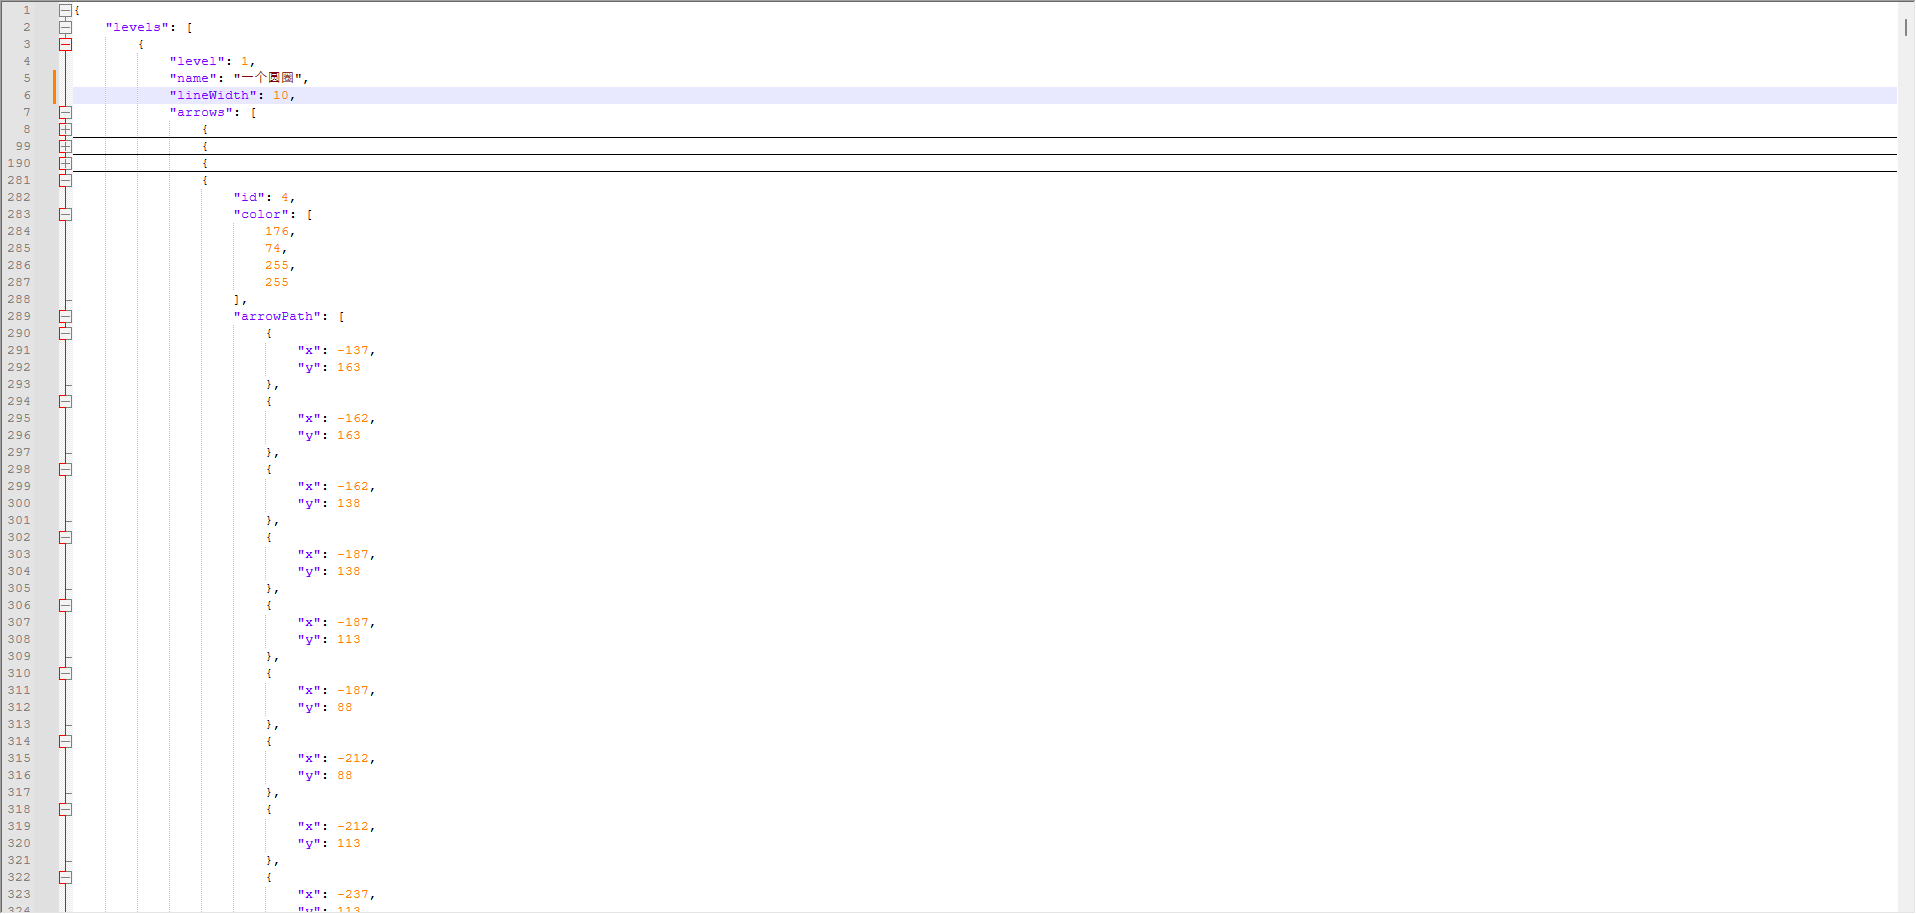
至于demo吗,弄一条就行了,装装样子吗。
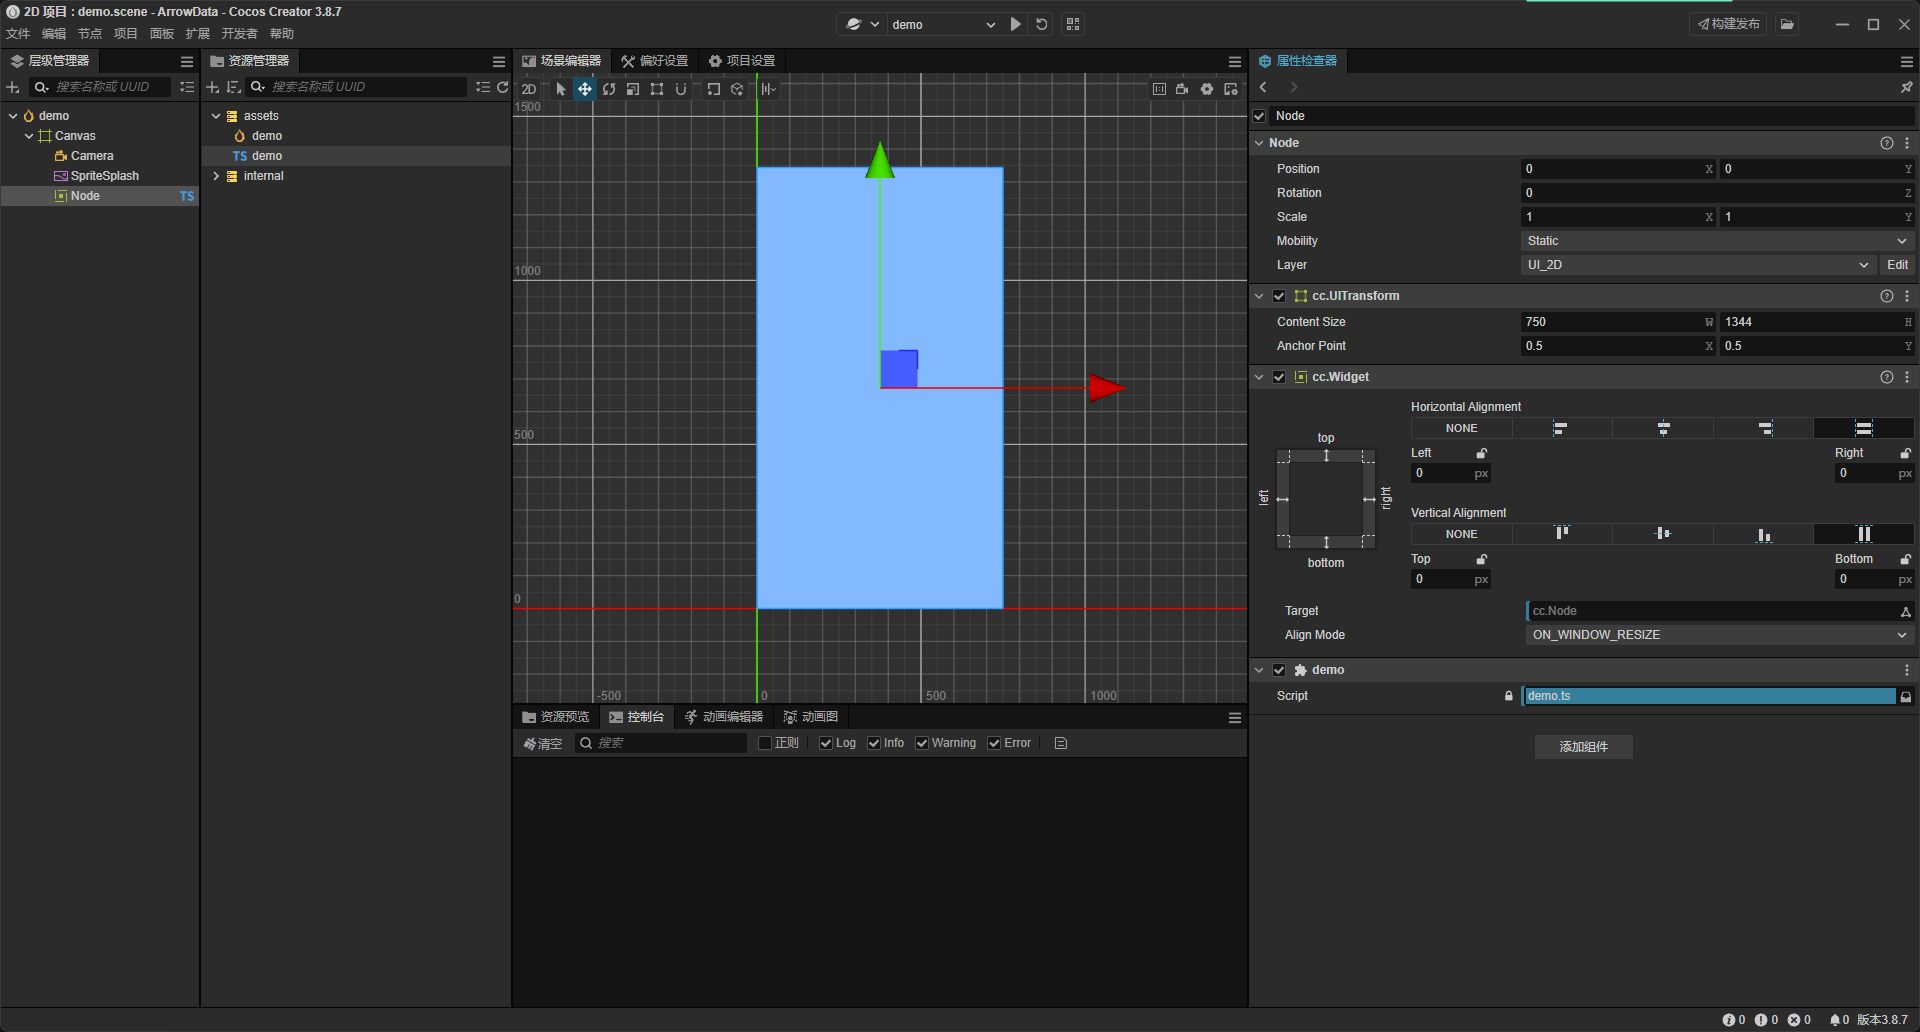
1.场景上挂一个节点,挂一个脚本。
几个必要的属性,没必要挂到属性面板上 type Point = { x: number, y: number };
// 箭头绘制组件
private _Graphics: Graphics = null!;
// 当前箭头路径点数组,0号=箭头头部,末尾=尾部
private _ArrowPath: Point[] = [];
// 移动开关
private _StartMove: boolean = false;
// 时间累加器:用于固定子步更新,原名叫_frameRate,容易误解
private _accumTime: number = 0;
// 可视窗口大小
private _WinSize: math.Size = null!;
// 移动开始时原始路径,用于碰撞回退,做深拷贝
private _OriginPath: Point[] = [];
// 每一次逻辑更新的固定时间片(秒),0.01 = 10ms
private readonly FIXED_DELTA = 0.01;
// 移动速度
private readonly MOVE_SPEED = 10;
这里的组件用到是Graphics,一些常用的属性
/**
    * @en
    * Graphics component.
    *
    * @zh
    * 自定义图形类。
    */
export class GraphicsComponent extends UIRenderer {
    /**
        * @en
        * Current line width.
        *
        * @zh
        * 当前线条宽度。
        */
    get lineWidth(): number;
    set lineWidth(value: number);
    /**
        * @en
        * Determines how two connecting segments (of lines, arcs or curves) with non-zero lengths in a shape are joined together.
        *
        * @zh
        * 用来设置2个长度不为0的相连部分(线段,圆弧,曲线)如何连接在一起的属性。
        */
    get lineJoin(): __private._cocos_2d_assembler_graphics_types__LineJoin;
    set lineJoin(value: __private._cocos_2d_assembler_graphics_types__LineJoin);
    /**
        * @en
        * Determines how the end points of every line are drawn.
        *
        * @zh
        * 指定如何绘制每一条线段末端。
        */
    get lineCap(): __private._cocos_2d_assembler_graphics_types__LineCap;
    set lineCap(value: __private._cocos_2d_assembler_graphics_types__LineCap);
    /**
        * @en
        * Brush stroke color.
        *
        * @zh
        * 笔触的颜色。
        */
    get strokeColor(): Readonly<math.Color>;
    set strokeColor(value: Readonly<math.Color>);
    /**
        * @en
        * Fill paint color.
        *
        * @zh
        * 填充绘画的颜色。
        */
    get fillColor(): Readonly<math.Color>;
    set fillColor(value: Readonly<math.Color>);
    /**
        * @en
        * Move path start point to (x,y).
        *
        * @zh
        * 移动路径起点到坐标(x, y)。
        *
        * @param x @en The x-axis coordinate of the target position.
        *          @zh 目标位置的 X 轴坐标。
        * @param y @en The y-axis coordinate of the target position.
        *          @zh 目标位置的 y 轴坐标。
        */
    moveTo(x: number, y: number): void;
    /**
        * @en
        * Adds a straight line to the path.
        *
        * @zh
        * 绘制直线路径。
        *
        * @param x @en The x-axis coordinate of the target position.
        *          @zh 目标位置的 x 轴坐标。
        * @param y @en The x-axis coordinate of the target position.
        *          @zh 目标位置的 y 轴坐标。
        */
    lineTo(x: number, y: number): void;
    /**
        * @en
        * Adds a cubic Bézier curve to the path.
        *
        * @zh
        * 绘制三次贝赛尔曲线路径。
        *
        * @param c1x @en The x-axis coordinate of the first control point.
        *            @zh 第一个控制点的 x 轴坐标。
        * @param c1y @en The y-axis coordinate of the first control point.
        *            @zh 第一个控制点的 y 轴坐标。
        * @param c2x @en The x-axis coordinate of the second control point.
        *            @zh 第二个控制点的 x 轴坐标。
        * @param c2y @en The y-axis coordinate of the second control point.
        *            @zh 第二个控制点的 y 轴坐标。
        * @param x @en The x-axis coordinate of the last control point.
        *          @zh 最后一个控制点的 x 轴坐标。
        * @param y @en The y-axis coordinate of the last control point.
        *          @zh 最后一个控制点的 y 轴坐标。
        */
    bezierCurveTo(c1x: number, c1y: number, c2x: number, c2y: number, x: number, y: number): void;
    /**
        * @en
        * Adds a quadratic Bézier curve to the path.
        *
        * @zh
        * 绘制二次贝赛尔曲线路径。
        *
        * @param cx @en The x-axis coordinate of the starting control point.
        *           @zh 起始控制点的 x 轴坐标。
        * @param cy @en The y-axis coordinate of the starting control point.
        *           @zh 起始控制点的 y 轴坐标。
        * @param x @en The x-axis coordinates of the endpoint control point.
        *          @zh 终点控制点的 x 轴坐标。
        * @param y @en The y-axis coordinates of the endpoint control point.
        *          @zh 终点控制点的 x 轴坐标。
        */
    quadraticCurveTo(cx: number, cy: number, x: number, y: number): void;
    /**
        * @en
        * Adds an arc to the path which is centered at (cx, cy) position with radius r starting at startAngle
        * and ending at endAngle going in the given direction by counterclockwise (defaulting to false).
        *
        * @zh
        * 绘制圆弧路径。圆弧路径的圆心在 (cx, cy) 位置,半径为 r ,根据 counterclockwise (默认为false)指定的方向从 startAngle 开始绘制,到 endAngle 结束。
        *
        * @param cx @en The coordinate x-axis of the central control point.
        *           @zh 中心控制点的坐标 x 轴。
        * @param cy @en The coordinate y-axis of the central control point.
        *           @zh 中心控制点的坐标 y 轴。
        * @param r @en Angle in Radian.
        *          @zh 圆弧弧度。
        * @param startAngle @en The starting angle in radian, measured clockwise from the positive x-axis.
        *                   @zh 弧度起点,从正 x 轴顺时针方向测量。
        * @param endAngle @en The ending angle in radian, measured clockwise from the positive x-axis.
        *                 @zh 弧度终点,从正 x 轴顺时针方向测量。
        * @param counterclockwise @en If true, draws counterclockwise between the two angles. Default is clockwise.
        *                         @zh 如果为真,在两个角度之间逆时针绘制。默认顺时针。
        */
    arc(cx: number, cy: number, r: number, startAngle: number, endAngle: number, counterclockwise: boolean): void;
    /**
        * @en
        * Adds an ellipse to the path.
        *
        * @zh
        * 绘制椭圆路径。
        *
        * @param cx @en The x-axis coordinates of the center point.
        *           @zh 中心点的 x 轴坐标。
        * @param cy @en The y-axis coordinates of the center point.
        *           @zh 中心点的 y 轴坐标。
        * @param rx @en The radius of the x-axis of the ellipse.
        *           @zh 椭圆 x 轴半径。
        * @param ry @en The radius of the y-axis of the ellipse.
        *           @zh 椭圆 y 轴半径。
        */
    ellipse(cx: number, cy: number, rx: number, ry: number): void;
    /**
        * @en
        * Adds a circle to the path.
        *
        * @zh
        * 绘制圆形路径。
        *
        * @param cx @en The x-axis coordinates of the center point.
        *           @zh 中心点的 x 轴坐标。
        * @param cy @en The y-axis coordinates of the center point.
        *           @zh 中心点的 y 轴坐标。
        * @param r @en Radius.
        *          @zh 圆半径。
        */
    circle(cx: number, cy: number, r: number): void;
    /**
        * @en
        * Adds a rectangle to the path.
        *
        * @zh
        * 绘制矩形路径。
        *
        * @param x @en The x-axis coordinate of the top left point of the rectangle.
        *          @zh 矩形起始 x 轴坐标。
        * @param y @en The y-axis coordinate of the top left point of the rectangle.
        *          @zh 矩形起始 y 轴坐标。
        * @param w @en The width of the rectangle.
        *          @zh 矩形宽度。
        * @param h @en The height of the rectangle.
        *          @zh 矩形高度。
        */
    rect(x: number, y: number, w: number, h: number): void;
    /**
        * @en
        * Adds a round corner rectangle to the path.
        *
        * @zh
        * 绘制圆角矩形路径。
        *
        * @param x @en The x-axis coordinate of the top left point of the rectangle.
        *          @zh 矩形起始 x 轴坐标。
        * @param y @en The y-axis coordinate of the top left point of the rectangle.
        *          @zh 矩形起始 y 轴坐标。
        * @param w @en The width of the rectangle.
        *          @zh 矩形宽度。
        * @param h @en The height of the rectangle.
        *          @zh 矩形高度。
        * @param r @en Radius of rectangular rounded corners.
        *          @zh 矩形圆角半径。
        */
    roundRect(x: number, y: number, w: number, h: number, r: number): void;
    /**
        * @en
        * Draws a filled rectangle.
        *
        * @zh
        * 绘制填充矩形。
        *
        * @param x @en The x-axis coordinate of the top left point of the rectangle.
        *          @zh 矩形起始 x 轴坐标。
        * @param y @en The y-axis coordinate of the top left point of the rectangle.
        *          @zh 矩形起始 y 轴坐标。
        * @param w @en The width of the rectangle.
        *          @zh 矩形宽度。
        * @param h @en The height of the rectangle.
        *          @zh 矩形高度。
        */
    fillRect(x: number, y: number, w: number, h: number): void;
    /**
        * @en
        * Erasing any previously drawn content.
        *
        * @zh
        * 擦除之前绘制的所有内容的方法。
        */
    clear(): void;
    /**
        * @en
        * Causes the point of the pen to move back to the start of the current path.
        * It tries to add a straight line from the current point to the start.
        *
        * @zh
        * 将笔点返回到当前路径起始点的。它尝试从当前点到起始点绘制一条直线。
        */
    close(): void;
    /**
        * @en
        * Strokes the current or given path with the current stroke style.
        *
        * @zh
        * 根据当前的画线样式,绘制当前或已经存在的路径。
        */
    stroke(): void;
    /**
        * @en
        * Fills the current or given path with the current fill style.
        *
        * @zh
        * 根据当前的画线样式,填充当前或已经存在的路径。
        */
    fill(): void;
}
这里在start() {}中写启动脚本了,正常情况下,肯定是传值进来的
start() {
    const data = {
        id: 1,
        color: [255, 68, 68, 255],
        lineWidth: 10,
        arrowPath: [
            { "x": 270, "y": -270 },
            { "x": 225, "y": -270 },
            { "x": 180, "y": -270 },
            ...忽略...
        ],
    };
    this._Graphics = this.node.addComponent(Graphics);
    this._Graphics.lineWidth = data.lineWidth;
    this._Graphics.lineCap = Graphics.LineCap.BUTT;
    this._WinSize = view.getVisibleSize();
    this._Graphics.strokeColor = new math.Color(...data.color);
    this._Graphics.fillColor = new math.Color(...data.color);
    // 初始化移动开关等数据
    this._StartMove = false;
    this._accumTime = 0;
    this._ArrowPath.length = 0;
    this._OriginPath.length = 0;

    // 拷贝路径,保存原始数据
    for (const p of data.arrowPath) {
        const copy = { x: p.x, y: p.y };
        this._ArrowPath.push(copy);
        this._OriginPath.push({ x: p.x, y: p.y });
    }

    this._drawArrow();
    //使用input需要范围检测的,毕竟多次调用这个脚本,this.node监听不现实
    input.on(Input.EventType.TOUCH_END, this._onTouchEnd, this);
}
2.有数据了,下面就是绘制这条箭头线段了
/**
    * 绘制箭头折线 折线和箭头三角分开绘制,防止路径互相干扰
    */
private _drawArrow() {
    if (this._ArrowPath.length < 2) return;
    const pts = this._ArrowPath;
    this._Graphics.clear();
    // 1.绘制折线路径,只构建不提交
    this._Graphics.moveTo(pts[0].x, pts[0].y);
    for (let i = 1; i < pts.length; i++) {
        this._Graphics.lineTo(pts[i].x, pts[i].y);
    }
    // 只执行一次stroke,绘制出来折线路径
    this._Graphics.stroke();
    // 2.绘制头部箭头三角形 给三个点,闭合填充
    const headP = pts[0];
    const nextP = pts[1];
    const dir = this._getDirection(nextP.x, nextP.y, headP.x, headP.y);
    if (!(dir.x === 0 && dir.y === 0)) {
        const arrowSize = this._Graphics.lineWidth;
        const perpX = -dir.y;
        const perpY = dir.x;
        this._Graphics.moveTo(
            headP.x + dir.x * arrowSize,
            headP.y + dir.y * arrowSize
        );
        this._Graphics.lineTo(
            headP.x - dir.x * arrowSize + perpX * arrowSize,
            headP.y - dir.y * arrowSize + perpY * arrowSize
        );
        this._Graphics.lineTo(
            headP.x - dir.x * arrowSize - perpX * arrowSize,
            headP.y - dir.y * arrowSize - perpY * arrowSize
        );
        this._Graphics.close();
        this._Graphics.fill();
    }
}
3.绘制箭头肯定也需要有个方向,sqrt(x*x + y*y)不知道从哪个版本开始支持这个hypot(x, y)了
/**
    * 获取从 pointA → pointB 的归一化方向向量,支持任意斜线
    * @param ax pointA x
    * @param ay pointA y
    * @param bx pointB x
    * @param by pointB y
    * @returns 归一化 {x,y}; 距离为0返回零向量
    */
private _getDirection(ax: number, ay: number, bx: number, by: number): { x: number; y: number } {
    const dx = bx - ax;
    const dy = by - ay;
    const len = Math.hypot(dx, dy);
    if (len < 0.0001) {
        return { x: 0, y: 0 };
    }
    return { x: dx / len, y: dy / len };
}
4.线段的移动,最好弄一个开关来控制,开关的控制记得加上范围检测
private _onTouchEnd(event: EventTouch) {
    if (this._StartMove) return;
    const uiPos = event.getUILocation();
    // 触摸点转换到本节点本地坐标系(与 _ArrowPath 同一坐标系)
    const localPos = this.node.getComponent(UITransform).convertToNodeSpaceAR(new Vec3(uiPos.x, uiPos.y, 0));
    // TODO:判断点击点是否在箭头路径范围内 记录本次移动的原始位置,用于碰撞后回退
    this._StartMove = true;
}
5.CC中每帧调用的周期函数,就俩一个update一个lateUpdate,帧率还不稳,不想u3d那样有个FixedUpdate,尽量乔正,比如你写背景移动啊,什么的也可以这样用。
update(deltaTime: number) {
    if (!this._StartMove) return;
    this._accumTime += deltaTime;
    // 固定子步:减法保留剩余时间,不会丢时间片
    while (this._accumTime >= this.FIXED_DELTA) {
        this._ArrowMove(this.MOVE_SPEED);
        this._accumTime -= this.FIXED_DELTA;
    }
}
6.然后就是移动了,好了,逻辑基本上就这样,动手强的可以看一下,那个...就去下载demo吧
/**
    * 箭头移动逻辑
    * @param speed 移动步长
    */
private _ArrowMove(speed: number) {
    if (this._ArrowPath.length < 2) {
        this._StartMove = false;
        return;
    }
    if (this._ArrowPath.length === 2) {
        const p0 = this._ArrowPath[0];
        const p1 = this._ArrowPath[1];
        const dir = this._getDirection(p1.x, p1.y, p0.x, p0.y);
        if (dir.x === 0 && dir.y === 0) {
            this._drawArrow();
            return;
        }

        p0.x += dir.x * speed;
        p0.y += dir.y * speed;
        p1.x += dir.x * speed;
        p1.y += dir.y * speed;
        // TODO 对撞其他箭头线段,则回退原位置
        this._drawArrow();
        //TODO:判断是否飞出屏幕,若飞出则移除
        return;
    }

    // 折线阶段:头部延伸,尾部追赶并pop拐点
    // 头部向前
    const headDir = this._getDirection(
        this._ArrowPath[1].x, this._ArrowPath[1].y,
        this._ArrowPath[0].x, this._ArrowPath[0].y
    );
    this._ArrowPath[0].x += headDir.x * speed;
    this._ArrowPath[0].y += headDir.y * speed;

    // 尾部向前追赶
    const lastIdx = this._ArrowPath.length - 1;
    const tailDir = this._getDirection(
        this._ArrowPath[lastIdx].x, this._ArrowPath[lastIdx].y,
        this._ArrowPath[lastIdx - 1].x, this._ArrowPath[lastIdx - 1].y
    );
    this._ArrowPath[lastIdx].x += tailDir.x * speed;
    this._ArrowPath[lastIdx].y += tailDir.y * speed;

    // 距离足够就移除尾部拐点
    const dist = math.Vec2.distance(
        new math.Vec2(this._ArrowPath[lastIdx].x, this._ArrowPath[lastIdx].y),
        new math.Vec2(this._ArrowPath[lastIdx - 1].x, this._ArrowPath[lastIdx - 1].y)
    );
    if (dist < speed) {
        this._ArrowPath.pop();
    }
    // TODO 对撞其他箭头线段,则回退原位置
    this._drawArrow();
}