我是一个初学者,记录学习过程。仅供参考。
之前我已经在VSCode之中搭建好了ESP32的开发环境,然后有时会刷到一些教程用的Arduino IDE。 我也不清楚哪种方式更好,就试试吧。
本文是我在以下这篇做完后的基础上做的,我也不清楚哪些地方会有影响。
《archlinux 搭建ESP32开发环境 从0到Hello world》
https://blog.csdn.net/lxyoucan/article/details/166984393
中文可以近似读作:阿尔杜伊诺。
一共四个音节:Ar-du-i-no,重音在第三个音节(i)上。
这个名字来自意大利语,日常交流中按这个发音读就可以了。
环境信息
本文是在archlinux下测试的。
OS: Arch Linux x86_64
Kernel: Linux 7.2.9-zen1-1-zen
我看了一下Arduino 这个软件是可以跨平台的,理论上应该差距不大。
下载与安装
下载地址:
https://www.arduino.cc/en/software/
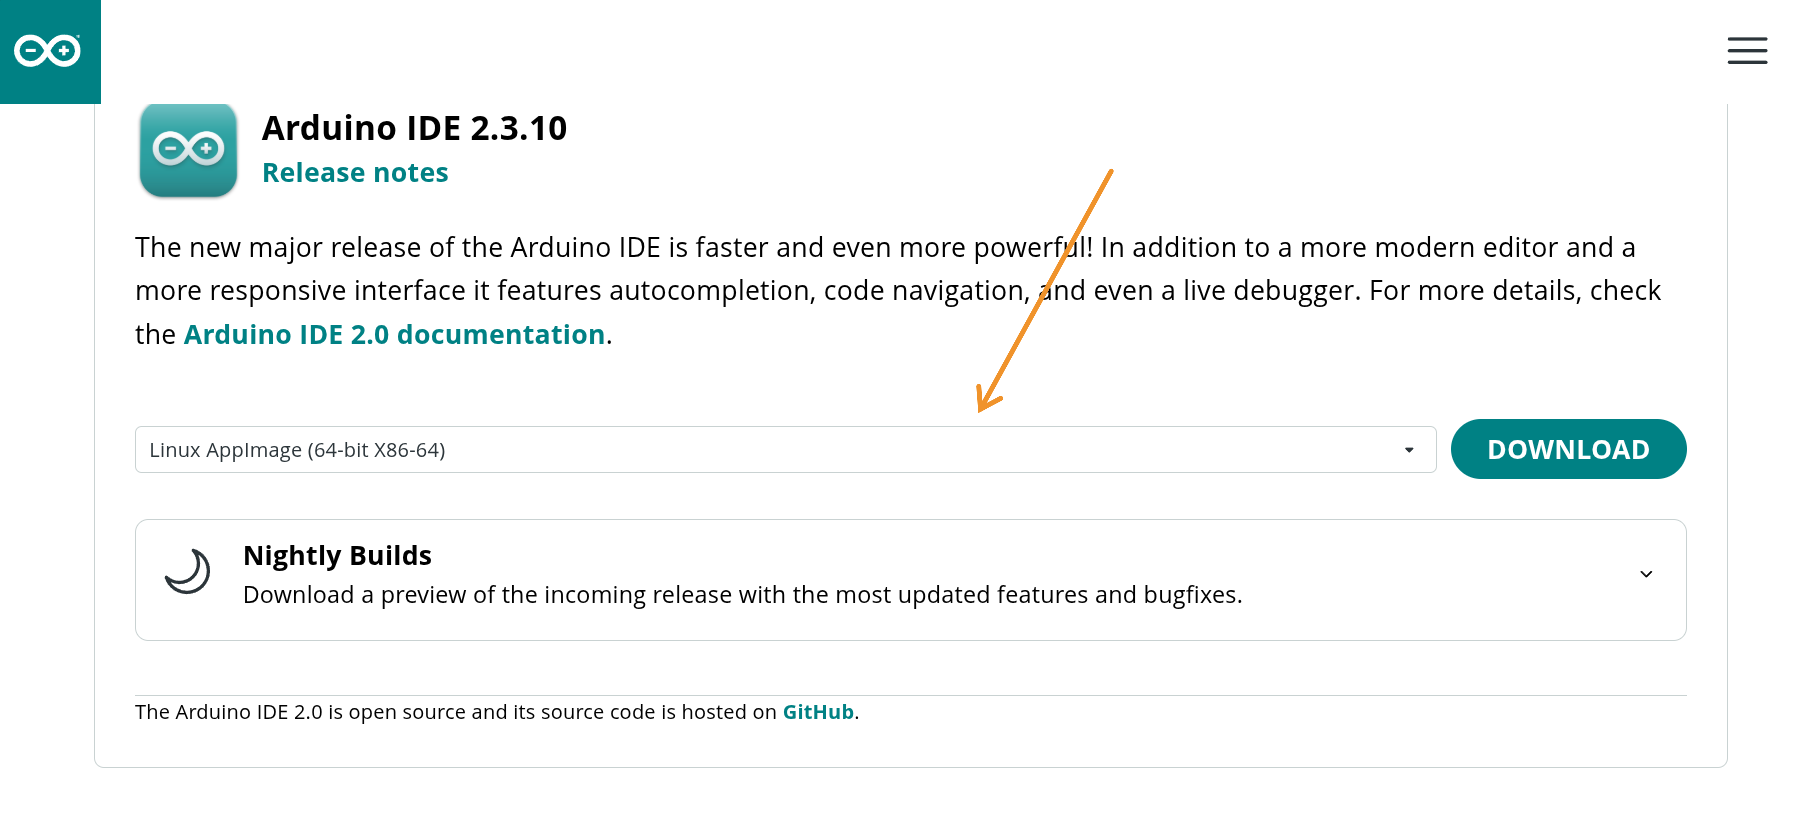
我这里下载下来是
arduino-ide_2.3.10_Linux_64bit.AppImage
bash
chmod +x arduino-ide_2.3.10_Linux_64bit.AppImage
./arduino-ide_2.3.10_Linux_64bit.AppImage
就可以直接运行了。
第1次打开会显示一直在下载什么依赖。一会儿就结束了。
如果想有个图标,可以这样做:
创建~/.local/share/applications/arduino-ide.desktop
内容如下:
bash
[Desktop Entry]
Version=1.0
Type=Application
Name=Arduino IDE
Comment=Arduino Integrated Development Environment
Exec=/home/itkey/.soft/arduino-ide_2.3.10_Linux_64bit.AppImage --no-sandbox %U
TryExec=/home/itkey/.soft/arduino-ide_2.3.10_Linux_64bit.AppImage
Icon=arduino-ide
Terminal=false
Categories=Development;Electronics;IDE;
Keywords=Arduino;IDE;
StartupWMClass=Arduino IDE
X-AppImage-Version=2.3.10
运行报错
./arduino-ide_2.3.10_Linux_64bit.AppImage
dlopen(): error loading libfuse.so.2
AppImages require FUSE to run.
You might still be able to extract the contents of this AppImage
if you run it with the --appimage-extract option.
See https://github.com/AppImage/AppImageKit/wiki/FUSE
for more information
解决办法:
bash
sudo pacman -S fuse2然后就可以正常打开软件了,首先打开会提示在下载一些内容:
bash
Downloading packages
arduino:arduinoOTA@1.3.0
arduino:avr-gcc@7.3.0-atmel3.6.1-arduino7
arduino:avrdude@8.0.0-arduino1
arduino:avr@1.8.8
Installing arduino:arduinoOTA@1.3.0
arduino:arduinoOTA@1.3.0 installed
Installing arduino:avr-gcc@7.3.0-atmel3.6.1-arduino7
arduino:avr-gcc@7.3.0-atmel3.6.1-arduino7 installed
Installing arduino:avrdude@8.0.0-arduino1
arduino:avrdude@8.0.0-arduino1 installed
Installing platform arduino:avr@1.8.8
Platform arduino:avr@1.8.8 installed
Downloading Mouse@1.0.1
......
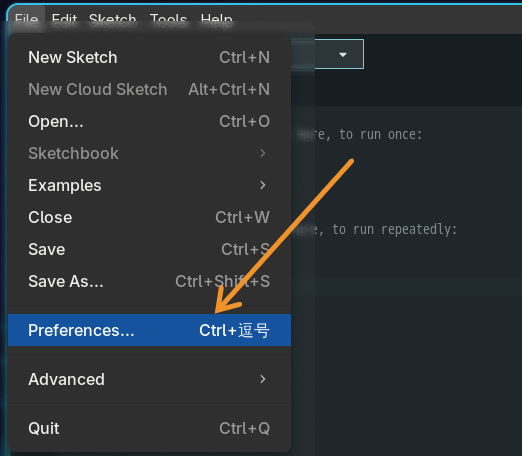
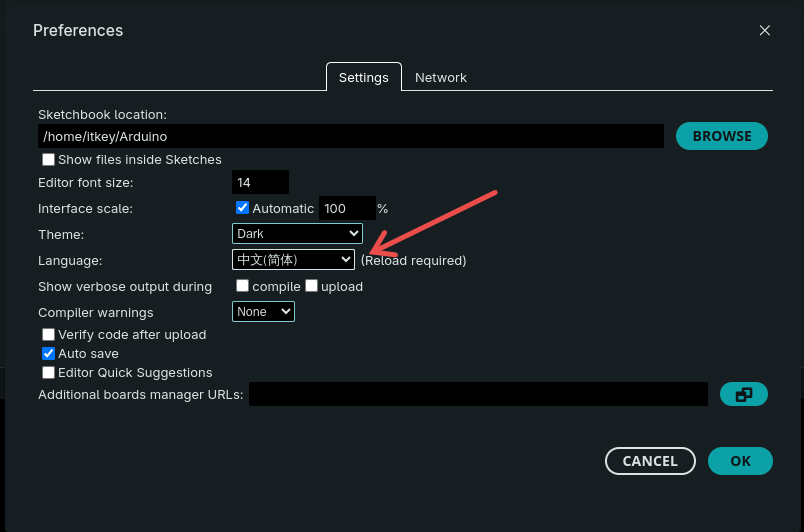
设置语言为中文
File==>Preferences...
选择开发板
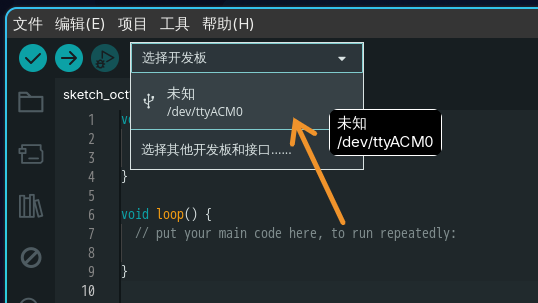
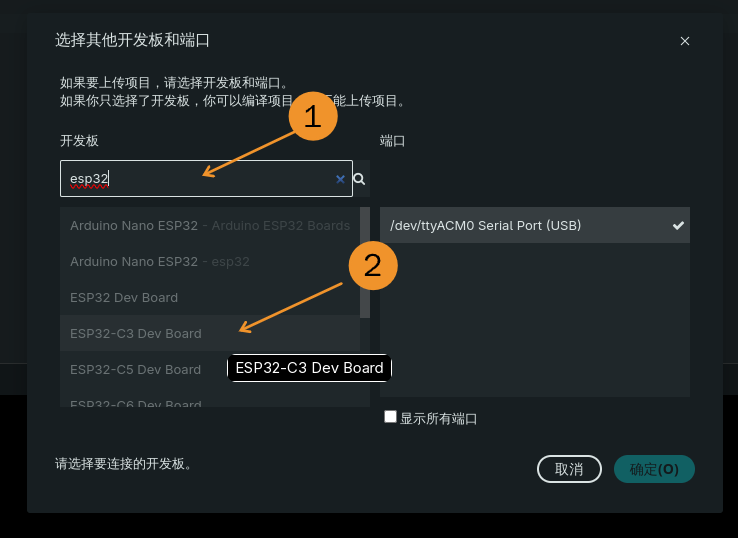
我这里搜索的是esp32 选择的是ESP32-C3 Dev Board
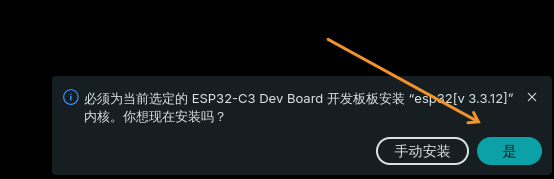
这里会有一个提示,安装开发板内核 esp32v 3.3.12 内核。
这一步就开始自动下载安装内核了,感觉就像安装一个插件一样的。
这一步下载挺久的,总下载量约2.3GB。如果下载过慢。
可以尝试
Users in China might have troubles with connection and download speeds
using GitHub. Please use our Jihulab mirror as the repository source:
使用国内的源。理论上更推荐,但是我没有试,可以自行尝试。
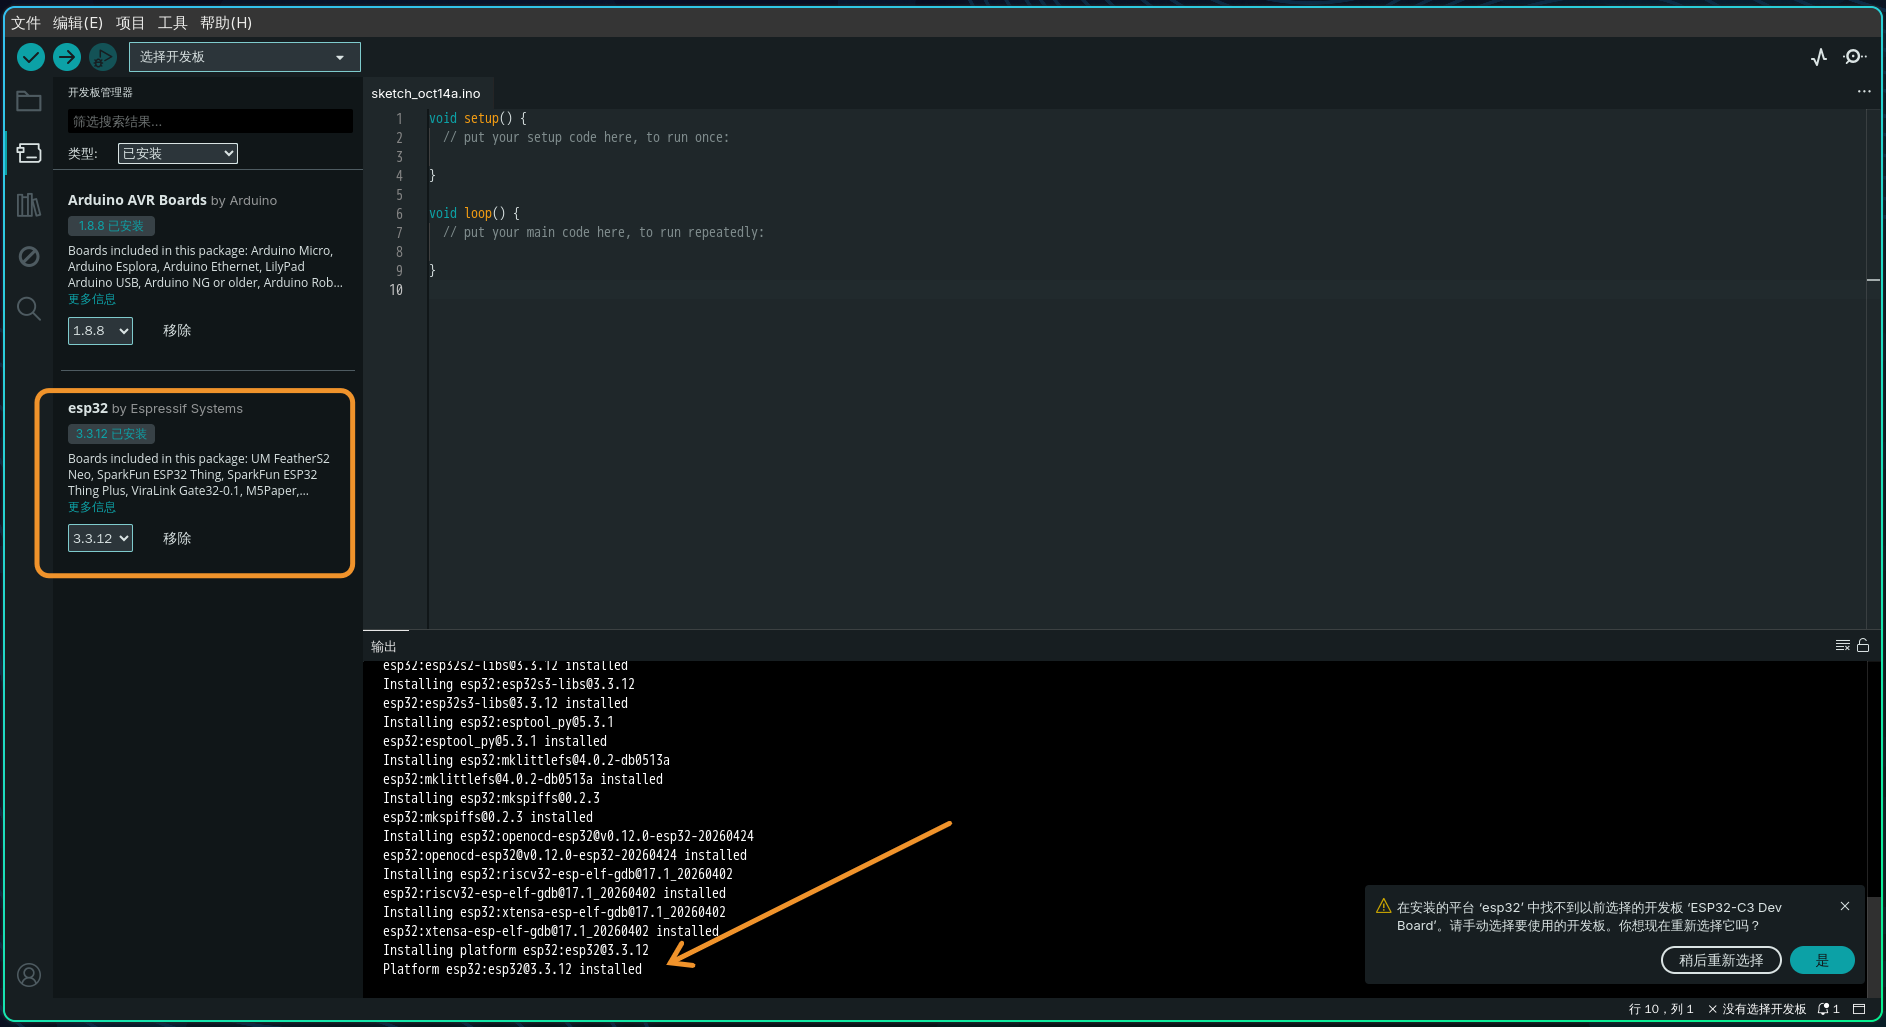
我电脑放一边下载了挺久的,预计20分钟到30分钟吧。到这个界面应该已经下载完成了。
hello world
新建一个项目
比如:我这里默认打开了sketch_oct14.ino
"工具"中设置:
| 选项 | 值 |
|---|---|
| 开发板 | ESP32C3 Dev Module |
| USB CDC On Boot | Enabled |
| Flash Size | 4MB,与项目分区表对应 |
| Partition Scheme | No OTA (1MB APP/3MB SPIFFS) |
| Upload Speed | 115200 |
| Port | /dev/ttyACM0 |
为什么要这么设置,是AI帮我分析告诉我的,我先按这个来。
我估计是根据板子配置来的吧。
我写了个hello world
bash
void setup() {
  // 初始化串口,波特率为 115200
  Serial.begin(115200);
}

void loop() {
  // 输出 Hello World!
  Serial.println("Hello World!");

  // 延迟 1 秒
  delay(1000);
}
按ctrl + s保存项目,自己选择一个文件夹就可以了。
点击 ✓ 验证,然后点击 → 上传。
✓ 应该就是编译的意思
→ 上传应该就是烧写的意思吧
运行效果
将代码编译并上传到开发板后:
- 打开 Arduino IDE。
- 点击右上角的 串口监视器(Serial Monitor)。
- 将波特率设置为 115200。
- 就可以看到每秒输出一次:
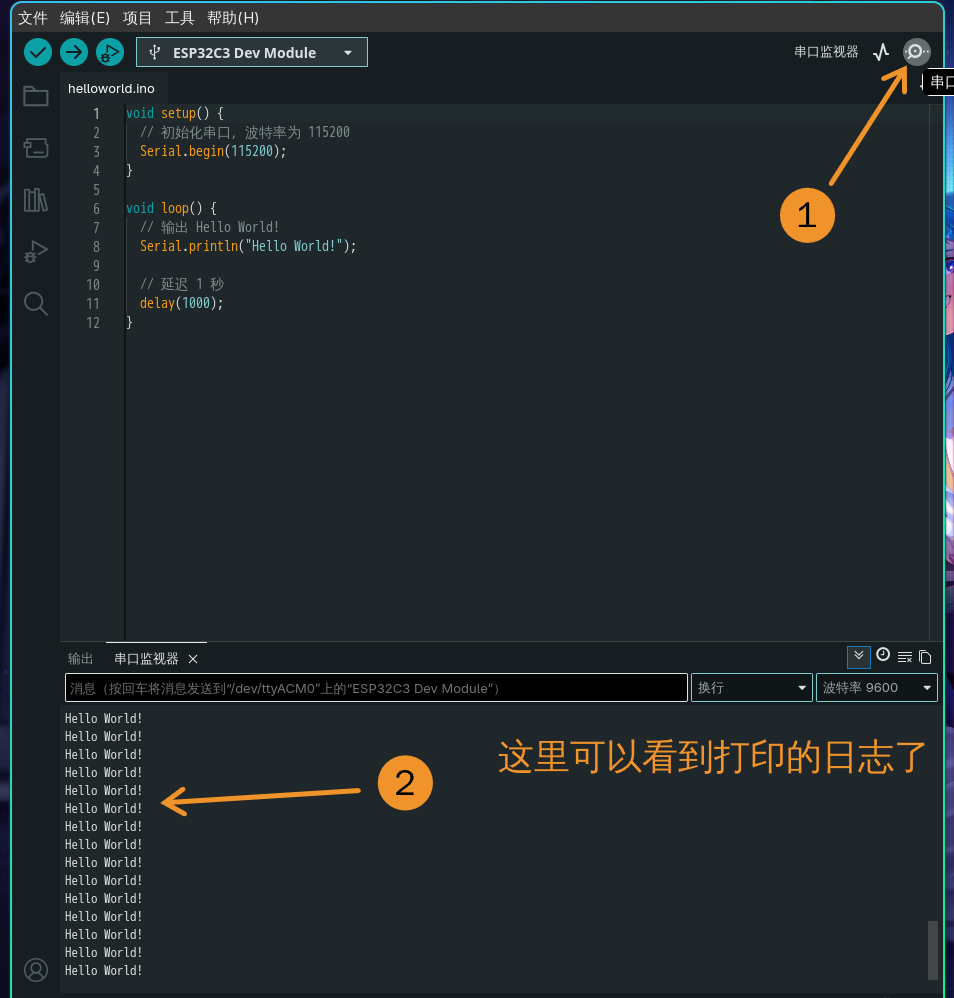
示例
这里有一些内置的示例,感觉不错,使用起来很方便 。
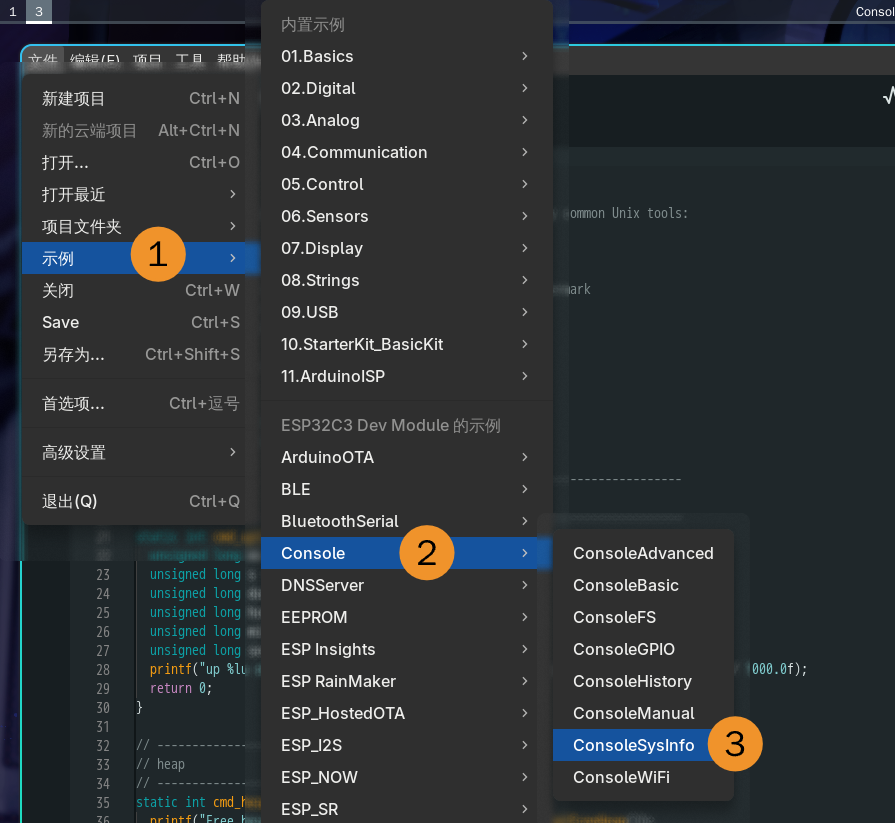
海量示例,对我这样的初学者很有帮助。
总结
对比我之前用vscode搭建的方式
《archlinux 搭建ESP32开发环境 从0到Hello world》
https://blog.csdn.net/lxyoucan/article/details/166984393
我感觉用Arduino IDE 好像更简单,方便。