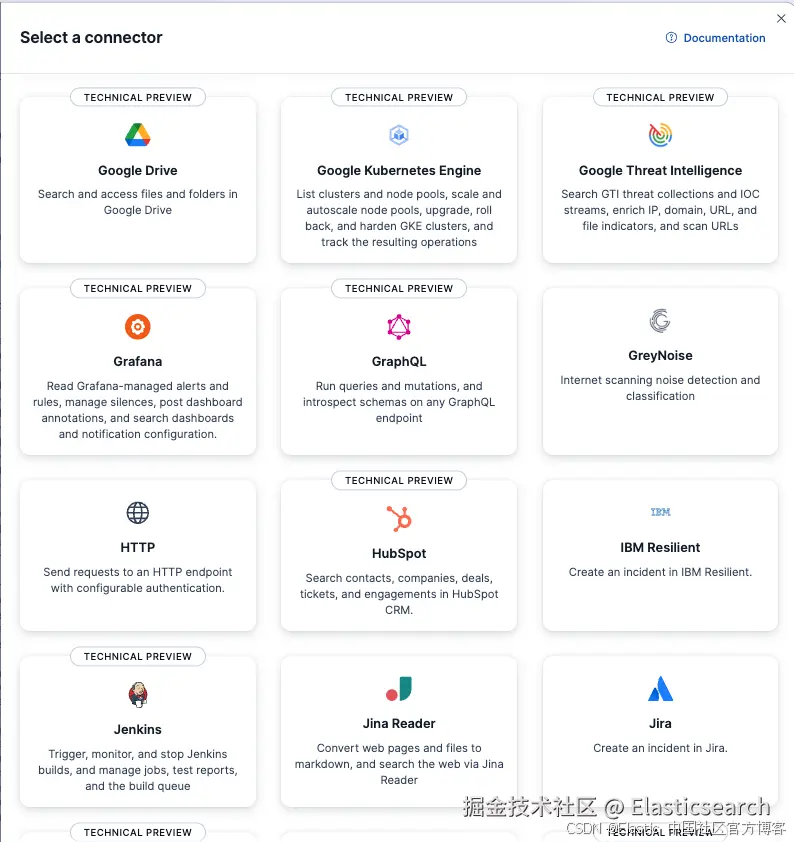
在之前的文章 "Kibana 中的人工智能连接器:你的 agent 可调用的 90 多个数据源",Kibana 提供了超过 90 多个连接器供我们的 Agents 来使用。我们可以很方便地把自己的企业数据接入到 agents 里,并对它们查询使用。Kibana 内置了超过 90 个连接器规范,涵盖 Gmail、谷歌云端硬盘、谷歌日历、Slack、 GitHub 、Confluence、PagerDuty、Jira、Salesforce、Datadog 和 Snowflake:
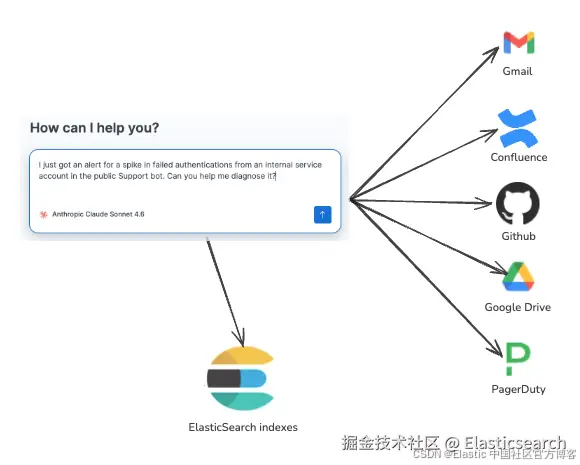
在今天的文章里,我们来详细介绍如何使用 github 连接器接入 github issue 的数据,并供我们查询。
步骤一:申请 github API key
我们可以 github 的图像处找到 Settings,并获取 API key:
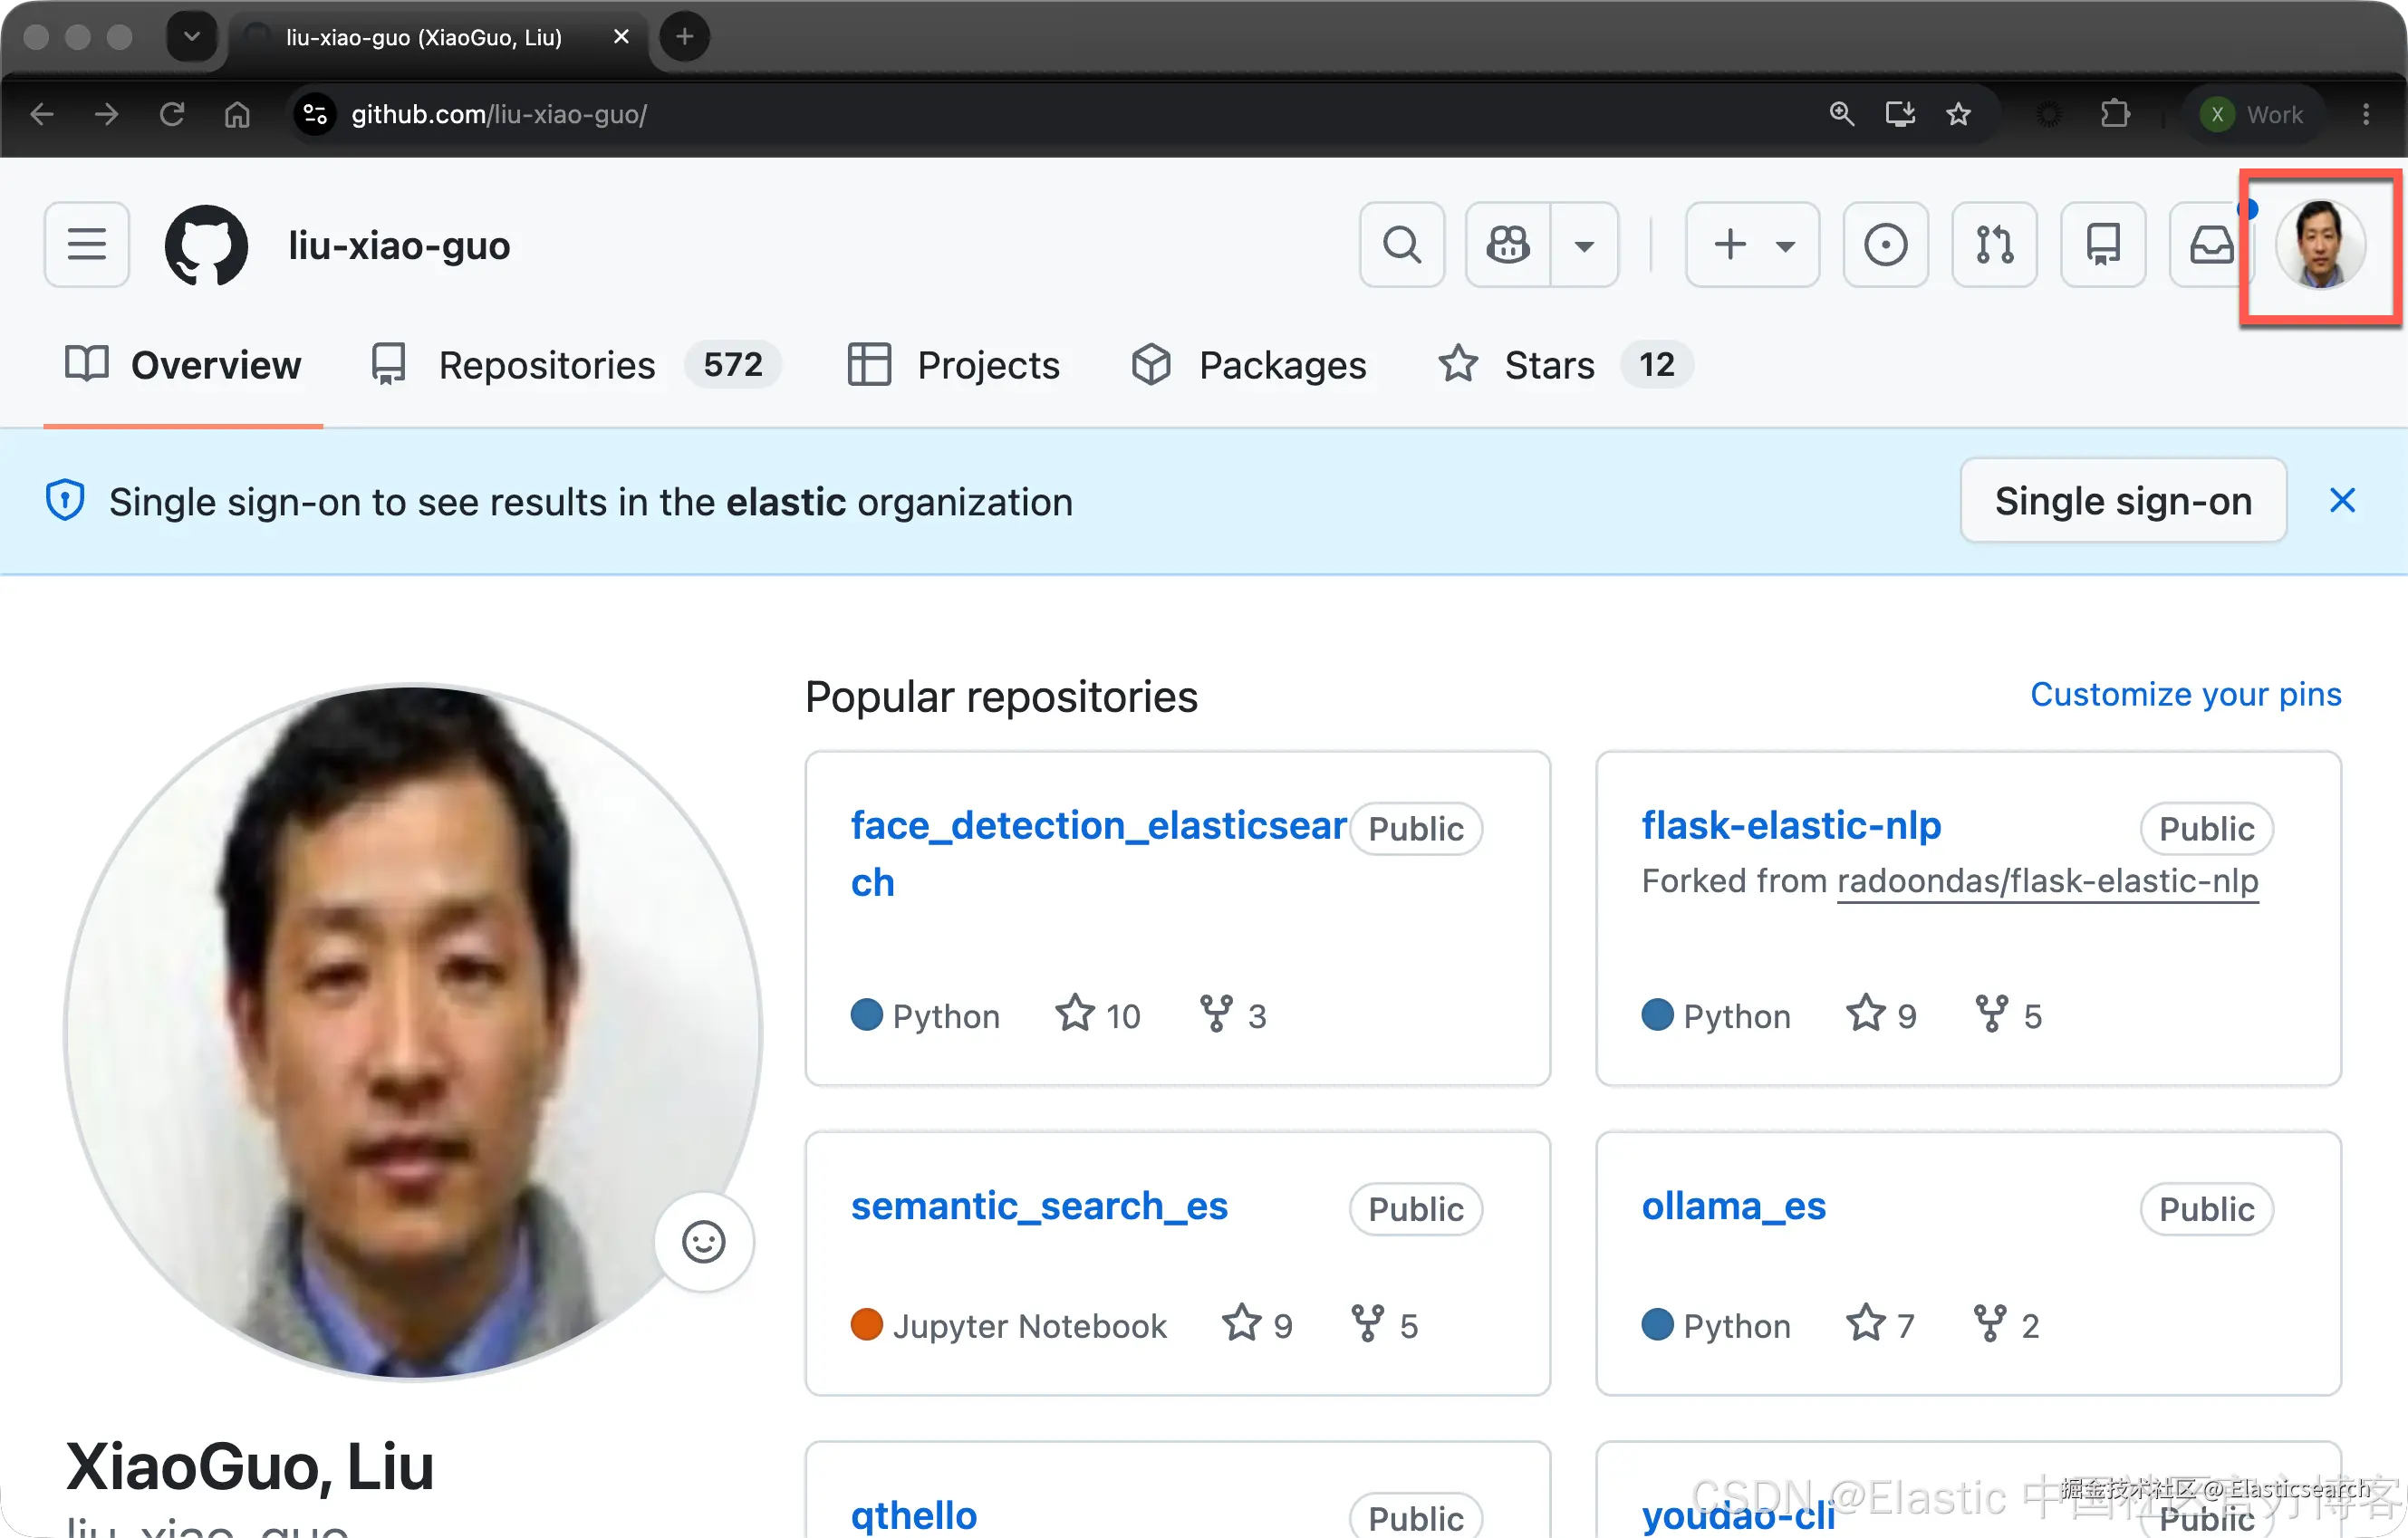
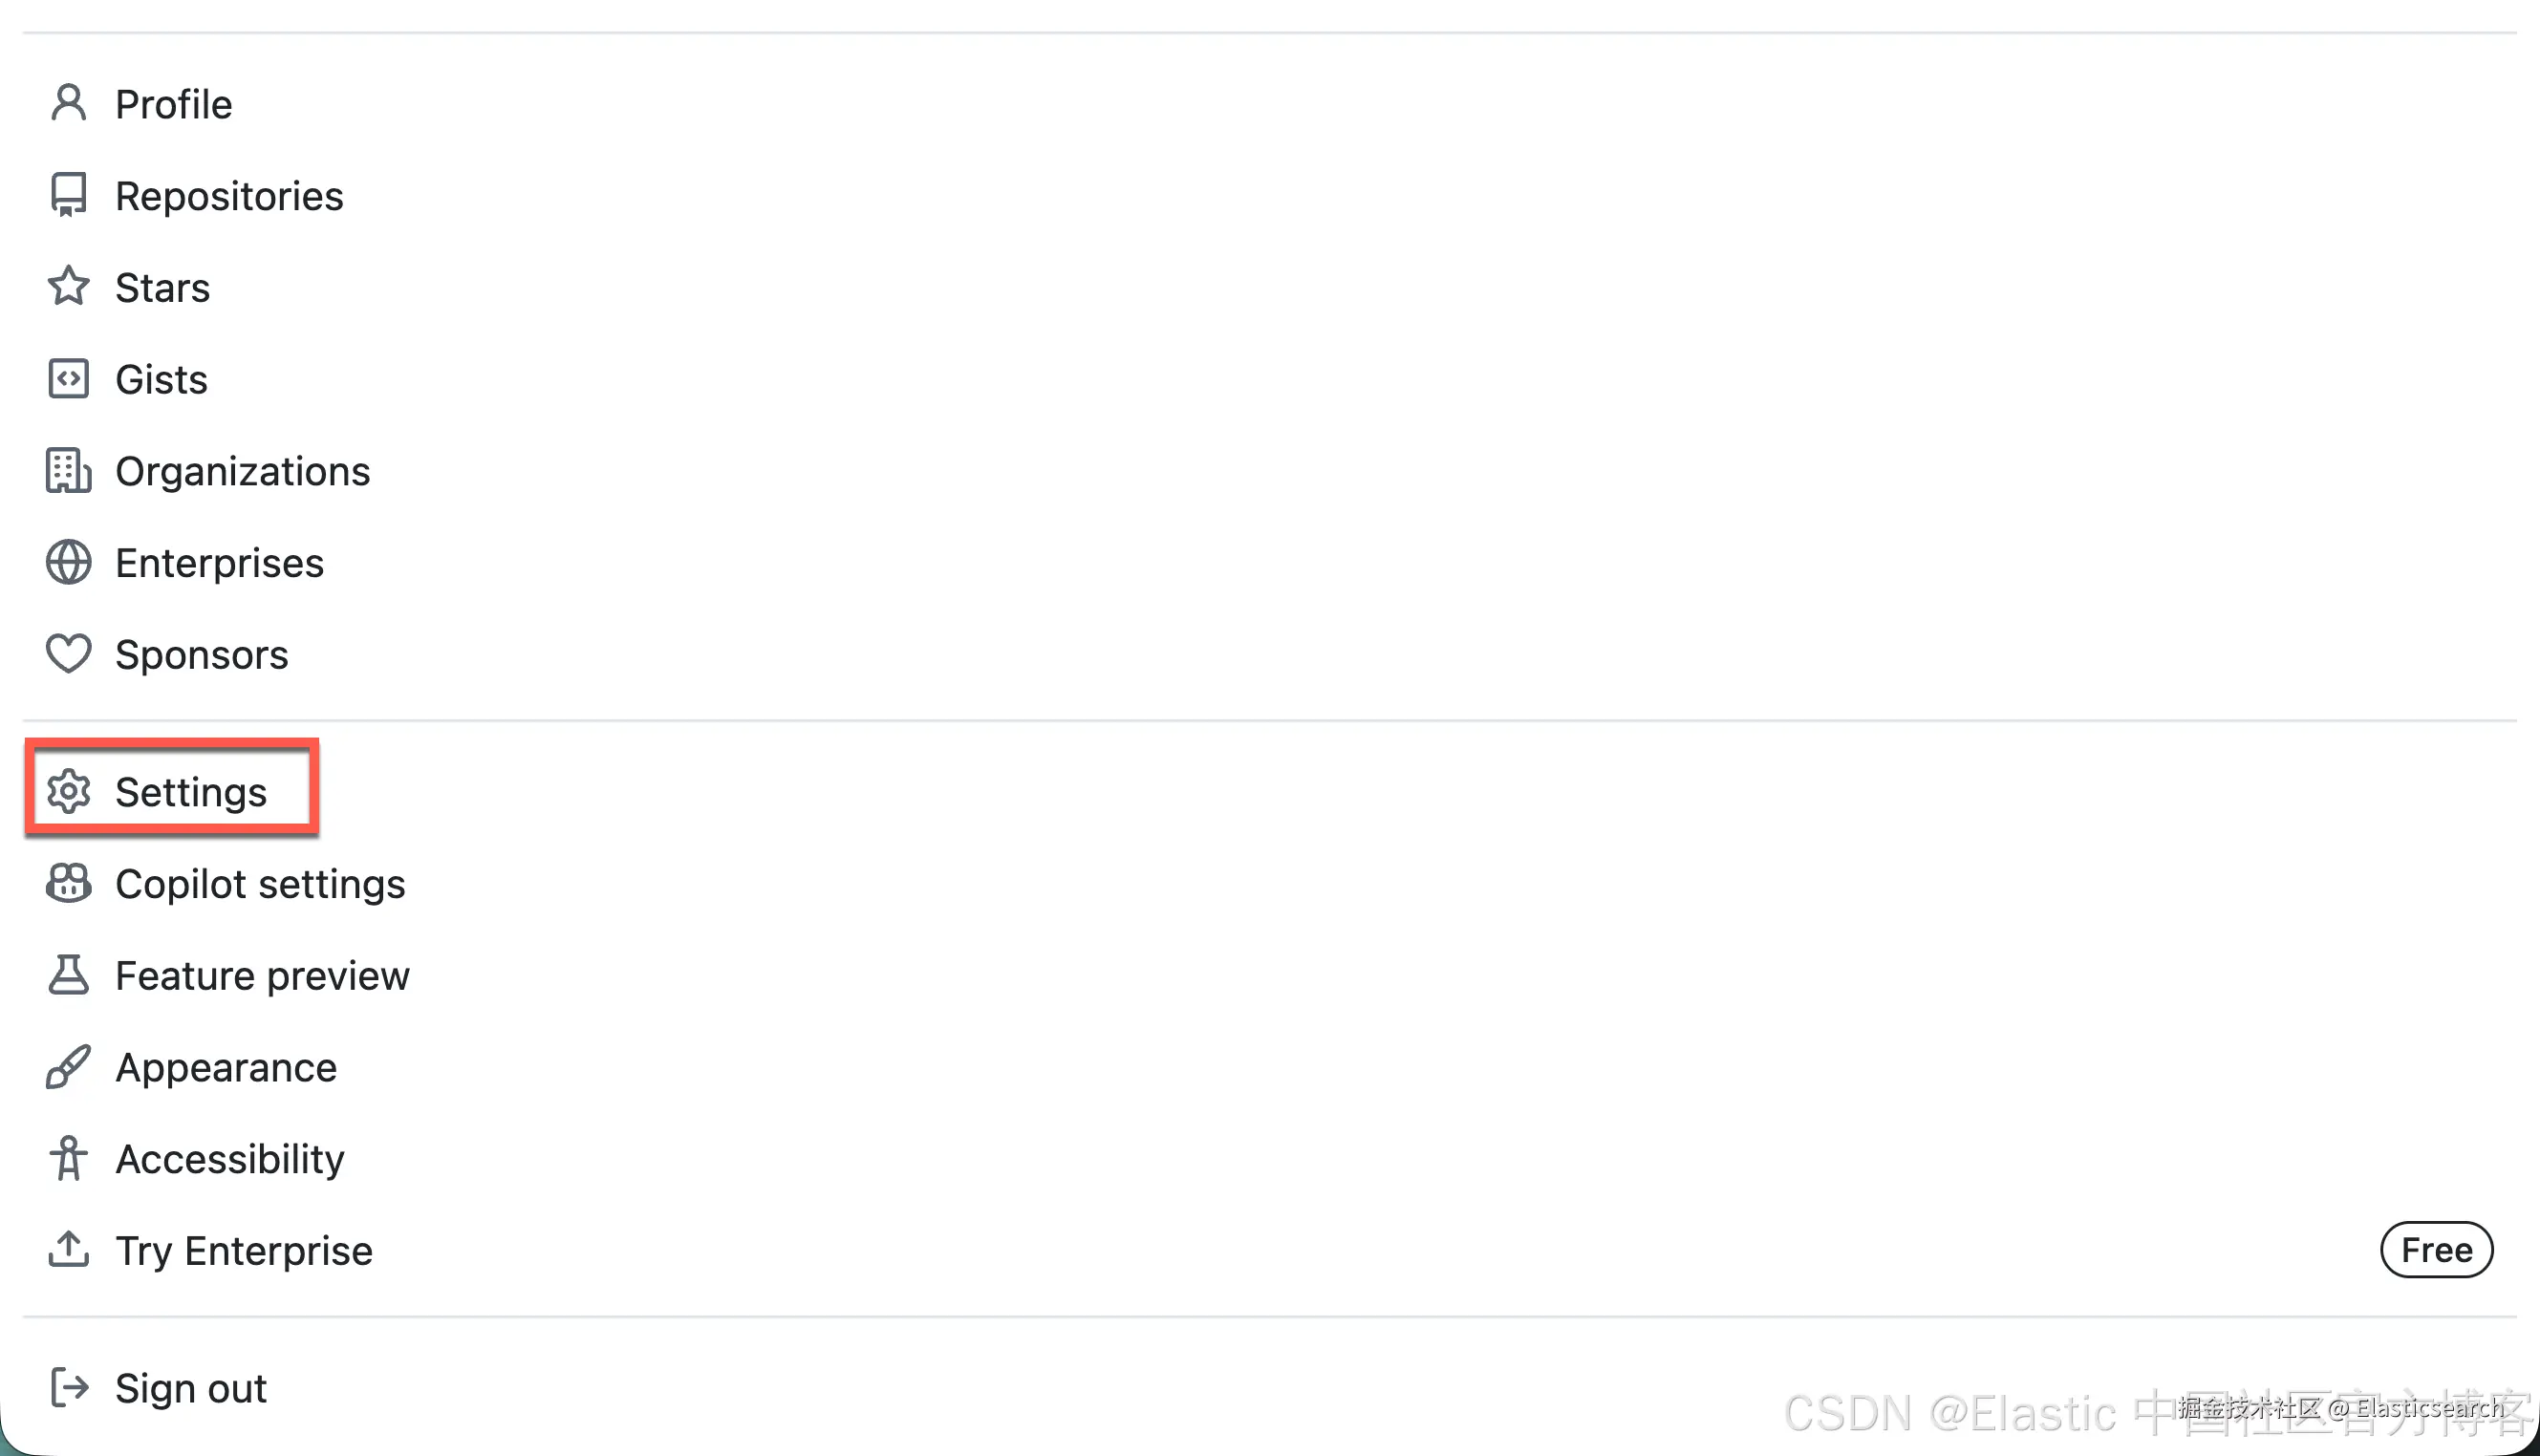
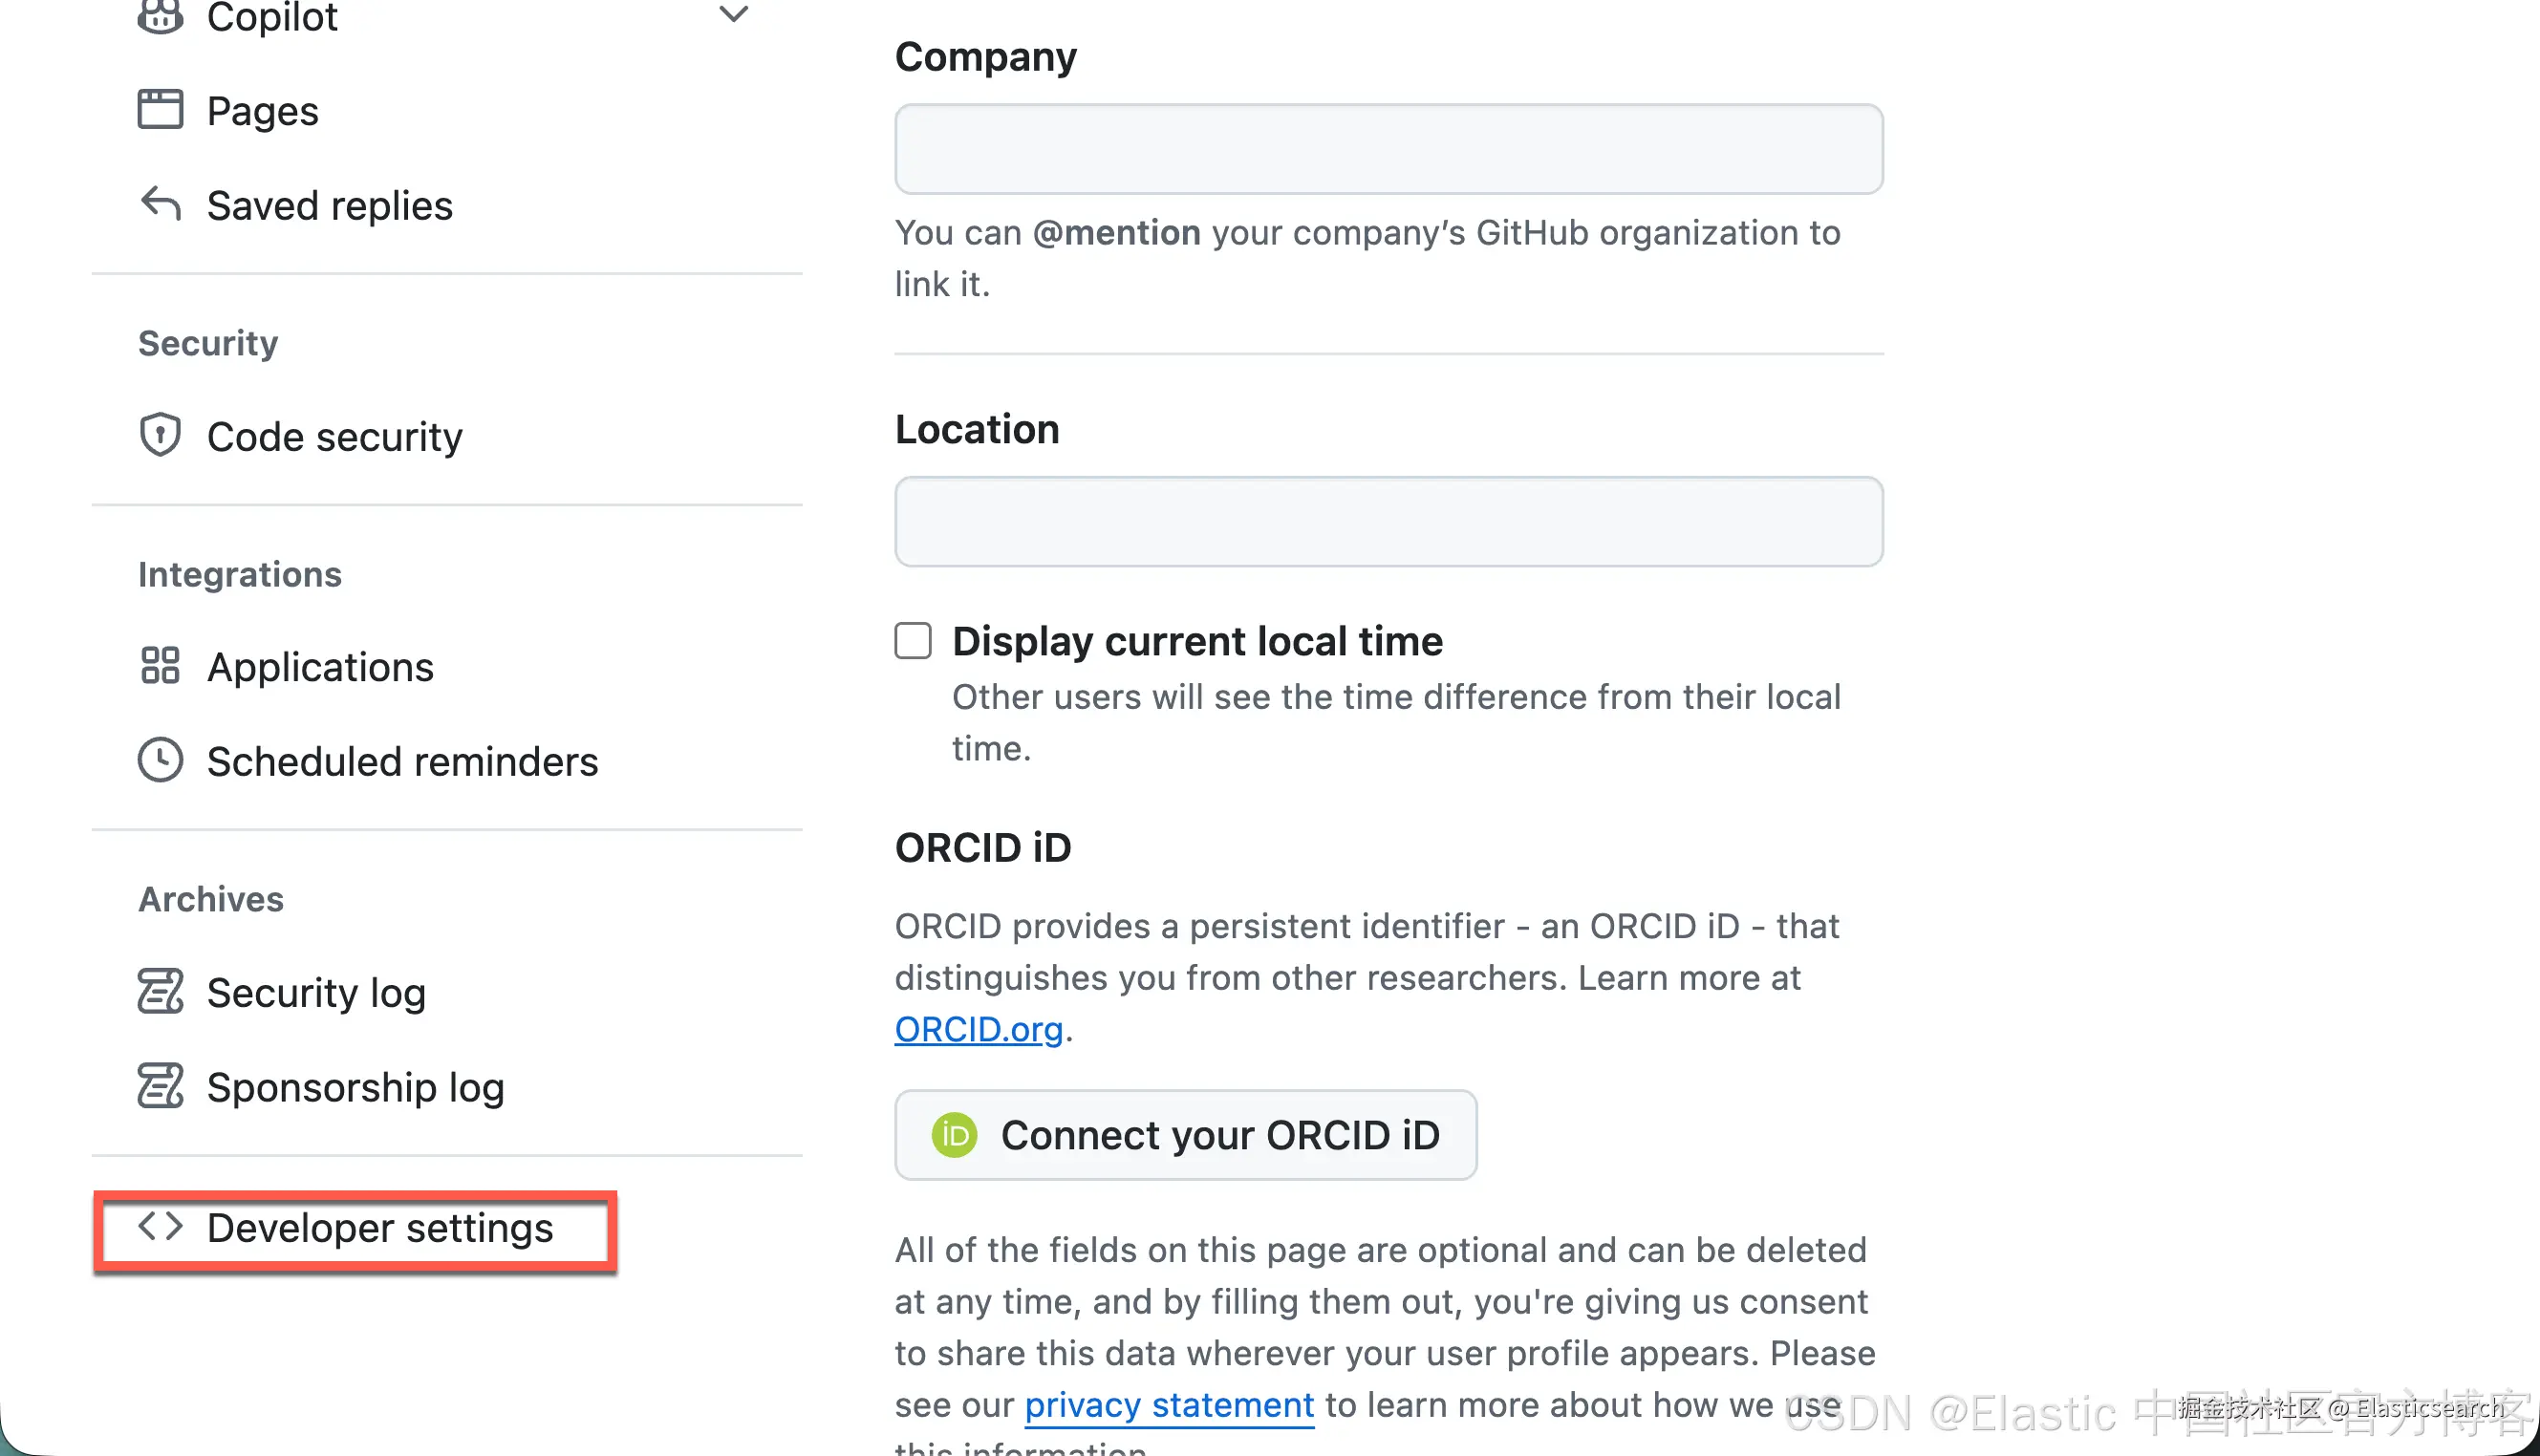
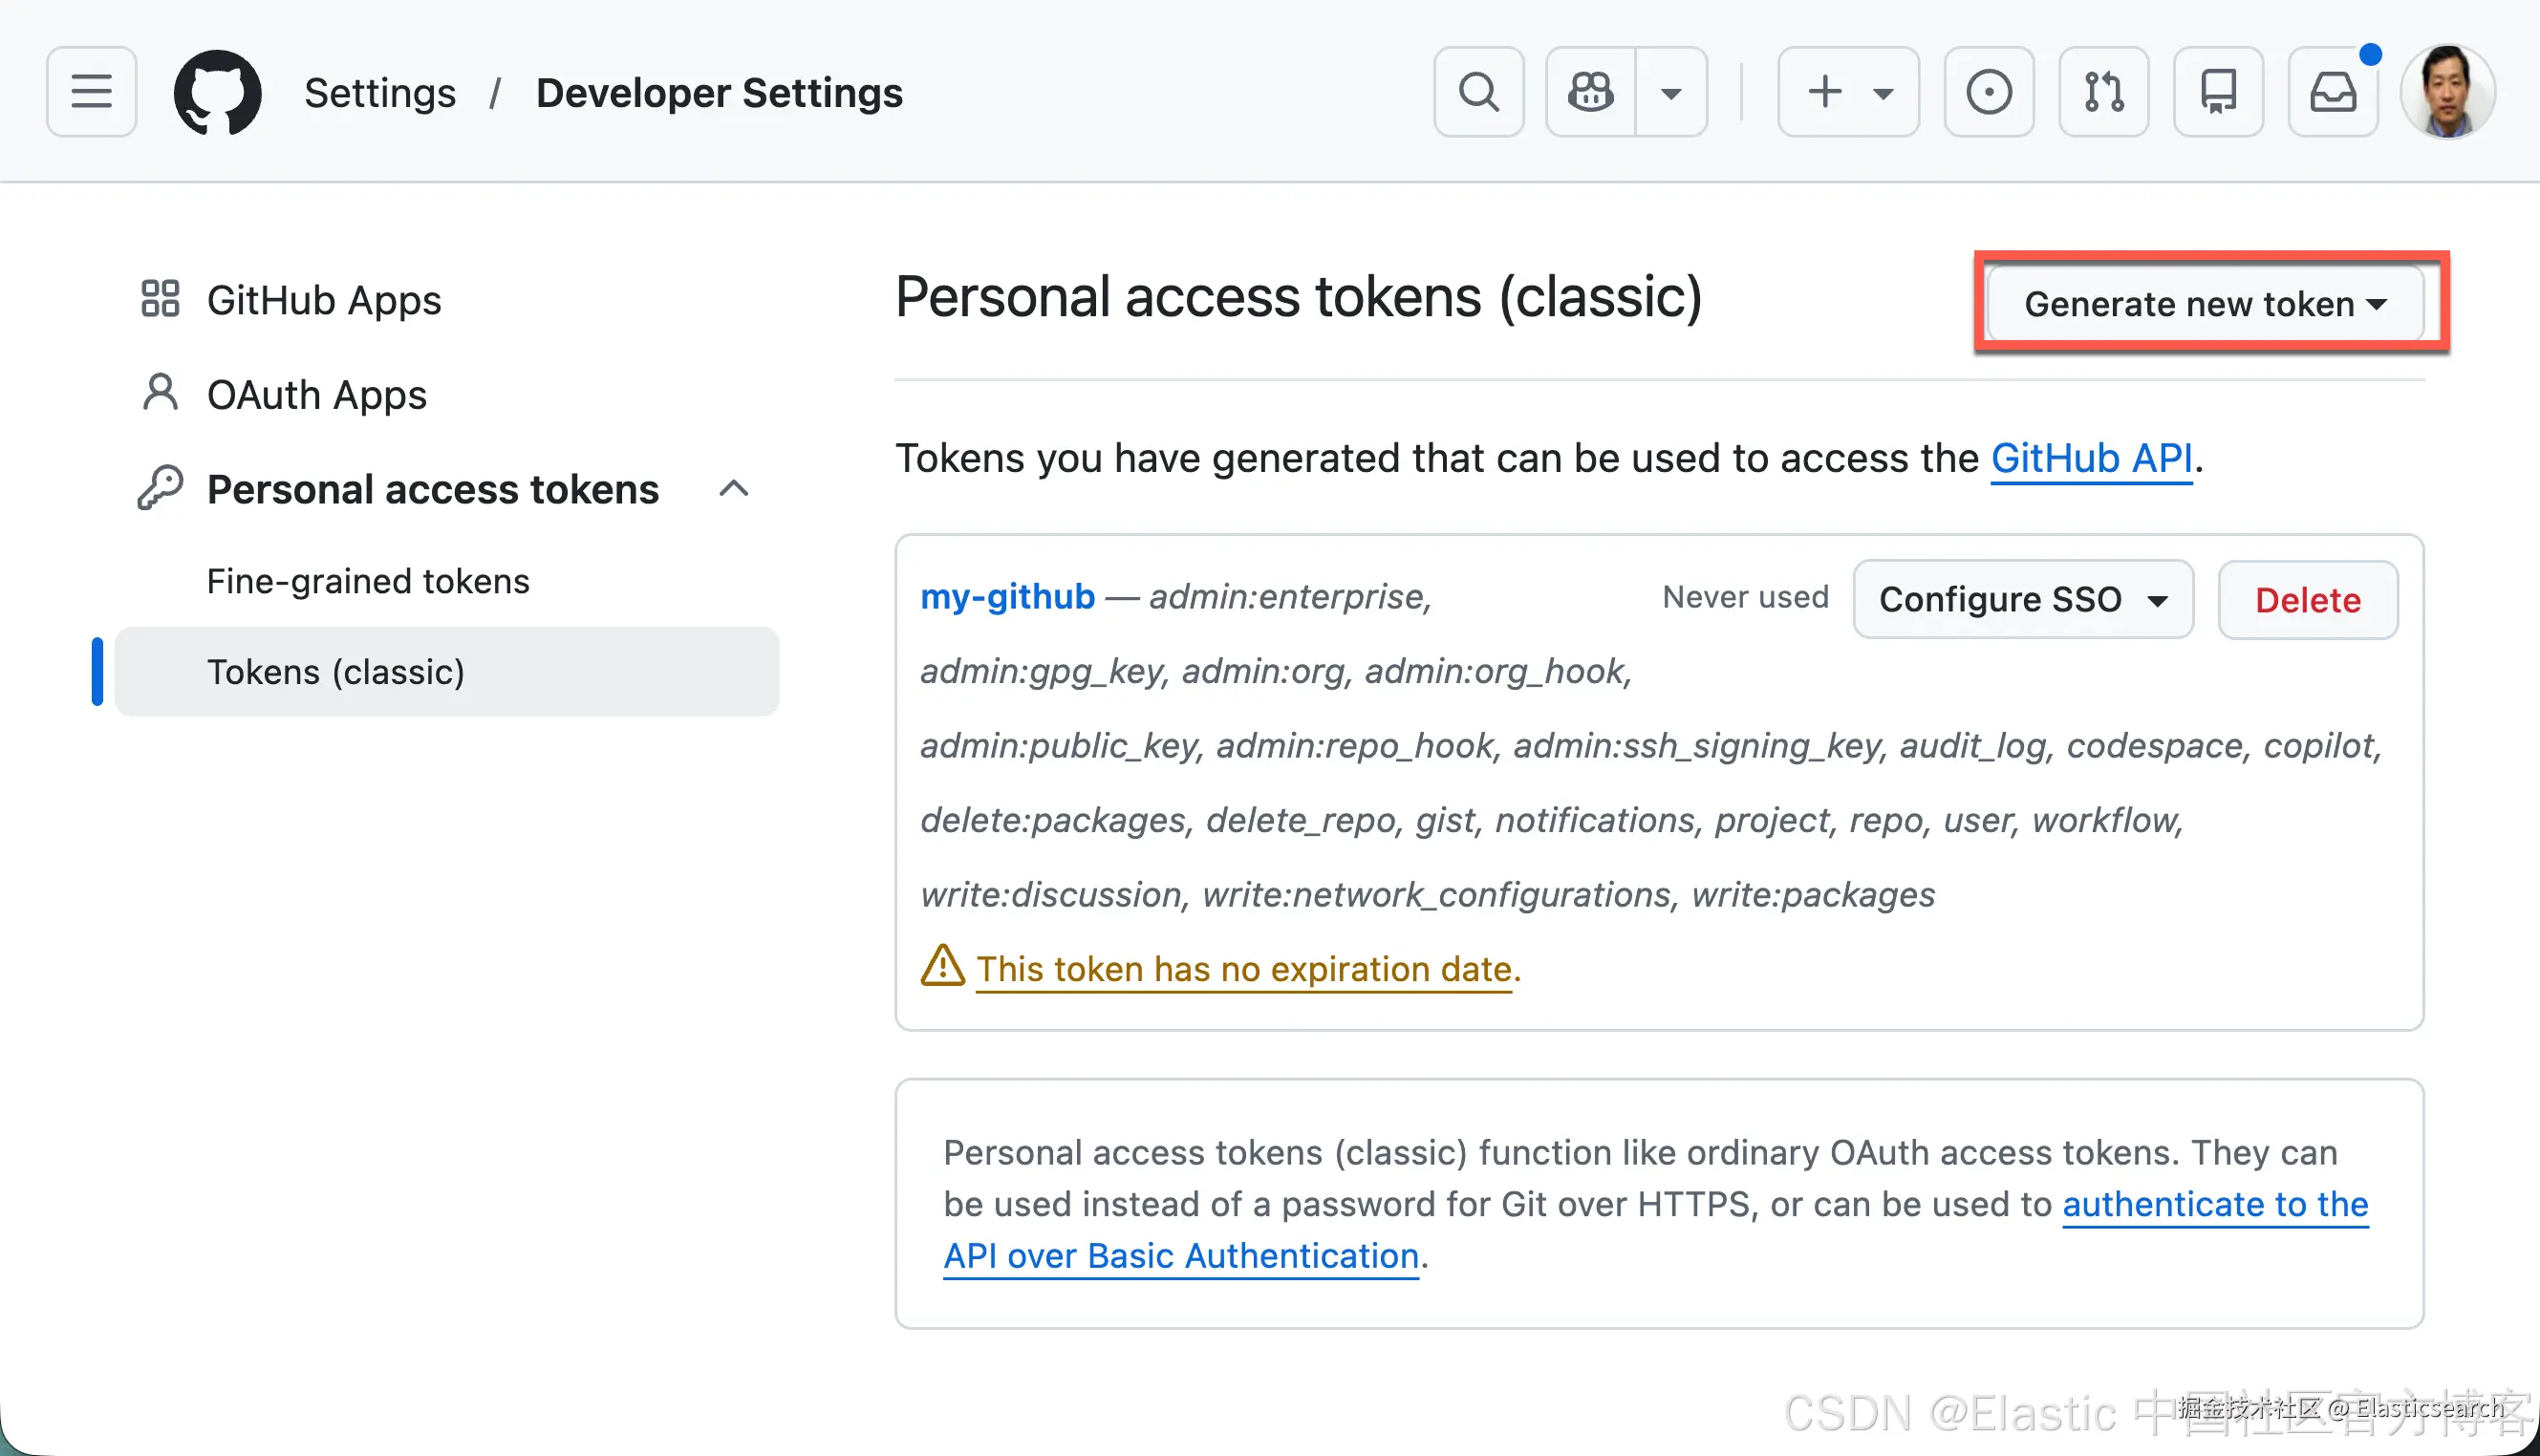
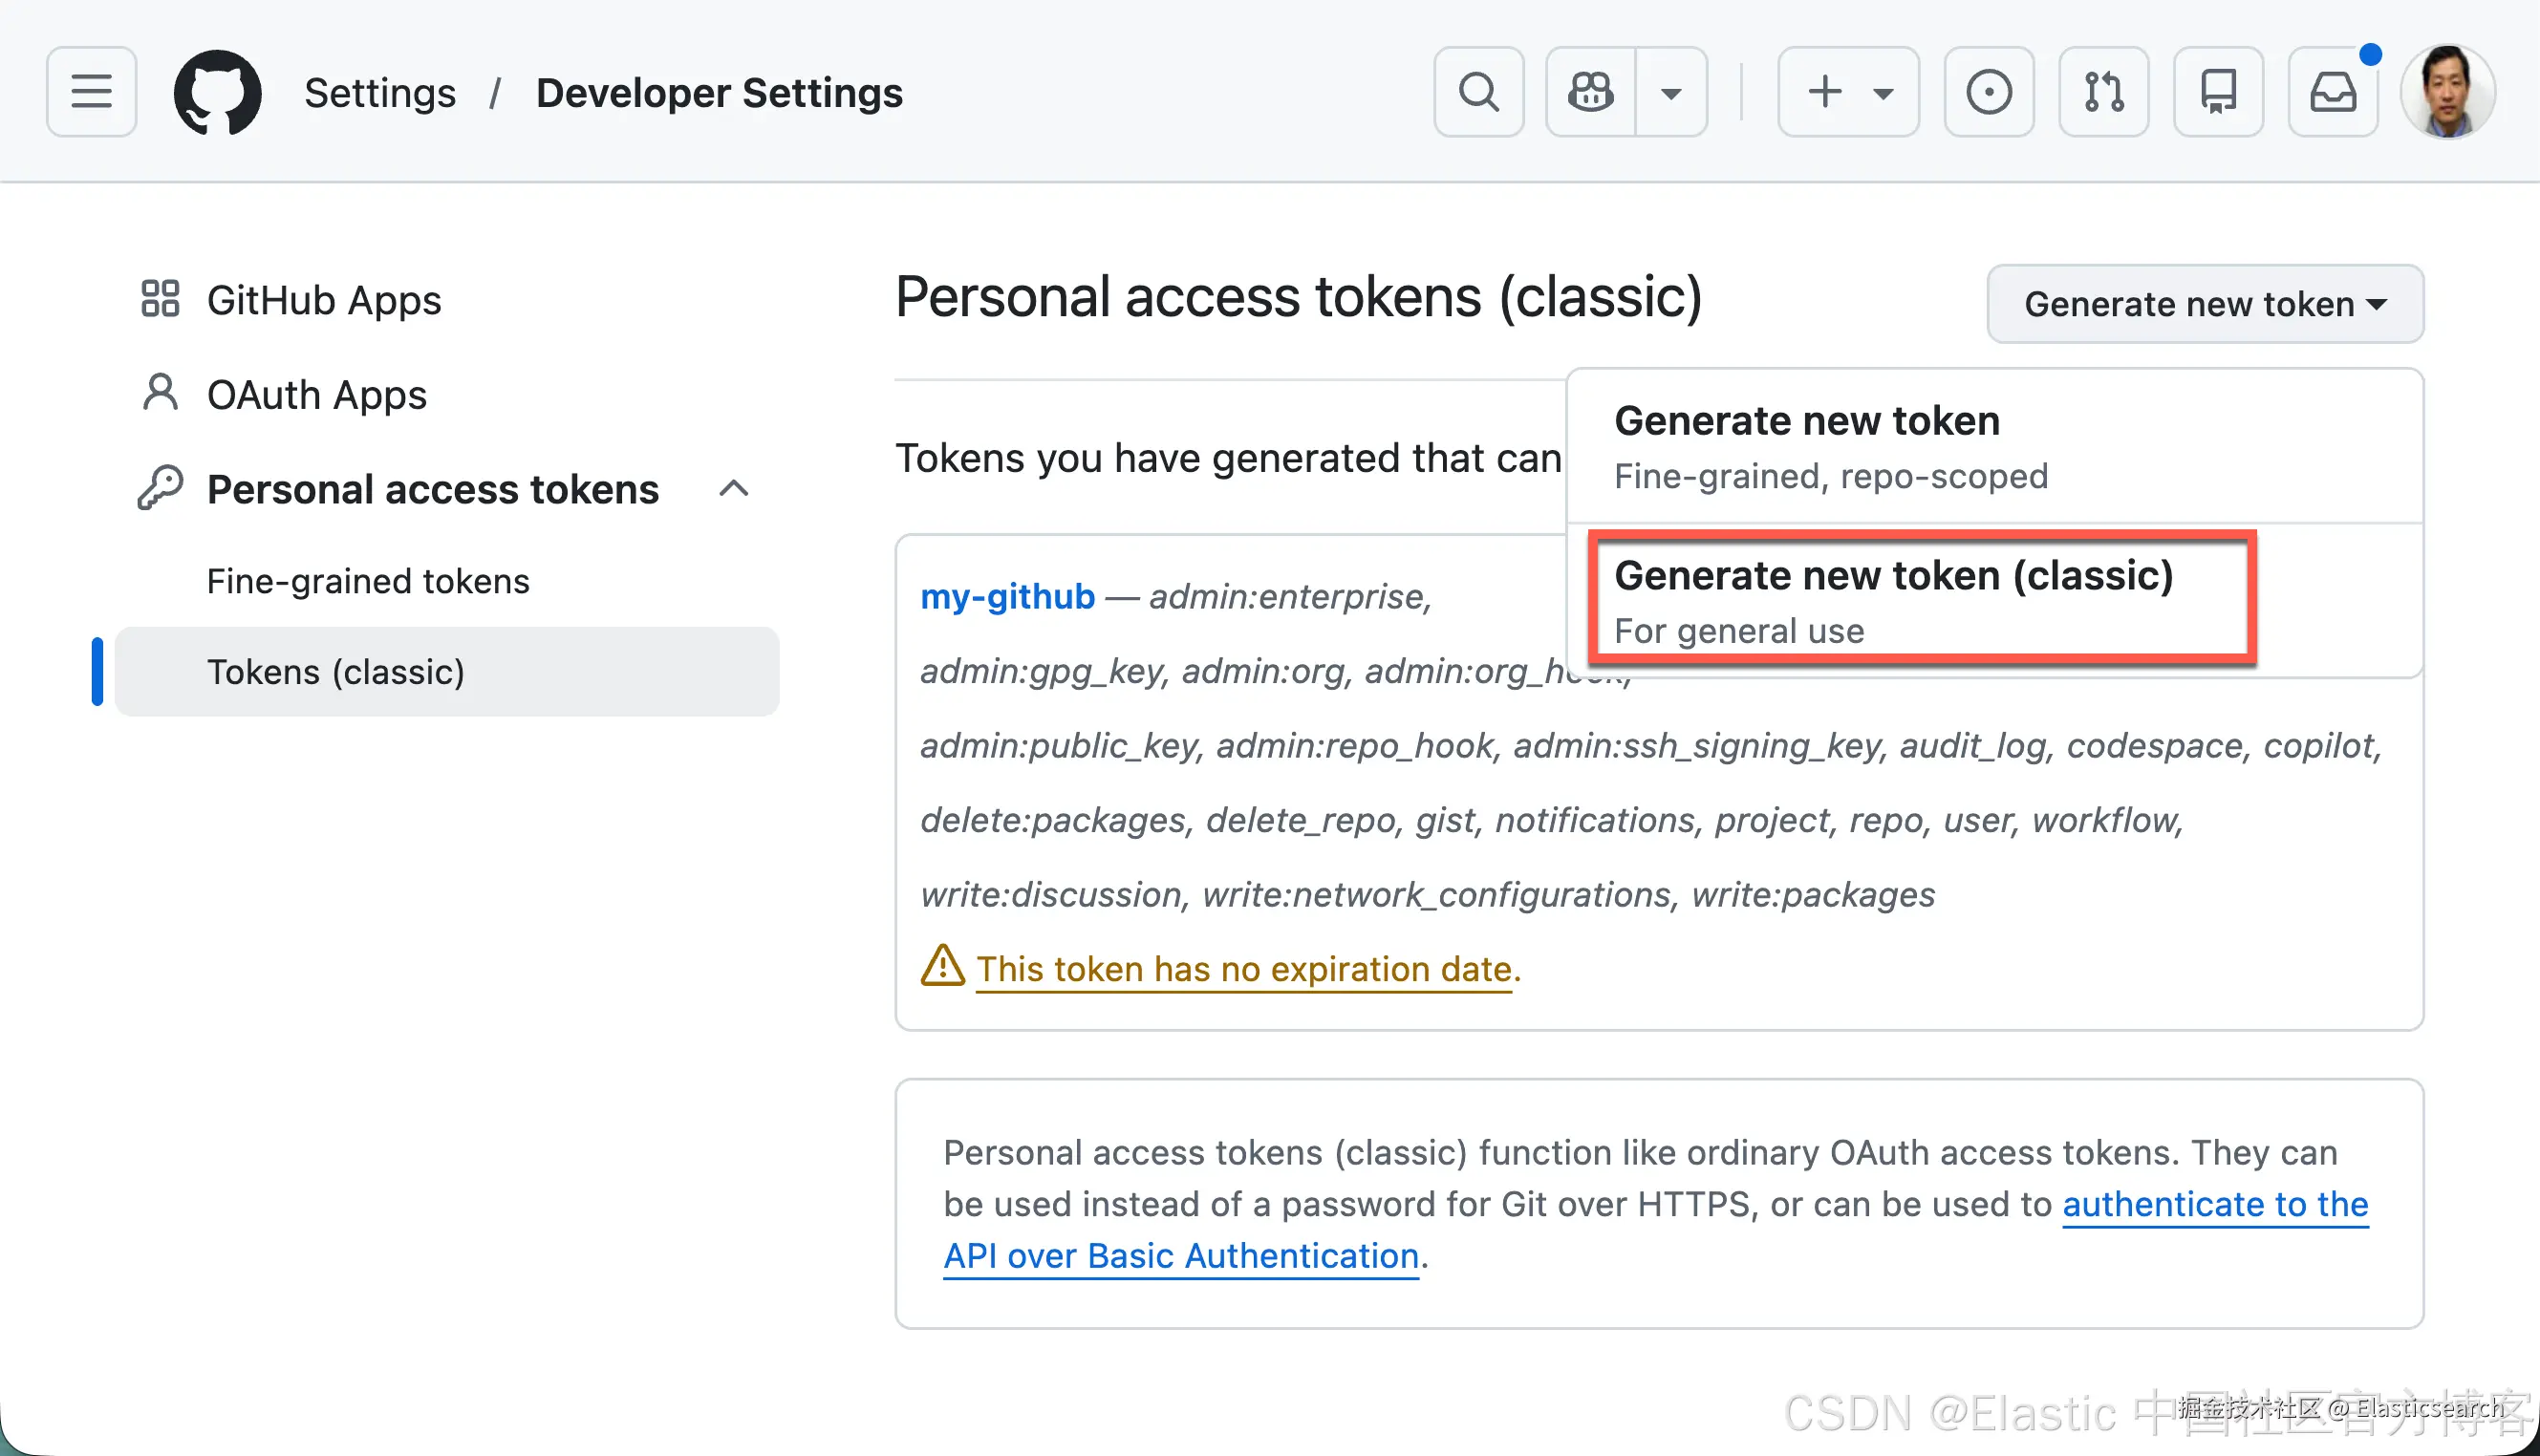
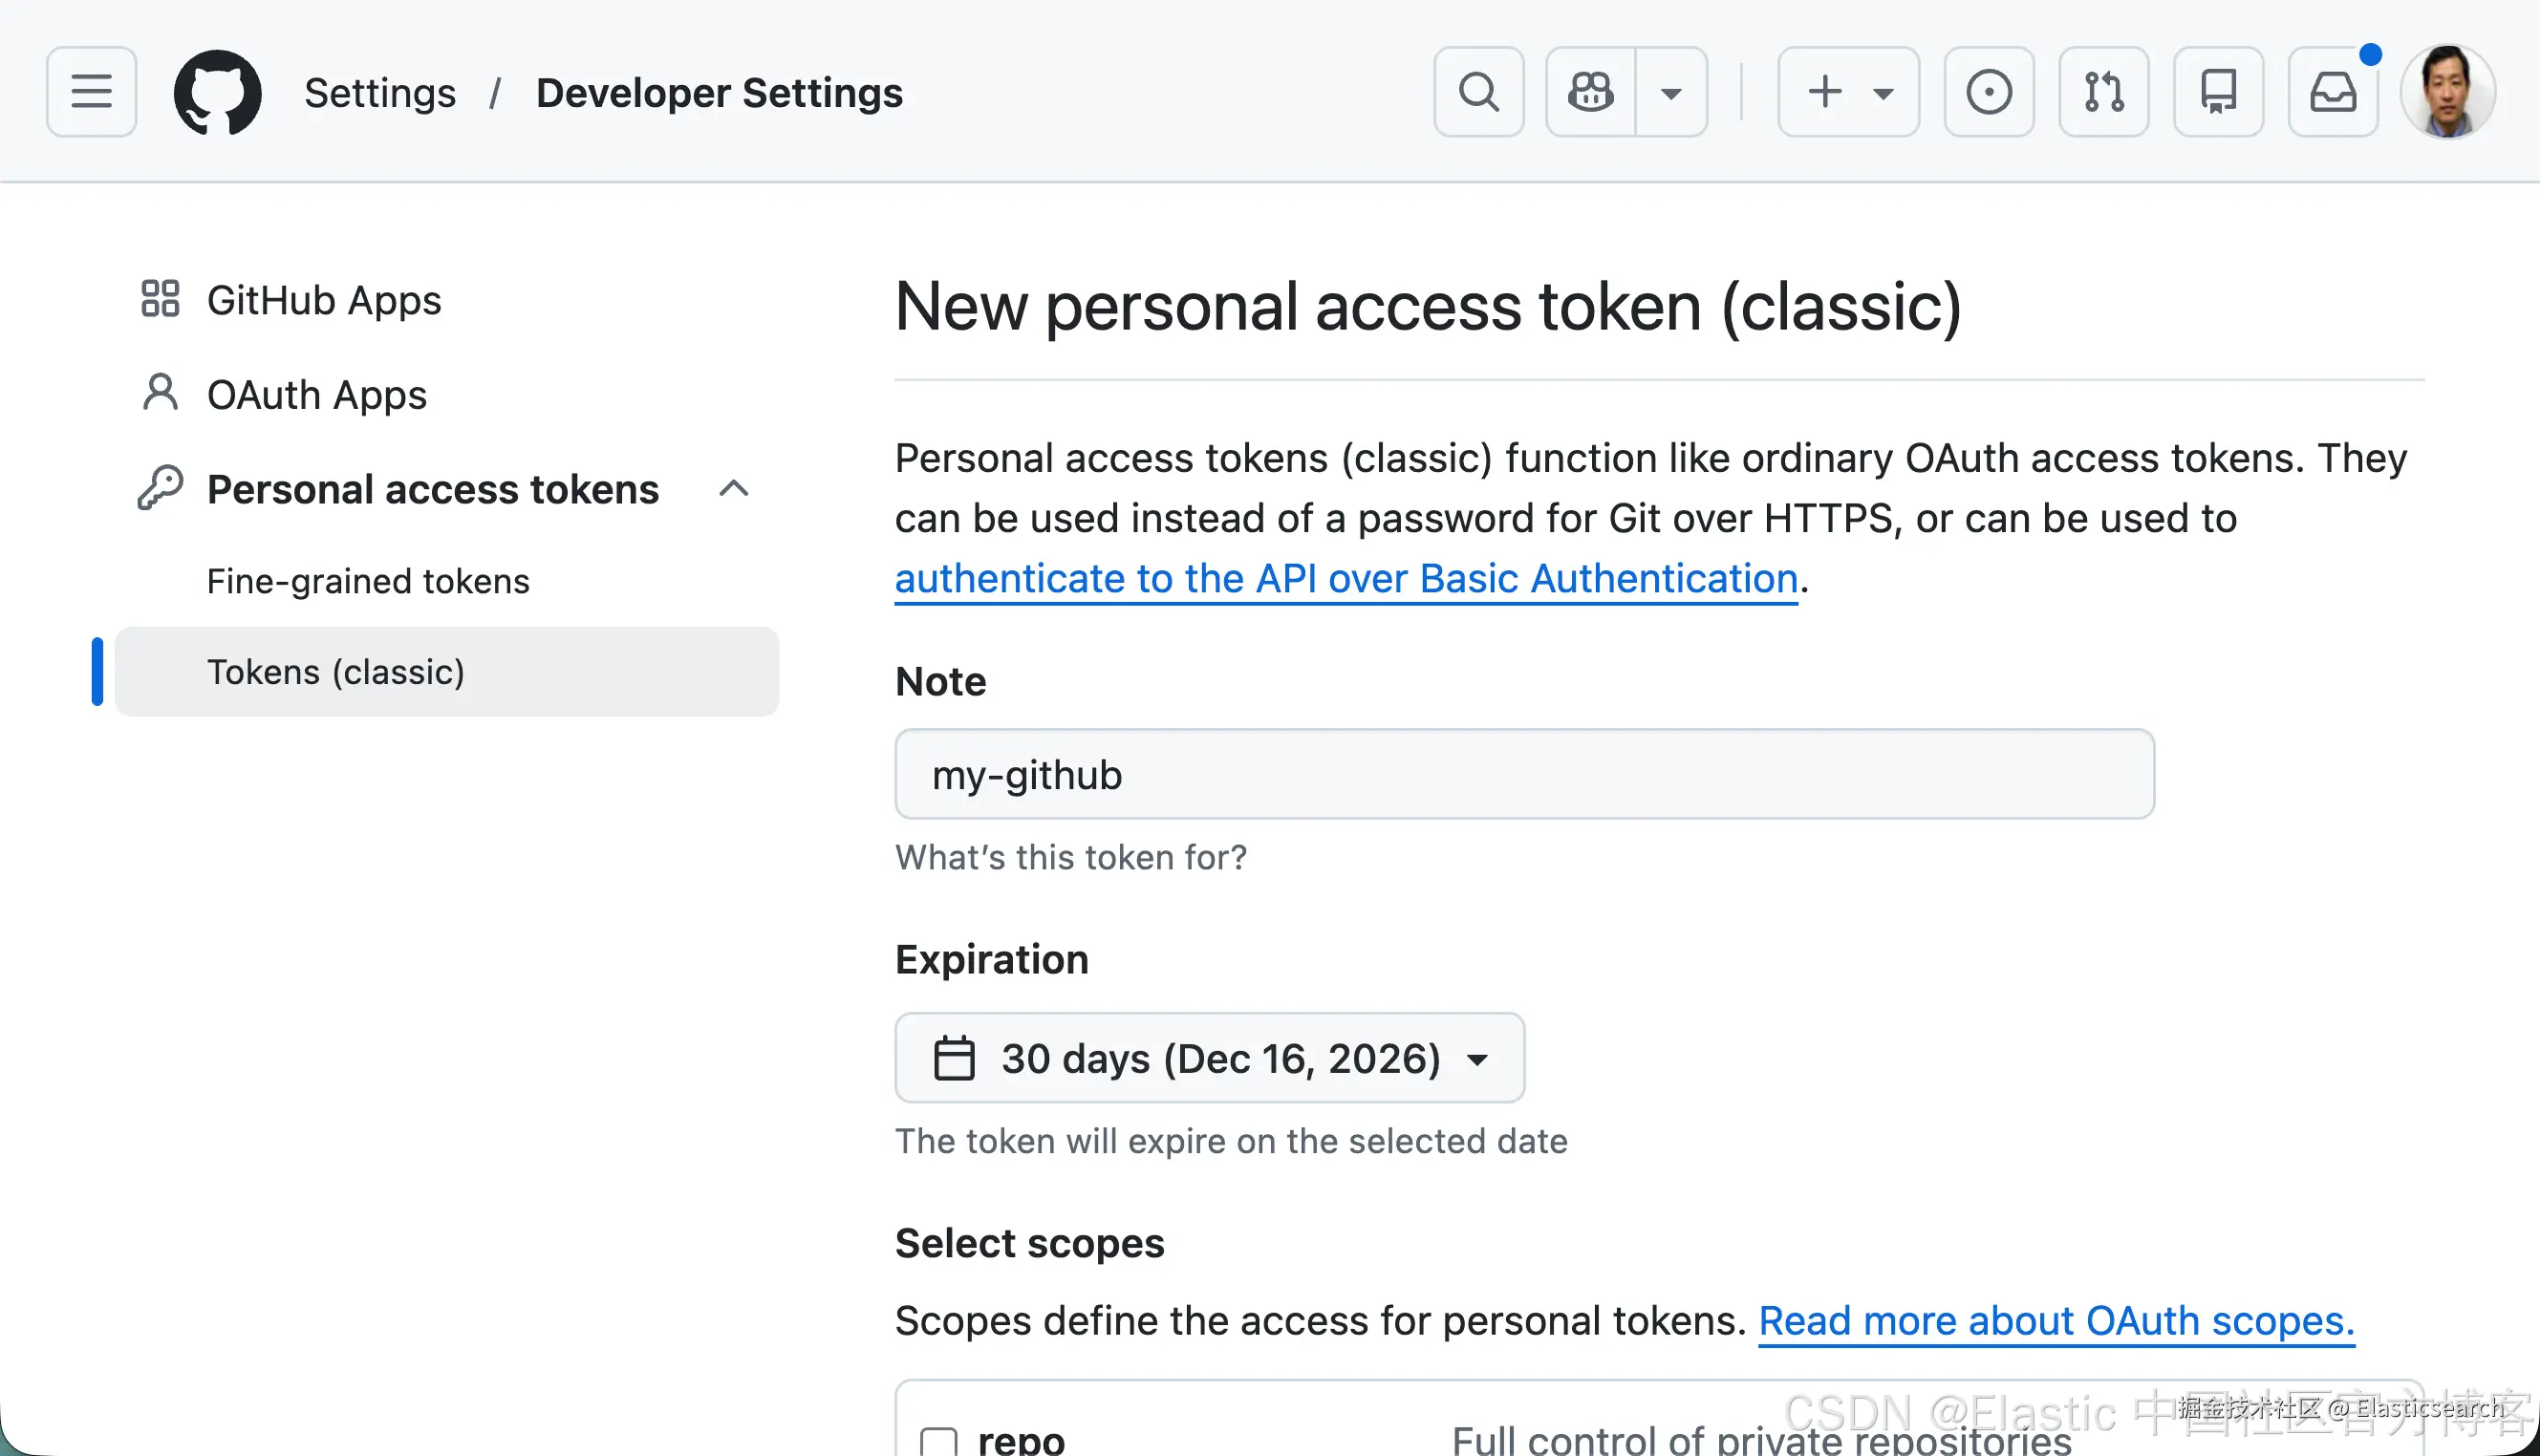
最终,我们得到一个属于我们自己的 API token 。
步骤二:创建一个 github 连接器
我们在 Kibana 中创建一个 github 连接器:
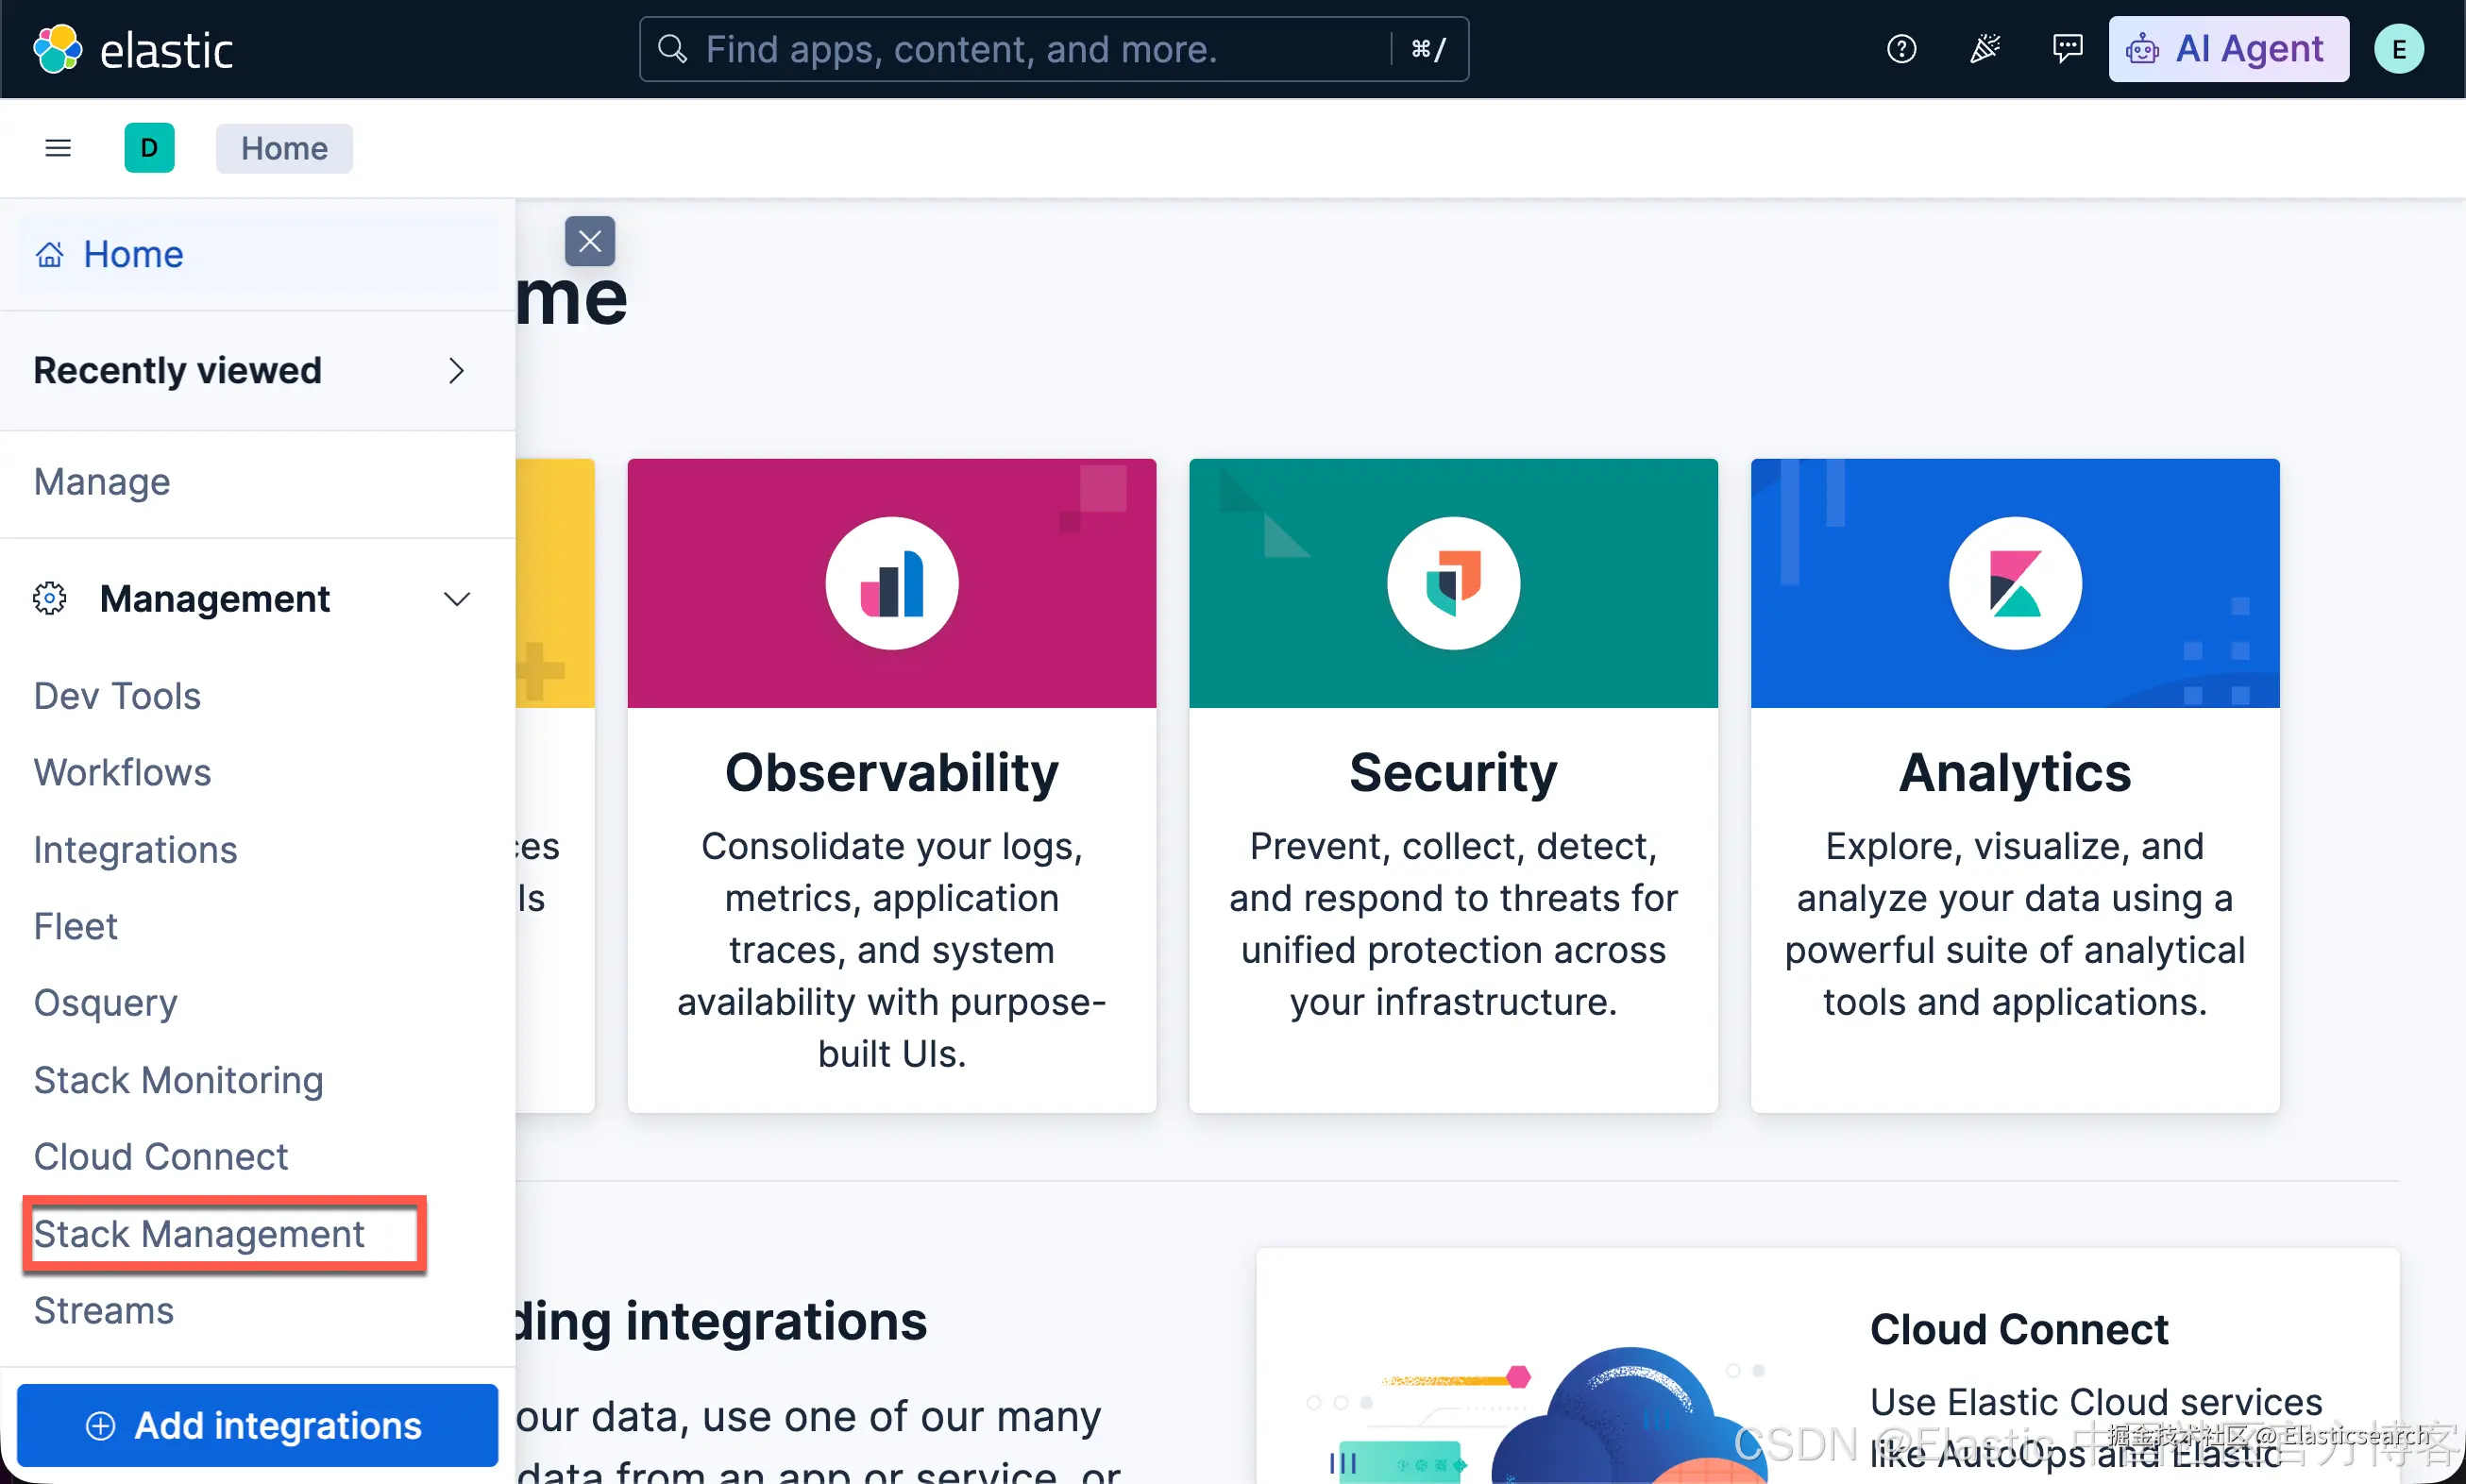
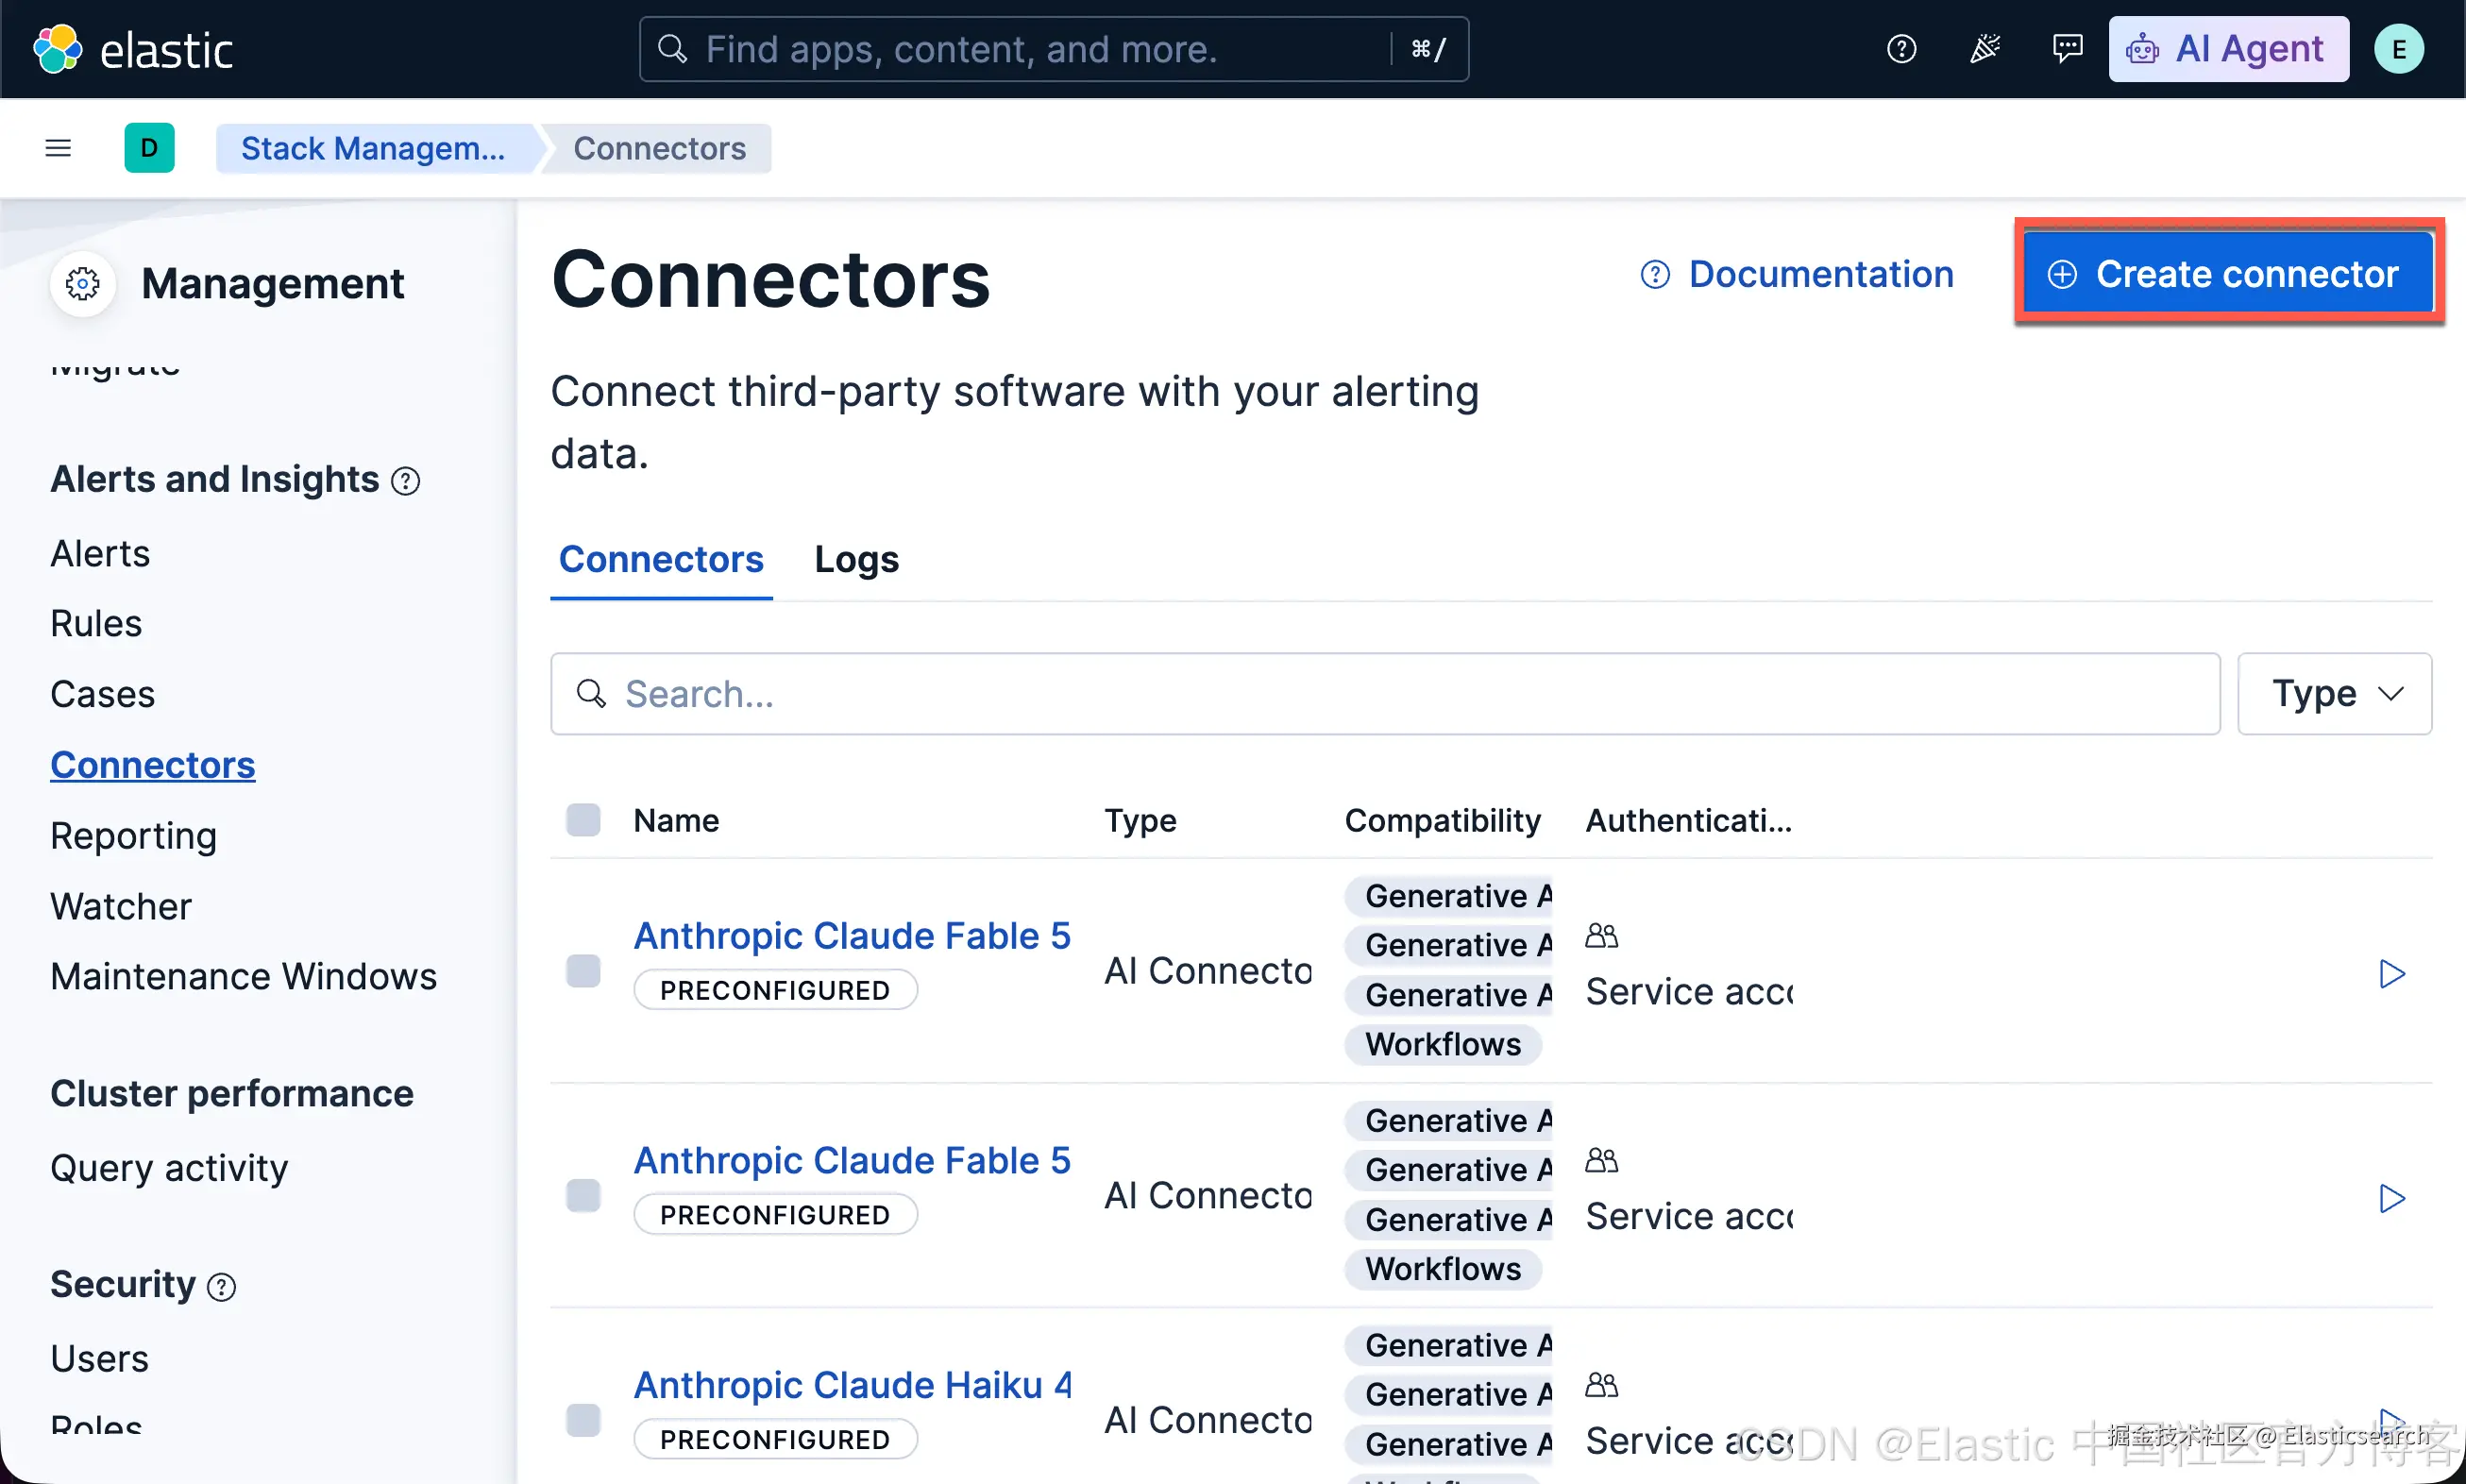
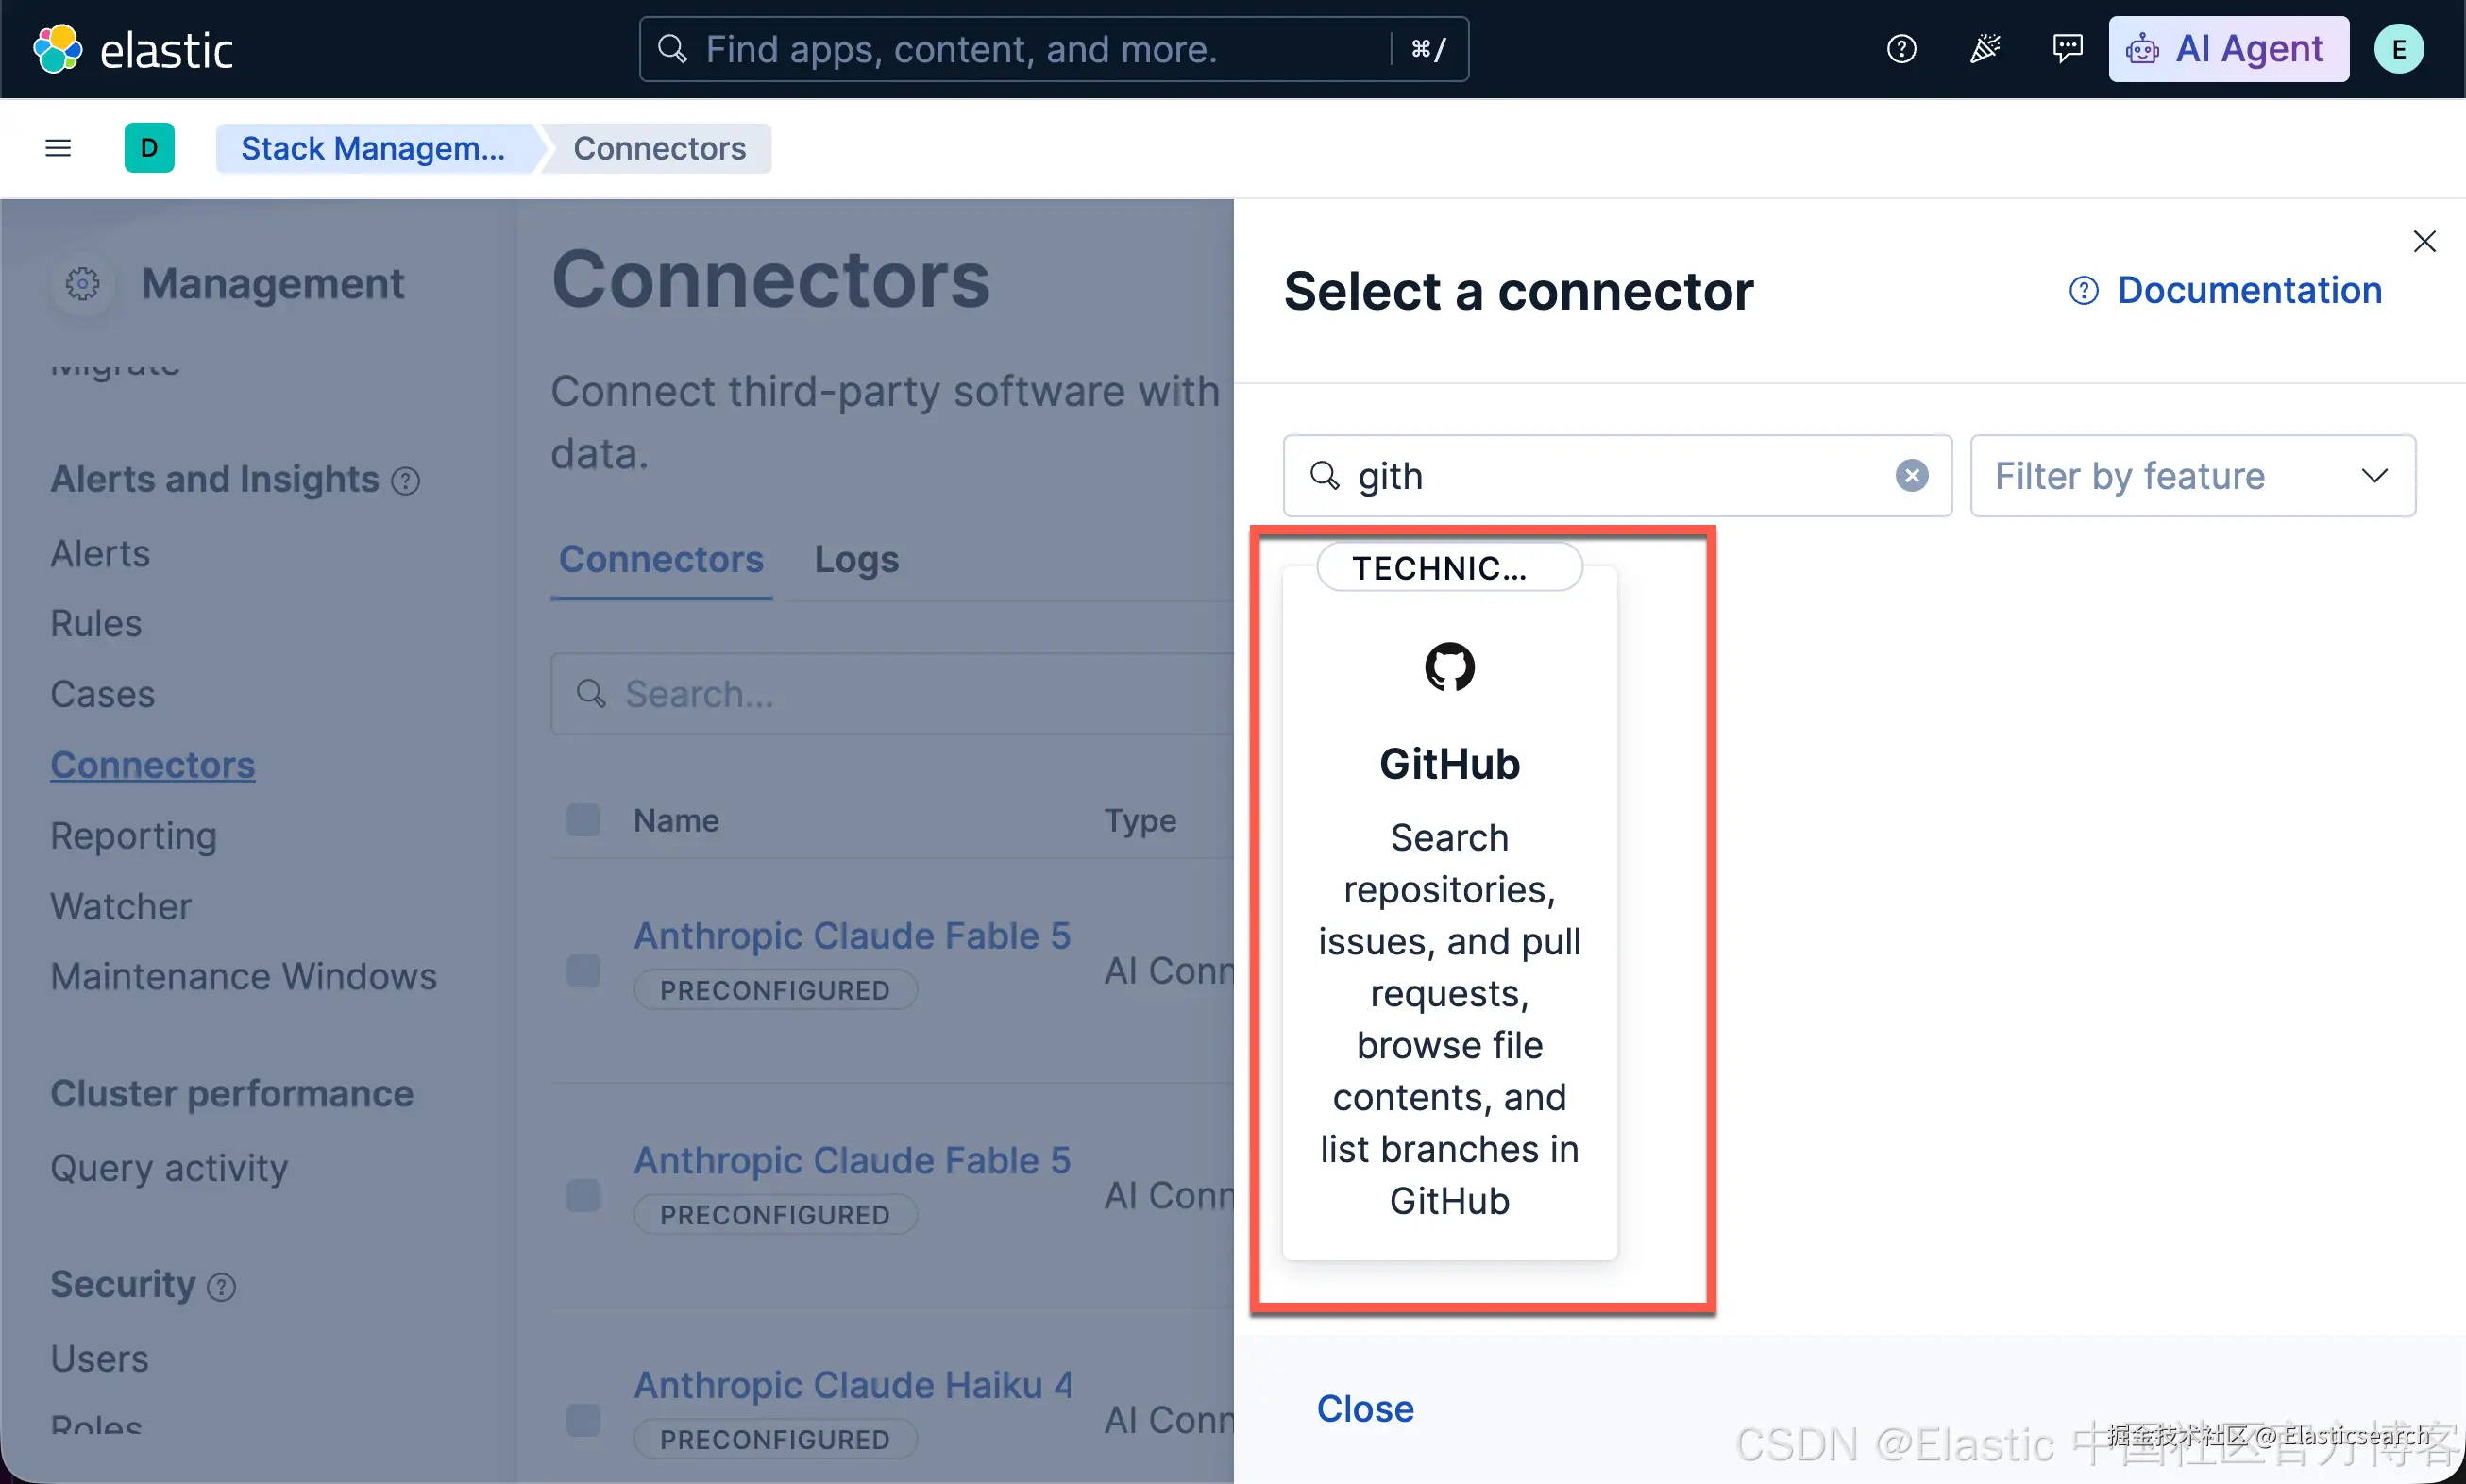
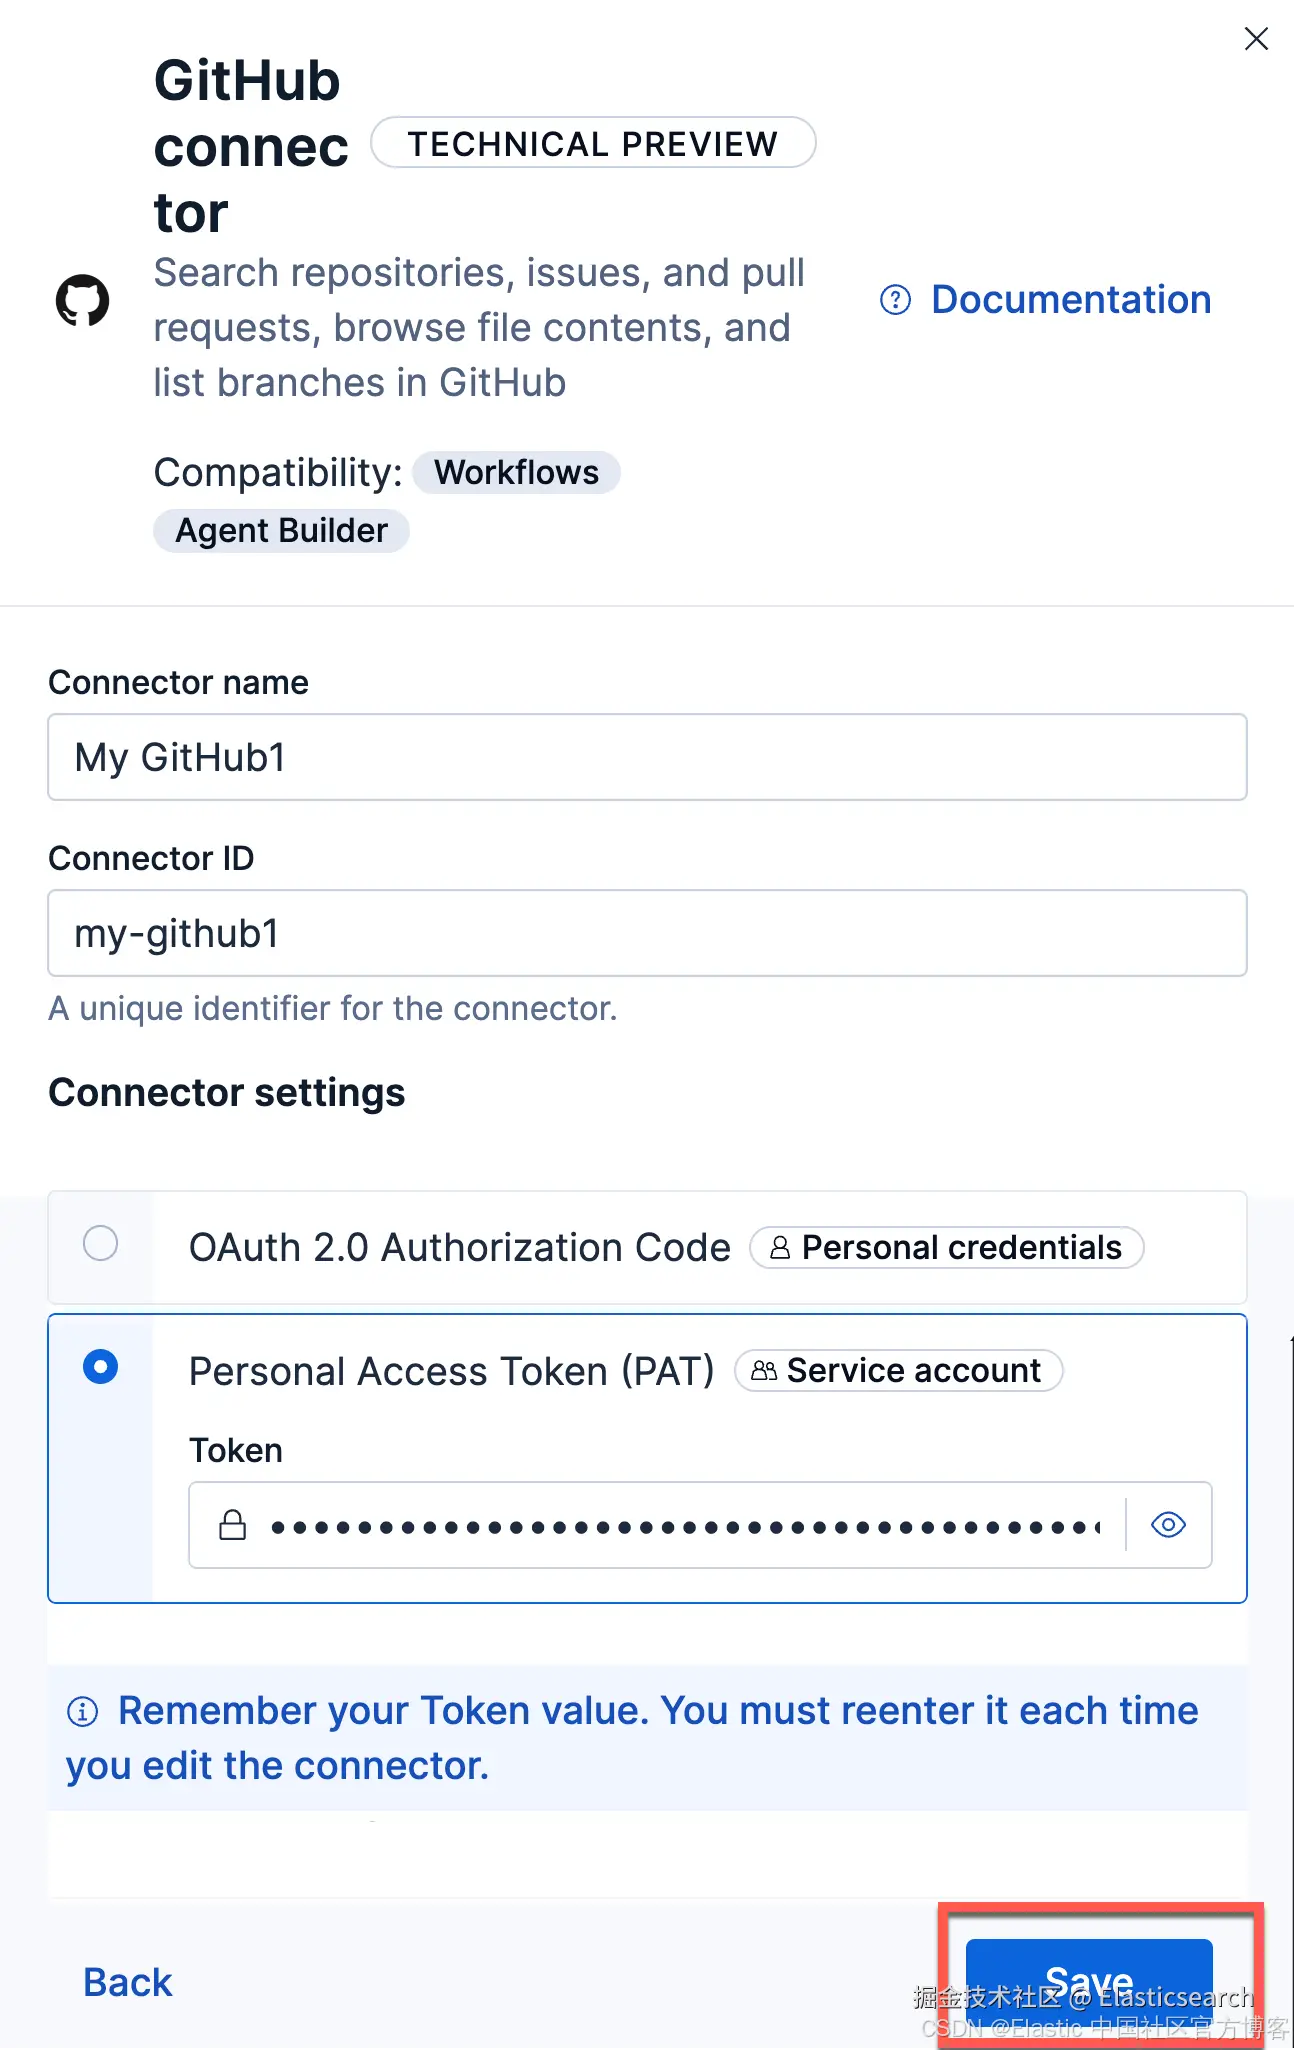
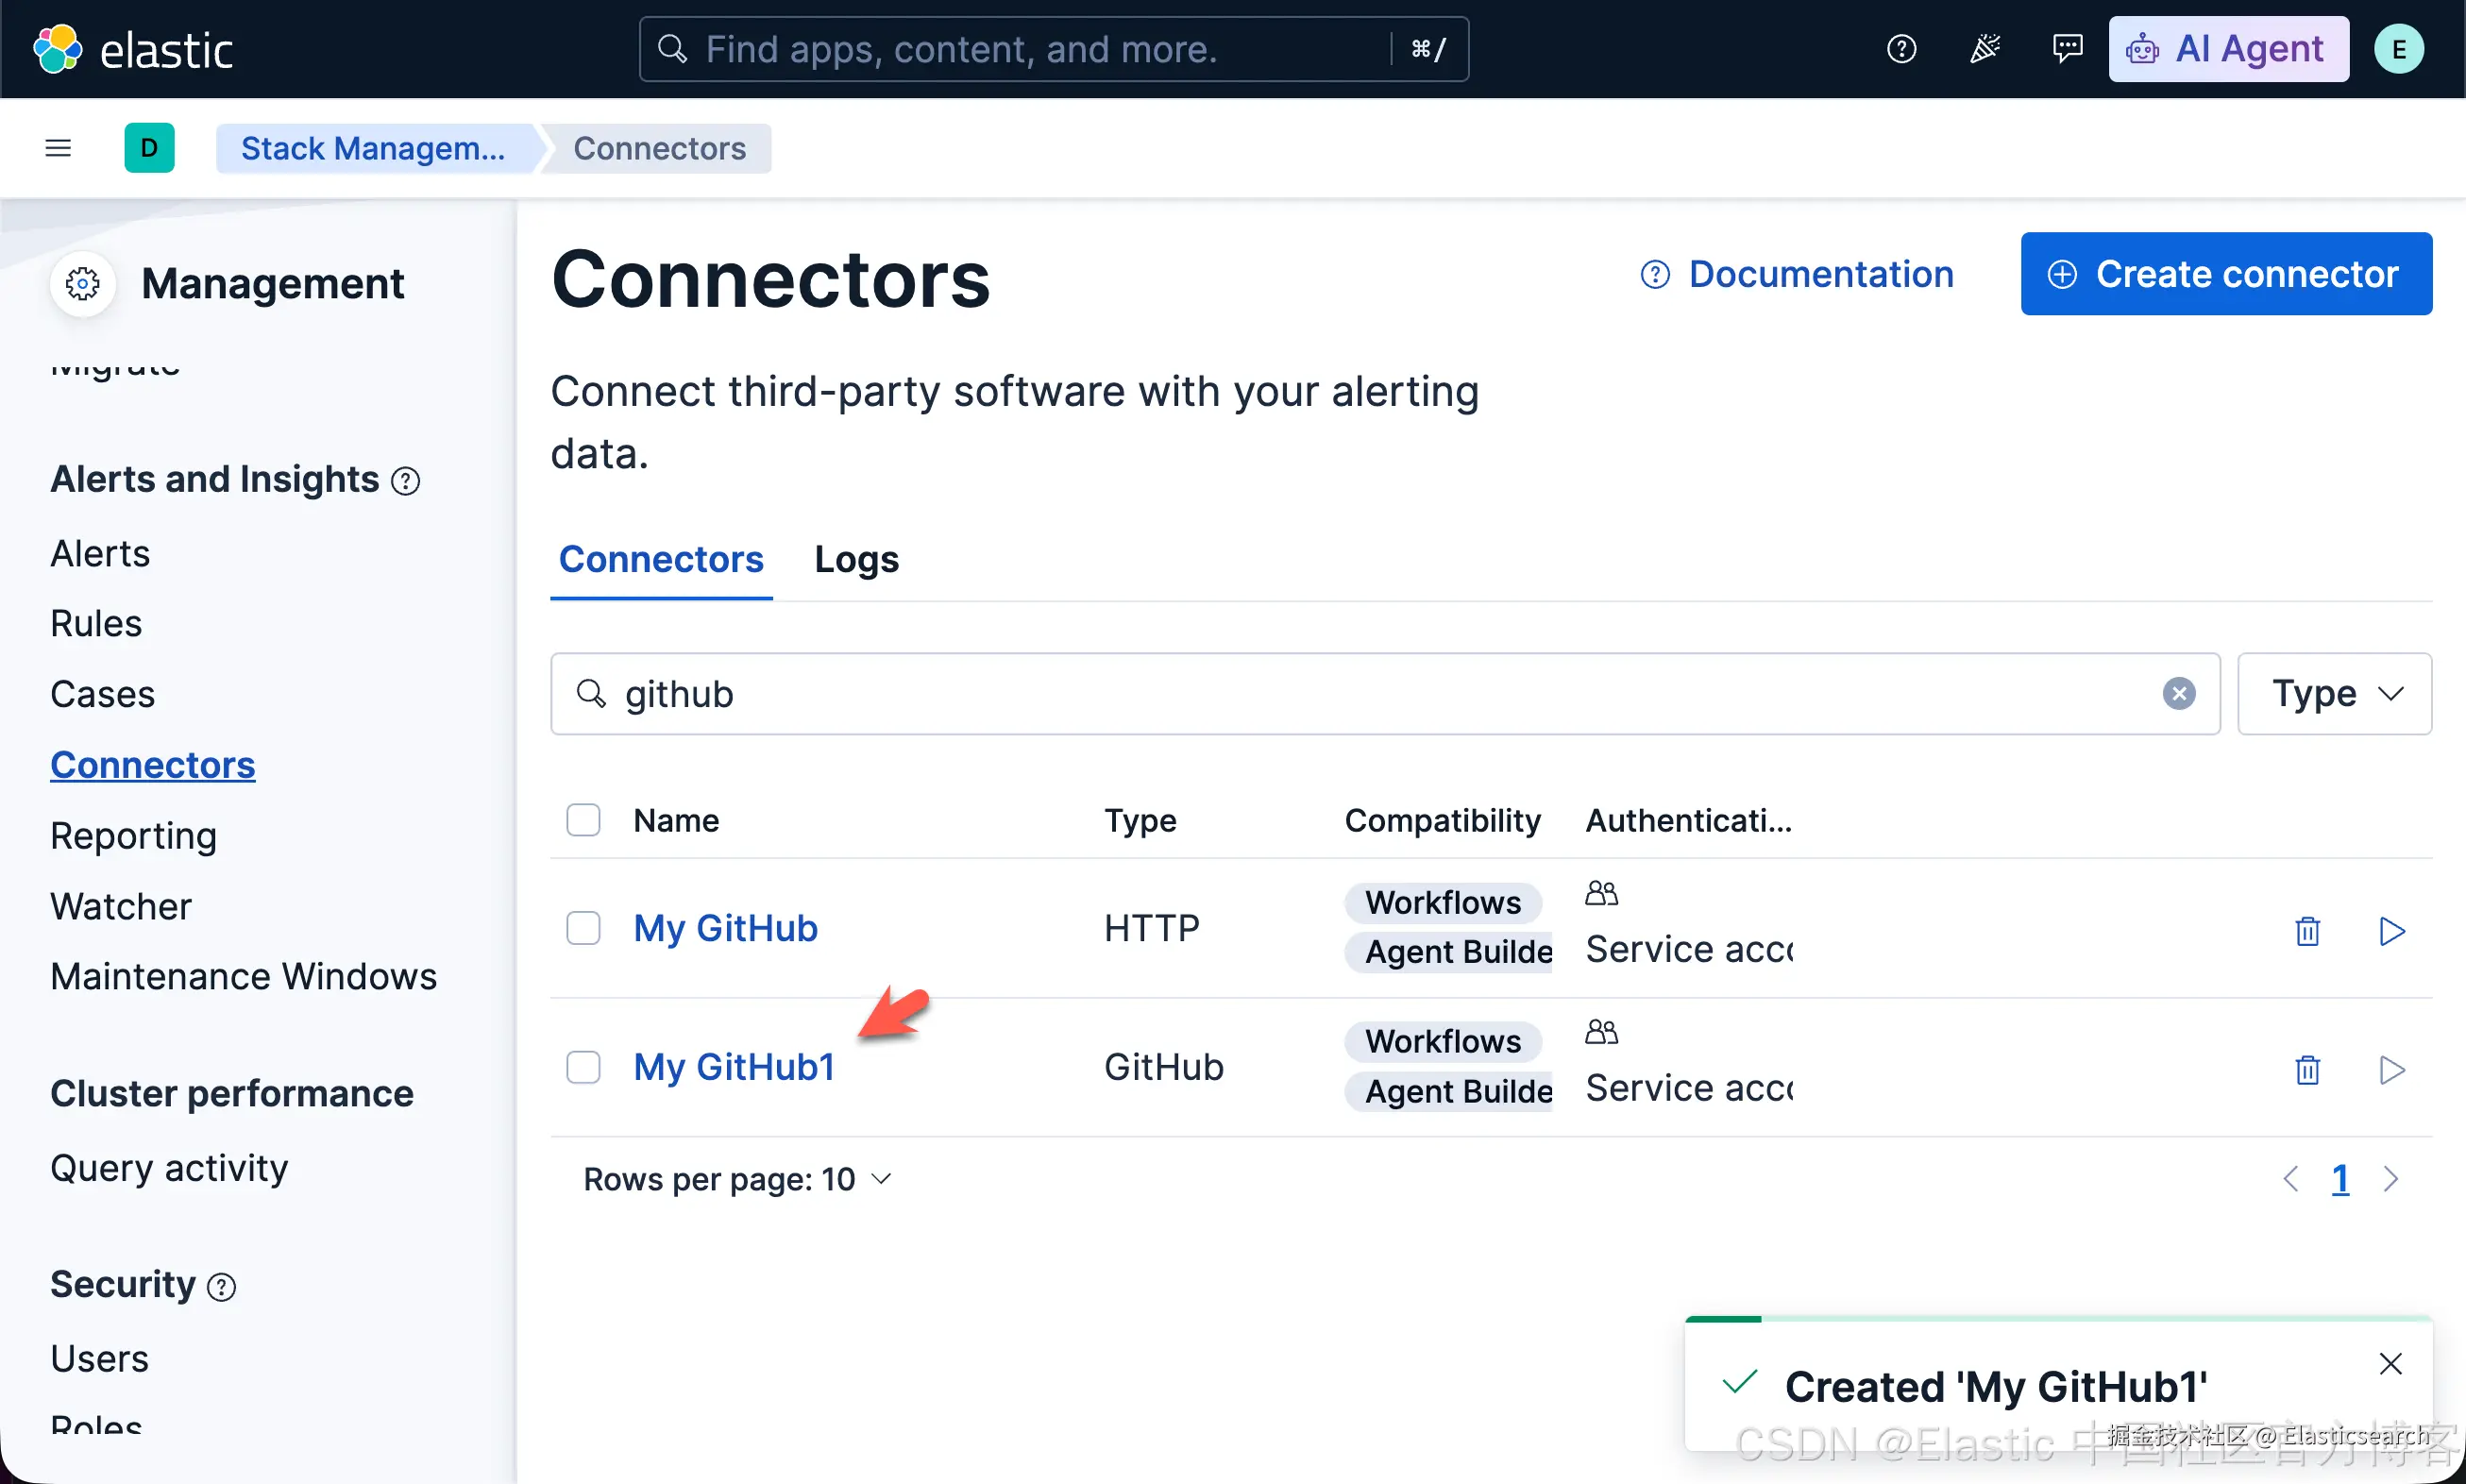
这样,我们就创建了一个叫做 my-github1 ID 的 github 连接器。
步骤三:使用上面的 github 连接器创建一个 workflow
我们使用上面创建的 github ID 创建一个如下的 workflow。它用来读取所有的 issues:
yaml
`
1. version: "1"
2. name: GitHub Issue Analyzer1
3. enabled: true
4. consts:
5. repo_owner: liu-xiao-guo
6. repo_name: elastic_multimodal_search
7. triggers:
8. - type: manual
9. steps:
10. - name: search_issue
11. type: github.searchIssues
12. with:
13. query: repo:liu-xiao-guo/elastic_multimodal_search is:issue
14. order: asc
15. sort: created
16. page: 1
17. perPage: 100
18. connector-id: my-github1
19. - name: analyze_issues
20. type: foreach
21. foreach: "{{ steps.search_issue.output.items | json }}"
22. steps:
23. - name: extract_issue
24. type: data.set
25. with:
26. title: "{{ foreach.item.title }}"
27. body: "{{ foreach.item.body }}"
28. html_url: "{{ foreach.item.html_url }}"
29. state: "{{ foreach.item.state }}"
30. number: "{{ foreach.item.number }}"
31. - name: get_issue_comments
32. type: github.callTool
33. with:
34. name: issue_read
35. arguments:
36. method: get_comments
37. owner: "{{ consts.repo_owner }}"
38. repo: "{{ consts.repo_name }}"
39. issue_number: "{{ foreach.item.number | plus: 0 }}"
40. connector-id: my-github1
41. - name: analyze_issue
42. type: ai.prompt
43. with:
44. prompt: |
45. Please analyze the following GitHub issue and suggest a concrete solution.
47. **Issue #{{ steps.extract_issue.output.number }}**: {{ steps.extract_issue.output.title }}
49. **State**: {{ steps.extract_issue.output.state }}
51. **Description**:
52. {{ steps.extract_issue.output.body }}
54. **Comments**:
55. {% for comment in steps.get_issue_comments.output %}- **{{ comment.user.login }}**: {{ comment.body }}
56. {% endfor %}
57. ---
59. Provide a detailed, step-by-step solution in Markdown that includes:
60. 1. A brief summary of the problem
61. 2. Root cause analysis (if determinable)
62. 3. A concrete, actionable solution with code examples where applicable
63. 4. Any relevant references or best practices
64. systemPrompt: |
65. You are an expert software engineer and open-source contributor.
66. Your task is to analyze GitHub issues and suggest concrete, actionable solutions.
67. Always respond in well-structured Markdown.
68. - name: set_output
69. type: data.set
70. with:
71. issue_number: "{{ steps.extract_issue.output.number }}"
72. issue_title: "{{ steps.extract_issue.output.title }}"
73. issue_url: "{{ steps.extract_issue.output.html_url }}"
74. issue_state: "{{ steps.extract_issue.output.state }}"
75. suggested_solution: "{{ steps.analyze_issue.output.content }}"
`AI代码解释收起代码块上面创建的 GitHub Issue Analyzer1 workflow。
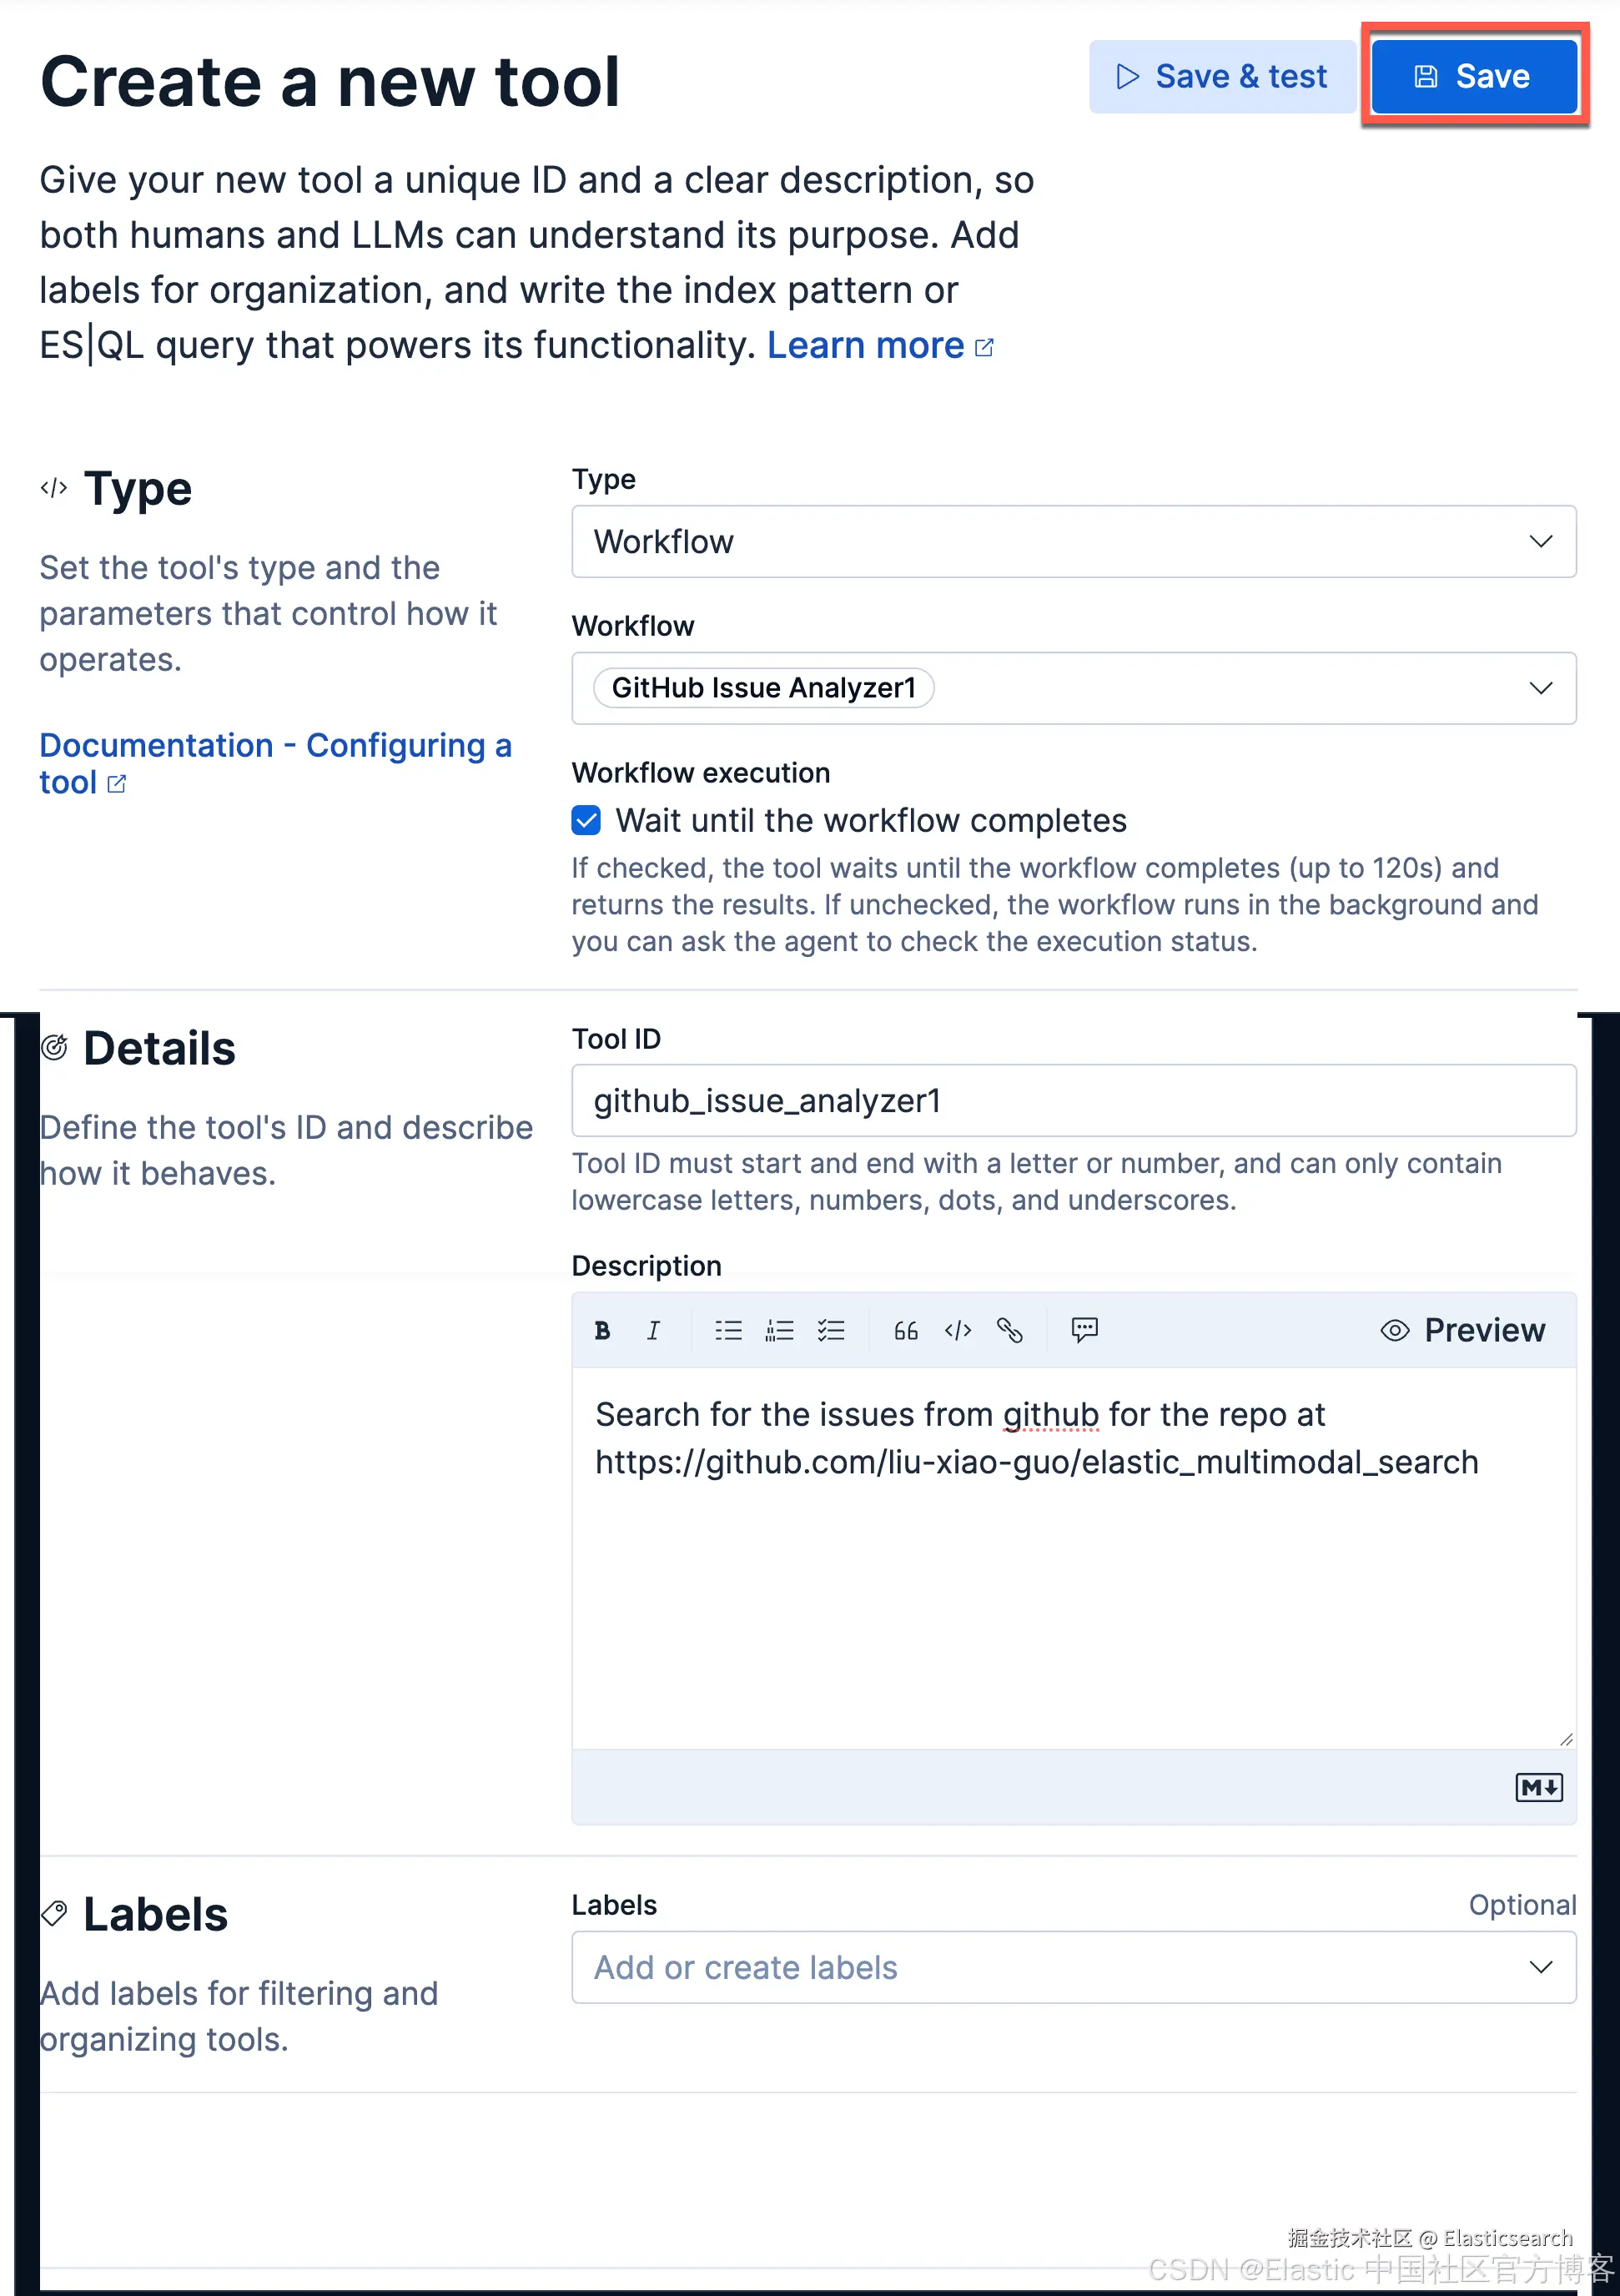
步骤三:创建一个 github tool
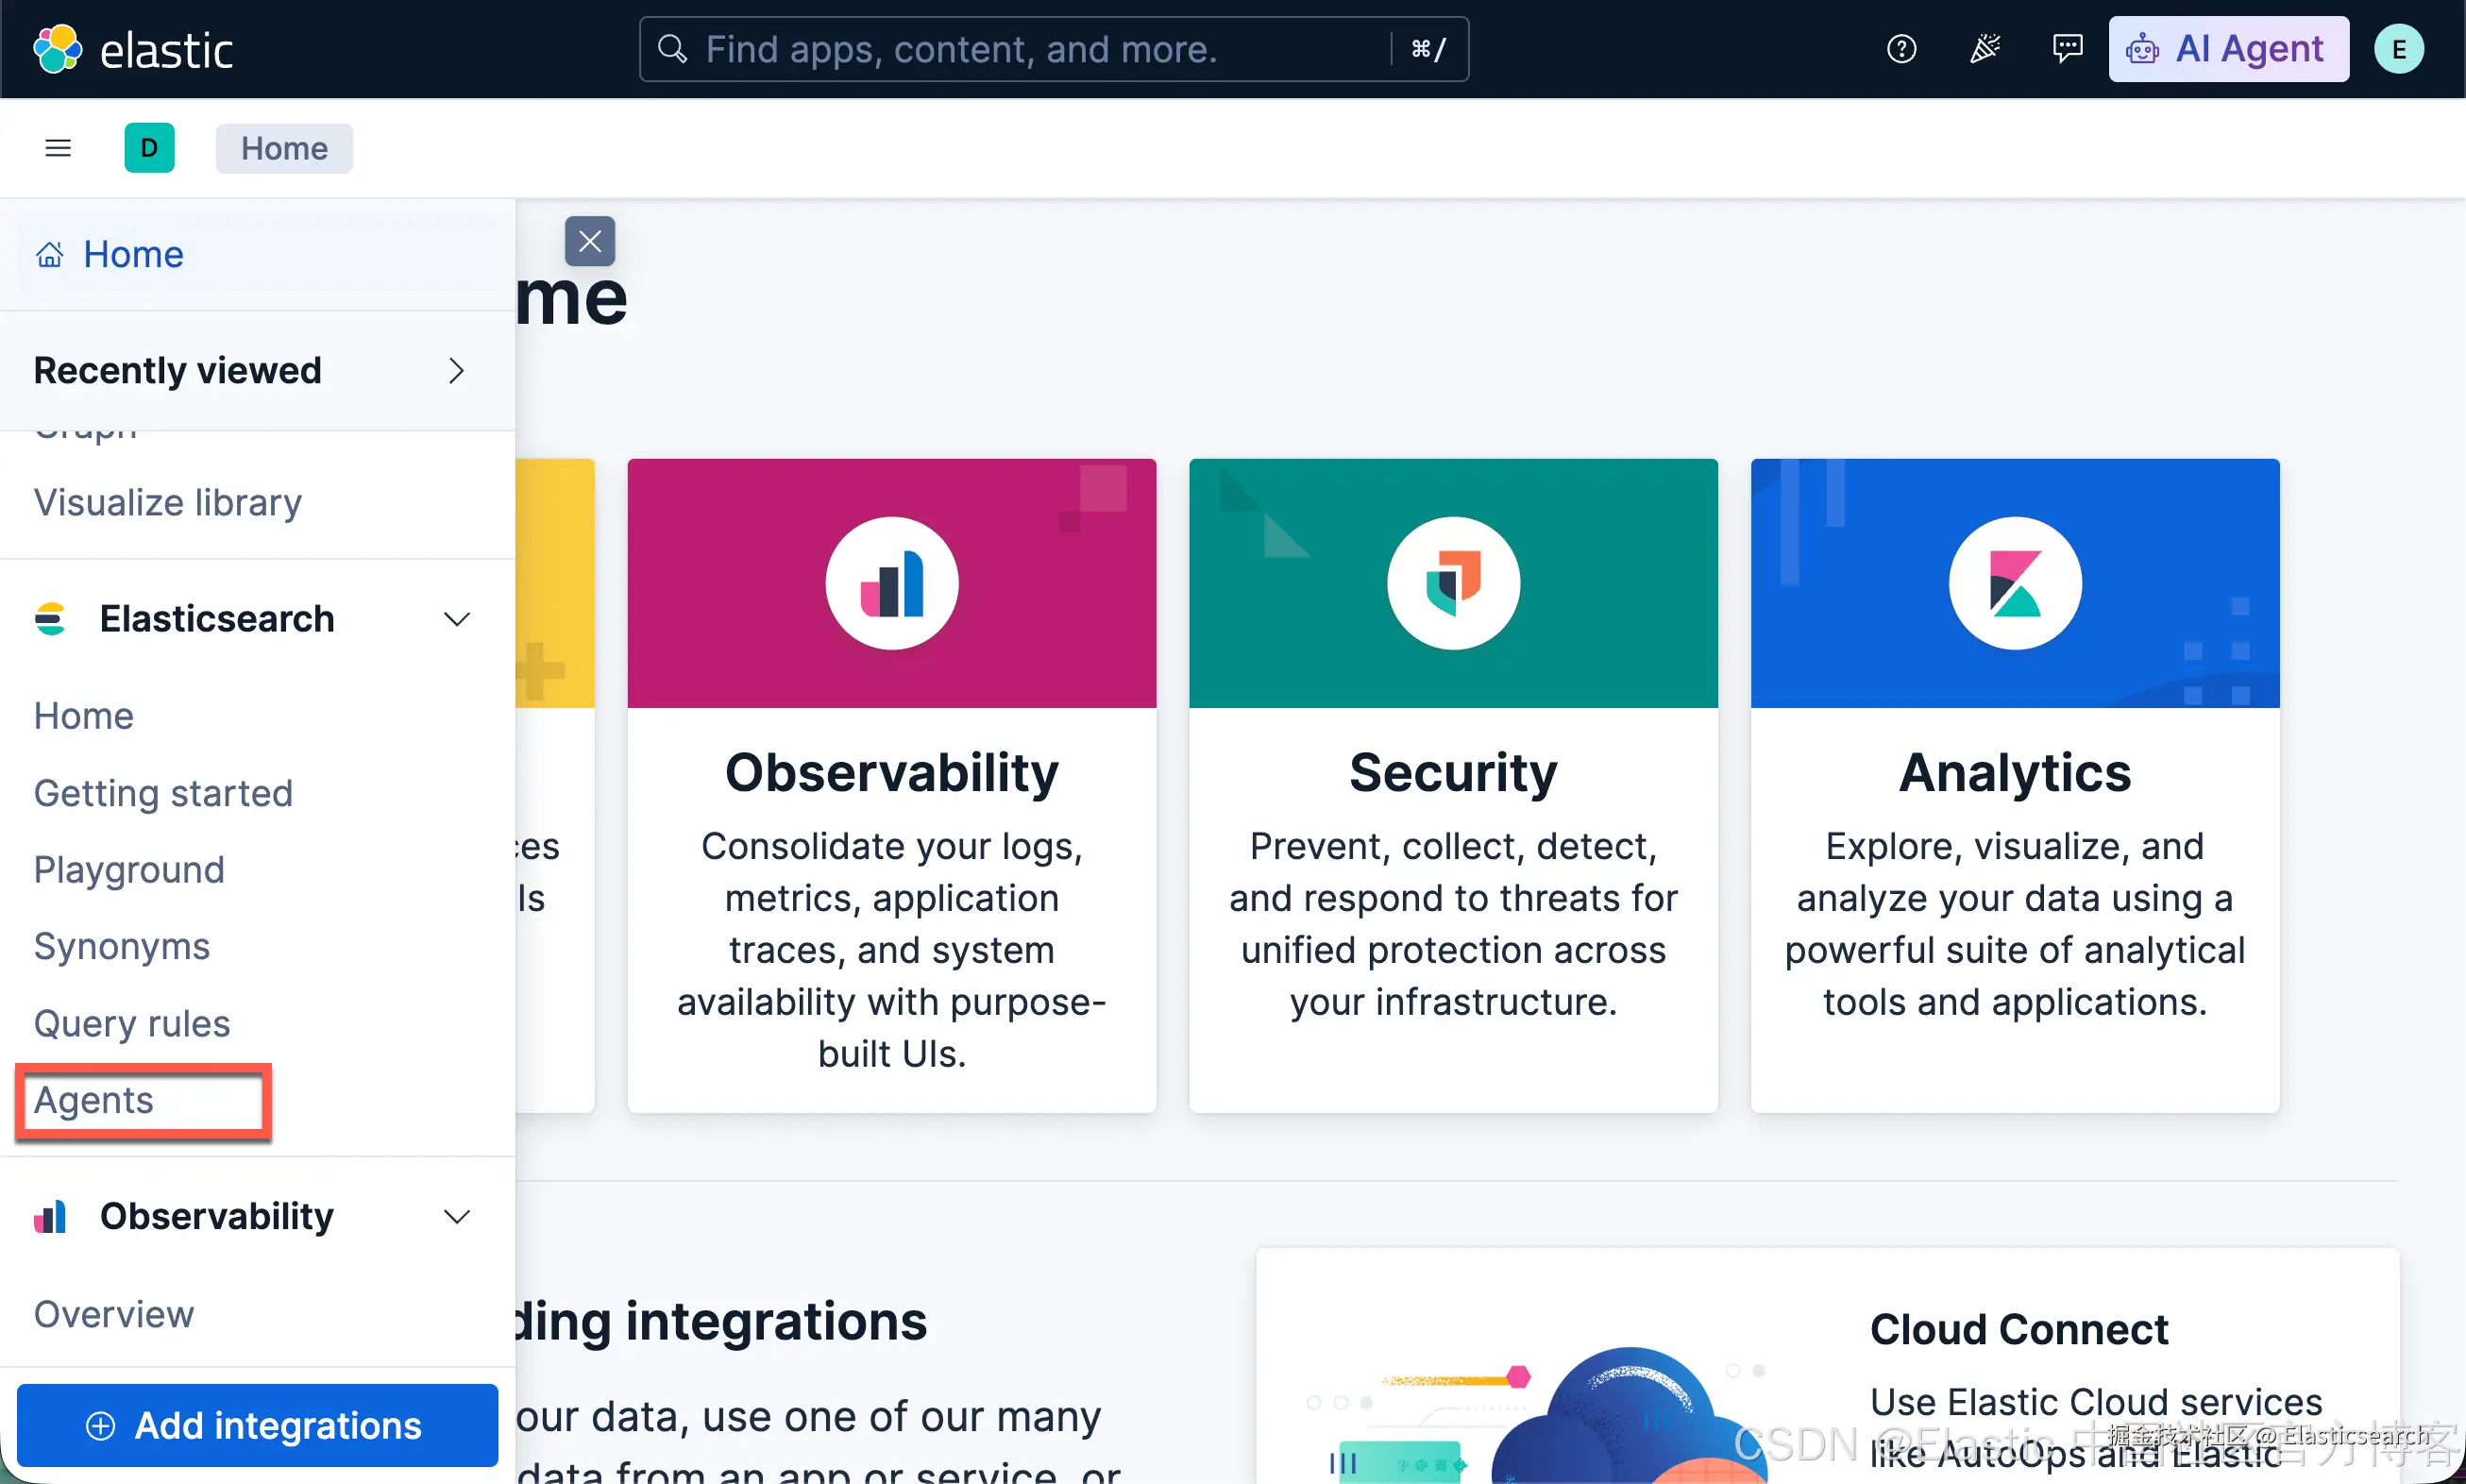
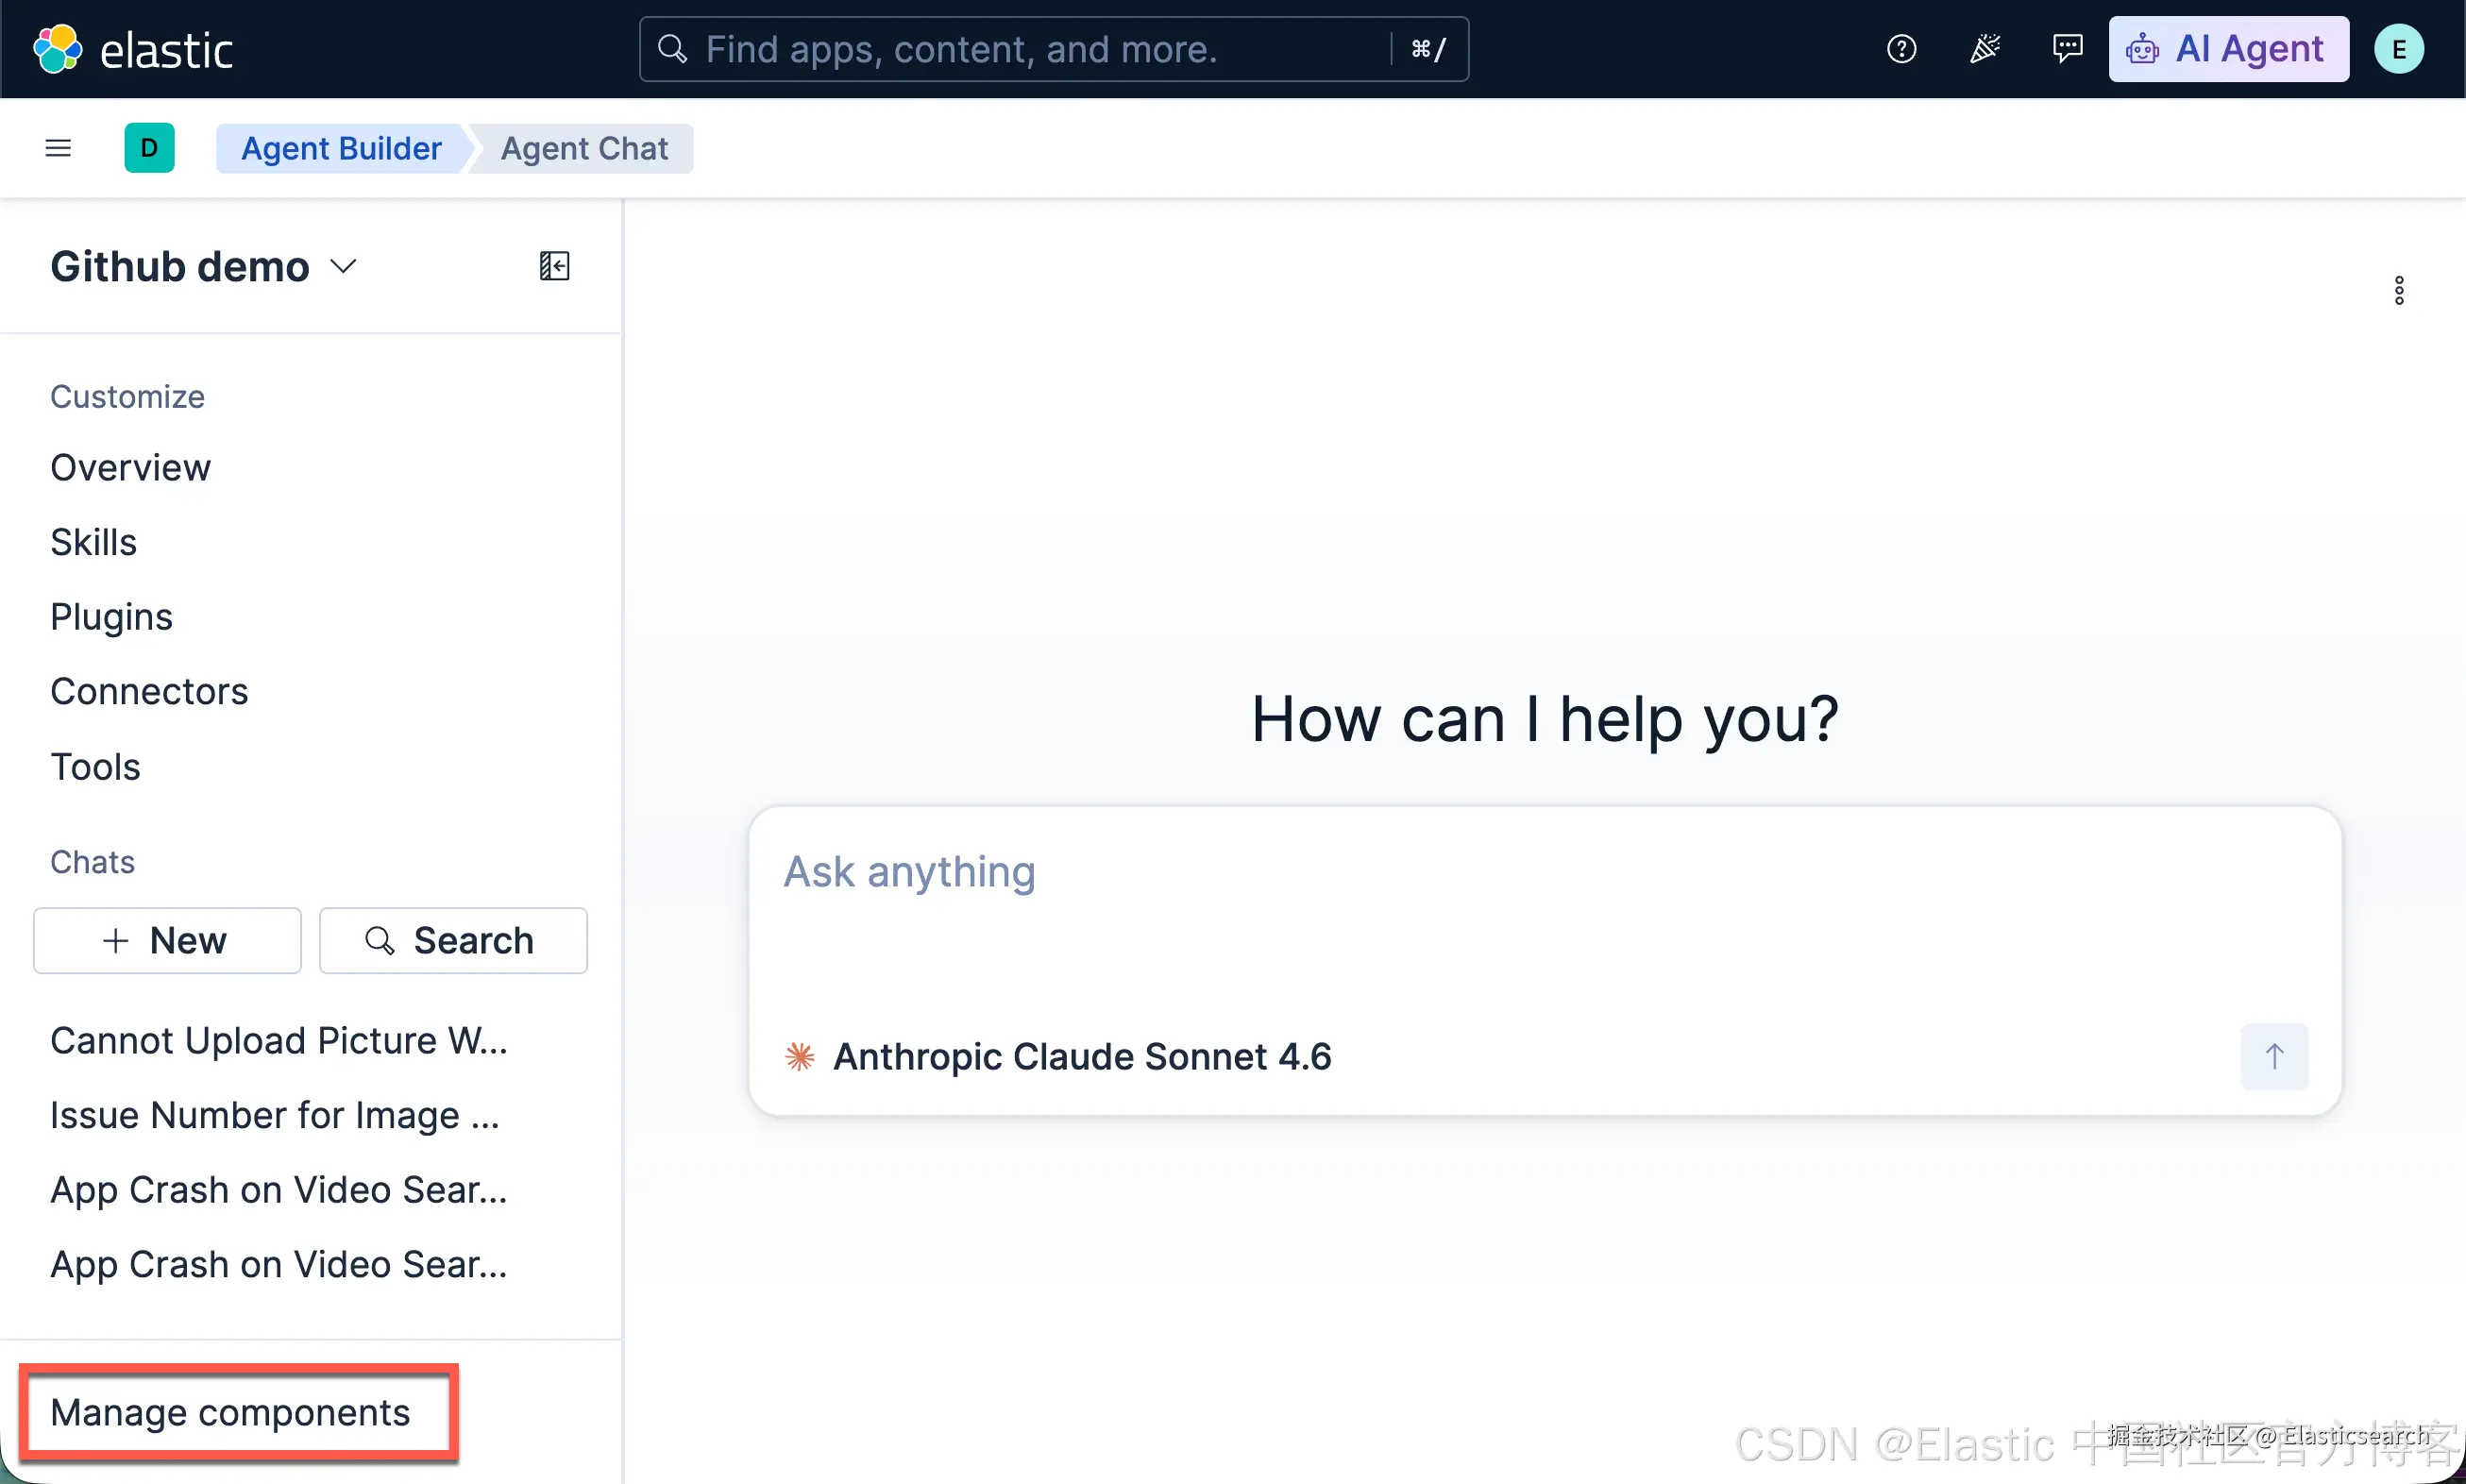
我们使用上面创建的 workflow 来创建一个叫做 github_issue_analyzer1 的 tool。这个 tool 将会被在下面的 agent 里所使用:
步骤四:创建一个 skill
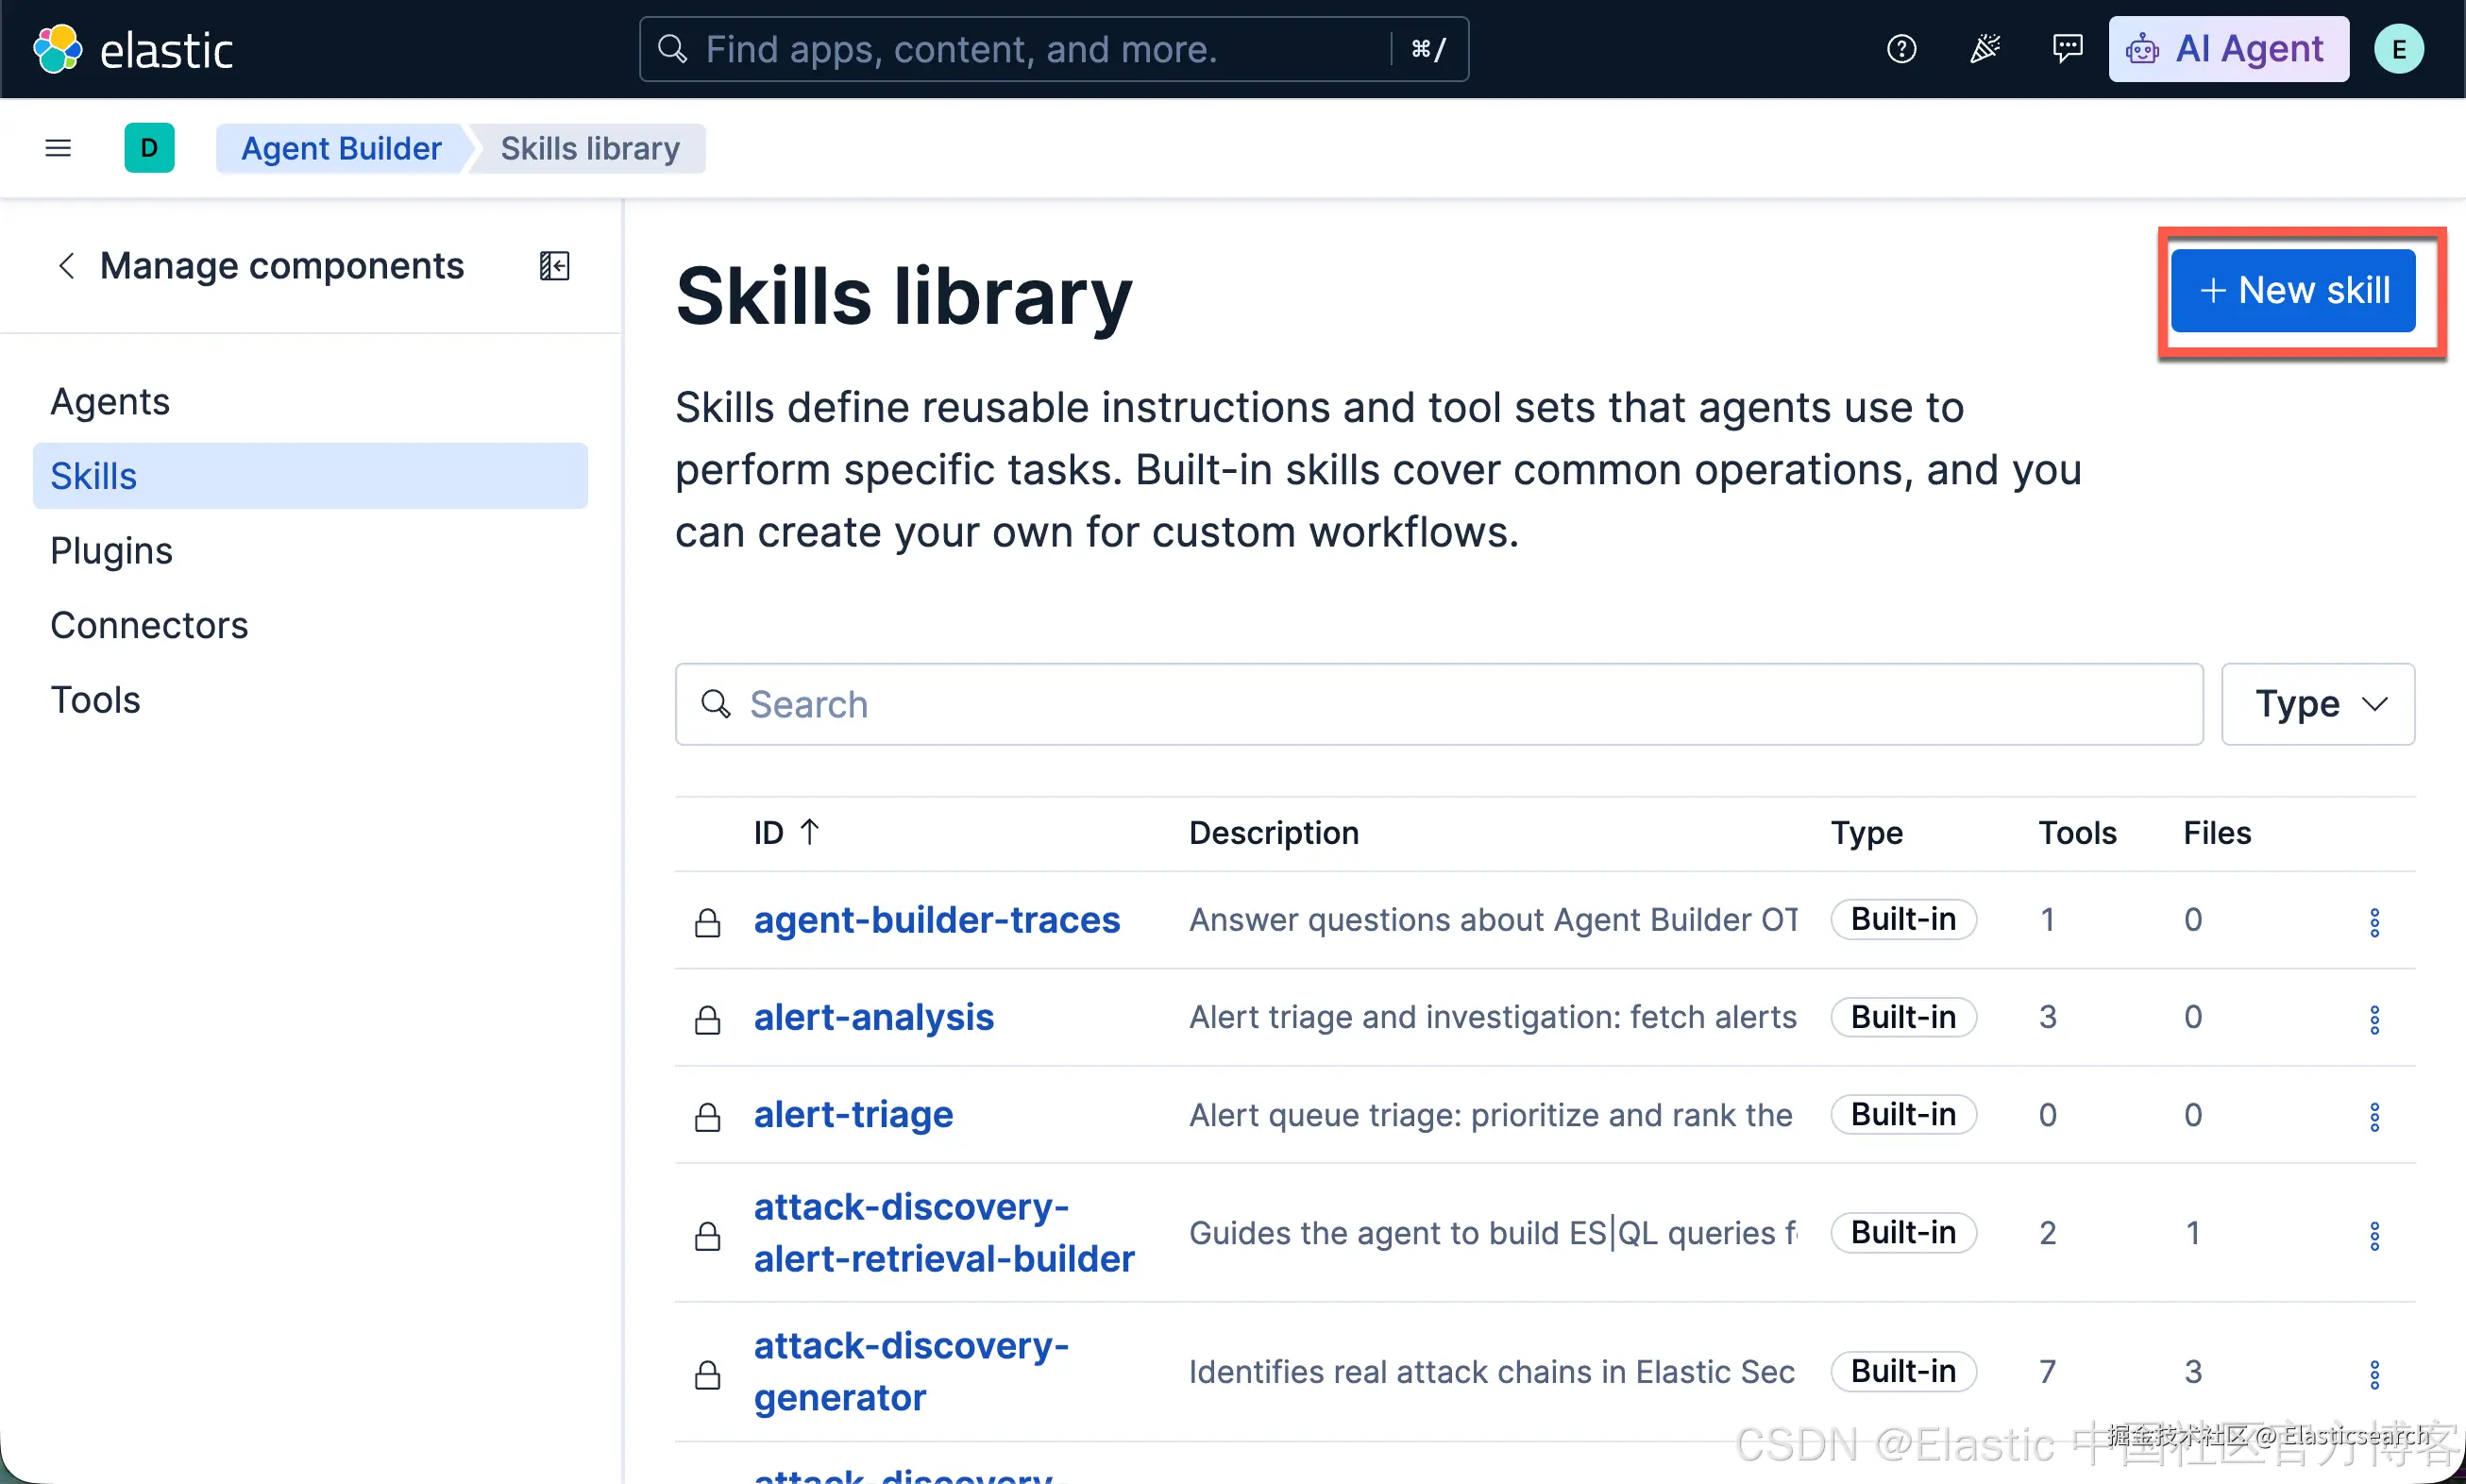
- Description:
sql
`Analyze all GitHub issues (open and closed) from the liu-xiao-guo/elastic_multimodal_search repository. Fetches issue comments and generates AI-suggested solutions for each issue. Use when the user asks to analyze, review, or get solutions for repository issues.`AI代码解释- Instructions
markdown
``
1. ## When to Use
3. Use this skill when the user:
4. - Asks to analyze, investigate, or get AI-suggested solutions for GitHub issues
5. - Wants to review all open and/or closed issues in the `liu-xiao-guo/elastic_multimodal_search` repository
6. - Asks "what issues are there?", "analyze the issues", or "run the issue analyzer"
8. Do **not** use this skill for:
9. - General GitHub questions unrelated to issue analysis
10. - Creating or updating GitHub issues (not supported)
11. - Analyzing a single specific issue by number (the workflow analyzes all issues at once)
13. ## Available Tools
15. - **platform.core.execute_workflow** --- Runs the `github-issue-analyzer1` workflow with no inputs. It fetches all issues (open and closed), retrieves their comments, and returns an AI-generated solution for each.
17. ## Workflow
19. 1. **No inputs required** --- the workflow runs against the hardcoded repo `liu-xiao-guo/elastic_multimodal_search`.
21. 2. **Run the workflow** by calling `platform.core.execute_workflow` with:
22. - `attachmentId`: `github-issue-analyzer1`
23. - `inputs`: `{}` (no inputs needed)
25. 3. **Present the results** to the user. The workflow output is an array of results, one per issue. Each entry contains:
26. - `issue_number` --- the GitHub issue number
27. - `issue_title` --- the issue title
28. - `issue_url` --- clickable link to the issue on GitHub
29. - `issue_state` --- `open` or `closed`
30. - `suggested_solution` --- AI-generated Markdown solution (includes analysis of comments)
32. Format the response clearly:
33. - List each issue with its number, title, state, and URL
34. - Present the suggested solution in full Markdown for each issue
35. - Highlight whether comments were factored into the solution
37. ## Example
39. User: *"Analyze all the GitHub issues"*
41. 1. Call `platform.core.execute_workflow` with `attachmentId: github-issue-analyzer1`, `inputs: {}`.
42. 2. For each issue in the output, reply with:
43. - **Issue #N** --- [title](url) --- `open` / `closed`
44. - AI-suggested solution in Markdown
``AI代码解释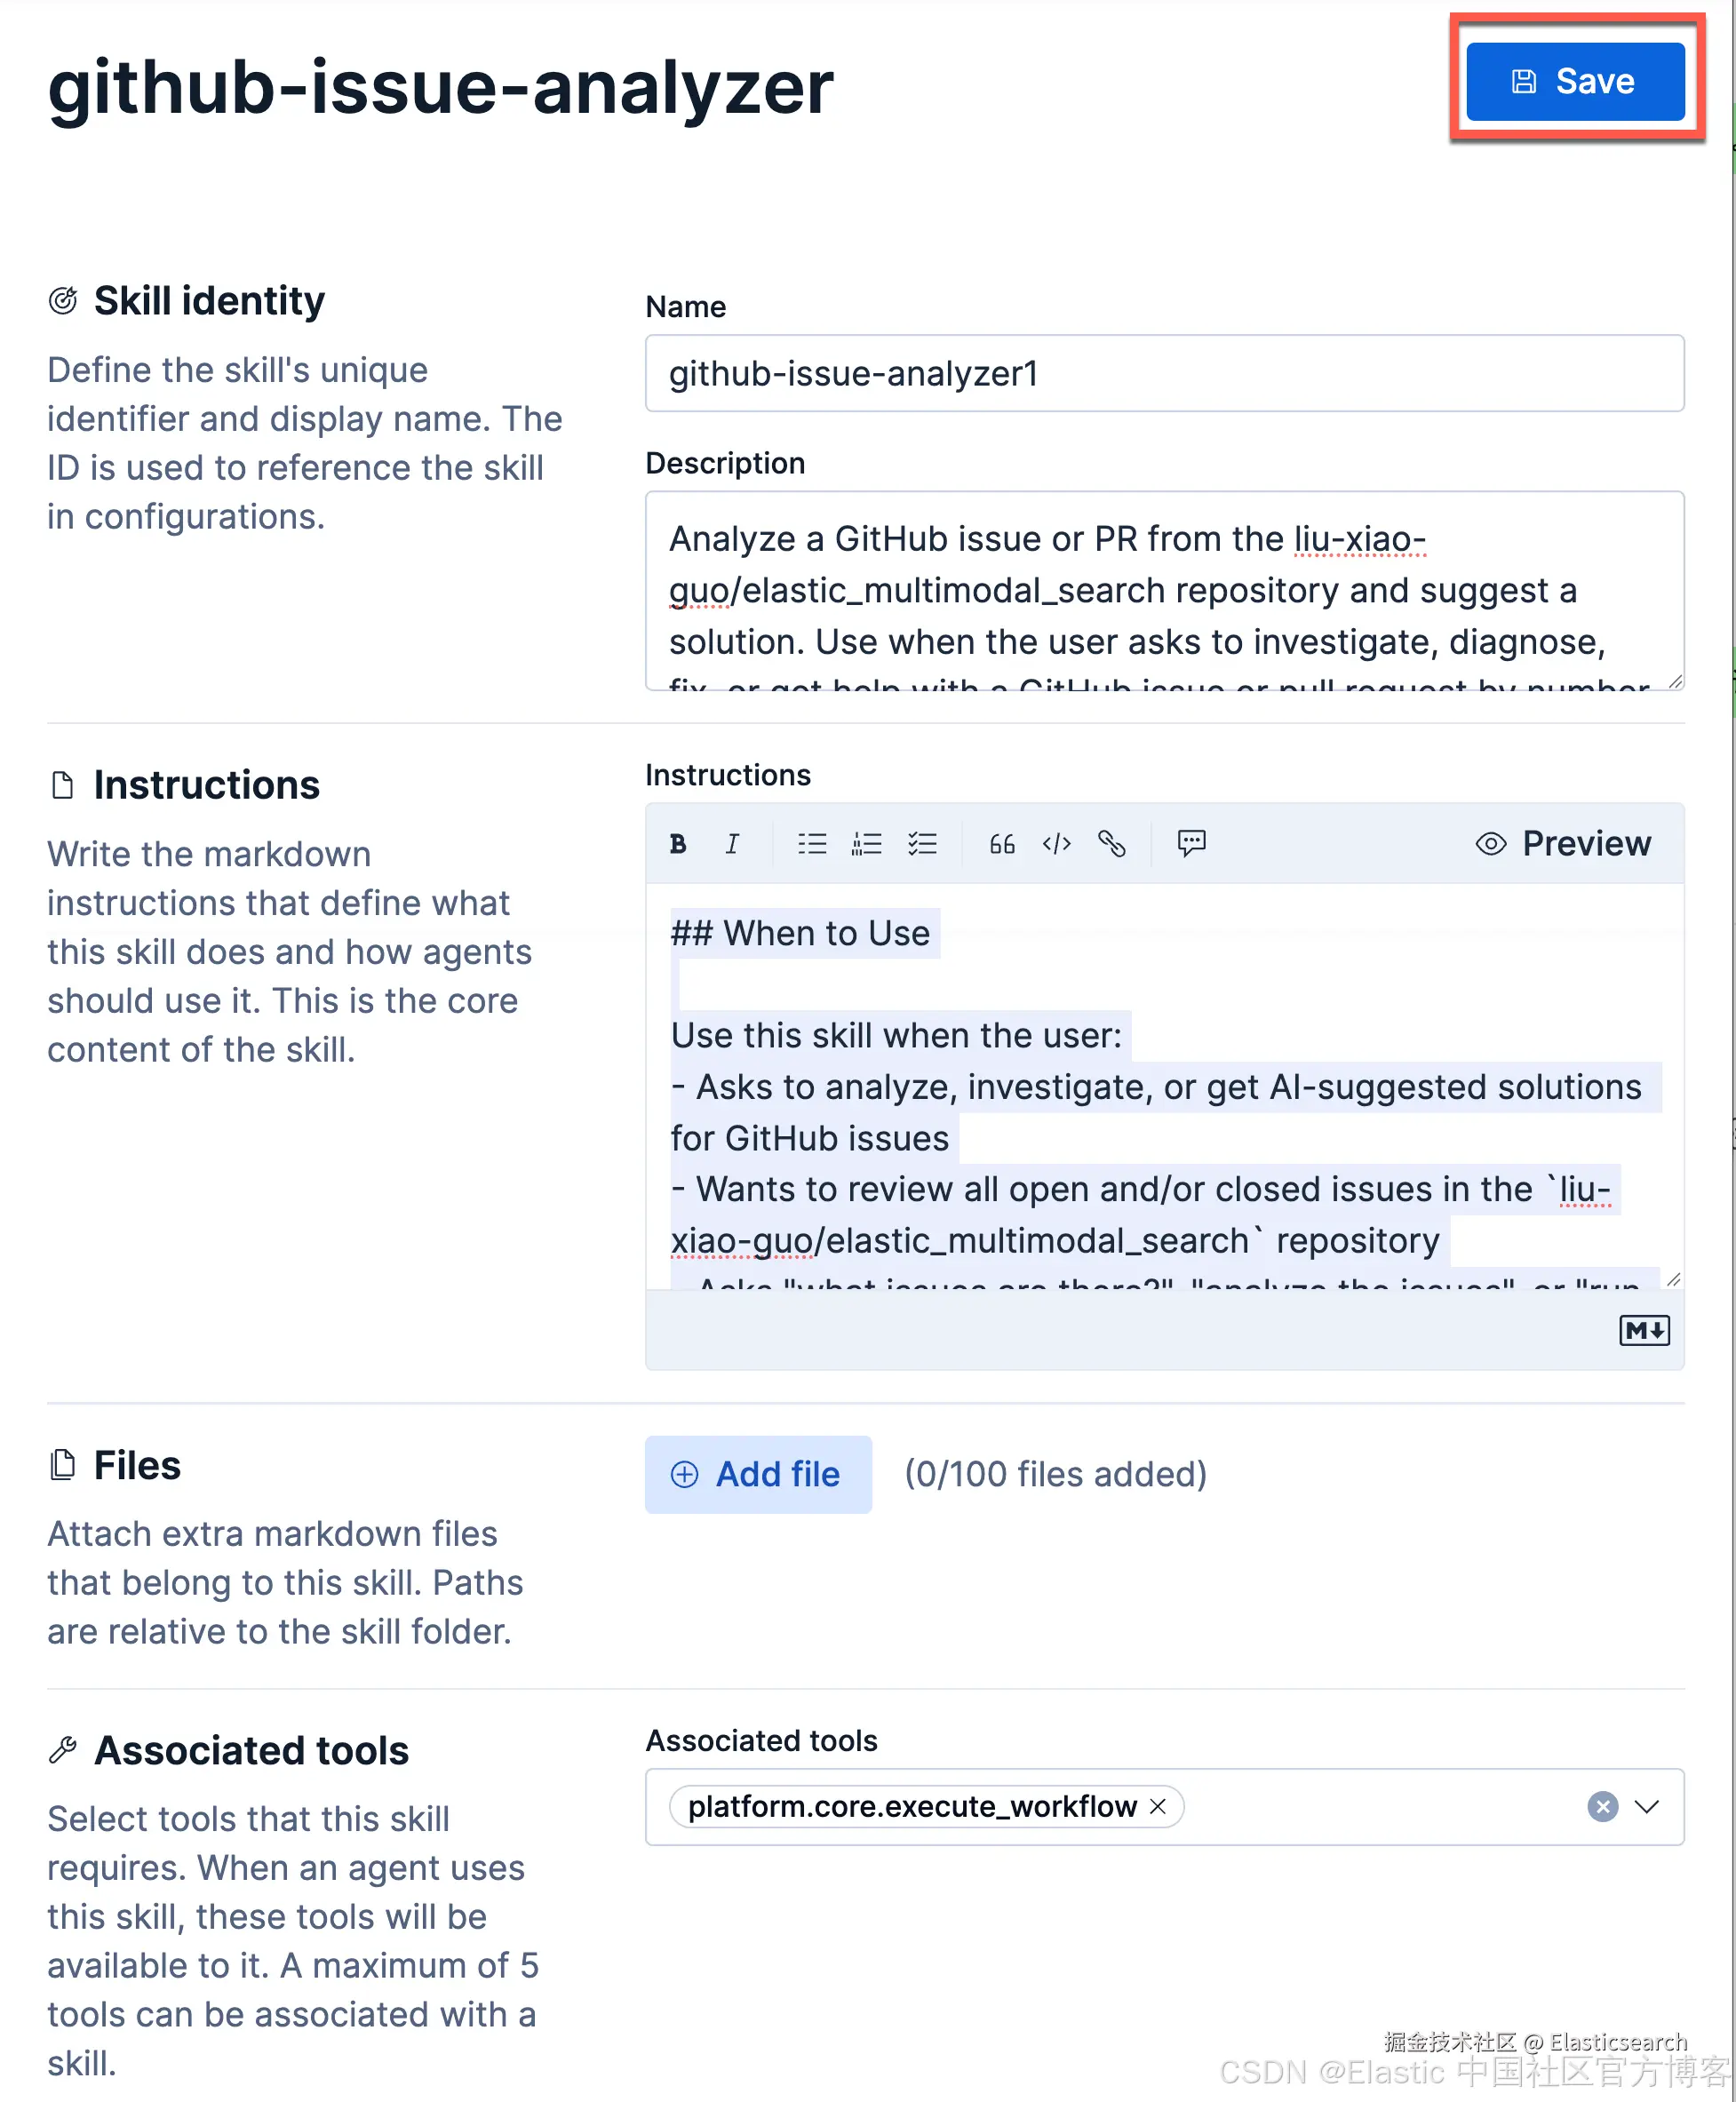
步骤五:创建 github demo 智能体
创建智能体
我们运用上面创建的 tool 及 skill 来创建一个 github demo 智能体:
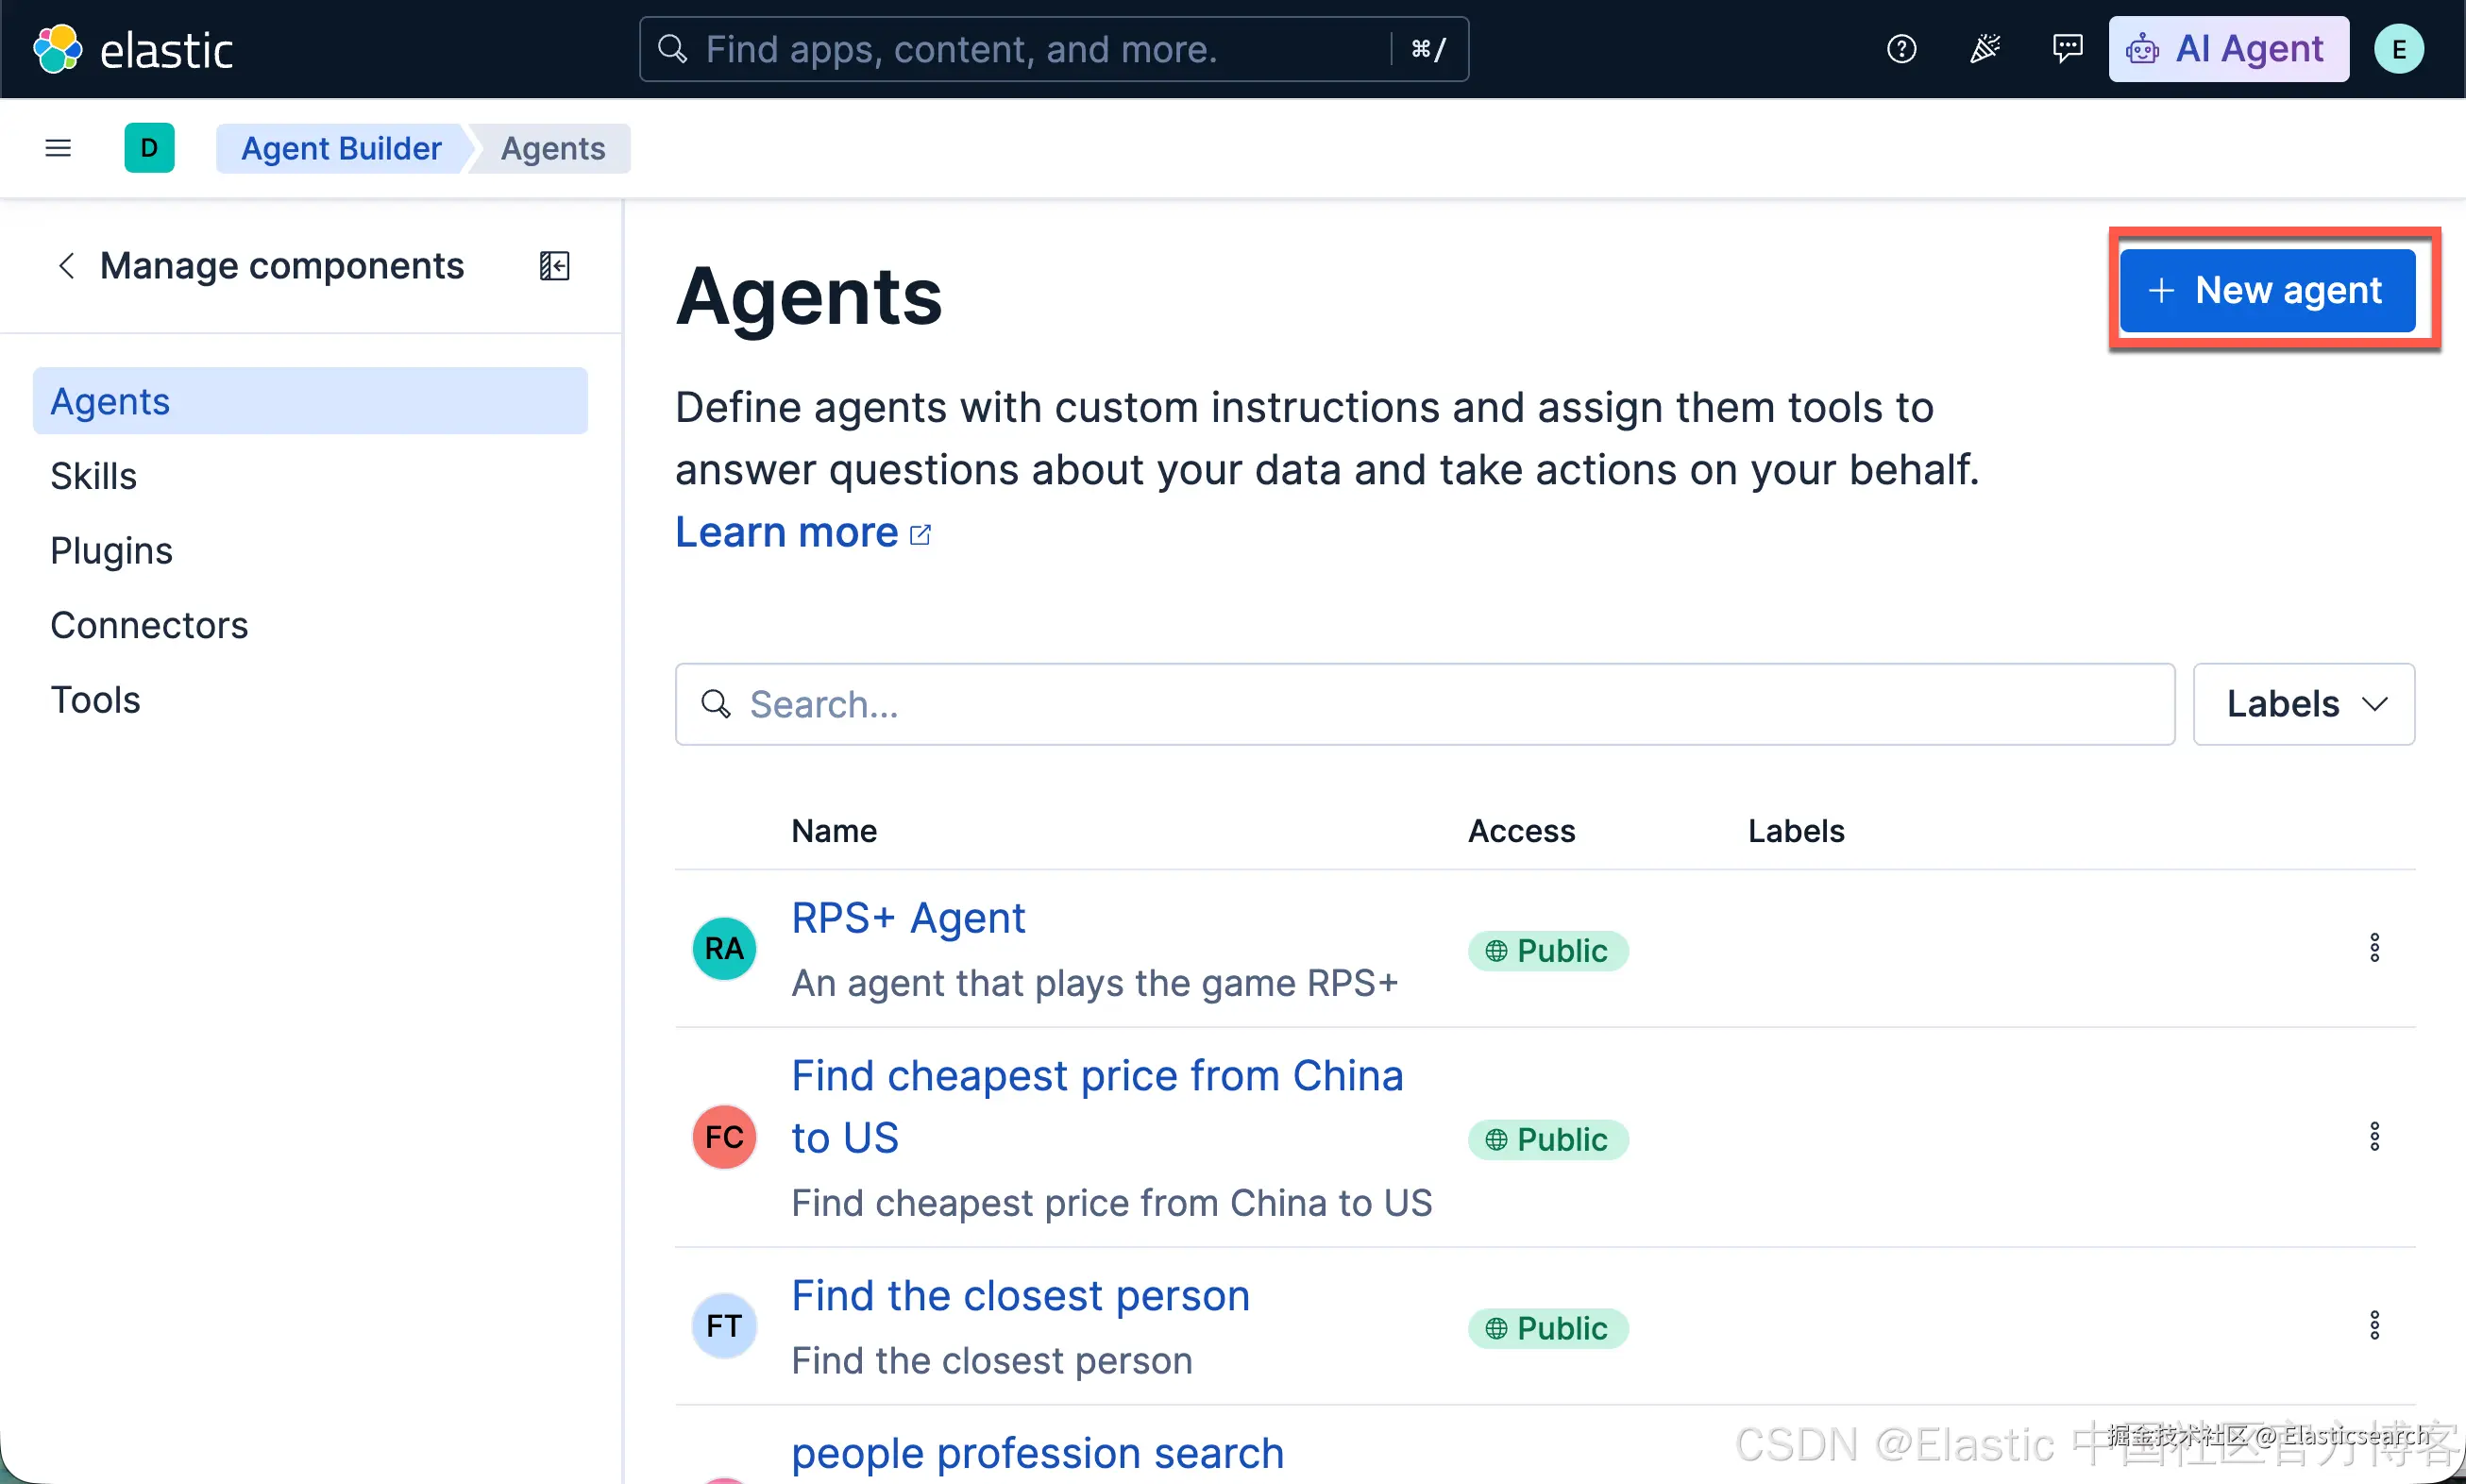
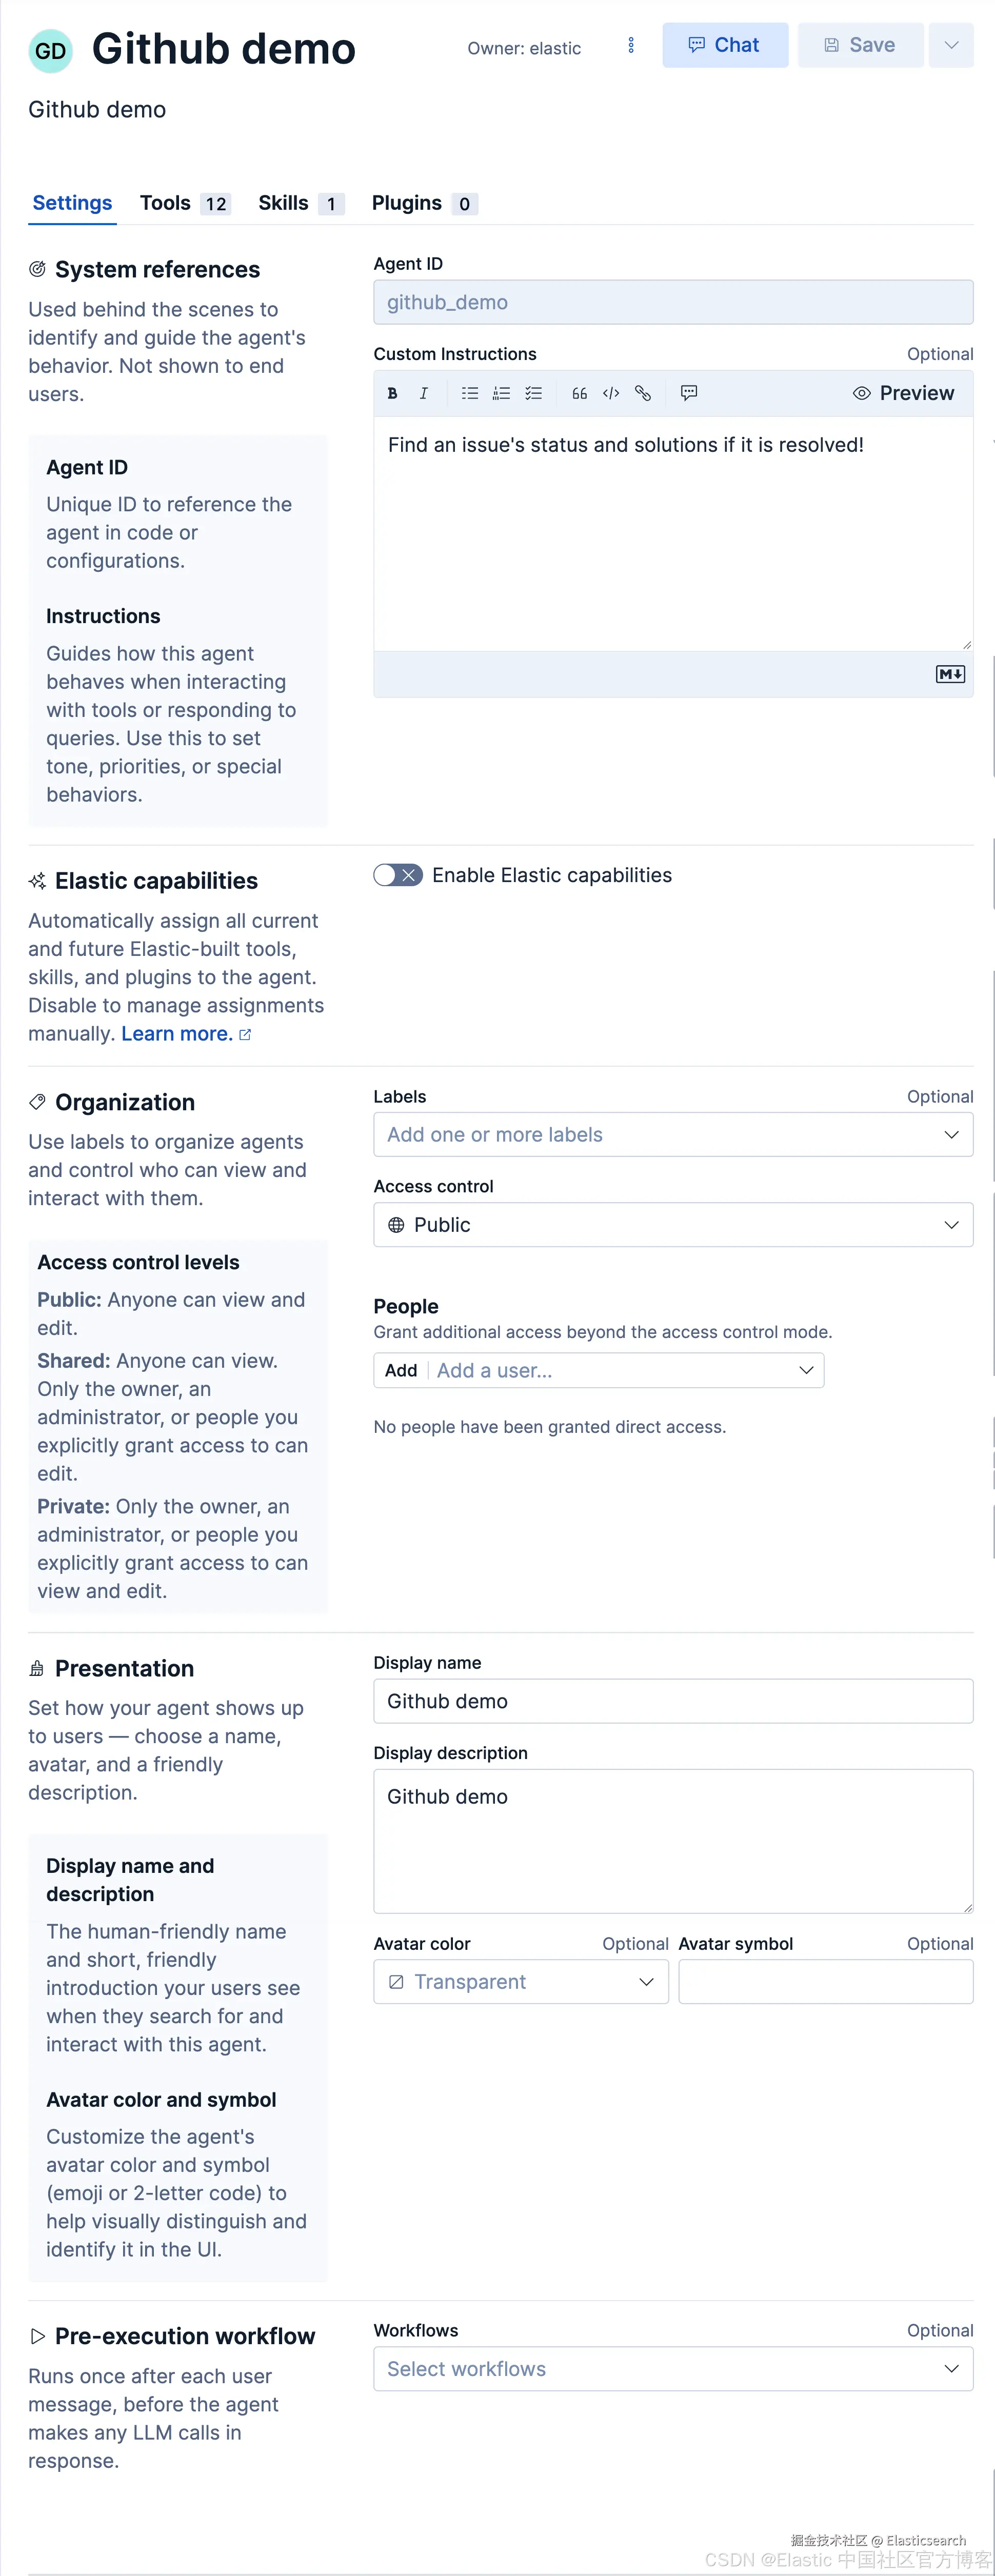
添加 tool
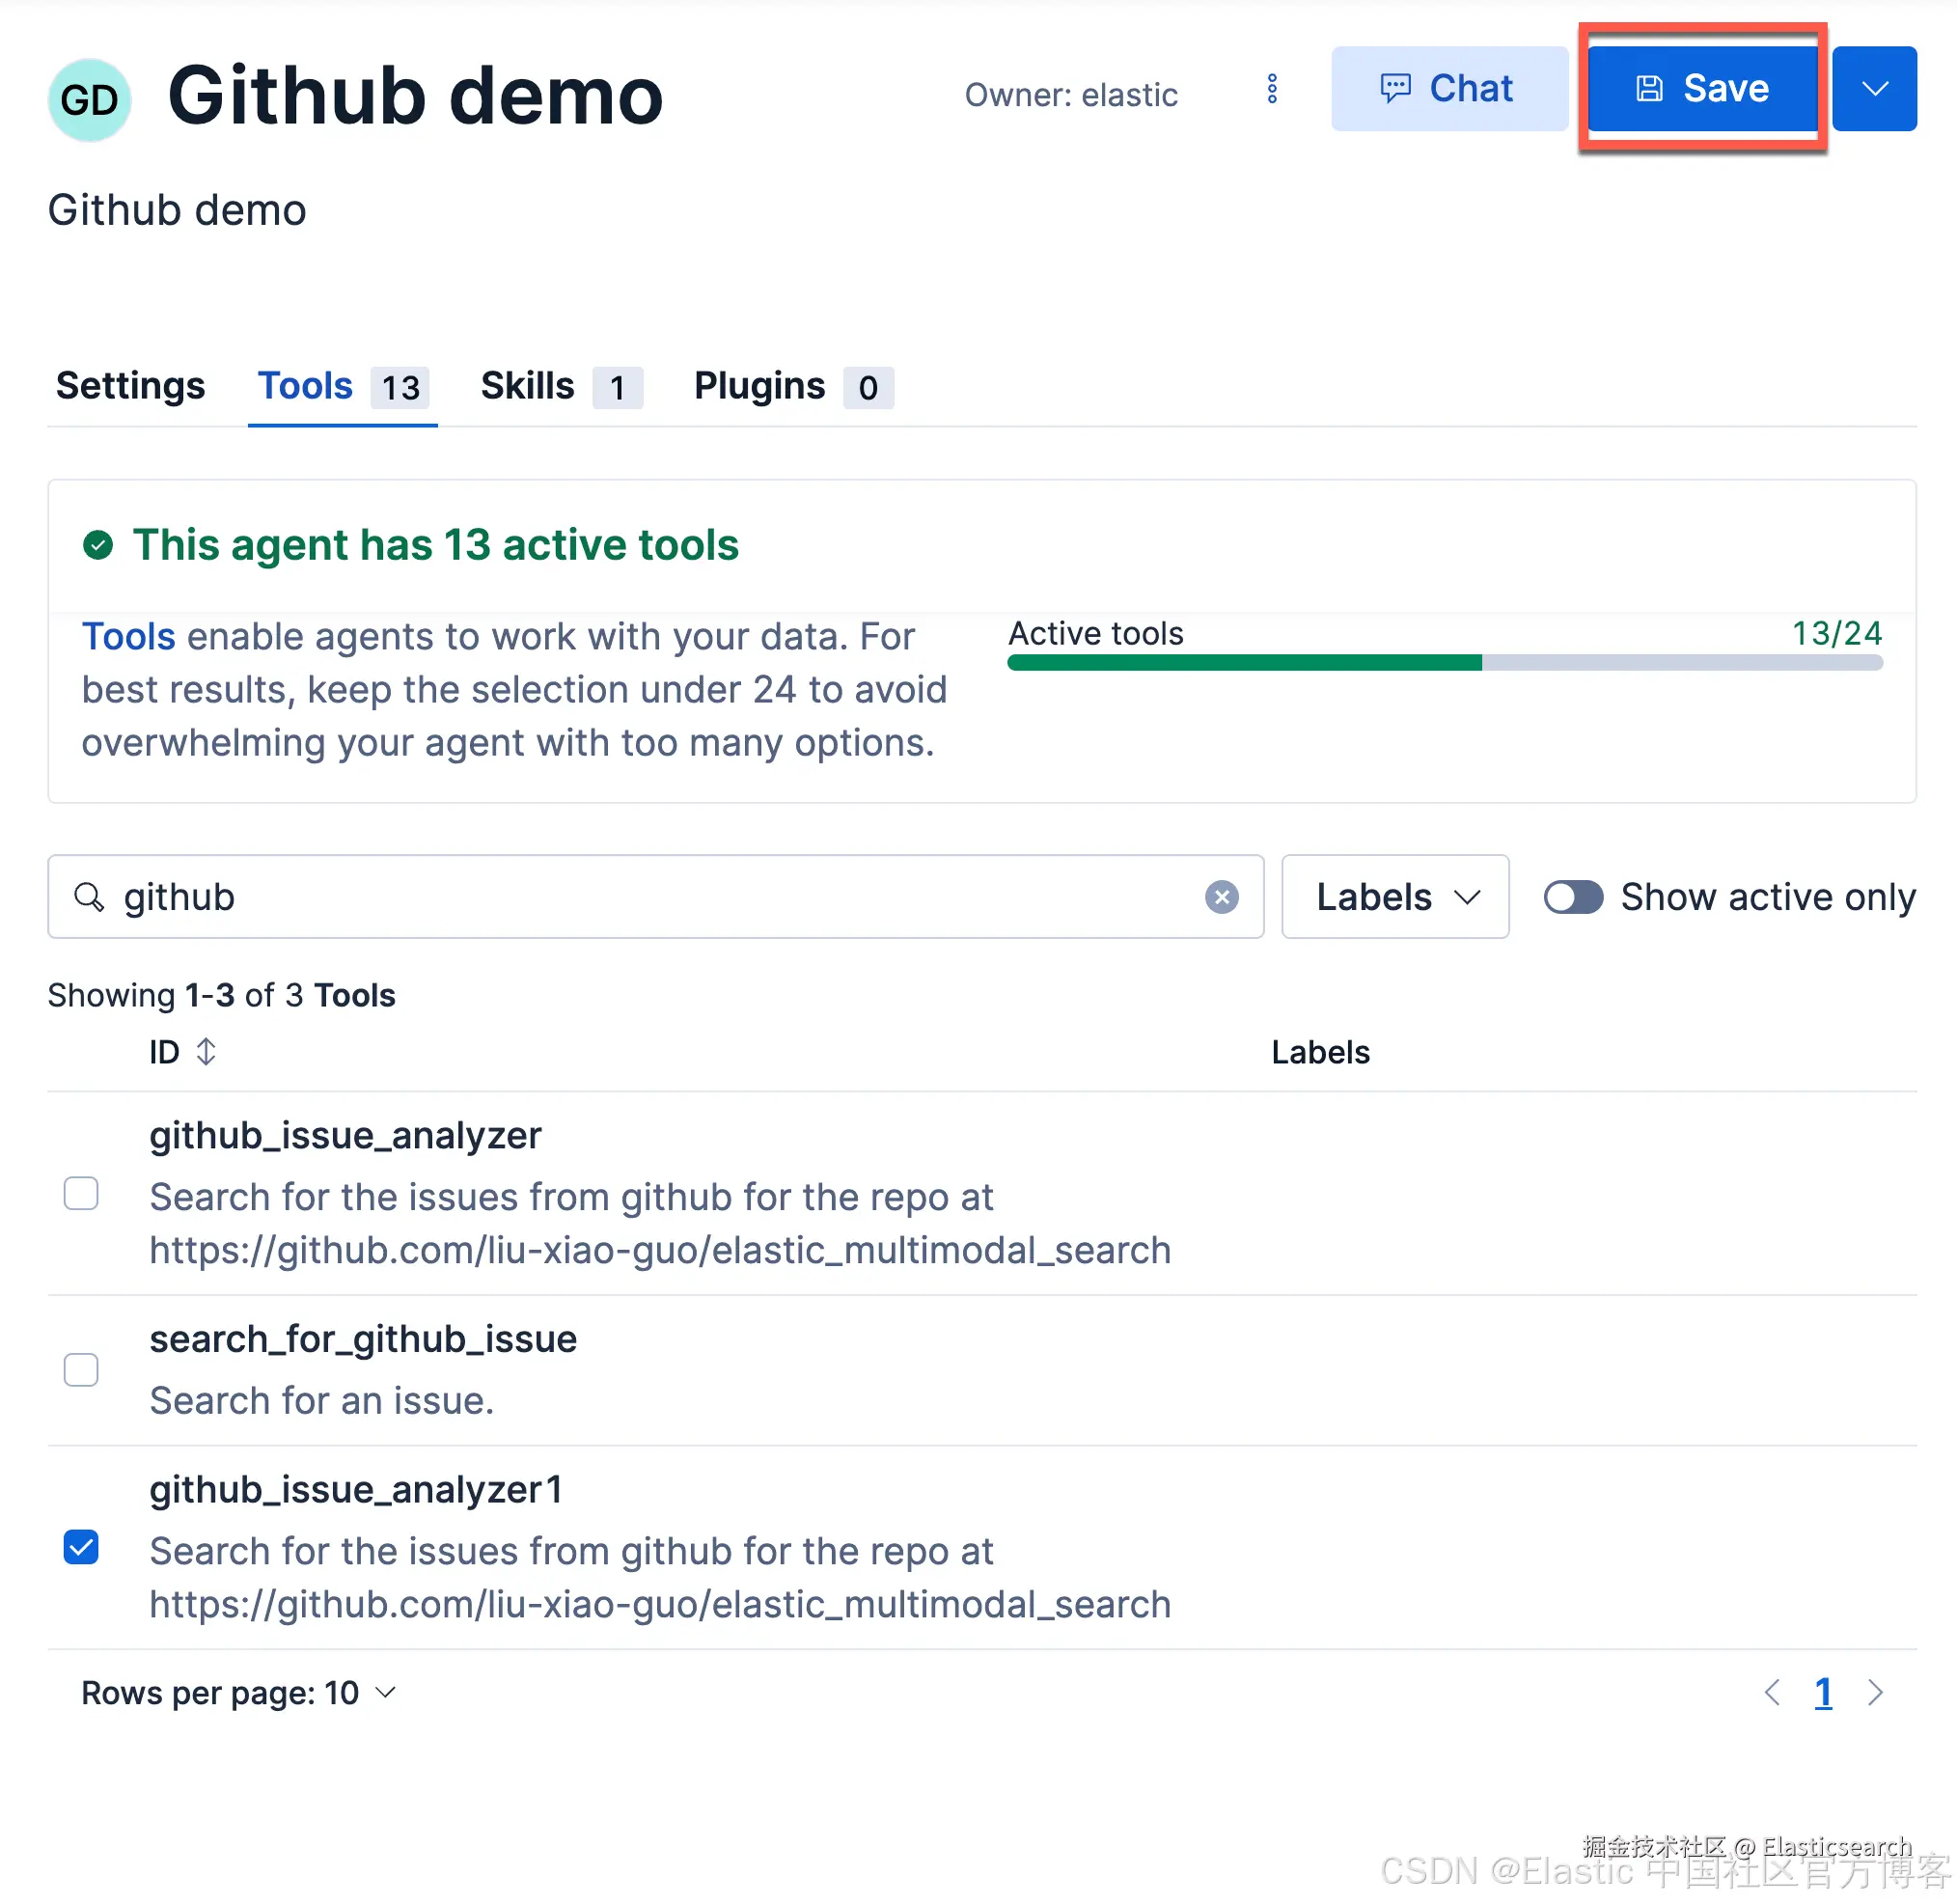
添加 skill
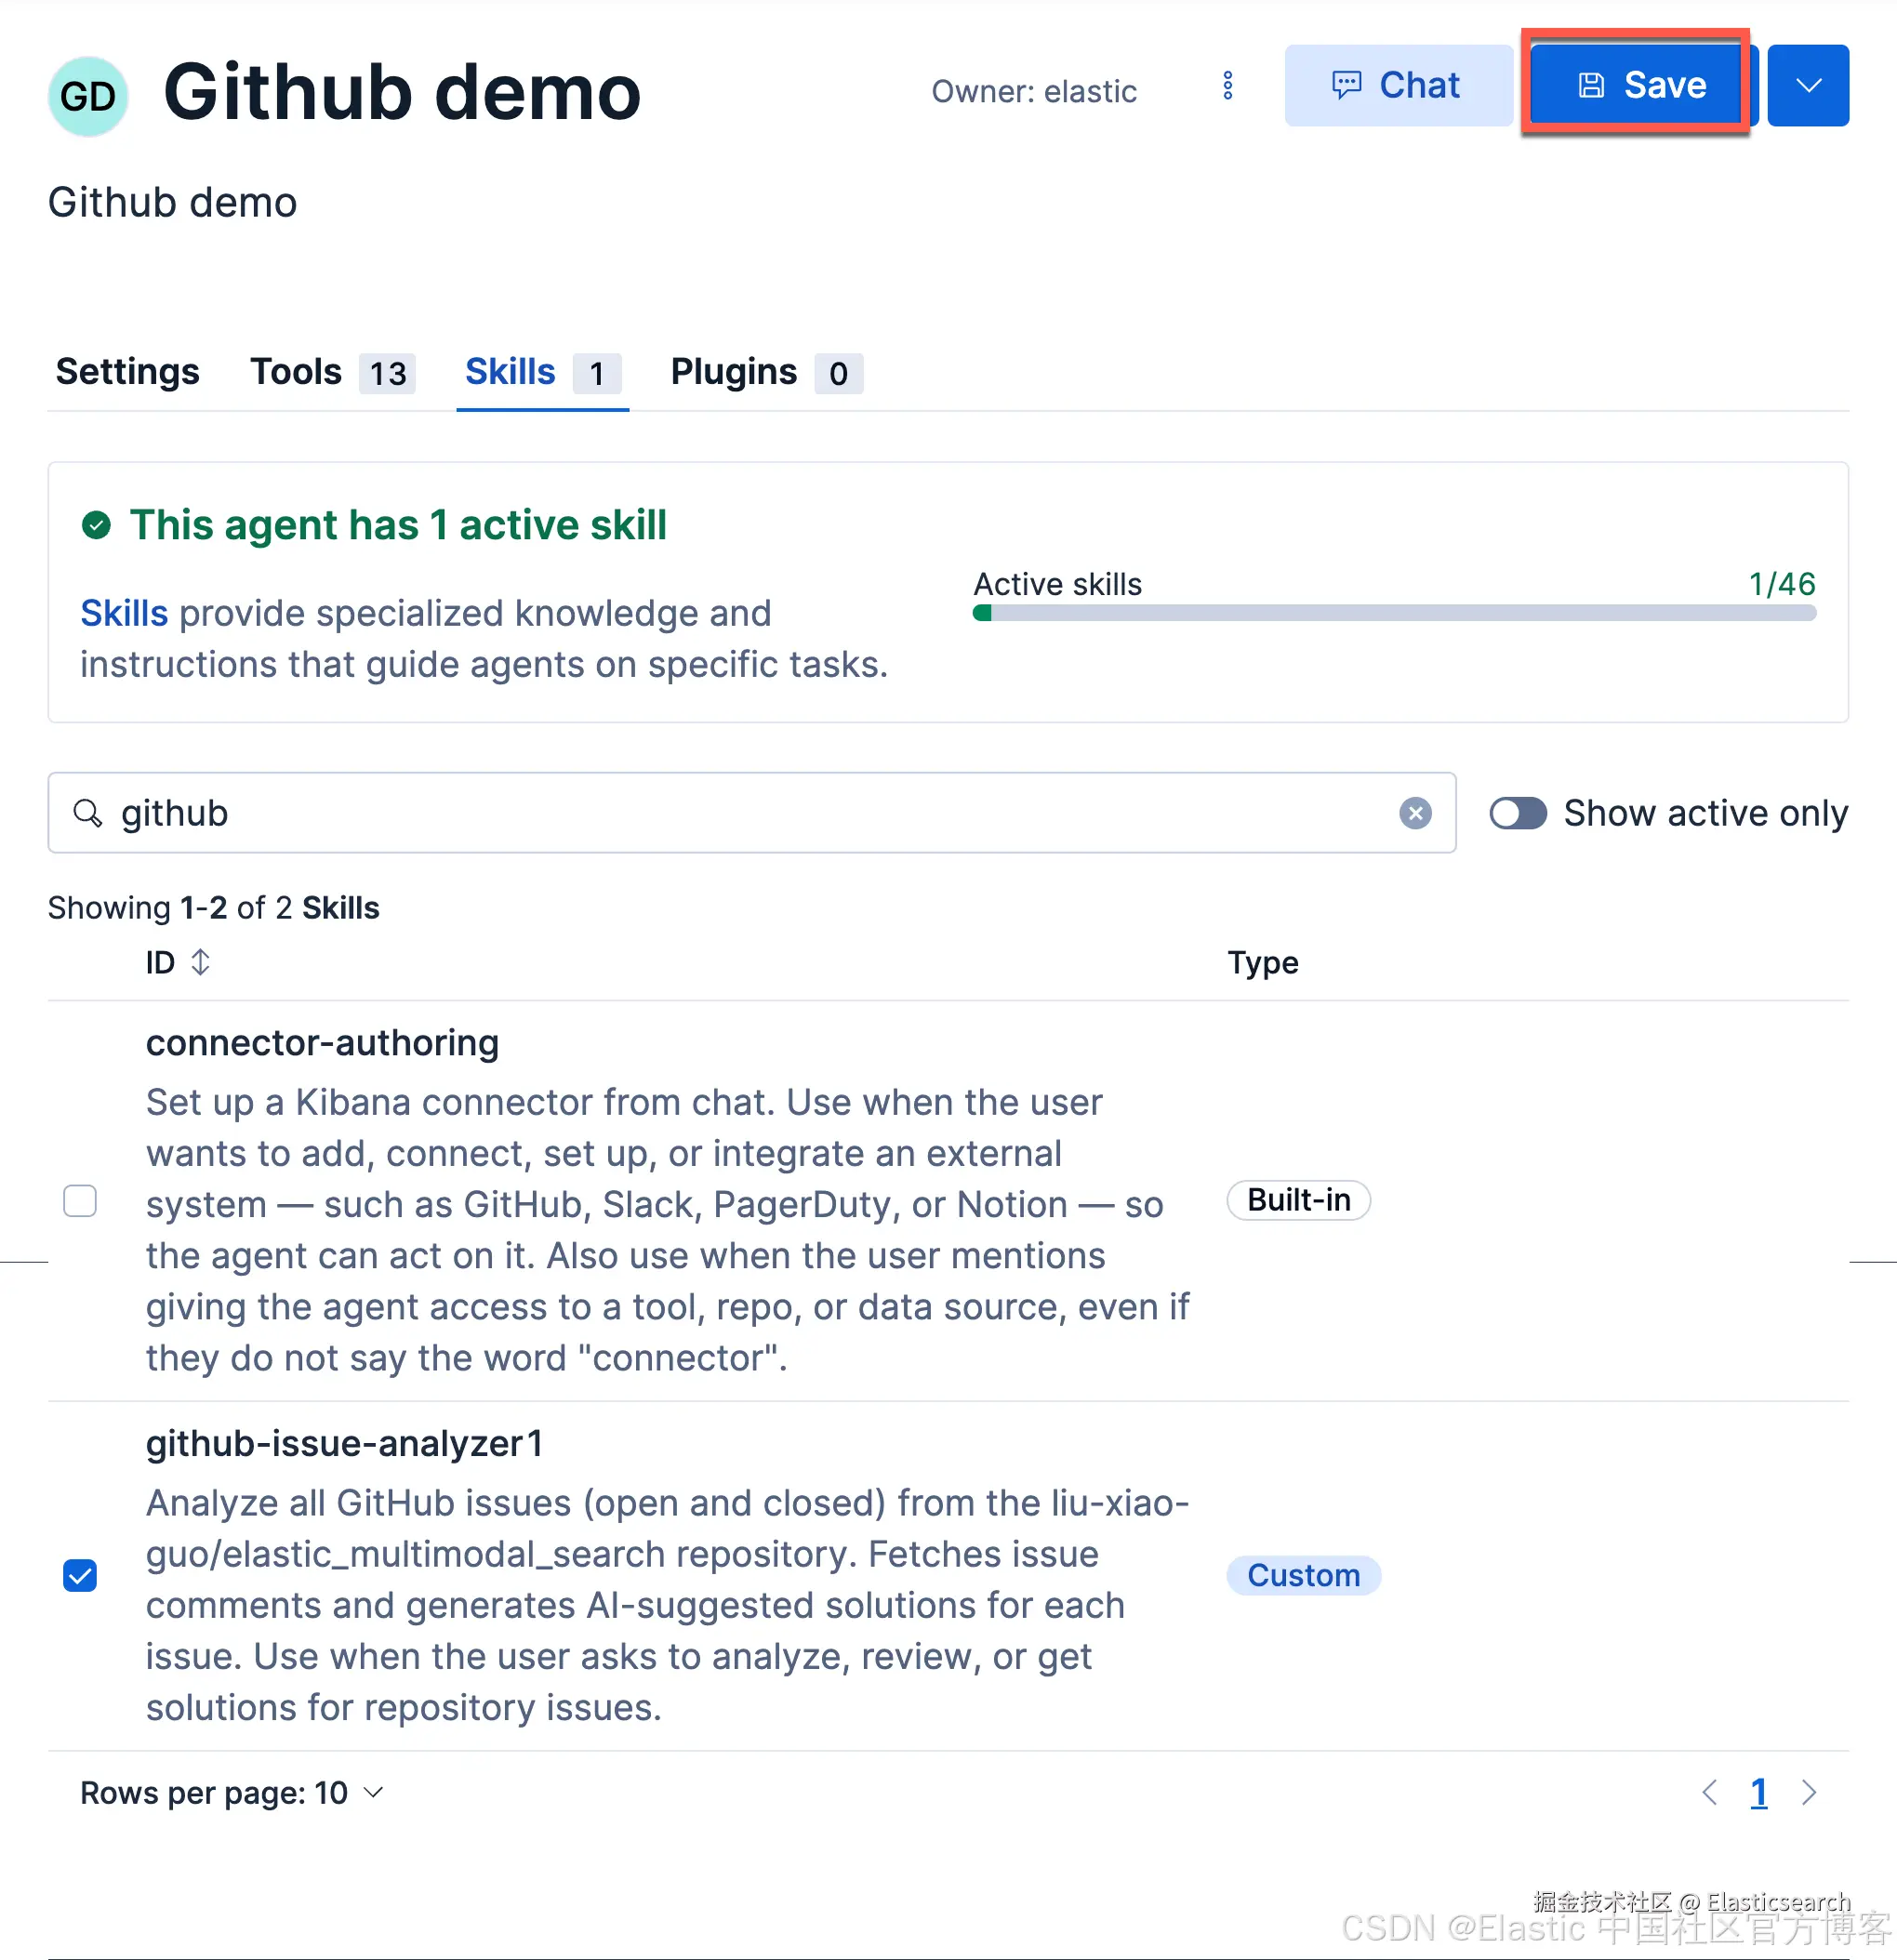
这样我们就添加了 skill。
步骤六:使用 github demo 智能体
我们使用如下的步骤来使用上面的智能体:
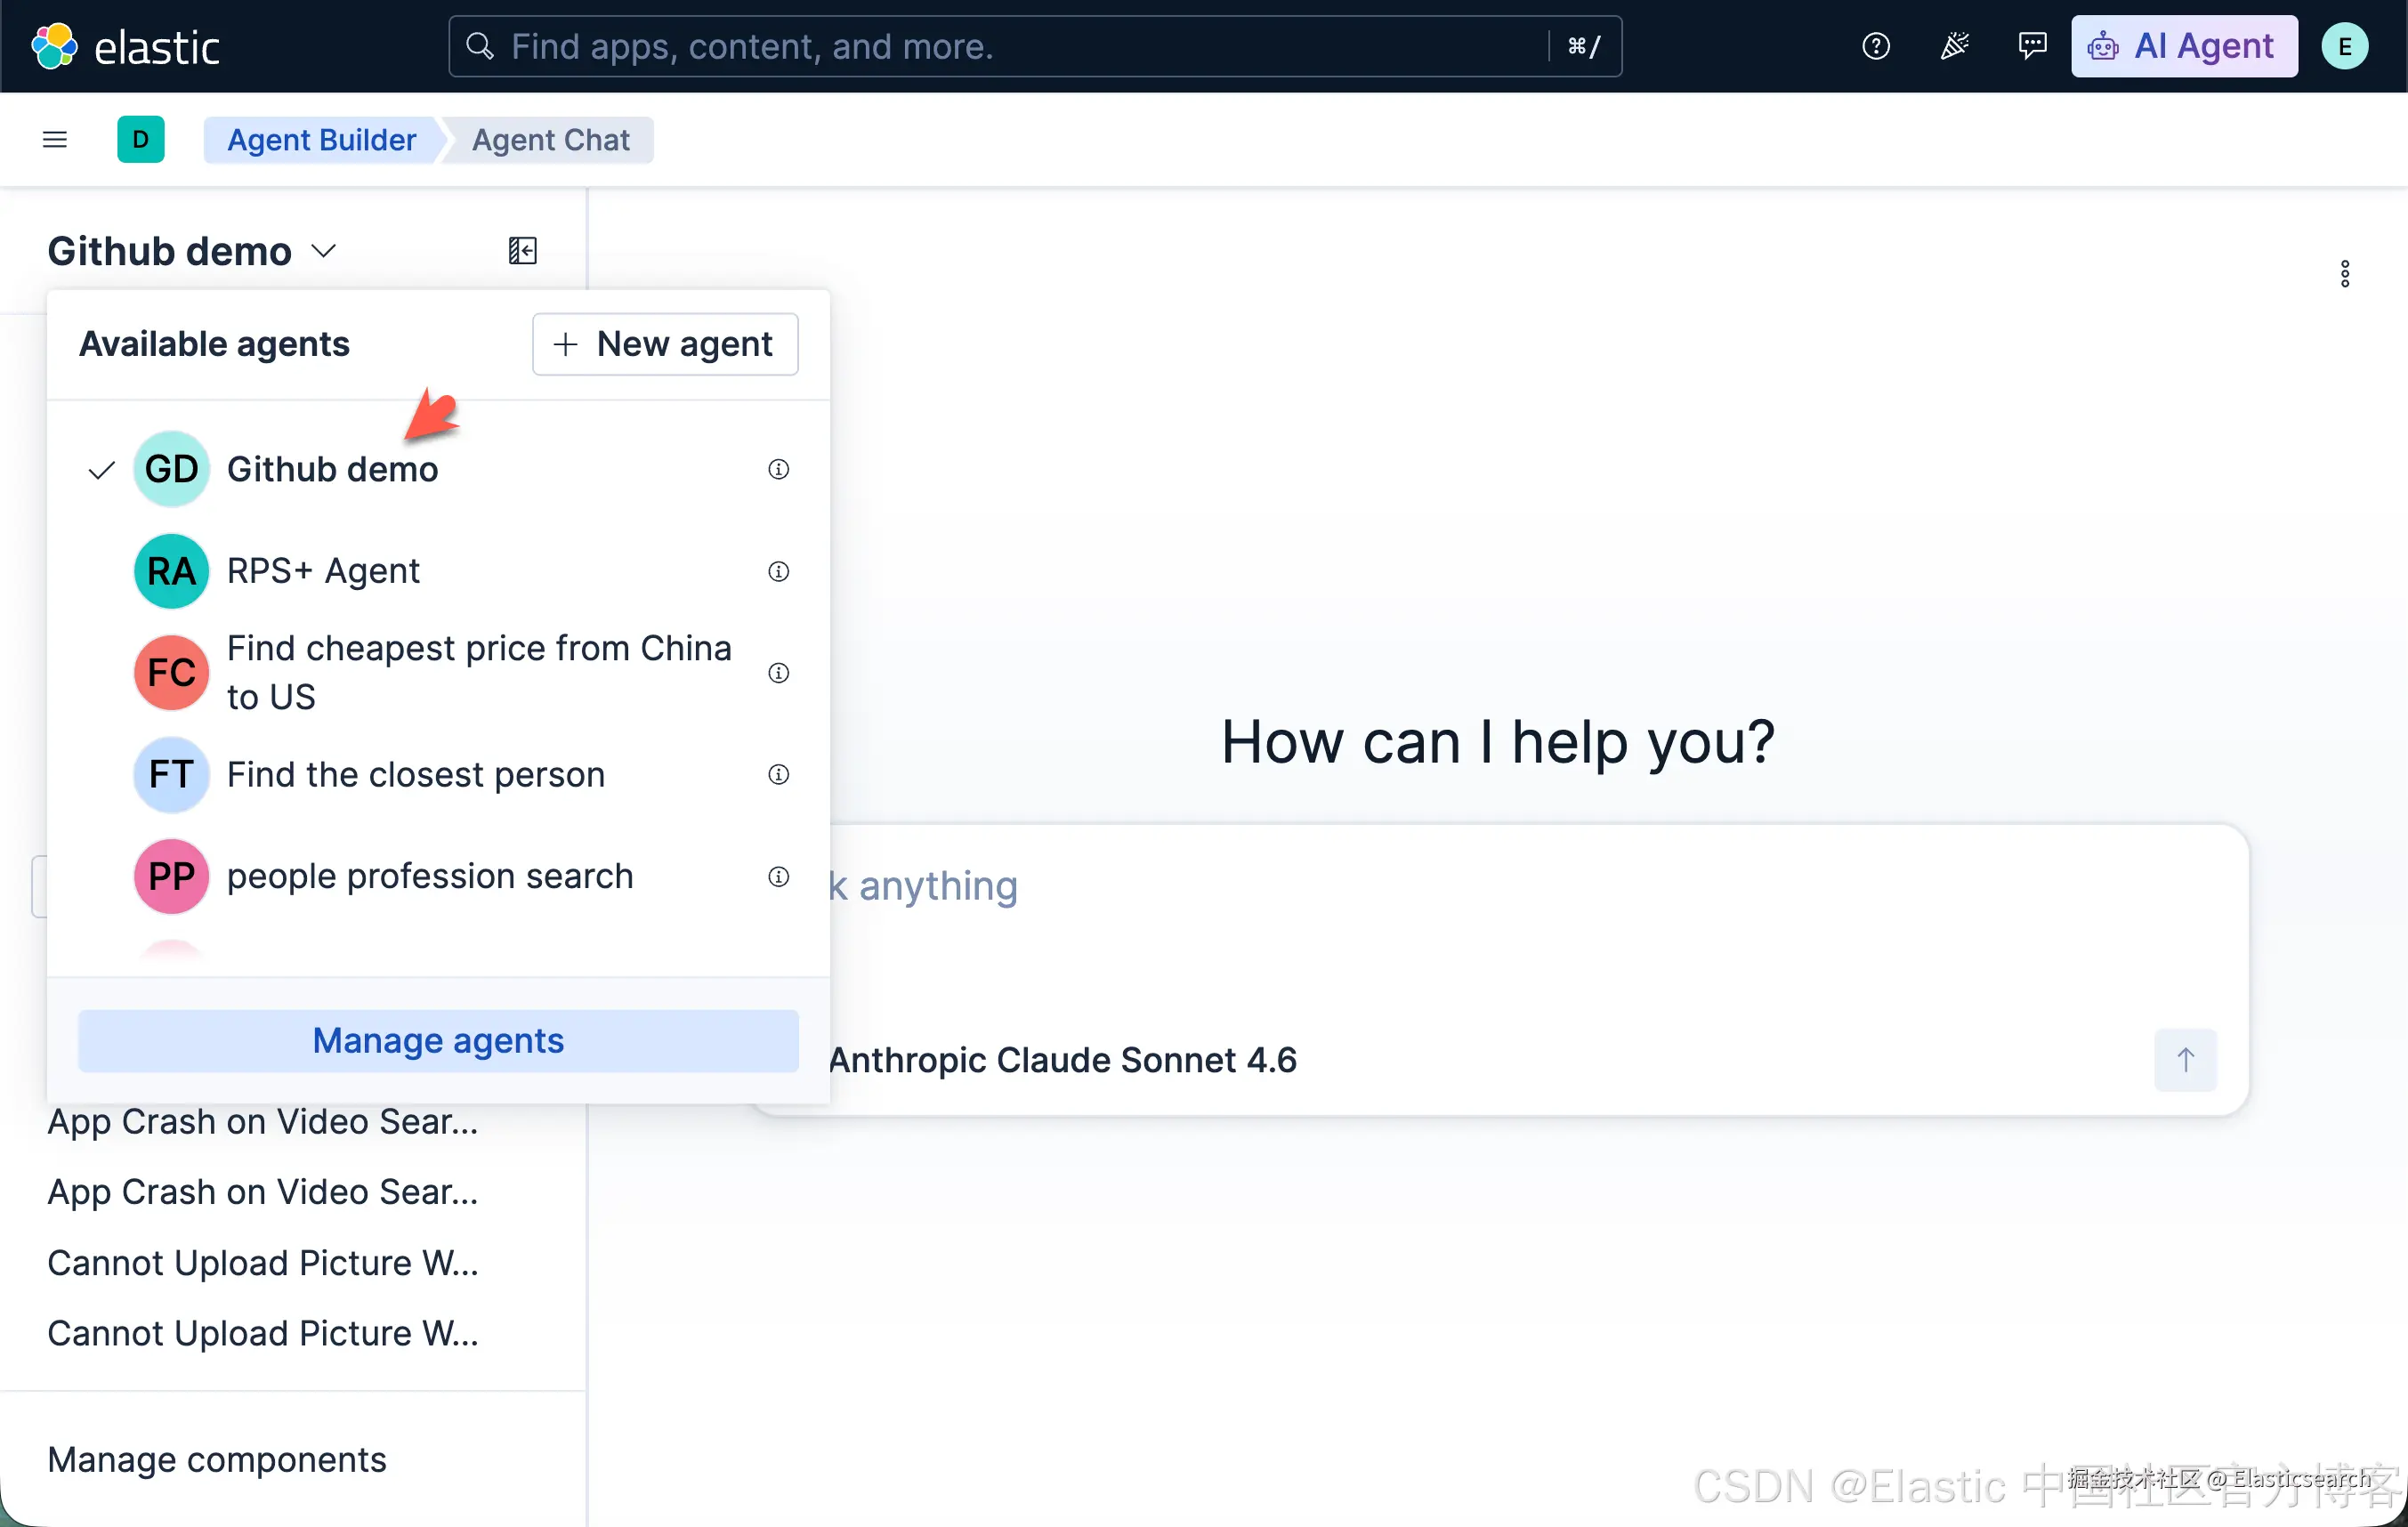
我们来使用智能体来查看一下我们的 issues:
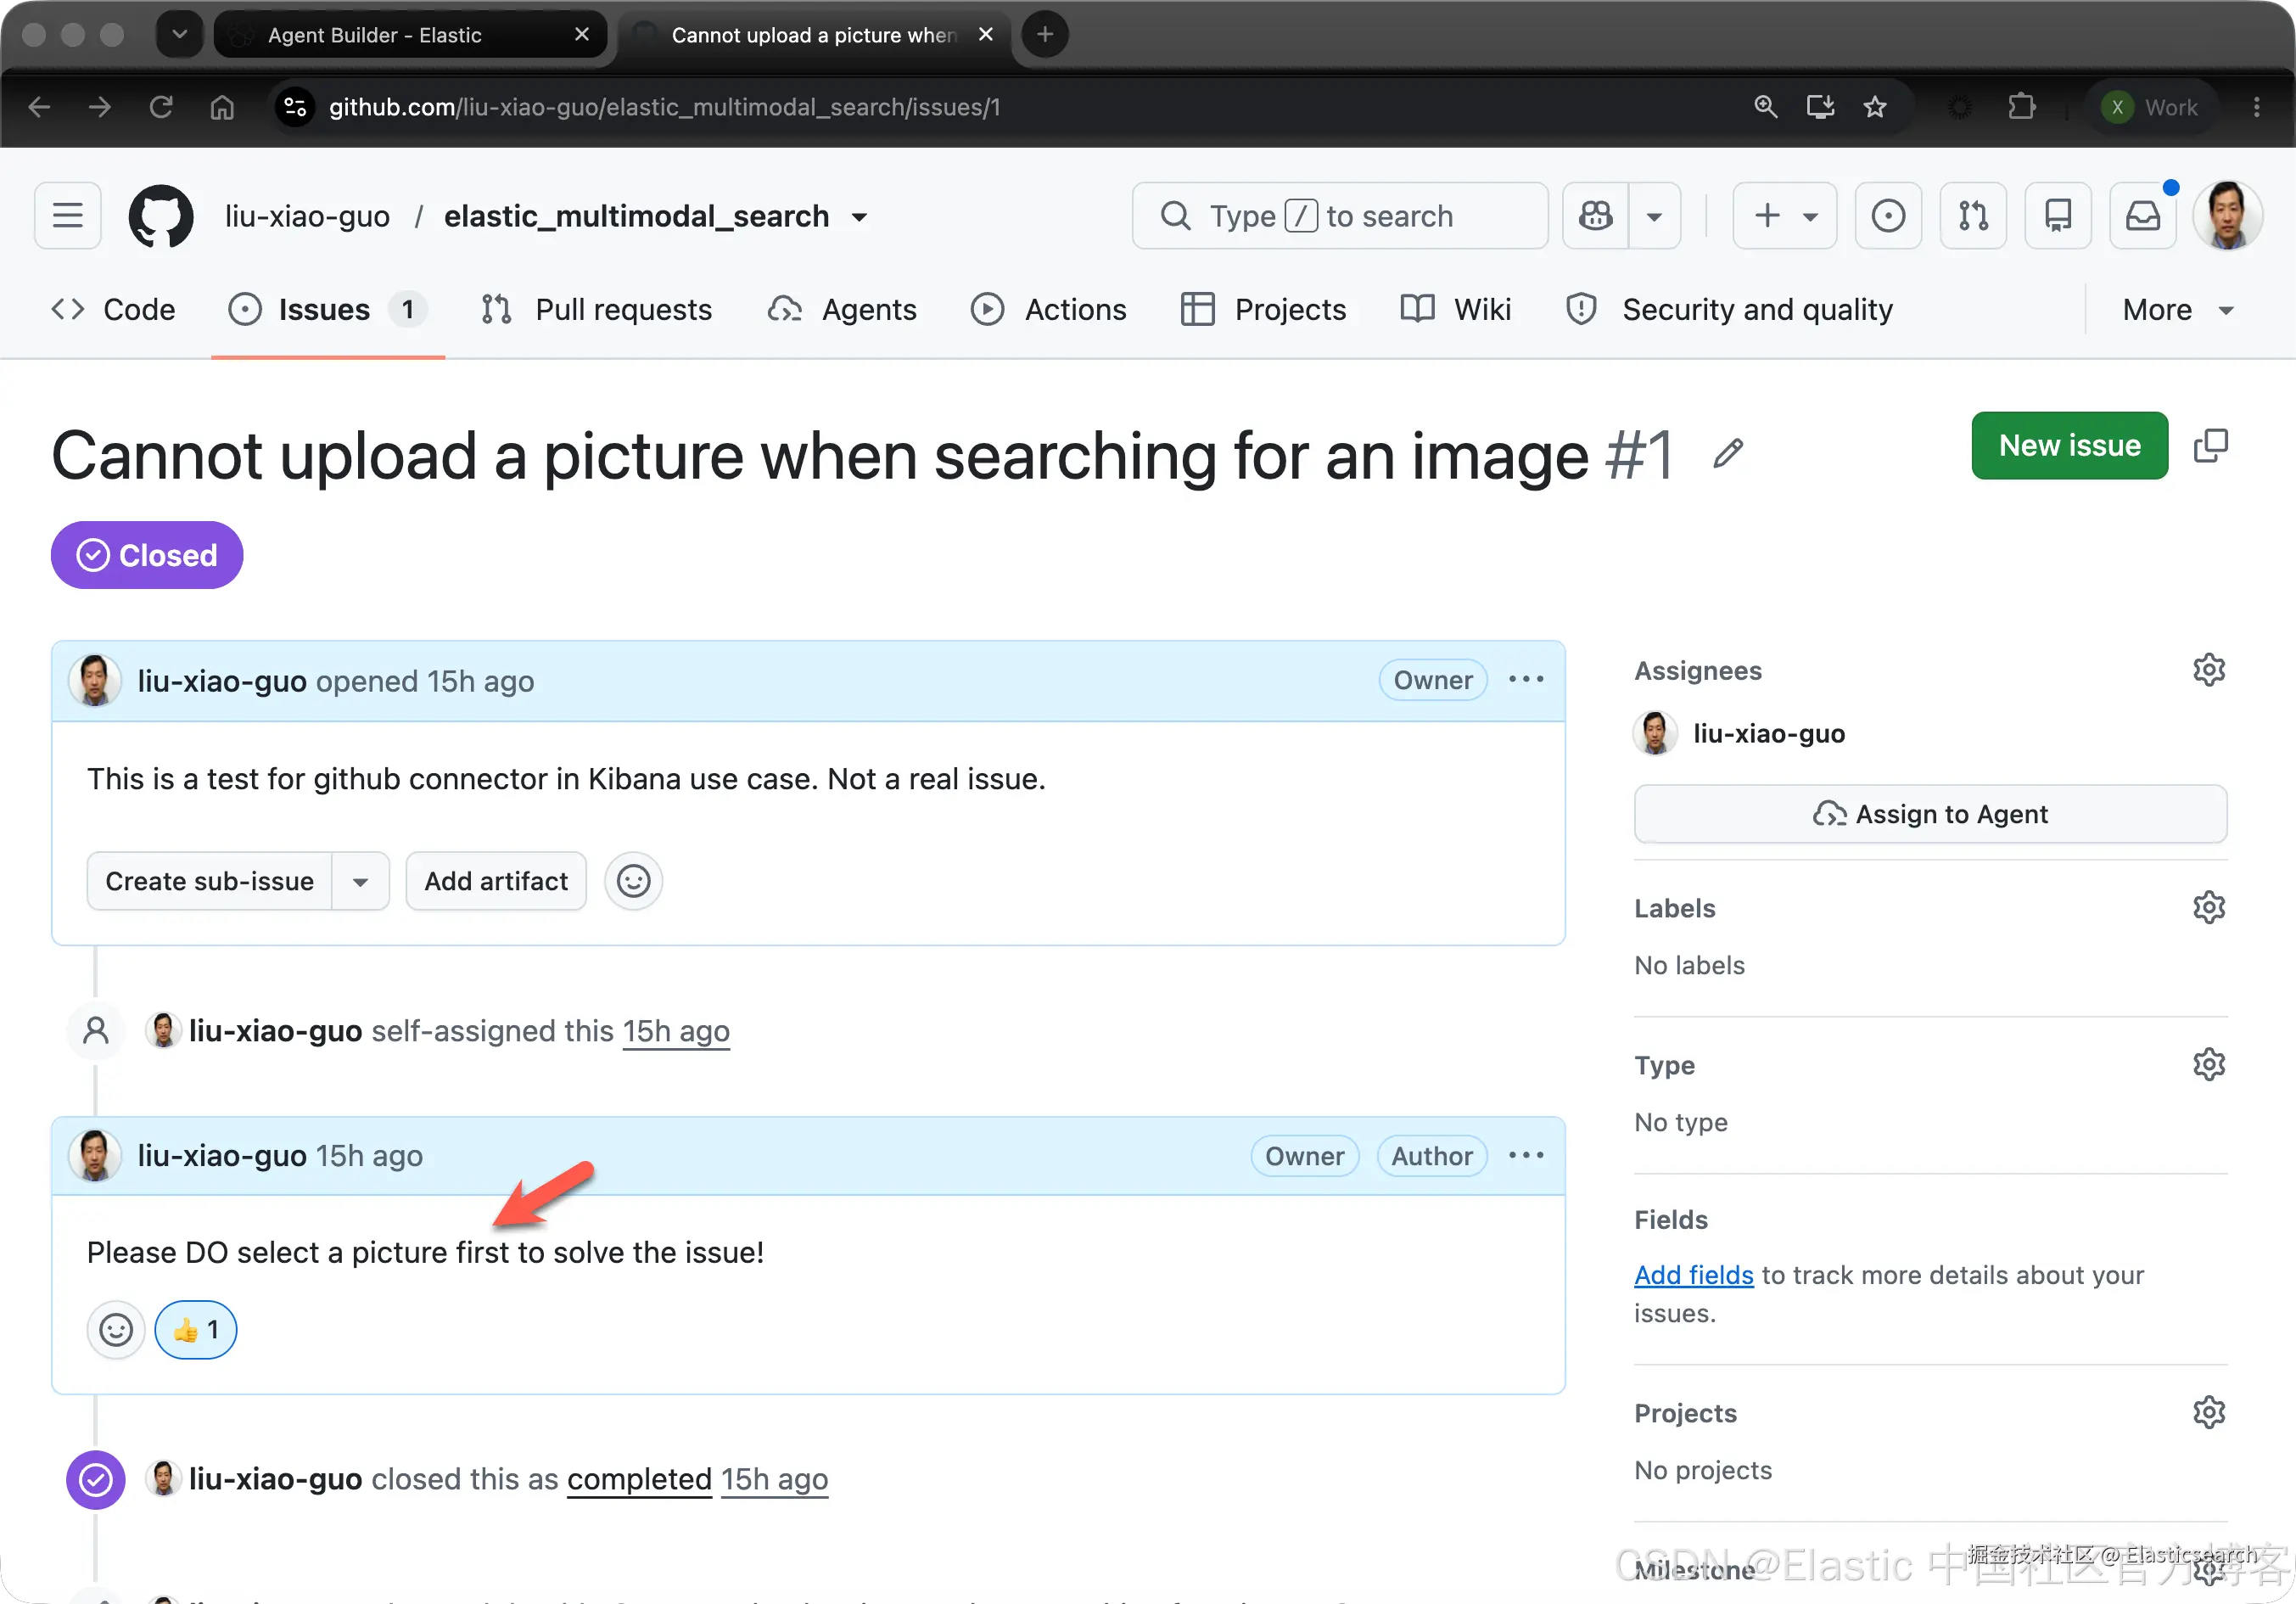
上面显示的是我们的 issue:Cannot upload a picture when searching for an image · Issue #1 · liu-xiao-guo/elastic_multimodal_search · GitHub
我们使用如下的方法来查看:
vbnet
`Cannot upload a picture when searching for an image, what is the solution to it?`AI代码解释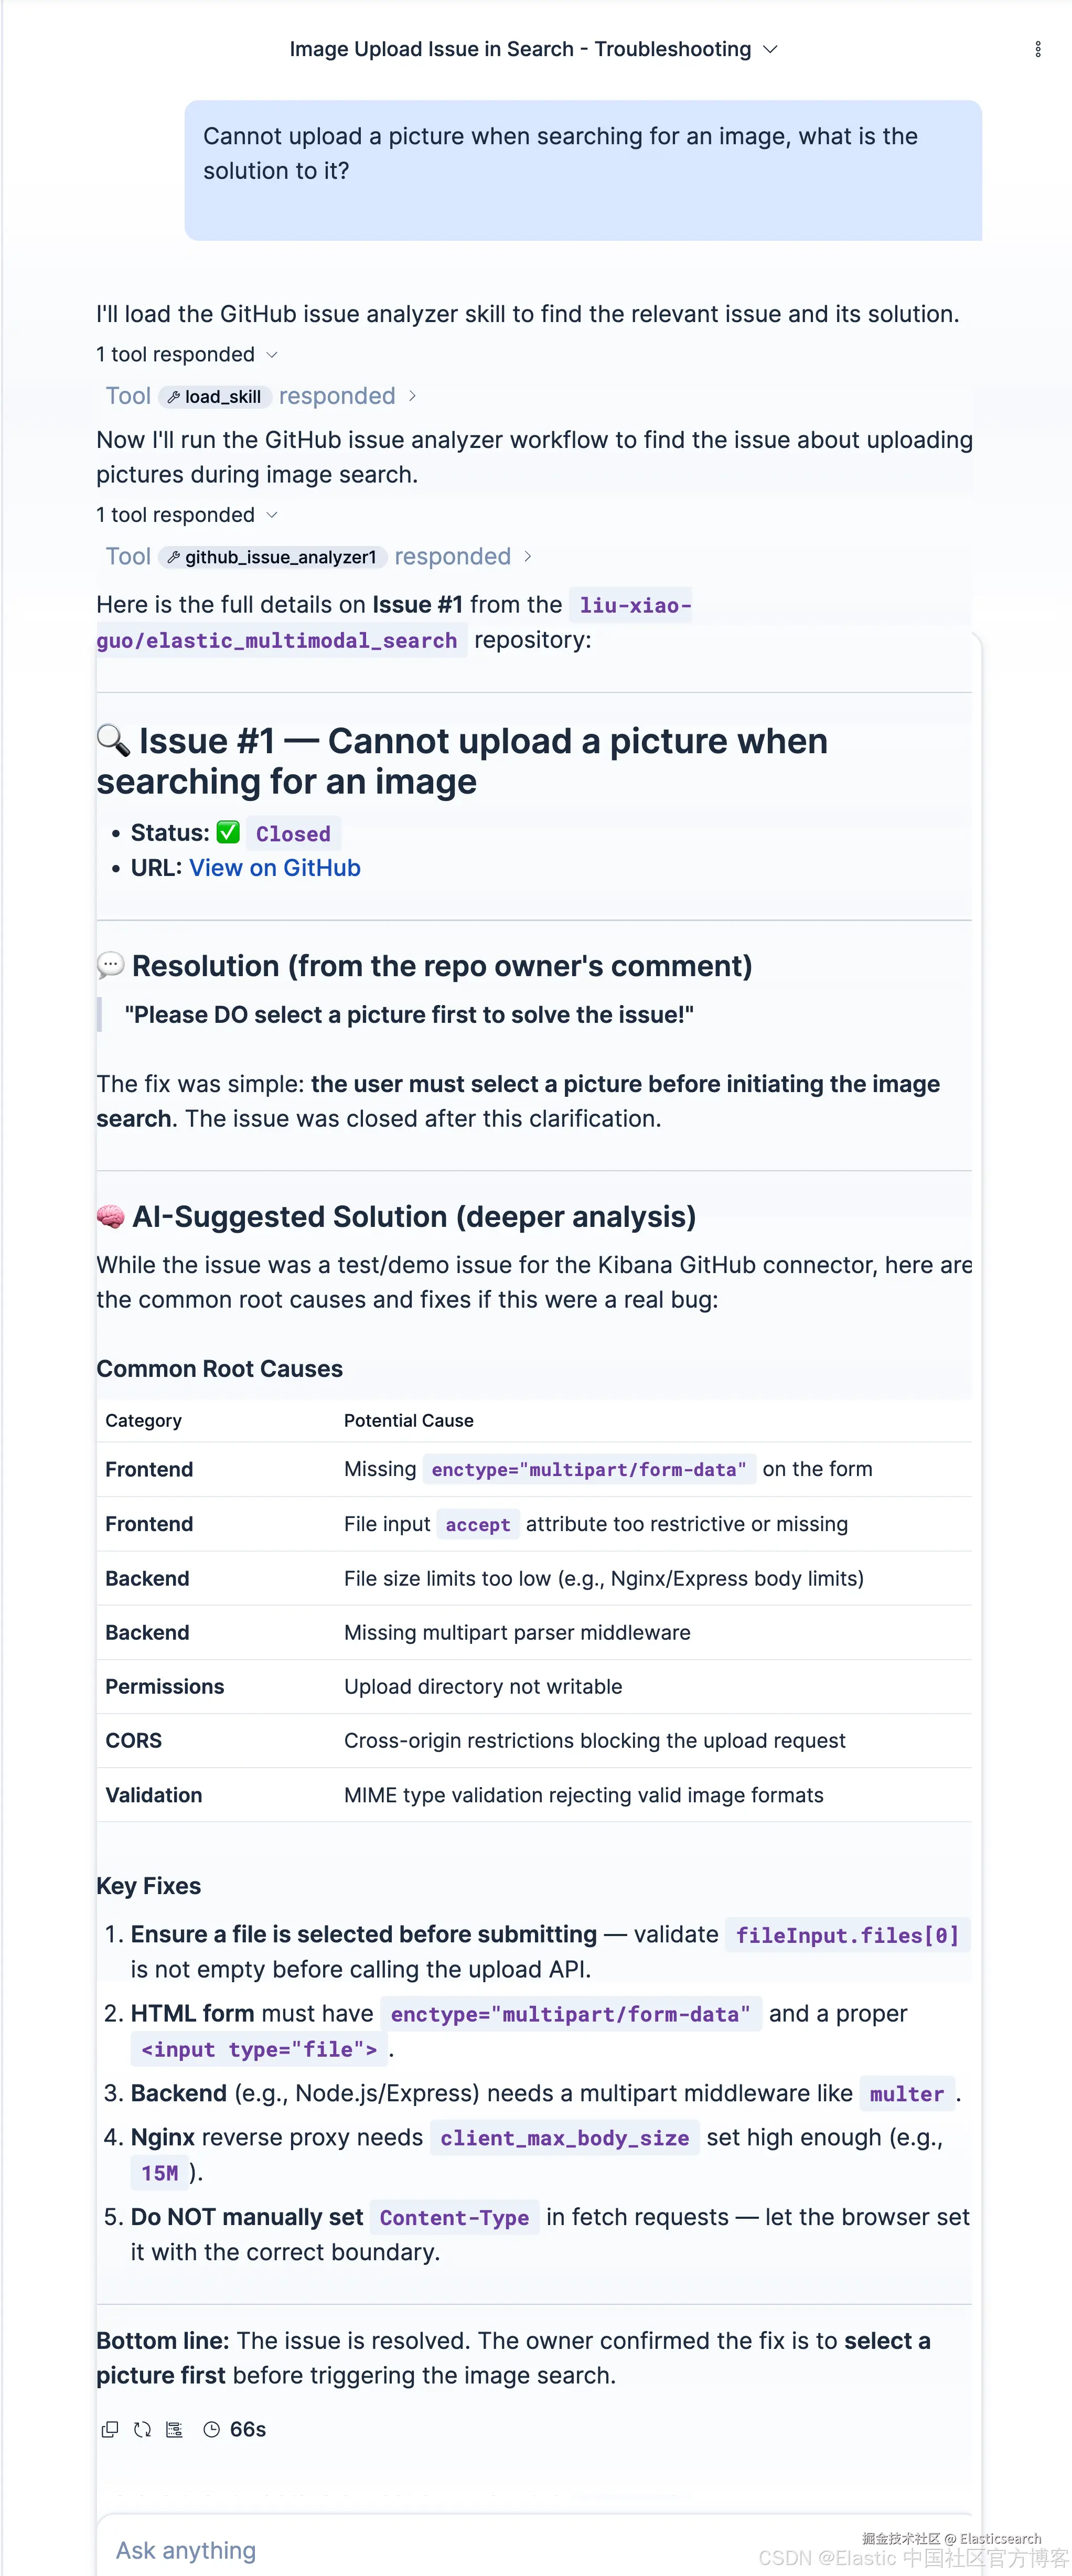
sql
`How many issues are there? what are the states for them?`AI代码解释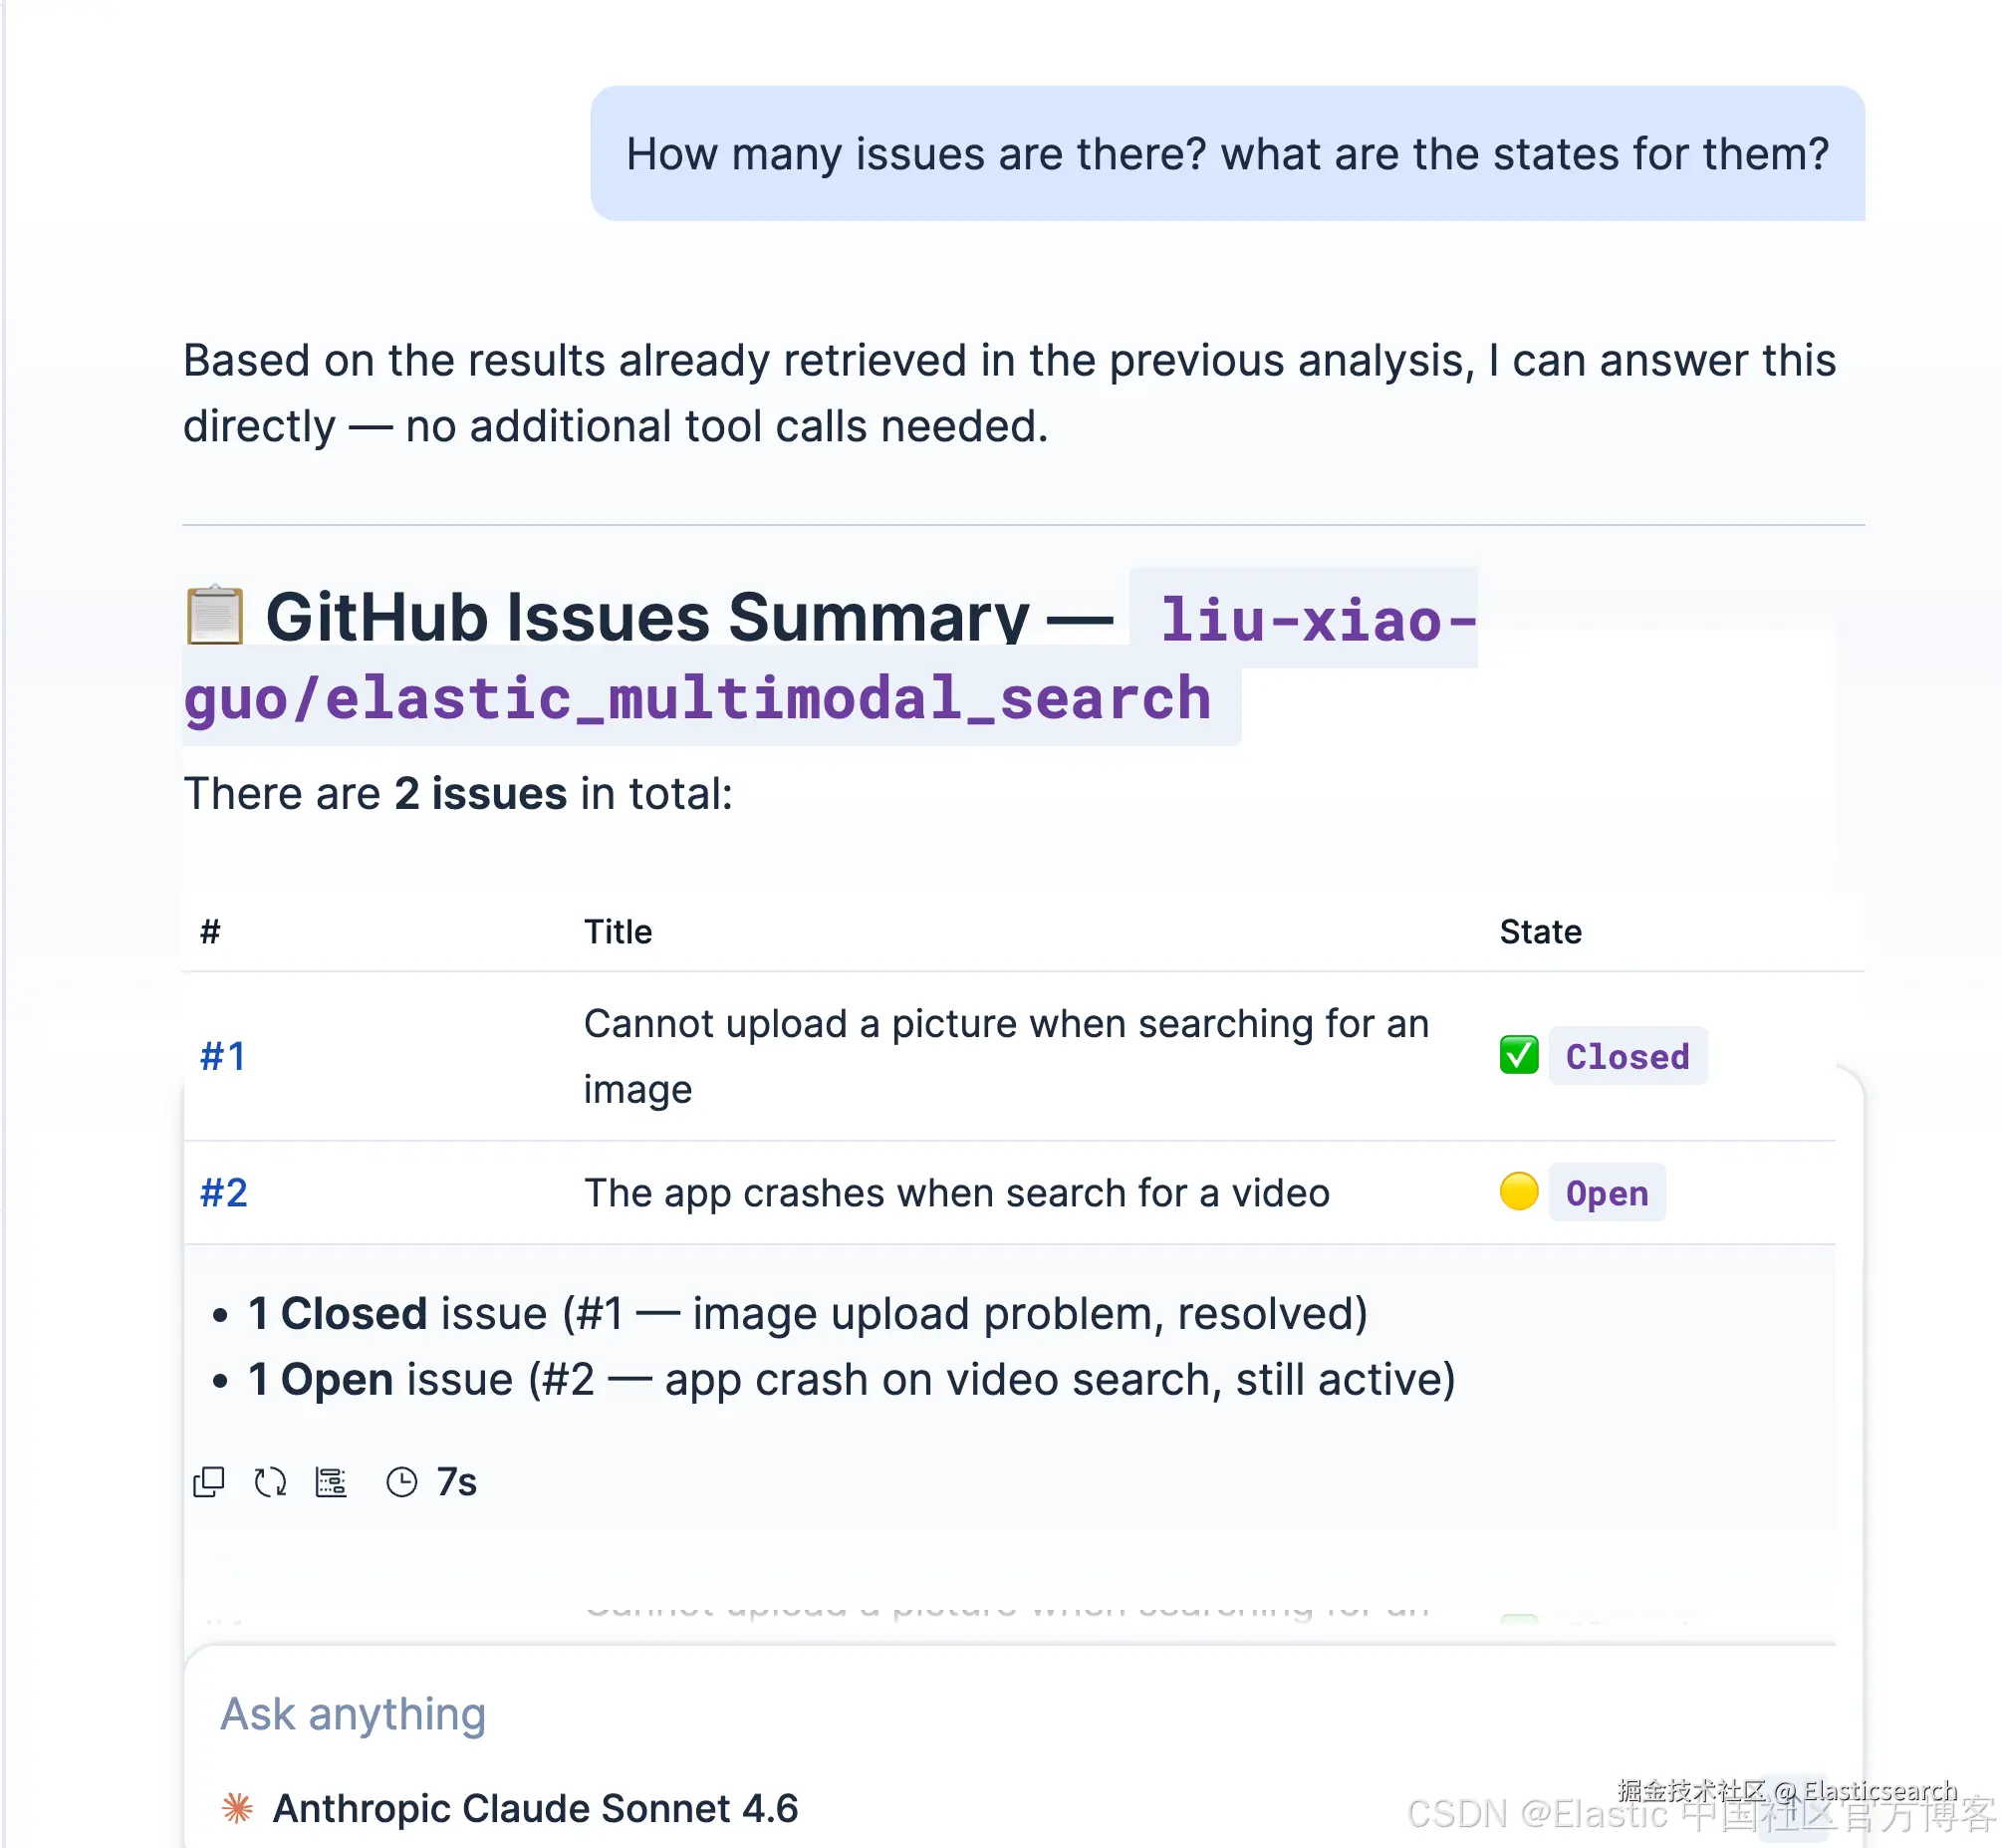
总结
我们可以在 Kibana 中轻松地配置 connnectors,并使它们很方便地引入到我们的 agents 里。这样我们使用连接器里的数据结合企业数据,更容易得到我们想要的结果。