Freemarker入门使用
FreeMarker介绍
FreeMarker是一款模板引擎,即基于模板和要改改变的数据,并用来生成输出文本(html页面、电子邮件、配置文件、源代码等)的通用工具。
FreeMarker的模板编写为FreeMarker Template Language(FTL),这是一种简单且专用的语言。开发人员可以在模板中插入变量、控制结构、条件语句等,以动态地生成输出内容。与其他模板引擎相比,Freemarker具有清晰简洁的语法和较高的性能,使得它成为许多Java Web应用程序中常用的选择。
在Java Web应用程序开发中,Freemarker通常与Spring MVC(freemarker作为springmvc一种视图格式,默认情况下SpringMVC支持freemarker视图格式)、Servlet或其他Web框架一起使用,用于生成动态的HTML页面。开发人员可以通过模板引擎将视图和数据有效地结合起来,为用户提供动态且个性化的Web体验
Freemarker 环境搭建
1.创建一个freemarker-demo 的测试工程专门用于freemarker的功能测试与模板的测试。

2.pom.xml
xml
<?xml version="1.0" encoding="UTF-8"?>
<project xmlns="http://maven.apache.org/POM/4.0.0" xmlns:xsi="http://www.w3.org/2001/XMLSchema-instance"
         xsi:schemaLocation="http://maven.apache.org/POM/4.0.0 https://maven.apache.org/xsd/maven-4.0.0.xsd">
    <modelVersion>4.0.0</modelVersion>
    <parent>
        <groupId>org.springframework.boot</groupId>
        <artifactId>spring-boot-starter-parent</artifactId>
        <version>2.3.9.RELEASE</version>
        <relativePath/> <!-- lookup parent from repository -->
    </parent>
    <groupId>com.avgrado</groupId>
    <artifactId>freemarker-demo</artifactId>
    <version>0.0.1-SNAPSHOT</version>
    <name>freemarker-demo</name>

    <properties>
        <project.build.sourceEncoding>UTF-8</project.build.sourceEncoding>
        <maven.compiler.source>8</maven.compiler.source>
        <maven.compiler.target>8</maven.compiler.target>
        <lombok.version>1.18.4</lombok.version>
    </properties>
    <dependencies>
        <!--SpringBoot通用依赖模块-->a
        <dependency>
            <groupId>org.springframework.boot</groupId>
            <artifactId>spring-boot-starter-web</artifactId>
        </dependency>
       <dependency>
            <groupId>org.springframework.boot</groupId>
            <artifactId>spring-boot-starter-freemarker</artifactId>
        </dependency>

        <!--通用基础配置 boottest / lombok >
        <dependency>
            <groupId>org.springframework.boot</groupId>
            <artifactId>spring-boot-starter-test</artifactId>
            <scope>test</scope>
        </dependency>
        <dependency>
            <groupId>org.projectlombok</groupId>
            <artifactId>lombok</artifactId>
            <version>${lombok.version}</version>
            <optional>true</optional>
        </dependency>

        <!-- apache 对 java io 的封装工具库 -->
        <dependency>
            <groupId>org.apache.commons</groupId>
            <artifactId>commons-io</artifactId>
            <version>1.3.2</version>
        </dependency>
    </dependencies>

    <build>
        <plugins>
            <plugin>
                <groupId>org.springframework.boot</groupId>
                <artifactId>spring-boot-maven-plugin</artifactId>
            </plugin>
        </plugins>
    </build>

</project>
3.写application.yml
yaml
server:
port: 8881 #服务端口
spring:
application:
name: freemarker-demo #指定服务名
freemarker:
cache: false #关闭模板缓存,方便测试
settings:
template_update_delay: 0 #检查模板更新延迟时间,设置为0表示立即检查,如果时间大于0会有缓存不方便进行模板测试
suffix: .ftl #指定Freemarker模板文件的后缀名,后缀名如果不配置,则需要把模板文件后缀名定义为 .ftlh,因为在Freemarker在 FreeMarkerProperties 源码中默认定义了此配置
template-loader-path: classpath:/templates # 加载的模板文件路径配置,此路径参数可以不配置,因为在Freemarker在 FreeMarkerProperties 源码中默认定义了此配置
4.创建启动类
typescript
package com.avgrado.freemarker;

import org.springframework.boot.SpringApplication;
import org.springframework.boot.autoconfigure.SpringBootApplication;

/**
 * @ClassName FreemakerDemoApplication
 * @Description FreemakerDemoApplication
 * @Author avgrado
 * @Date 2024-02-23 16:02
 */
@SpringBootApplication
public class FreemakerDemoApplication {
    public static void main(String[] args) {
        SpringApplication.run(FreemakerDemoApplication.class,args);
    }
}
5.创建模板
在 resource目录下创建 tempates 目录,然后在templates目录下创建模板 basic.ftl

basic.ftl内容如下:使用插值表达式接受返回的内容
xml
<!DOCTYPE html>
<html>
<head>
<meta charset="utf-8">
<title>Hello World!</title>
</head>
<body>
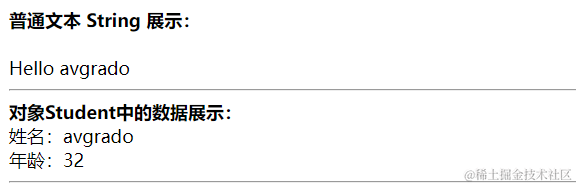
<b>普通文本 String 展示:</b><br><br>
Hello ${name} <br>
<hr>
<b>对象Student中的数据展示:</b><br/>
姓名:${stu.name}<br/>
年龄:${stu.age}
<hr>
</body>
</html>6.创建返回的student 对象实体类和编写controller,返回数据给视图展示
java
package com.heima.freemarker.entity;

import lombok.Data;

import java.util.Date;

@Data
public class Student {
    private String name;//姓名
    private int age;//年龄
    private Date birthday;//生日
    private Float money;//钱包
}
kotlin
package com.heima.freemarker.controller;

import com.heima.freemarker.entity.Student;
import org.springframework.stereotype.Controller;
import org.springframework.ui.Model;
import org.springframework.web.bind.annotation.GetMapping;

/**
 * @ClassName FreemarkerTestController
 * @Description FreemarkerTestController
 * @Author avgrado
 * @Date 2024-02-23 16:51
 */
@Controller
public class FreemarkerTestController {
    @GetMapping("/basic")
    public String basic(Model model){
        model.addAttribute("name","avgrado");
        Student stu = new Student();
        stu.setAge(32);
        stu.setName("avgrado");
        model.addAttribute("stu",stu);
        //此处是.ftl文件的名称,不用加后缀,否则访问不到
        return "basic";
    }

}
7.启动项目,访问 http://localhost:8881/basic
 8.至此环境搭建成功
Freemarker 基础
语法种类
1、注释,即<#-- -->,介于其之间的内容会被freemarker忽略
bash
<#--我是一个freemarker注释-->2、插值(Interpolation):即 ${..} 部分,freemarker会用真实的值代替 ${..}
bash
Hello ${name}3、FTL指令:和HTML标记类似,名字前加#予以区分,Freemarker会解析标签中的表达式或逻辑。
bash
<# >FTL指令</#> 4、文本,仅文本信息,这些不是freemarker的注释、插值、FTL指令的内容会被freemarker忽略解析,直接输出内容。
bash
<#--freemarker中的普通文本-->
我是一个普通的文本
集合指令
- list指令 :循环展示list数据
- templates 目录下新建 list.ftl模板
xml
<!DOCTYPE html>
<html>
<head>
    <meta charset="utf-8">
        <title>Hello World!</title>
    </head>
    <body>
        <b>展示list中的stu数据:</b>
        <table>
            <tr>
                <td>序号</td>
                <td>姓名</td>
                <td>年龄</td>
                <td>收入</td>
            </tr>
            <#list stuList as stu>
                <tr>
                    <td>${stu_index+1}</td>
                    <td>${stu.name}</td>
                    <td>${stu.age}</td>
                    <td>${stu.money}</td>
                </tr>
            </#list>
        </table>
    </body>
</html>
2.controller中 创建返回 list 接口
java
 @GetMapping("/list")
public String list(Model model){
    Student stu1 = new Student();
    stu1.setName("Avgrado");
    stu1.setAge(32);
    stu1.setMoney(5000.0f);

    Student stu2 = new Student();
    stu2.setName("Beasly");
    stu2.setAge(30);
    stu2.setMoney(3000.0f);

    Student stu3 = new Student();
    stu3.setName("Cindy");
    stu3.setMoney(8000.0f);
    stu3.setAge(28);

    List<Student> studentList = new ArrayList<Student>();
    studentList.add(stu1);
    studentList.add(stu2);
    studentList.add(stu3);

    model.addAttribute("stuList",studentList);
    return "list";
}- 访问测试

- map指令
map数据的展示:
方式一:通过 map['keyname'].property
方式二:通过 map.keyname.property
1.在templates目录中创建 map.ftl模板
html
<html>
    <head>
    <meta charset="utf-8">
    <title>Hello World!</title>
    </head>
    <body>
        <h1>Map指令</h1>

        <#-- Map 数据的展示 -->
        <b>map数据的展示:</b>
        <br/><br/>
        <a href="###">方式一:通过map['keyname'].property</a><br/>
        输出stu1的学生信息:<br/>
        姓名:${stuMap['stu1'].name}<br/>
        年龄:${stuMap['stu1'].age}<br/>
        <br/>
        <a href="###">方式二:通过map.keyname.property</a><br/>
        输出stu2的学生信息:<br/>
        姓名:${stuMap.stu2.name}<br/>
        年龄:${stuMap.stu2.age}<br/>

        <br/>
        <a href="###">遍历map中两个学生信息:</a><br/>
        <table>
            <tr>
            <td>序号</td>
            <td>姓名</td>
            <td>年龄</td>
            <td>钱包</td>
            </tr>
            <#list stuMap?keys as key >
                <tr>
                    <td>${key_index}</td>
                    <td>${stuMap[key].name}</td>
                    <td>${stuMap[key].age}</td>
                    <td>${stuMap[key].money}</td>
                </tr>
            </#list>
        </table>
        <hr>
    </body>
</html>
2.controller 创建返回 包含student信息的map数据 接口
java
@GetMapping("/map")
public String map(Model model){
    Student stu1 = new Student();
    stu1.setName("Avgrado");
    stu1.setAge(32);
    stu1.setMoney(5000.0f);

    Student stu2 = new Student();
    stu2.setName("Beasly");
    stu2.setAge(30);
    stu2.setMoney(3000.0f);

    Student stu3 = new Student();
    stu3.setName("Cindy");
    stu3.setMoney(8000.0f);
    stu3.setAge(28);

    Map<String, Object> stuMap = new HashMap<>();
    stuMap.put("stu1",stu1);
    stuMap.put("stu2",stu2);
    stuMap.put("stu3",stu3);

    model.addAttribute("stuMap" ,stuMap);

    return "map";
}
3.访问测试

if 指令
html
<#if 条件>
    .....
<#elseif 条件>
    ...
<#else>
    ..
<#/if>
通过index来控制每行的背景色
xml
    <!DOCTYPE html>
<html>
    <head>
        <meta charset="utf-8">
        <title>Hello World!</title>
    </head>
    <body>
        <b>展示list中的stu数据:</b>
        <table>
            <tr>
            <td>序号</td>
            <td>姓名</td>
            <td>年龄</td>
            <td>收入</td>
            </tr>
            <#list stuList as stu>
                <#if stu_index % 2 == 0>
                    <tr style="background-color: #f0f0f0">
                        <td>${stu_index+1}</td>
                        <td>${stu.name}</td>
                        <td>${stu.age}</td>
                        <td>${stu.money}</td>
                    </tr>
                <#elseif stu_index == 1>
                    <tr style="background-color: #00ff00">
                        <td>${stu_index+1}</td>
                        <td>${stu.name}</td>
                        <td>${stu.age}</td>
                        <td>${stu.money}</td>
                    </tr>
                 <#else>
                    <tr style="background-color: #ffccff">
                        <td>${stu_index+1}</td>
                        <td>${stu.name}</td>
                        <td>${stu.age}</td>
                        <td>${stu.money}</td>
                    </tr>
                </#if>
            </#list>
        </table>
    </body>
</html>
运行结果:

运算符
算数运算符
FreeMarker表达式中完全支持算术运算,FreeMarker支持的算术运算符包括:
-
加法:
+ -
减法:
- -
乘法:
* -
除法:
/ -
求模 (求余):
%
比较运算符
- **
=**和 **!=**可以用于字符串、数值和日期来比较是否相等 - **
=**和 **!=**两边必须是相同类型的值,否则会产生错误 - 字符串
"x"、"x "、"X"比较是不等的.因为FreeMarker是精确比较 - 其它的运行符可以作用于数字和日期,但不能作用于字符串
- 使用**
gt**等字母运算符代替>会有更好的效果,因为 FreeMarker会把>解释成FTL标签的结束字符 - 可以使用括号来避免这种情况,如:
<#if (x>y)> - 比较运算的结果不能用插值表达式输出,因为比较运算的结果是 boolean ,直接用插值表达式输出会报错
逻辑运算符
- 逻辑与:&&
- 逻辑或:||
- 逻辑非:!
逻辑运算符只能作用于布尔值,否则将产生错误
新建 calculate.ftl
ruby
<html>
    <head>
        <title>Calculate</title>

    </head>
    <body>
        加法:${5+10}<br>
        减法:${5-10}<br>
        乘法:${5*10}<br>
        除法:${5/10}<br>
        求模:${5%10}<br>
        <hr/>
        <h3>比较运算符</h3><br/>
        5大于3吗 :${(5 > 3)?string("大于","小于")}<br/>
        5小于3吗 :${(5 < 3)?string("大于","小于")}<br/>
        5等于3吗 :${(5 == 3)?string("等于","不等于")}<br/>

        <hr/>
        <h3>逻辑运算符</h3><br/>
        <#if (10 lt 12 )&&( 10 gt 5 ) >
        (10 lt 12 )&&( 10 gt 5 ) 显示为 true
        </#if>
        <br/>
        <br/>
        <#if !false>
        false 取反为true
        </#if>
    </body>
</html>
空值处理
- 判断某个变量是否存在使用
"??":variable??------如果该变量存在返回true,否则返回false
为防止变量 stus 为空报错可以加上判断如下:
arduino
 <#if stus??>
    <#list stus as stu>
    	......
    </#list>
</#if> -
缺失变量时指定默认值使用
"!":-
使用
!要以指定一个默认值,当变量为空时显示默认值:${name!''}表示如果name为空显示空字符串
-
如果是嵌套对象则建议使用()括起来:
${(stu.bestFriend.name)!''}表示,如果stu或bestFriend或name为空默认显示空字符串
-
内建函数
内建函数语法格式:变量+?+函数名称
-
某个集合大小:${集合名?size}
-
日期格式化:
- 显示年月日:${today?date}
- 显示时分秒:${today?time}
- 显示日期+时间:${today?datetime}
- 自定义格式化:${today?string("yyyy年mm月")}
-
内建函数 c:
- modelAttribute.add("point",102920122)这行代码添加的 point是数字型, 使用
${point}输出显示数字的值会每三位被用逗号隔开,如果不想每三位用都好隔开,可以用 c 函数将数字转为字符串输出:${point?c}
- modelAttribute.add("point",102920122)这行代码添加的 point是数字型, 使用
-
JSON 字符串转为对象:其中用到了 assign标签,assign的作用是定义一个变量。
scss
<#assign text="{'bank':'工商银行','account':'10101920201920212'}" />
<#assign data=text?eval />
开户行:${data.bank}  账号:${data.account}
代码示例: 1.创建内建函数Controller数据模型:
java
@GetMapping("innerFunc")
public String innerFunc(Model model){
    //添加集合
    Map<String, Object> map = new HashMap<>();
    map.put("m1","k1");
    map.put("m2","k2");
    map.put("m3","k3");
    model.addAttribute("map",map);

    //添加日期
    Date date = new Date();
    model.addAttribute("today", date);

    //添加数字
    model.addAttribute("point",102920122);
    return "innerFunc";
}- 创建innerFunc.ftl
xml
<!DOCTYPE html>
<html>
    <head>
        <meta charset="utf-8">
        <title>inner Function</title>
    </head>
    <body>

    <b>获得集合大小</b><br>

        集合大小:${map?size}
        <hr>


        <b>获得日期</b><br>

        显示年月日: ${today?date}<br>

        显示时分秒:${today?time}<br>

        显示日期+时间:${today?datetime}<br>

        自定义格式化: ${today?string("yyyy年mm月")} <br>

        <hr>

        <b>内建函数C</b><br>
        没有C函数显示的数值:${point} <br>

        有C函数显示的数值:${point?c}

        <hr>

        <b>声明变量assign</b><br>

        <#assign banktext = "{'bank':'中国银行','account':'1234567890'}" />
        <#assign bankJson = banktext?eval />
        开户行:${bankJson.bank} <br>
        银行账号:${bankJson.account}

        <hr>
    </body>
</html>
运行结果:

静态化输出文件
使用Freemarker原生Api来生成静态内容:利用原生Api将页面生成html文件
实现思路:

1、 application.yml文件配置内容如下
yaml
server:
  port: 8881 #服务端口
spring:
  application:
    name: freemarker-demo #指定服务名
  freemarker:
    cache: false  #关闭模板缓存,方便测试
    settings:
      template_update_delay: 0 #检查模板更新延迟时间,设置为0表示立即检查,如果时间大于0会有缓存不方便进行模板测试
    suffix: .ftl               #指定Freemarker模板文件的后缀名
    template-loader-path: classpath:/templates   #模板存放位置
2.test包下创建 FreemarkerGenerateStaticFile 类
java
import com.heima.freemarker.FreemakerDemoApplication;
import com.heima.freemarker.entity.Student;
import freemarker.template.Configuration;
import freemarker.template.Template;
import org.junit.Test;
import org.junit.runner.RunWith;
import org.springframework.beans.factory.annotation.Autowired;
import org.springframework.boot.test.context.SpringBootTest;
import org.springframework.test.context.junit4.SpringRunner;
import org.springframework.ui.Model;

import java.io.FileWriter;
import java.io.IOException;
import java.util.HashMap;
import java.util.Map;

@SpringBootTest(classes = FreemakerDemoApplication.class)
@RunWith(SpringRunner.class)
public class FreemarkerGenerateStaticFile {

    @Autowired
    private Configuration configuration;

    @Test
    public void generateStaticFile() throws Exception {
        //获取模板的位置
        Template template = configuration.getTemplate("map.ftl");
        Map<String, Object> data = getData();
        template.process(data,new FileWriter("C:\\Users\\DAWN\\Desktop\\map.html"));
    }


    public Map<String, Object> getData(){
        Student stu1 = new Student();
        stu1.setName("Avgrado");
        stu1.setAge(32);
        stu1.setMoney(5000.0f);

        Student stu2 = new Student();
        stu2.setName("Beasly");
        stu2.setAge(30);
        stu2.setMoney(3000.0f);

        Student stu3 = new Student();
        stu3.setName("Cindy");
        stu3.setMoney(8000.0f);
        stu3.setAge(28);

        Map<String, Object> stuMap = new HashMap<>();
        stuMap.put("stu1",stu1);
        stuMap.put("stu2",stu2);
        stuMap.put("stu3",stu3);

        Map<String, Object> resutMap = new HashMap<>();
        resutMap.put("stuMap",stuMap);
        return resutMap;
        }
}
执行成功后,查看生成的map.html文件
