今天是学习的第六天,把以前的重新回顾一次,加深记忆
- v-for列表循环和复选框展示
这是vue的学习知识,在组件中使用后v-for,方式有几种,
v-for="item in 数据源"
v-for="(item , index)in 数据源" :key="index"
:key="item.id"
这里记录下,在key的时,可以写下标也可以是数据源的id,使用数据源中的id,更为的严谨。例如:
<template>
	<view>
		<view class="box" v-for="(item , index) in 10">for模块-{{index+1}}</view>
		<view v-for="(item,index) in nba" :key="index">
			球星:{{item.name}}--球衣:{{item.num}}
		</view>
	</view>
	===========================
	<view class="out">
		<view class="box" v-for="(item,index) in goods" :key="item.id">
			<checkbox-group @change="getHander">
				<checkbox :value="item.name"  :checked="item.checked" />
				<text class="title">{{item.name}}</text>
				<text class="del" @click="remote(index)">删除</text>
			</checkbox-group>
		</view>
	</view>

</template>

<script setup>
	import {
		ref
	} from 'vue';

	const goods = ref([{
			id: 11,
			name: "小米",
			checked: true
		},
		{
			id: 12,
			name: "华为",
			checked: false
		},
		{
			id: 13,
			name: "苹果",
			checked: false
		},
		{
			id: 14,
			name: "三星",
			checked: false
		}
	]);
	const nba = ref([{
			id: 1,
			name: "乔丹",
			num: 23
		},
		{
			id: 2,
			name: "詹姆斯",
			num: 17
		},
		{
			id: 3,
			name: "科比",
			num: 7
		}
	]);

	function remote(index) {
		goods.value.splice(index, 1);  //这是js中数组去掉某一下标的方法,splice(下标,需要删除几条)
	}
	function getHander(e){
		console.log(e);
	}

</script>

<style lang="scss" scoped>
	.out {
		padding: 10px;

		.box {
			padding: 10px;

			.del {
				color: red;
				margin-left: 30px;
			}
		}
	}
</style>
以上还有使用的checkbox ,也使用了checkbox -gooup,这个本来是想着做一个关联的复选框,最后没做出来,先记录下,后期完善
- input组件、v-model 、深入:添加一个获取焦点得到一个小图片
这里学习了input组件的常用属性,在组件中使用v-model的效果,下面是代码
<template>
	<view class="out">
	<!-- 	<input type="text" :value="inpValue" @focus="isActivity=true" @blur="isActivity=false"
	 @input="event= > inpValue=event.detail.value"/> -->
	 <!-- 上面是一般情况下使用input组件的方法,在vue中,使用v-model指令,就可以实现下上面的效果,只用添加v-model,不需要
	 在添加value、 @input了 -->
		<input type="text" v-model="inpValue" @focus="isActivity=true" @blur="isActivity=false"
		@confirm="onConfirm"
		/>
		<image src="../../static/chicken.gif" mode="" class="pic" :class="isActivity ? 'active' : '' "></image>
	</view>
	<view class="">预览:{{inpValue}}</view>
</template>

<script setup>
	import { ref } from 'vue';
	const inpValue=ref("")
	const isActivity=ref(false)

	// 在@input中,使用函数获取输入的值,然后赋值给变量中,因为是只有简单的赋值,没其他业务逻辑,
	// 因此也可以是在@input中进行,使用的方法就是:@input="event => inpValue=event.detail.value"
	// 这就简化了代码
	// function oninput(e){
	// 	inpValue.value=e.detail.value;
	// }
	function onConfirm(e){
		console.log(e);
	}

</script>

<style lang="scss" scoped>
.out{
	padding: 0 20px;
	margin-top: 40px;
	position: relative;
	input{
		border: 1px solid red;
		height: 40px;
		position: relative;
		//position 属性用于指定一个元素在文档中的定位方式
		// 定位元素(positioned element)是其计算后位置属性为 relative, absolute, fixed 或 sticky 的一个元素
		// (换句话说,除static以外的任何东西)。
		// 相对定位元素(relatively positioned element)是计算后位置属性为 relative的元素。
		// 绝对定位元素(absolutely positioned element)是计算后位置属性为 absolute 或 fixed 的元素。
		// 粘性定位元素(stickily positioned element)是计算后位置属性为 sticky 的元素。
		z-index: 2;
		//z-index 属性设置定位元素及其后代元素或 flex 项目的 Z 轴顺序。z-index 较大的重叠元素会覆盖较小的元素。
		//auto盒子不会创建一个新的局部层叠上下文。盒子在当前层叠上下文的层叠等级是 0。
		// <integer>盒子在当前层叠上下文的层叠等级就是 <integer> 的值。盒子还会创建一个局部层叠上下文。
		// 这意味着该元素的后代元素不会和该元素的外部元素比较 z-index。
		background: white;
	}
	.pic{
		width: 24px;
		height: 24px;
		z-index: 1;
		position: absolute;
		top: 0px;
		left: calc(50% - 12px);
		transition: top 0.3s;
		// 过渡可以为一个元素在不同状态之间切换的时候定义不同的过渡效果。比如在不同的伪元素之间切换,
		// 像是 :hover,:active 或者通过 JavaScript 实现的状态变化。
	}
	.pic.active{
		top:-24px;
	}
}
</style>
上面主要需要多练习的是css的样式,会行成一个获取焦点后,给一个小图片的提示,这里图片不能显示出来,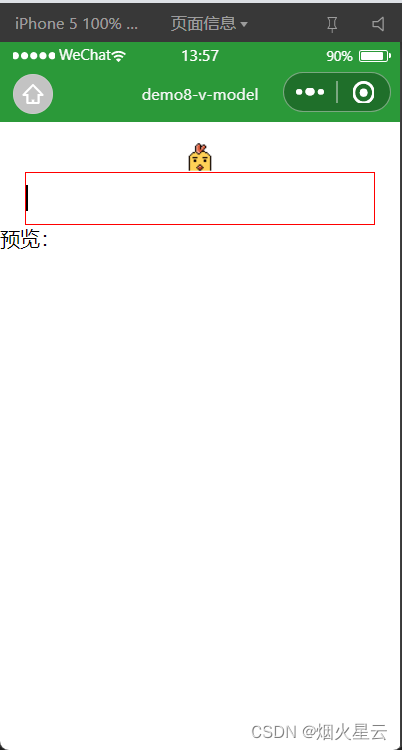
- 近期所有学习的汇总
根据老师的视频,做了一个小功能,包含了近期学习的各个组件使用的方法,然后在最后,自己添加了一个小的提示框,虽然距离自己的设想还有点远,但初步达到了效果
<template>
	<view class="title">
		近期热梗
	</view>

	<view class="out">
		<view class="list">
			<view class="row" v-for="(item,index) in lists" :key="item.id">
				<view class="text">{{index+1}}.{{item.title}}</view>
				<view class="close" @click="onClick(index)">
					<icon type="clear" size="26" />
				</view>
			</view>
		</view>
		<view class="count">
			共{{lists.length}}条梗
		</view>
		<view class="comment">
			<input type="text" placeholder="请输入热梗..." v-model="inpValue" />
			<!-- 这里做个记录:设置了disabled,但是在h5页面上并没有效果,点击后还是会进入设置的点击事件
			因此就在点击事件中添加了判断;由于HTML规范的原因,所以设置<button>元素的disabled属性是无效的
			在微信小程序中设置的disabled,是有效果的 -->
			<button size="mini" type="primary" :disabled="inpValue.length<3 " @click="onsubmit">
				发布
				<!-- :disabled="inpValue.length>0 ? false : true " -->
			</button>
		</view>
	</view>
</template>

<script setup>
	import {
		ref
	} from "vue";

	const inpValue = ref("");

	const lists = ref([{
			id: 111,
			title: "刚满18岁"
		},
		{
			id: 222,
			title: "我不吃牛肉"
		},
		{
			id: 333,
			title: "遥遥领先"
		},
		{
			id: 444,
			title: "哪里贵了"
		}
	])
	//这是在网上查的,是uni-app下的api,这是一个提示框
	function showToast() {
		uni.showToast({
			title: '最少输入三个字符'
		});
	}
	function onClick(index) {
		lists.value.splice(index, 1)
	}
	//这里对应上面的判断,在h5页面上button设置了禁用,没有效果
	//这里的判断,不能和templat中,直接用变量名.length进行长度判断,
	//不然是没有效果的,需要使用值进行判断才可以
	function onsubmit() {
		if (inpValue.value.length < 3) {
			console.log("长度不够");
			showToast();
		} else {
			console.log("够了" + inpValue.value.length);
			lists.value.push({
				id: Date.now(),
				title: inpValue.value
			});
			inpValue.value = "";
		}
	}
</script>
<style lang="scss" scoped>
	.title {
		font-size: 26px;
		text-align: center;
		color: #3c3c3c;
		padding: 30px 0 15px;
	}

	.out {
		width: 90vw;
		margin: 15px auto;
		box-shadow: 0 10px 20px rgba(0, 0, 0, 0.1);
		border-radius: 5px;
		padding: 15px;
		box-sizing: border-box;

		.list {
			.row {
				padding: 10px 0;
				border-bottom: 1px solid #e8e8e8;
				display: flex;
				justify-content: space-between;
				align-items: center;
				font-size: 18px;
				color: #333;

				.text {
					padding-right: 5px;
					box-sizing: border-box;
				}
			}
		}

		.count {
			padding: 10px 0;
			font-size: 15px;
			color: #888;
			text-align: center;
		}

		.comment {
			display: flex;
			margin-top: 10px;

			input {
				flex: 4;
				background: #f4f4f4;
				margin-right: 5px;
				height: 100%;
				height: 32px;
				border-radius: 4px;
				padding: 0 10px;
				color: #333;
			}

			button {
				flex: 1;
			}
		}
	}
</style>