虚拟列表
就是只渲染当前可视区的内容,通过这种方式减少DOM的数量
完整列高度 = 每一项高度 × 总项数
可视区域高度 = 屏幕可见高度
滚动高度(scrollHeight) = 完整列表高度
当前滚动距离 = 已滚动的距离
基础版本的虚拟列表
html
<template>
  <div class="dashboard-container">
    <div ref="container" class="virtual-container" @scroll="handleScroll">
      <div
        class="placeholder"
        :style="{ height: placeholderHeight + 'px' }"
      ></div>
      <div
        class="list-content"
        :style="{ transform: `translateY(${offsetHeight}px)` }"
      >
        <div
          v-for="item in visibleList"
          :key="item.id"
          class="list-item"
          :style="{ height: itemHeight + 'px', lineHeight: itemHeight + 'px' }"
        >
          {{ item.id }}
        </div>
      </div>
    </div>
  </div>
</template>
<script setup>
const startIndex = ref(0); //可视区渲染数组的开始下标
const endIndex = ref(0); //可视区渲染数组的结束下标
const listData = ref(
  new Array(1000).fill({}).map((item, index) => ({ id: index }))
); //生成1000条要渲染的数据
const itemHeight = ref(50); //确定每一项的高度
const container = ref(null); //内容区的ref
const offsetHeight = ref(0); //偏移量
const placeholderHeight = ref(itemHeight.value * listData.value.length); //占位元素的高度
const clientHeight = ref(0); //内容区的高度
const visibleList = computed(() => {
   return listData.value.slice(
    startIndex.value,
    Math.min(endIndex.value, listData.value.length)
  );
}); //计算属性得到要渲染的数组
const visibleCount = computed(() => {
  return Math.ceil(container.value.clientHeight / itemHeight.value);
}); //计算属性 获取当前可见区域能渲染的元素的个数
const handleScroll = (e) => {
  // 滚动变化后重新结算新的开始和结束下标
  startIndex.value = Math.floor(e.target.scrollTop / itemHeight.value);
  endIndex.value = startIndex.value + visibleCount.value;
  offsetHeight.value = startIndex.value * itemHeight.value;
};
onMounted(() => {
  // 初始化值
  startIndex.value = 0;
  endIndex.value = startIndex.value + visibleCount.value;
  clientHeight.value = container.value.clientHeight;
});
</script>
<style lang="scss" scoped>
.virtual-container {
  position: relative;
  overflow-y: scroll;
  width: 300px;
  height: 498px;
  background-color: #baf;
  margin: 50px auto 0;
  .list-content {
    width: 100%;
    position: absolute;
    left: 0;
    top: 0;
    .list-item {
      box-sizing: border-box;
      border: 1px solid #ddd;
      text-align: center;
      width: 100%;
    }
  }
}
</style>
visibleCount计算为什么要用Math.ceil
js
const visibleCount = computed(() => {
  return Math.ceil(container.value.clientHeight / itemHeight.value);
});
假设容器的高度是220px,每项的高度是50px;
计算:visibleCount = 220 / 50 = 4.4
如果使用Math.floor(4.4)得到4,就只能显示4个项目,但是4个项目的高度是: 4×50=200,容器底部会有20px的空白,实际上这20px可以显示第五个项目的部分内容,所以需要显示5个项目才能填满容器的可视区,所以就得使用Math.ceil(4.4) = 5,这样可视区就能渲染五个项目,虽然第五个项目只有部分可见,但是这样可以保证容器被填满,不会出现空白
startIndex为什么是Math.floor
js
startIndex = Math.floor(scrollTop / itemHeight.value)假设
项目高度: 50px
容器高度:200px(可显示4个项目)
总项目数:1000个
容器滚动高度(scrollTop): 125px
startIndex计算:startIndex= 125 / 50 = 2.5
如果是Math.ceil: Math.ceil(125 / 50)=3,本来滚动125px的时候,可视区域的顶部位于项目2的中间(如下:项目2的Y轴位置是100px- 150px),现在开始索引为3,那就是从索引为3的位置开始渲染,项目2就不会渲染,这就会导致可视区域顶部出现空白(因为项目2 的部分内容没有被渲染)
所以为了保证任何部分再可见区域内的项目都被渲染要用Math.floor
项目坐标图(y轴位置):
项目0: 0-50px
项目1: 50-100px
项目2: 100-150px
项目3: 150-200px
项目4: 200-250px
Math.ceil顶部就会出现空白
总结 :在虚拟列表中计算开始索引使用Math.floor,计算可视区域的可见数量Math.ceil
visibleList截取为什么要用Math.min
js
listData.value.slice(
    startIndex.value,
    Math.min(endIndex.value, listData.value.length)
  );
防止数组越界
比如现在这里有1000条数据,容器可显示10条,当滚动到第995条附近的时候,此时startIndex = 995,endIndex = 995 + 10 = 1005超过了数据总量,所以需要用Math.min
上面写法存在的问题
上面那样写在快速滚动的时候容器底部会出现空白,需要通过设置上下缓冲区来解决,也就是在前后多取几项,比如可视区可以渲染10项,但是实际取的数组的长度是,上面缓冲区10项 + 可视区10项 + 下面缓冲区的10项,数组一共要取20项,这样滚动的时候就不会出现空白了
html
<template>
<div class="dashboard-container">
<div ref="container" class="virtual-container" @scroll="handleScroll">
<div
class="placeholder"
:style="{ height: placeholderHeight + 'px' }"
></div>
<div
class="list-content"
:style="{ transform: `translateY(${offsetHeight}px)` }"
>
<div
v-for="item in visibleList"
:key="item.id"
class="list-item"
:style="{ height: itemHeight + 'px', lineHeight: itemHeight + 'px' }"
>
{{ item.id }}
</div>
</div>
</div>
</div>
</template>
<script setup>
const startIndex = ref(0); //可视区渲染数组的开始下标
const endIndex = ref(0); //可视区渲染数组的结束下标
const listData = ref(
new Array(1000).fill({}).map((item, index) => ({ id: index }))
); //生成1000条要渲染的数据
const itemHeight = ref(50); //确定每一项的高度
const container = ref(null); //内容区的ref
const offsetHeight = ref(0); //偏移量
const placeholderHeight = ref(itemHeight.value * listData.value.length); //占位元素的高度
const clientHeight = ref(0); //内容区的高度
const buffer = 10;
const topIndex = ref(0);
const visibleList = computed(() => {
return listData.value.slice(
startIndex.value,
Math.min(endIndex.value, listData.value.length)
);
}); //计算属性得到要渲染的数组
const visibleCount = computed(() => {
return Math.ceil(container.value.clientHeight / itemHeight.value);
}); //计算属性 获取当前可见区域能渲染的元素的个数
const handleScroll = (e) => {
// 滚动变化后重新结算新的开始和结束下标
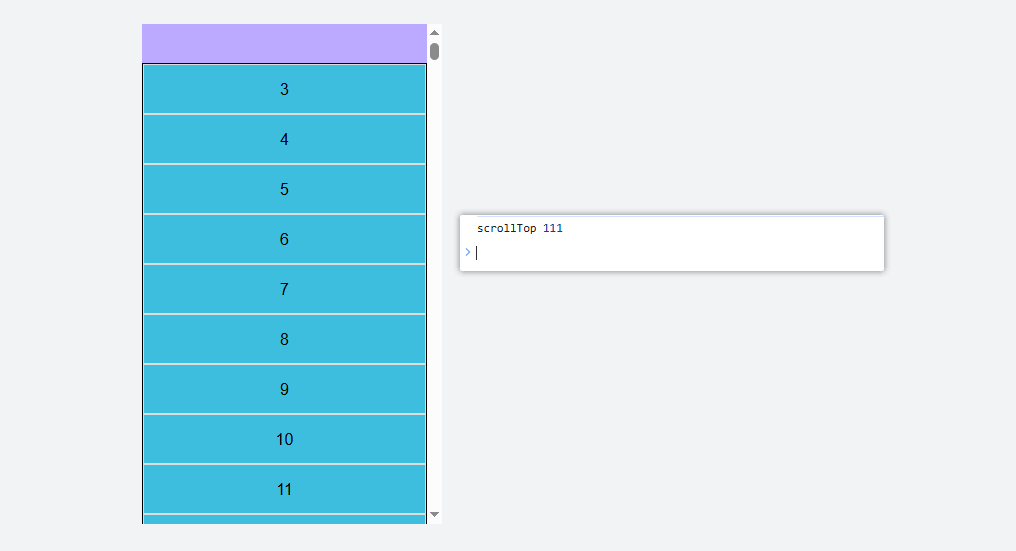
console.log("scrollTop", e.target.scrollTop);
topIndex.value = Math.floor(e.target.scrollTop / itemHeight.value);
startIndex.value = Math.max(0, topIndex.value - buffer);
endIndex.value = startIndex.value + visibleCount.value + buffer;
offsetHeight.value = topIndex.value * itemHeight.value;
};
onMounted(() => {
// 初始化值
startIndex.value = 0;
endIndex.value = startIndex.value + visibleCount.value + buffer;
clientHeight.value = container.value.clientHeight;
});
</script>
<style lang="scss" scoped>
.virtual-container {
position: relative;
overflow-y: scroll;
width: 300px;
height: 500px;
background-color: #baf;
margin: 50px auto 0;
.list-content {
width: 100%;
position: absolute;
left: 0;
top: 0;
background-color: rgb(61, 190, 223);
.list-item {
box-sizing: border-box;
border: 1px solid #ddd;
text-align: center;
width: 100%;
}
}
}
</style>topIndex是在可视区见到的可视区顶部的下标,实际的startIndex是topIndex-buffer得到的
注意添加缓冲区后offsetHeight偏移量要用topIndex计算而不是之前的startIndex