js sdk中的渲染函数embed使用方式如下:
const amis = amisRequire("amis/embed");
const amisScoped = amis.embed( self.$refs"mnode",amisJSON, {}, amisEnv); //env会有默认值,默认值与传来的参数进行合并({默认值, ...env})
amisScoped.getComponentByName("crud");
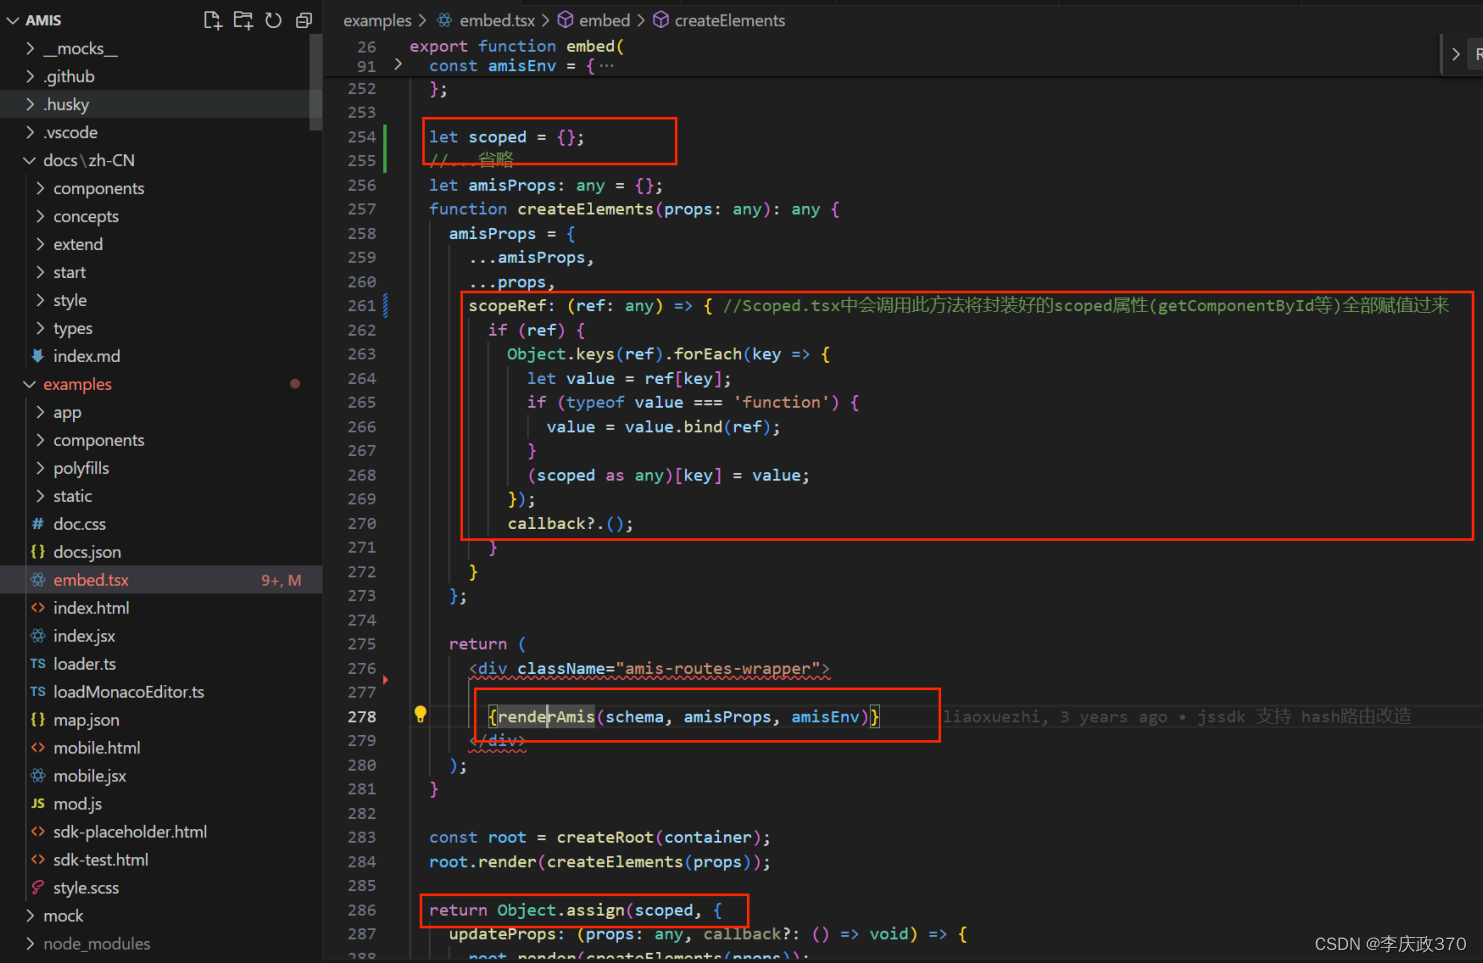
embed函数 源码在examples/embed.tsx中 :
import { render as renderAmis } from 'amis ';
1.核心是通过 {renderAmis(schema, amisProps, amisEnv)}渲染的. (amisEnv里是fetcher,isCancel,tracker等)
2.返回一个scoped对象,里面属性(getComponentByName等)是在amis-core/src/Scoped.tsx中调用scopeRef方法赋值的
render函数在amis-core/src/index.tsx中:
没什么东西,只是return 了一个AMISRenderer,我们直接看AMISRenderer:
1.首先会从stores缓存中获取store(RendererStore树),按amisEnv.session指定的值来获取,amisEnv.session不存在则用固定值'global'
2.若缓存store(RendererStore树)不存在,则会创建一个RendererStore类型的mobx树,将env设置为树的环境配置。然后会将此store(树)缓存到stores对象中(key为amisEnv.session || 'global')。
3.若缓存store(RendererStore树)存在,获取缓存store中的env,并做assign更新env。
(默认 env 会被缓存,所以新传入的 env 不会替换旧的 。除非先删了旧的,新的才会生效)
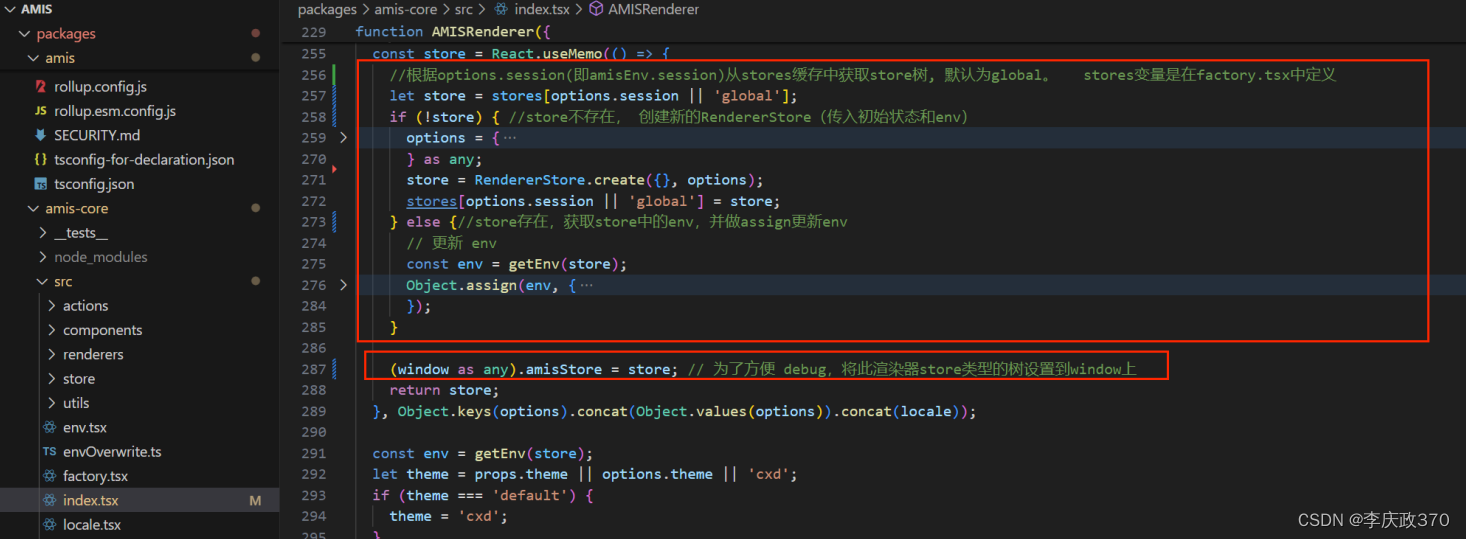
另外:RendererStore是一个渲染器store也是rootStore. RendererStore里还有个单例stores是用来维护amisJSON渲染时生成的一个个组件store树(page、form、crud等),组件销毁时从stores中移除。
4.最终走<ScopedRootRenderer> 并传递props进行后续处理
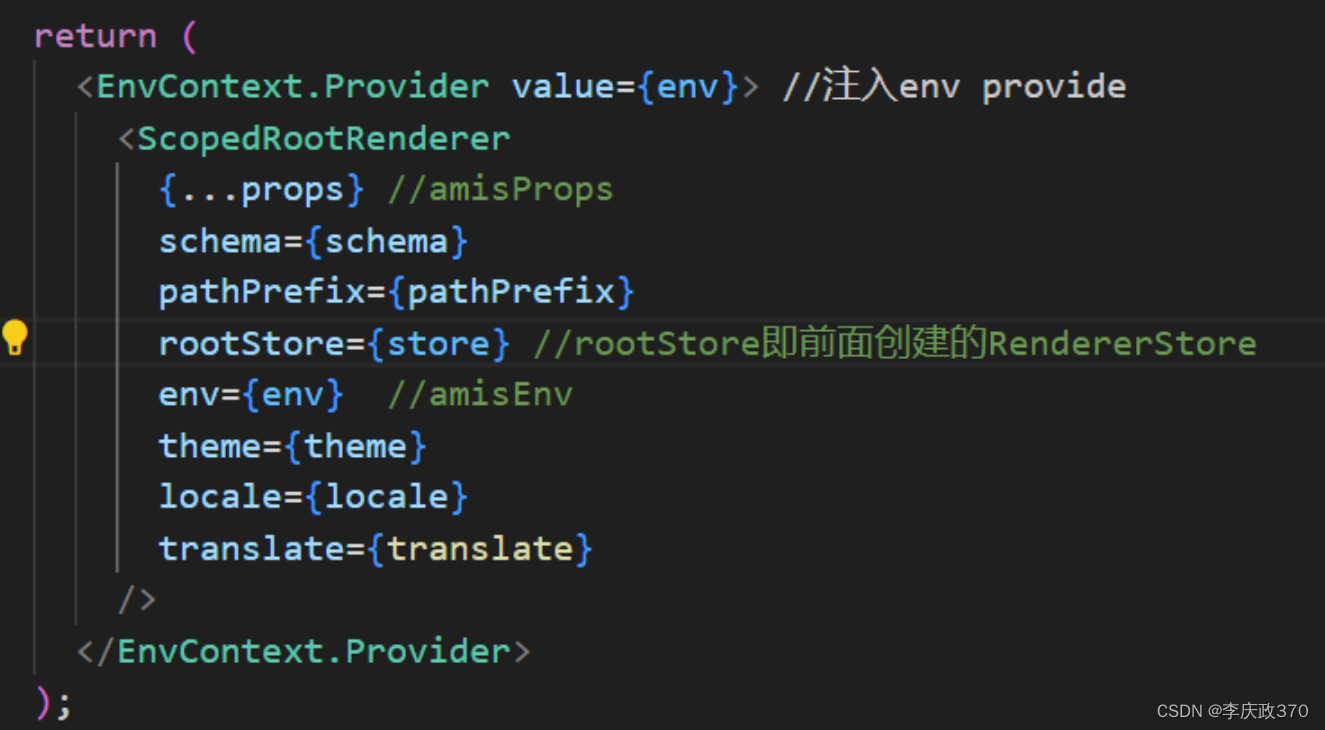
ScopedRootRenderer在amis-core/src/Root.tsx中导出:
1.default导出函数及解释:
export default StatusScoped(Scoped(Root));
Scoped函数:传入Root 作为ComposedComponent参数, 返回ScopedComponent
StatusScoped函数:传入 Scoped(Root) 作为ComposedComponent, 返回一个自定义class
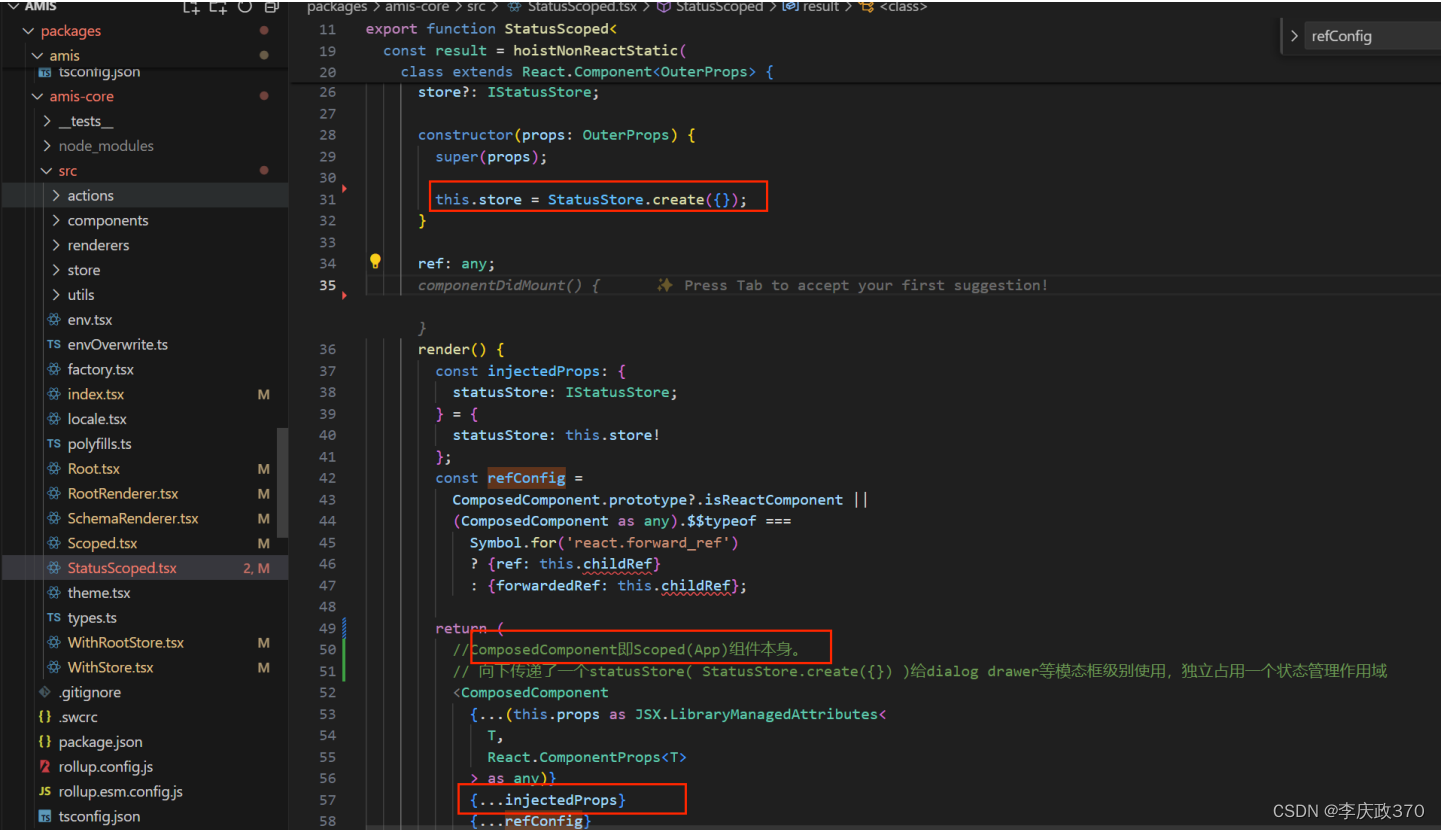
2. 自定义class 在amis-core/src/StatusScoped.tsx中:
主要是 向下传递了一个statusStore( StatusStore.create({}) )给dialog drawer等模态框级别使用,独立占用一个状态管理作用域
3. ScopedComponent在amis-core/src/Scoped.tsx中:
主要封装了一个scoped对象(包含getComponentByName等属性方法)并作为provide向下传递。 此外还调用了scopeRef方法(examples/embed.tsx中传递过来的)
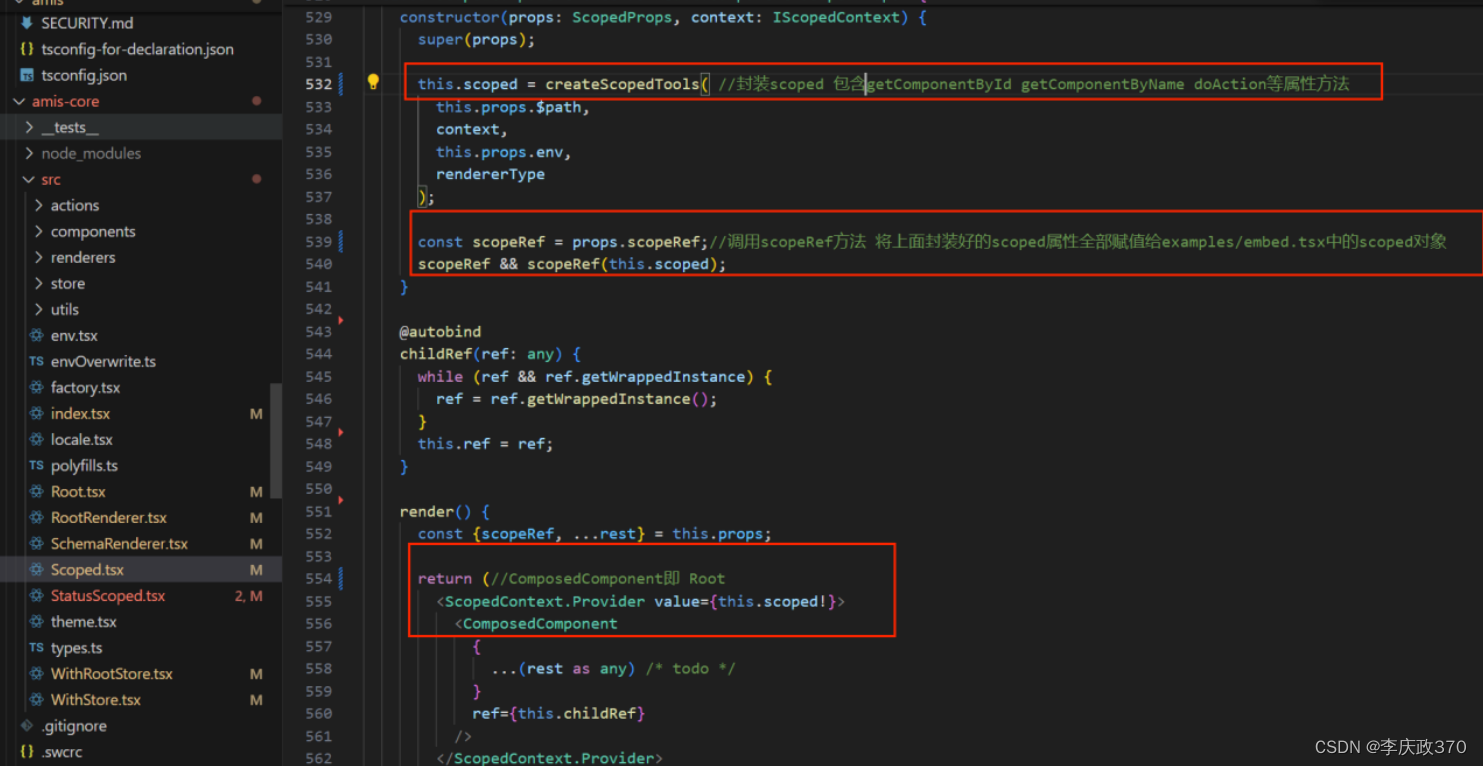
4.在amis-core/src/Root.tsx中:
进行reduce处理,rootWrappers数组中有wrapper函数则进行合并处理,空数组直接返回初始值进行<RootRenderer schema = {{type: 'page'}}>
最终走<RootRenderer> 并传递props进行后续处理
Root.tsx中renderChild方法:
export function renderChild(
prefix: string,
node: SchemaNode,
props: renderChildProps
): ReactElement {
if (Array.isArray(node)) {
return renderChildren(prefix, node, props);
}
//...省略
return (
<SchemaRenderer
render={renderChild as any}
{...props}
schema={schema}
propKey={schema.key}
$path={`${prefix ? `${prefix}/` : ''}${(schema && schema.type) || ''}`}
/>
);
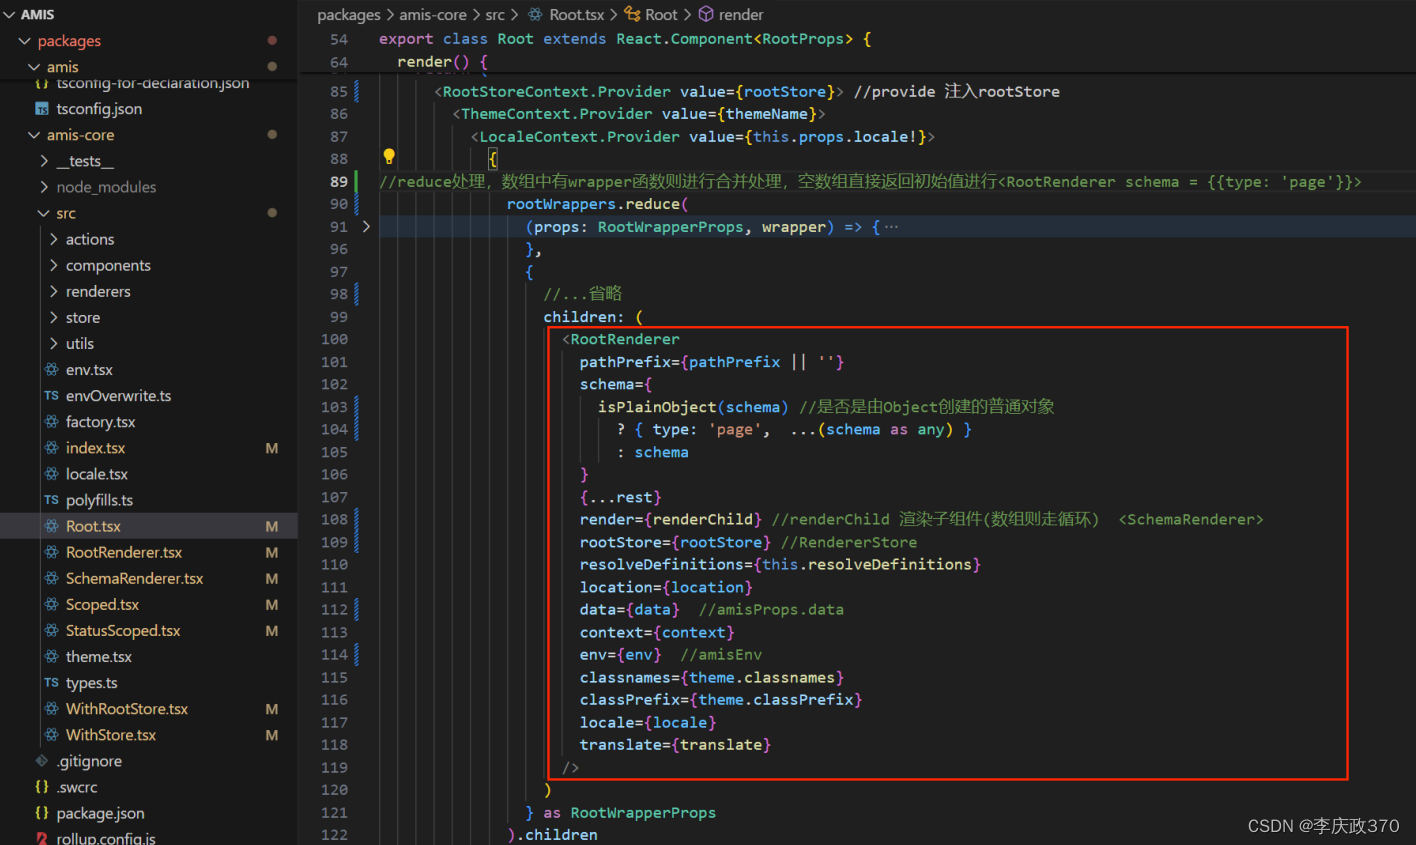
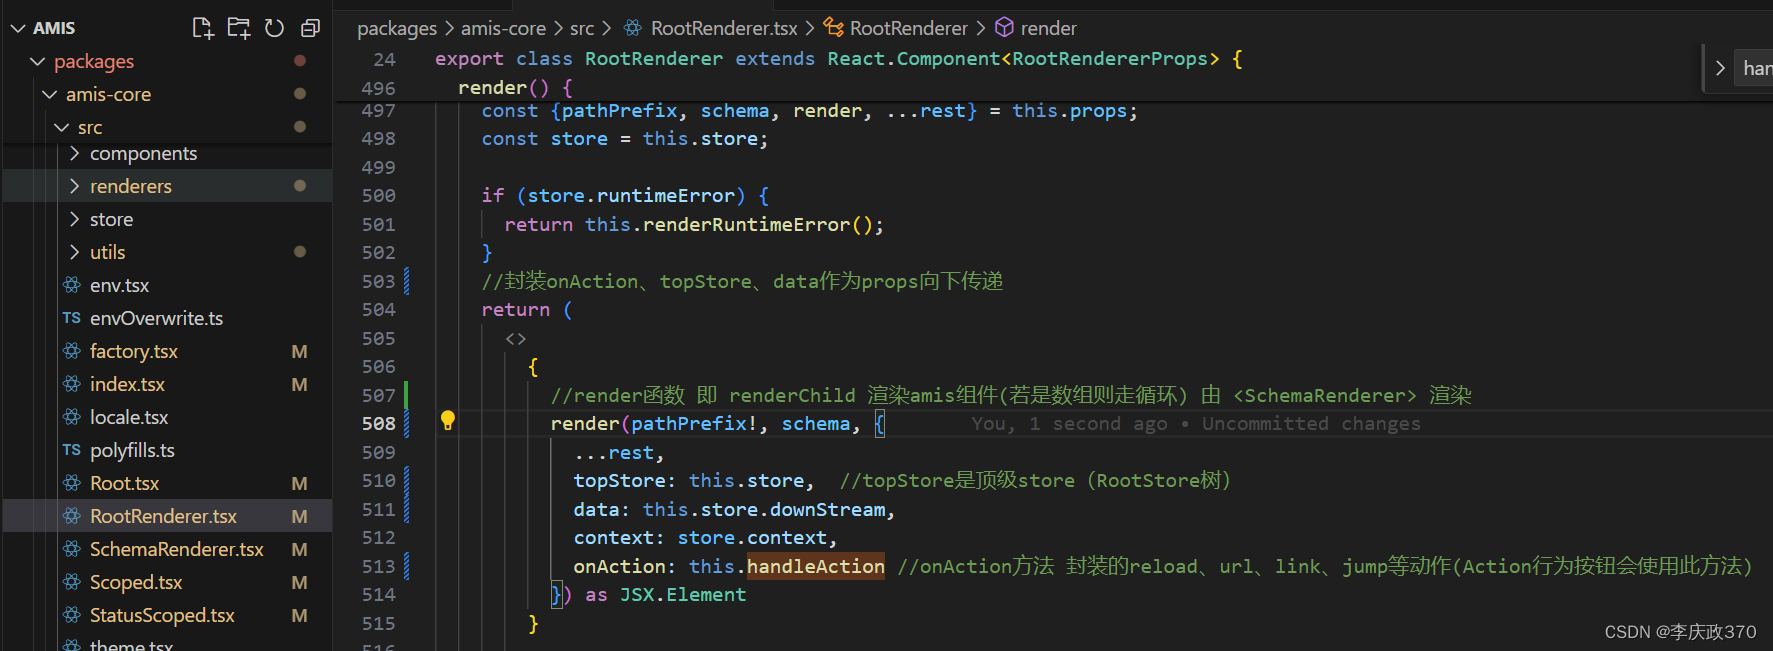
}RootRenderer在amis-core/src/RootRenderer.tsx中
创建顶级store(RootStore树),并添加到rootStore.stores中(rootStore即RendererStore),这个store会作为topStore向下传递。 props.rootStore.addStore({storeType: RootStore.name})
使用amisProps.data初始化顶级store数据域 。 this.store.initData(props.data);
最终调用this.props.render函数 (这个props.render是Root.tsx中renderChild方法,底层走<SchemaRenderer>完成渲染)进行render渲染page
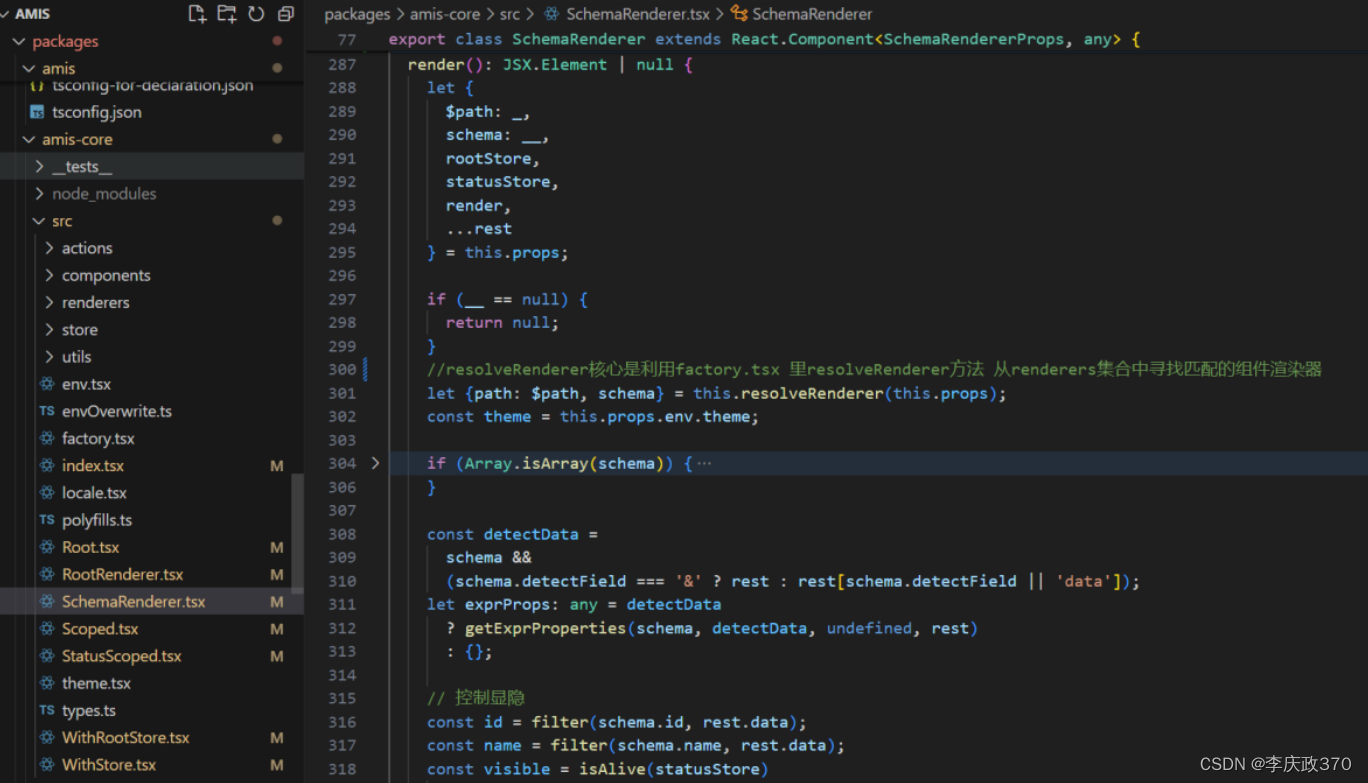
SchemaRenderer在amis-core/src/ SchemaRenderer .tsx中
核心是利用renderer Component进行渲染(amis/src/renderers中定义的),根据schema的type,找到@renderer(type: 'xxx')注册的渲染器,将schema数据作为props传入渲染不同Component。
由对应的renderer Component内部控制body子节点渲染:比如Page会判断schema的body存在则调用this.props.render('body', body) 渲染body子节点(这个props.render是SchemaRenderer.tsx中的 renderChild方法 【进行了一些预处理,最终还是调用的Root.tsx中renderChild走<SchemaRenderer>完成渲染】)
    const Component = renderer.component;

    let props = {
      $schema: schema,
      ref: this.refFn,
//传递的是SchemaRenderer.tsx中的 renderChild方法(进行了一些预处理,然后还是调用的Root.tsx中renderChild渲染<SchemaRenderer>)
      render: this.renderChild,
      rootStore,
      statusStore,
      dispatchEvent: this.dispatchEvent,
      mobileUI: schema.useMobileUI === false ? false : rest.mobileUI
    };

    //...省略

    // 自动解析变量模式,主要是方便直接引入第三方组件库,无需为了支持变量封装一层
    if (renderer.autoVar) {
      for (const key of Object.keys(schema)) {
        if (typeof props[key] === 'string' && isExpression(props[key])) {
          props[key] = resolveVariableAndFilter(
            props[key],
            props.data,
            '| raw'
          );
        }
      }
    }

    const component = isClassComponent ? (
      <Component {...props} ref={this.childRef} />
    ) : (
      <Component {...props} />
    );

    return this.props.env.enableAMISDebug ? (
      <DebugWrapper renderer={renderer}>{component}</DebugWrapper>
    ) : (
      component
    );
  }
}
SchemaRenderer.tsx中renderChild:
  renderChild(
    region: string,
    node?: SchemaNode,
    subProps: {
      data?: object;
      [propName: string]: any;
    } = {}
  ) {
    //这个render是Root.tsx中的renderChild方法(底层<SchemaRenderer>渲染)
    let {schema: _, $path: __, env, render, ...rest} = this.props;
    let {path: $path} = this.resolveRenderer(this.props);

    const omitList = RENDERER_TRANSMISSION_OMIT_PROPS.concat();
    if (this.renderer) {
      const Component = this.renderer.component;
      Component.propsList &&
        omitList.push.apply(omitList, Component.propsList as Array<string>);
    }

    return render!(`${$path}${region ? `/${region}` : ''}`, node || '', {
      ...omit(rest, omitList),
      defaultStatic:
        (this.renderer?.type &&
        ['drawer', 'dialog'].includes(this.renderer.type)
          ? false
          : undefined) ??
        this.isStatic ??
        (_.staticOn
          ? evalExpression(_.staticOn, rest.data)
          : _.static ?? rest.defaultStatic),
      ...subProps,
      data: subProps.data || rest.data, //首先取传来的data 没有 则用this.props.data父组件data
      env: env
    });
  }
amis 的渲染过程是将 json 转成对应的 React 组件。先通过 json 的 type 找到对应的 Component,然后把其他属性作为 props 传递过去完成渲染。