|-----------------|------------|--------|
| IP | 功能 | 版本 |
| 192.168.140.153 | elk-1 | 8.13.4 |
| 192.168.140.153 | metricbeat | 8.13.4 |
| 192.168.140.156 | elk-2 | 8.13.4 |
| 192.168.140.156 | metricbeat | 8.13.4 |
| 192.168.140.159 | logstash | 8.13.4 |
| 192.168.140.159 | kibana | 8.13.4 |
一、安装ELK
参考文档:
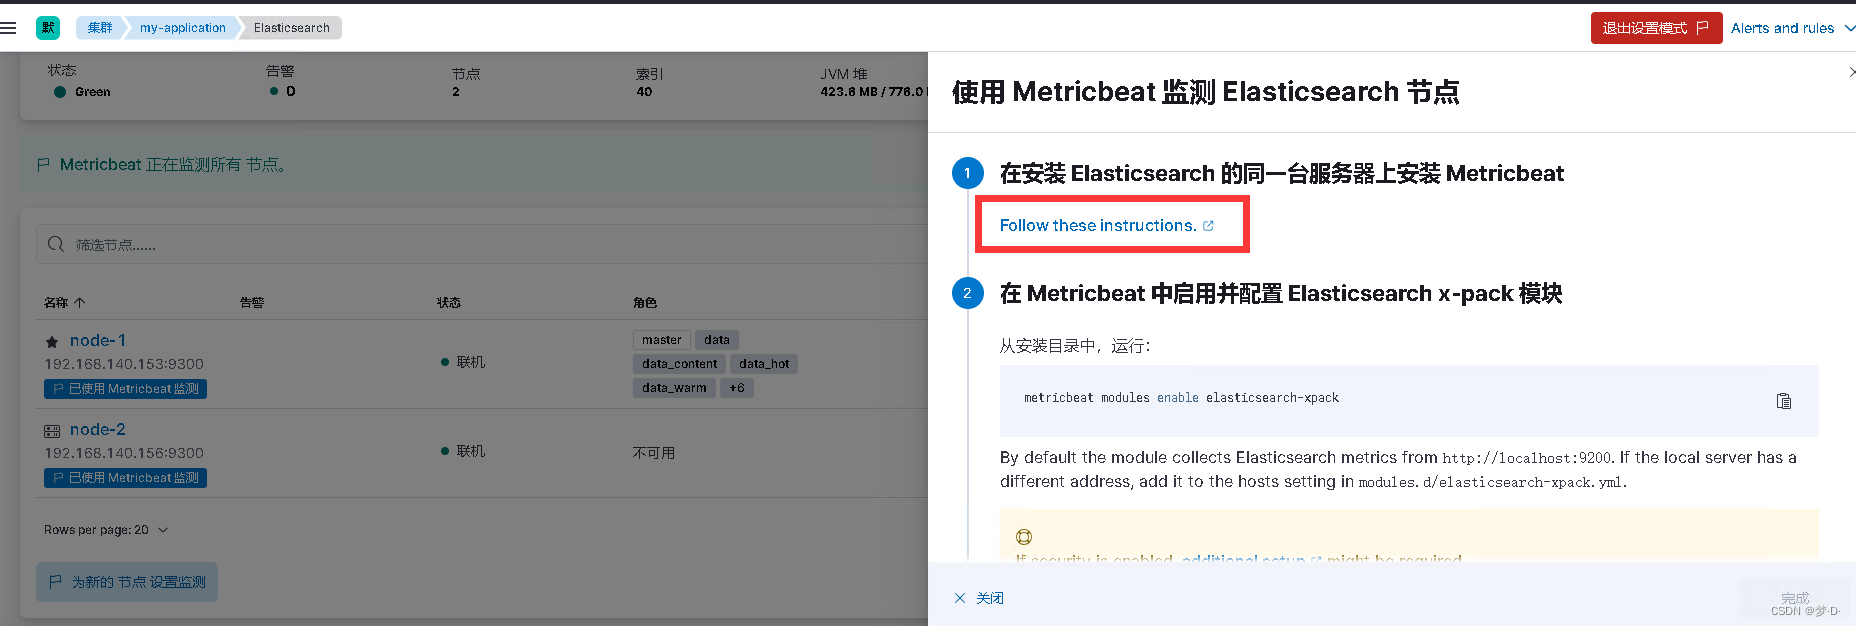
二、安装metricbeat(elastic所在服务器都需要执行)
1、下载metricbeat
可以跟据自己需要选择安装方式(该文档使用tar包安装)
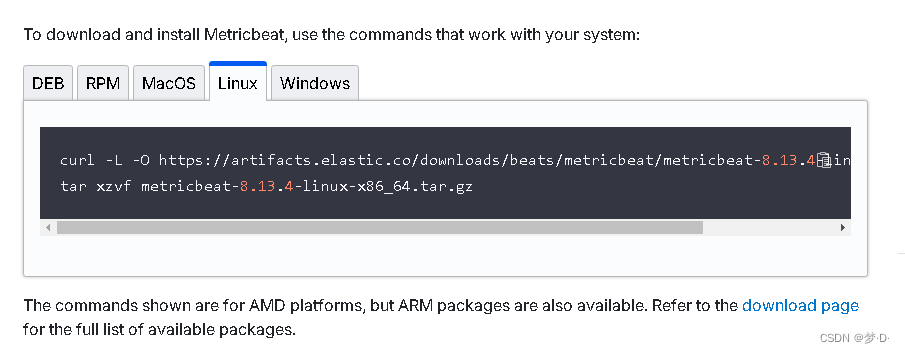
2、解压
bash
tar -zxvf metricbeat-8.13.4-linux-x86_64.tar.gz
mv metricbeat-8.13.4 /opt/metricbeat
3、开启elasticsearch-xpack模块
bash
cd /opt/metricbeat
ln -s /opt/metricbeat/metricbeat /usr/bin/metricbeat
metricbeat modules enable elasticsearch-xpack
4、修改配置文件
bash
vi /opt/metricbeat/modules.d/elasticsearch-xpack.yml
# 修改如下
- module: elasticsearch
  xpack.enabled: true
  period: 10s
  hosts: ["https://192.168.140.153:9200"]
  username: "elastic"
  password: "password"
  ssl.enabled: true
  ssl.certificate_authorities: ["/opt/es/config/certs/http_ca.crt"]


vi /opt/metricbeat/metricbeat.yml
# =================================== Kibana ===================================
setup.kibana:
  host: "192.168.140.153:5601"
  protocol: "https"
  ssl.certificate_authorities: ["/opt/metricbeat/certs/kibana-server.crt"]
  ssl.verification_mode: "none"
  ssl.certificate: "/opt/metricbeat/certs/kibana-server.crt"
  ssl.key: "/opt/metricbeat/certs/kibana-server.key"

# ---------------------------- Elasticsearch Output ----------------------------
output.elasticsearch:
  hosts: ["192.168.140.153:9200"]
  preset: balanced
  protocol: "https"
  username: "elastic"
  password: "introcks"
  ssl.enabled: true
  ssl.certificate_authorities: ["/opt/es/config/certs/http_ca.crt"]
5、检测配置文件格式
bash
[root@localhost metricbeat]# metricbeat test config
Config OK
[root@localhost metricbeat]# metricbeat test output
elasticsearch: https://192.168.140.153:9200...
  parse url... OK
  connection...
    parse host... OK
    dns lookup... OK
    addresses: 192.168.140.153
    dial up... OK
  TLS...
    security: server's certificate chain verification is enabled
    handshake... OK
    TLS version: TLSv1.3
    dial up... OK
  talk to server... OK
  version: 8.13.4
6、编写启动脚本
bash
[root@localhost metricbeat]# vi /etc/systemd/system/metricbeat.service
[Unit]
Description=Metricbeat service
After=network.target

[Service]
Type=simple
User=root
Group=root
ExecStart=/opt/metricbeat/metricbeat -c /opt/metricbeat/metricbeat.yml
Restart=always
LimitNOFILE=65535

[Install]
WantedBy=multi-user.target
7、启动服务
bash
systemctl daemon-reload
systemctl start metricbeat.service
systemctl enable metricbeat.service
8、测试
