目录
[1. Splash 布局(第一页)](#1. Splash 布局(第一页))
[1.1 目标](#1.1 目标)
[1.2 当前效果图](#1.2 当前效果图)
[1.3 创建 Splash 界面](#1.3 创建 Splash 界面)
[1.4 设置 MaterialApp](#1.4 设置 MaterialApp)
[1.5 设置 Splash 背景色](#1.5 设置 Splash 背景色)
[1.6 布局 Splash 界面](#1.6 布局 Splash 界面)
[1.7 总结](#1.7 总结)
[2. Splash 圆角图片](#2. Splash 圆角图片)
[2.1 目标](#2.1 目标)
[2.2 当前效果图](#2.2 当前效果图)
[2.3 蓝湖下载图片](#2.3 蓝湖下载图片)
[2.4 图片导入项目](#2.4 图片导入项目)
[2.5 编写 assets 索引](#2.5 编写 assets 索引)
[2.6 编写标志 Logo](#2.6 编写标志 Logo)
[2.7 总结](#2.7 总结)
[3. Splash 文字](#3. Splash 文字)
[3.1 目标](#3.1 目标)
[3.2 当前效果图](#3.2 当前效果图)
[3.3 蓝湖标注查看](#3.3 蓝湖标注查看)
[3.4 字体下载导入](#3.4 字体下载导入)
[3.5 编写 TextStyle](#3.5 编写 TextStyle)
[3.6 加入间距](#3.6 加入间距)
[3.7 总结](#3.7 总结)
[4. Splash 倒计时](#4. Splash 倒计时)
[4.1 目标](#4.1 目标)
[4.2 当前效果图](#4.2 当前效果图)
[4.3 改成有状态组件](#4.3 改成有状态组件)
[4.4 实现倒计时](#4.4 实现倒计时)
[4.5 重构文字显示函数](#4.5 重构文字显示函数)
[4.6 完整代码](#4.6 完整代码)
[4.7 总结](#4.7 总结)
[1. Welcome 图片尺寸适应(第二页)](#1. Welcome 图片尺寸适应(第二页))
[1.1 目标](#1.1 目标)
[1.2 当前效果图](#1.2 当前效果图)
[1.3 设置全局字体](#1.3 设置全局字体)
[1.4 界面布局、标题](#1.4 界面布局、标题)
[1.5 图片尺寸适应](#1.5 图片尺寸适应)
[1.6 总结](#1.6 总结)
[2. Welcome 导航切换](#2. Welcome 导航切换)
[2.1 目标](#2.1 目标)
[2.2 当前效果图](#2.2 当前效果图)
[2.3 底部按钮](#2.3 底部按钮)
[2.4 导航切换](#2.4 导航切换)
[2.5 总结](#2.5 总结)
[1. login 布局(第三页)](#1. login 布局(第三页))
[1.1 目标](#1.1 目标)
[1.2 布局](#1.2 布局)
[1.3 总结](#1.3 总结)
[2. login 登录表单](#2. login 登录表单)
[2.1 目标](#2.1 目标)
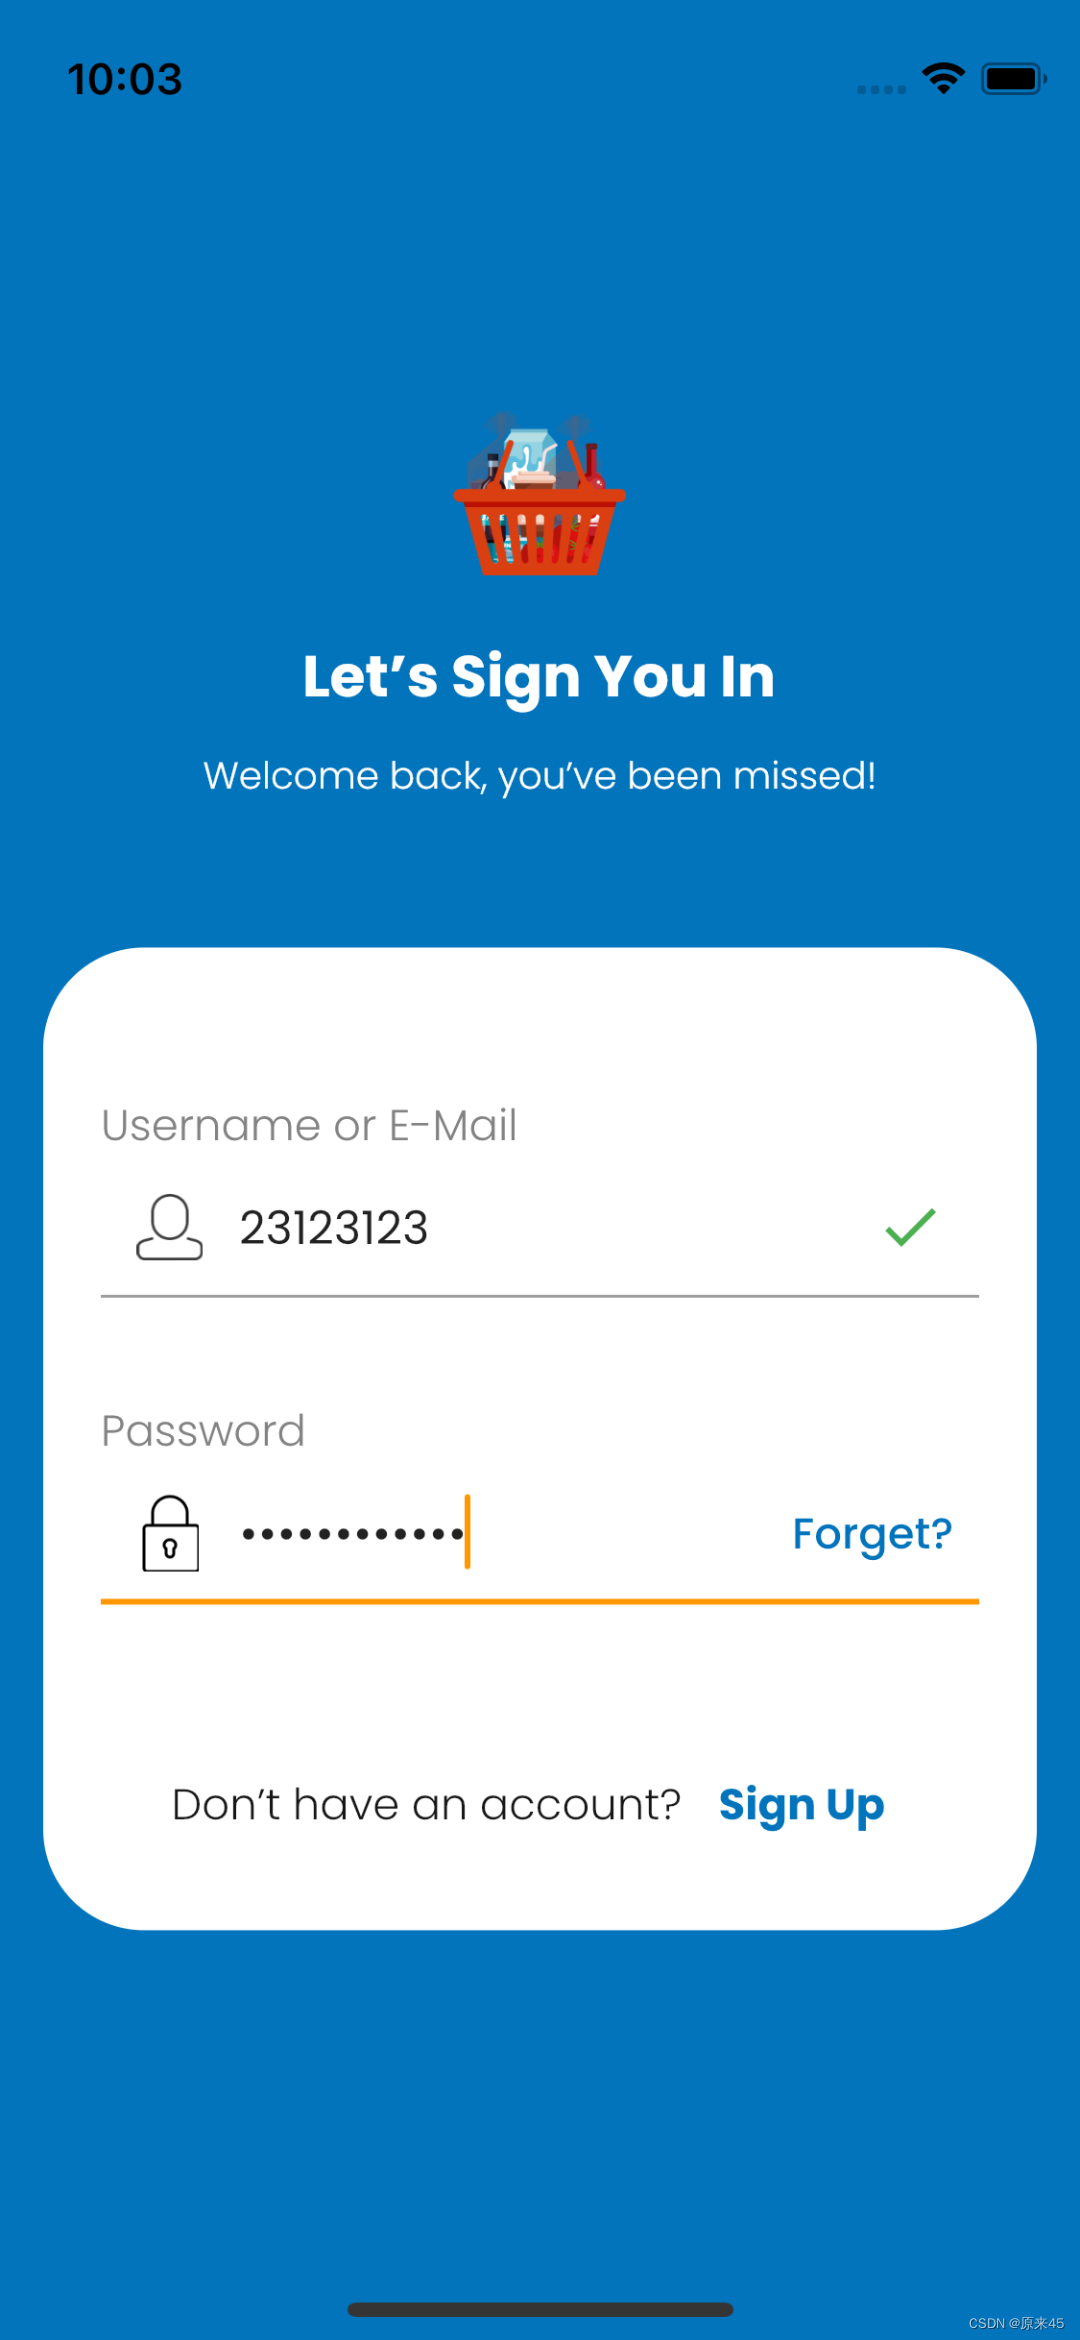
[2.2 当前效果图](#2.2 当前效果图)
[2.3 登录表单](#2.3 登录表单)
[2.4 总结](#2.4 总结)
[3. login 按钮抽取](#3. login 按钮抽取)
[3.1 目标](#3.1 目标)
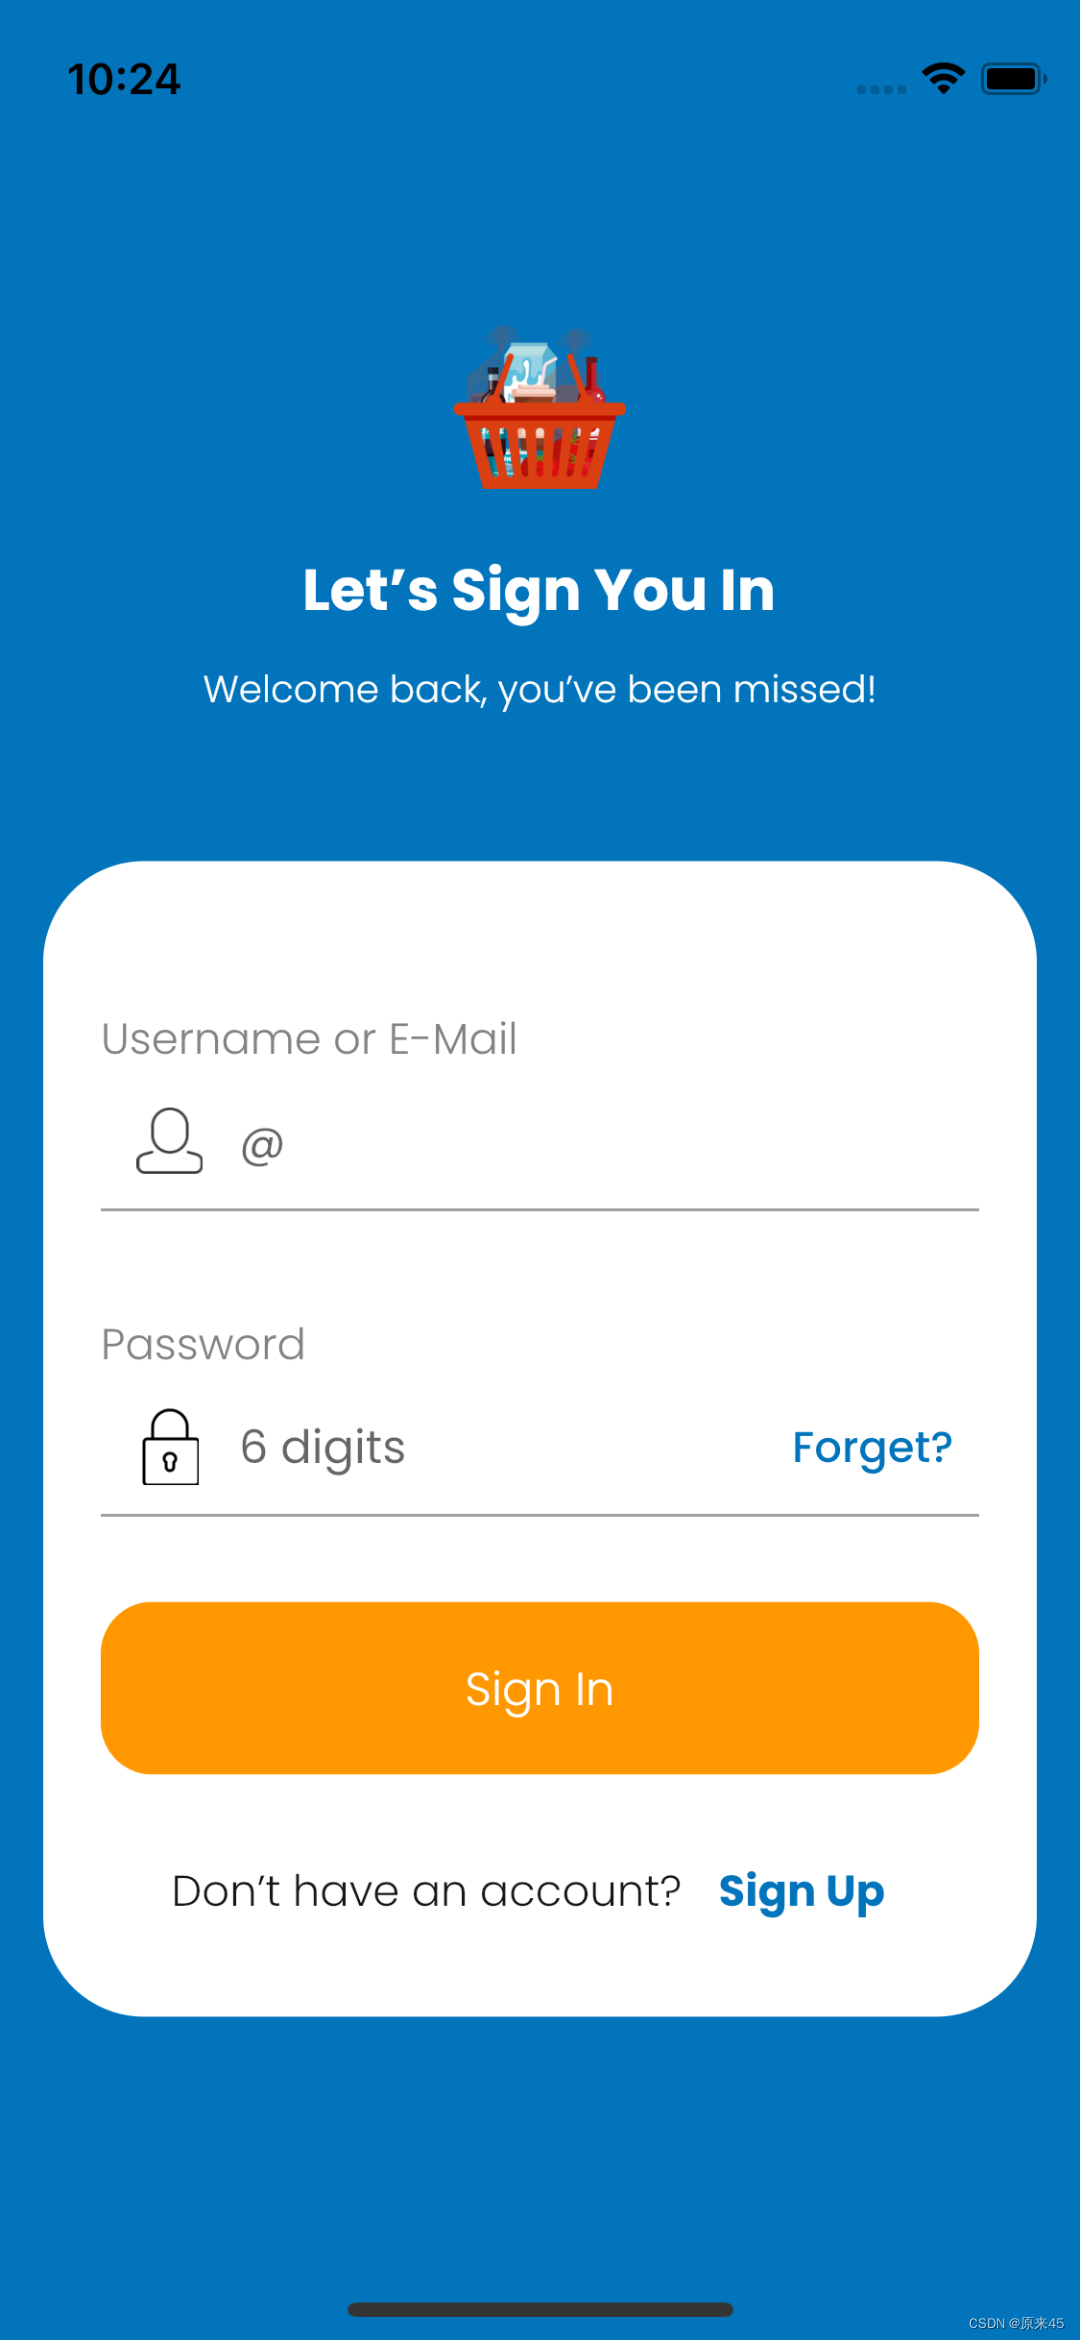
[3.2 当前效果图](#3.2 当前效果图)
[3.3 按钮组件抽取](#3.3 按钮组件抽取)
[3.4 登录按钮](#3.4 登录按钮)
[3.5 欢迎按钮](#3.5 欢迎按钮)
[3.6 总结](#3.6 总结)
**博主wx:**yuanlai45_csdn **博主qq:**2777137742
后期会创建粉丝群,为同学们提供分享交流平台以及提供官方发送的福利奖品~
1. Splash 布局(第一页)
1.1 目标
- 查看蓝湖标注
- 初始项目
- 创建 splash 界面
github 目标图片在里面
https://github.com/ducafecat/flutter_quickstart_learn
1.2 当前效果图
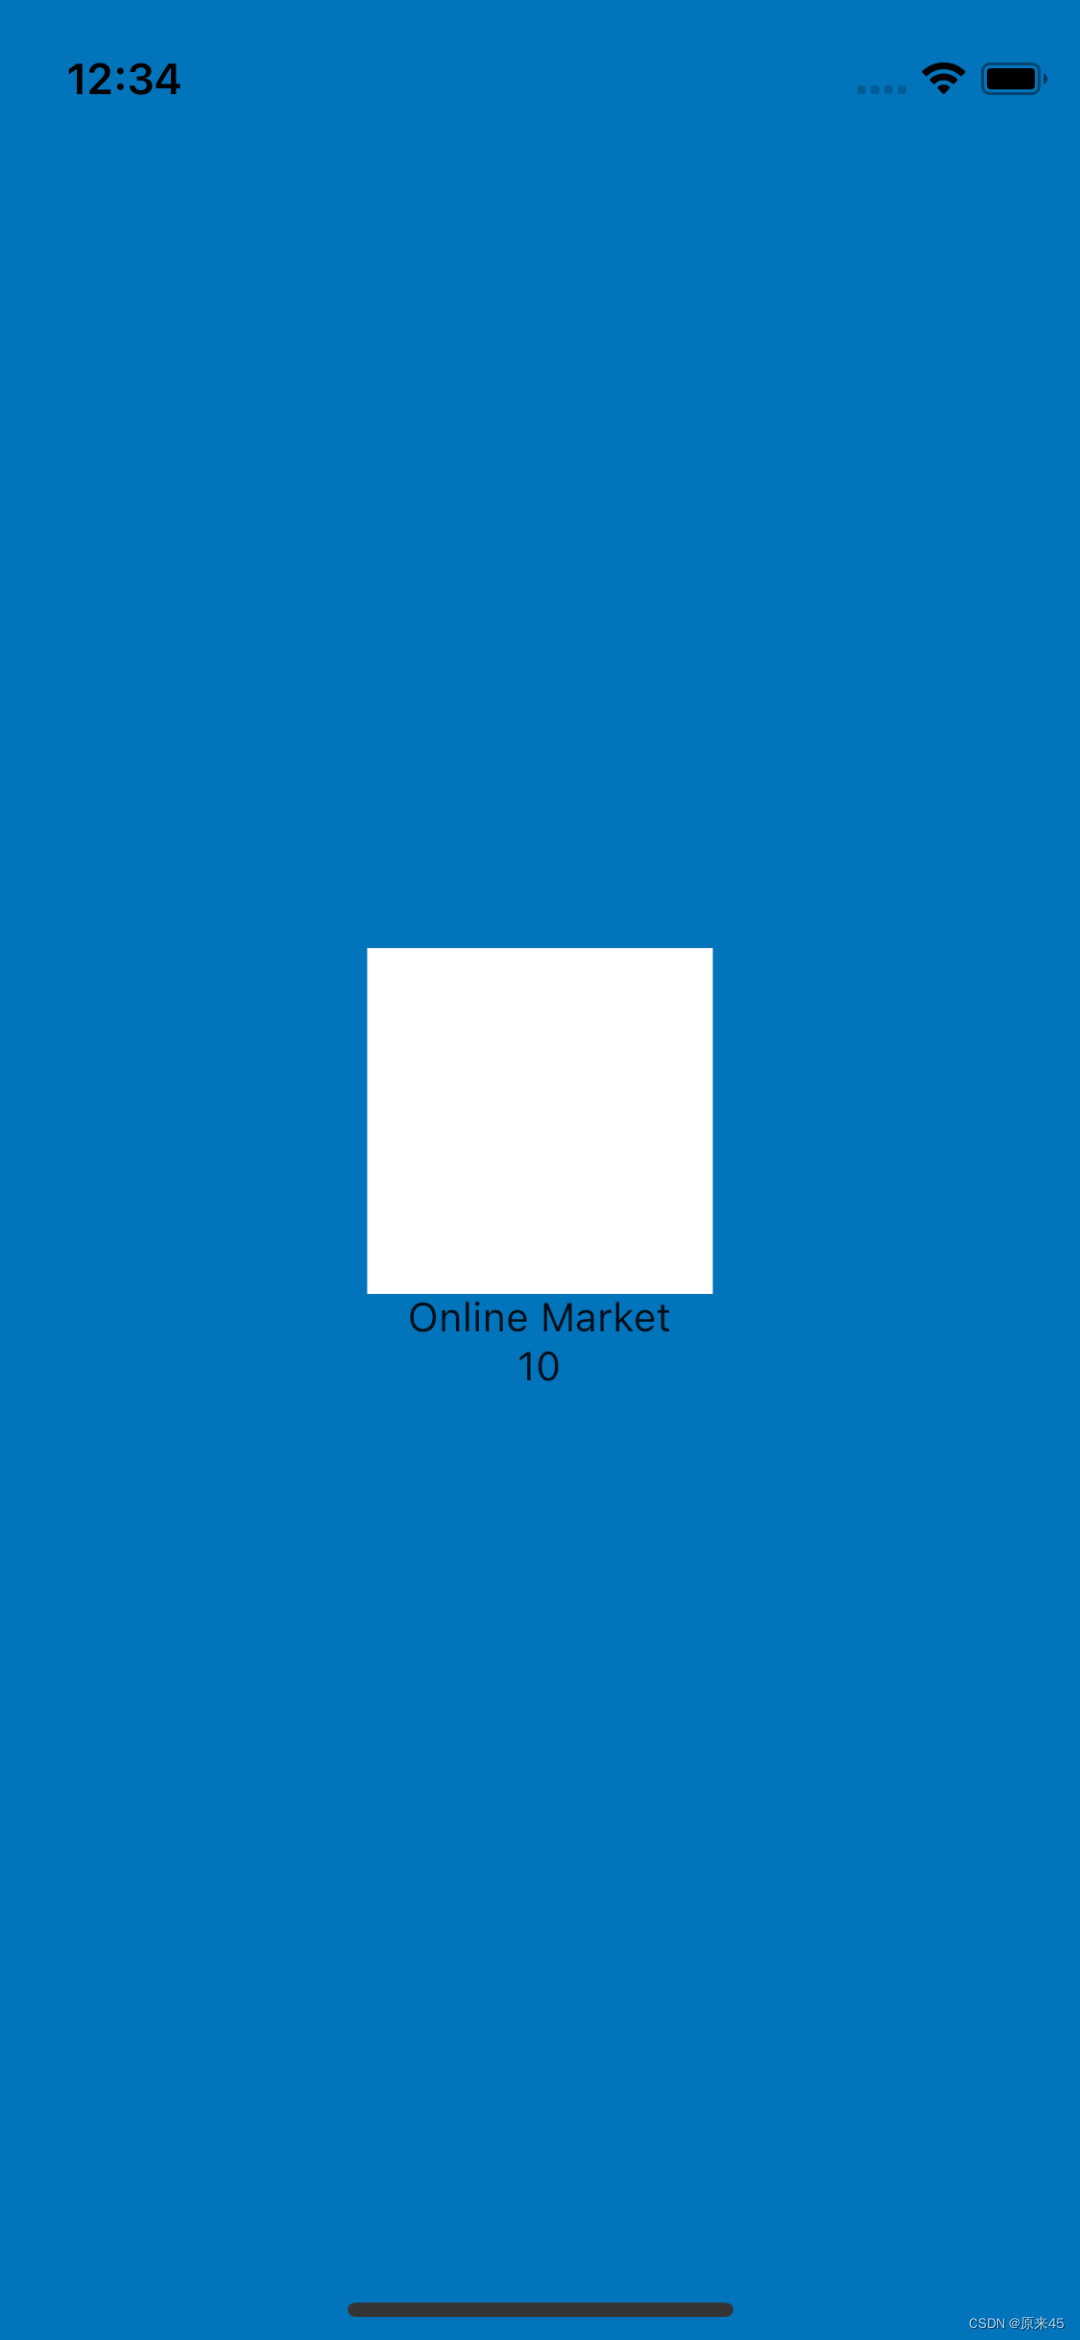
1.3 创建 Splash 界面
lib/pages/splash.dart
Dart
import 'package:flutter/material.dart';

import '../common/index.dart';

class SplashPage extends StatelessWidget {
  const SplashPage({Key? key}) : super(key: key);

  // 主视图
  Widget _buildView(BuildContext context) {
    return Text("splash");
  }

  @override
  Widget build(BuildContext context) {
    return Scaffold(
      body: Center(child: _buildView(context)),
    );
  }
}
1.4 设置 MaterialApp
lib/main.dart
Dart
import 'package:flutter/material.dart';

import 'pages/splash.dart';

void main() {
  runApp(const MyApp());
}

class MyApp extends StatelessWidget {
  const MyApp({Key? key}) : super(key: key);

  @override
  Widget build(BuildContext context) {
    return MaterialApp(
      title: 'Flutter Quick Start',

      // 首页
      home: const SplashPage(),

      // 关闭 debug 标签
      debugShowCheckedModeBanner: false,
    );
  }
}
1.5 设置 Splash 背景色
lib/common/app_colors.dart
Dart
import 'package:flutter/material.dart';

/// 颜色配置
class AppColors {
  /// splash 背景色
  static const Color backgroundSplash = Color(0xff0274bc);
}
lib/pages/splash.dart
Dart
import '../common/index.dart';

...

	@override
  Widget build(BuildContext context) {
    return Scaffold(
      backgroundColor: AppColors.backgroundSplash, // 背景色
      body: _buildView(context),
    );
  }
1.6 布局 Splash 界面
lib/pages/splash.dart
Dart
  // 主视图
  Widget _buildView(BuildContext context) {
    return Column(
      mainAxisAlignment: MainAxisAlignment.center,
      crossAxisAlignment: CrossAxisAlignment.center,
      children: [
        // 图标
        Container(
          color: Colors.white,
          width: 120,
          height: 120,
        ),
        // 标题
        const Text("Online Market"),
        // 倒计时
        const Text("10"),
      ],
    );
  }
1.7 总结
-
蓝湖标注平台 布局、尺寸、字体、颜色...
-
初始项目
pagescommon目录创建 -
配置
MaterialApp.home首页 -
配置
Scaffold脚手架背景色 -
全局颜色管理
AppColors -
布局
Splash界面
2. Splash 圆角图片
2.1 目标
- 导入图片资源
- 使用层叠布局编写
logo
2.2 当前效果图
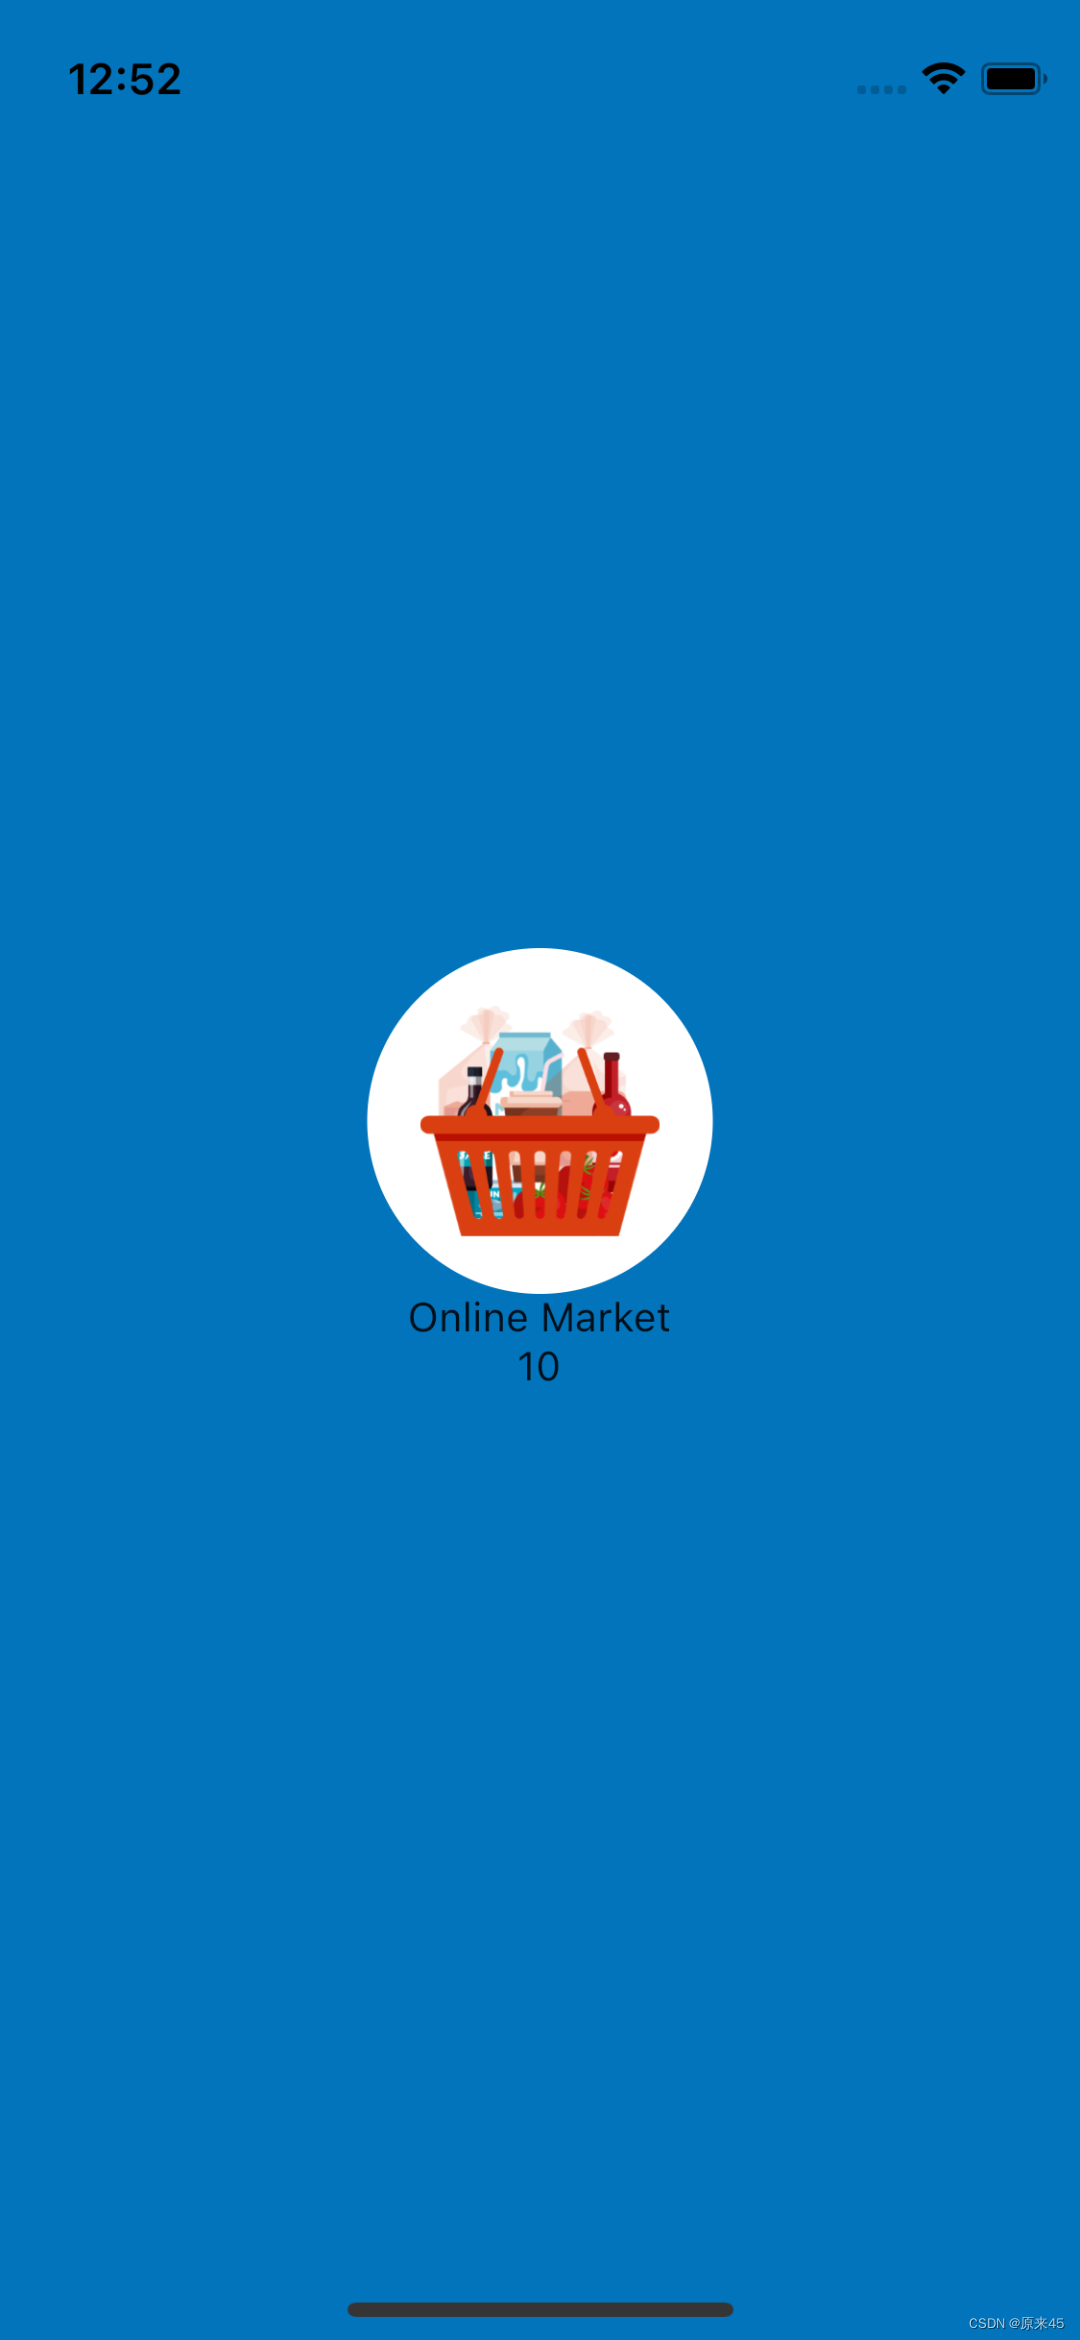
2.3 蓝湖下载图片
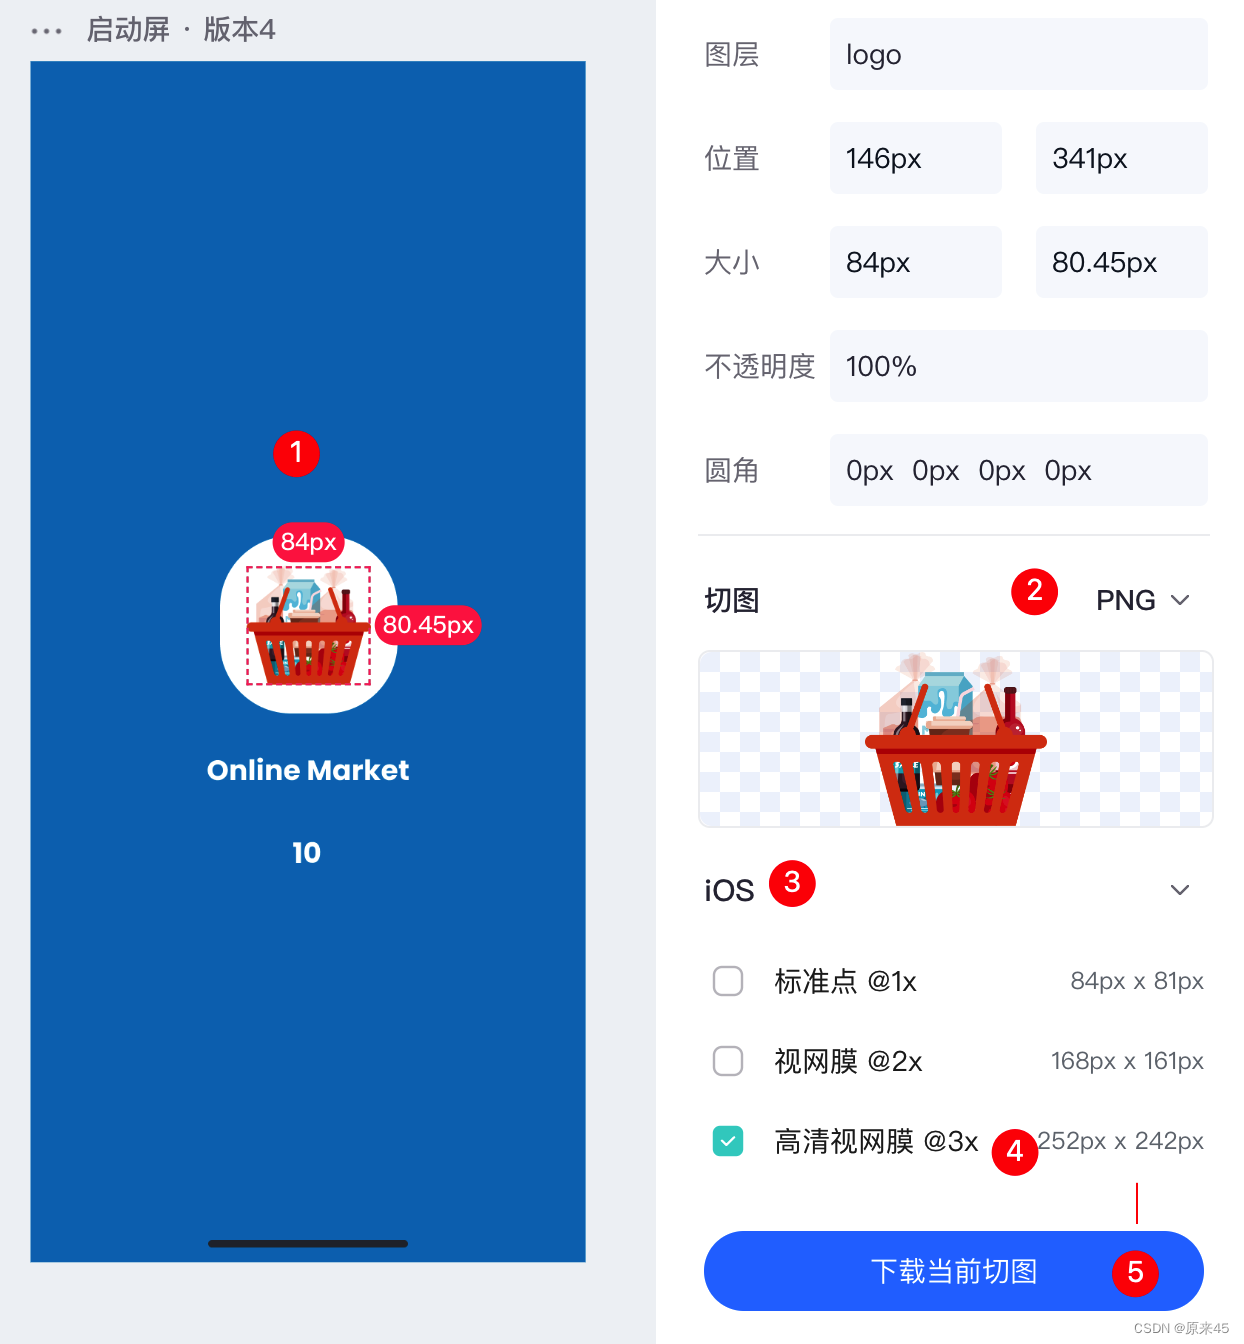
依次选中图片,选中 PNG 格式,IOS 类型,3X 高清,最后下载当前切图
2.4 图片导入项目
放入你的项目 assets/images/3.0x/logo.pn
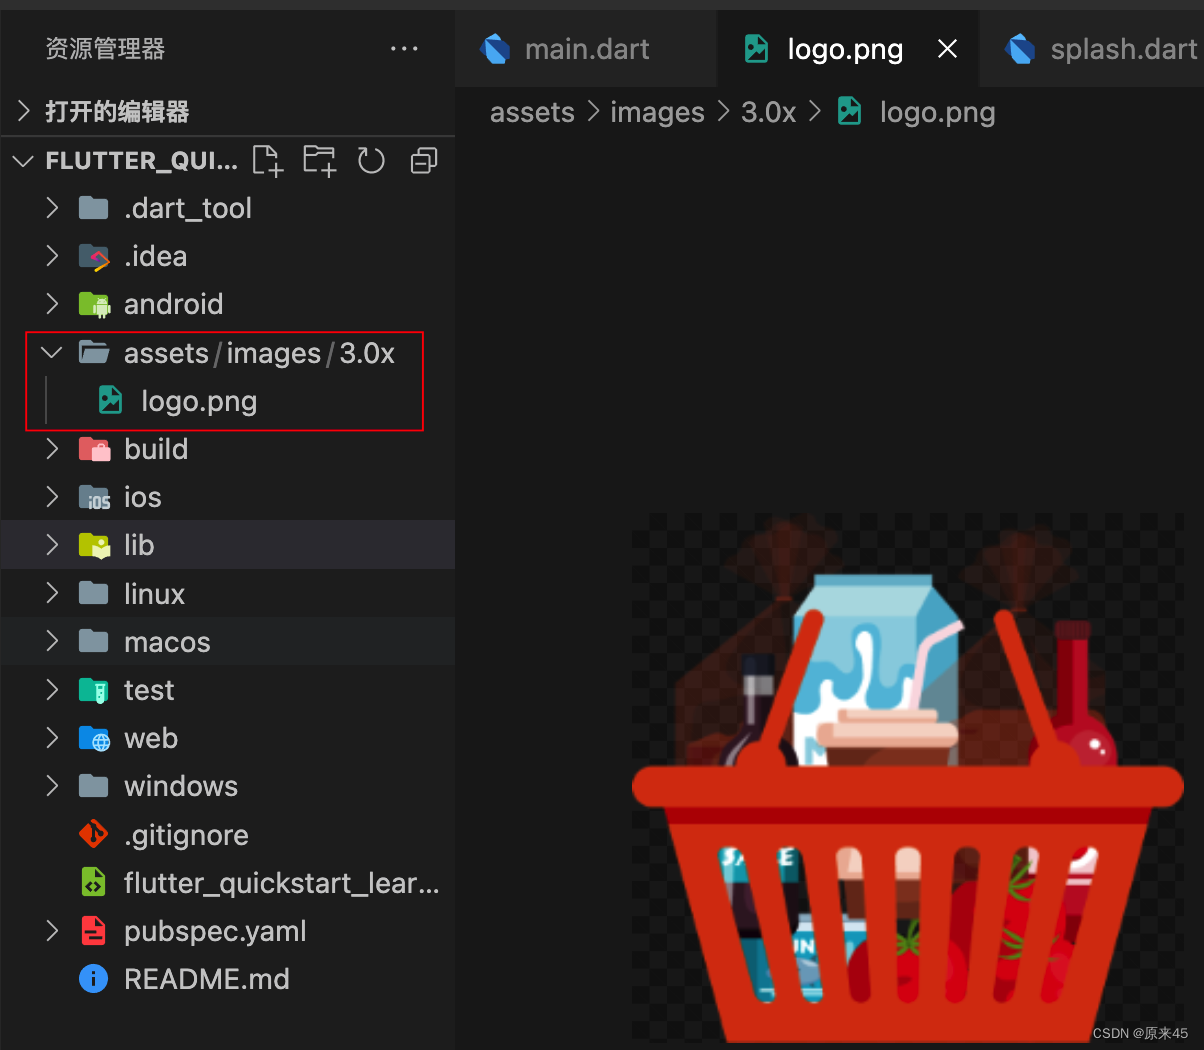
生成 1x 2x 图片
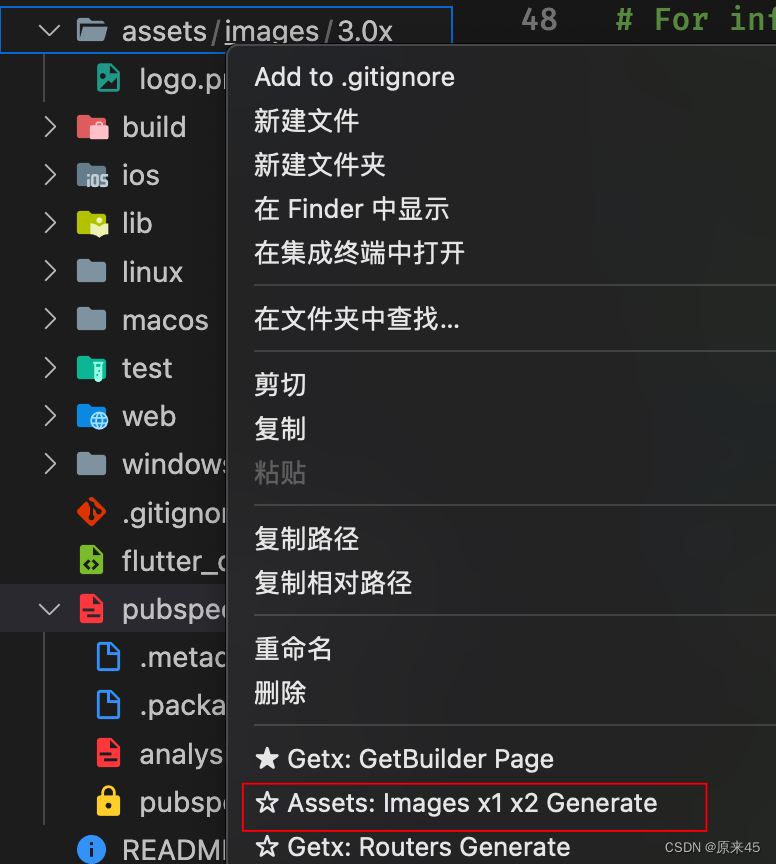

插件地址 Flutter GetX Generator - 猫哥 - Visual Studio Marketplace
修改 pubspec.yaml
Dart
flutter:
  ...

  assets:
    - assets/images/
2.5 编写 assets 索引
编写 lib/common/assets.dart, 将 assets/images/files.txt 内容复制进去,这个文件是插件生成的,防止文件太多,手写出错
Dart
/// 图片资源
class AssetsImages {
  static const logoPng = 'assets/images/logo.png';
}
2.6 编写标志 Logo
lib/pages/splash.dart
Dart
  // 图标
  Widget _buildLogo() {
    return Stack(
      alignment: Alignment.center,
      children: [
        // 底部
        Container(
          width: 120,
          height: 120,
          decoration: BoxDecoration(
            color: Colors.white,
            borderRadius: BorderRadius.circular(120 / 2),
          ),
        ),
        // 图标
        Image.asset(
          AssetsImages.logoPng,
          width: 84,
          height: 80,
        ),
      ],
    );
  }
Dart
  // 主视图
  Widget _buildView(BuildContext context) {
    return Column(
      mainAxisAlignment: MainAxisAlignment.center,
      crossAxisAlignment: CrossAxisAlignment.center,
      children: [
        // 图标
        _buildLogo(),
        // 标题
        const Text("Online Market"),
        // 倒计时
        const Text("10"),
      ],
    );
  }
2.7 总结
- 下载蓝湖切图 选择
png格式ios模式3x尺寸 - 使用猫哥插件生成
1x2x图片,创建资源索引管理 - 使用层叠布局创建
logo - 使用函数进一步的管理代码
3. Splash 文字
3.1 目标
- 导入字体文件
- 配置文字样式
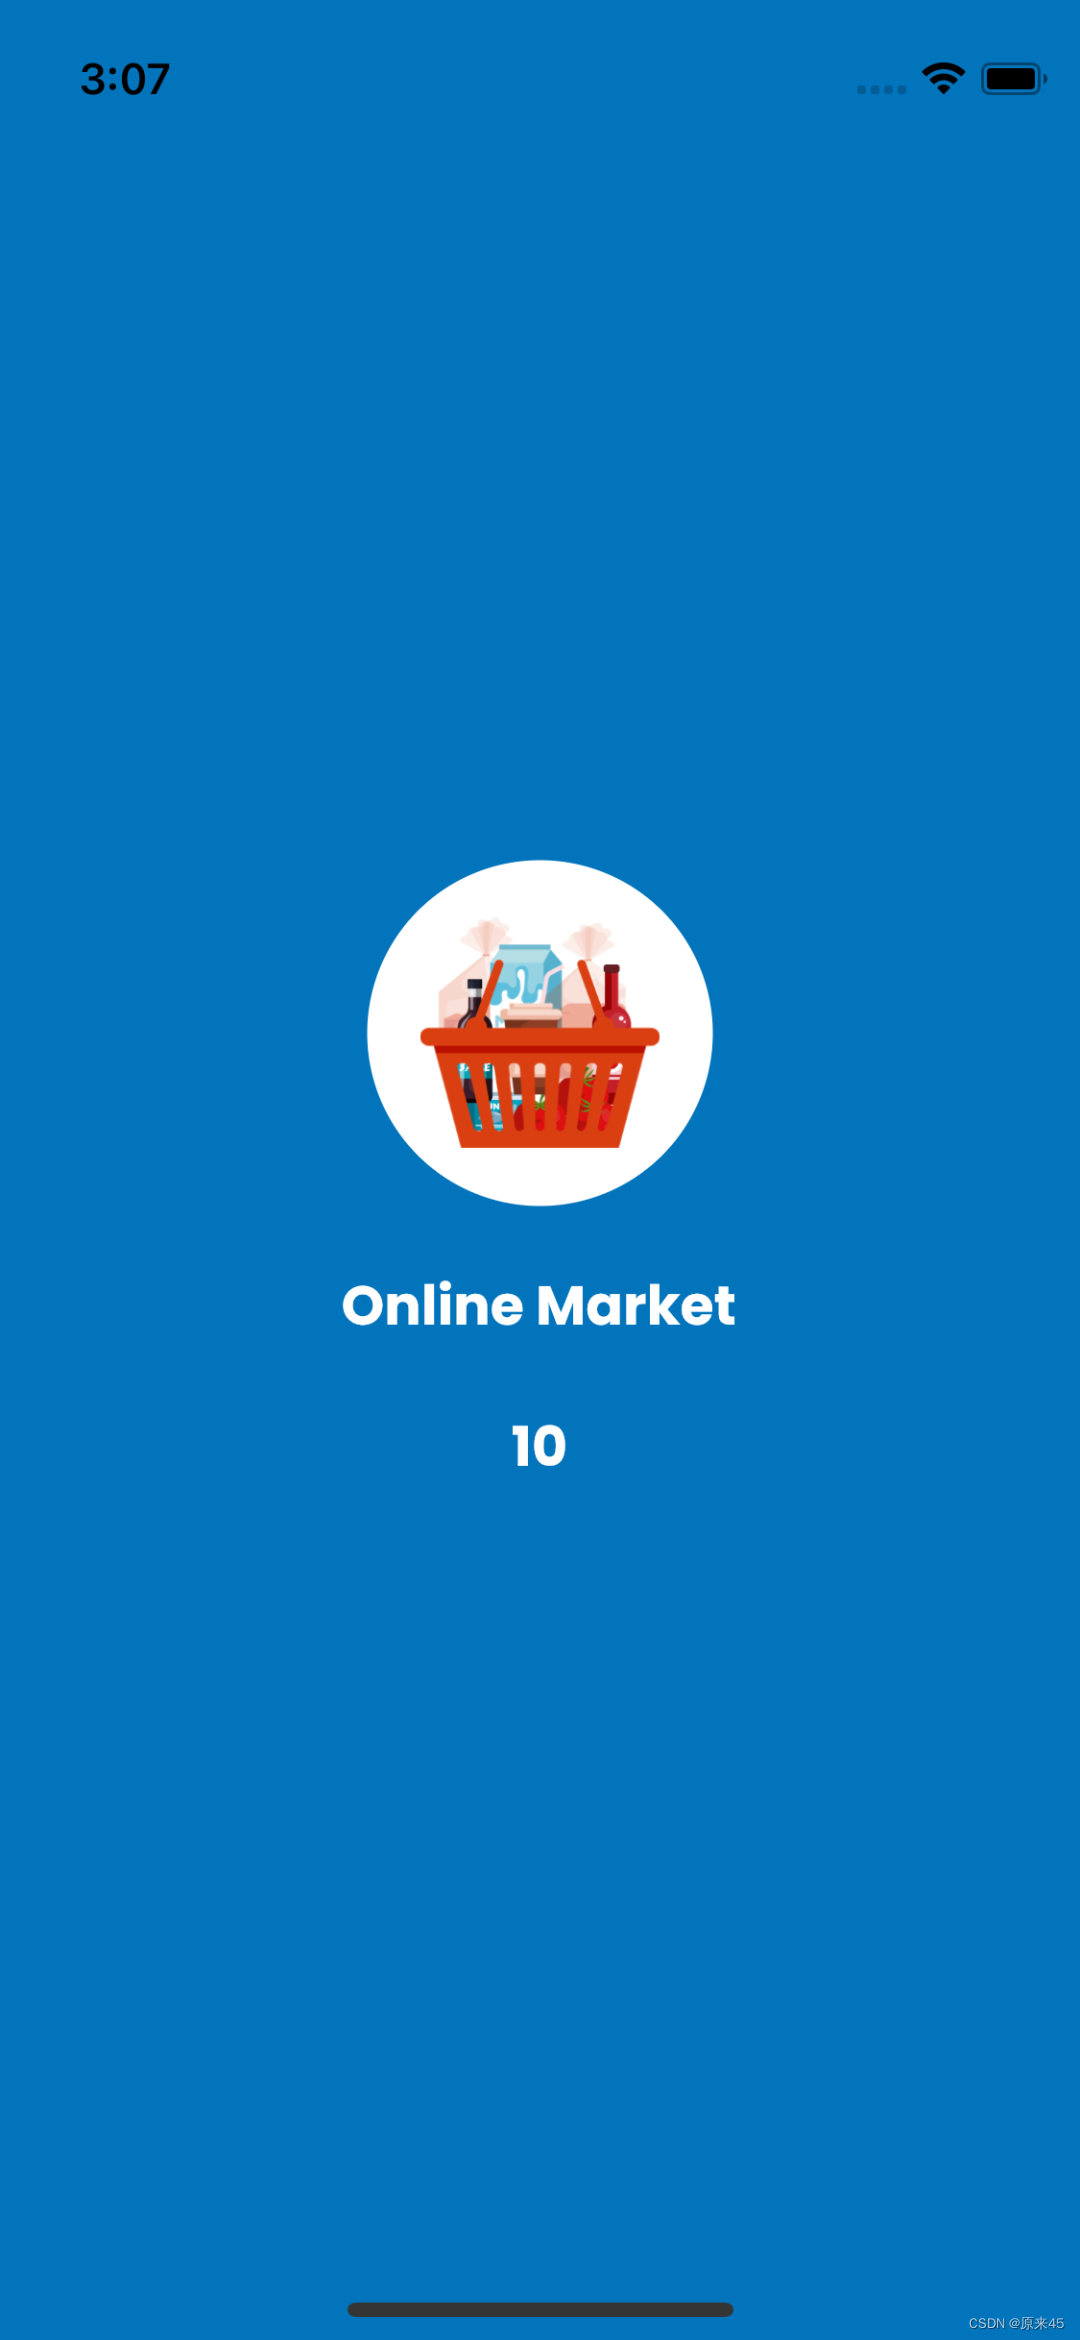
3.2 当前效果图
3.3 蓝湖标注查看
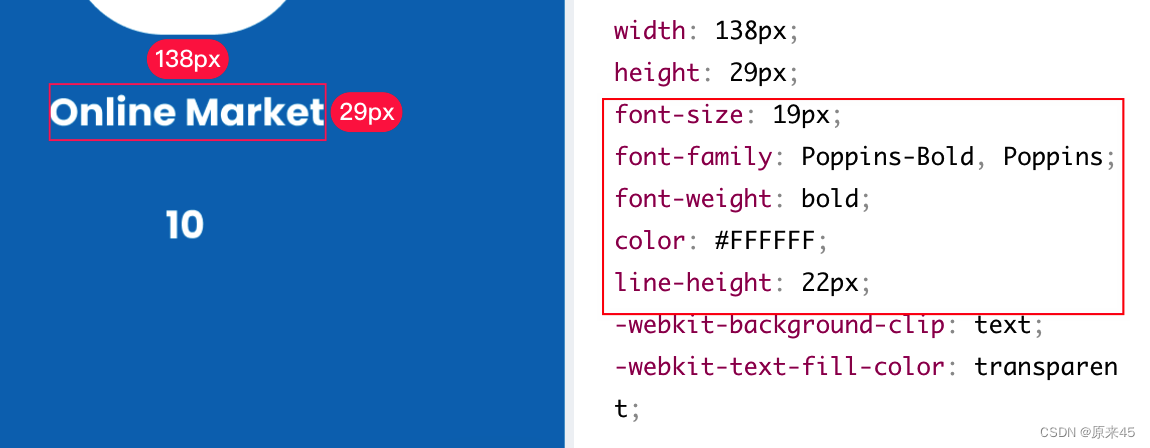
需要关注的属性有:
- font-size 字体大小
- font-family 字体名称
- font-weight 字体重度
- color 颜色
- line-height 行高
3.4 字体下载导入
google 字体下载
下载后导入 assets/fonts/
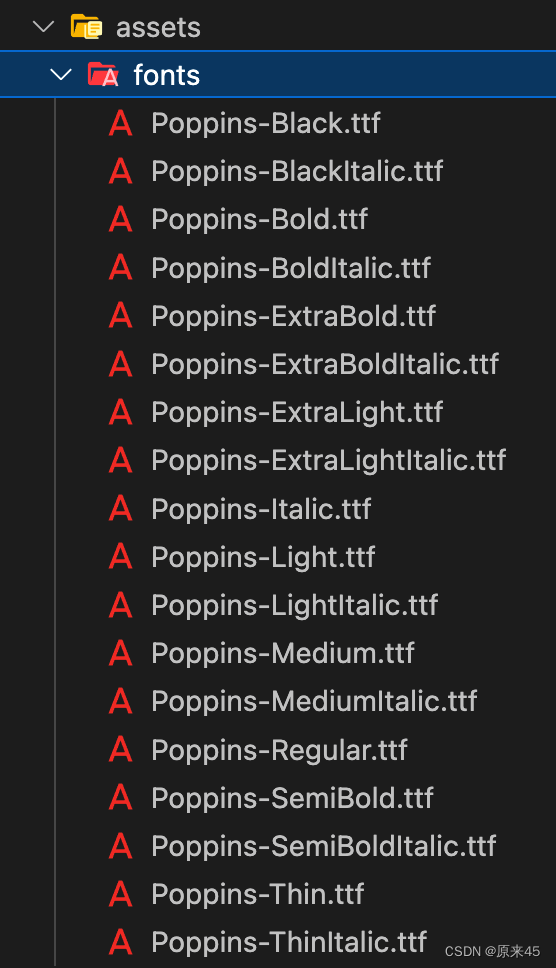
编辑 pubspec.yaml
Dart
  fonts:
    - family: Poppins
      fonts:
        - asset: assets/fonts/Poppins-Light.ttf
          weight: 300
        - asset: assets/fonts/Poppins-Regular.ttf
          weight: 400
        - asset: assets/fonts/Poppins-Medium.ttf
          weight: 500
        - asset: assets/fonts/Poppins-Bold.ttf
          weight: 700
3.5 编写 TextStyle
lib/pages/splash.dart
Dart
  // 标题
  const Text(
    "Online Market",
    style: TextStyle(
      fontSize: 19,
      fontFamily: "Poppins",
      fontWeight: FontWeight.bold,
      color: Colors.white,
      height: 22 / 19,
    ),
  ),
fontFamily 中写入字体名称 Poppins
height 文本跨度的行高将为 [fontSize] 的倍数并且正好是 fontSize *height 逻辑像素 高。换行的时候才有意义

3.6 加入间距
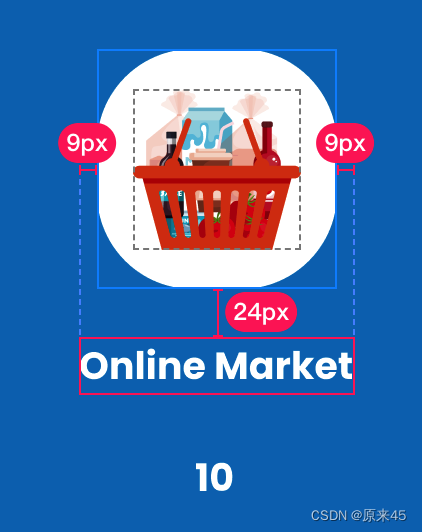

标题和图标间距 24,和计数器 27
lib/pages/splash.dart
Dart
  // 主视图
  Widget _buildView(BuildContext context) {
    return Column(
      mainAxisAlignment: MainAxisAlignment.center,
      crossAxisAlignment: CrossAxisAlignment.center,
      children: [
        // 图标
        _buildLogo(),

        const SizedBox(height: 24),

        // 标题
        const Text(
          "Online Market",
          style: TextStyle(
            fontSize: 19,
            fontFamily: "Poppins",
            fontWeight: FontWeight.bold,
            color: Colors.white,
            height: 22 / 19,
          ),
        ),

        const SizedBox(height: 27),

        // 倒计时
        const Text(
          "10",
          style: TextStyle(
            fontSize: 19,
            fontFamily: "Poppins",
            fontWeight: FontWeight.bold,
            color: Colors.white,
            height: 22 / 19,
          ),
        ),
      ],
    );
  }
3.7 总结
- 导入字体
pubspec中详细明确字体名称、字体文件、字体weight - 用不到的字体文件不用方式
assets/fonts目录中 - 设置文字样式
fontSize、fontFamily、fontWeight、color - 具体值的间距用
SizedBox来配置
4. Splash 倒计时
4.1 目标
- 使用有状态组件
- 倒计时更新组件
4.2 当前效果图
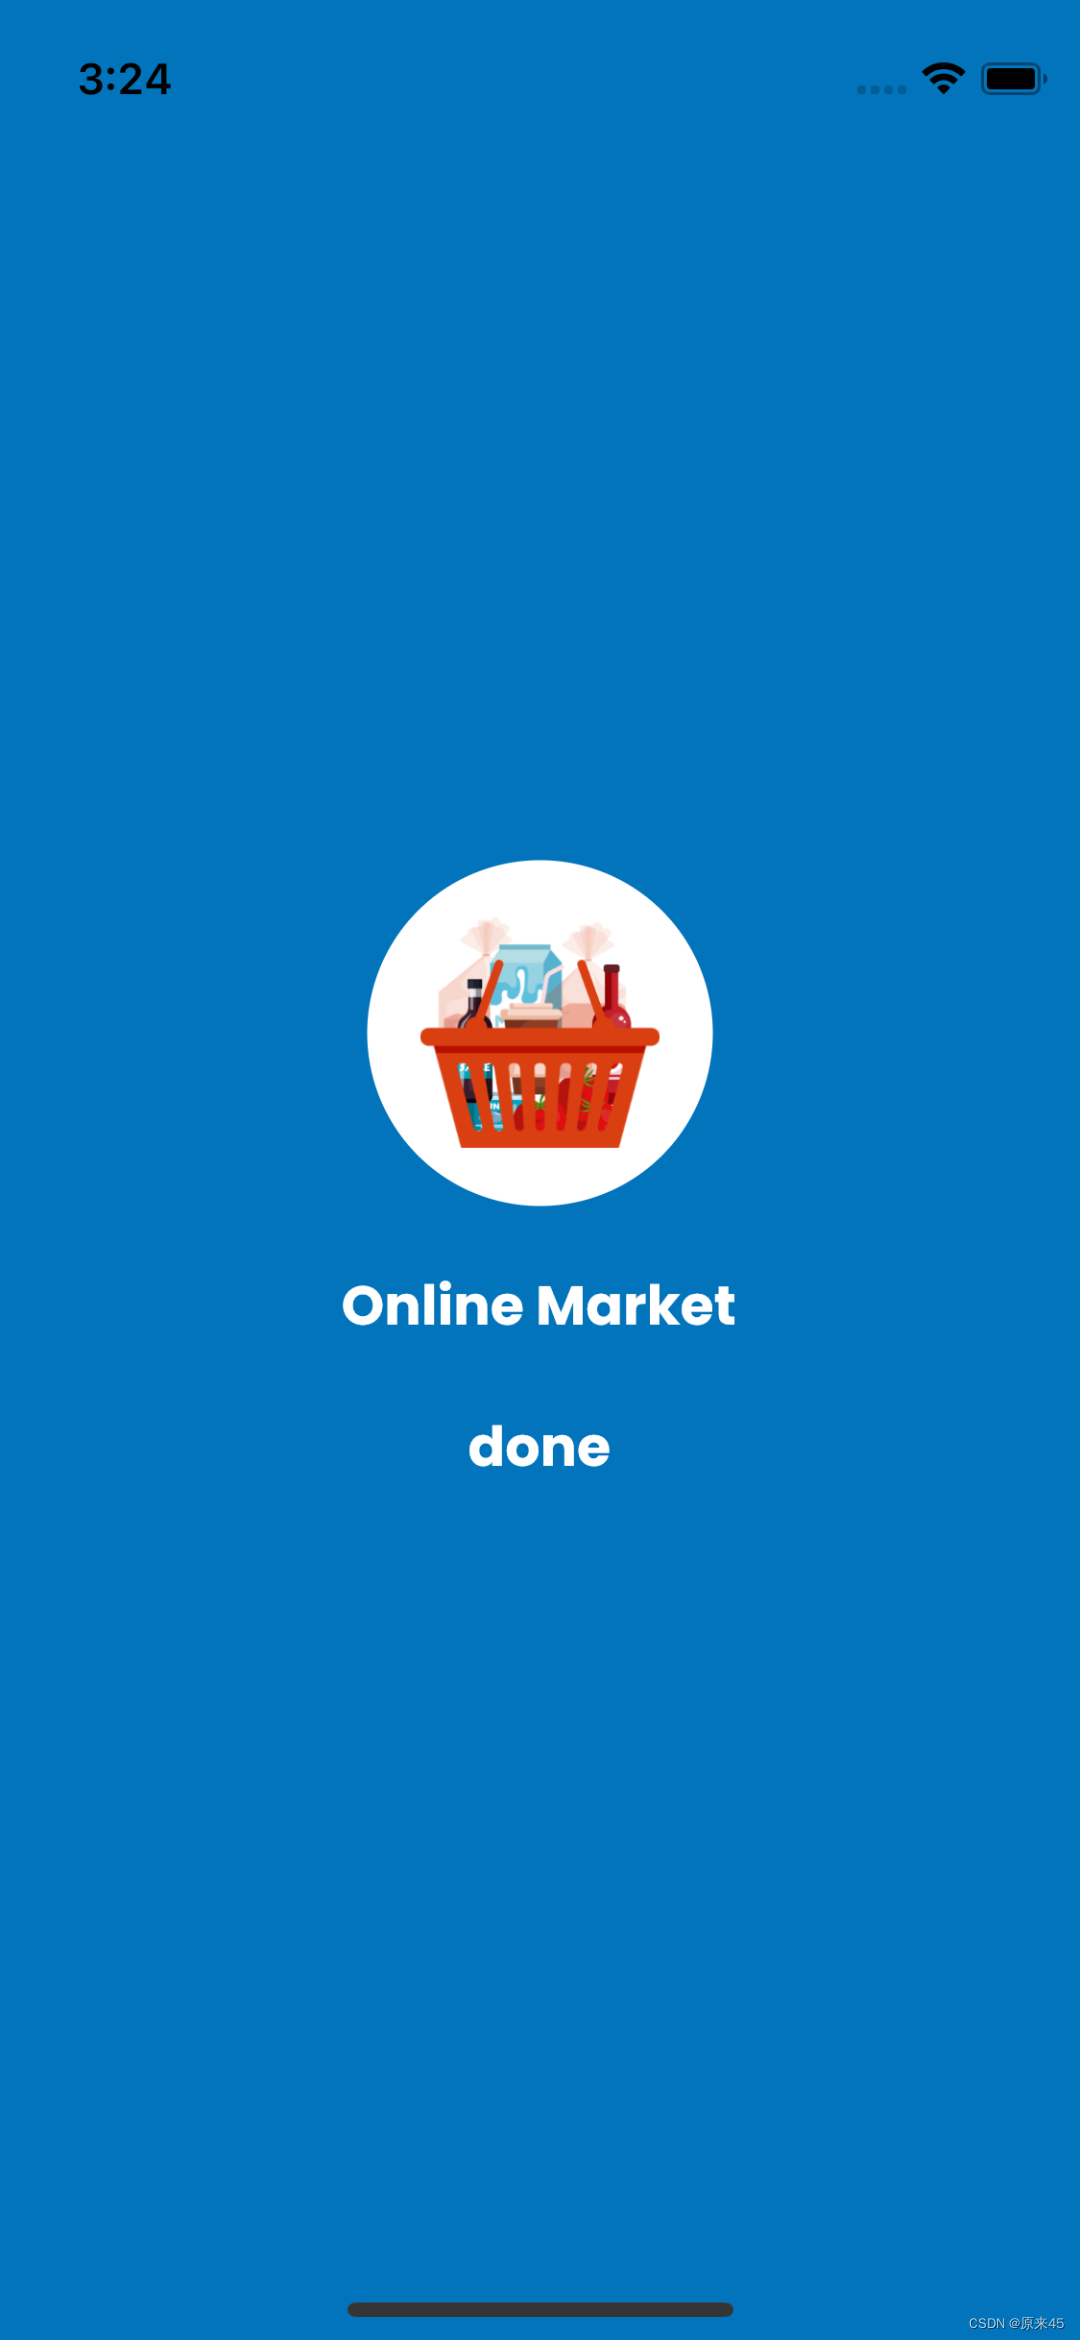
4.3 改成有状态组件
lib/pages/splash.dart
Dart
import 'package:flutter/foundation.dart';
import 'package:flutter/material.dart';

import '../common/index.dart';

class SplashPage extends StatefulWidget {
  const SplashPage({Key? key}) : super(key: key);

  @override
  State<SplashPage> createState() => _SplashPageState();
}

class _SplashPageState extends State<SplashPage> {
  // 图标
  Widget _buildLogo() {
    return Stack(
      alignment: Alignment.center,
      children: [
        // 底部
        Container(
          width: 120,
          height: 120,
          decoration: BoxDecoration(
            color: Colors.white,
            borderRadius: BorderRadius.circular(120 / 2),
          ),
        ),
        // 图标
        Image.asset(
          AssetsImages.logoPng,
          width: 84,
          height: 80,
        ),
      ],
    );
  }

  // 主视图
  Widget _buildView(BuildContext context) {
    return Column(
      mainAxisAlignment: MainAxisAlignment.center,
      crossAxisAlignment: CrossAxisAlignment.center,
      children: [
        // 图标
        _buildLogo(),

        const SizedBox(height: 24),

        // 标题
        const Text(
          "Online Market",
          style: TextStyle(
            fontSize: 19,
            fontFamily: "Poppins",
            fontWeight: FontWeight.bold,
            color: Colors.white,
            height: 22 / 19,
          ),
        ),

        const SizedBox(height: 27),

        // 倒计时
        Text(
          "0",
          style: const TextStyle(
            fontSize: 19,
            fontFamily: "Poppins",
            fontWeight: FontWeight.bold,
            color: Colors.white,
            height: 22 / 19,
          ),
        ),
      ],
    );
  }

  @override
  Widget build(BuildContext context) {
    return Scaffold(
      backgroundColor: AppColors.backgroundSplash,
      body: Center(child: _buildView(context)),
    );
  }
}
4.4 实现倒计时
lib/pages/splash.dart
计数 num
Dart
  // 计数 num
  final duration = 10;
  int number = 0;
倒计时函数
Dart
  // 倒计时
  Future<void> _countdown() async {
    number = duration;
    for (int i = 0; i < duration; i++) {
      await Future.delayed(const Duration(seconds: 1), () {
        if(mounted == ture) {
          setState(() {
            number--;
          });
        }
      });
      // 倒计时结束, 进入 welcome
      if (number == 0) {
        if (kDebugMode) {
          print("倒计时结束");
        }
      }
    }
  }
注意 await async 异步函数的语法
初始执行
Dart
  @override
  void initState() {
    super.initState();
    _countdown();
  }
打印显示
Dart
  // 主视图
  Widget _buildView(BuildContext context) {
    		...

				// 倒计时
        Text(
          number > 0 ? "$number" : "done",
          style: const TextStyle(
            fontSize: 19,
            fontFamily: "Poppins",
            fontWeight: FontWeight.bold,
            color: Colors.white,
            height: 22 / 19,
          ),
        ),
4.5 重构文字显示函数
macos 下是 option + enter , 也可以在组件上 右键 -> 重构...
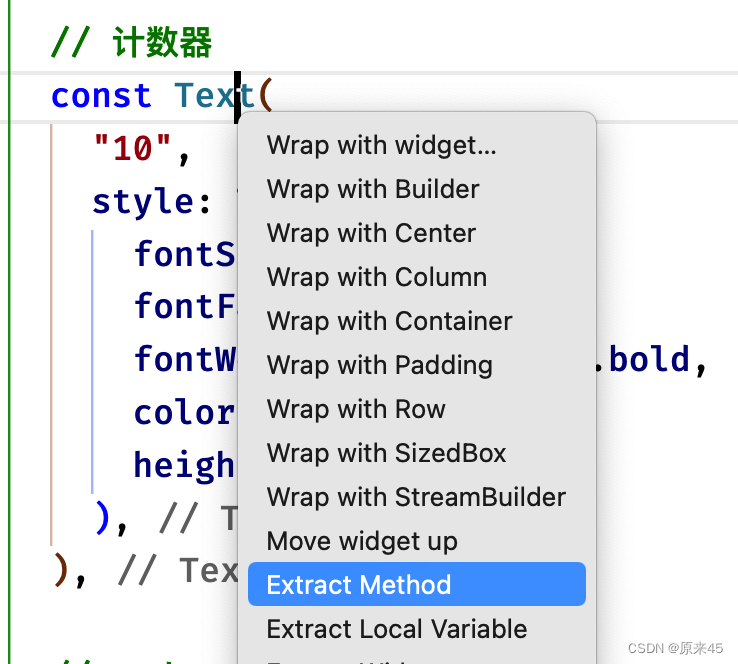
文字显示函数
Dart
  // 文字显示
  Text _buildText(String text) {
    return Text(
      text,
      style: const TextStyle(
        fontSize: 19,
        fontFamily: "Poppins",
        fontWeight: FontWeight.bold,
        color: Colors.white,
        height: 22 / 19,
      ),
    );
  }
主视图代码
Dart
  // 主视图
  Widget _buildView(BuildContext context) {
    return Center(
      child: Column(
        mainAxisAlignment: MainAxisAlignment.center,
        children: [
          // logo
          _buildLogo(),
          const SizedBox(height: 24),

          // 标题
          _buildText("Online Market"),
          const SizedBox(height: 27),

          // 计数器
          _buildText("10"),

          // end
        ],
      ),
    );
  }
4.6 完整代码
lib/pages/splash.dart
Dart
import 'package:flutter/material.dart';

import '../common/app_colors.dart';
import '../common/assets.dart';

class SplashPage extends StatefulWidget {
  const SplashPage({Key? key}) : super(key: key);

  @override
  State<SplashPage> createState() => _SplashPageState();
}

class _SplashPageState extends State<SplashPage> {
  // 计数变量
  final duration = 3;
  int number = 0;

  // 倒计时函数
  Future<void> _countdown() async {
    number = duration;
    for (var i = 0; i < duration; i++) {
      await Future.delayed(const Duration(seconds: 1), () {
        if (mounted == true) {
          setState(() {
            number--;
          });
        }
      });

      if (number == 0) {
        print("倒计时结束");
      }
    }
  }

  @override
  void initState() {
    super.initState();
    _countdown();
  }

  // logo
  Widget _buildLogo() {
    return Stack(
      alignment: Alignment.center,
      children: [
        // 底部
        Container(
          width: 120,
          height: 120,
          decoration: BoxDecoration(
            color: Colors.white,
            borderRadius: BorderRadius.circular(120 / 2),
          ),
        ),

        // 图片
        Image.asset(
          AssetsImages.logoPng,
          width: 84,
          height: 80,
        ),
      ],
    );
  }

  // 文字显示
  Text _buildText(String text) {
    return Text(
      text,
      style: const TextStyle(
        fontSize: 19,
        fontFamily: "Poppins",
        fontWeight: FontWeight.bold,
        color: Colors.white,
        height: 22 / 19,
      ),
    );
  }

  // 主视图
  Widget _buildView(BuildContext context) {
    return Center(
      child: Column(
        mainAxisAlignment: MainAxisAlignment.center,
        children: [
          // logo
          _buildLogo(),
          const SizedBox(height: 24),

          // 标题
          _buildText("Online Market"),
          const SizedBox(height: 27),

          // 计数器
          _buildText(number > 0 ? "$number" : "done"),

          // end
        ],
      ),
    );
  }

  @override
  Widget build(BuildContext context) {
    return Scaffold(
      backgroundColor: AppColors.backgroundSplash,
      body: _buildView(context),
    );
  }
}
4.7 总结
- 无状态组件重构成有状态组件
- 使用
Future.delayed方式实现倒计时 - 使用
三目运算符控制显示
1. Welcome 图片尺寸适应(第二页)
1.1 目标
- 全局配置样式、字体
- 图片适配高宽
- 布局代码练习
1.2 当前效果图
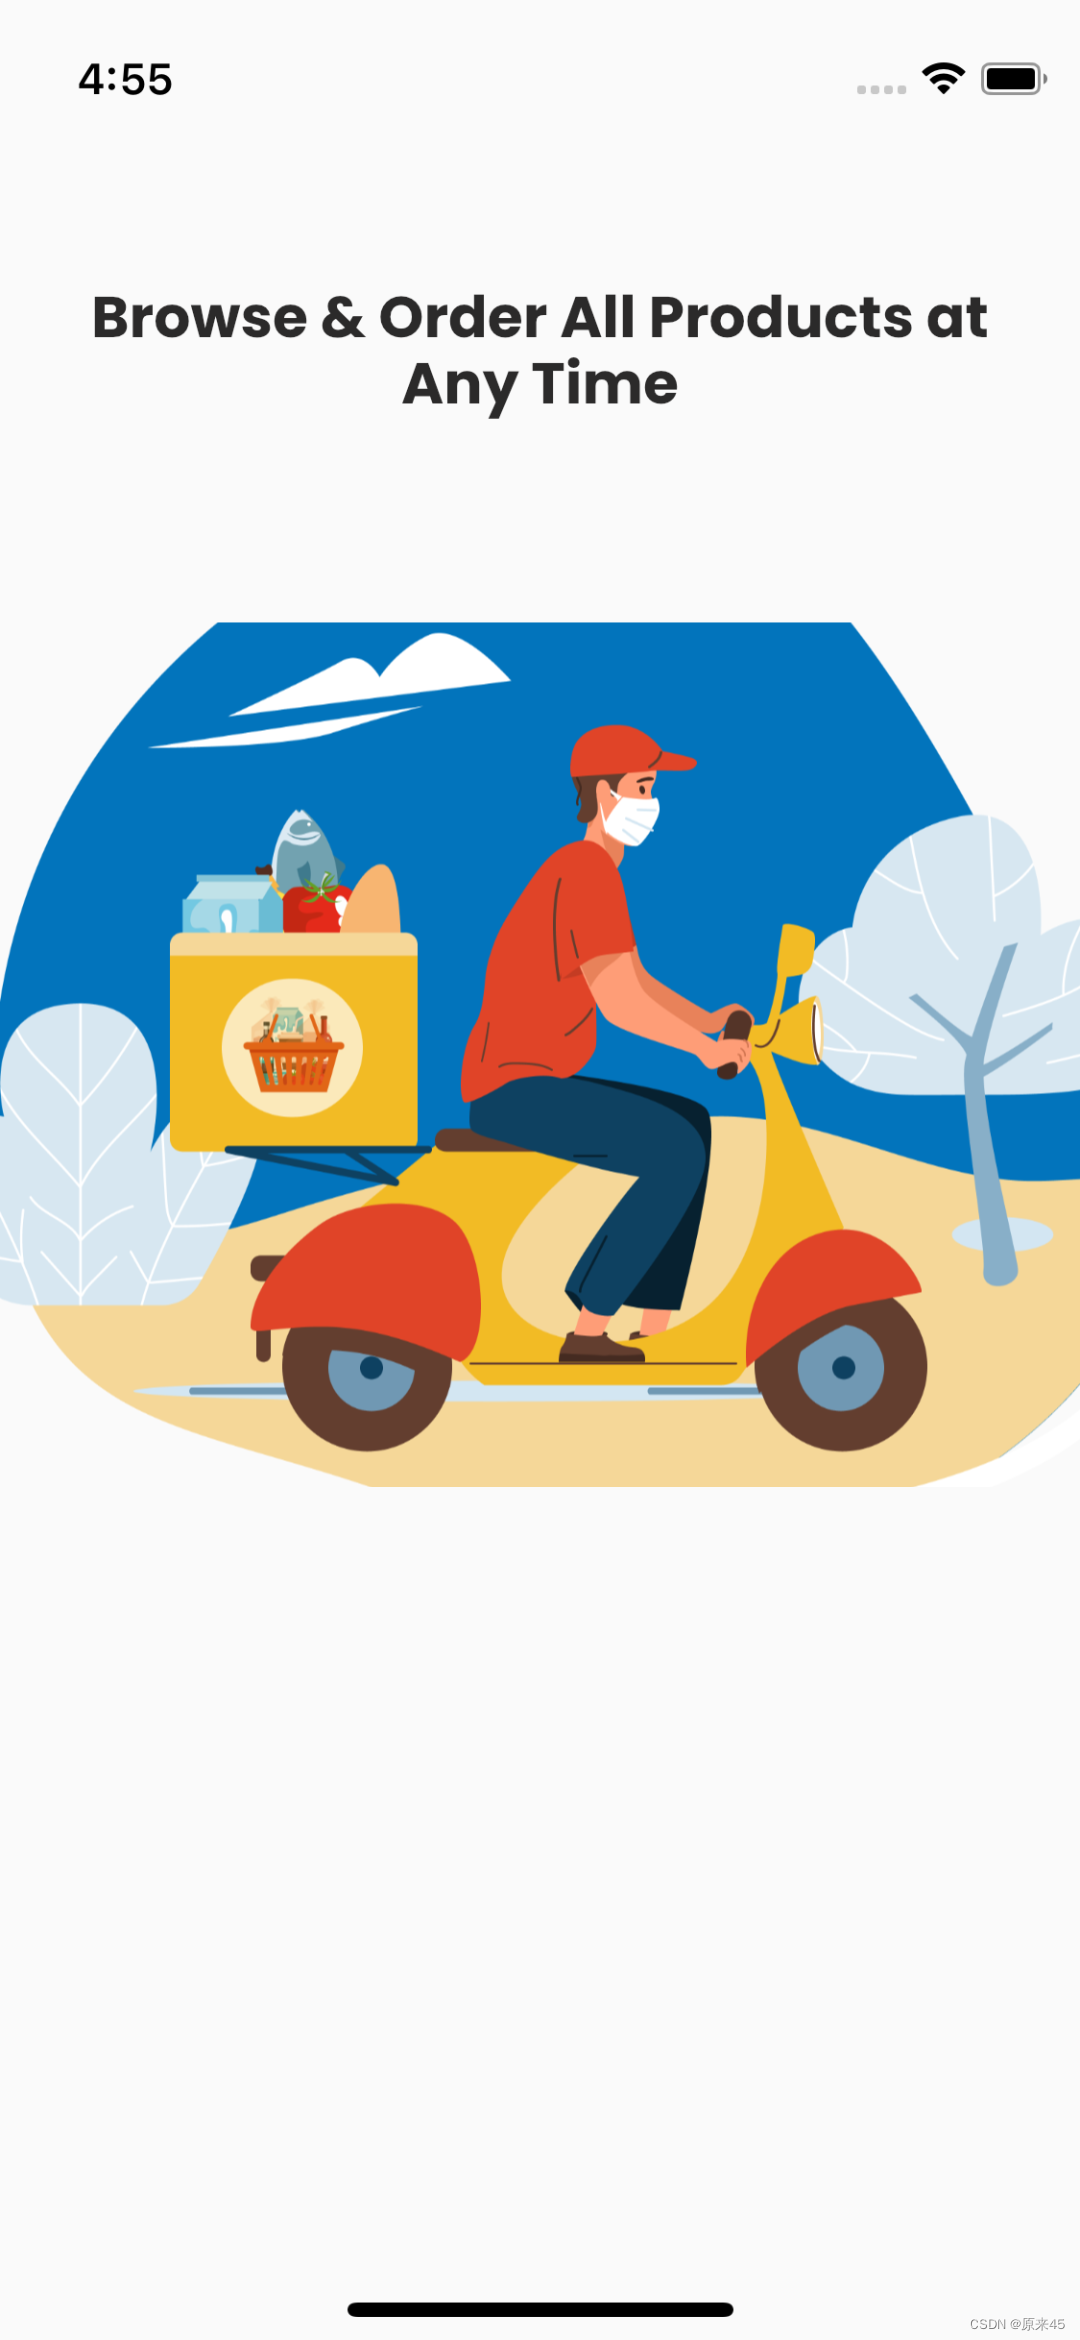
1.3 设置全局字体
lib/main.dart
Dart
class MyApp extends StatelessWidget {
  const MyApp({Key? key}) : super(key: key);

  @override
  Widget build(BuildContext context) {
    return MaterialApp(
      ...

      // 样式
      theme: ThemeData(
        primarySwatch: Colors.orange,
        fontFamily: "Poppins", // 字体
      ),
字体全局放在 theme fontFamily 属性中
1.4 界面布局、标题
lib/pages/welcome.dart
Dart
import 'package:flutter/material.dart';

/// 欢迎页面
class WelcomePage extends StatelessWidget {
  const WelcomePage({Key? key}) : super(key: key);

  // 主视图
  Widget _buildView() {
    return Column(
      mainAxisAlignment: MainAxisAlignment.center,
      children: [
        // 标题
        const Padding(
          padding: EdgeInsets.symmetric(horizontal: 30),
          child: Text(
            "Browse & Order All Products at Any Time",
            textAlign: TextAlign.center,
            style: TextStyle(
              fontSize: 20,
              fontFamily: "Poppins",
              fontWeight: FontWeight.bold,
              color: Color(0xff2B2A2A),
              height: 23 / 20,
            ),
          ),
        ),

        // 图
        Container(),

        // 底部按钮
        Container(),
      ],
    );
  }

  @override
  Widget build(BuildContext context) {
    return Scaffold(
      body: _buildView(),
    );
  }
}
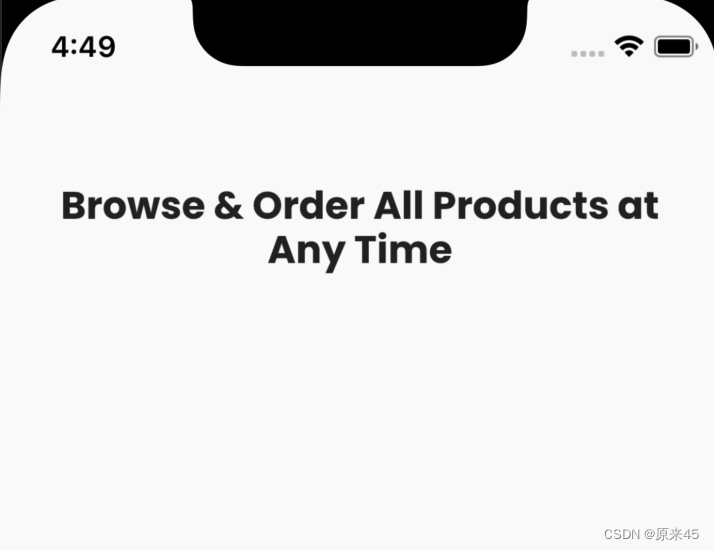
标题代码抽取函数,整理代码
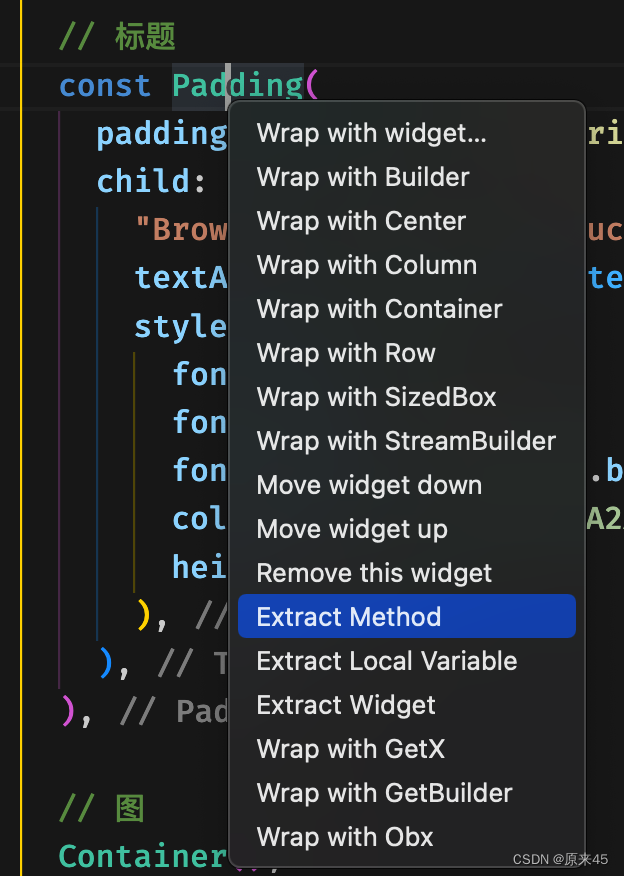
Dart
  // 标题
  Padding _buildTitle() {
    return const Padding(
      padding: EdgeInsets.symmetric(horizontal: 30),
      child: Text(
        "Browse & Order All Products at Any Time",
        textAlign: TextAlign.center,
        style: TextStyle(
          fontSize: 20,
          fontFamily: "Poppins",
          fontWeight: FontWeight.bold,
          color: Color(0xff2B2A2A),
          height: 23 / 20,
        ),
      ),
    );
  }
Dart
  // 主视图
  Widget _buildView() {
    return Column(
      children: [
        const SizedBox(height: 100),

        // 标题
        _buildTitle(),

        ...
1.5 图片尺寸适应
从蓝湖下载图片导入项目,这里不再重复叙述
lib/pages/welcome.dart
Dart
  // 图片
  Image _buildImage() {
    return Image.asset(
      AssetsImages.welcomePng,
      height: 300,
      width: double.infinity,
      fit: BoxFit.none,
      //fit:BoxFit.fitWidth
    );
  }
Dart
  // 主视图
  Widget _buildView() {
    return Column(
      mainAxisAlignment: MainAxisAlignment.center,
      children: [
        // 标题
        _buildTitle(),

        const SizedBox(height: 70),

        // 图
        _buildImage(),

        // 底部按钮
        _buildBtns(),
      ],
    );
  }
1.6 总结
- 通过
ThemeData.fontFamily设置全局字体 padding: EdgeInsets.symmetric(horizontal: 30)水平Padding距离- 图片组件
Image.fit设置宽高适配 - 布局第一规则
从上往下
2. Welcome 导航切换
2.1 目标
- 布局规则 "从上往下、从左往右"
- 全局按钮颜色样式
- 布局训练 横向、纵向 混合
2.2 当前效果图
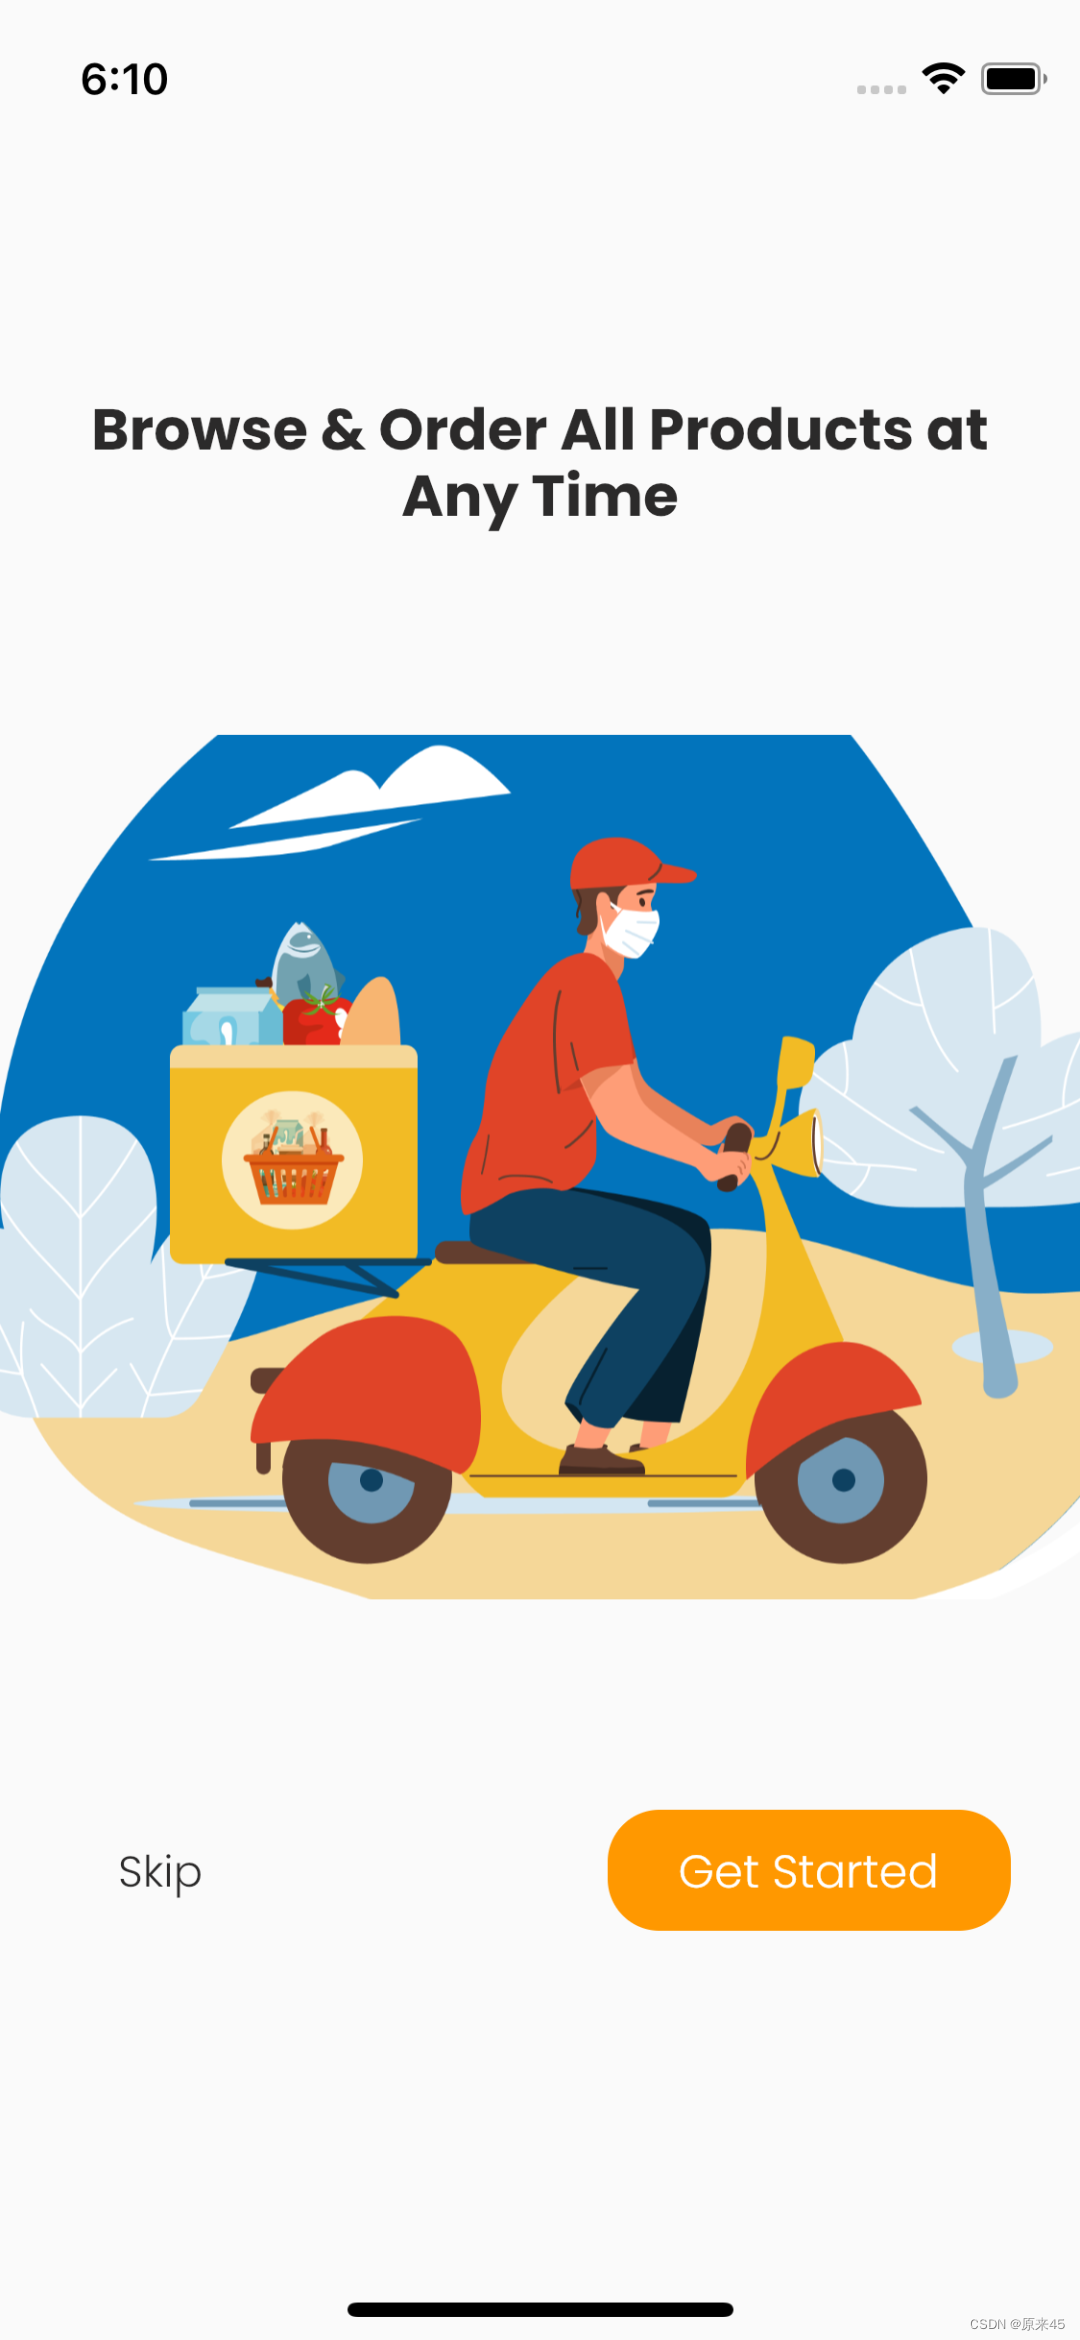
2.3 底部按钮
lib/pages/welcome.dart
Dart
  // goto 登录页面
  void onLogin(BuildContext context) {}

	// 底部按钮
  Padding _buildBtns(BuildContext context) {
    return Padding(
      padding: const EdgeInsets.symmetric(horizontal: 24),
      child: Row(
        children: [
          // skip
          TextButton(
            onPressed: () => onLogin(context),
            child: const Text(
              "Skip",
              style: TextStyle(
                fontSize: 15,
                fontWeight: FontWeight.w300,
                color: Color(0xff2B2A2A),
              ),
            ),
          ),

          // 撑开
          const Expanded(
            child: SizedBox(),
          ),

          // Get Started
          Container(
            height: 42,
            width: 140,
            clipBehavior: Clip.antiAlias,
            decoration: const BoxDecoration(
              borderRadius: BorderRadius.all(
                Radius.circular(18),
              ),
            ),
            child: ElevatedButton(
              onPressed: () => onLogin(context),
              style: ButtonStyle(
                elevation: MaterialStateProperty.all(0),
                minimumSize: MaterialStateProperty.all(Size.zero),
              ),
              child: const Text(
                "Get Started",
                style: TextStyle(
                  fontSize: 16,
                  fontWeight: FontWeight.w300,
                  color: Colors.white,
                ),
              ),
            ),
          ),
        ],
      ),
    );
  }
Dart
  // 主视图
  Widget _buildView(BuildContext context) {
    return Column(
      mainAxisAlignment: MainAxisAlignment.center,
      children: [
        // 标题
        _buildTitle(),

        const SizedBox(height: 70),

        // 图
        _buildImage(),

        const SizedBox(height: 70),

        // 底部按钮
        _buildBtns(context),
      ],
    );
  }
2.4 导航切换
splash 倒计时结束进入 welcome 界面
Dart
  // 倒计时
  Future<void> _countdown() async {
    number = duration;
    for (int i = 0; i < duration; i++) {
      ...
      // 倒计时结束, 进入 welcome
      if (number == 0) {
        Navigator.pushReplacement(context,
            MaterialPageRoute(builder: (context) => const WelcomePage()));
      }
    }
  }
2.5 总结
Dart
设计稿布局分析 "从上往下、从左往右"
先写布局代码结构
注意命名 _buildXXX 开头都是私有布局函数
导航 Navigator.pushReplacement 进入新界面并替换当前
1. login 布局(第三页)
1.1 目标
看标注布局界面(千锤百炼就会了)
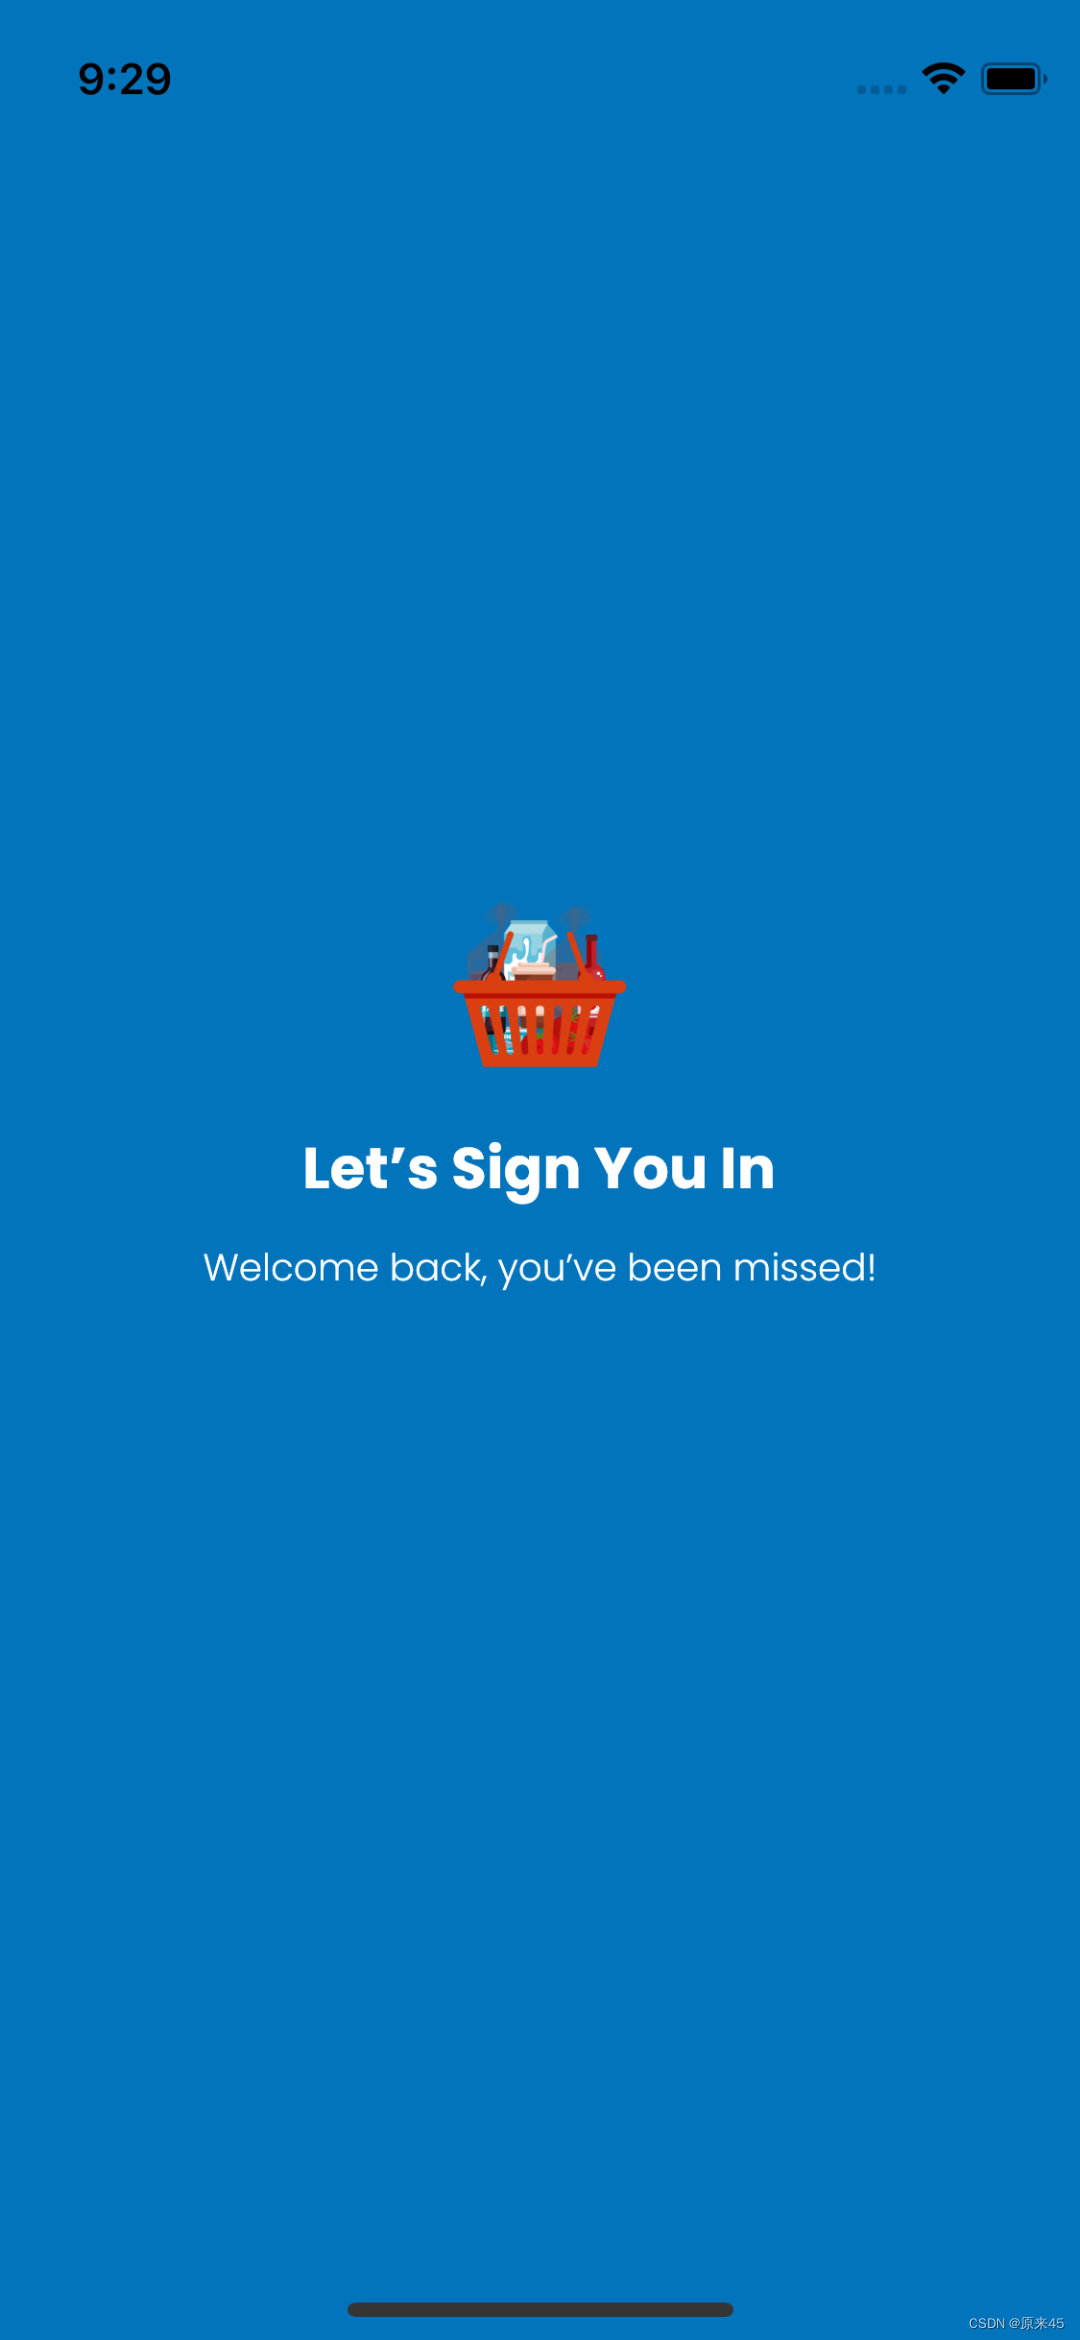
1.2 布局
lib/pages/login.dart
Dart
  // 登录表单
  Widget _buildForm() {
    return Container();
  }
Dart
	// 主视图
  Widget _buildView() {
    return Container(
      padding: const EdgeInsets.symmetric(horizontal: 15),
      color: AppColors.backgroundSplash,
      child: Column(
        mainAxisAlignment: MainAxisAlignment.center,
        children: [
          // 图标
          Image.asset(
            AssetsImages.logoPng,
            width: 60,
          ),

          const SizedBox(height: 20),

          // 主标
          const Text(
            "Let's Sign You In",
            style: TextStyle(
              fontSize: 20,
              color: Colors.white,
              fontWeight: FontWeight.bold,
            ),
          ),

          const SizedBox(height: 10),

          // 子标
          const Text(
            "Welcome back, you've been missed!",
            style: TextStyle(
              fontSize: 13,
              color: Colors.white,
              fontWeight: FontWeight.w300,
            ),
          ),

          const SizedBox(height: 50),

          // 表单
          _buildForm(),
        ],
      ),
    );
  }
Dart
  @override
  Widget build(BuildContext context) {
    return Scaffold(
      body: _buildView(),
    );
  }
1.3 总结
- 记住布局规则 "从上往下、从左往右"
- 用函数拆分视图结构
2. login 登录表单
2.1 目标
- 编写表单
- 有效性检查
2.2 当前效果图
2.3 登录表单
lib/pages/login.dart
Dart
  // 账号输入是否有效
  bool isUserNameValid = false;
Dart
  // 登录表单
  Widget _buildForm() {
    return Container(
      padding: const EdgeInsets.fromLTRB(20, 50, 20, 20),
      decoration: BoxDecoration(
        color: Colors.white,
        borderRadius: BorderRadius.circular(35),
      ),
      child: Column(
        crossAxisAlignment: CrossAxisAlignment.start,
        children: [
          // Username or E-Mail
          const Text(
            "Username or E-Mail",
            style: TextStyle(
              fontSize: 15,
              color: Color(0xff838383),
              fontWeight: FontWeight.w300,
            ),
          ),
          TextField(
            onChanged: (value) {
              bool valid = false;
              if (value.length >= 6) {
                valid = true;
              } else {
                valid = false;
              }

              setState(() {
                isUserNameValid = valid;
              });
            },
            decoration: InputDecoration(
              hintText: "@",
              // labelText: "Username or E-Mail",
              // labelStyle: const TextStyle(
              //   fontSize: 15,
              //   color: Color(0xff838383),
              //   fontWeight: FontWeight.w300,
              // ),
              prefixIcon: Image.asset(
                AssetsImages.iconUserPng,
                width: 23,
                height: 23,
              ),
              suffixIcon: isUserNameValid == true
                  ? const Icon(
                      Icons.done,
                      color: Colors.green,
                    )
                  : null,
            ),
          ),

          // 间距
          const SizedBox(height: 35),

          // Password
          const Text(
            "Password",
            style: TextStyle(
              fontSize: 15,
              color: Color(0xff838383),
              fontWeight: FontWeight.w300,
            ),
          ),
          TextField(
            obscureText: true,
            decoration: InputDecoration(
              hintText: "6 digits",
              // labelText: "Password",
              // labelStyle: const TextStyle(
              //   fontSize: 15,
              //   color: Color(0xff838383),
              //   fontWeight: FontWeight.w300,
              // ),
              prefixIcon: Image.asset(
                AssetsImages.iconLockPng,
                width: 23,
                height: 23,
              ),
              suffixIcon: TextButton(
                onPressed: () {},
                child: const Text(
                  "Forget?",
                  style: TextStyle(
                    fontSize: 15,
                    color: Color(0xff0274bc),
                    fontWeight: FontWeight.w500,
                  ),
                ),
              ),
            ),
          ),

          // 间距
          const SizedBox(height: 30),

          // Sign In

          // 间距
          const SizedBox(height: 16),

          // Don't have an account?  + Sign Up
          Row(
            mainAxisAlignment: MainAxisAlignment.center,
            children: [
              // 文字
              const Text(
                "Don't have an account? ",
                style: TextStyle(
                  fontSize: 15,
                  color: Color(0xff171717),
                  fontWeight: FontWeight.w300,
                ),
              ),

              // 按钮
			  TextButton(
                onPressed: () {},
                child: const Text(
                  "Sign Up",
                  style: TextStyle(
                    fontSize: 15,
                    color: Color(0xff0274bc),
                    fontWeight: FontWeight.bold,
                  ),
                ),
              ),

            ],
          ),
        ],
      ),
    );
  }
2.4 总结
- 通过
TextField.decoration属性进行装饰 TextField.obscureText开启密码
3. login 按钮抽取
3.1 目标
- 抽取公共按钮组件
- 修改成纯
ElevatedButton按钮
3.2 当前效果图
3.3 按钮组件抽取
lib/common/widgets.dart
Dart
import 'package:flutter/material.dart';

/// 按钮组件
class ButtonWidget extends StatelessWidget {
  const ButtonWidget({
    Key? key,
    this.height,
    this.widget,
    this.radius,
    this.onPressed,
    this.text,
  }) : super(key: key);

  /// 文字
  final String? text;

  /// 高度
  final double? height;

  /// 宽度
  final double? widget;

  /// 圆角
  final double? radius;

  /// 点击事件
  final void Function()? onPressed;

  @override
  Widget build(BuildContext context) {
    return ElevatedButton(
      onPressed: onPressed,
      style: ButtonStyle(
        // 阴影高度
        elevation: MaterialStateProperty.all(0),
        // 最小尺寸
        minimumSize: MaterialStateProperty.all(
            Size(widget ?? double.infinity, height ?? double.infinity)),
        // 形状 圆角
        shape: MaterialStateProperty.all(
          RoundedRectangleBorder(
            borderRadius: BorderRadius.all(
              Radius.circular(radius ?? 18),
            ),
          ),
        ),
      ),
      child: Text(
        // 文字
        text ?? "",
        // 文字样式
        style: const TextStyle(
          fontSize: 16,
          fontWeight: FontWeight.w300,
          color: Colors.white,
        ),
      ),
    );
  }
}
3.4 登录按钮
lib/pages/login.dart
Dart
  // 登录表单
  Widget _buildForm() {
					...
    			// Sign In
          ButtonWidget(
            text: 'Sign In',
            onPressed: () {},
            height: 60,
            widget: double.infinity,
            radius: 18,
          ),
3.5 欢迎按钮
lib/pages/welcome.dart
Dart
  // 底部按钮
  Padding _buildBtns(BuildContext context) {
    ...
    // Get Started
    ButtonWidget(
      text: "Get Started",
      height: 42,
      widget: 140,
      radius: 32,
      onPressed: () => onLogin(context),
    ),
Dart
  // goto 登录页面
  void onLogin(BuildContext context) {
    Navigator.push(
      context,
      MaterialPageRoute(builder: (context) => const LoginPage()),
    );
  }
3.6 总结
- 公共组件类抽取方法
ElevatedButton组件属性配置
创作不易,希望读者三连支持 💖
赠人玫瑰,手有余香 💖