一、什么是MVC
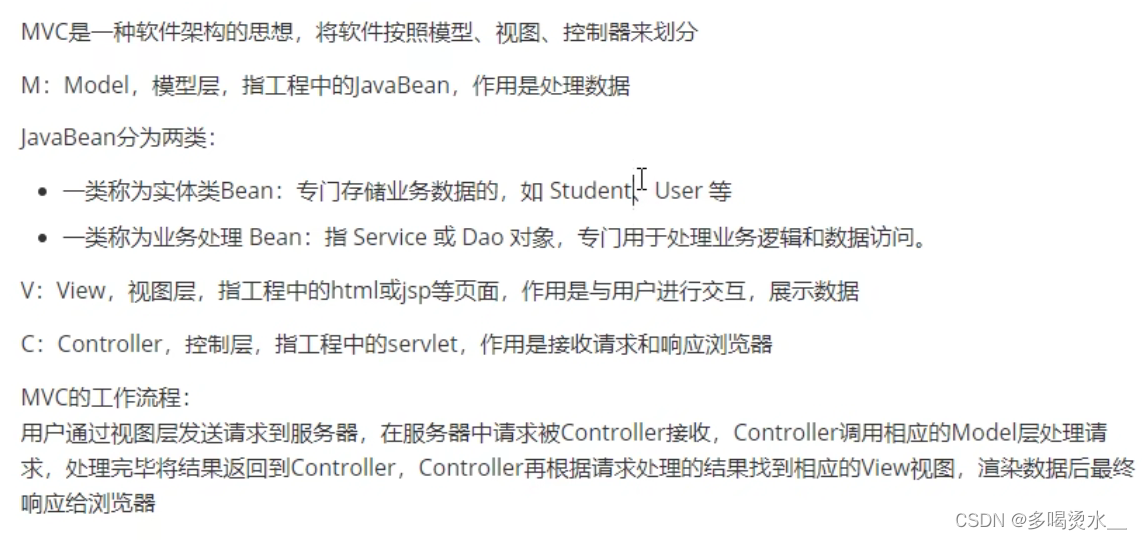
二、什么是SpringMVC
 三、SpringMVC的特点

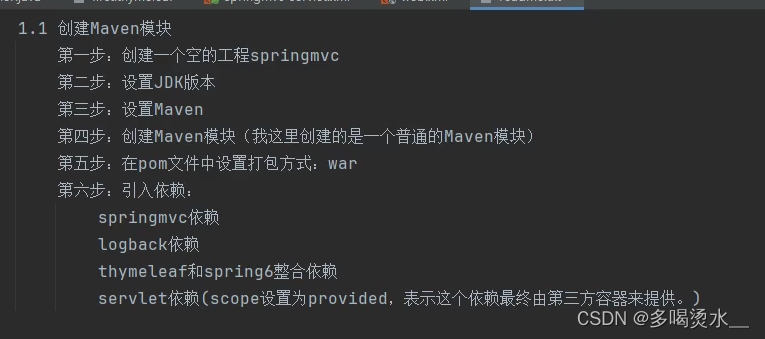
四、配置SpringMVC

简单流程:

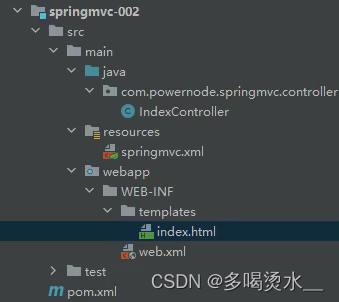
总体框架

1.创建pom.xml依赖
XML
  <!--打包方式-->
      <packaging>war</packaging>
          <!--依赖-->
    <dependencies>
        <dependency>
            <groupId>org.springframework</groupId>
            <artifactId>spring-webmvc</artifactId>
            <version>6.1.4</version>
        </dependency>
        <!--servlet依赖-->
        <dependency>
            <groupId>jakarta.servlet</groupId>
            <artifactId>jakarta.servlet-api</artifactId>
            <version>6.0.0</version>
            <scope>provided</scope>
        </dependency>
        <!--日志依赖-->
        <dependency>
            <groupId>ch.qos.logback</groupId>
            <artifactId>logback-classic</artifactId>
            <version>1.2.11</version>
        </dependency>
        <dependency>
            <groupId>org.thymeleaf</groupId>
            <artifactId>thymeleaf-spring6</artifactId>
            <version>3.1.2.RELEASE</version>
        </dependency>
    </dependencies>
2.配置web.xml

XML
   <!--配置springmvc的前端控制器,对浏览器发送的请求统一处理-->
    <servlet>
        <servlet-name>springmvc</servlet-name>
        <servlet-class>org.springframework.web.servlet.DispatcherServlet</servlet-class>
    </servlet>
    <servlet-mapping>
        <servlet-name>springmvc</servlet-name>
        <url-pattern>/</url-pattern>
    </servlet-mapping>
3.编写控制类
就是先创建一个简单的FirstController类:
 4.配置Spring MVC框架的配置文件
这个配置文件的名字为web.xml中servelet定义的名字加-servlet.xml

XML
<context:component-scan base-package="com.pon.control"></context:component-scan>
<!--视图解析器-->
<bean id="thymeleafViewResolver" class="org.thymeleaf.spring6.view.ThymeleafViewResolver">
<!--作用于视图渲染的过程中,可以设置视图渲染后输出时采用的编码字符集-->
<property name="characterEncoding" value="UTF-8"/>
<!--如果配置多个视图解析器,它来决定优先使用哪个视图解析器,它的值越小优先级越高-->
<property name="order" value="1"/>
<!--当 ThymeleafViewResolver 渲染模板时,会使用该模板引擎来解析、编译和渲染模板-->
<property name="templateEngine">
<bean class="org.thymeleaf.spring6.SpringTemplateEngine">
<!--用于指定 Thymeleaf 模板引擎使用的模板解析器。模板解析器负责根据模板位置、模板资源名称、文件编码等信息,加载模板并对其进行解析-->
<property name="templateResolver">
<bean class="org.thymeleaf.spring6.templateresolver.SpringResourceTemplateResolver">
<!--设置模板文件的位置(前缀)-->
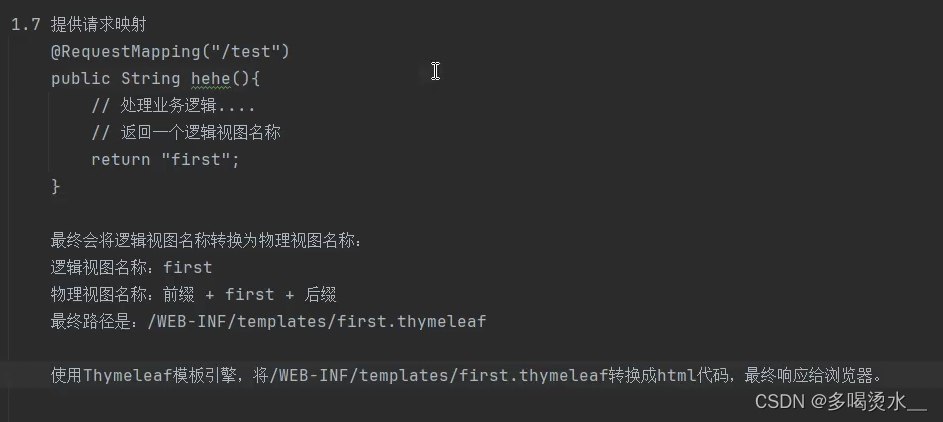
<property name="prefix" value="/WEB-INF/templates/"/>
<!--设置模板文件后缀(后缀),Thymeleaf文件扩展名不一定是html,也可以是其他,例如txt,大部分都是html,一般情况下后缀名为.html-->
<property name="suffix" value=".thymeleaf"/>
<!--设置模板类型,例如:HTML,TEXT,JAVASCRIPT,CSS等-->
<property name="templateMode" value="HTML"/>
<!--用于模板文件在读取和解析过程中采用的编码字符集-->
<property name="characterEncoding" value="UTF-8"/>
</bean>
</property>
</bean>
</property>
</bean>5.将FirstController类进行具体编码
java
package com.pon.control;
import org.springframework.stereotype.Controller;
import org.springframework.web.bind.annotation.RequestMapping;
@Controller
public class FirstController {
    @RequestMapping(value = "/test")
    public String hehe(){
        return "first";//返回值代表逻辑视图的名称
    }
}
6.提供浏览器显示的视图

html
<!doctype html>
<html lang="en">
     <head>
         <title>First Spring MVC</title>
     </head>
     <body>
         <h1>First Spring MVC!</h1>
     </body>
 </html>
7.运行结果


五、超链接
FirstController类:
java
package com.pon.control;

import org.springframework.stereotype.Controller;
import org.springframework.web.bind.annotation.RequestMapping;

@Controller
public class FirstController {
    @RequestMapping(value = "/test")
    public String hehe(){
        return "first";
    }
    @RequestMapping(value = "/aaa")//地址
    public String hihi(){
        return "other";
    }
}
first.thymeleaf:编写浏览器看到的界面
html
<!doctype html>
<html lang="en" xmlns:th="http://www.thymeleaf.org">
     <head>
         <title>First Spring MVC</title>
     </head>
     <body>
         <h1>First Spring MVC!</h1>     //a:超链接
         <a th:href="@{/aaa}">hihi</a> //@{}这个是thymeleaf的模式
     </body>
 </html>
bother.thymeleaf:
html
<!doctype html>
<html lang="en" xmlns:th="http://www.thymeleaf.org">
     <head>
         <title>First Spring MVC</title>
     </head>
     <body>
         <h1>你好</h1>
     </body>
 </html>

六、SpringMVC配置文件
SpringMVC配置文件的名字和位置可以自定义。